
A note from the Author
Hello fellow model makers! I’m John and, although I’m no expert at all – just a car enthusiast and keen model maker – but I always strive to improve and achieve the best results I can. I’ve built models from being a youngster – competition/sports cars of the 60’s/70’s are my number 1 ‘thing’ – and now I’m fully retired I can put the extra hours into this wonderful hobby.
Name – Revell 07669 AC Cobra 289 1:25 Model Kit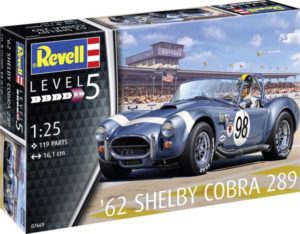
Number – 07669
Scale – 1/25
Price – £23.95
Availability – IN STOCK – Available to Buy Now! Buy yours here!
Revell have always had an interesting range of car kits and I’ve built quite a few over the years – so when I had the chance to build this new release 1/25 Cobra I couldn’t wait to start, especially as I had built their 1/24 Shelby Cobra a few years ago and this would sit nicely alongside it. I’m sure most of you will know that in Revell’s ‘degree of difficulty’ scale that this is at the top – level 5. Having built it I can confirm that it is a kit for the more advanced modeller, but I think anyone who has built a few kits wouldn’t have too much problem. There are just a few parts of the build where that extra bit of experience will enable a higher level of finish – I’ll highlight these in the build notes.
I should (and will) say that some of you will have noticed that this maybe isn’t a ’62Shelby Cobra 289. I’m no AC Cobra expert – but it certainly looks like a bit later version to me. I’m happy to be corrected though. No worries – but as long as we know!
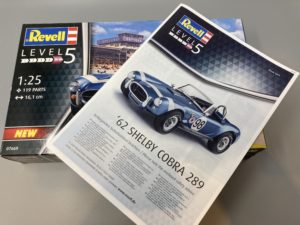
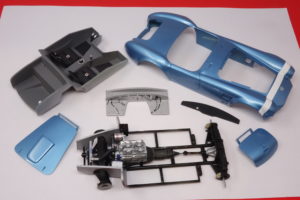
So, the kit is nicely boxed and illustrated; very clear, up to date instructions; high quality detailed decal sheet; accurately detailed tyres; 5 main sprues plus the body shell, clear parts and 2 metal axles. And – something I’ve not come a cross before – a duplicate sprue of the chromed parts – but just grey plastic non-chromed. This came in quite handy.
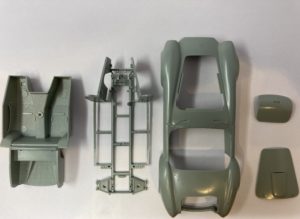
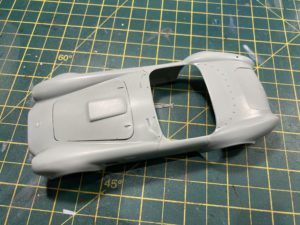
As for quality of the parts – body shell, bonnet, boot, interior ‘tub’ and chassis were all very well moulded with just the usual cleaning up to do. The small parts on the sprues were ok, but a little less ‘crisp’. All the plastic parts seemed quite ‘greasy’ – I think it’s the type of plastic and the release agent from the moulds – so it was really important to clean all parts thoroughly before painting.
And, just to say, I’m no expert at all! I’ve ‘aimed this review, the best I can, at the broad range of different levels of modellers out there. So apologies if I’m explaining stuff you already know about – but maybe some of it might be helpful to some people. I’ve assumed (as this is a Level 5 kit) that prospective builders of this model have already got the basic (or more advanced) materials and tools to do the job. So, off we go…..
What’s in the box?

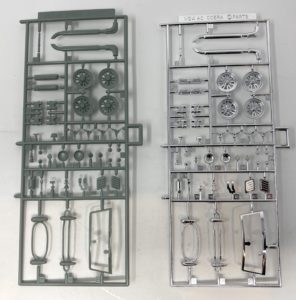
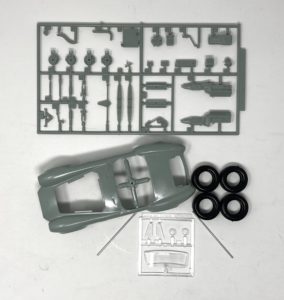
In the box there are the 5 main sprues + the duplicate chrome parts sprue , the body shell, clear parts, tyres and axles.
There’s also the instruction booklet and high quality decal sheet – which I unfortunately didn’t photograph – duh! But it’s really excellent – loads of detail decals.
The build
a) Body parts preparation
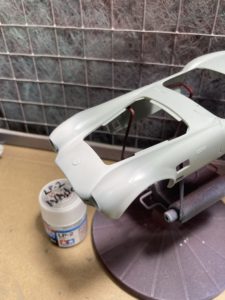
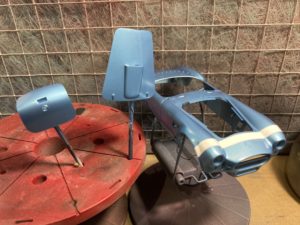
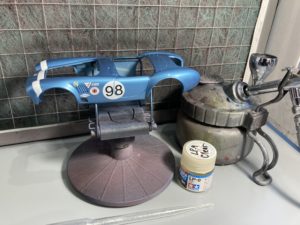
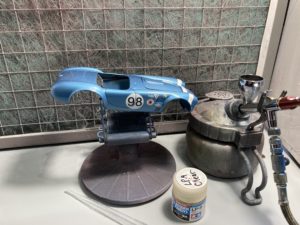
I decided to start with the painting of the main body work (body shell, bonnet and boot lid) – so that it could be hardening thoroughly whilst I was doing the rest of the build.
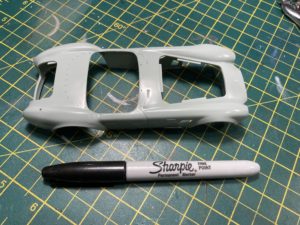
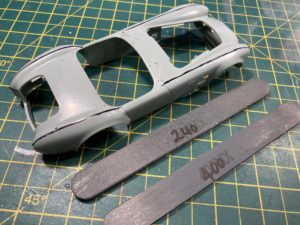
These parts were quite crisply moulded with very little flash. I cleaned them up a bit and then I used black Sharpie marker pen to pick out the seam lines on the body so they could be removed with medium/fine sanding sticks
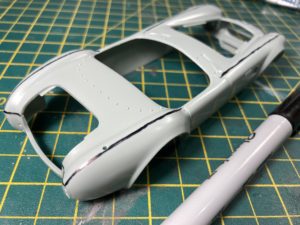
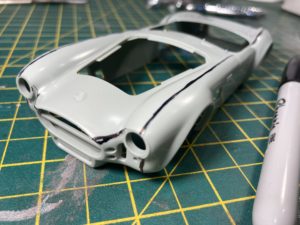
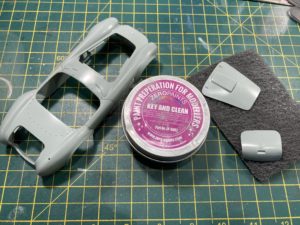
The body (and bonnet boot) were then cleaned up with Zero ‘Key and Clean’ paint prep paste and pad. This works really well, but I’m guessing a Scotchbrite type pad and mild household abrasive would work too.
b) Painting
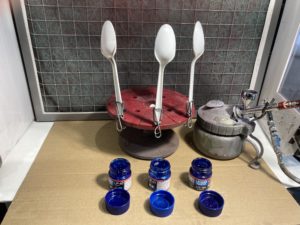
I use an airbrush set up for almost all my kit painting and, very importantly, in a properly ventilated spray booth with extractor. I wanted to use Tamiya Lacquer paint for the whole build because it’s just such a good product – and, really importantly for me, on properly prepared plastic it does not need a primer and therefore fine details under the paintwork can be preserved in their detail. I also wanted to try to get a ‘near enough’ pale metallic blue. Tamiya don’t do an ‘out of the bottle’ suitable colour, so I did some trial mixings and spraying of different blues and silver – on to some plastic teaspoons. I use these teaspoons to test most of my paints out, for colour/dilution/coverage etc, before committing air brush to model. They can easily be cleaned up and used again.
I tried a few mixes and decided upon Mica Blue/Silver 1:1 + about 25% retarder type LP thinners (the middle spoon in the photo below was the choice).
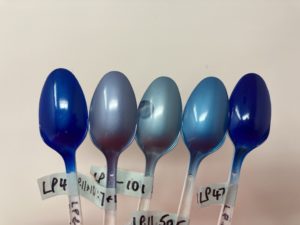
I’m not a fan – or should I say not confident – about using metallic paints on models. I find that sometimes the metallic flakes in the paint appear not to scale and then the paint job looks unrealistic. I also find that it’s really difficult to polish/buff metallic finishes without spoiling the paint finish. However, I was satisfied here that the paint looked good and gave a good finish.
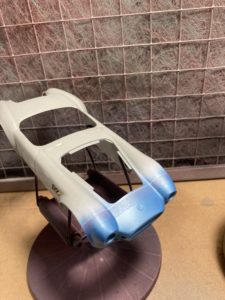
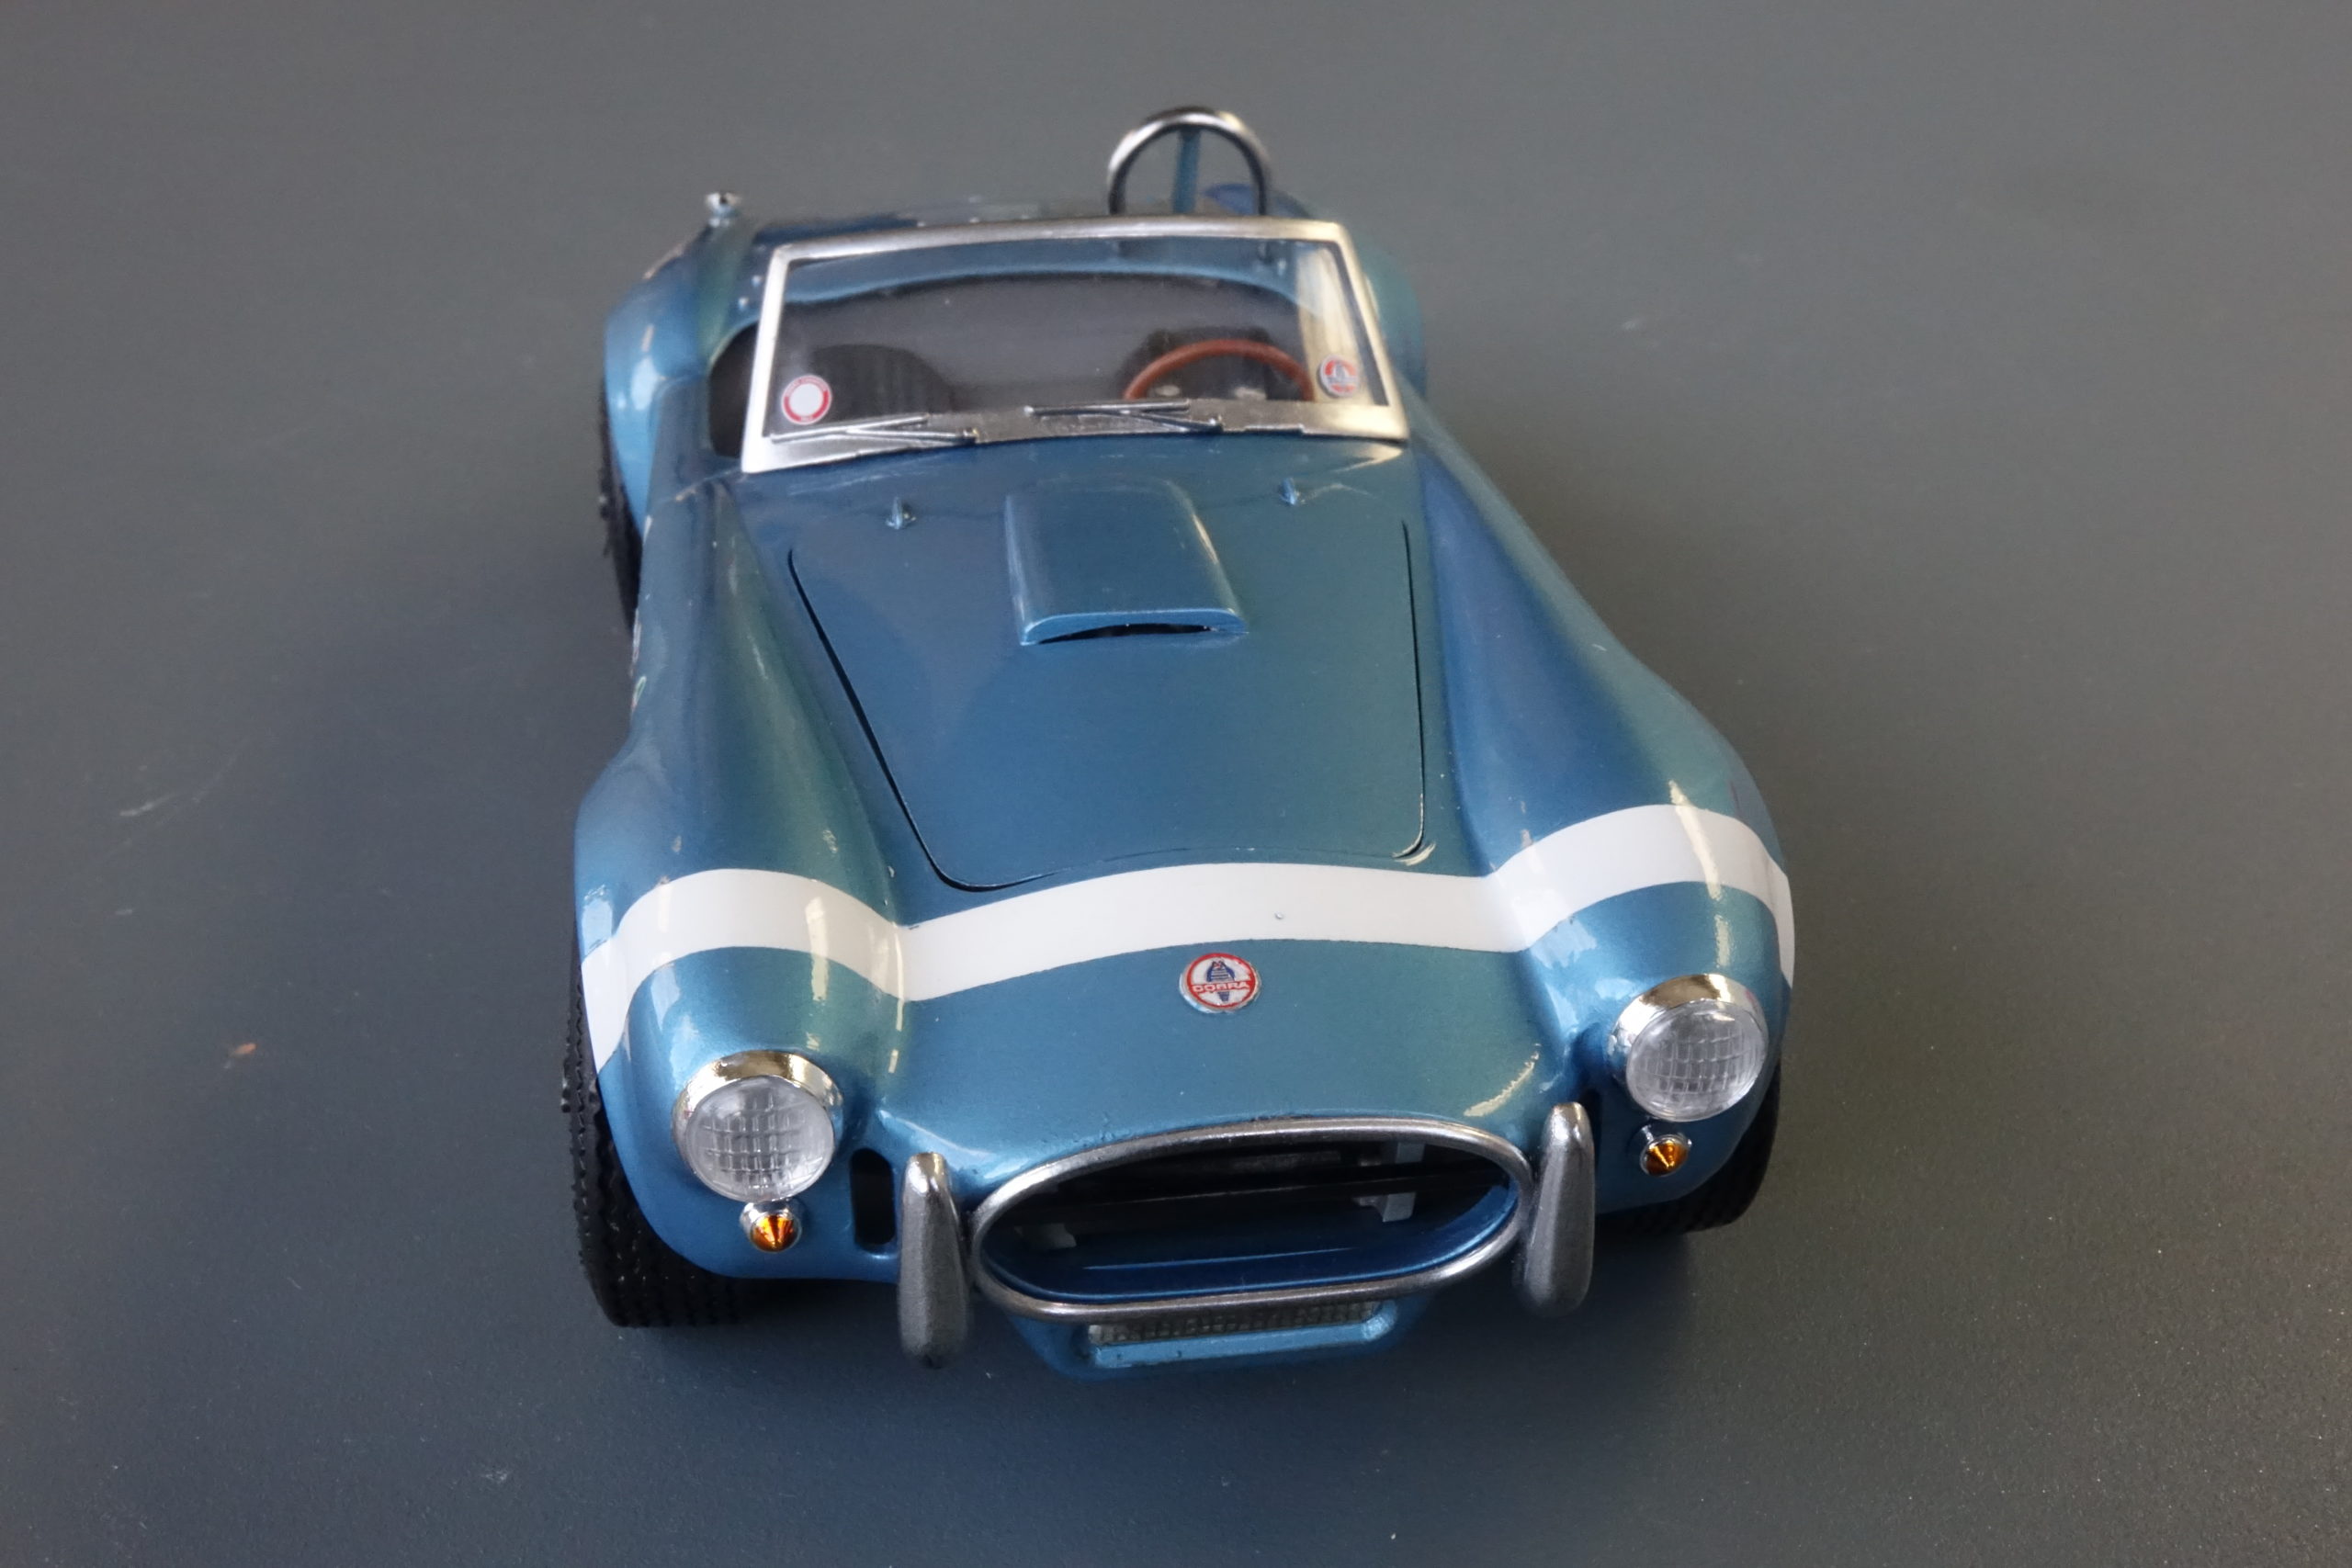
I had also decided that the broad white band across the front of the car I would paint rather than use the supplied decal , which I feared could be a little thin.
So, a bit more of a complication – but a challenge!
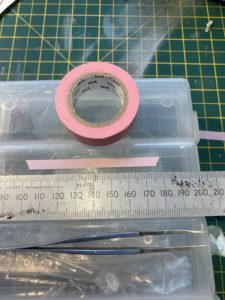
I had previously photocopied the the decal sheet ( I tend to do this routinely, especially if there are complicated decals, and I can play around with paper cut outs planning positioning and cut lines etc). So I used the photocopy to cut, with a very sharp blade, a piece of masking tape the same size as the decal.
Just a note here – Tamiya masking tape is top quality – but I’ve been using MT Washi tape for a while now and is, in my opinion, even better – it cuts extremely cleanly and pulls off new paintwork without leaving a trace or lifting the paint.
So, a band of white paint was applied across the nose of the car and allowed to dry. The pre-cut masking tape was applied in the correct place and then the whole body was sprayed with the blue. I’m sure many of you will have already used Tamiya LP – but, if not, wow! How good are they? A few light mist coats, gradually getting thicker and then a final wet coat and it’s done. No need to wait between coats- it flashes off so quickly, and the final coat is touch dry in a very short time – so not as many issues with dust, etc

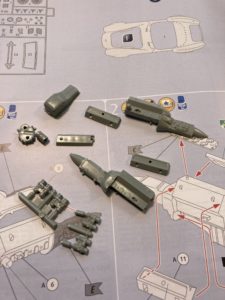
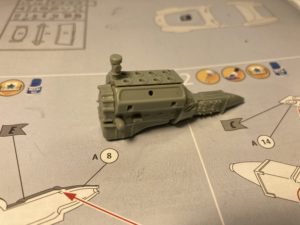
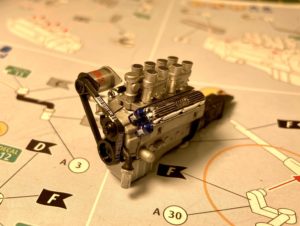
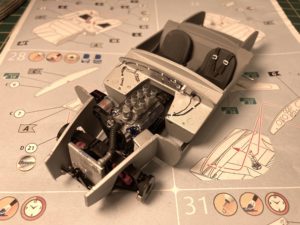
c) The engine
The engine is fairly straightforward in that there are just a few parts to build the basic block etc. The parts weren’t a great fit though – the mouldings not too accurate. As more engine ancillaries were added it got quite a bit more difficult, as the locations for the parts were poor. And some of the parts fouled other parts and had to be trimmed/modified. This is where the ‘Level 5’ starts to come into play! Some of the parts were simply ‘contact fit’ so this made it trickier. I use CA glue for all my building – and it came into its own from now on for speedy adhesion. I discovered later that it was quite easy to build inaccuracies in at this stage, and some parts (like the starter motor was just simply the wrong size/shape), and this meant that it was a struggle to locate the engine properly to the chassis. Be aware if you are building this!
But it did all go together – and there was range of very detailed decals for lots of the engine parts – really cool!
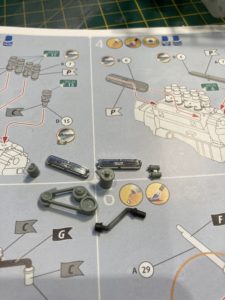
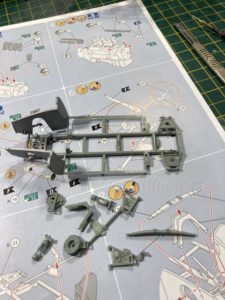
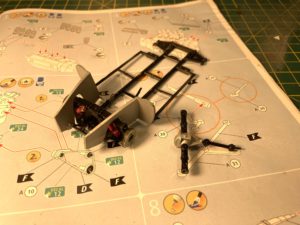
d) Chassis and suspension
A similar scenario to the engine here, in that the parts are all there and the instructions look very straightforward. But definitely some ‘Level 5’ work in here! The difficult steps were in the assembly of the front suspension units. Because there was a lot of contact fit, rather than ‘peg in a hole’ fit, it was almost impossible to do a test assembly. The shock absorbers are a good example – just surface to surface glueing with no location. Much of it was glue part A to B, then add C, etc. This was ok – it was fiddly, but worked – but it inevitably lead to some inaccuracy when later parts were fitted. The engine assembly was shoe-horned into place, but several of the ancillaries fouled the chassis frame and had to be filed down. I did get there eventually. I confess to having to leave out the lower engine hose assembly because it was totally the wrong shape and size to fit between its mounting points. No worries though – it all went together and, in the end, looked quite convincing. We do like a challenge!

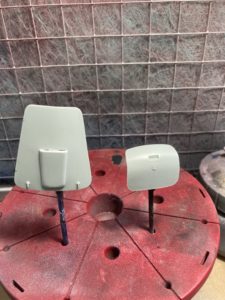
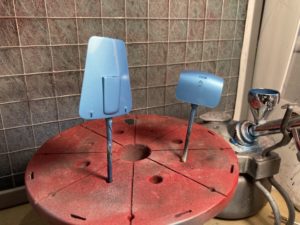
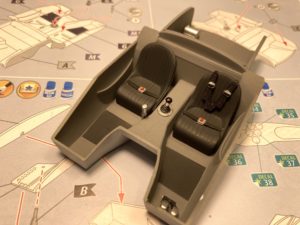
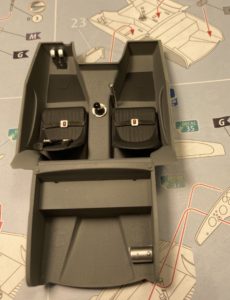
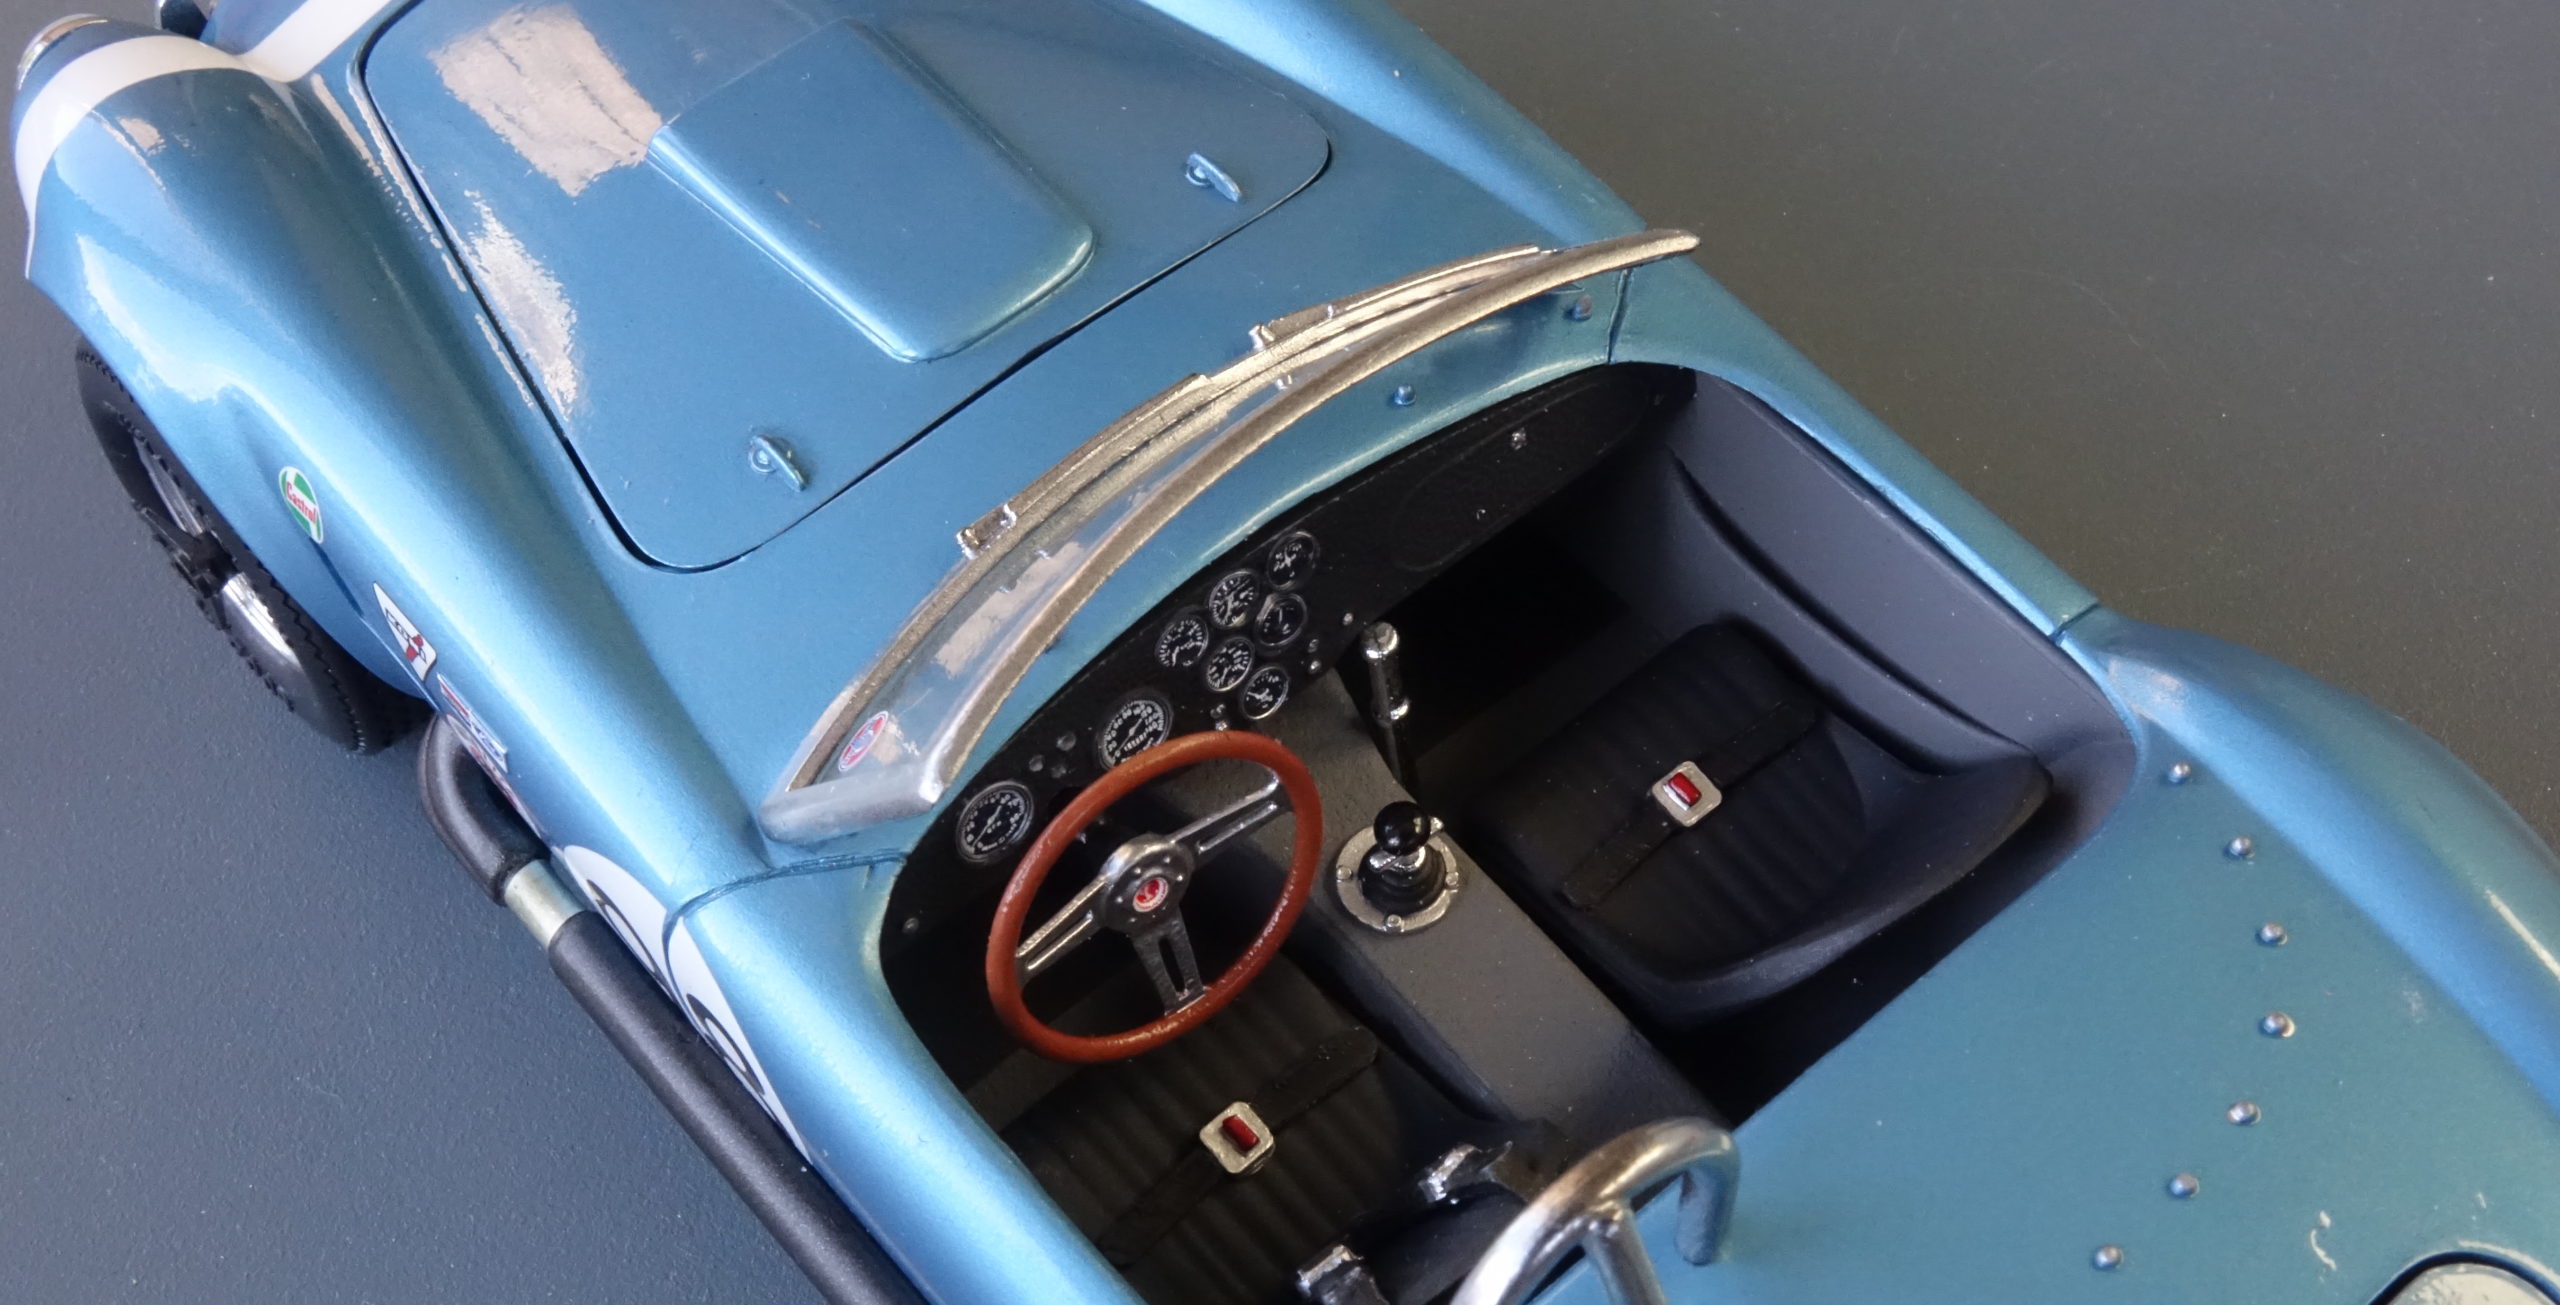
e) Interior ‘tub’
Some really nice detail in here – nicely moulded parts – no problems. The interior was masked up and airbrushed. I liked the textured detail for parts such as the floor mats, carpeting, seats, etc. A choice is provided for the seat belts – either decals to apply directly to the seats or plastic moulded parts. I opted for the latter and painted them as realistically as I could. No doubt some modellers may want to do some detailing up here with after market PE metal buckles and cloth webbing. I did think about it but hadn’t any to hand. The plastic moulded ones supplied were quite convincing. One thing I particularly liked were the many highly detailed and accurately cut decal for the instruments on the dash. They could all be clearly read (with a magnifying glass!) . I think Revell do a really good job here – I’ve seen it on quite a few of their previous kits.
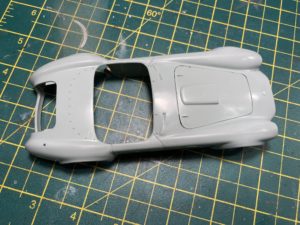
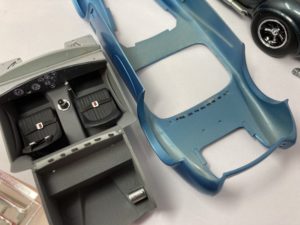
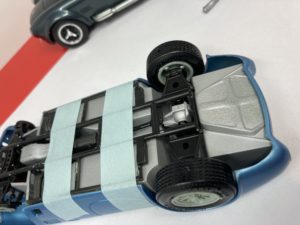
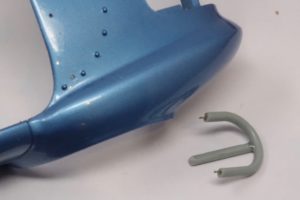
At this stage I also fixed the front bulkhead parts together, painted them and picked out some detail of the wiring etc by hand. I test fitted the interior ‘tub’ to the chassis and the body. It did become obvious here that the chassis tub would not fit properly into the body shell! The bulkhead behind the seats was too high and the wrong shape (I’ve highlighted it with marker pen on the photo). So, again not a big deal, but some filling and test fitting to make sure we would be ok later. It was.

f) Rear axle
Straightforward building with just a few parts – but some of the mounting parts didn’t match up. It was fairly easily resolved.
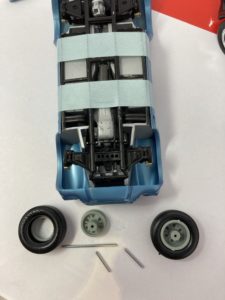
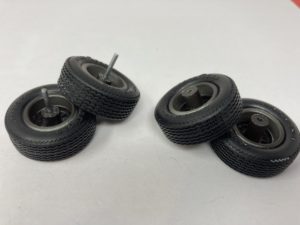
I had noticed previously that there could be a problem with the axle rod and wheels. This was no big deal, but the holes in the inner hubs were too small for the axle to fit – and they weren’t deep enough to allow the wheels/tyres to fit under the arches of the body (I had done a test fit earlier). So holes in inner wheel hubs drilled out and made deeper to allow the wheels to fit properly. I test fitted it all to the body again here.
g) Assembling the chassis, ‘tub’ and body shell.
At this stage it was a full test fit – before the bonnet and boot lid were attached by their hinges ( and this came post-decal and clear lacquer). A bit more cutting and filing needed here and there until it all fitted comfortably.
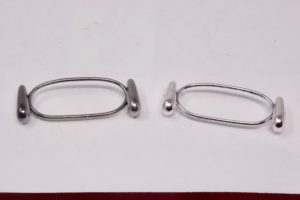
And here I had to sort out the front axle and wheels. Mmm. I mentioned earlier that trying to build both sides of the front suspension accurately was tricky – and this is where it shows! Firstly the solid metal axle no-way could be threaded through from one side the the other. Secondly, the inner wheel hubs were too long to allow the inside of the wheel to fit up to the brake/hub on the car without them protruding way too far outside the body work. So both problems sorted out in one go – I cut away a few mm of the length of the inner wheel hub, cut two smaller lengths from the axle and glued these (after test fitting) together. So we now have each wheel with a stub axle which will fit under the wheel arch. I put these to one side until the body had finally been fitted. I’ve tried to show it on these photos – including how the wheels would fit without the modification! These front wheels were fitted after all the final assembly had been done – and I had (in my mind) no option other than epoxy glueing them in place when I had got them all nicely lined up and in the right place. Considering what the ‘kit fit’ would have been compared to what I ended up with, I am really pleased with the result. Ok – the wheels don’t turn, but, eh?
I should mention here that the tyres are excellent – nicely moulded, really detailed with sidewall lettering, authentic tread pattern and hardly any flash to deal with. I gave the tyres a scrub down with the Key and Clean abrasive to take off the shine and give a more realistic appearance.
h) Back to the body work
Time to apply the decals. These are impressive, high quality decals (unfortunately I seem to not have a photo of the full decal sheet – but it’s really excellent).
I used the photocopy I did as a template for cutting the number roundel on the doors. I taped the cut out paper piece to the doors, marked the door panel gap line, then cut the decal dry on the sheet before I applied each one in two pieces. I got it 95% ok to my eye! All the other decals were as they came off the sheet. I used the usual MicroSol/Set liquids to help. When the decals were properly dry I airbrushed the body, bonnet and boot with a fairly thin coat of Tamiya LP Clear – suitably thinned down -and that was that. No buffing or polishing needed at all.
i) Final assembly
The bonnet and boot could now be mounted with their hinges ( a bit more filing of the hinge parts to allow for a good opening/closing fit). The body shell, interior ‘tub’ and chassis could now all be glued in. All went well!
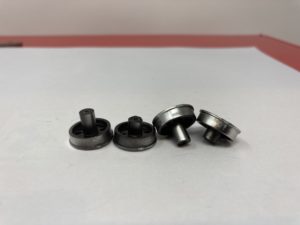
As for the wheels – I used the chrome sprue parts and masked the rims in order to air brush some darkened metallic grey LP to the centres. I did the wheel spinners the same. And then a light coat of semi-gloss clear to just take the shine back a bit. The small chrome parts (such as the sidelights, etc) I used straight off the chrome sprue, adding clear orange and red for the lenses. The headlamp bezels and plastic lenses fitted a treat. For the windscreen surround and the front and rear bumpers I used the un-chromed sprue parts. The chromed ones weren’t too good (comparison in photo) – rough surfaces mainly, so I sanded and smoothed these parts and gave then them the Alclad Chrome treatment. So, having a spare sprue works quite well! I always dread fitting the clear parts for windscreens etc – but thankfully the windscreen fitted well enough for me to rest it (no touching allowed!) on to the rear of the frame and carefully add tiny drops of CA glue on a mounted needle to the gaps at the corners as I pressed it down with a cotton bud. The clear aqueous type adhesive wouldn’t have worked because of the pressure needed to hold it in shape. The side exhausts I again used the non-chromed parts – painting the centres metallic grey – and adding some Bare Metal Foil to the middle and end sections for a bit of detail. The roll bar hoop is a story of its own – suffice to say I re-shaped it, made my own mounts for it by drilling and inserting 0.5mm wire to fasten it to the body – and it was given the Alclad treatment.

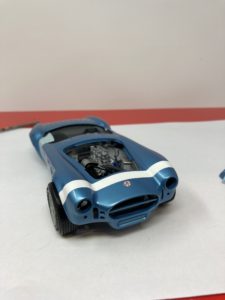
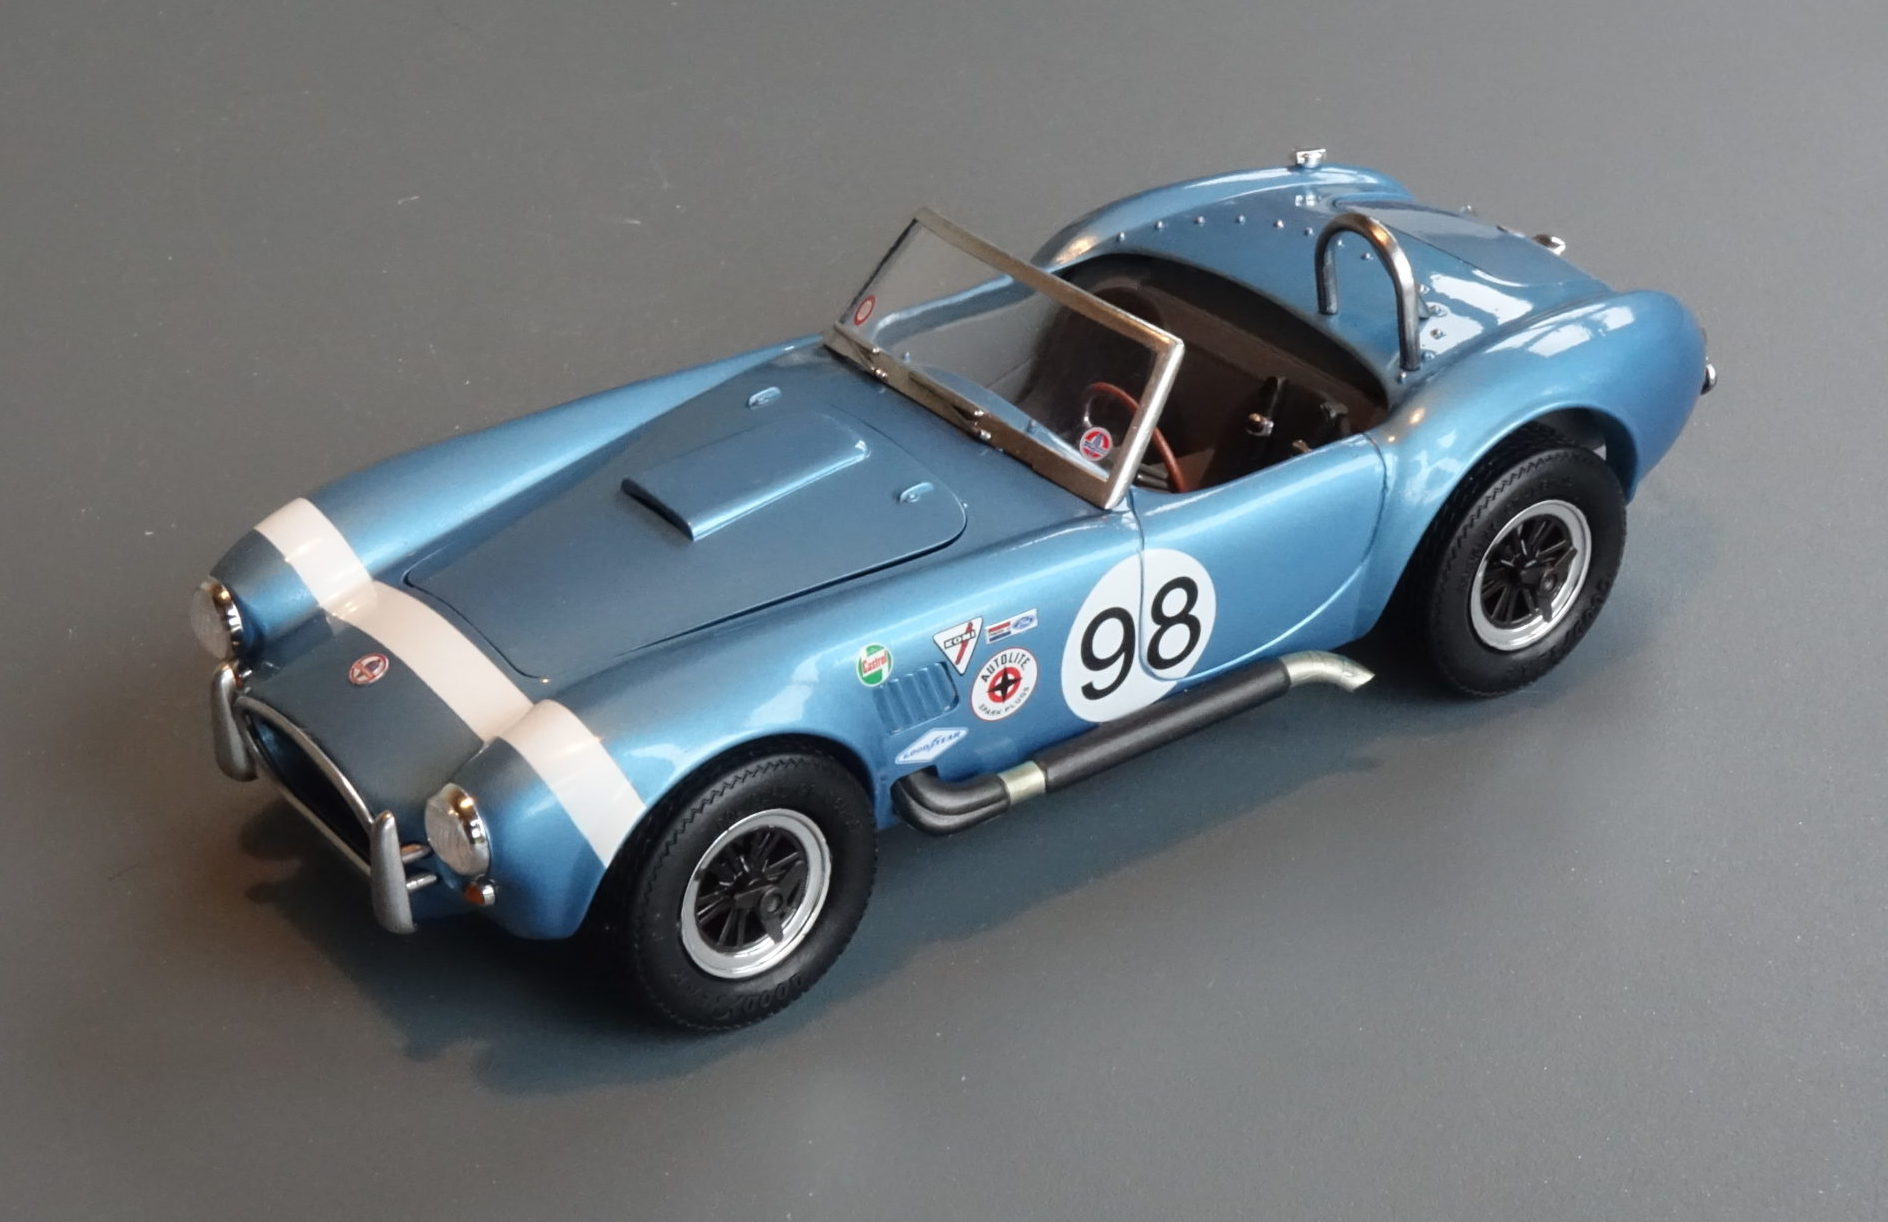
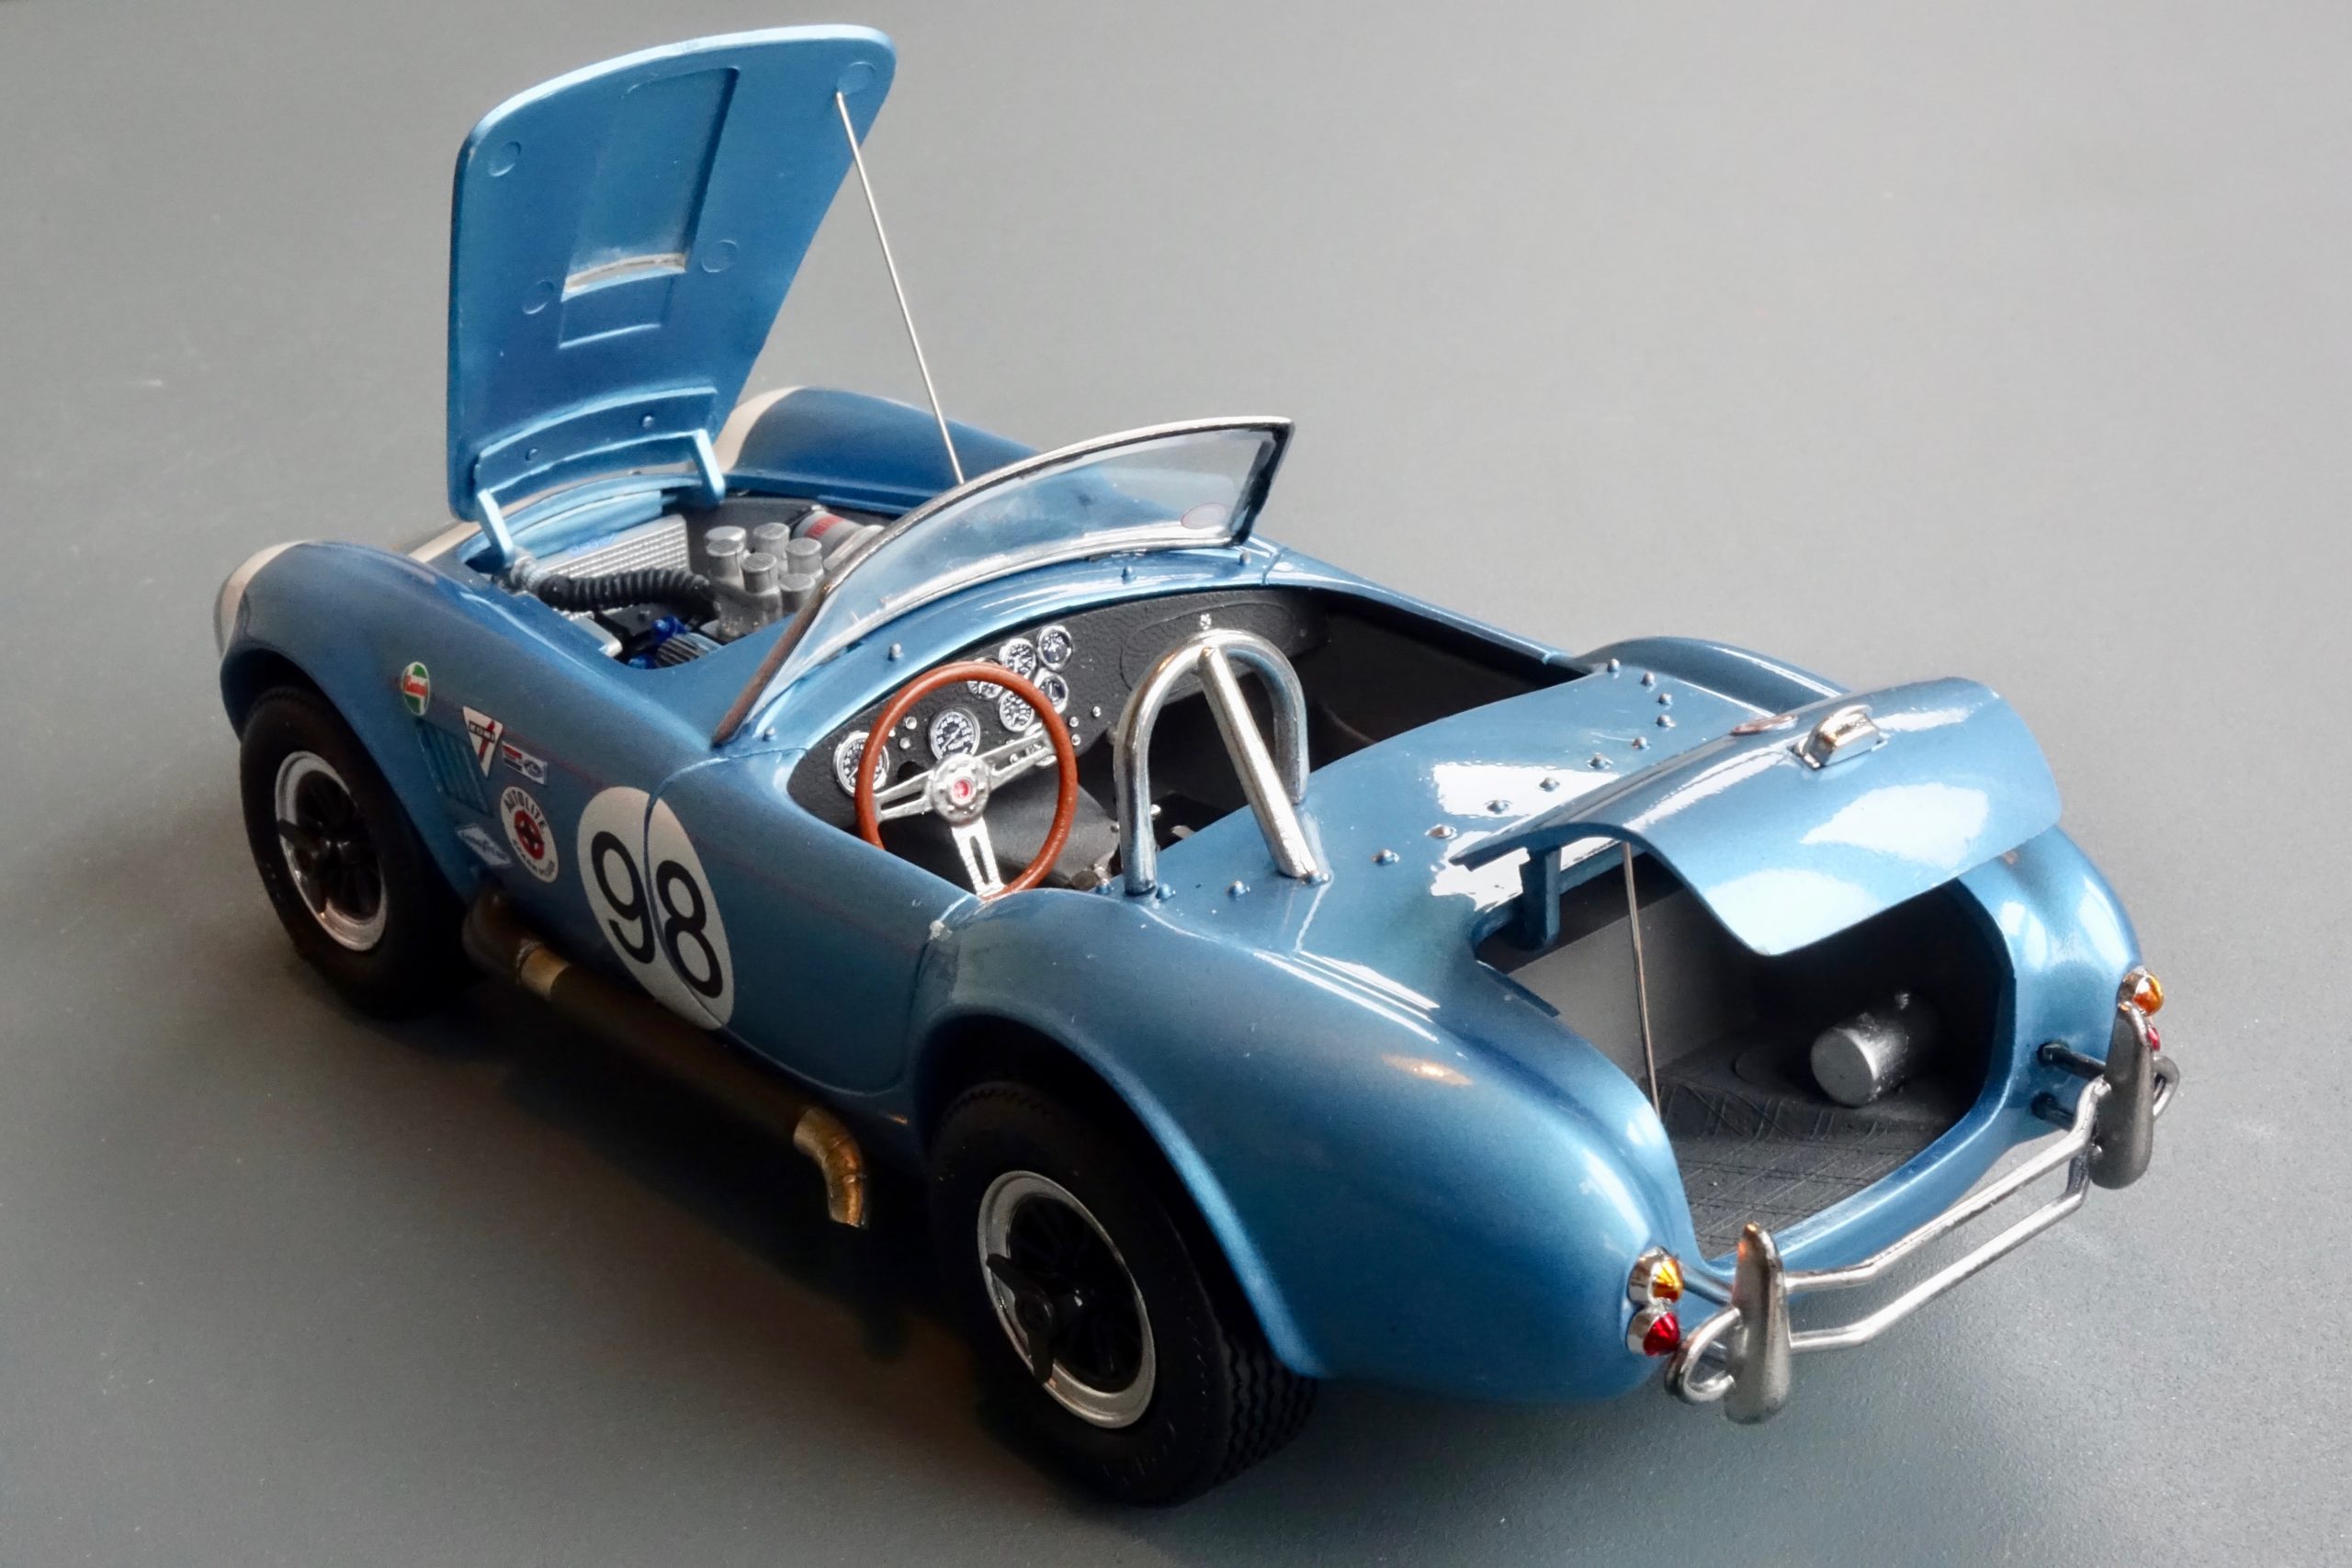
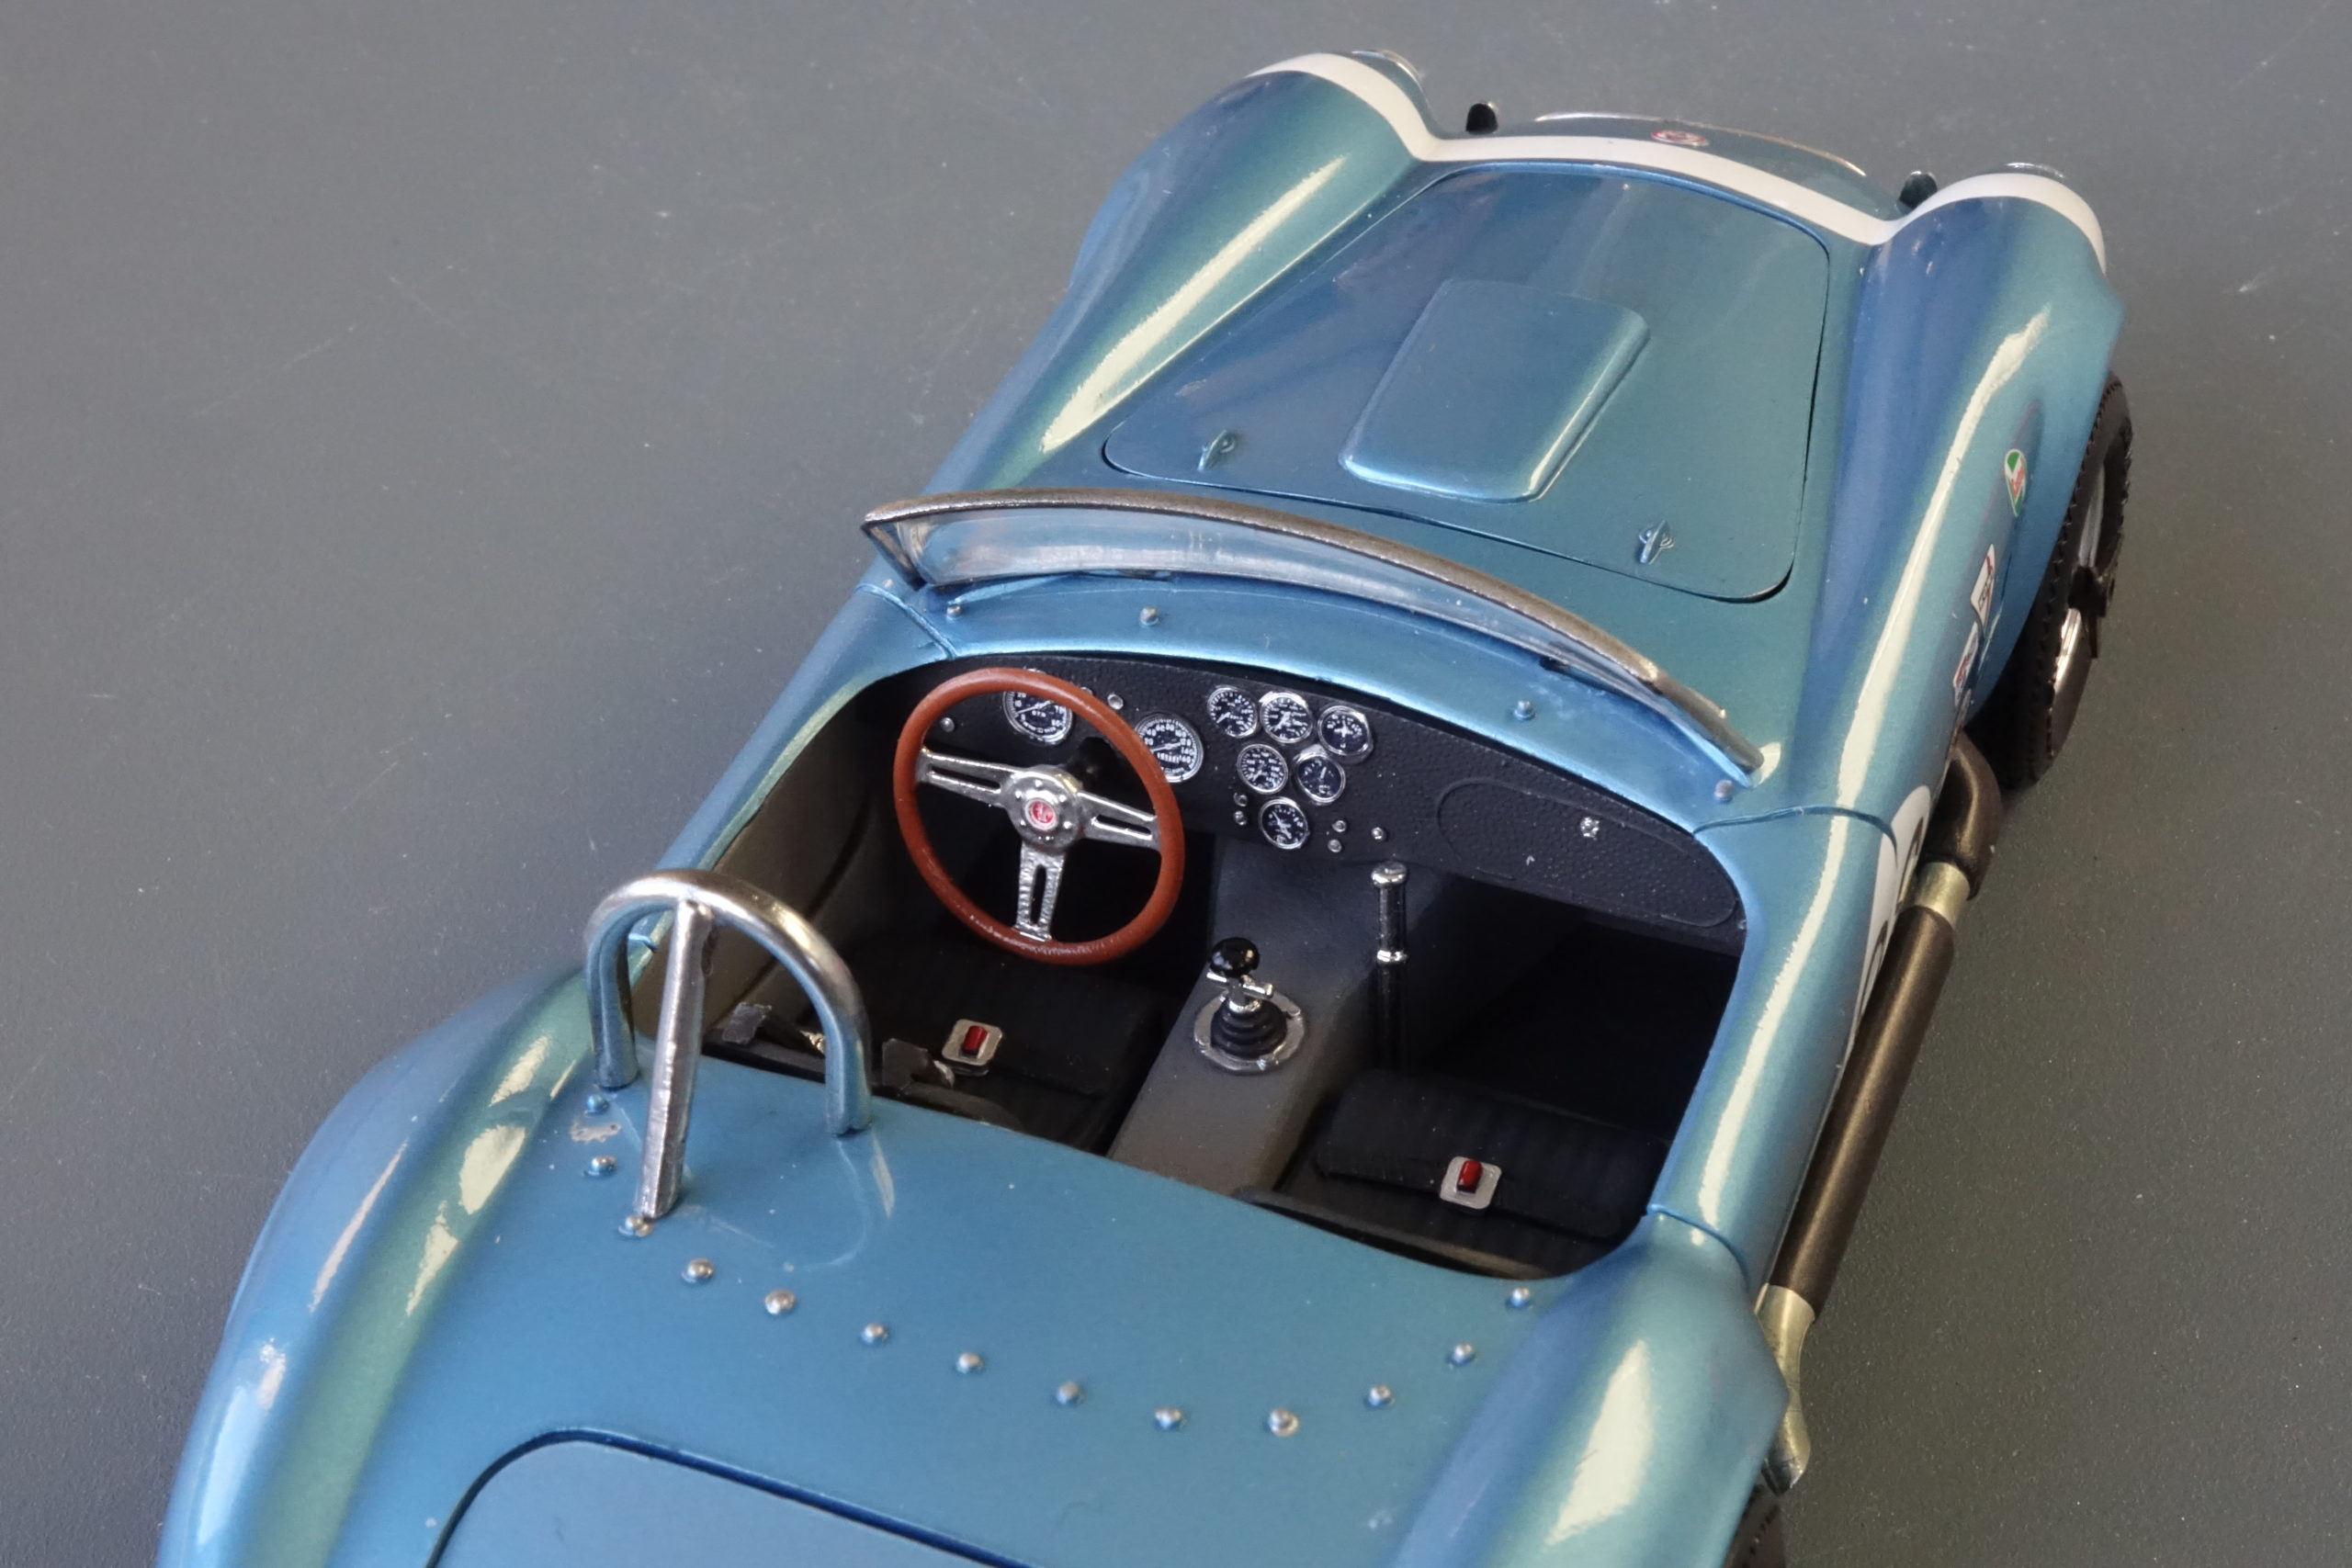
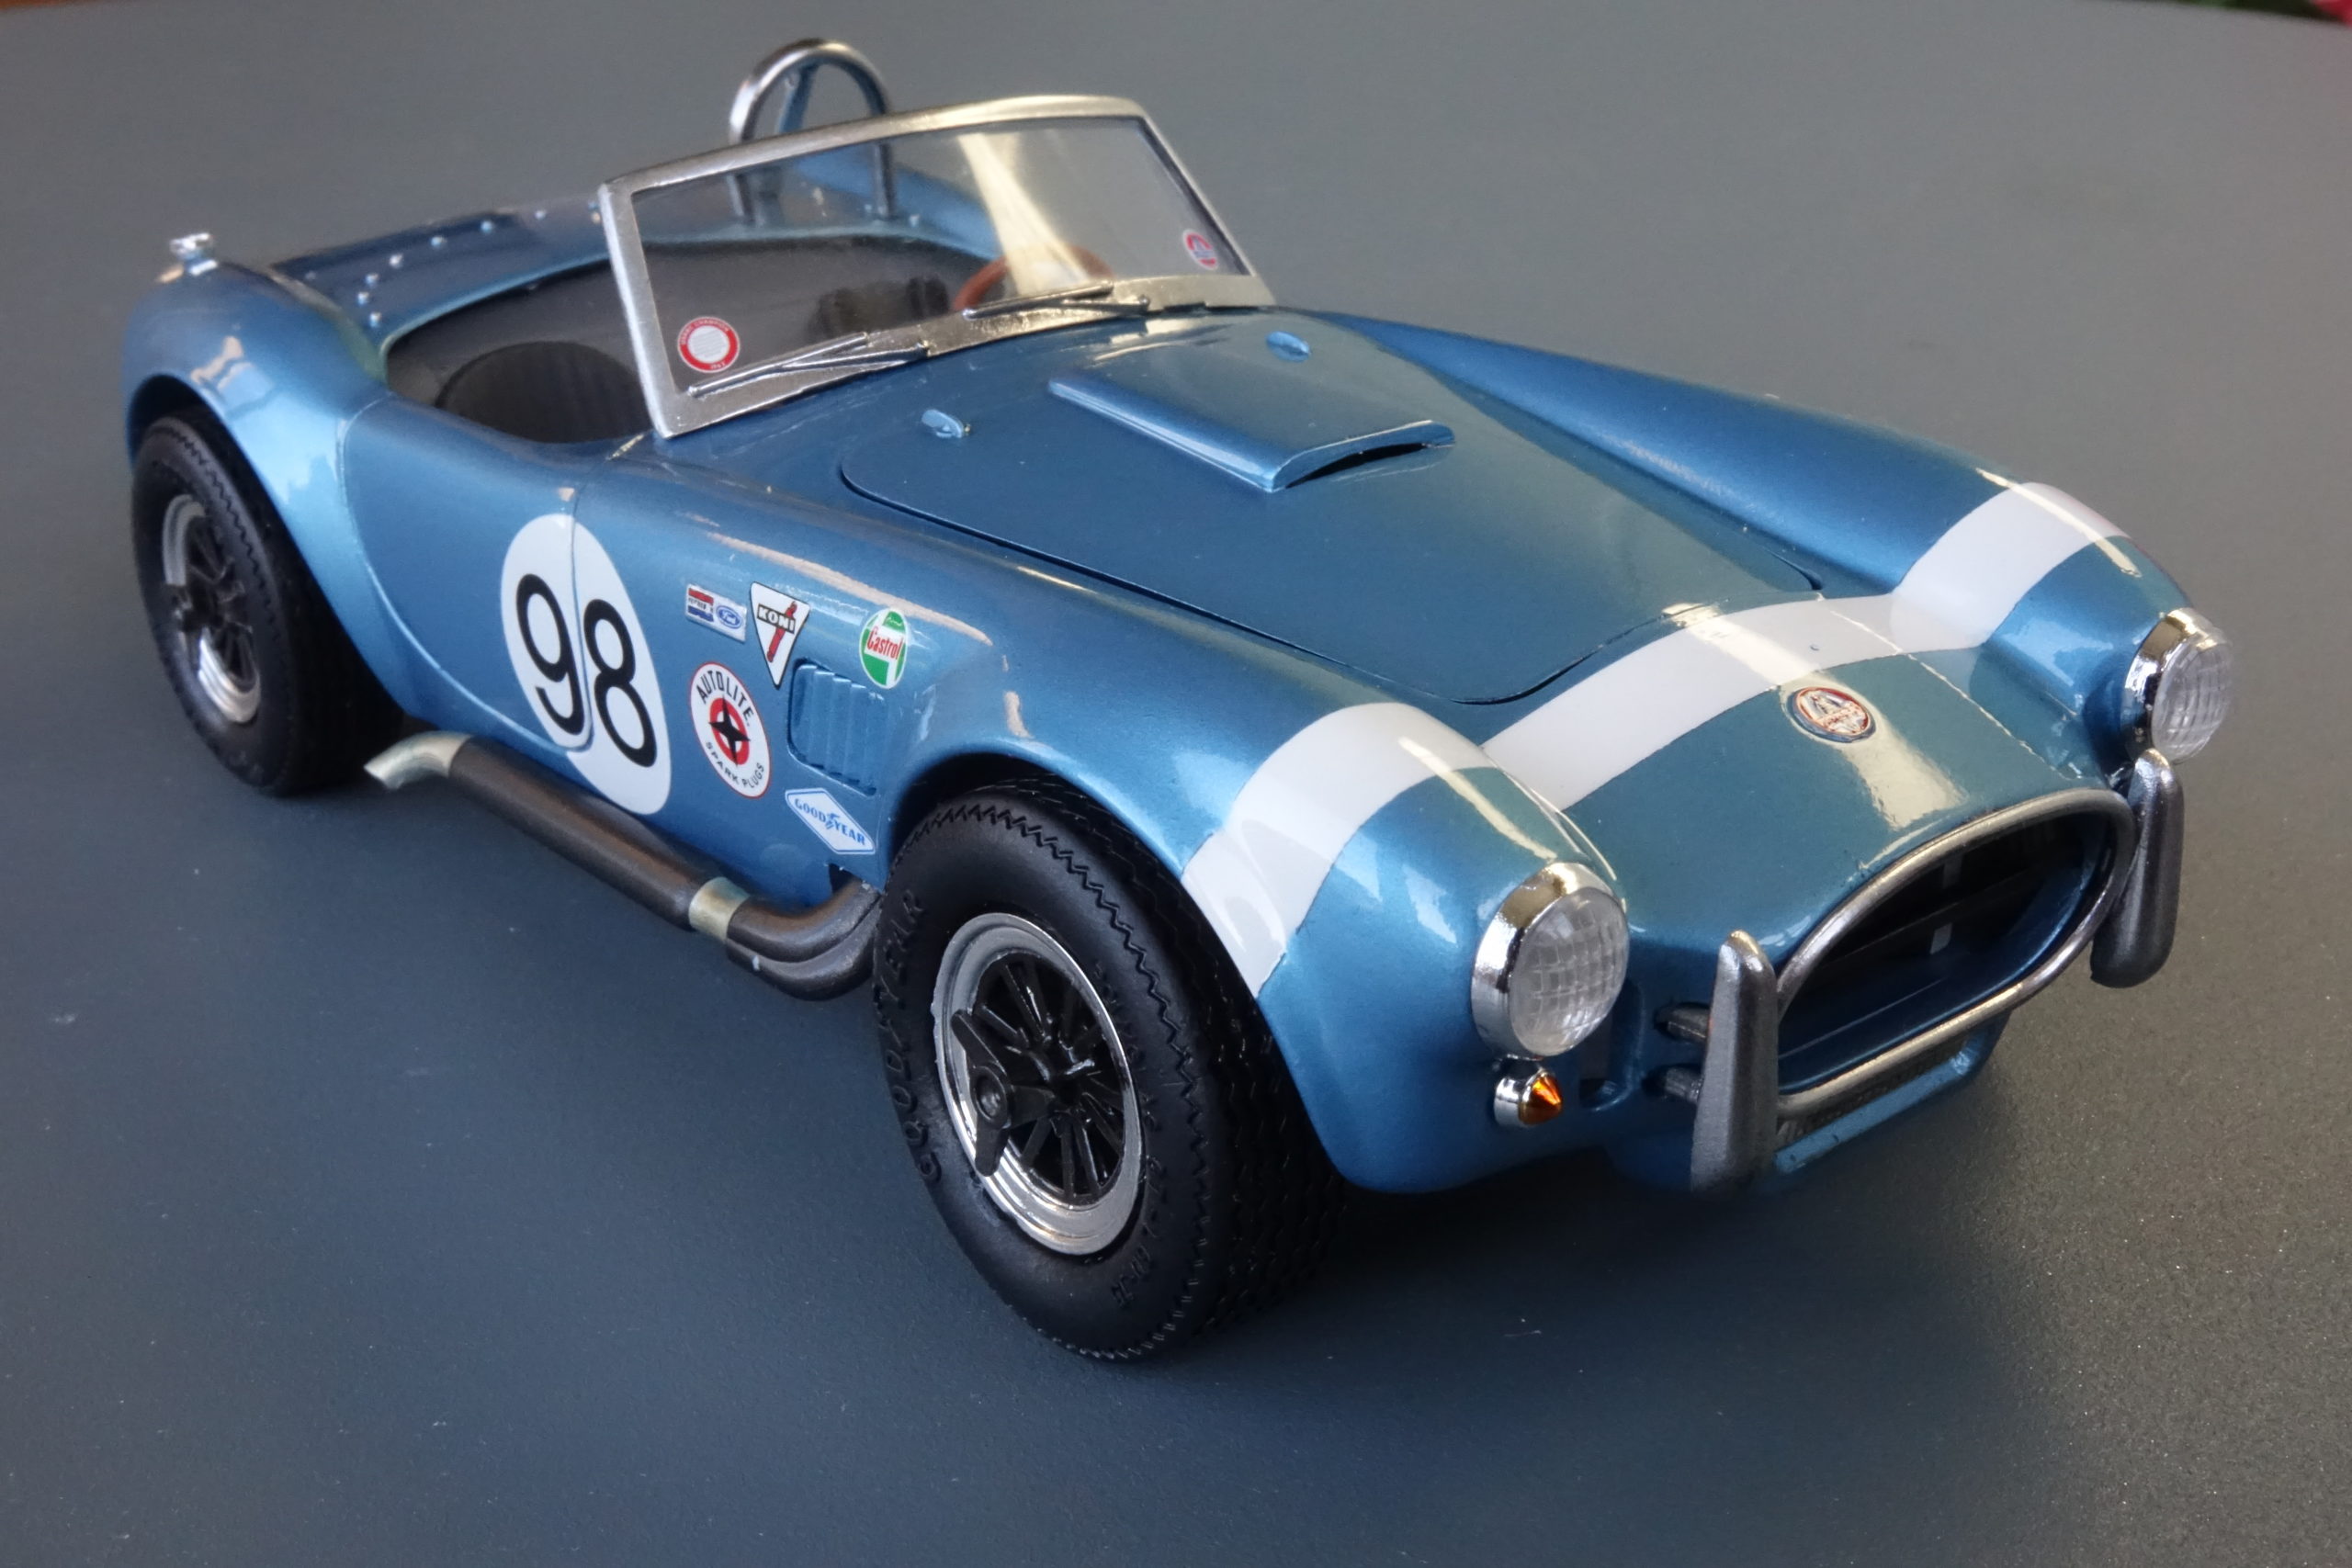
Final photos


The verdict on this kit
Build time
Not counting the time experimenting with paint mixes – about 40 hours in total.
Suggested tools
The usual modelling equipment – but as some drilling was needed, a pin vice (Tamiya do a great one) and suitable micro drill bits would be very useful. I think that to achieve this sort of finish with metallic paint an airbrush is essential. CA adhesive, especially for the simple contact fit parts, is recommended.
Kit specific advice
Do as much test fitting as possible – as early in the build as possible. Be aware of the problem with the ‘wheels within the wheel arches’ problem.
What we’ve taken away from this build
Well, it’s Level 5 and it lived up to it! It was frustrating in places where parts just didn’t fit or were the wrong shape. But, equally, some of the detail is delightful. In the end I am really happy – I have a really neat little model here that, to my eye, is very convincing. Ok, maybe it isn’t actually a model of a ’62 Shelby Cobra 289 as labelled – but it’s a really attractive model, with plenty of detail and a lovely addition to any collection.
It certainly is not for the novice builder – but for any modeller with experience and is up for a bit of a challenge then it’s a great little kit. And, for me , it’s really excellent value. It may well be a re-boxed kit here that Revell have given a re-vamp to – but it works for me. Have fun!
Want to build this kit? Buy it now on our website www.jadlamracingmodels.com – or click here to go straight to the product listing!
Fantastic review – it is definitely a level 5 kit! I made this in August and really enjoyed it (mostly…).
Your finish of the kit was really nice – i used Tamiya light metallic blue on mine and got a similar colour. The kit itself is actually a reissue of an Academy kit from the late 80s with new decals. It’s nice having the extra sprue – I ended up finding a spare tyre and put it in the boot!
My build can be found here How to build the Revell Shelby Cobra 289 ’62: https://www.youtube.com/playlist?list=PLKiQDI6u1XyD_WSWSEn3m_cHHxGRA5eiH
Hi Thomas. Thanks. As you have built this kit ( and I’ll check out your video) you will know some of the pitfalls! But, in the end, it’s a super little model and looks fab! Very pleased I stuck with it! And apologies for the lateness of this reply. Cheers. John
I see many references to Scotchbrite in model car kit videos, but which type as there are many products under that title. Why does Jadlam not stock the products mentioned in the build article?
Unfortunately we are not able to stock everything right now! But we will be increasing our range of accessories a lot in 2021.