
Regular maintenance is crucial for keeping your cars performing at their best!
If you’ve spent time tweaking and tuning your Scalextric cars, you don’t want to lose those performance gains. My mantra for slot car maintenance is ‘Clean & Smooth’. Regular maintenance also prevents unnecessary wear and damage – prevention is always better than repair.
In this blog, I’ll take a look at how the Mustang GT4 is holding up, give it a clean, lubricate the moving parts and consider some common repairs for Scalextric cars. By the end, we’ll also have added to our basic tool kit.

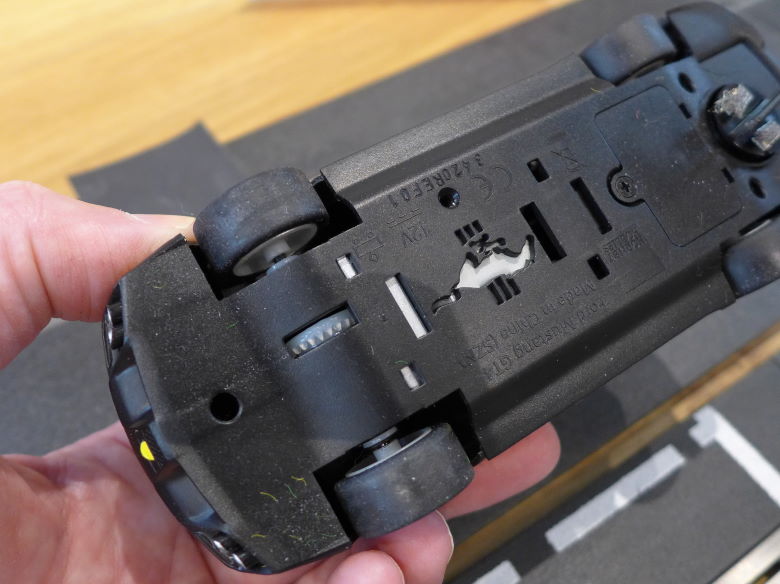
Over the past few weeks, the RACE Performance Ford Mustang GT4 has spent three long sessions on the Jadlam SL6 test track. There was the original review, the new car tweaks and preparation for next week’s blog. Although I have been careful with the car – and the track is set up on a clean floor – the Mustang is starting to get dirty, inside and out.
The most obvious places on the outside are the braids, the tyres and few greasy marks on the bodywork. The rear wing and mirrors are unscathed and there are no obvious chips to the paintwork or tell-tale scratches to show the car has been on its roof. Most ‘nearly-new’ cars won’t be so lucky!
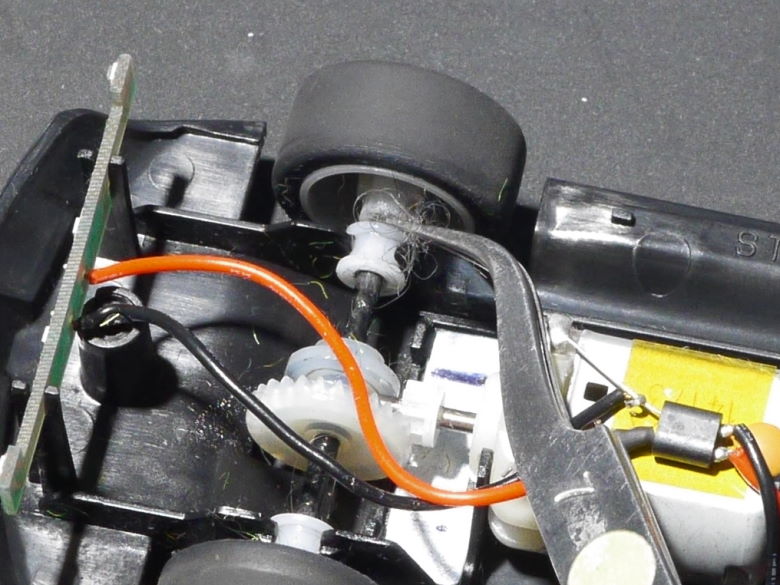
Inside looks fairly clean, although on closer inspection there are quite a few hairs wrapped around the rear axle – I share my house with a cat and a long-haired human, so that’s to be expected. I am glad I cleaned up any excess lubrication when I first got the car – grease and oil are a magnet for dust, dirt and grime.
Another thing I noticed are bits of grass ‘flock’ behind the front and rear wheels. This scenic material looks good, but gets everywhere. A while back, some of the track in my SL6 layout was used on top of scenic grass mats. Despite cleaning the track afterwards – and wiping it down before every session since – there are still some bits of the flock lurking somewhere and the cars pick it up with their tyres. That needs cleaning out, but more of a worry would be if it got in the gear mesh – that could cause wear and damage.

Clean & Tidy
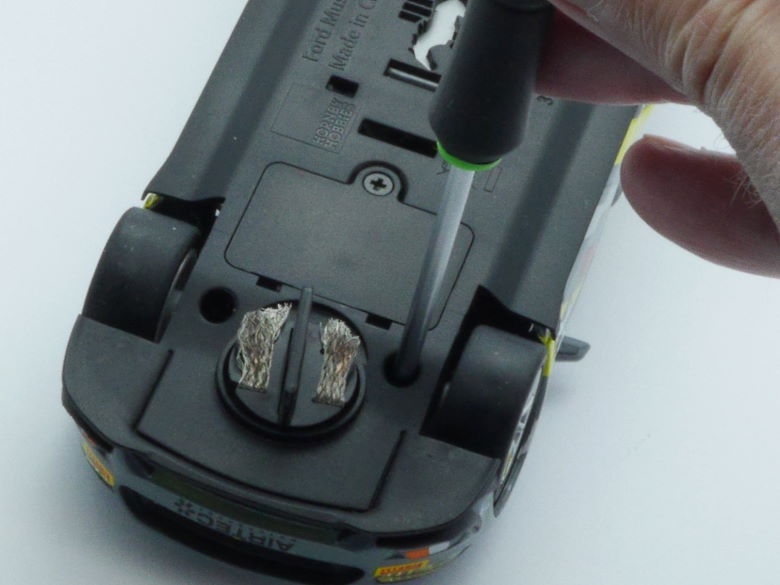
The first thing to do is get the Mustang on my workbench. I find it best to work on top of a soft surface that doesn’t scratch the car’s bodywork and prevents things like screws rolling away. I have a neat rubber work mat that has raised edges to keep tools and components separate and safe. A budget alternative is a cheap computer gaming mat.
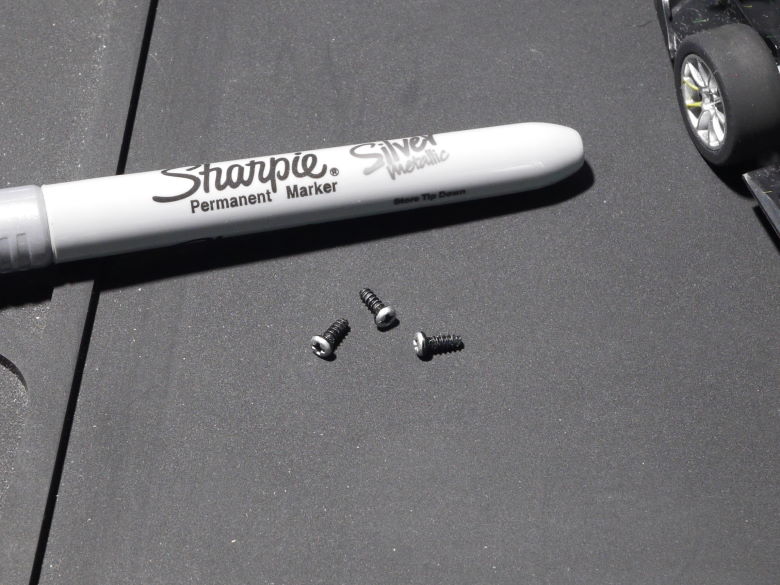
Talking of screws, I use a silver marker to paint the top of the black Scalextric body screws – this makes them easier to find if they do roll off my workbench onto the floor.
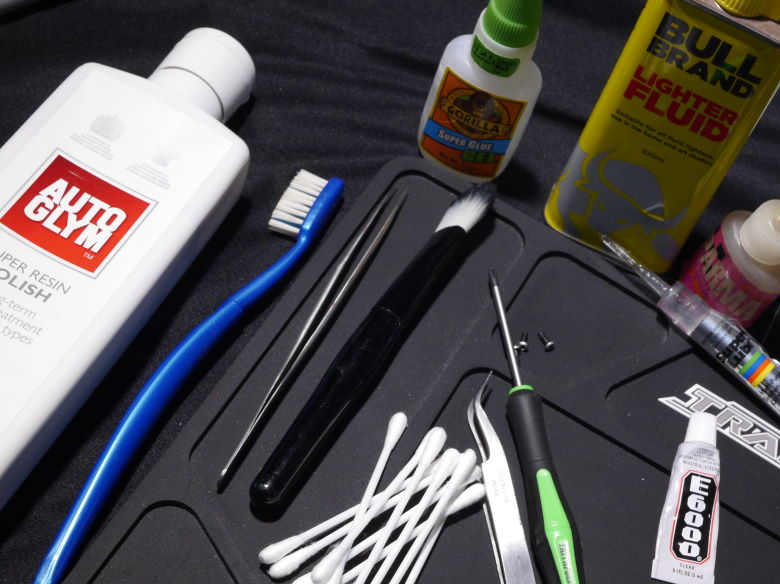
Bodywork: A simple way of keeping your car looking nice and shiny on the outside is to wipe it with a clean, fine microfibre cloth – the type sold for cleaning glasses and phones. If the paintwork is getting dull, scuffed or scratched, a little car polish will get it looking like new. I use AutoGlym ‘Super Resin Polish’.
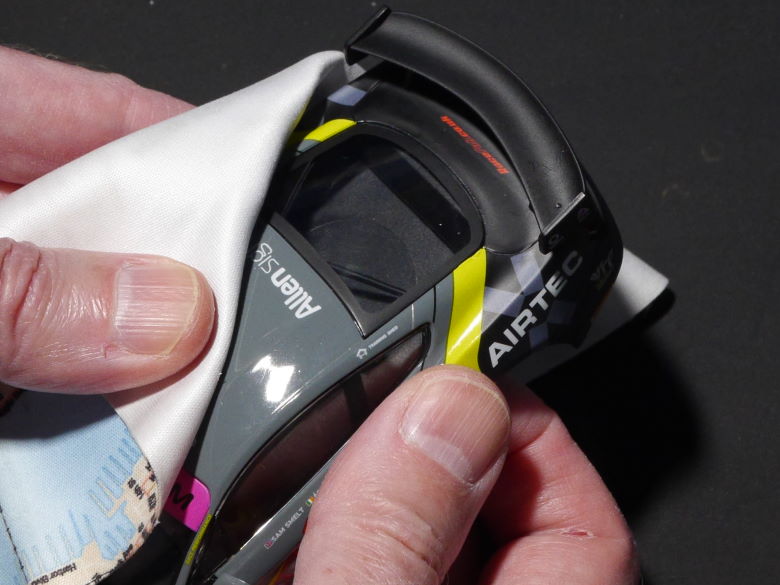
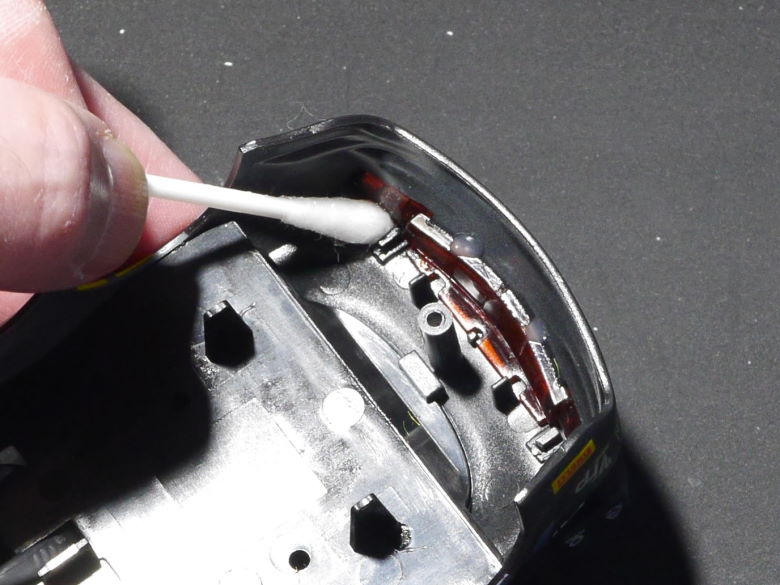
Braids: I clean braids using a good-quality cotton bud (Q-Tip) soaked in lighter fluid (naptha). Wiping from front to back, this dissolves and removes muck and oxidation. Regular cleaning helps maintain performance. I also tweak the braids to keep them tidy – straight front to back and not too bushy. When the braids get too straggly and worn, it’s time to change the braid plate – there are spares underneath the box.
**Caution** Lighter fluid is highly flammable! Take care when using it and follow the safety instructions on the tin.
Tyres: We looked at cleaning tyres in the second part of this Tuning series. I roll the rear tyres on the sticky side of some 5cm (2-inch) wide masking tape. This lifts off any dirt and should be done before every race to keep grip at a maximum level. Every now and then, a quick scuff on sandpaper will regain some grip too – that is also explained in part two of this Tuning series. Please be very careful scuffing the tyres if your car is fitted with a digital chip!
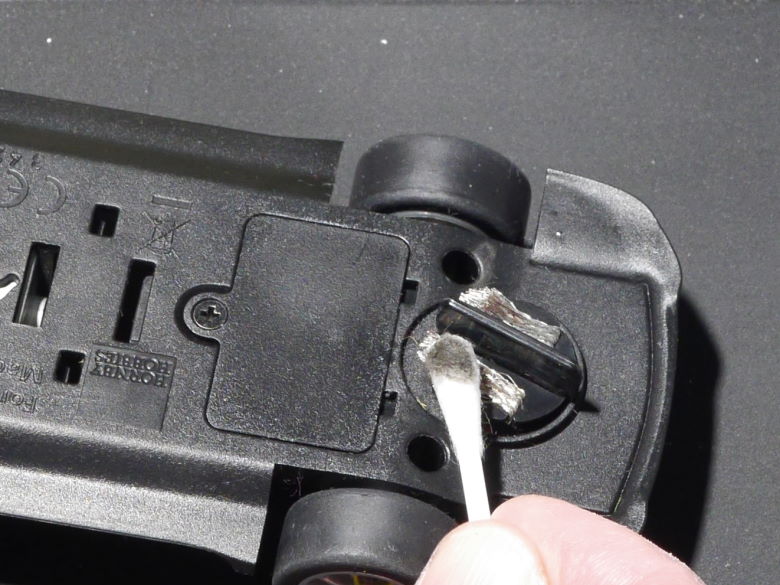
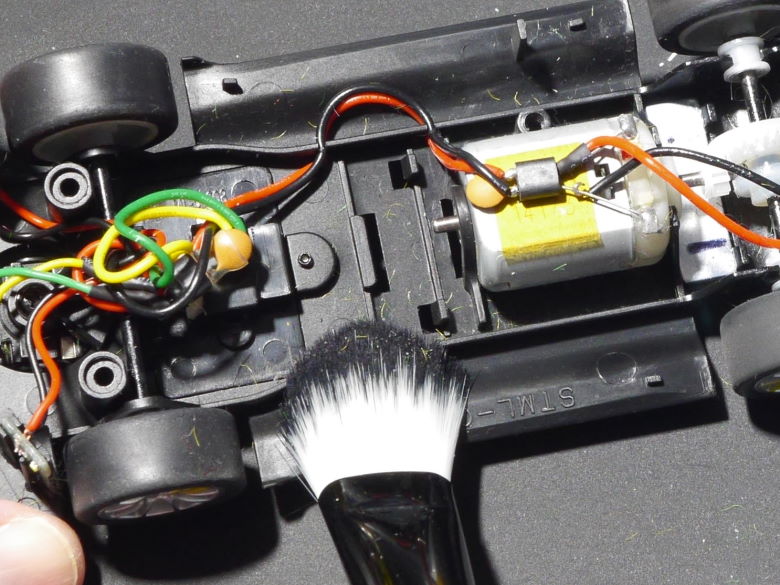
Underpan: If you don’t over-lubricate your car, cleaning is easy. I use a ‘foundation’ make-up brush for the areas with no greasy spots. The soft brush sweeps up any dust, dirt and scenic flock that has got into the car. A good lung-full of air works wonders too. In areas where there are greasy deposits – usually around the rear axle – I use a cotton bud. If there’s a lot of grease and muck, I soak the cotton bud in lighter fluid. Repeat this for the inside of the bodyshell – you’ll find that gets pretty dirty too.
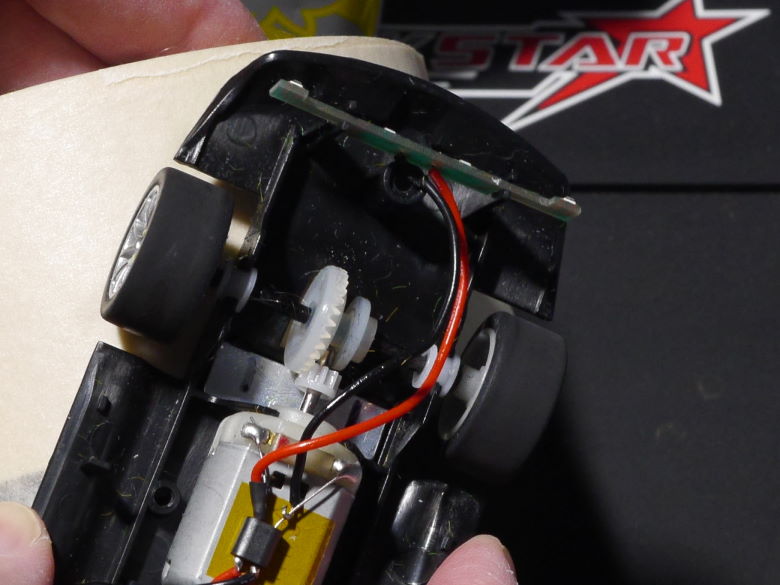
Removing hairs: Use a pair of tweezers to remove any hairs or carpet fibres you can see – check the gears, the axle and the gap between the bushings and the wheels. It can sometimes be easier to remove the axle. If hairs get in the gear mesh or the axle bushings, they will create friction that will both harm performance and cause the motor to run hot – risking permanent damage. It is especially important to do this regularly if your track is set up on a carpet. A pair of tweezers are included in the excellent Model Railway Screwdriver Set, although these curved tweezers are what I use and are great for getting into tight spaces.
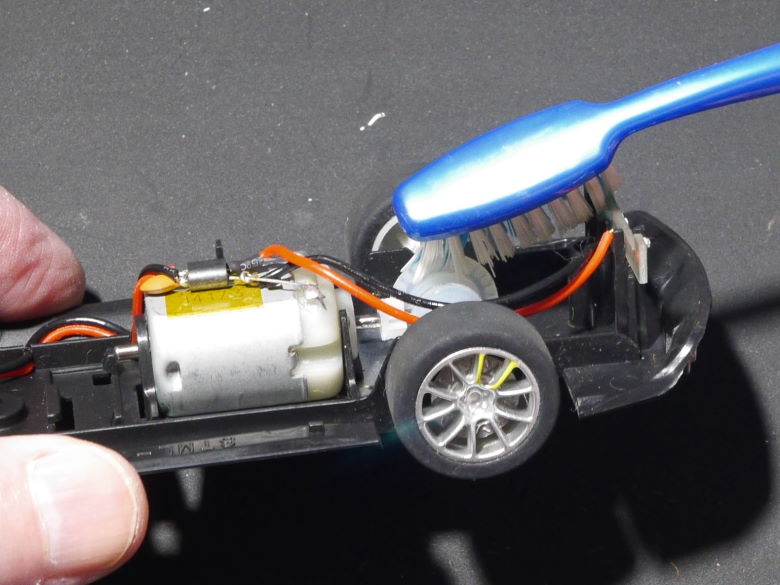
Cleaning Gears: If dirt, dust or scenic flock get into the gear mesh, it is important to remove it. I use a combination of a toothbrush, cotton bud and tweezers. This will also remove lubrication from the gears, but we’ll re-lubricate in a moment.
Smooth & Lubricated
Keeping all the moving parts rotating smoothly is crucial to good slot car performance. Any unnecessary friction means that electrical power going to the motor is turned into heat rather than speed on the track. Parts will also wear out much quicker. Once you’ve made sure your car is clean and any hair or debris removed, it’s time to lubricate those moving parts…
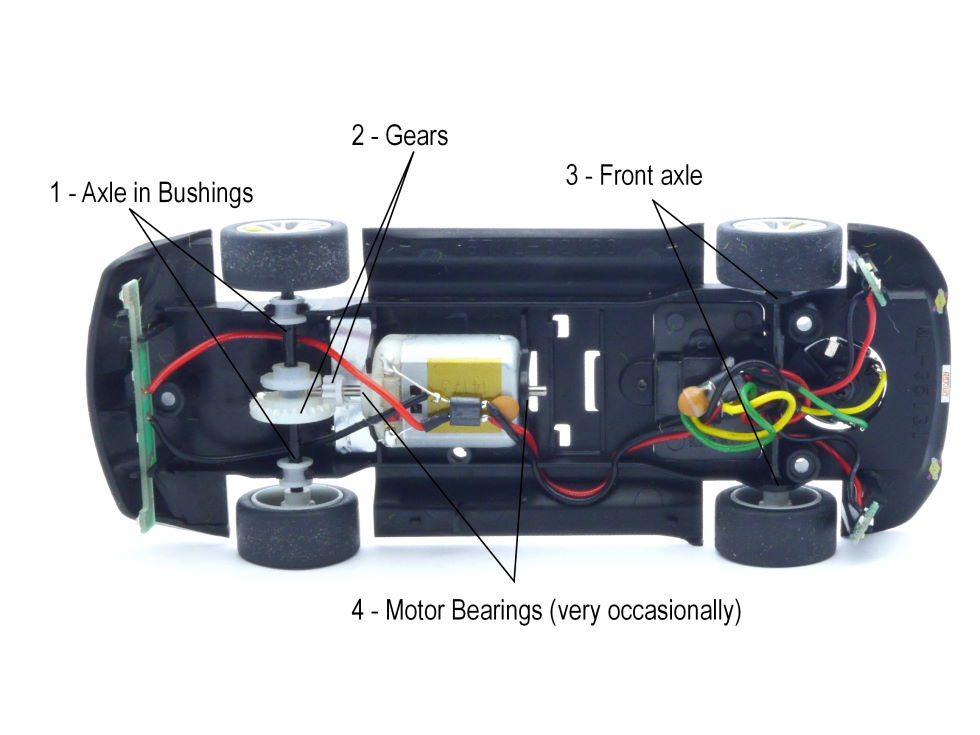
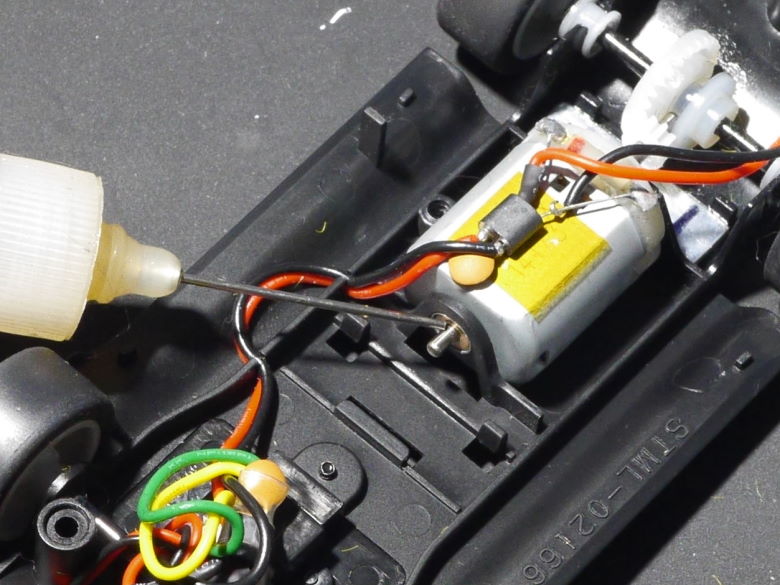
Lubrication points: The important places to lubricate are the gear teeth and the rear axle where it passes through the two white bushings. A tiny drop where the front axle passes through the underpan can also be useful. Very occasionally, put a minuscule drop of oil on the brass bearing at the front of the motor. Only use a precision oiler to do this. There is a similar bearing in the plastic ‘end-bell’ at the back of the motor – the tiniest drop of oil on the motor shaft next to the end-bell will also help keep the motor smooth. Please don’t over-oil the motor as any lubrication that gets inside risks gunking up the motor and ruining performance. With the gears, I usually just fill a couple of notches on the smaller pinion gear and then roll the wheels to spread the lubricant round all the teeth on both gears. If you carry out regular maintenance, that is all the lubrication you need.

Type of lubrication: If you asked ten slot car enthusiasts what brand of lubrication they use, you’ll probably get thirty different answers! It is very much a personal preference. There are loads of suitable options – including the pro-race Slot.it and NSR ranges in the Jadlam Scalextric & Slot Car shop, plus some of the model railway products too.
The lubrication added at the Scalextric factory is a light grease that stays on the moving surfaces for a long time – this is ideal if you won’t be maintaining your cars very often. If you are going to be regularly tinkering under the hood, then a less viscous oil will give slightly freer movement and marginally better performance. Remember not to over-lubricate – that’s a magnet for dirt, creating a horrible gunky slime in the car as well as an oil-slick on the track!
As important as the type of lubrication, is the application. A precision or ‘needle-nose’ applicator delivers a small amount of oil to exactly the place you want it – no waste, no mess. In terms of keeping your car smooth and clean, a perfect starter lubricator is the Gaugemaster Precision Oil Lubricator. I have one in my toolkit, along with a few other alternatives. I particularly like ‘SuperLube’, which is a slightly thicker product. I also have an old bottle of sewing machine oil, which is what I’ve used on Scalextric cars since the 1970s.
Spares & Repairs
My Mustang GT4 is in good shape. It works fine on the track, everything rotates smoothly, no parts are broken and the wheels are tight on the axles. It is always worth carrying out the inspection I described at the start of the second Tuning article. However, there are also a few wear and tear issues to look out for…
Rear wing: The rear wing and the mirrors on most Scalextric cars are vulnerable to snapping off in an accident. To reduce the risk of a breakage to the rear wing, I usually un-glue it. This is a case of dissolving the glue, using a cotton bud (Q-Tip) soaked in lighter fluid applied to the tabs on the underside of the body shell. Gently rock the wing front to back, so the solvent works into the join. Then apply more solvent in the same way. Repeat this as many times as you need, until the wing comes free. As it becomes freer, you can rock the wing more firmly – but never force it, otherwise the tabs will snap! It may take ten or fifteen minutes, but it is worth being patient and gentle. If one side becomes looser quicker, concentrate on loosening up the tighter side before removing either tab from the body.
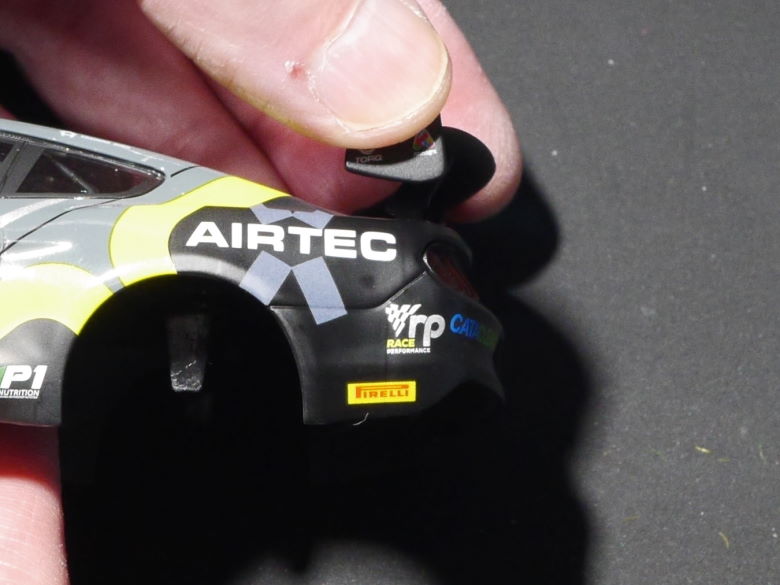
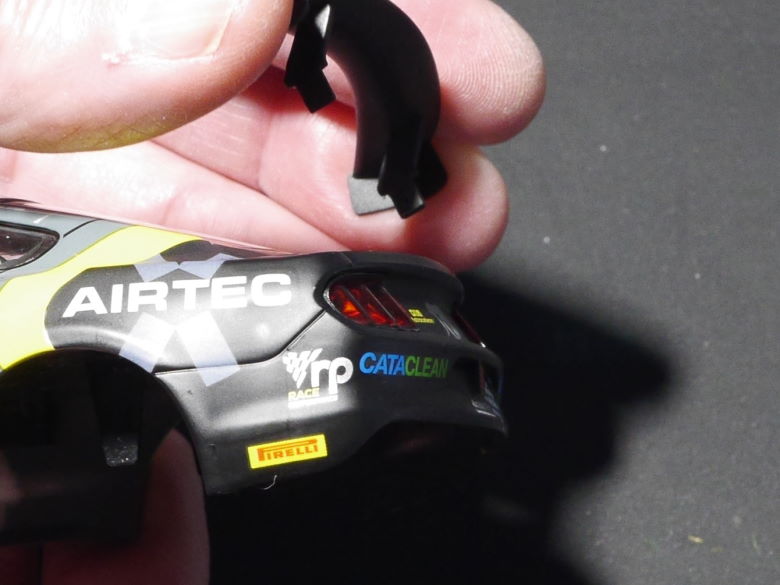
Once the wing is successfully removed, mop up any solvent and refit the wing without any glue. In theory, it will now fall off in a crash, rather than snap. If you find the wing is very loose and it falls out on its own, add some Blu Tak under the body to hold the tabs more securely. The Mustang wing is very tight, so I lightly sanded the tabs to allow it to fall out. I now also have the option of running without the rear wing, should I want to.
If your rear wing – or mirrors – do break, the easiest thing to do is to leave them off. If you want to repair the car, then gluing the parts back is a reasonable simple job. I use a flexible glue – either a superglue gel or a slower-setting glue like Shoe Goo or E6000. These stick really strongly and the added flexibility allows just a little ‘give’ in future impacts. As with any glue, clean the surfaces of the join, use enough glue – but not too much – and support the join when the glue is setting. However, don’t expect this to be a permanent fix – if it broke once, it’ll probably break again.
Although Scalextric don’t produce spare wings and mirrors for recent cars, some enthusiasts are producing 3D printed spares. Have a look on Shapeways for what’s available.
Underpan: If you have an extremely heavy crash, it is possible to break part of the underpan. If this is a part that holds the rear axle, motor or guide, you will almost certainly require a replacement. Some sort of repair might be possible, but it is not likely to withstand any heavy racing action.
Wheels: Occasionally, Scalextric wheels come loose and may even fall off. They are easily fixed with a small dab of super glue on the wheel hub, where the axle pushes in. Do clean both surfaces – lighter fluid is ideal – and don’t use too much glue. This is important as you run the risk of gluing the wheel to the axle bushing – so be careful as you push the wheel back on to the axle and leave a gap. You should always do this with the axle fitted to the car. Sometimes a wheel can become ‘wobbly’ – that might be because the wheel has broken or the axle has become bent. This isn’t very common, but a replacement rear axle is required. Spares aren’t generally available for newer Scalextric cars, so we’ll look at alternative rear axle set-ups later in this tuning series.
Wires: If your car stops working, it is possible a wire has come loose. The most common place for this to happen is where the yellow and green wires attach to the guide plate – there is a lot of movement here, putting stress on the crimped join between wire and connector. If a wire does break, it will require soldering. You have the option of taking the car to a friend or local computer repair business – or to do the soldering yourself. If you have a soldering iron and some basic skills, it is an easy job – just remember to remove the metal braid contact from the plastic guide plate. Heat and plastic don’t mix.
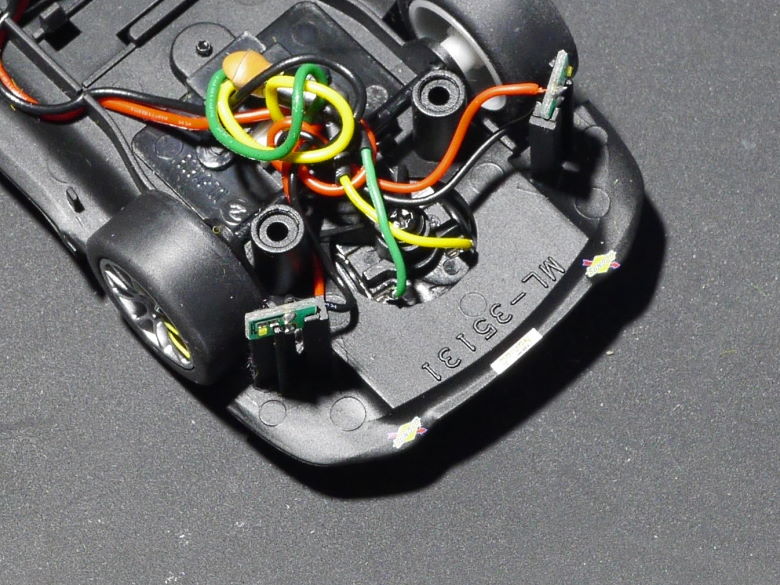
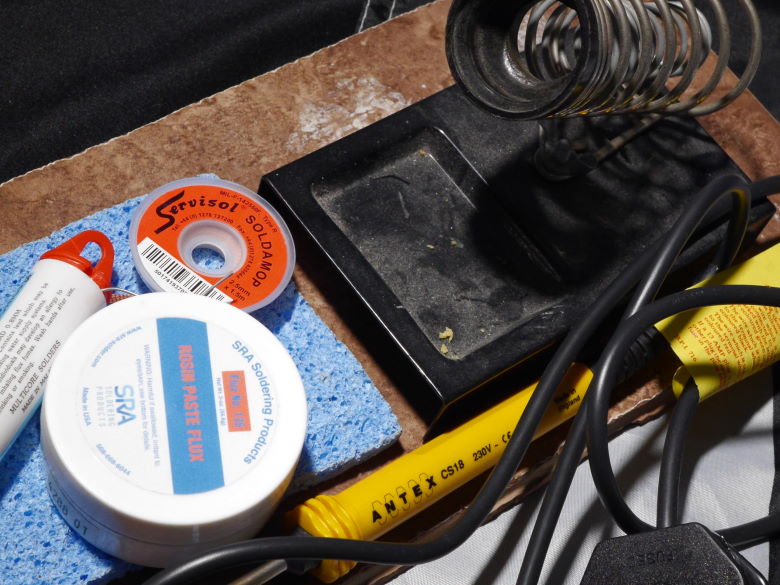
If you want to learn how to solder – and it’s a useful skill to have – there are plenty of great guides online. The choice of equipment is vast, but my basic slot car soldering kit is a low-wattage iron (like this one), a cheap soldering iron stand, a ceramic tile for a heat-resistant base, a damp washing-up sponge to clean the tip, rosin-core solder, rosin paste flux and a roll of de-soldering braid. Soldering can be hazardous, so take your time and follow all the safety instructions.
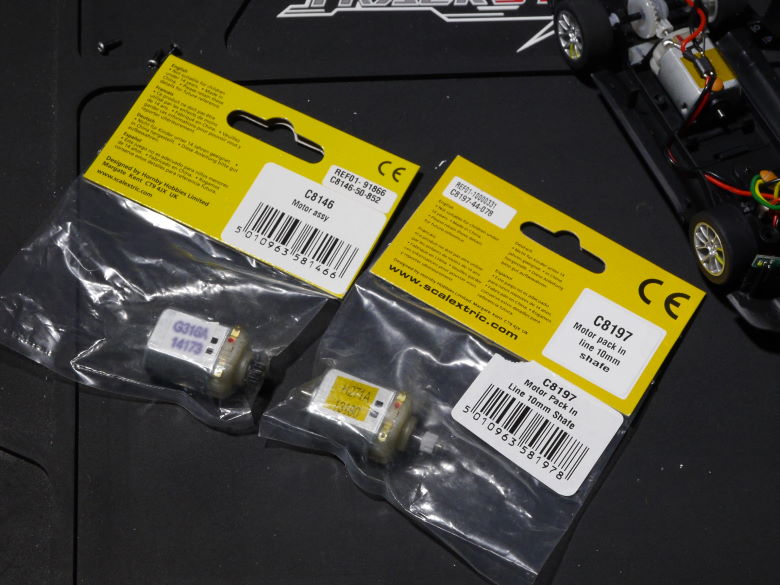
Motor: Another repair that requires soldering is replacing the motor. Even with careful maintenance, a motor will eventually wear out. If it is treated badly and asked to do too much work and gets too hot, it will wear out sooner rather than later. A drop-off in power will mean the car struggles to overcome the downforce from its magnet and will move slower and slower. Jadlams sell replacement motors – the C8197 for ‘in-line’ cars like the Mustang and C8146 for the older ‘sidewinder’ cars. Two soldering points – the legs of the ‘ferrite-man’ – will need to be de-soldered from the old motor and re-soldered to the new one.
That’s it for this week’s blog. I hope you found some of it useful. In the fourth part of the Tuning series, I’ll be returning the Mustang to the SL6 test track to look at tweaking magnetic downforce. However, before I sign off, here’s our updated toolkit…
Updated Scalextric Toolkit
- Size 0 cross-head screwdriver – included in the Model Railway Screwdriver Set
- Packet of cotton buds (Q-Tips). Branded versions are less likely to shed cotton fibres, so are worth the extra cost.
- Emery board. Borrow one or add a pack to your pharmacy / pound shop list.
- Sand paper – 400 or 600 grit, if possible. Pound shop sandpaper is fine.
- Masking tape. The 50mm (2-inch) wide stuff is best.
- Tooth picks or cocktail sticks.
- Notebook or text file. Helps you to remember what tweaks and tuning you’ve carried out on each of your cars – plus any testing data.
- Tweezers – included in the Model Railway Screwdriver Set
- Microfibre cloth
- Foundation make-up brush
- Rags (e.g. old cotton t-shirts)
- Lighter Fluid (naptha) – available in 100ml tins from most pound shops
- Lubricant – an ideal starter oil is this Precision Oil Lubricator
- Super Glue Gel
- Optional: Soldering kit (see blog above)