
A note from the Author
Hello fellow model makers! I’m John and, although I’m no expert at all – just a car enthusiast and keen model maker – but I always strive to improve and achieve the best results I can. I’ve built models from being a youngster – competition/sports cars of the 60’s/70’s are my number 1 ‘thing’ – and now I’m fully retired I can put the extra hours into this wonderful hobby.
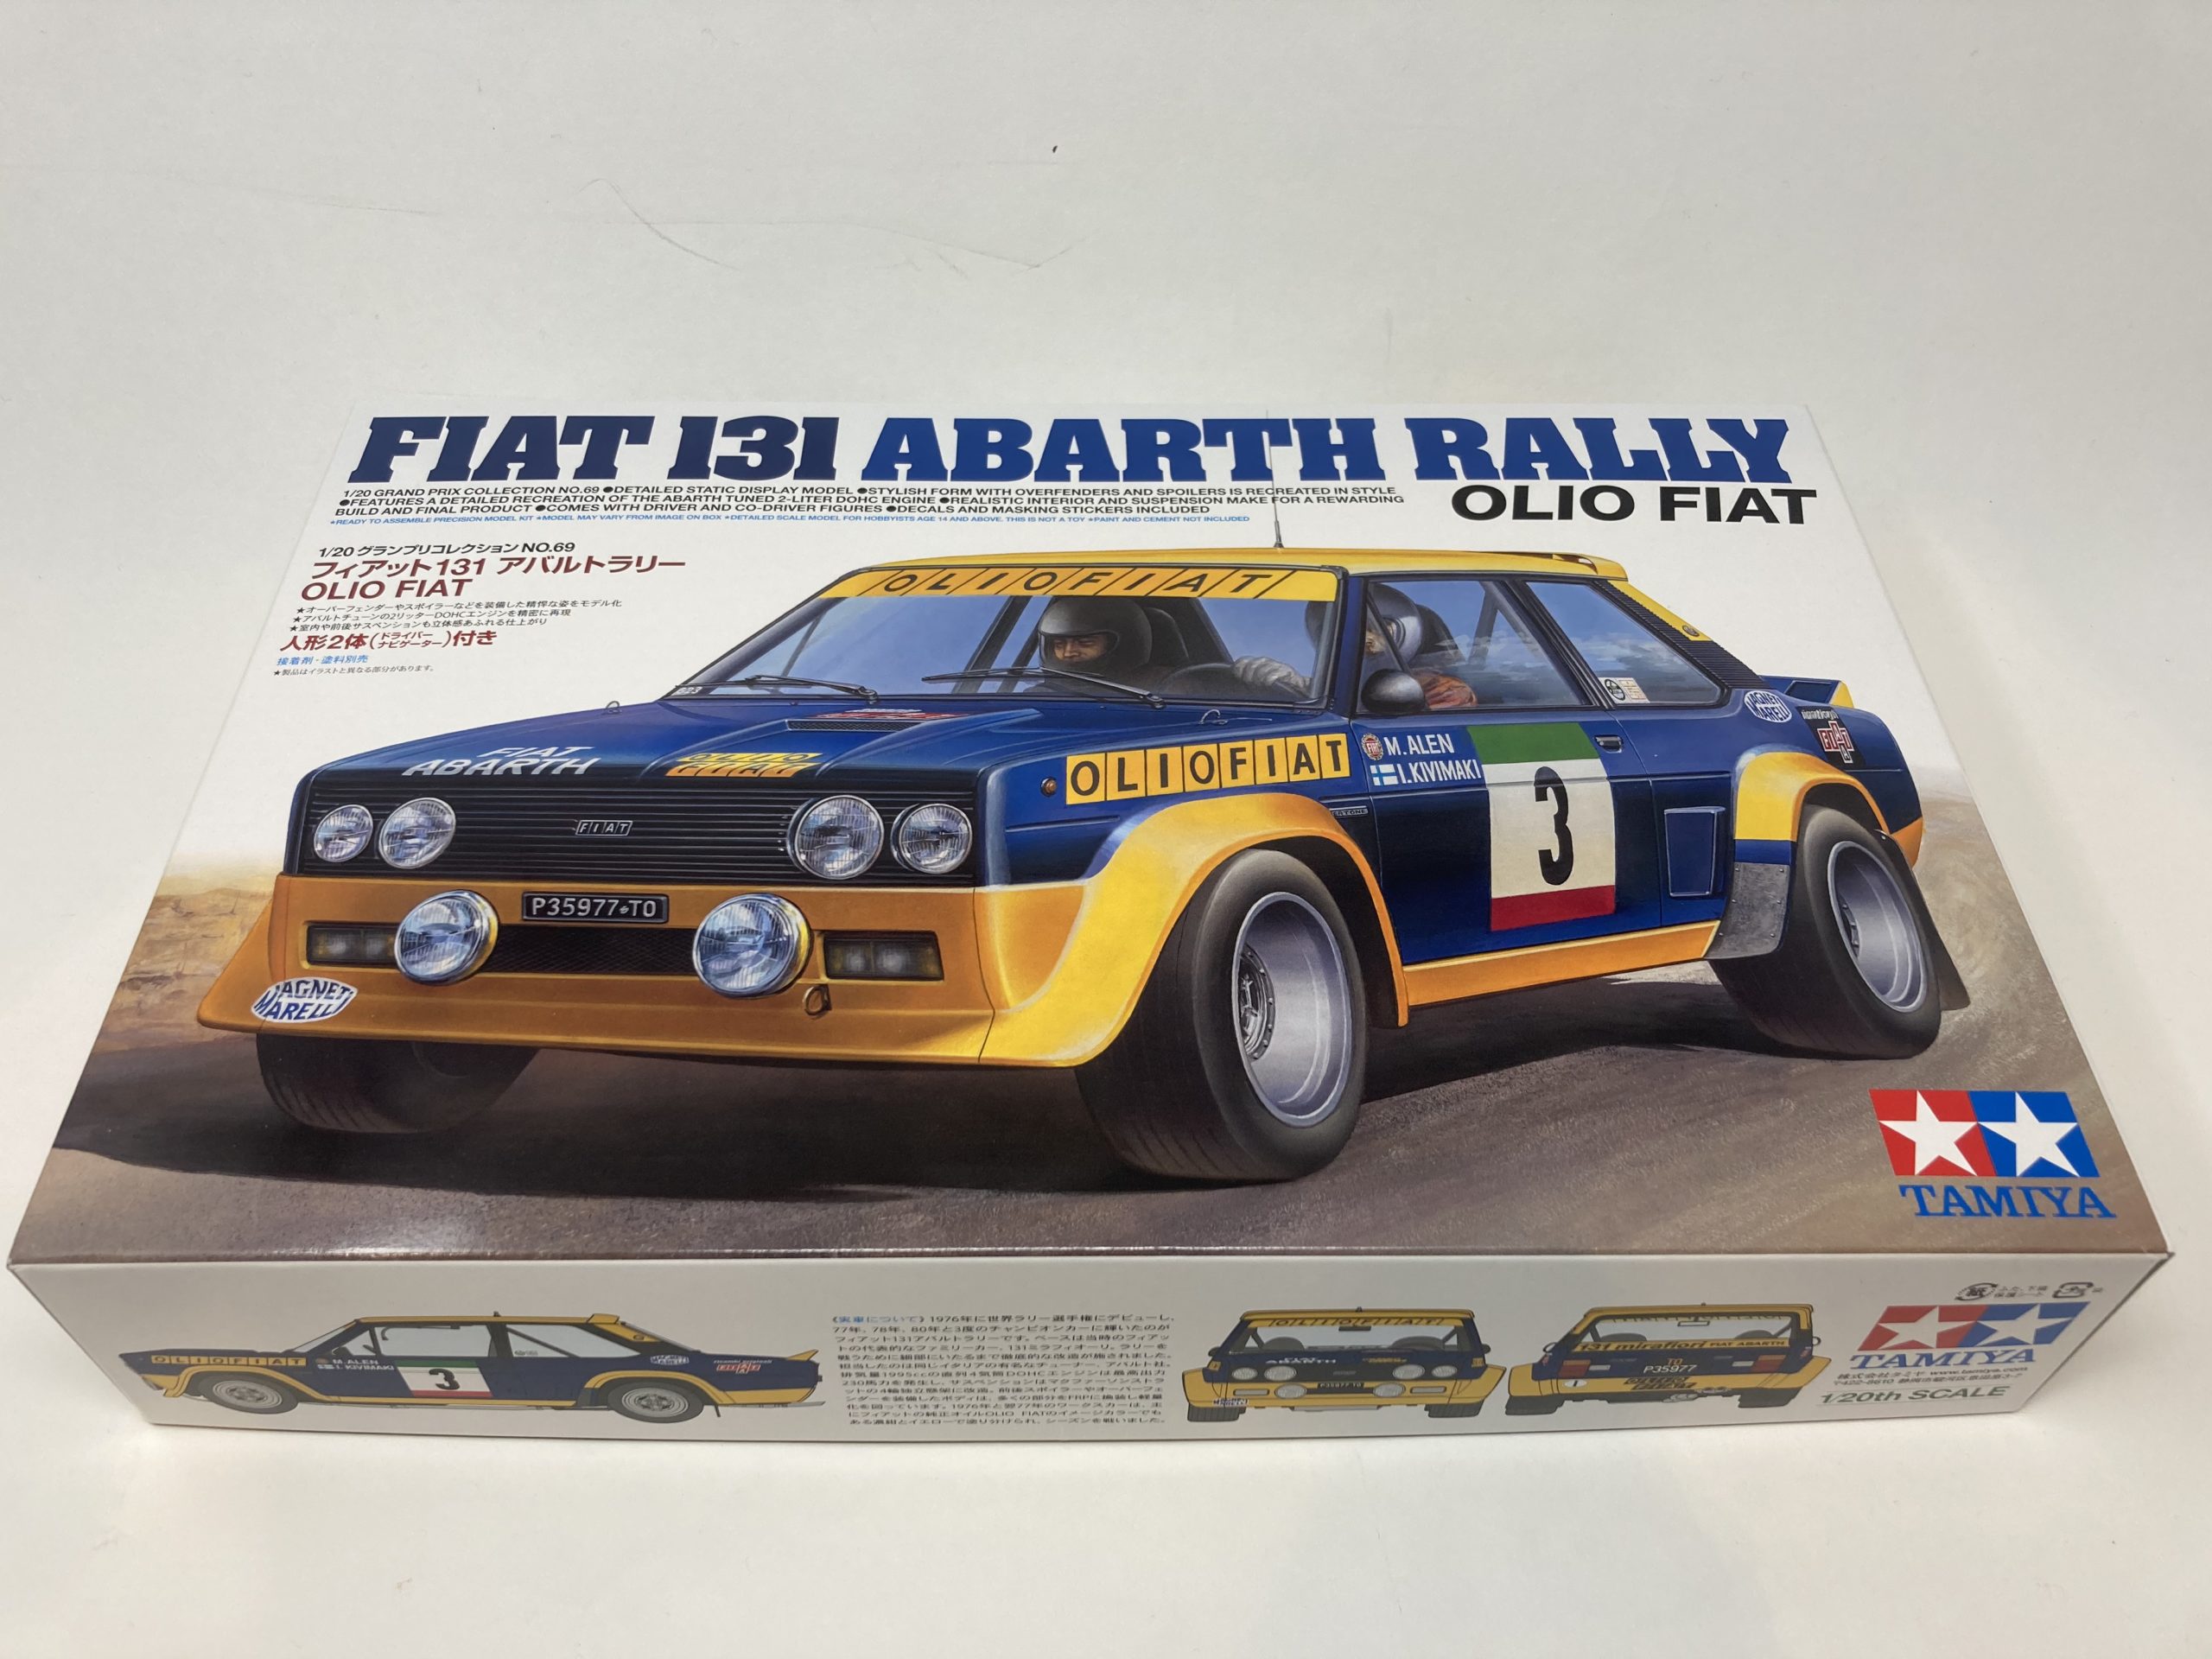
Name – Tamiya 20069 Fiat 131 Abarth Rally Olio Fiat Plastic Model Car Kit
Number – 20069
Scale – 1/20
Price – £37.49
Availability – Available now! Get yours here!
Hello fellow model makers.
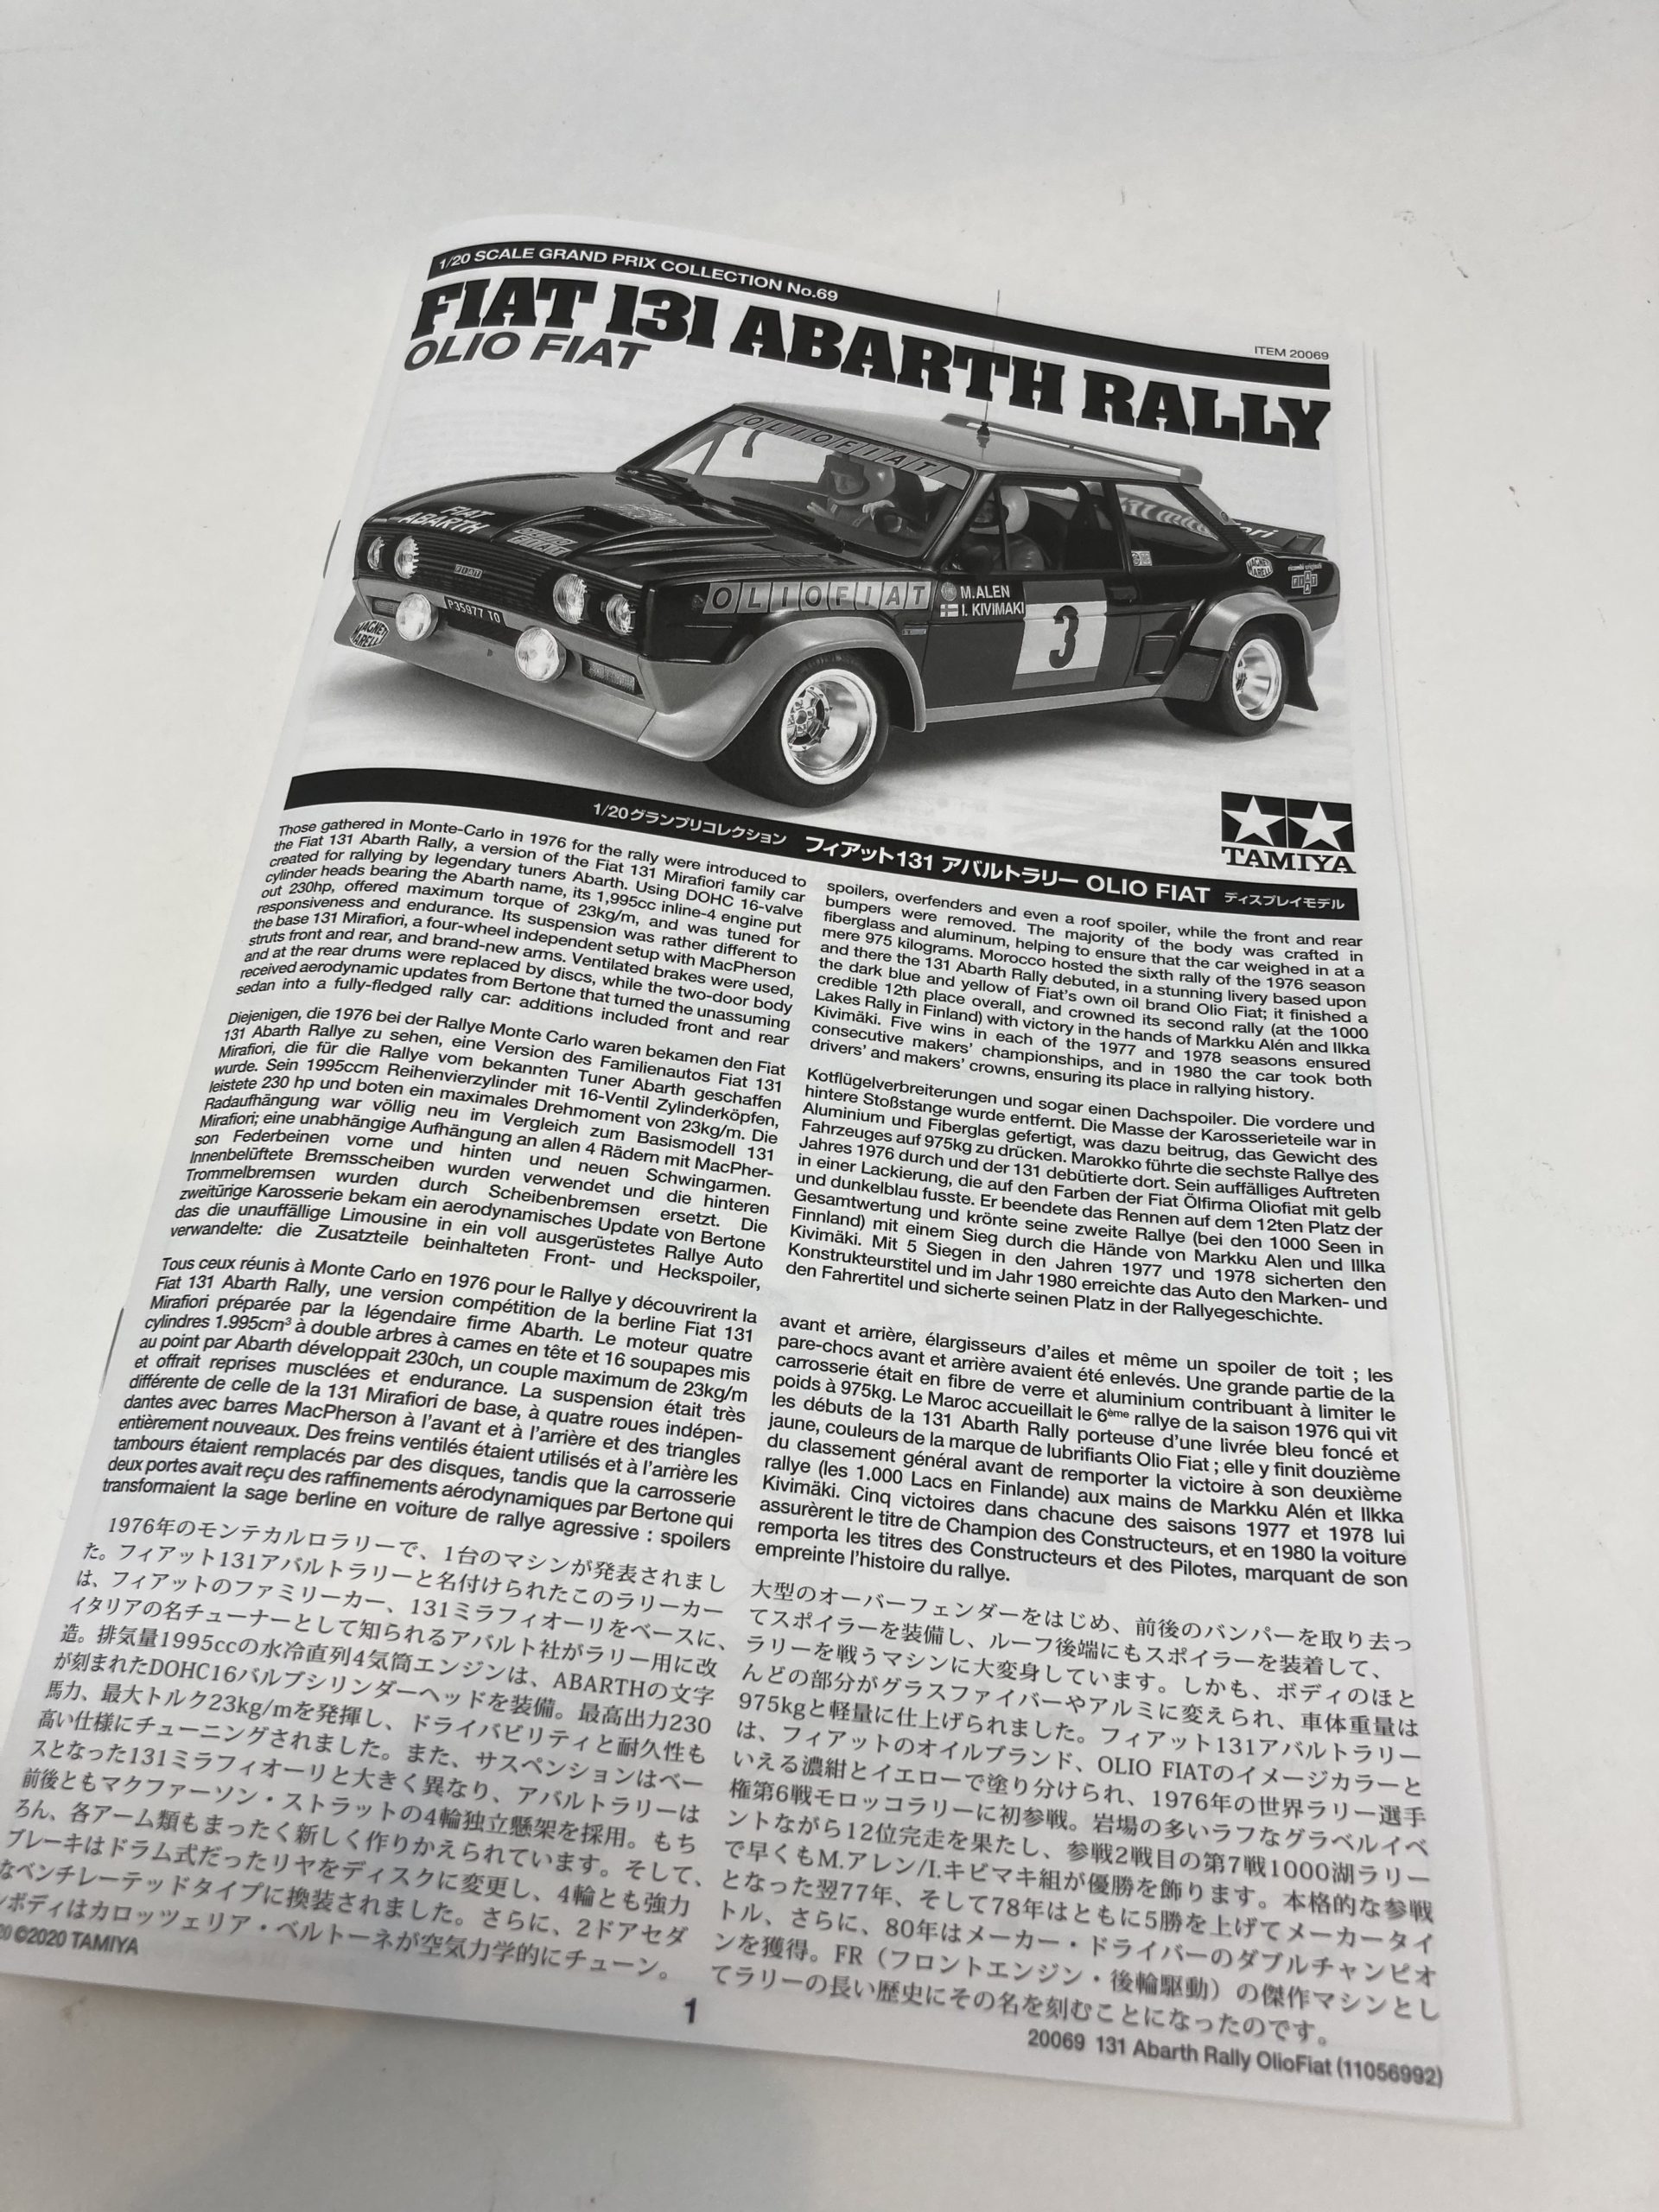
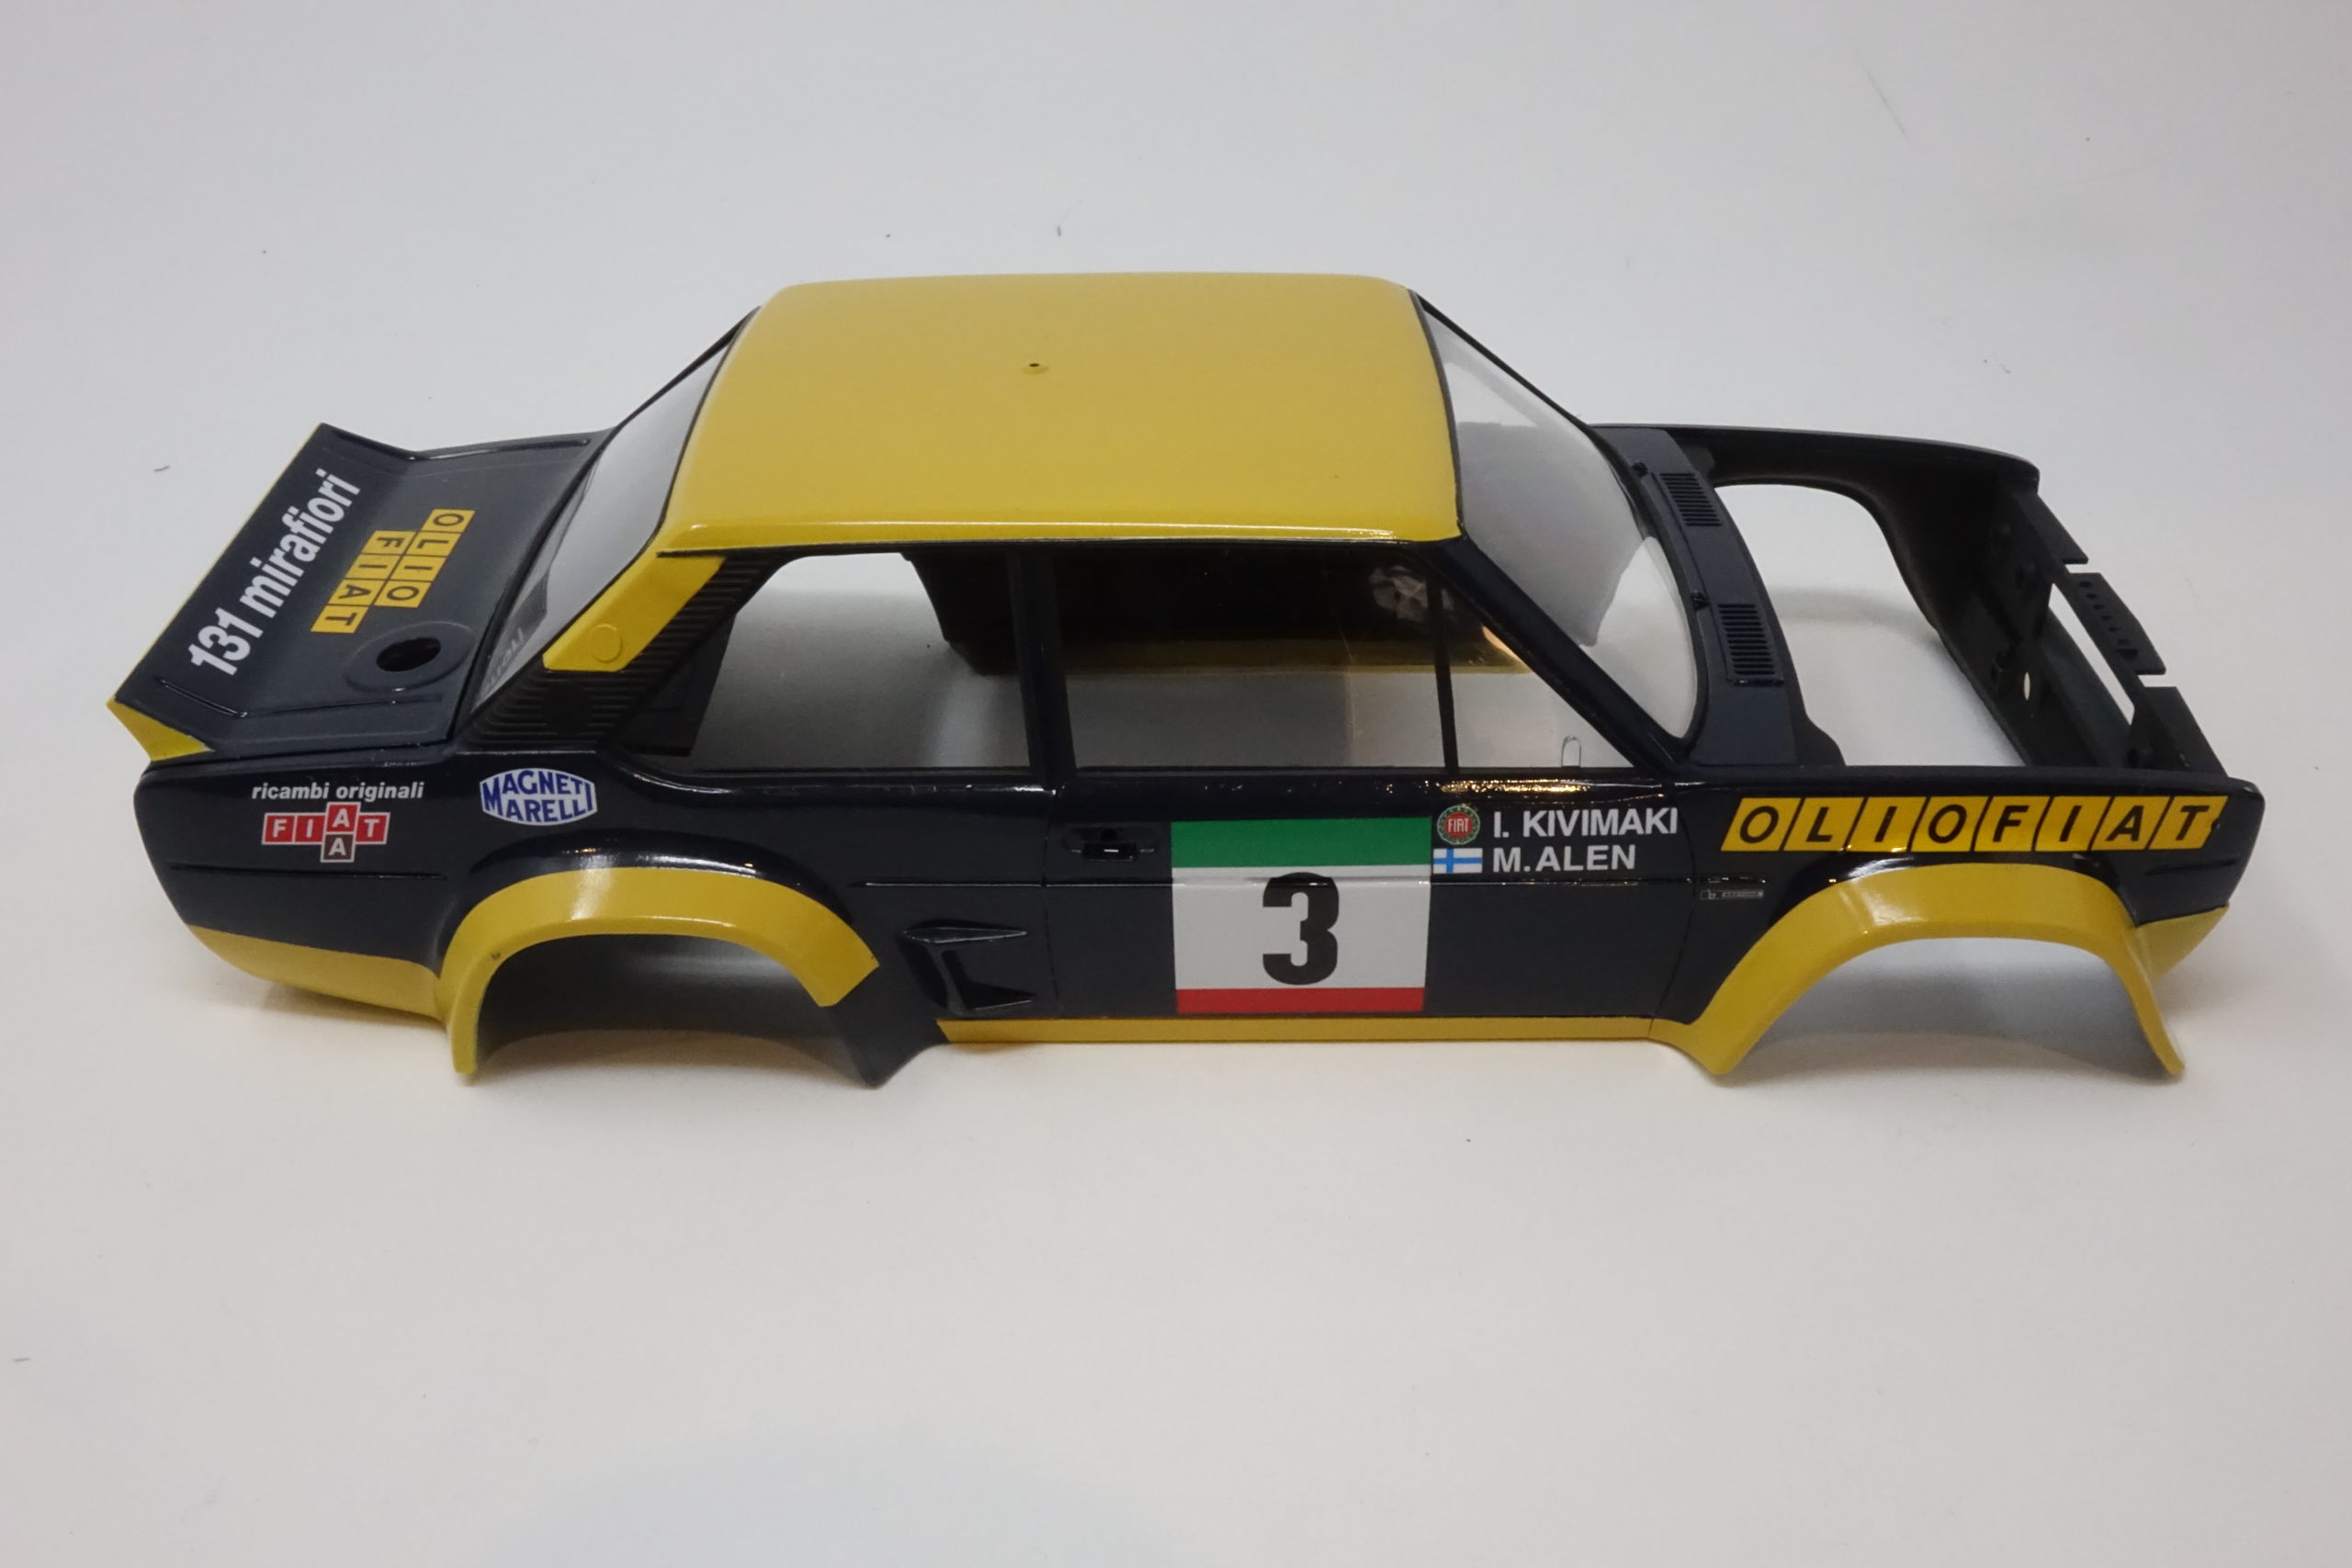
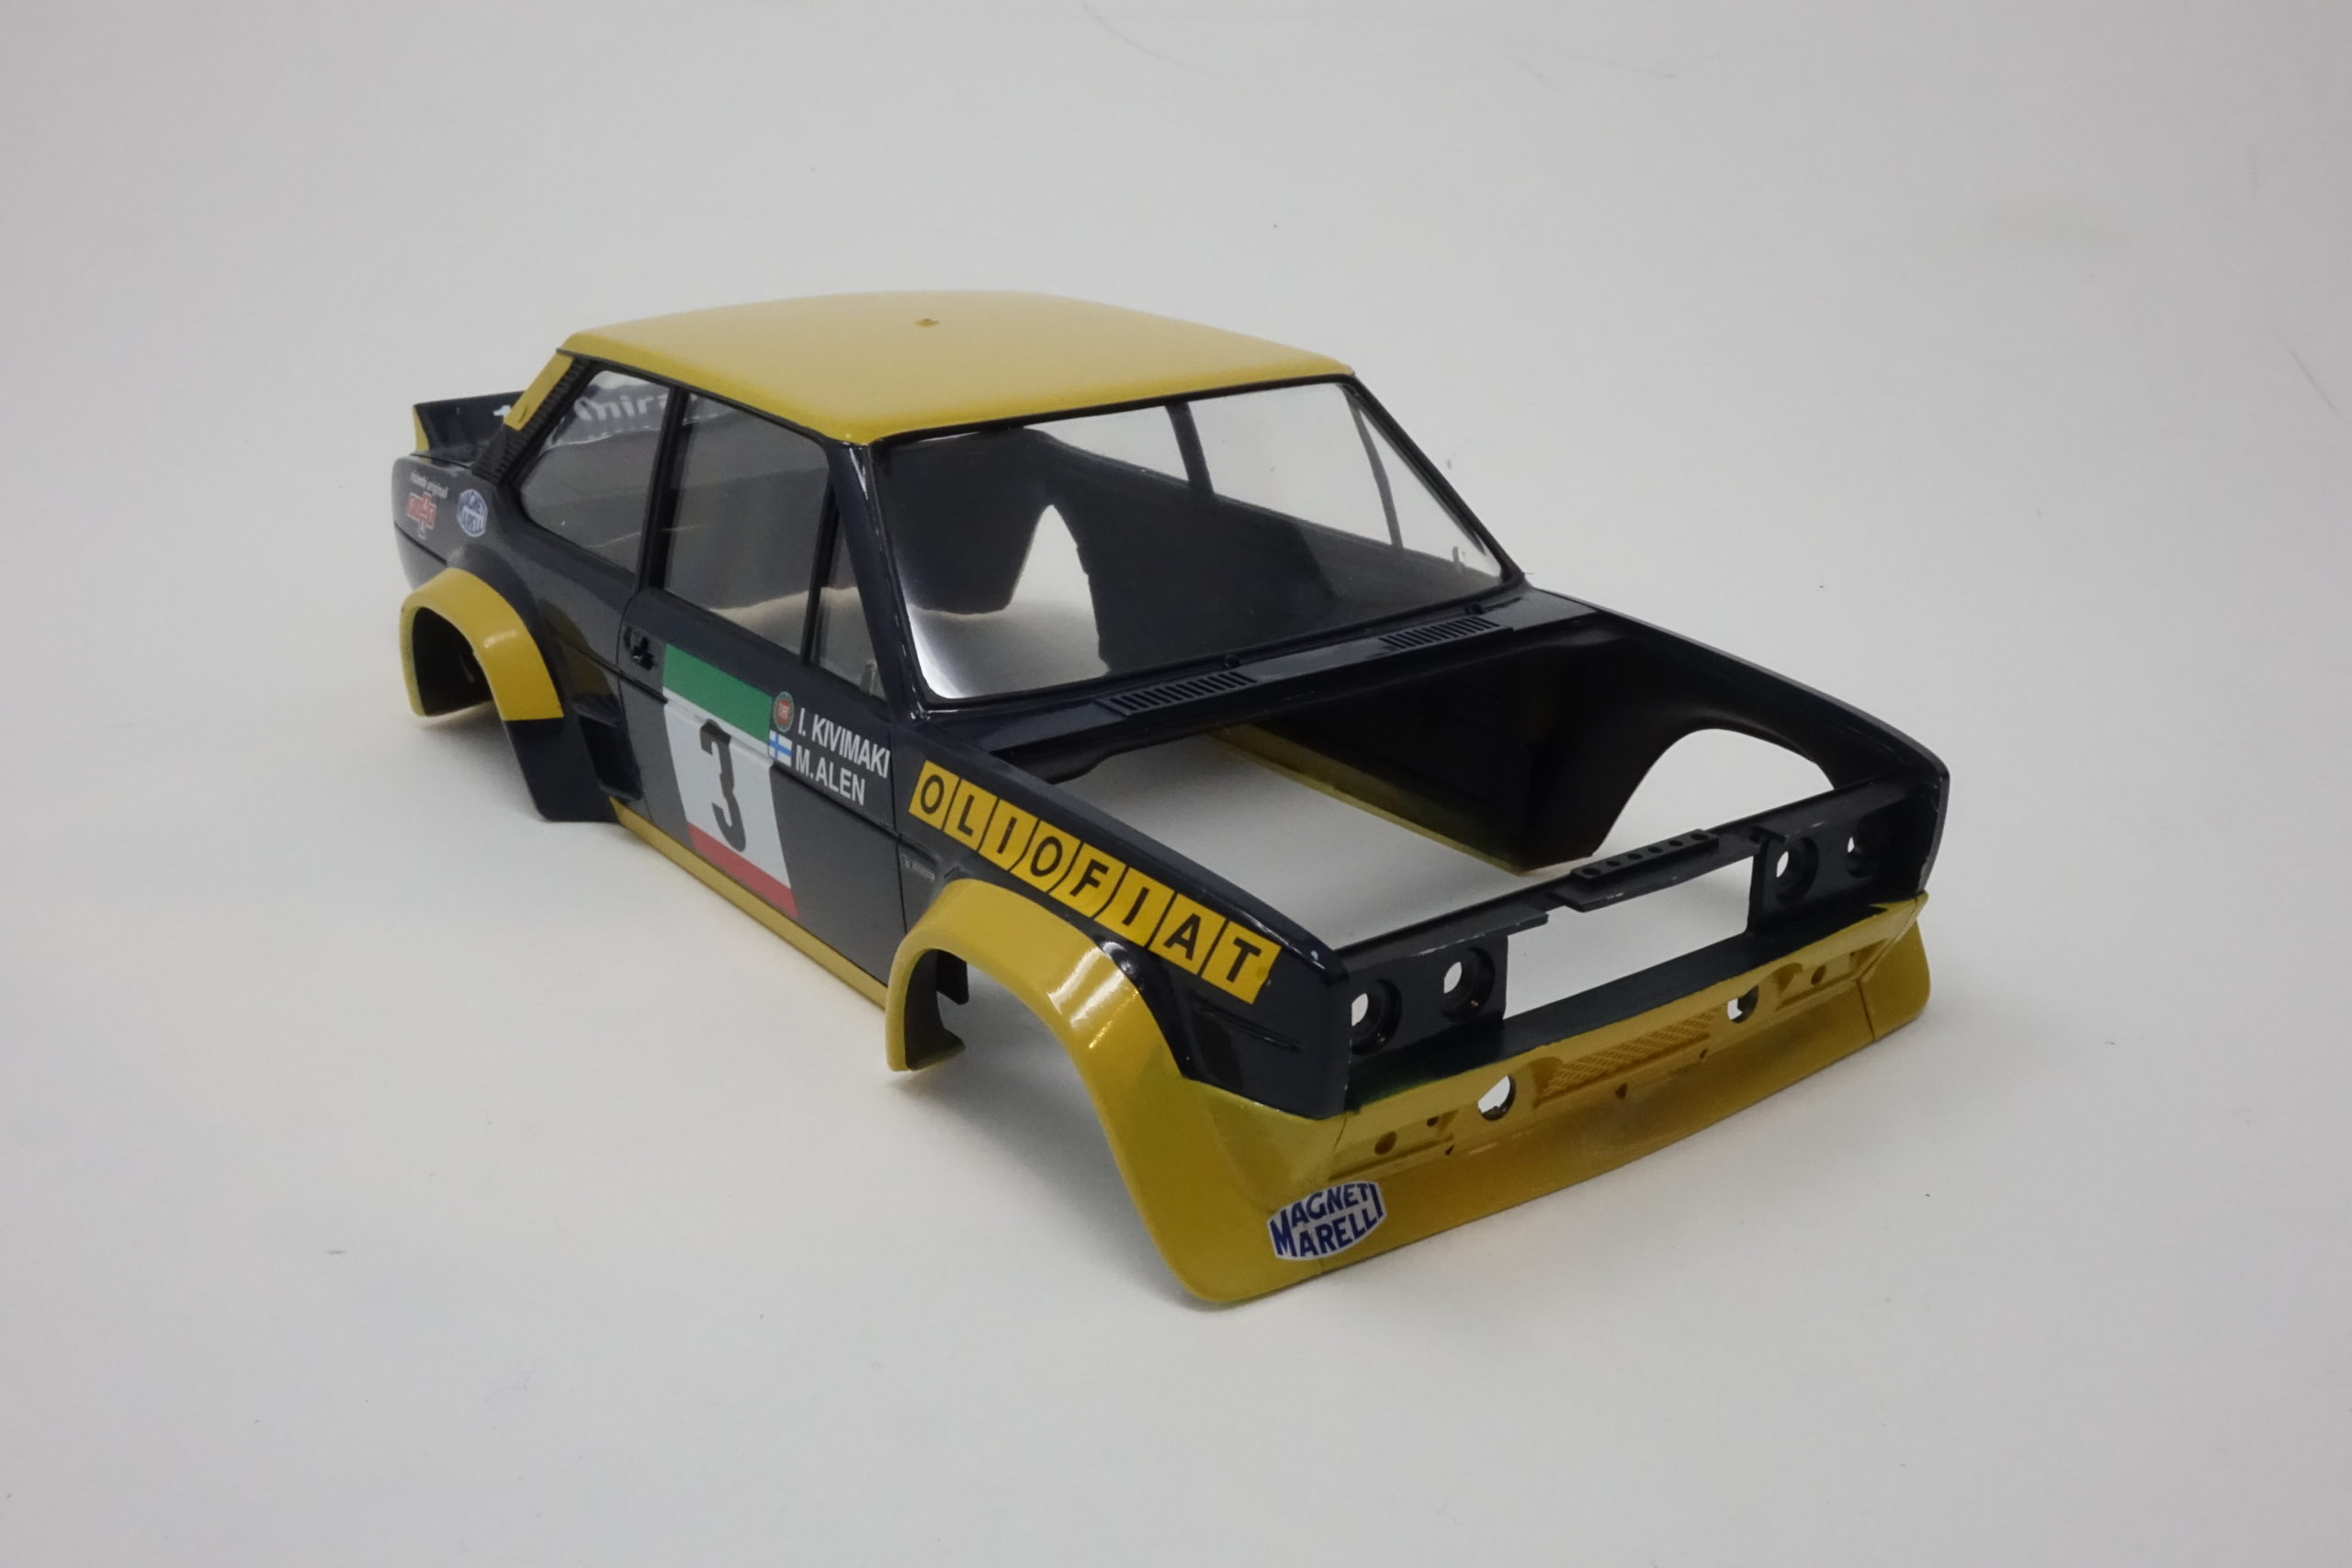
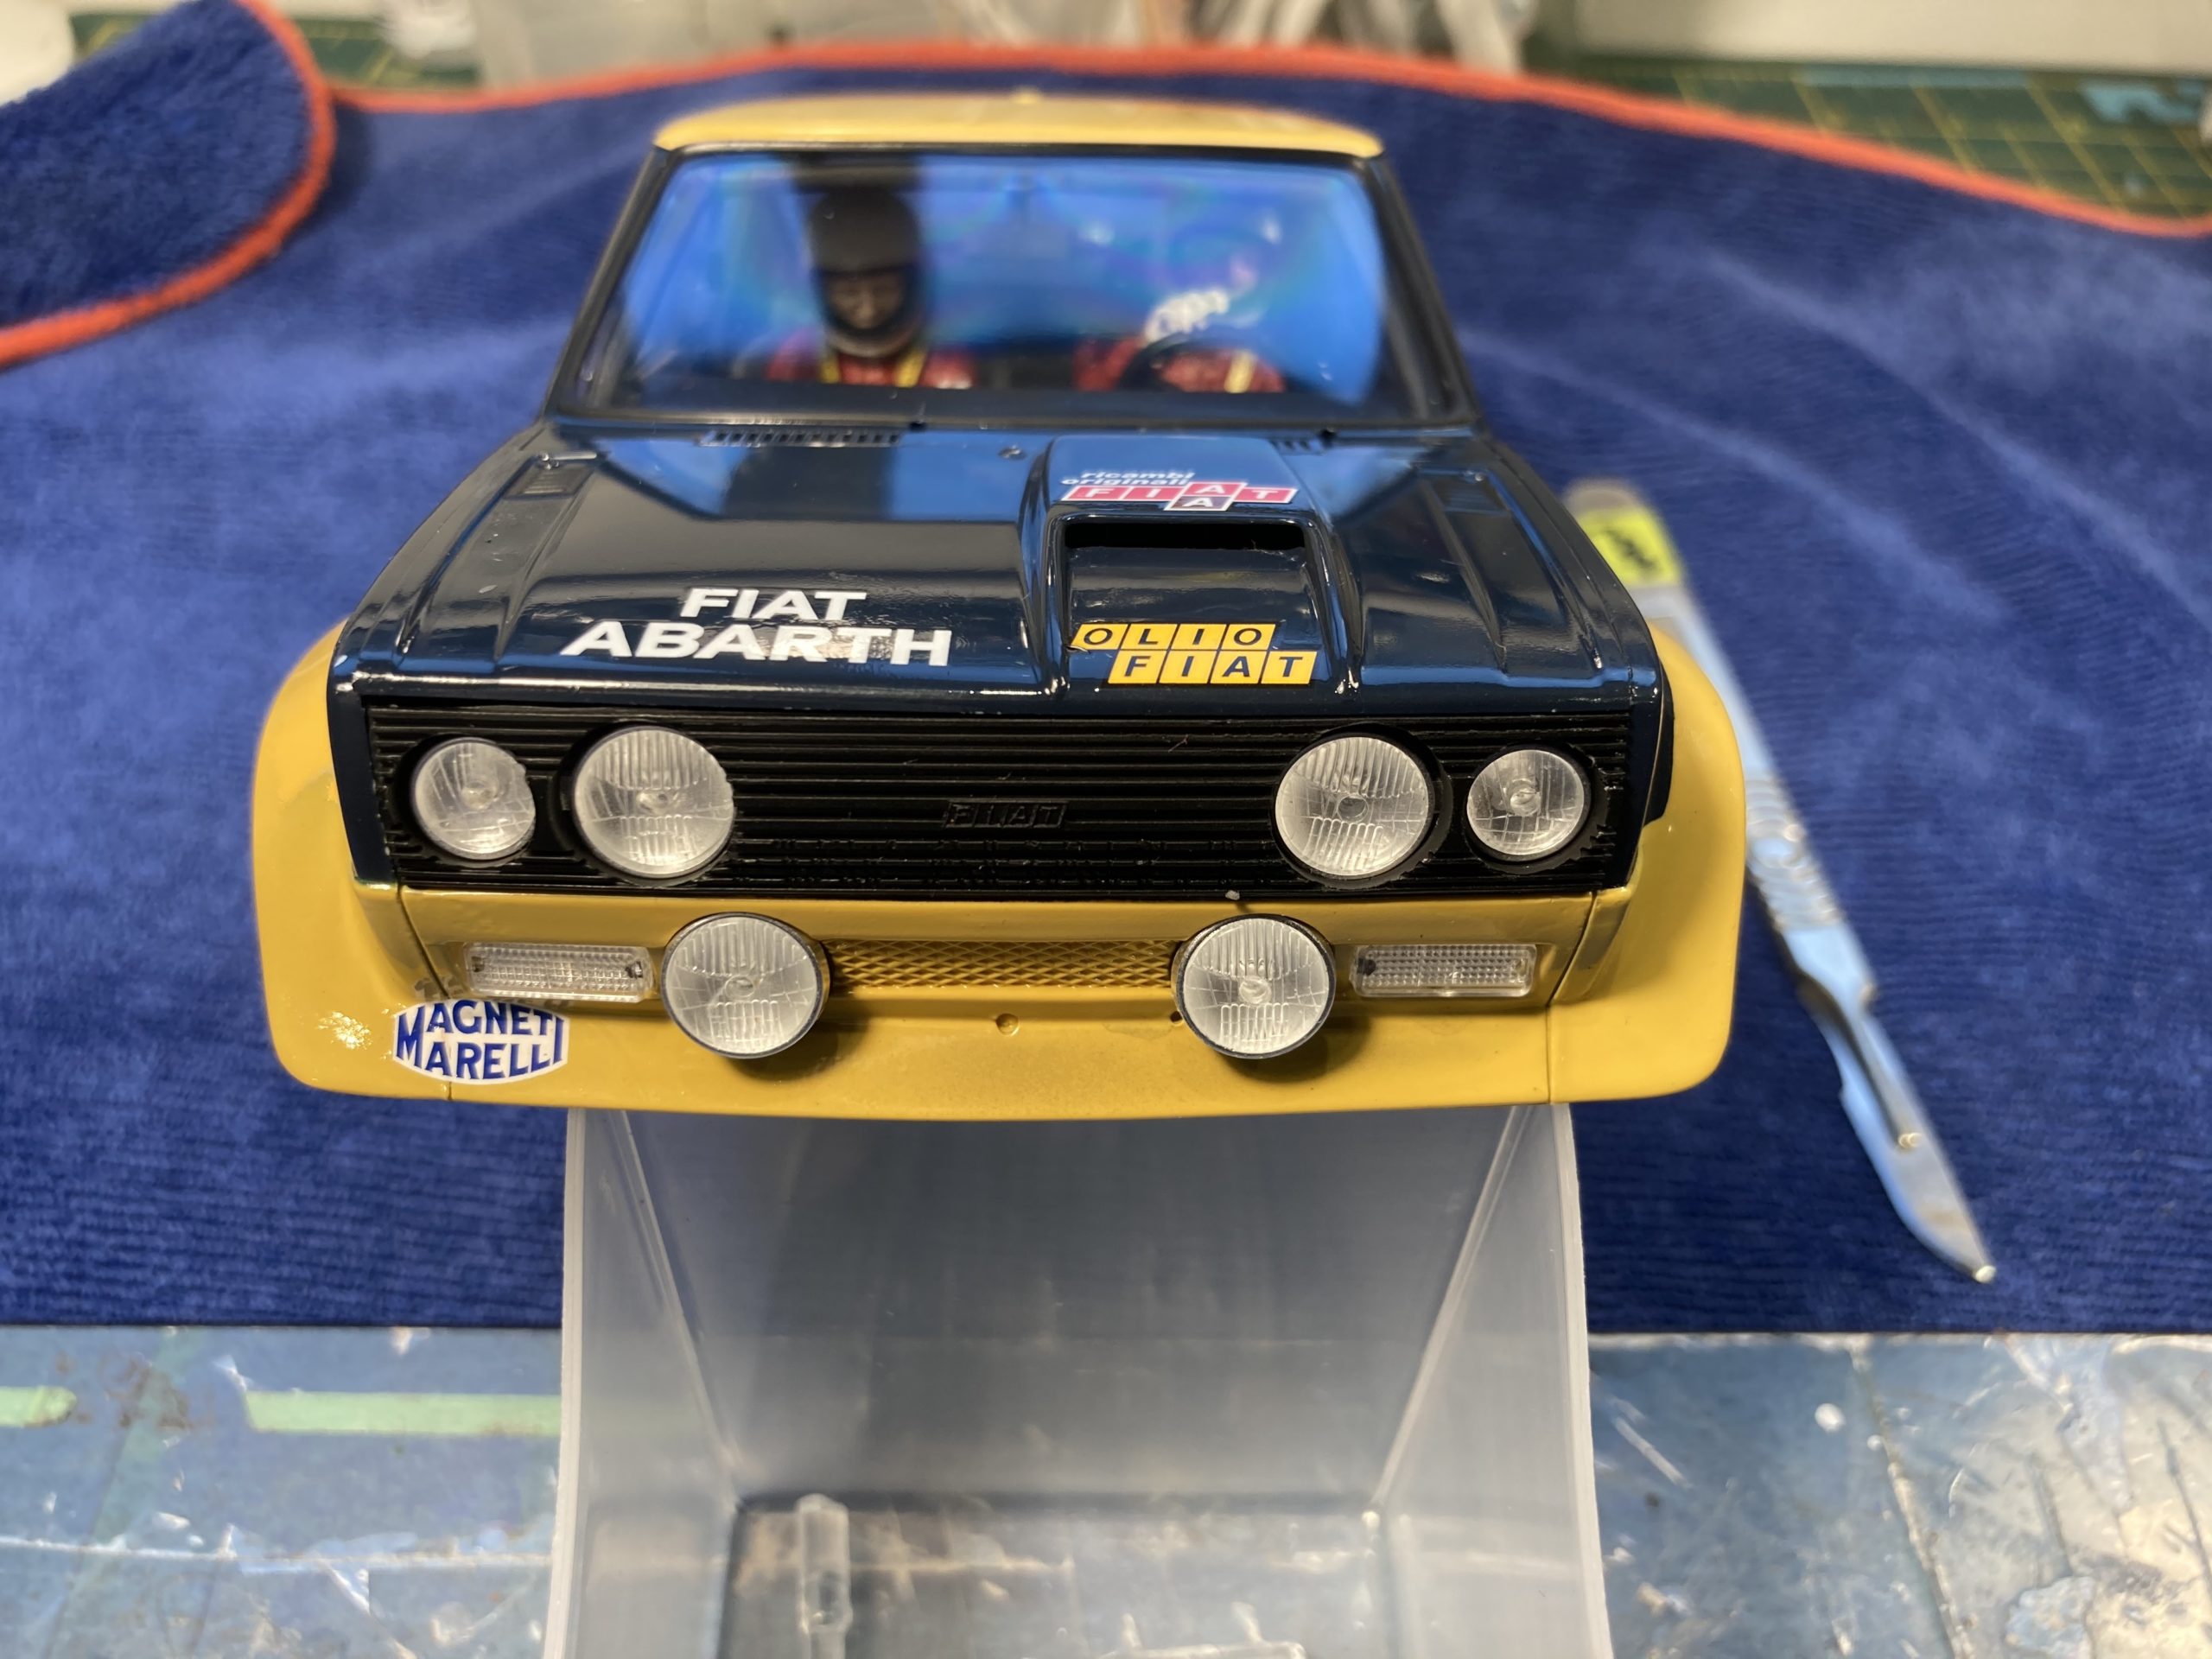
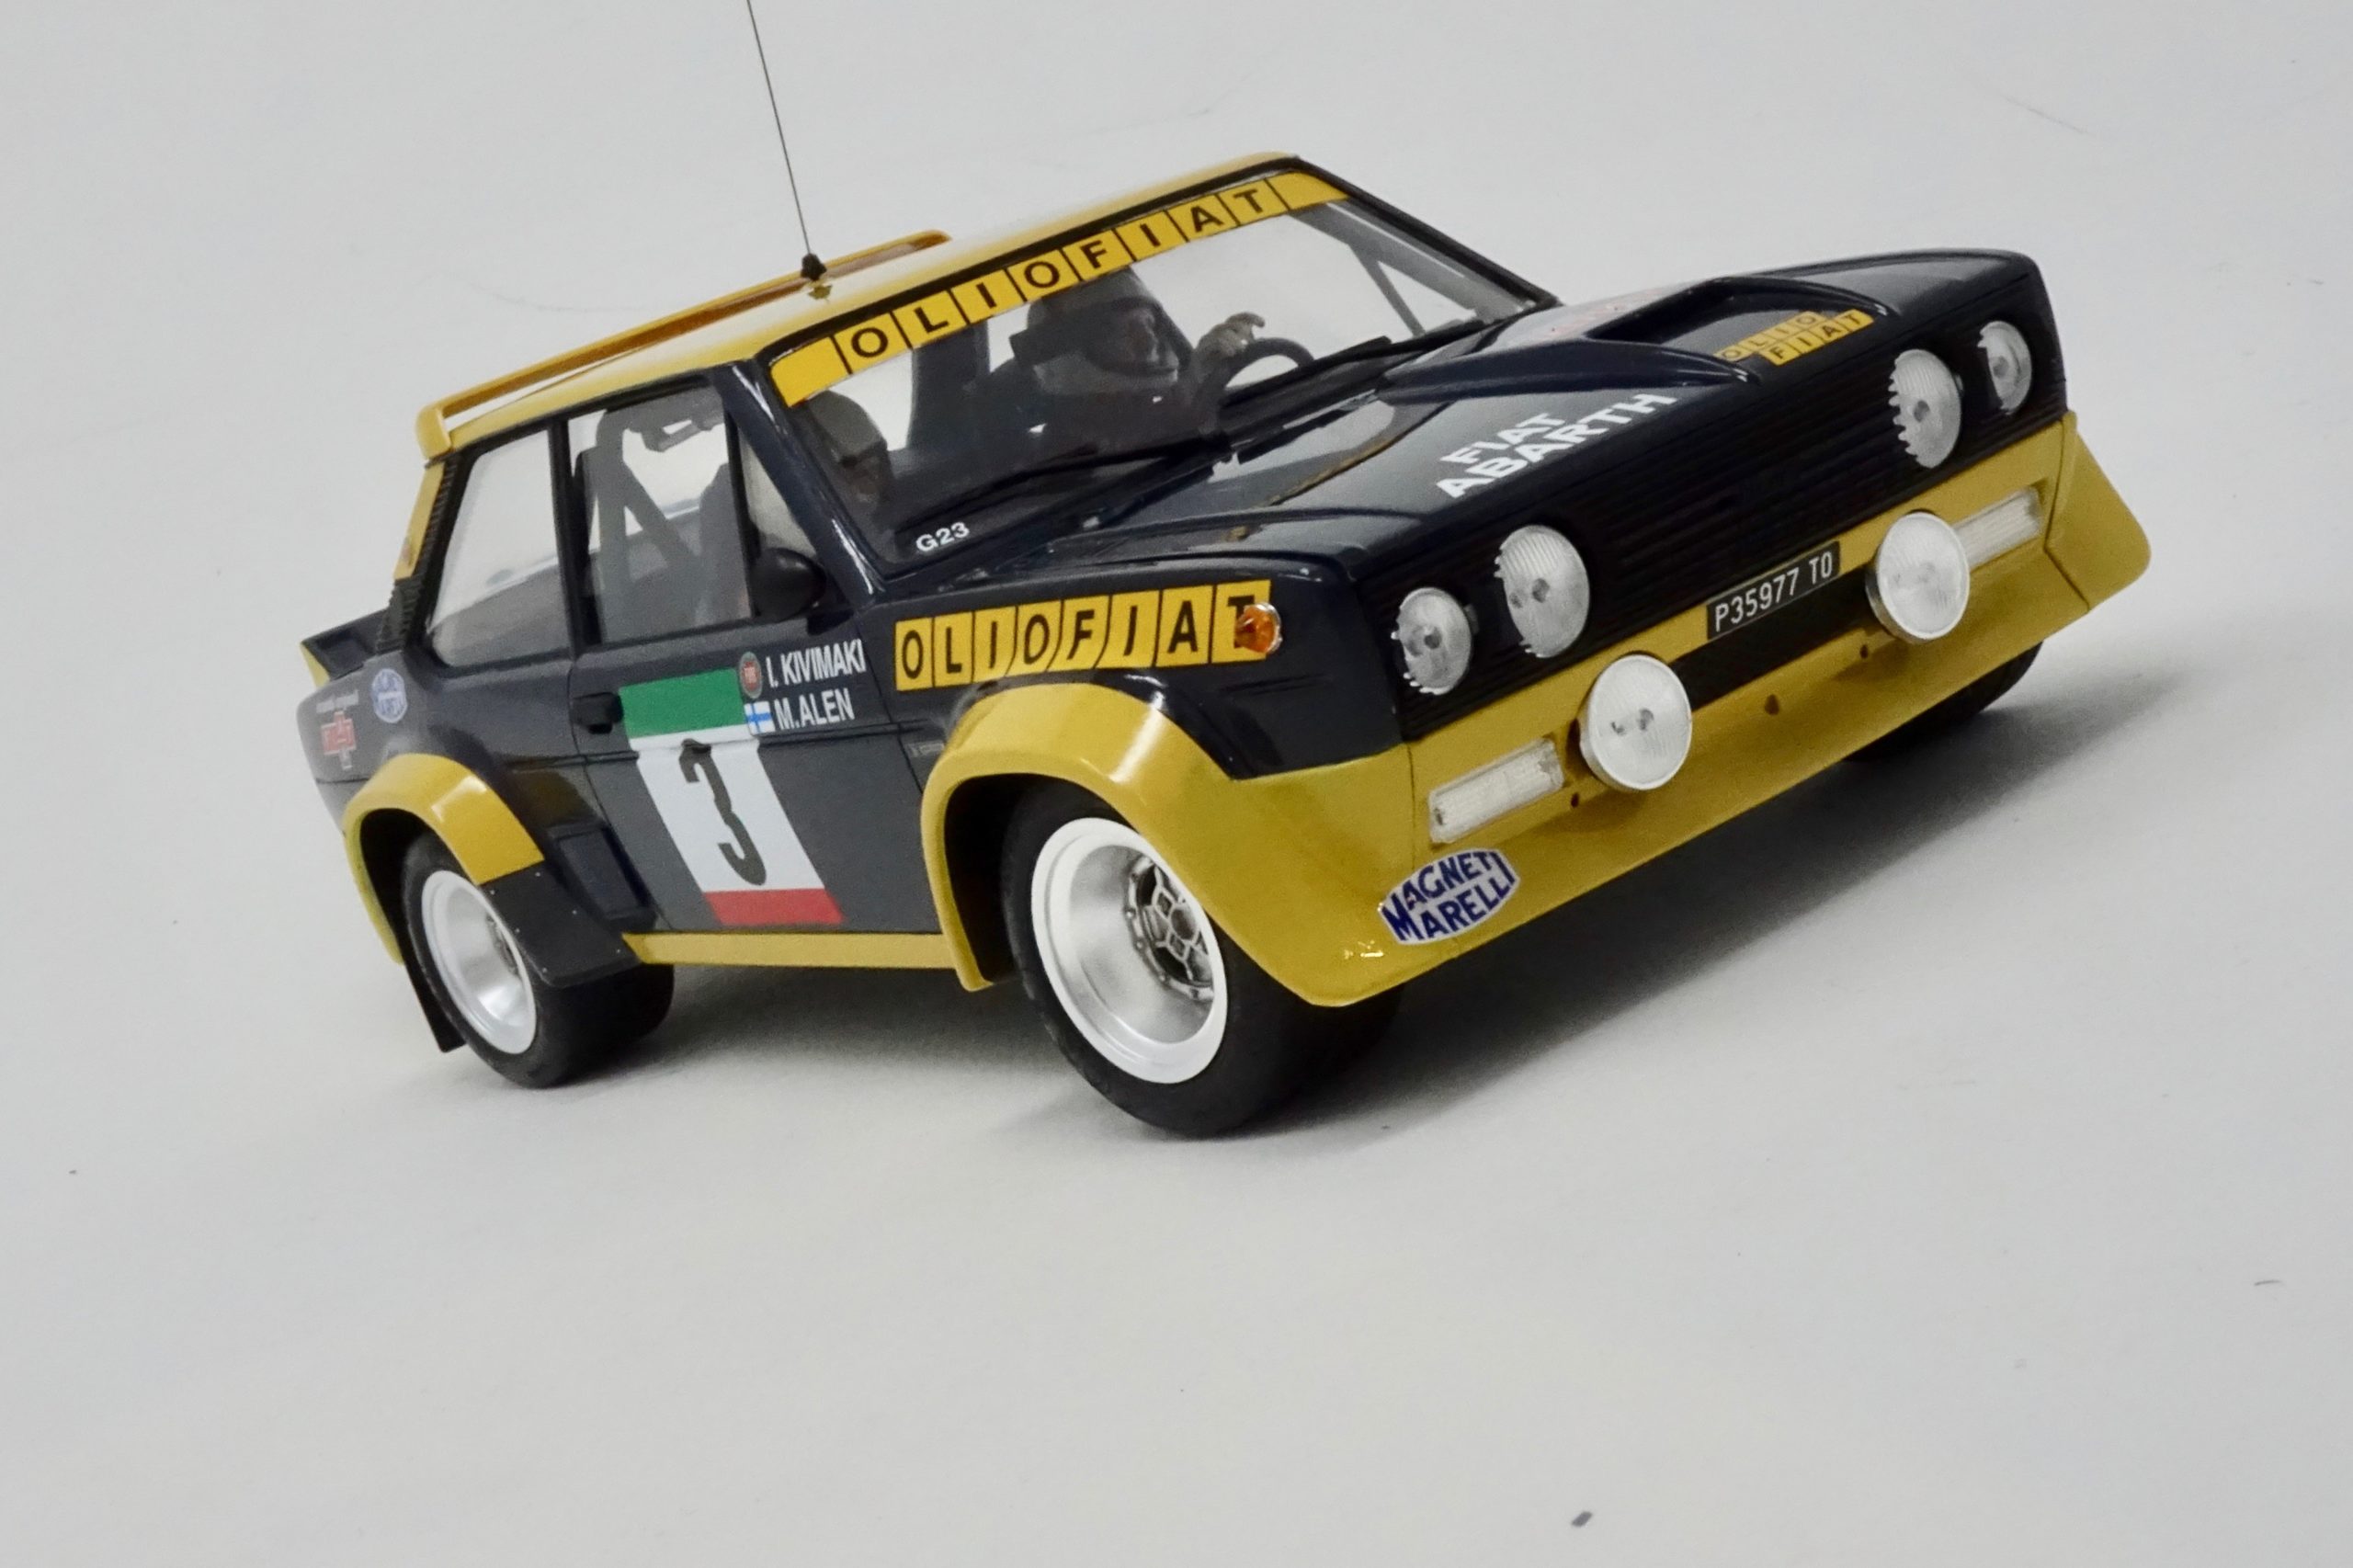
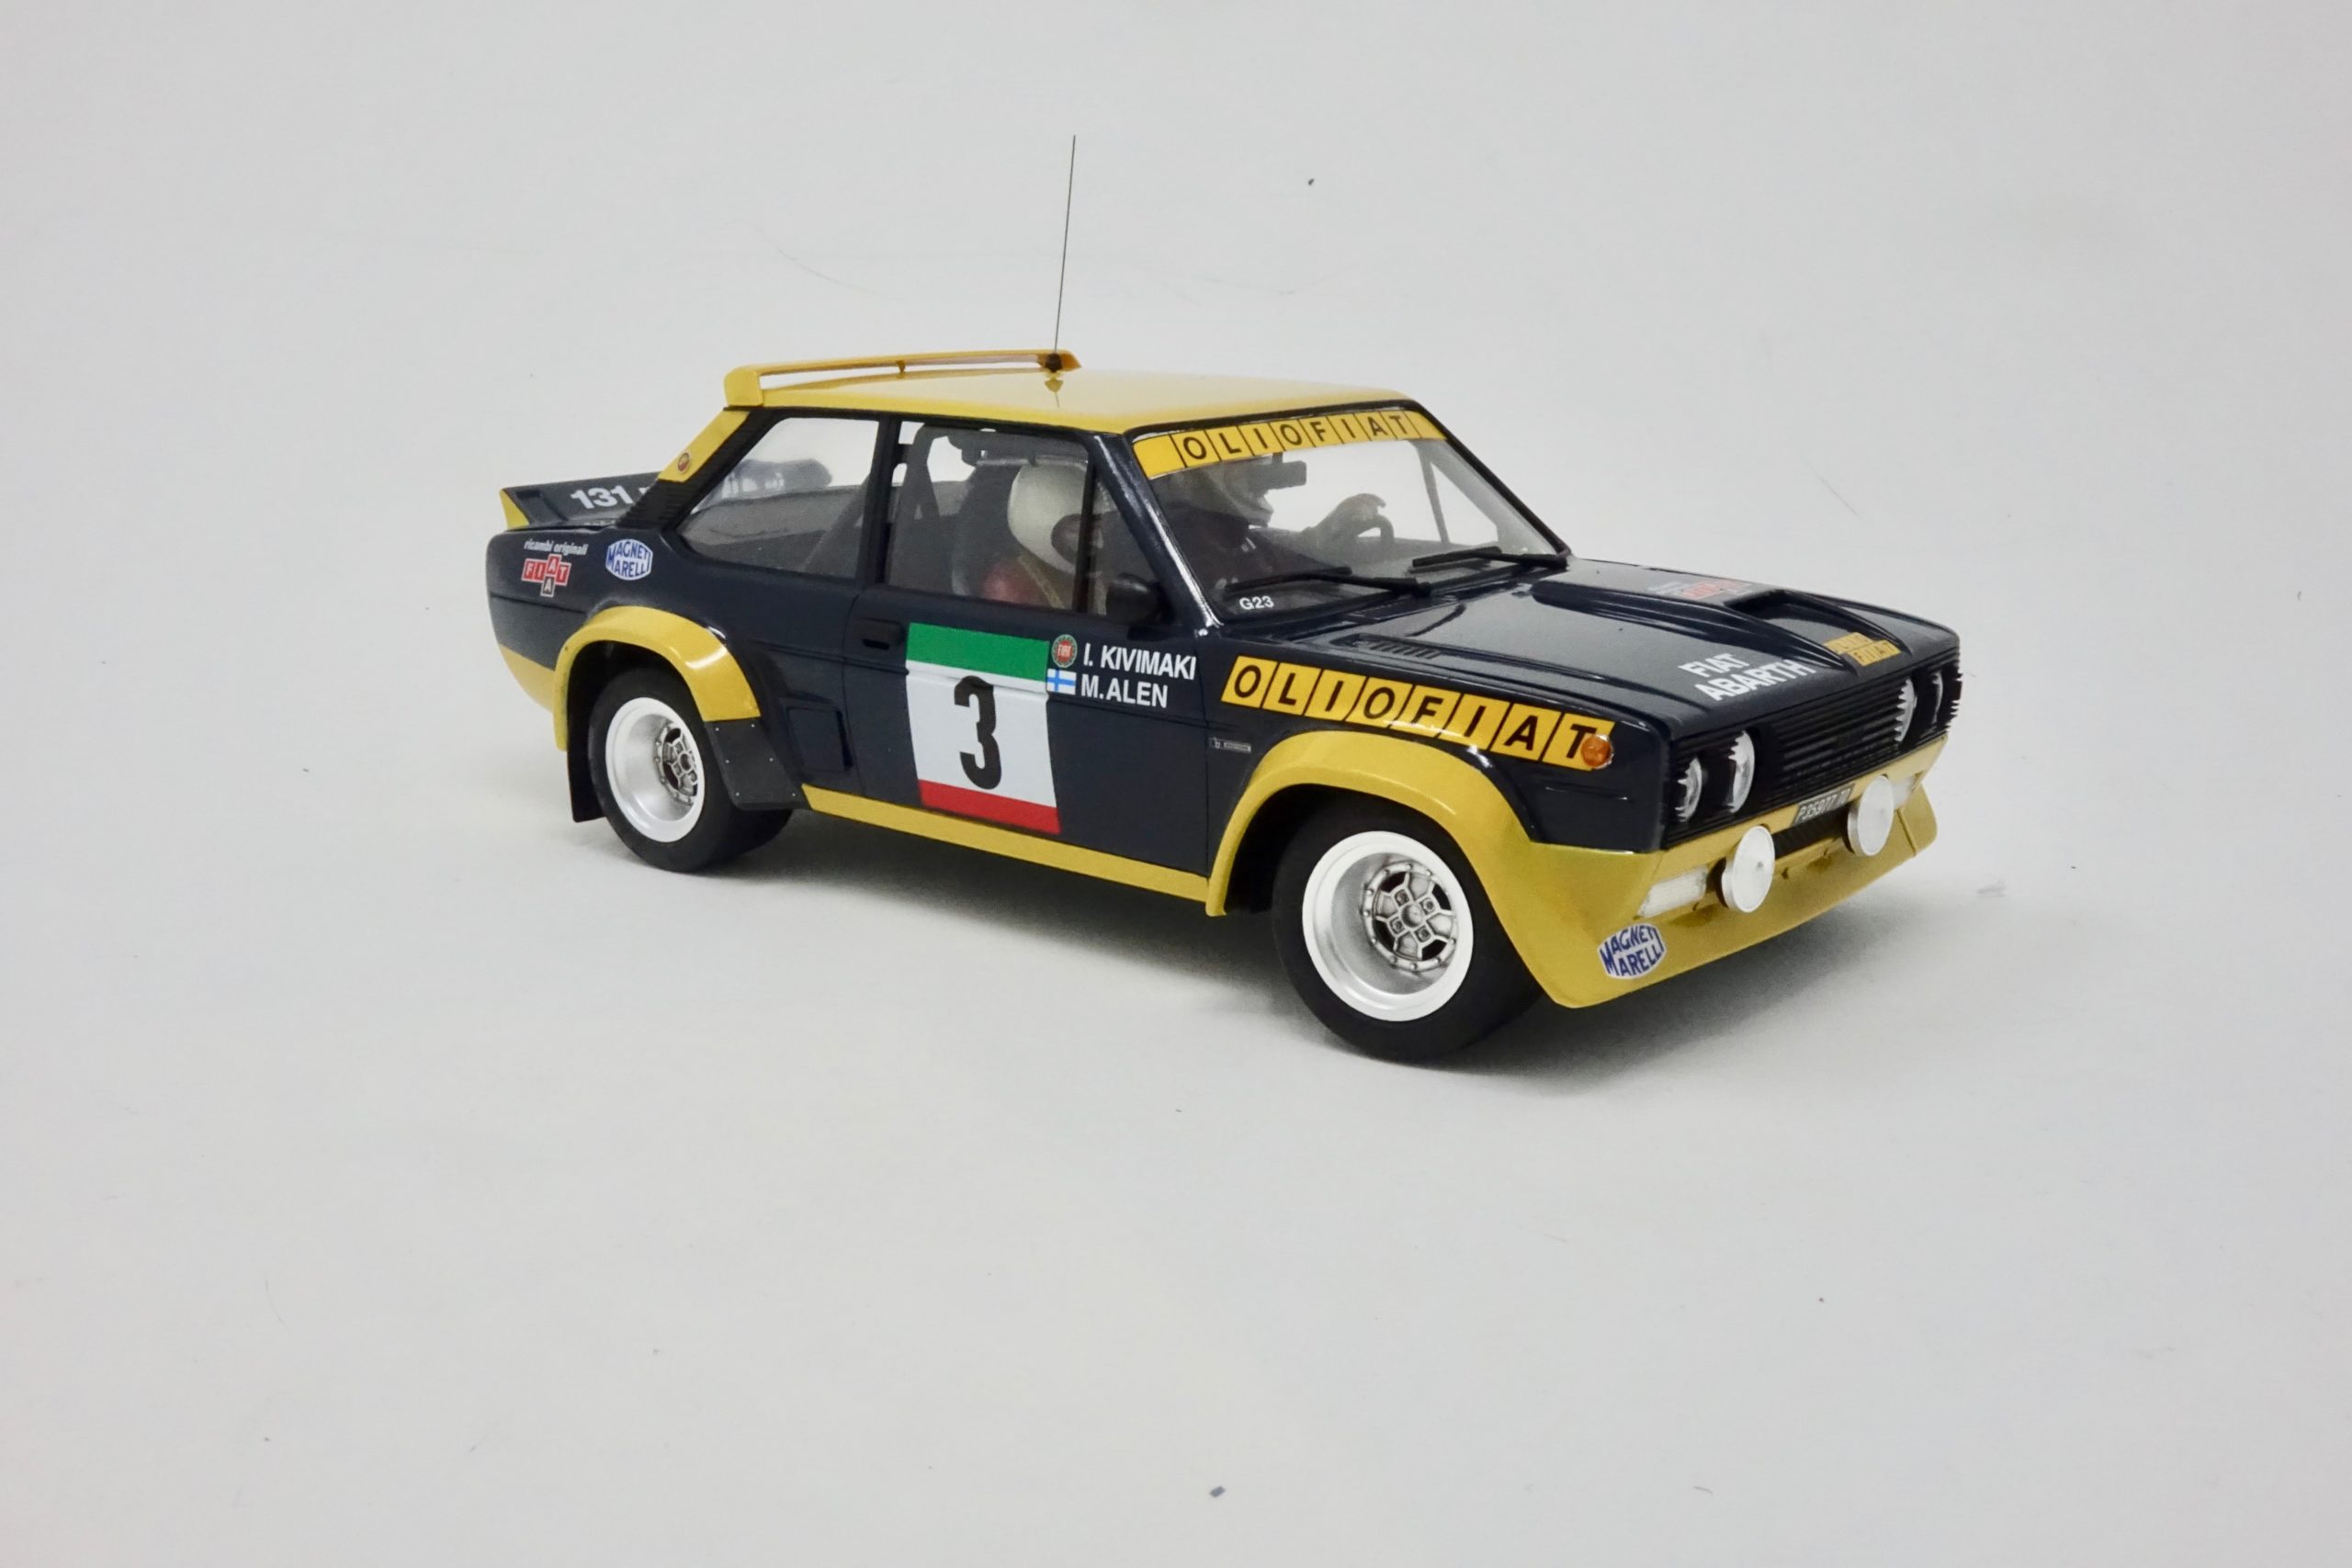
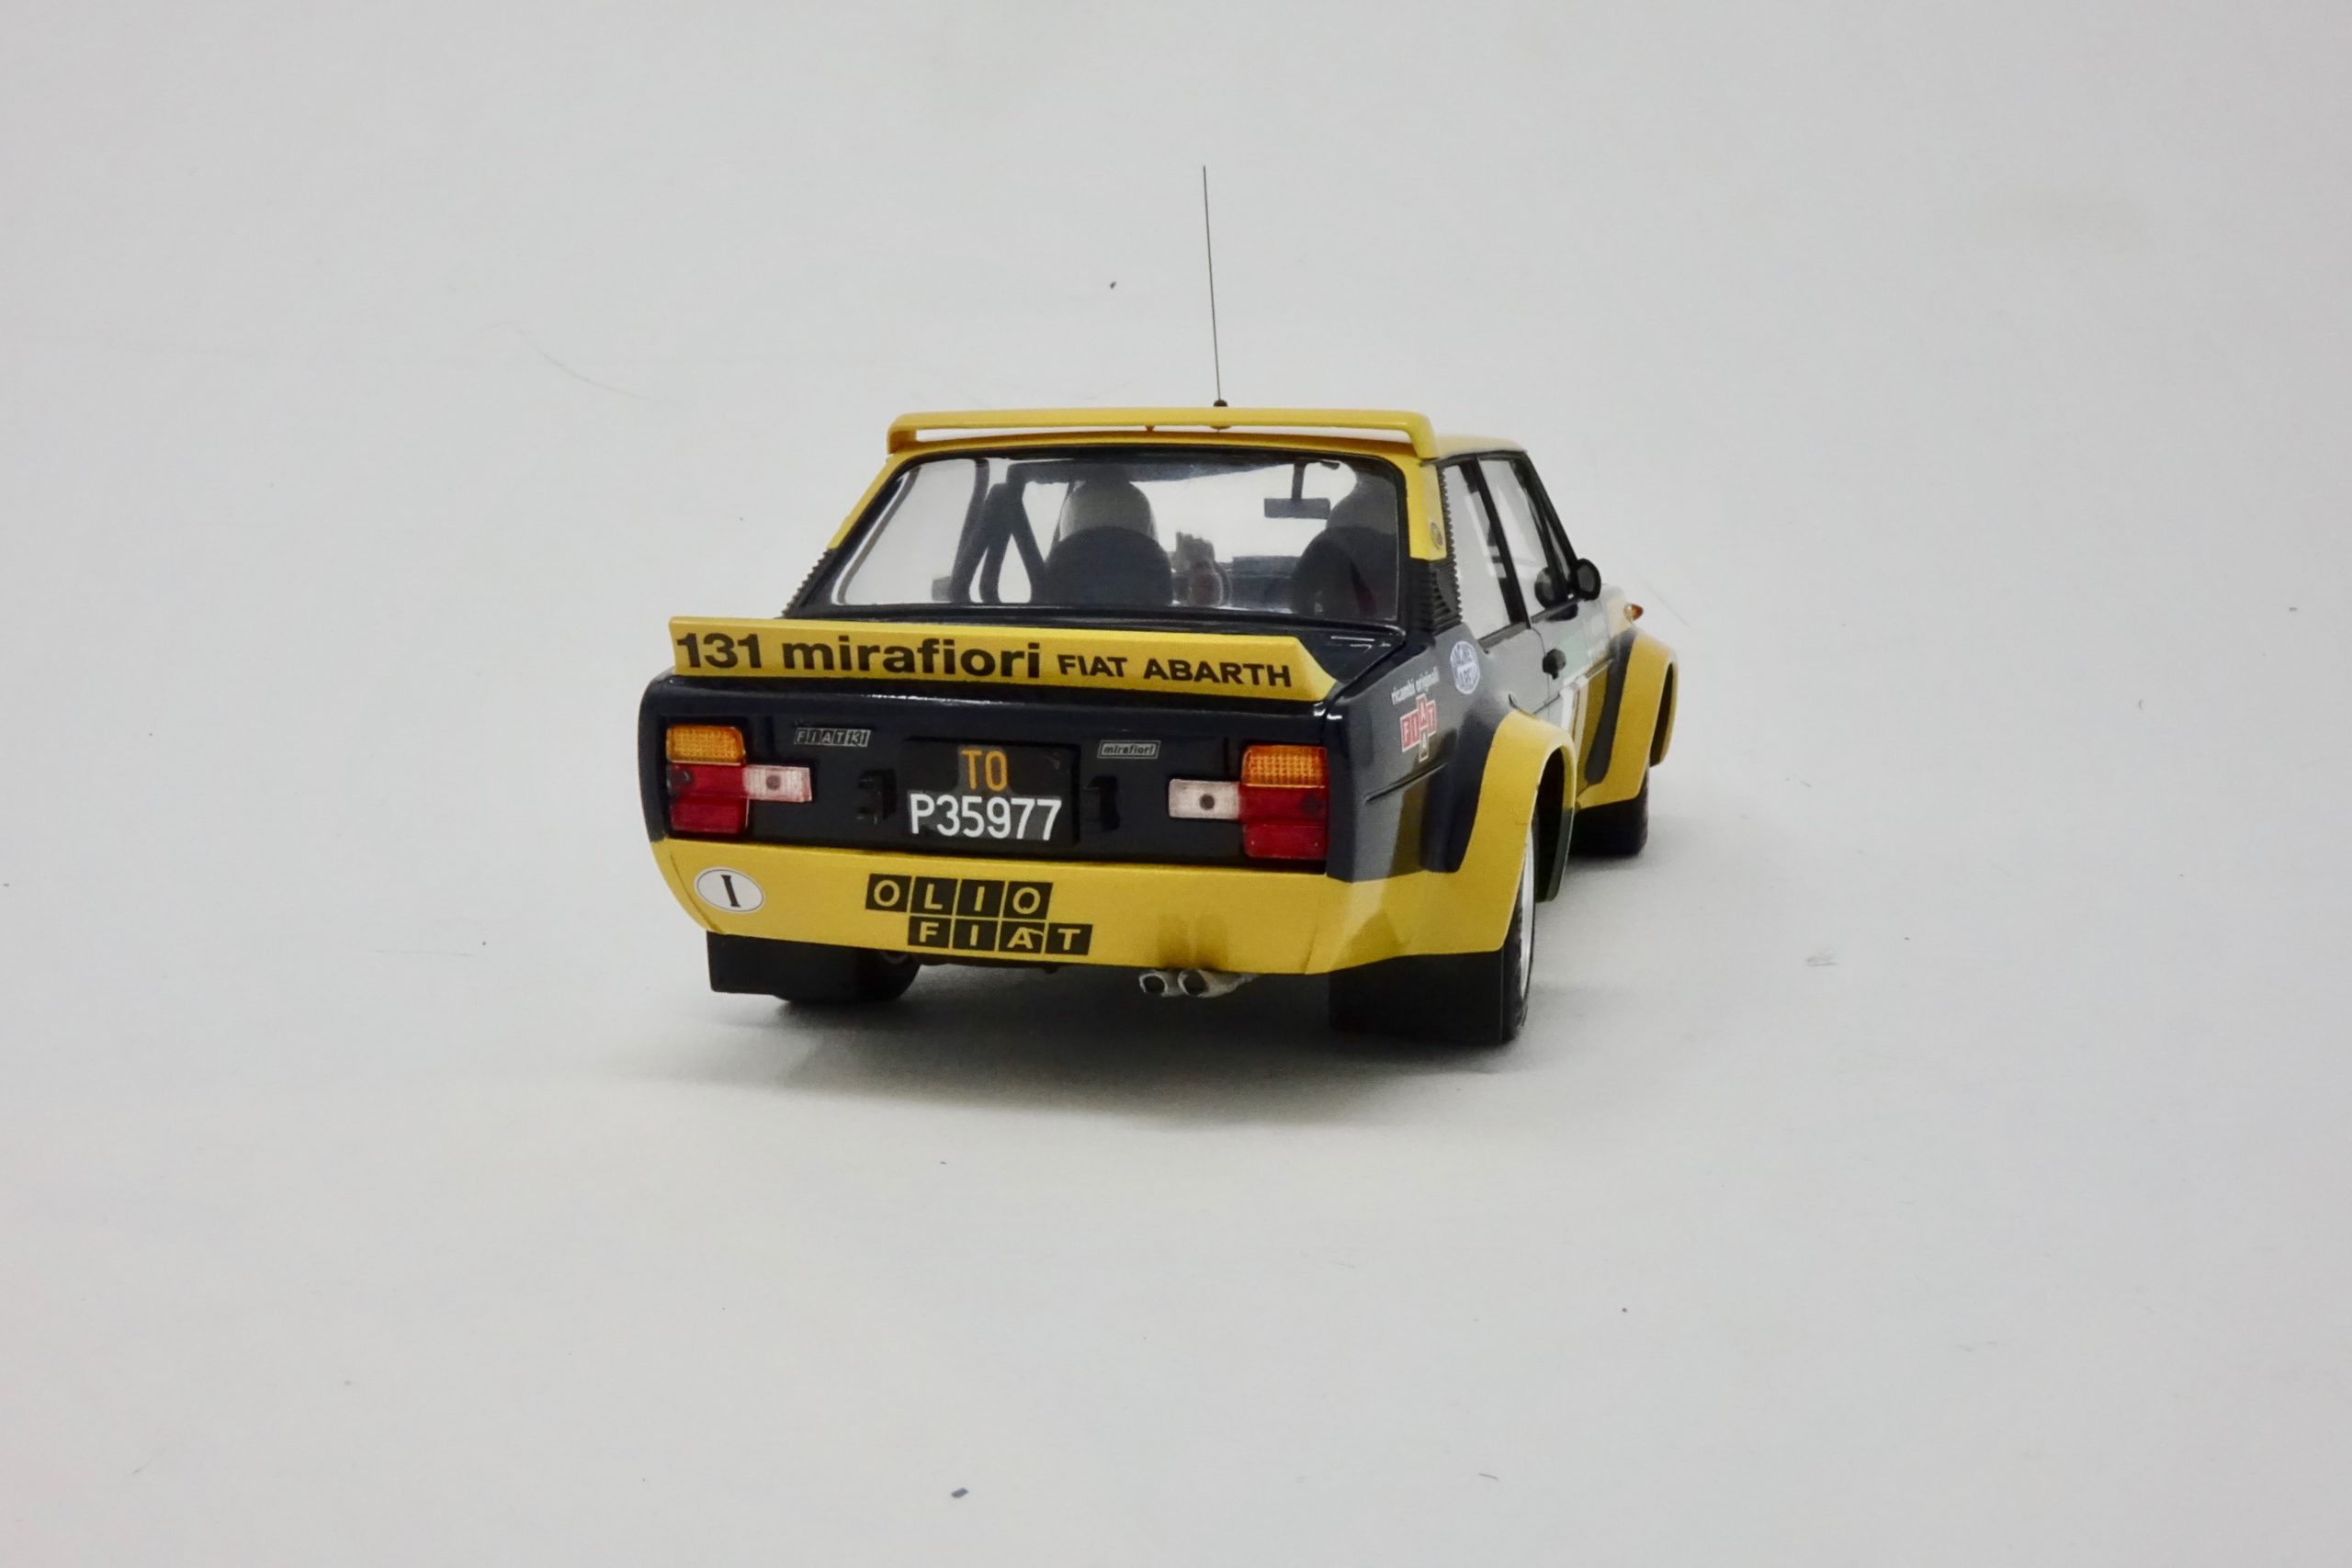
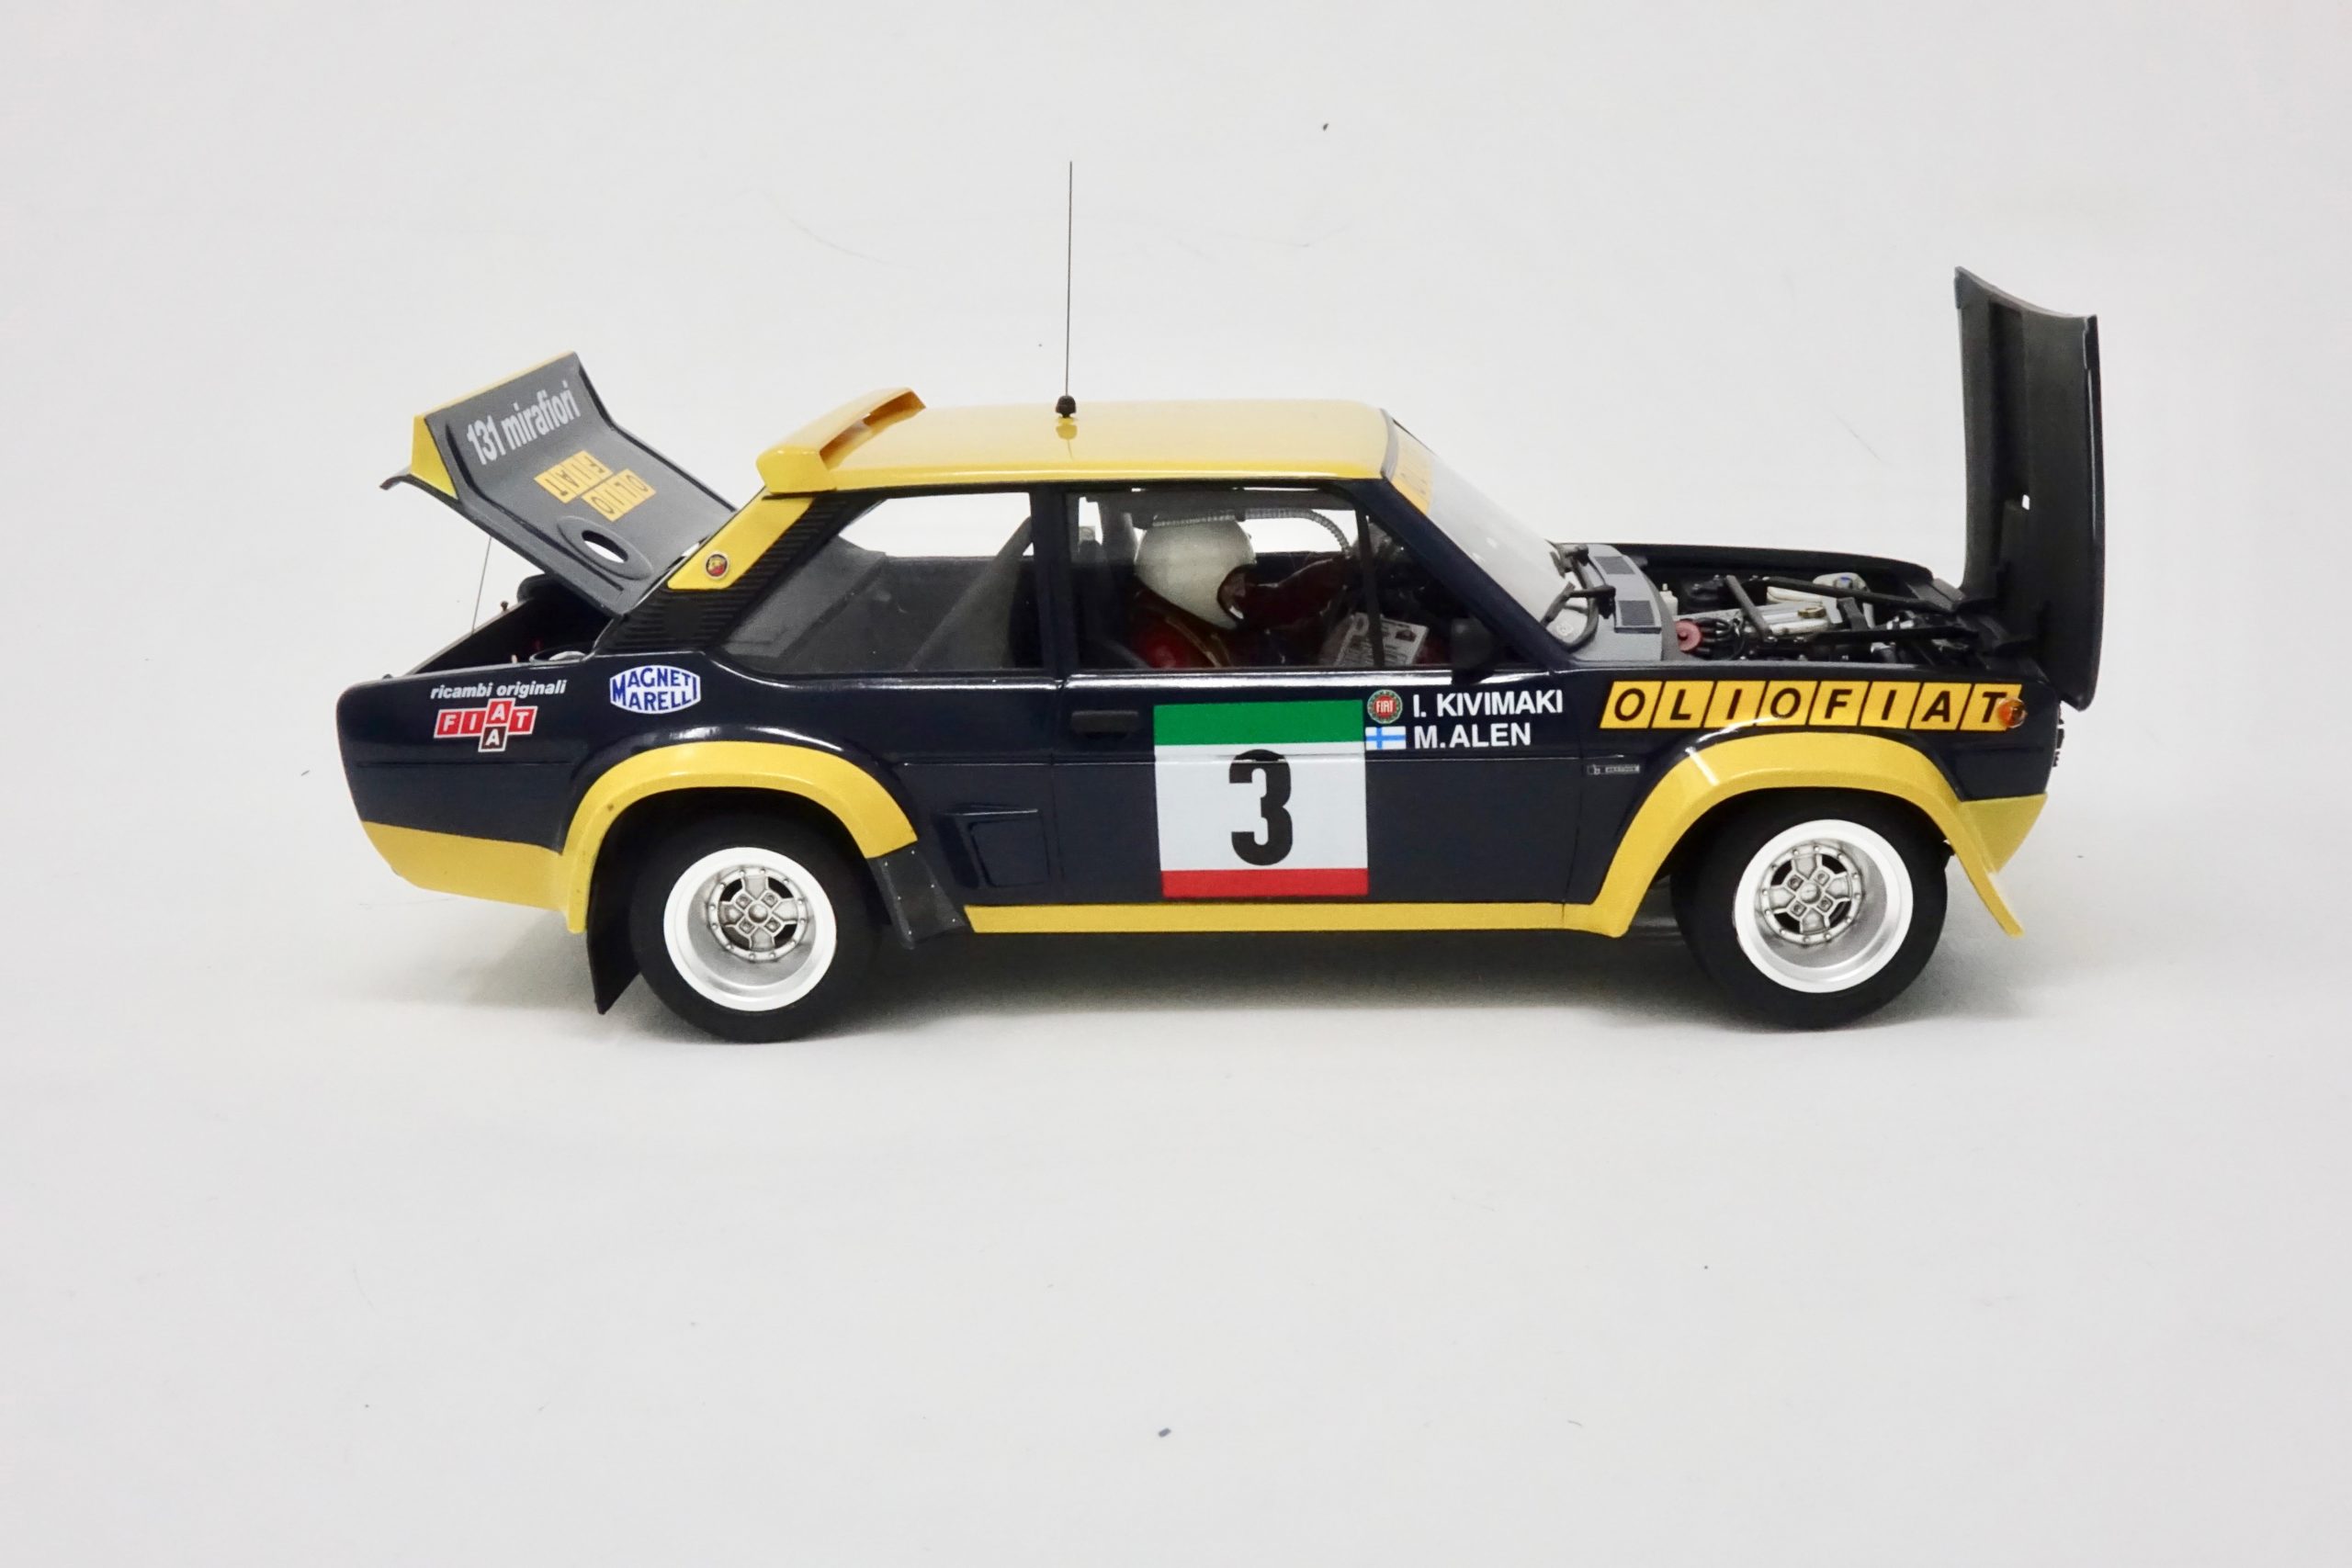
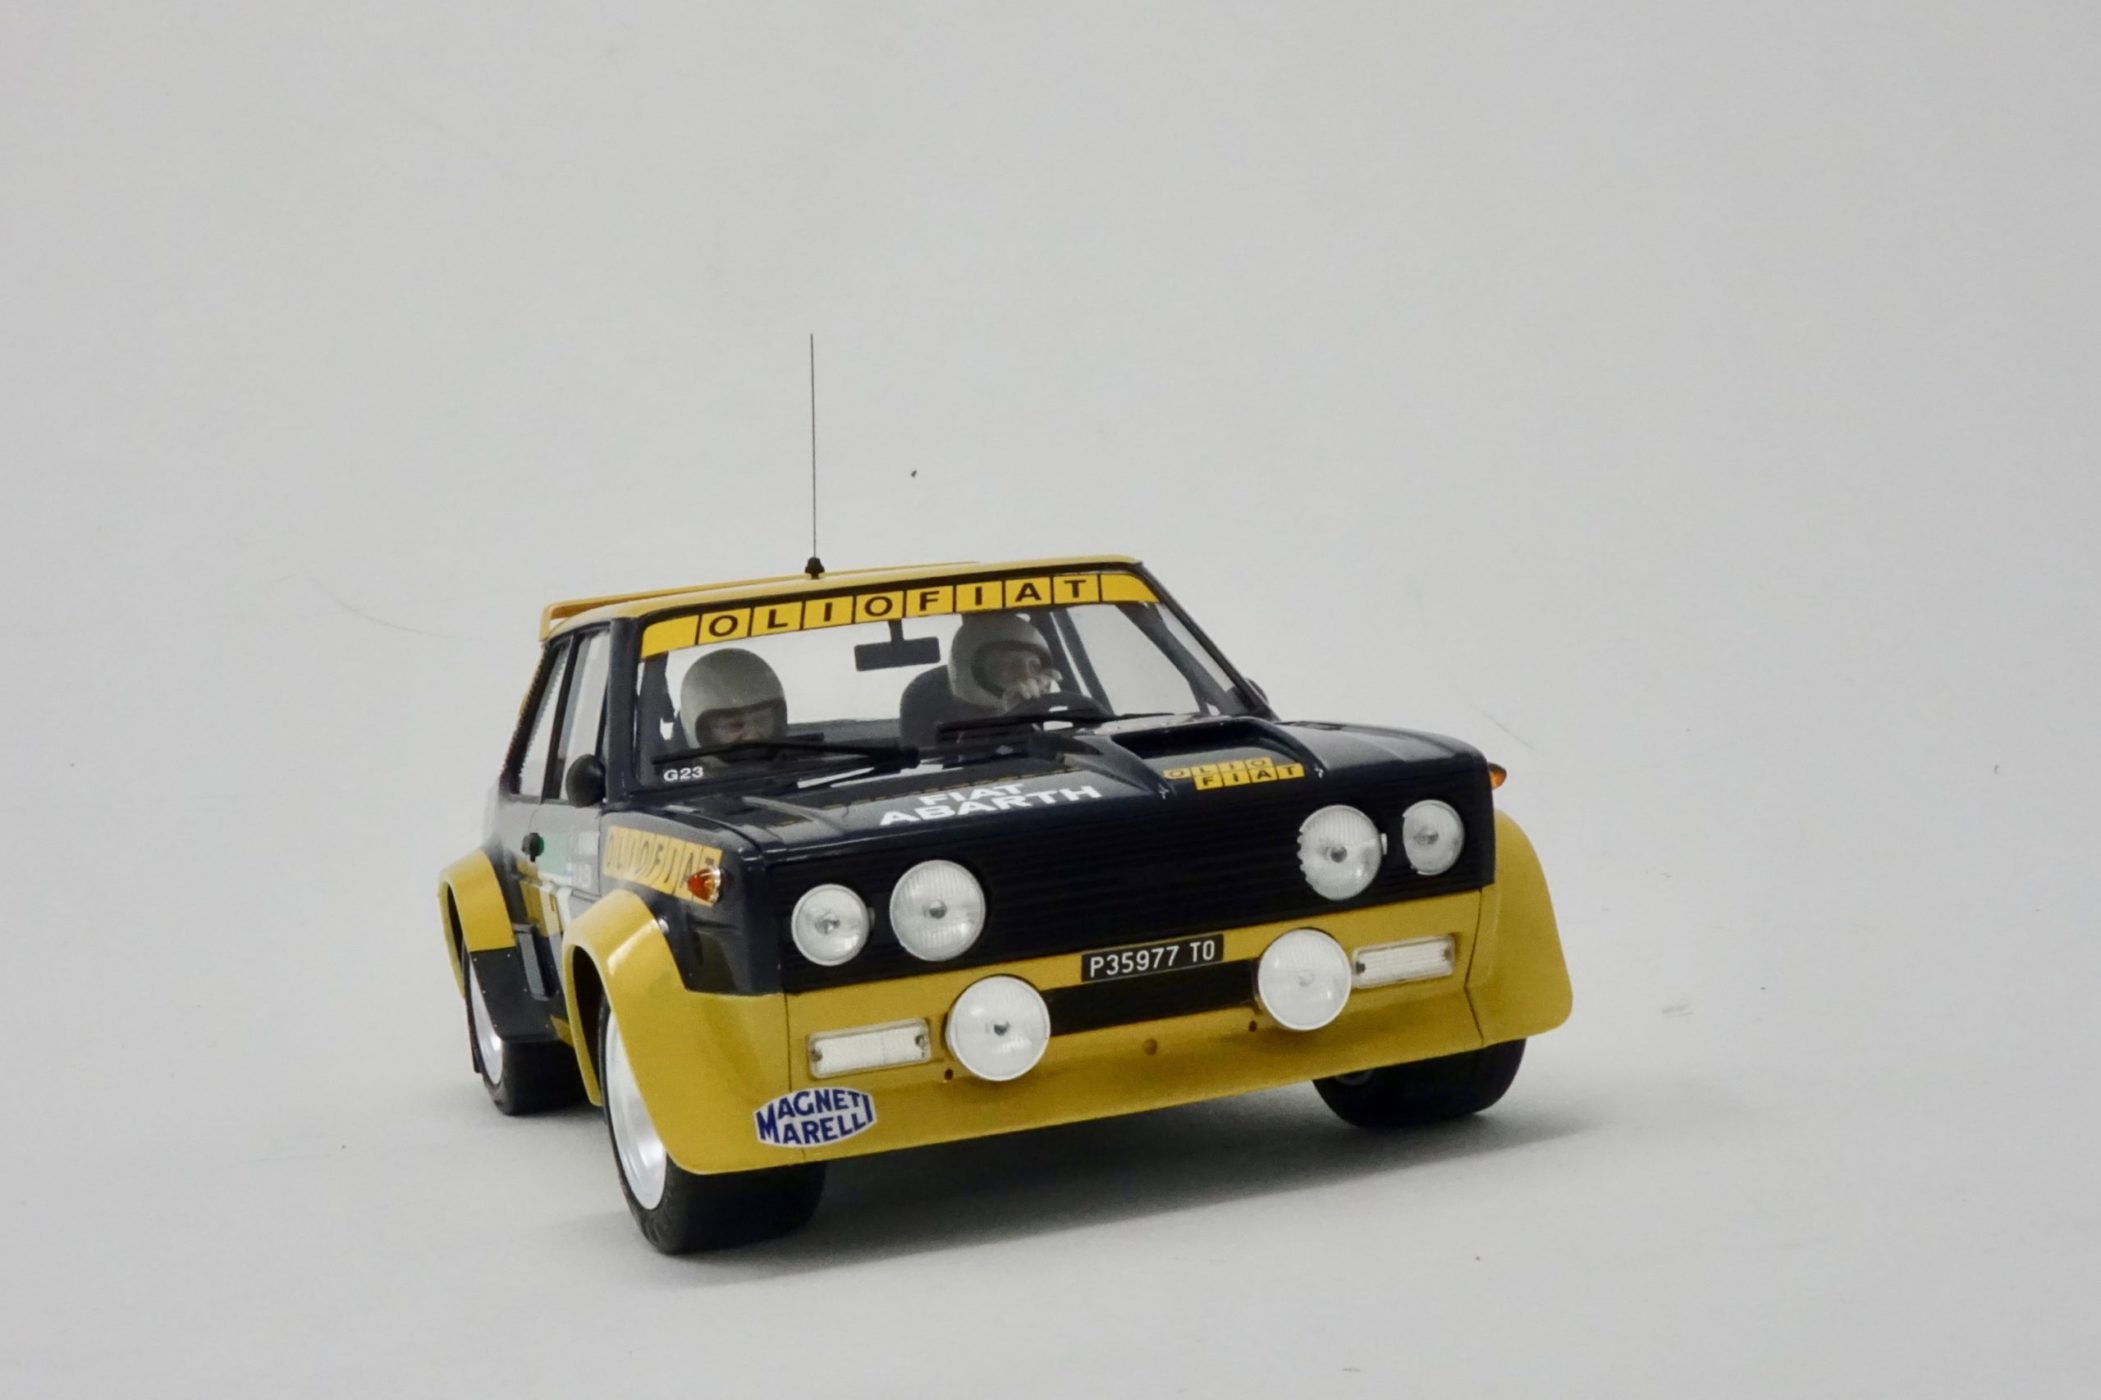
What we have here is a re-issued Tamiya kit of the Fiat 131 Abarth Rally – the car that won several honours for both manufacturer and drivers in the late 1970’s. The Fiat 131 works cars produced 20 WRC victories from ’76-’81 and 3 WRC titles for Fiat – as no doubt you will know. This model is based on the works Olio Fiat liveried car from early in it’s WRC competition days, such as the Portuguese rally of 1977 (winner) with M. Alen and I. Kivimaki. A very competitive car in it’s day.
This kit first appeared from Tamiya in the very early 80’s in a couple of different liveries and was a very popular kit – but this is a brand new re-release with different decals and a re-box.
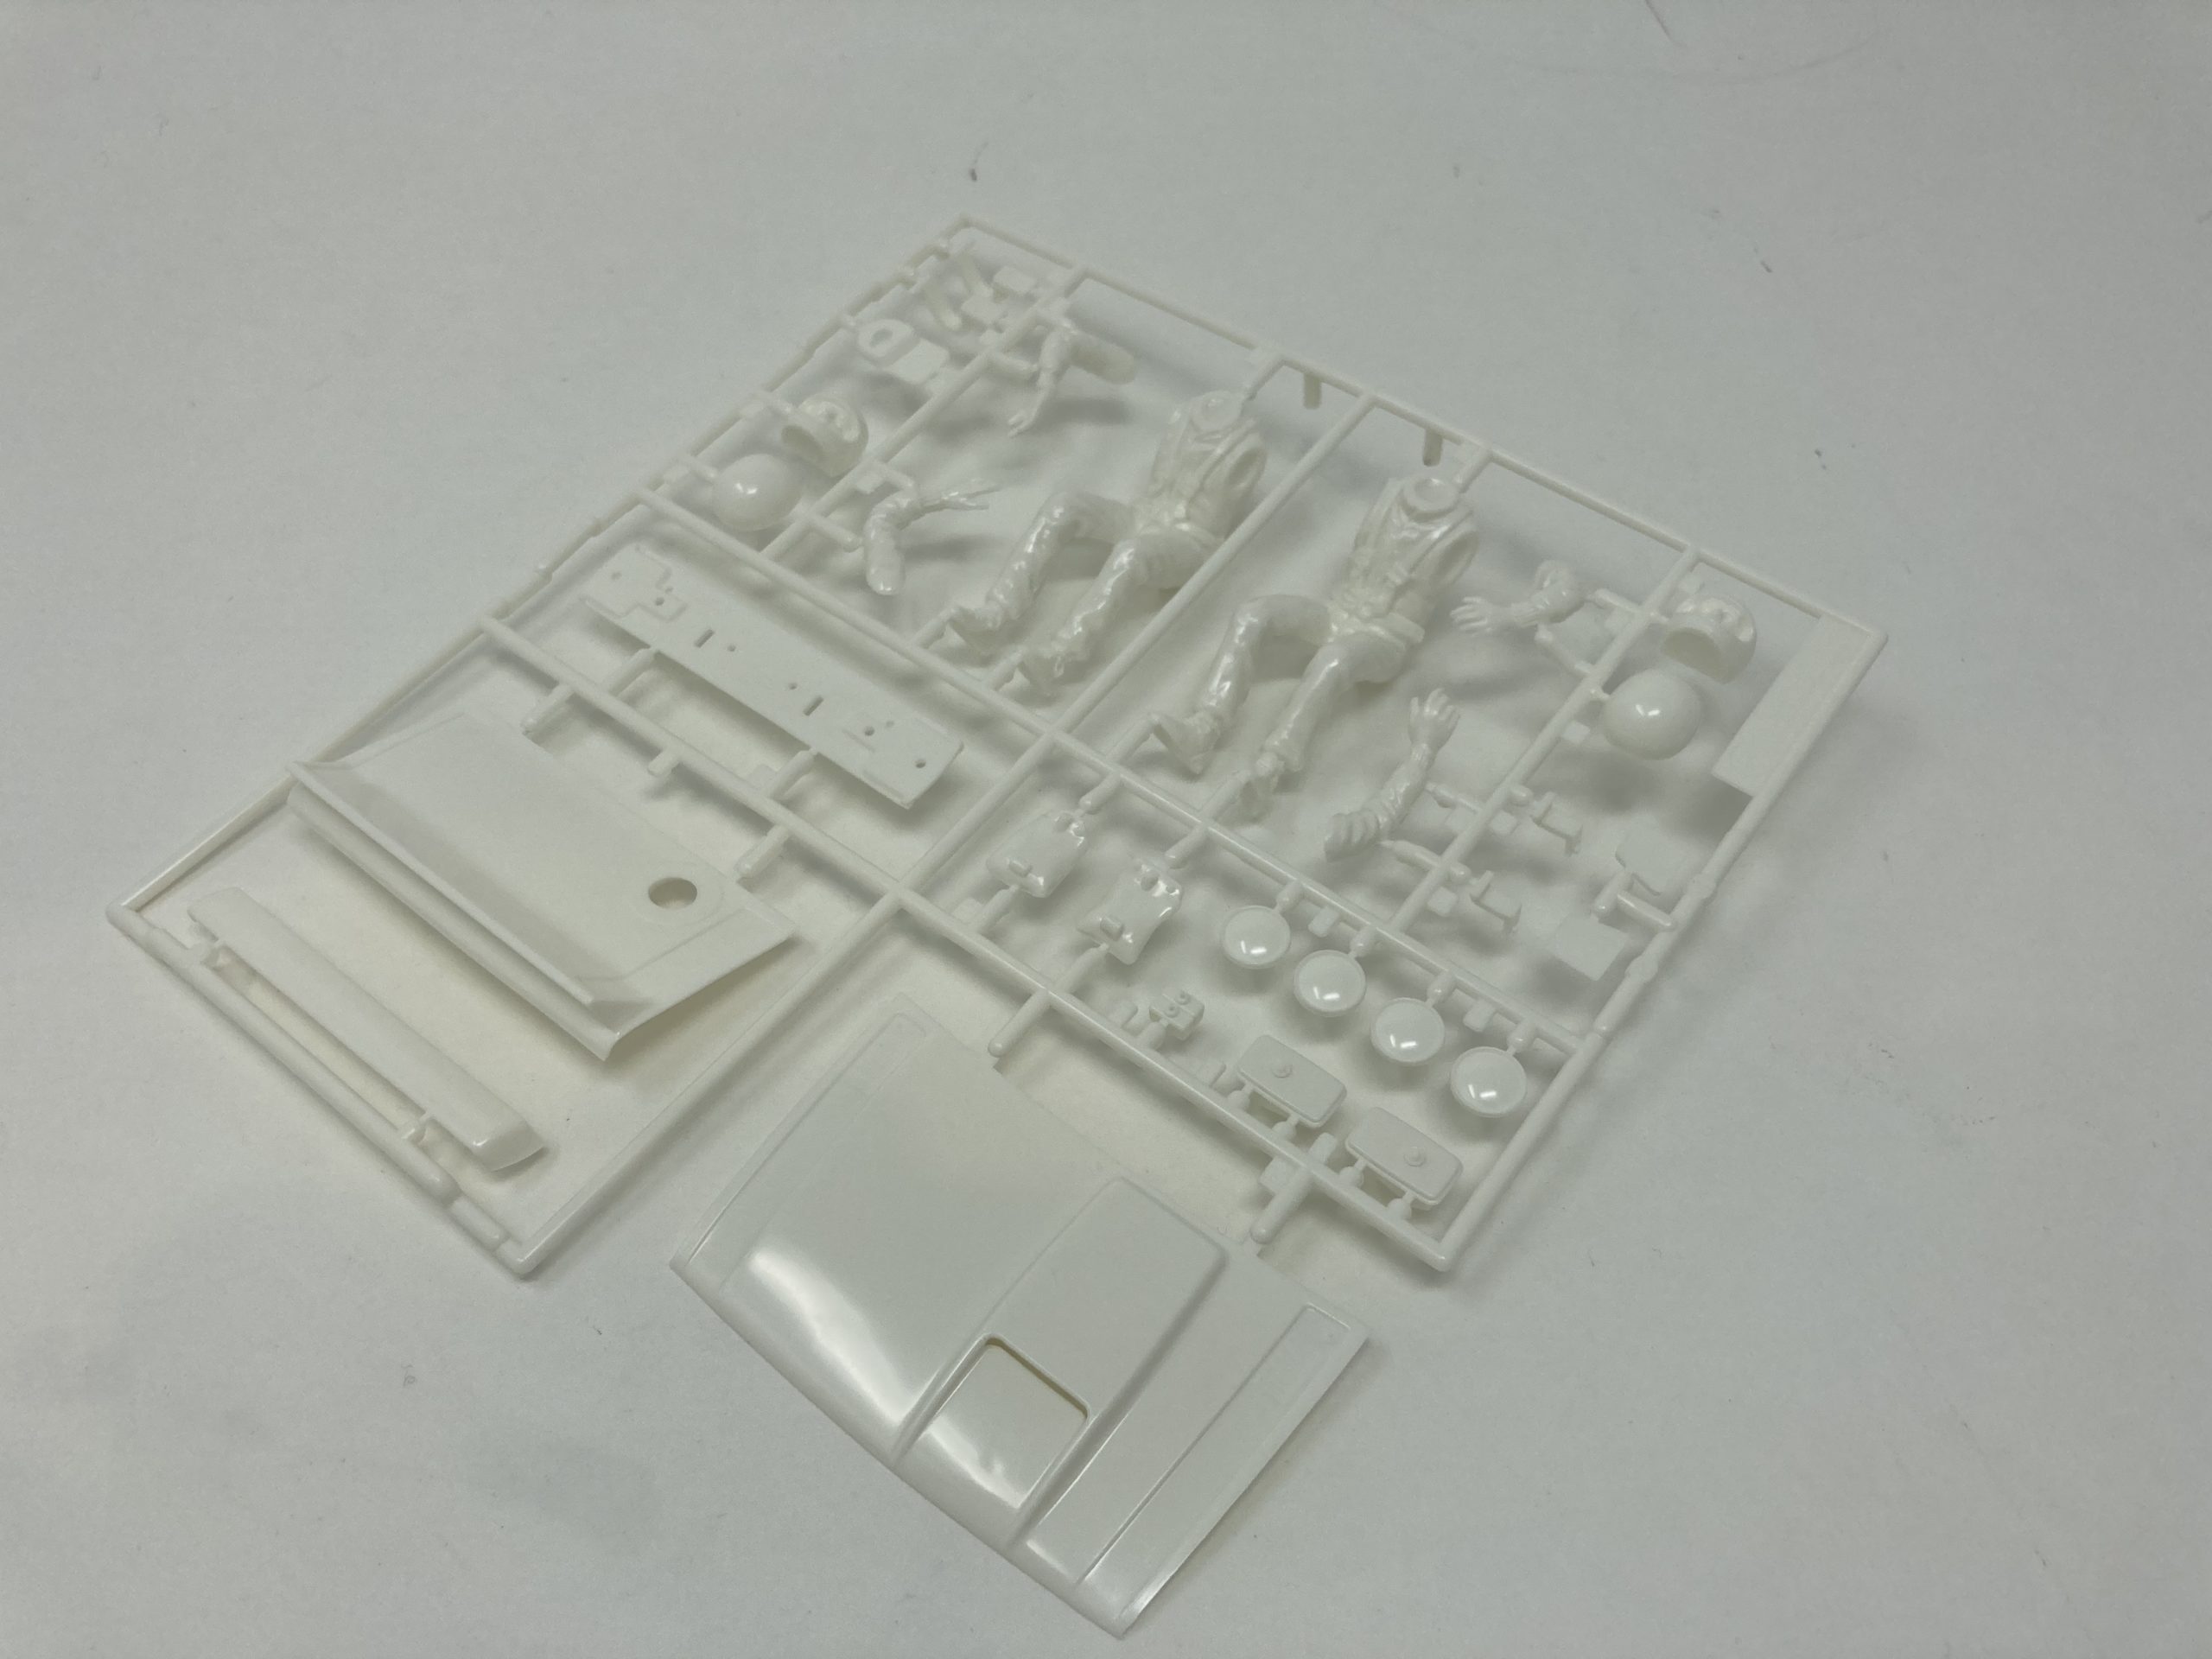
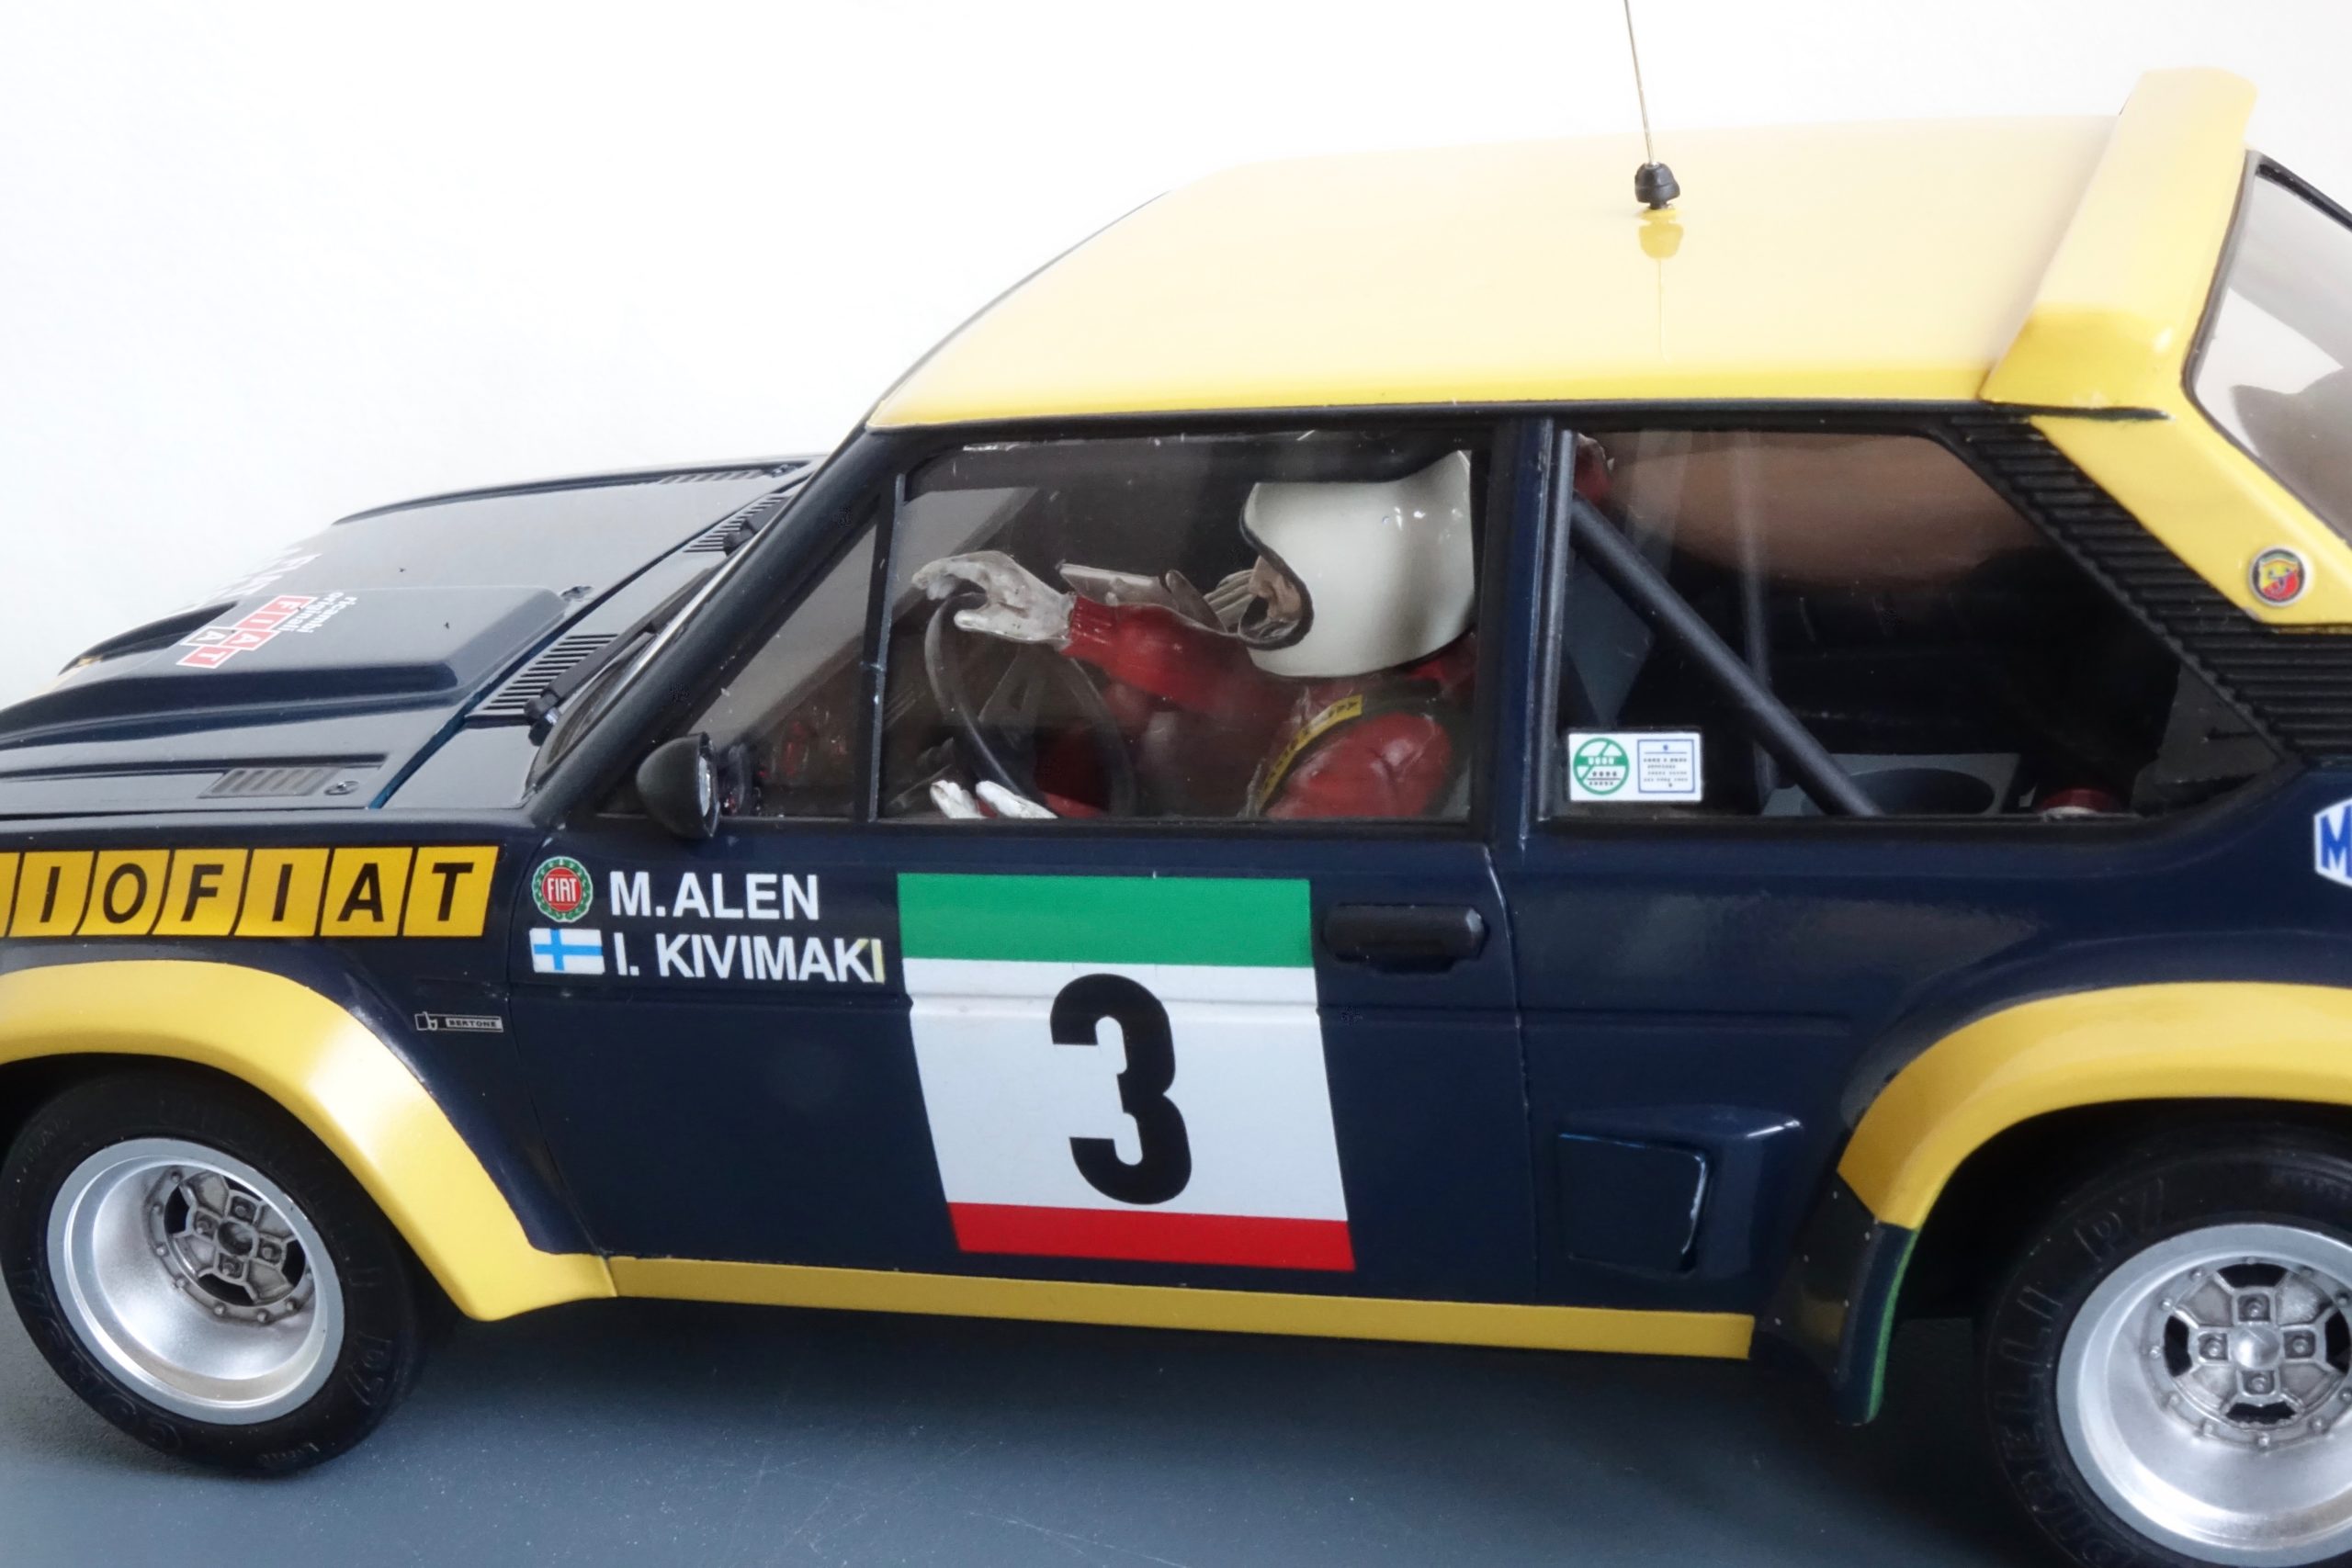
And of course, it’s a 1/20 scale model and it has driver and co-driver figures – so this kit is quite a bit different to the normal 1/24 driverless car kits. I’ve never been too confident about adding figures to my models (because I don’t think I can make a good job of it) – so I was a bit apprehensive. The last Tamiya kit I built with driver figures was the Audi Quattro Rally car in the mid 80’s.
My brief here is to build straight out of the box, with no additional detail added, following painting instructions etc. I stuck to this with just a couple of exceptions – I substituted thinner, more scale appropriate wire for the plug leads and I had to do some paint mixing for the main body colours so that I could use Tamiya lacquer Paints throughout. I’ll detail this in the build notes.
So – here we go!
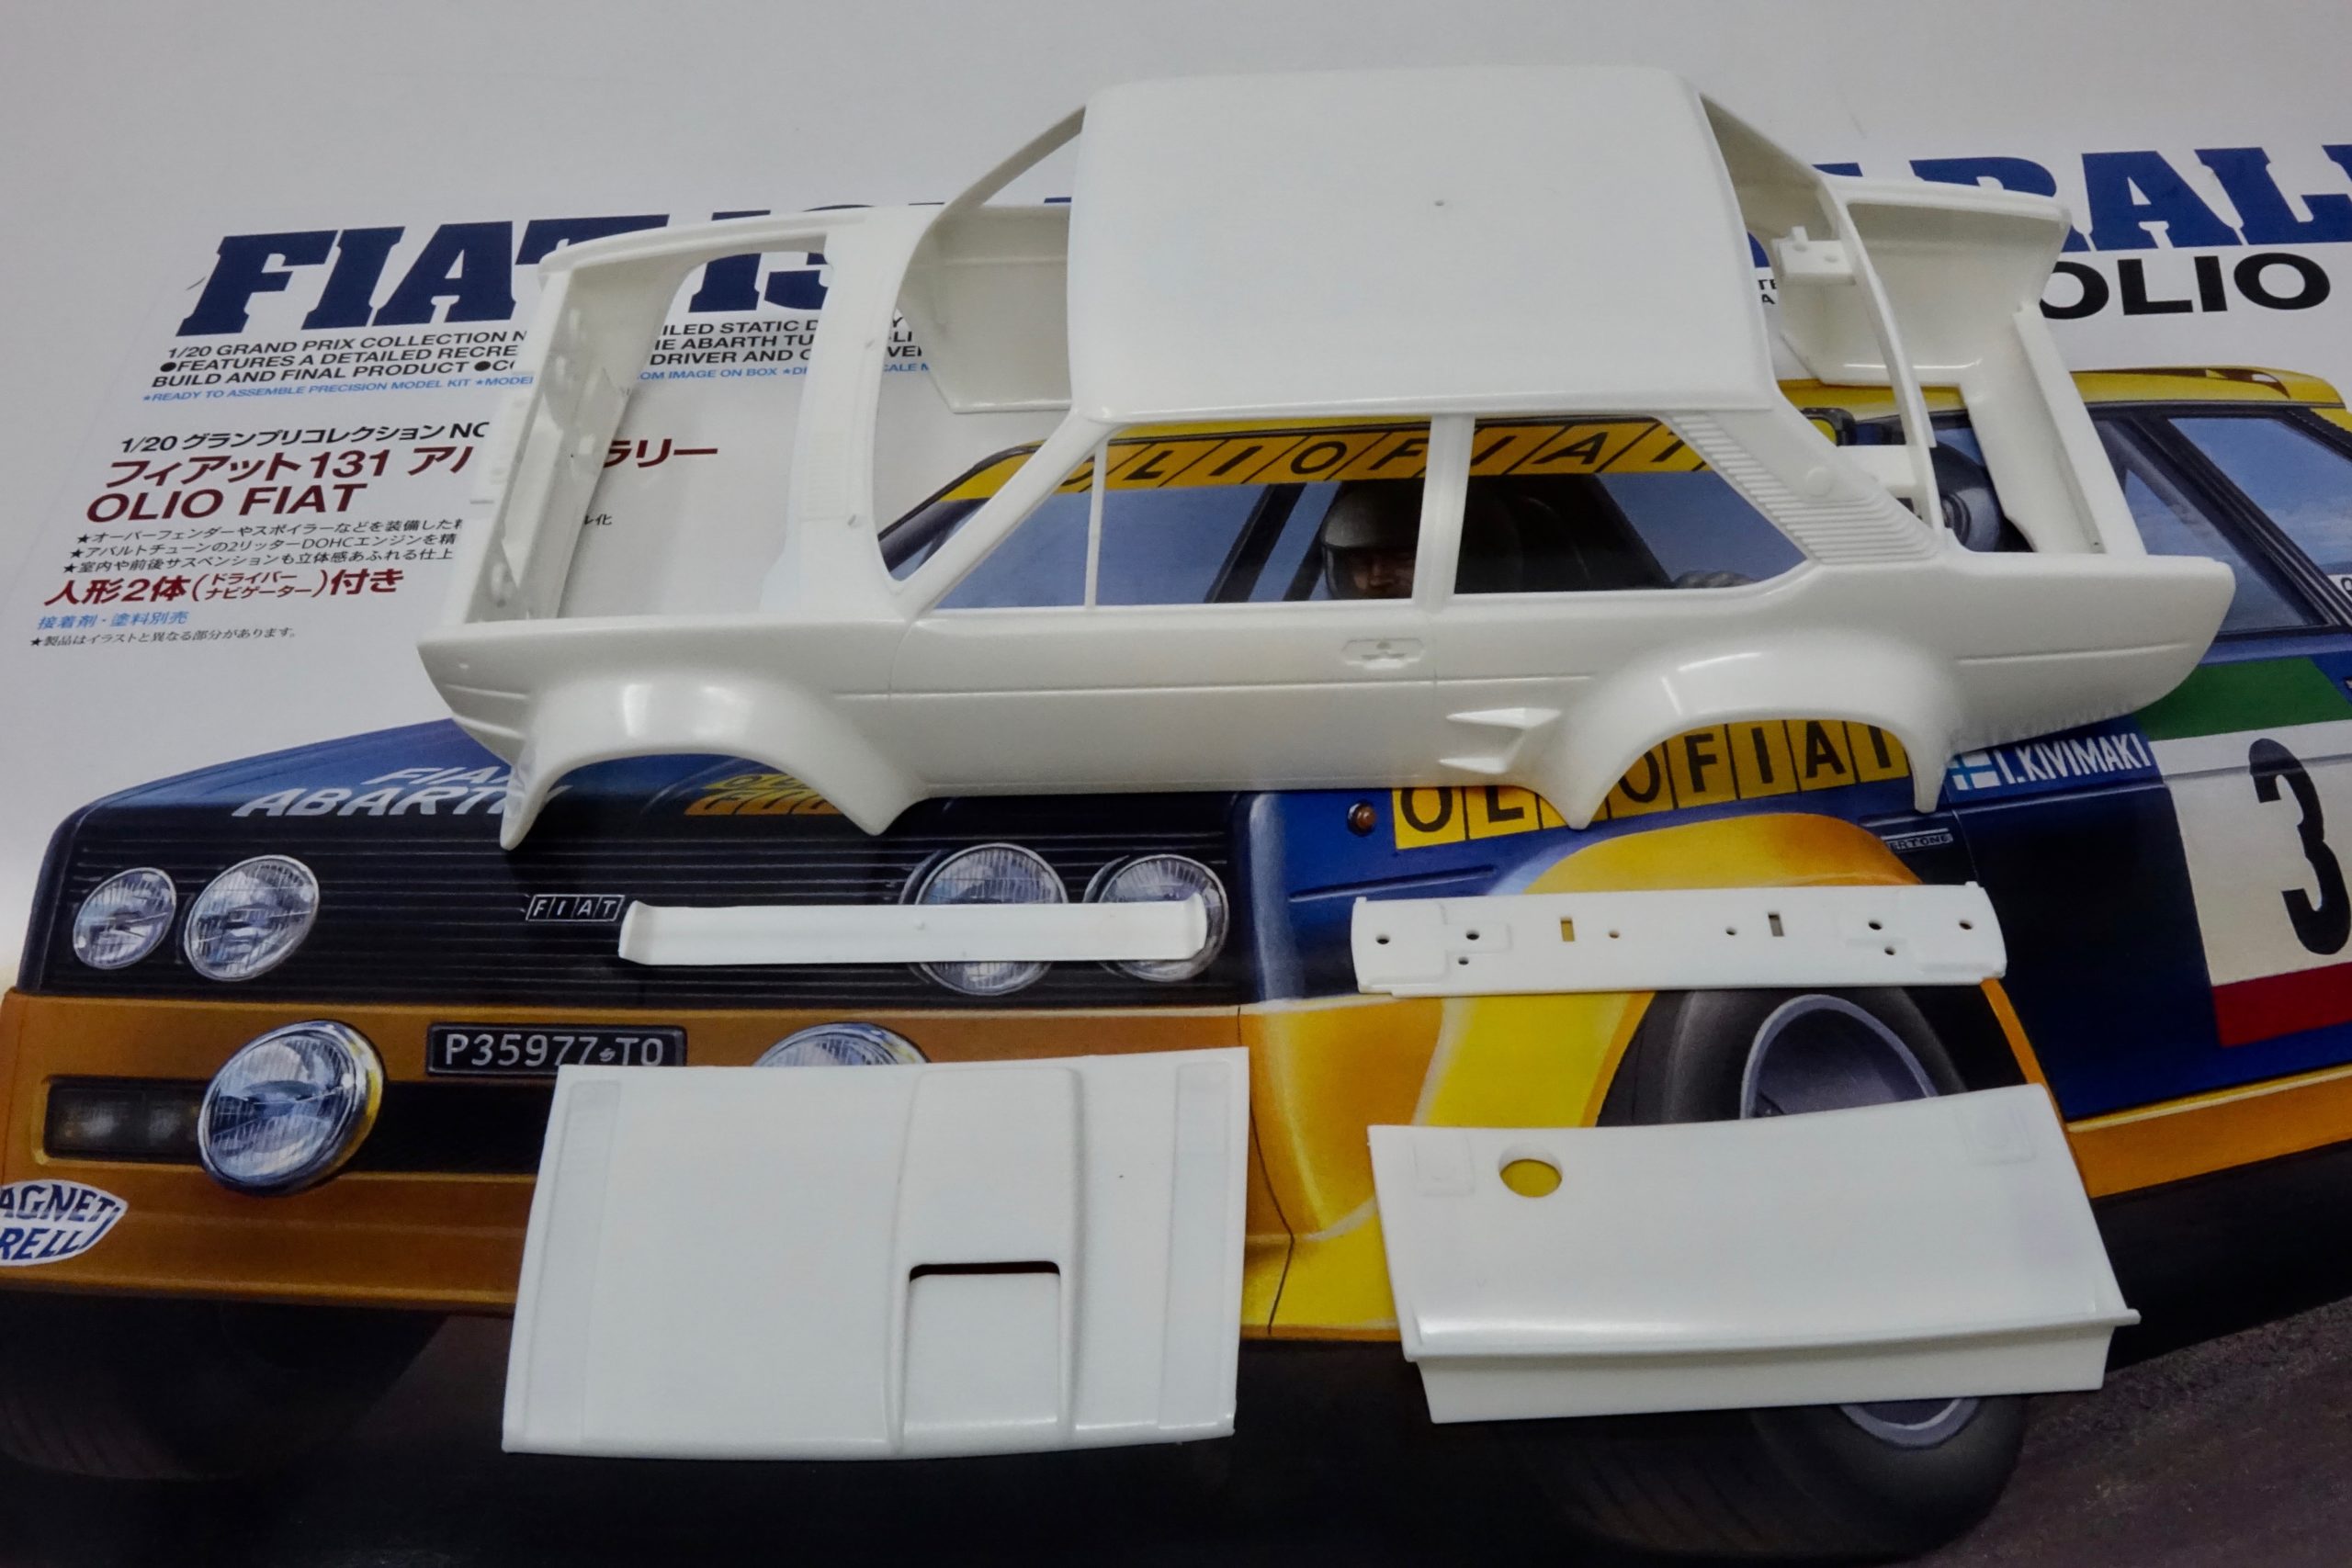
What’s in the box?
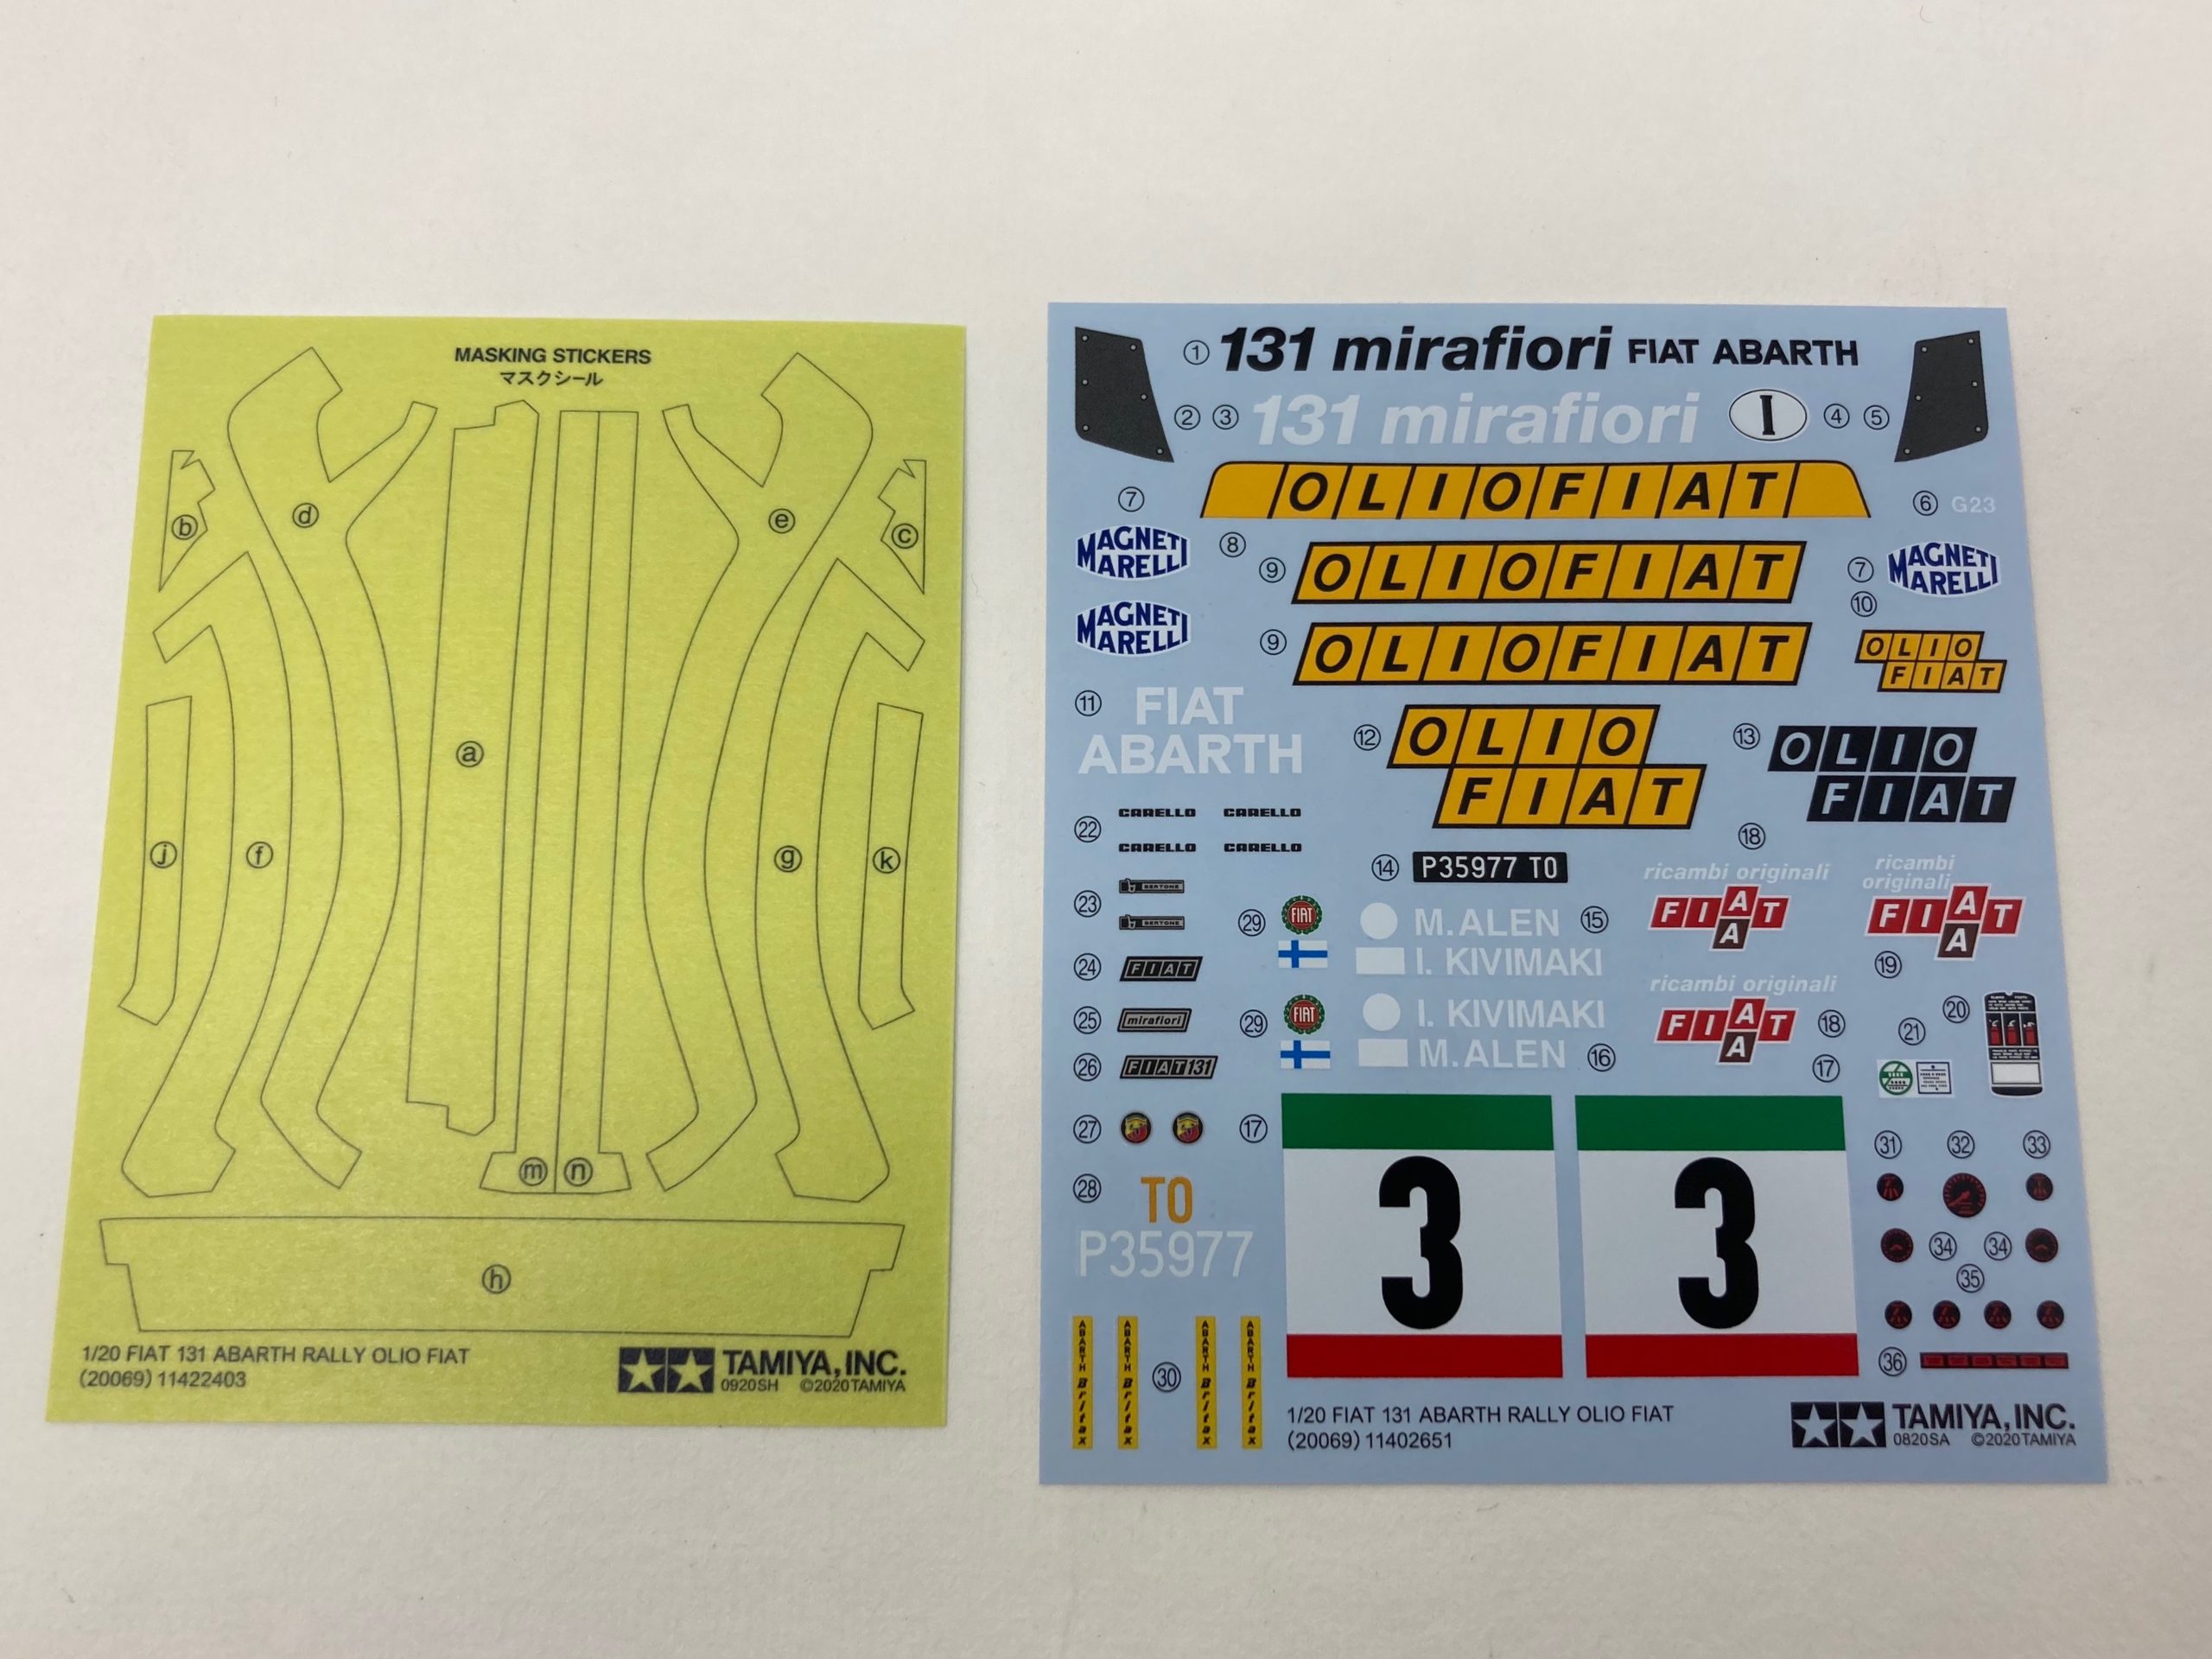
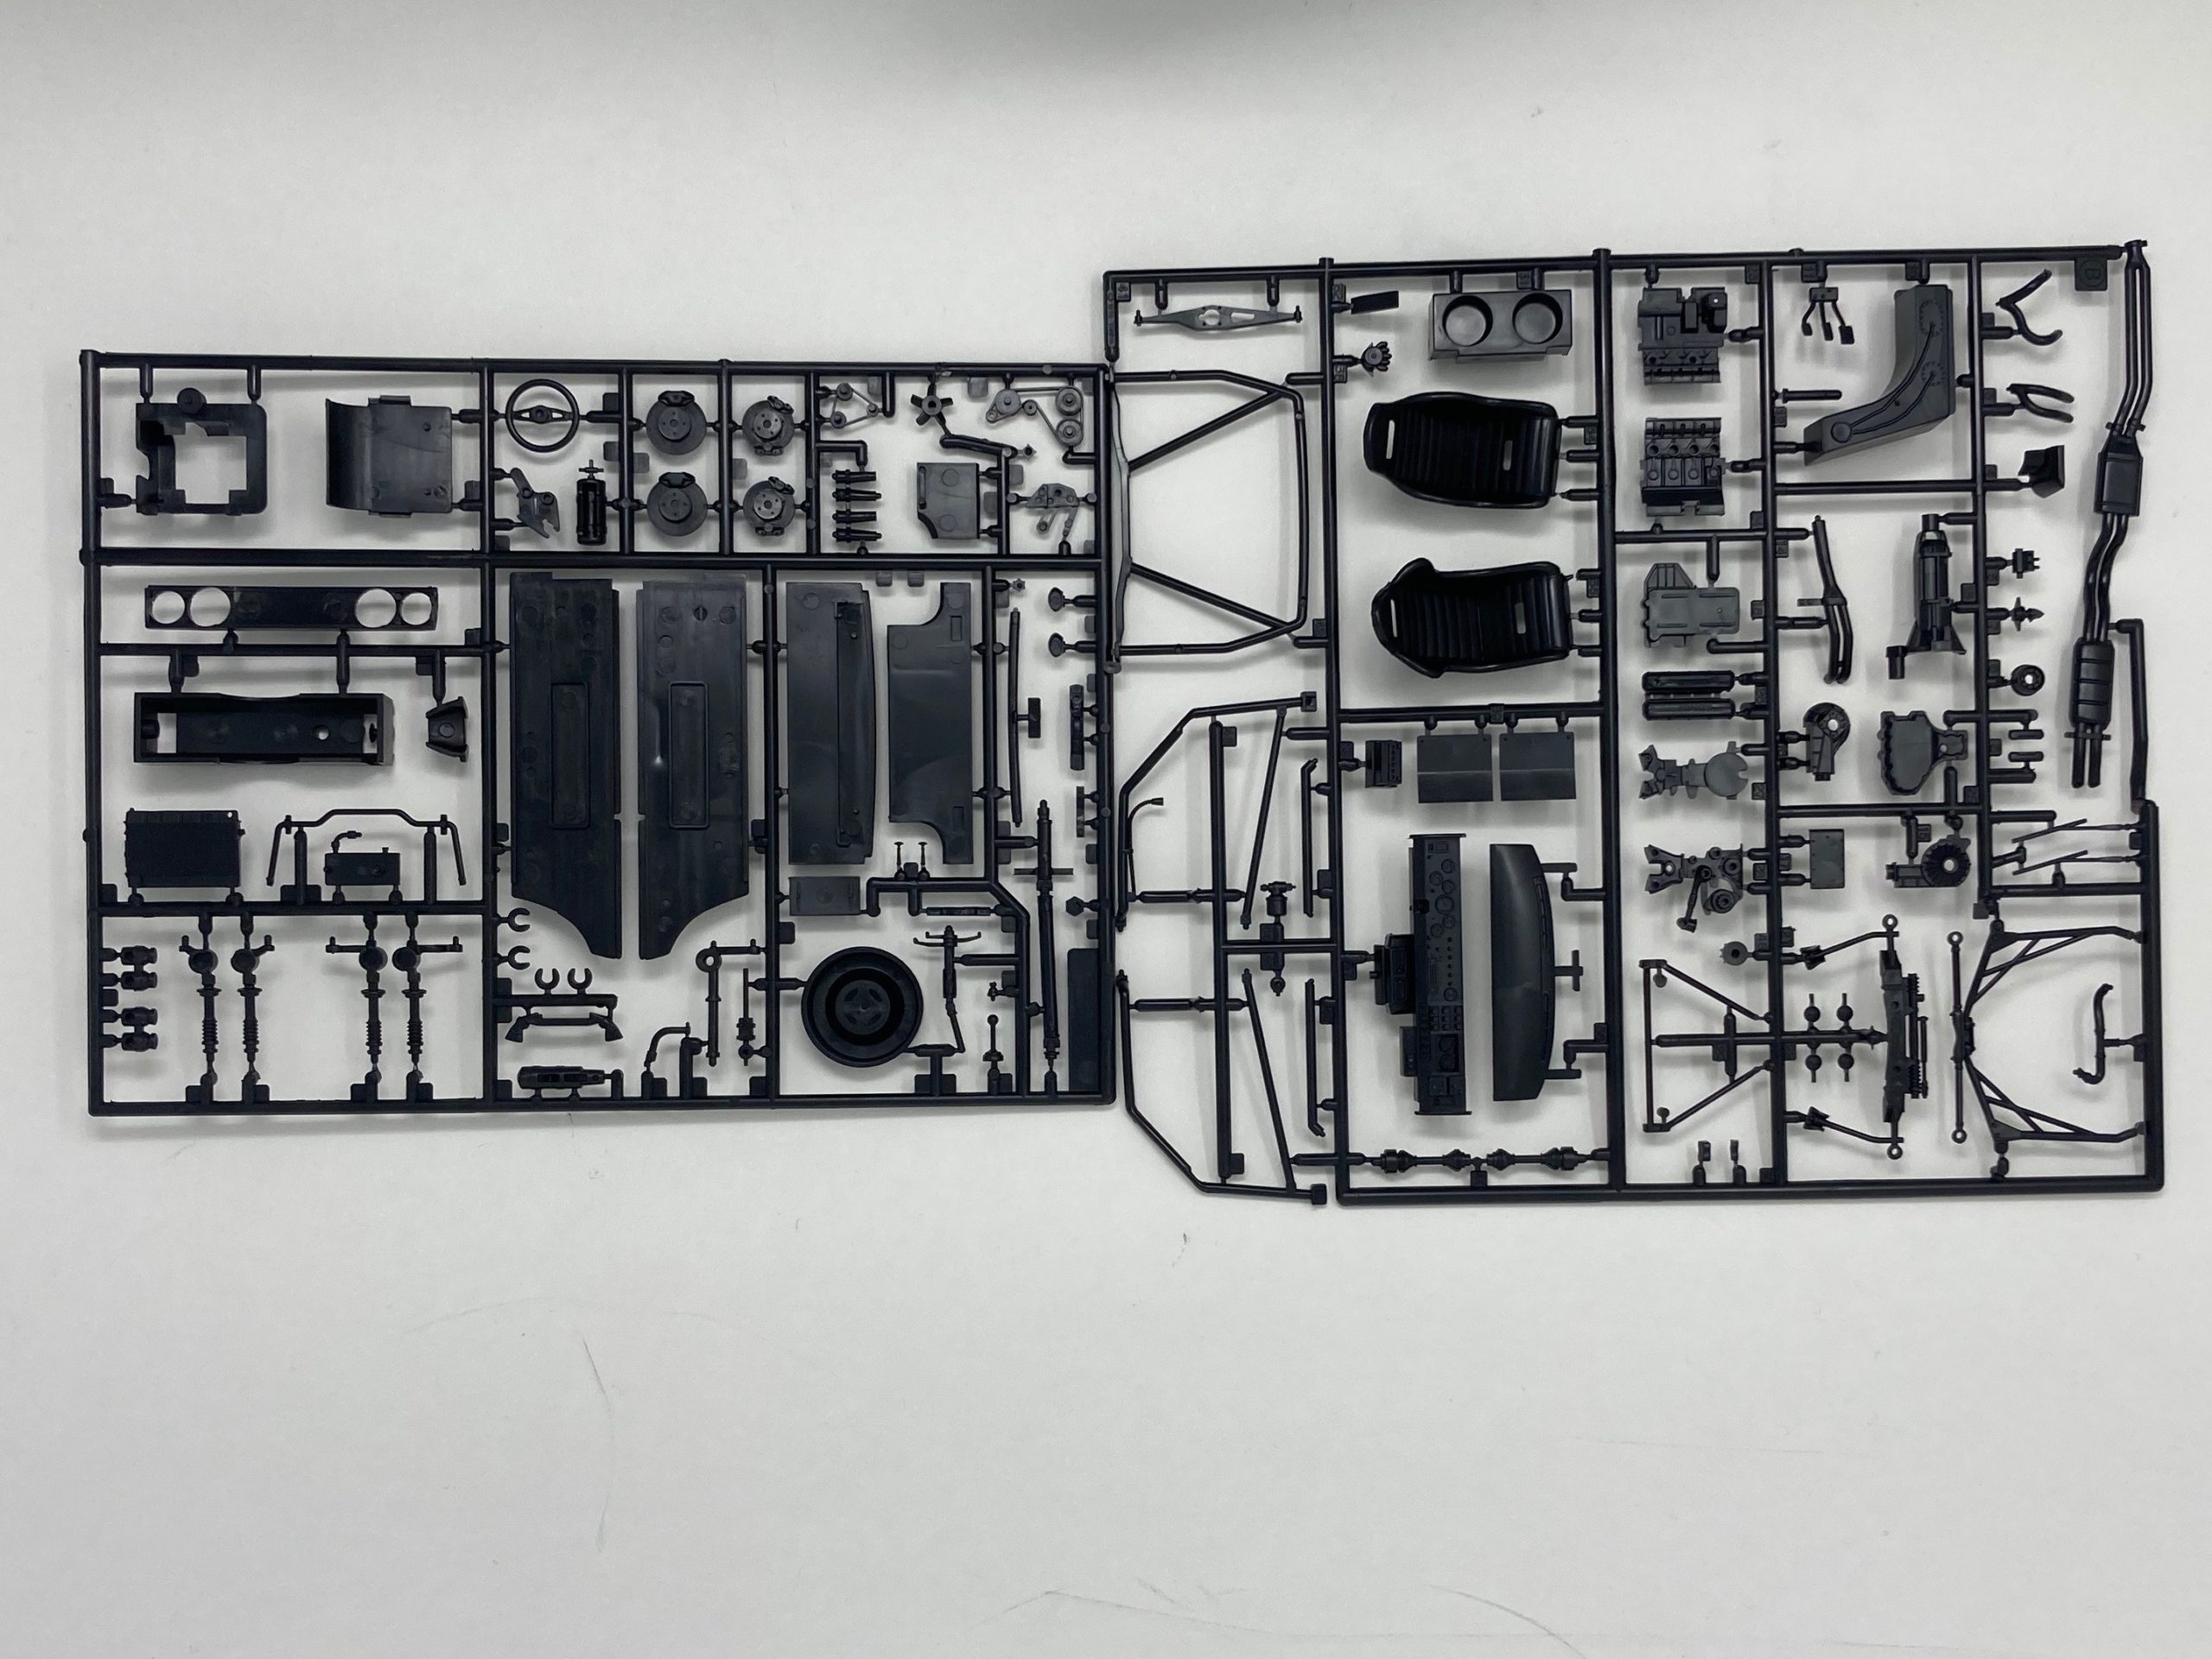
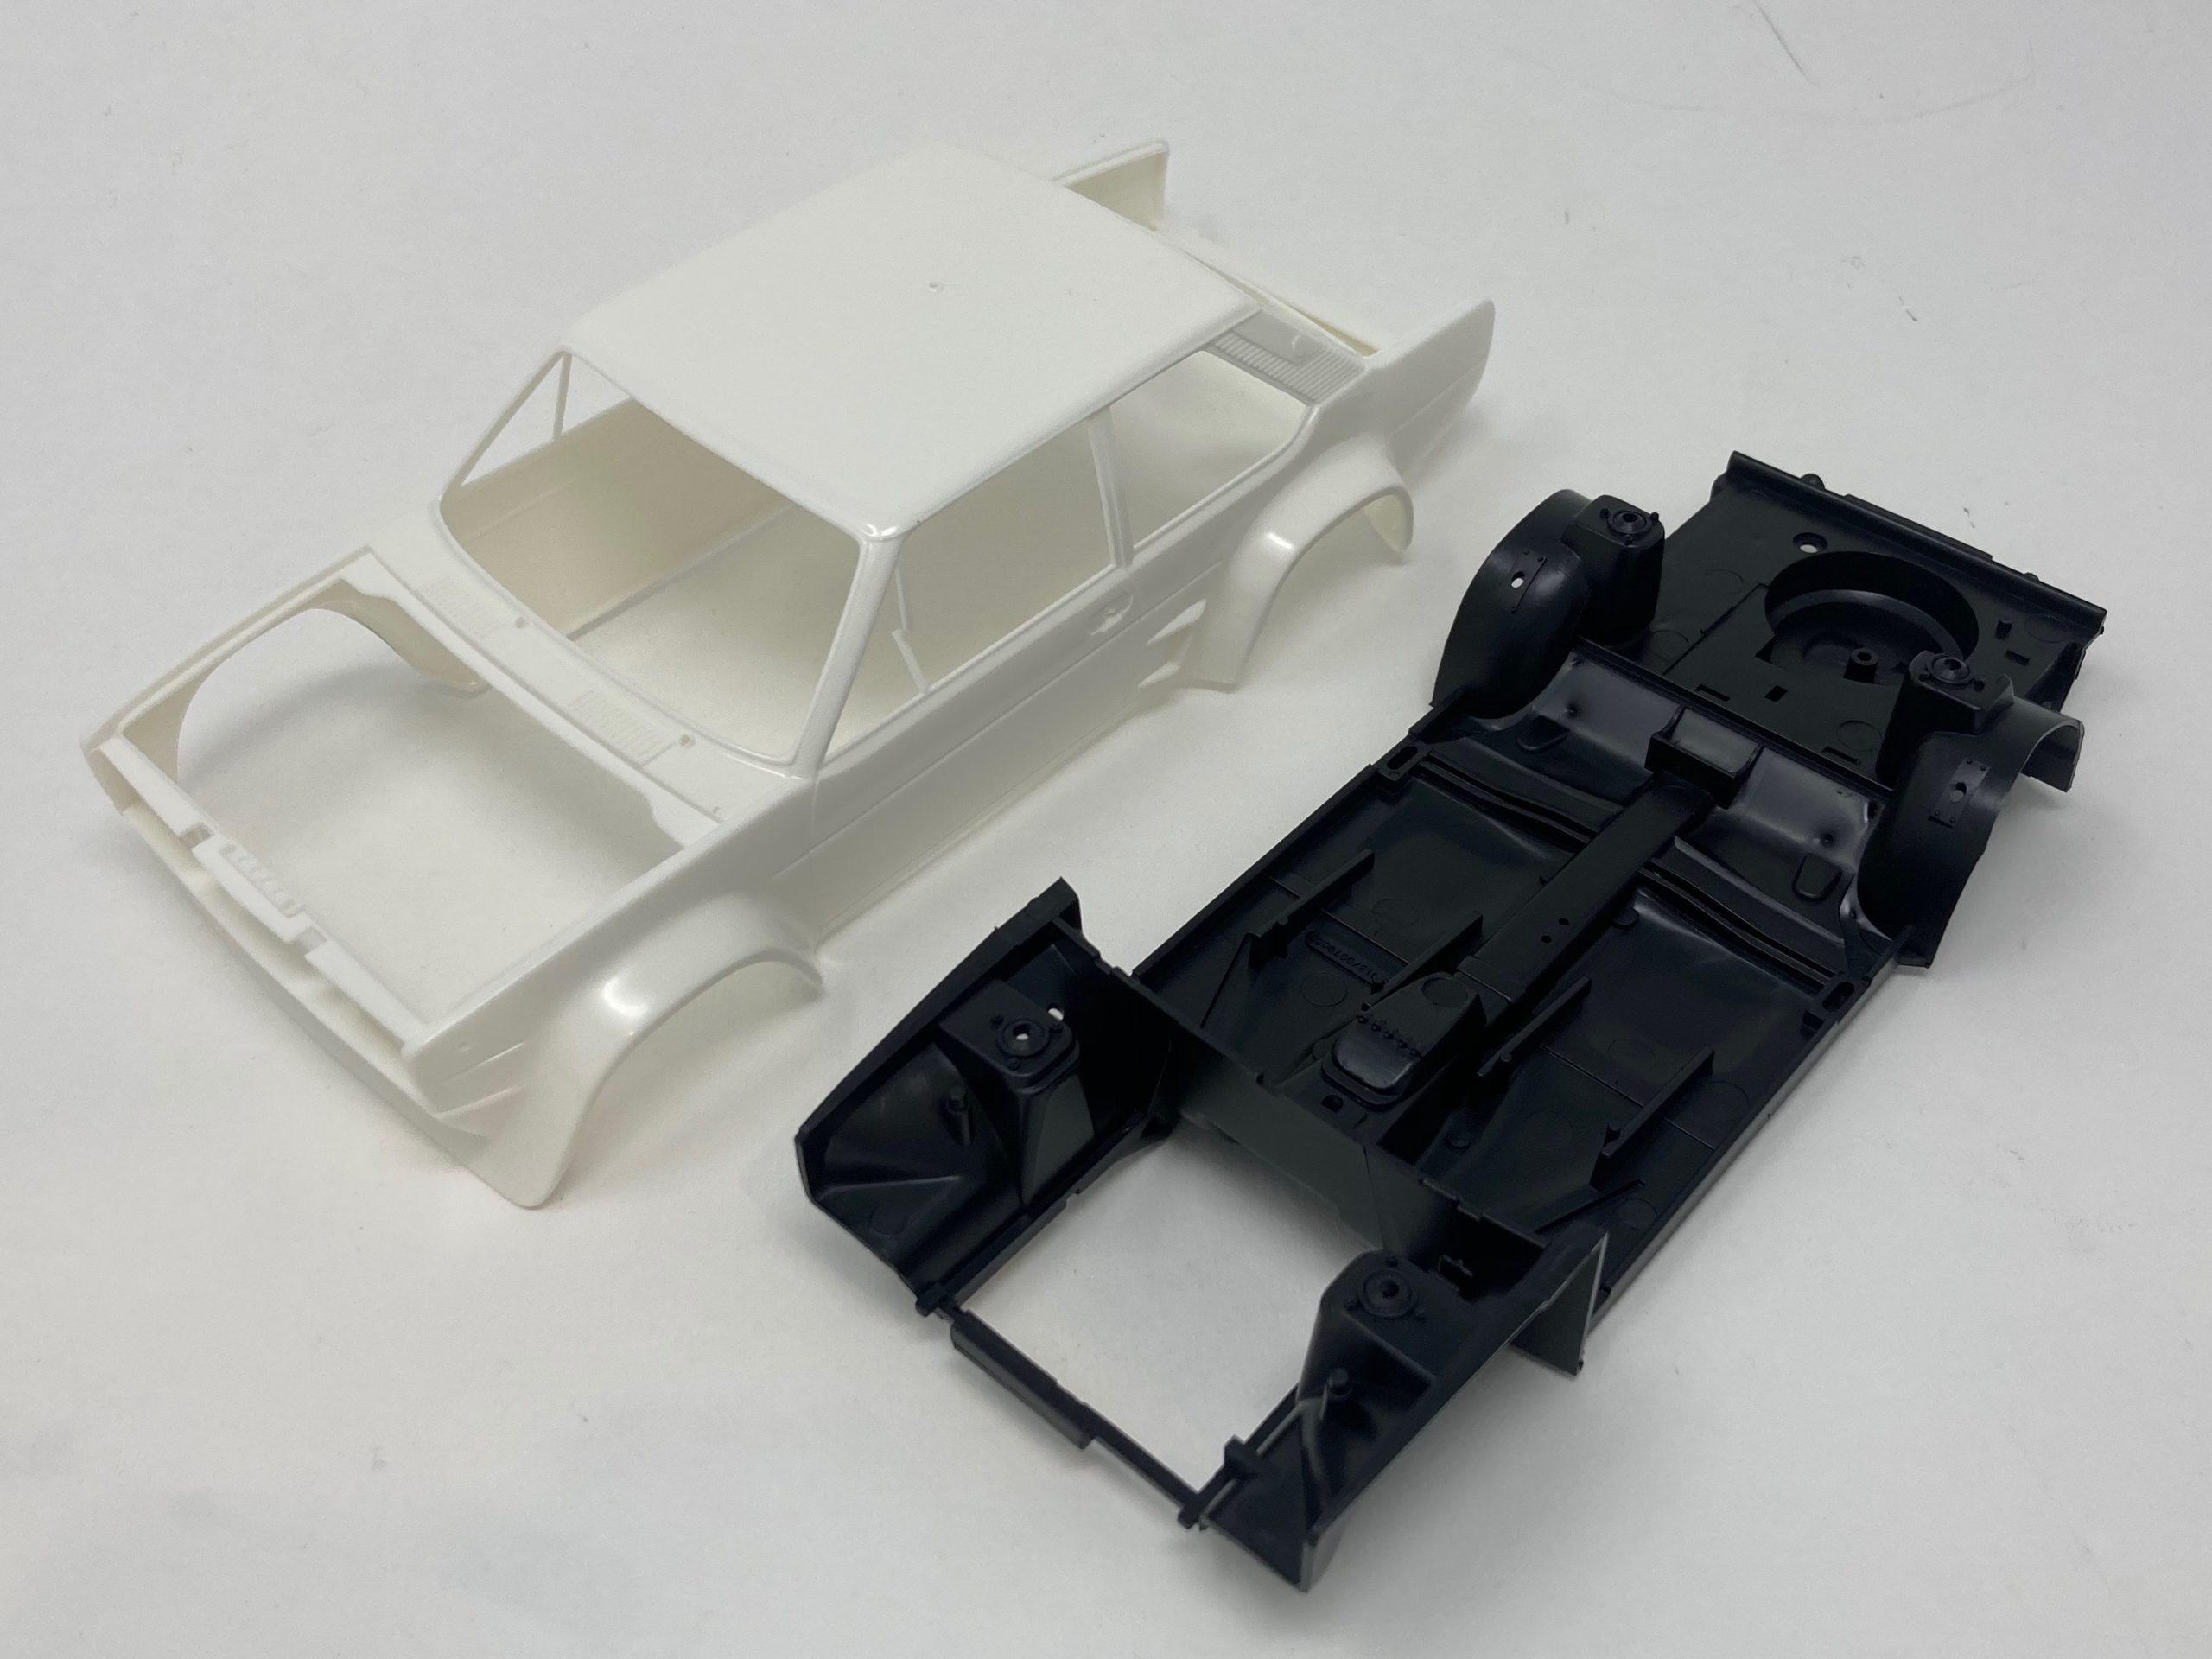
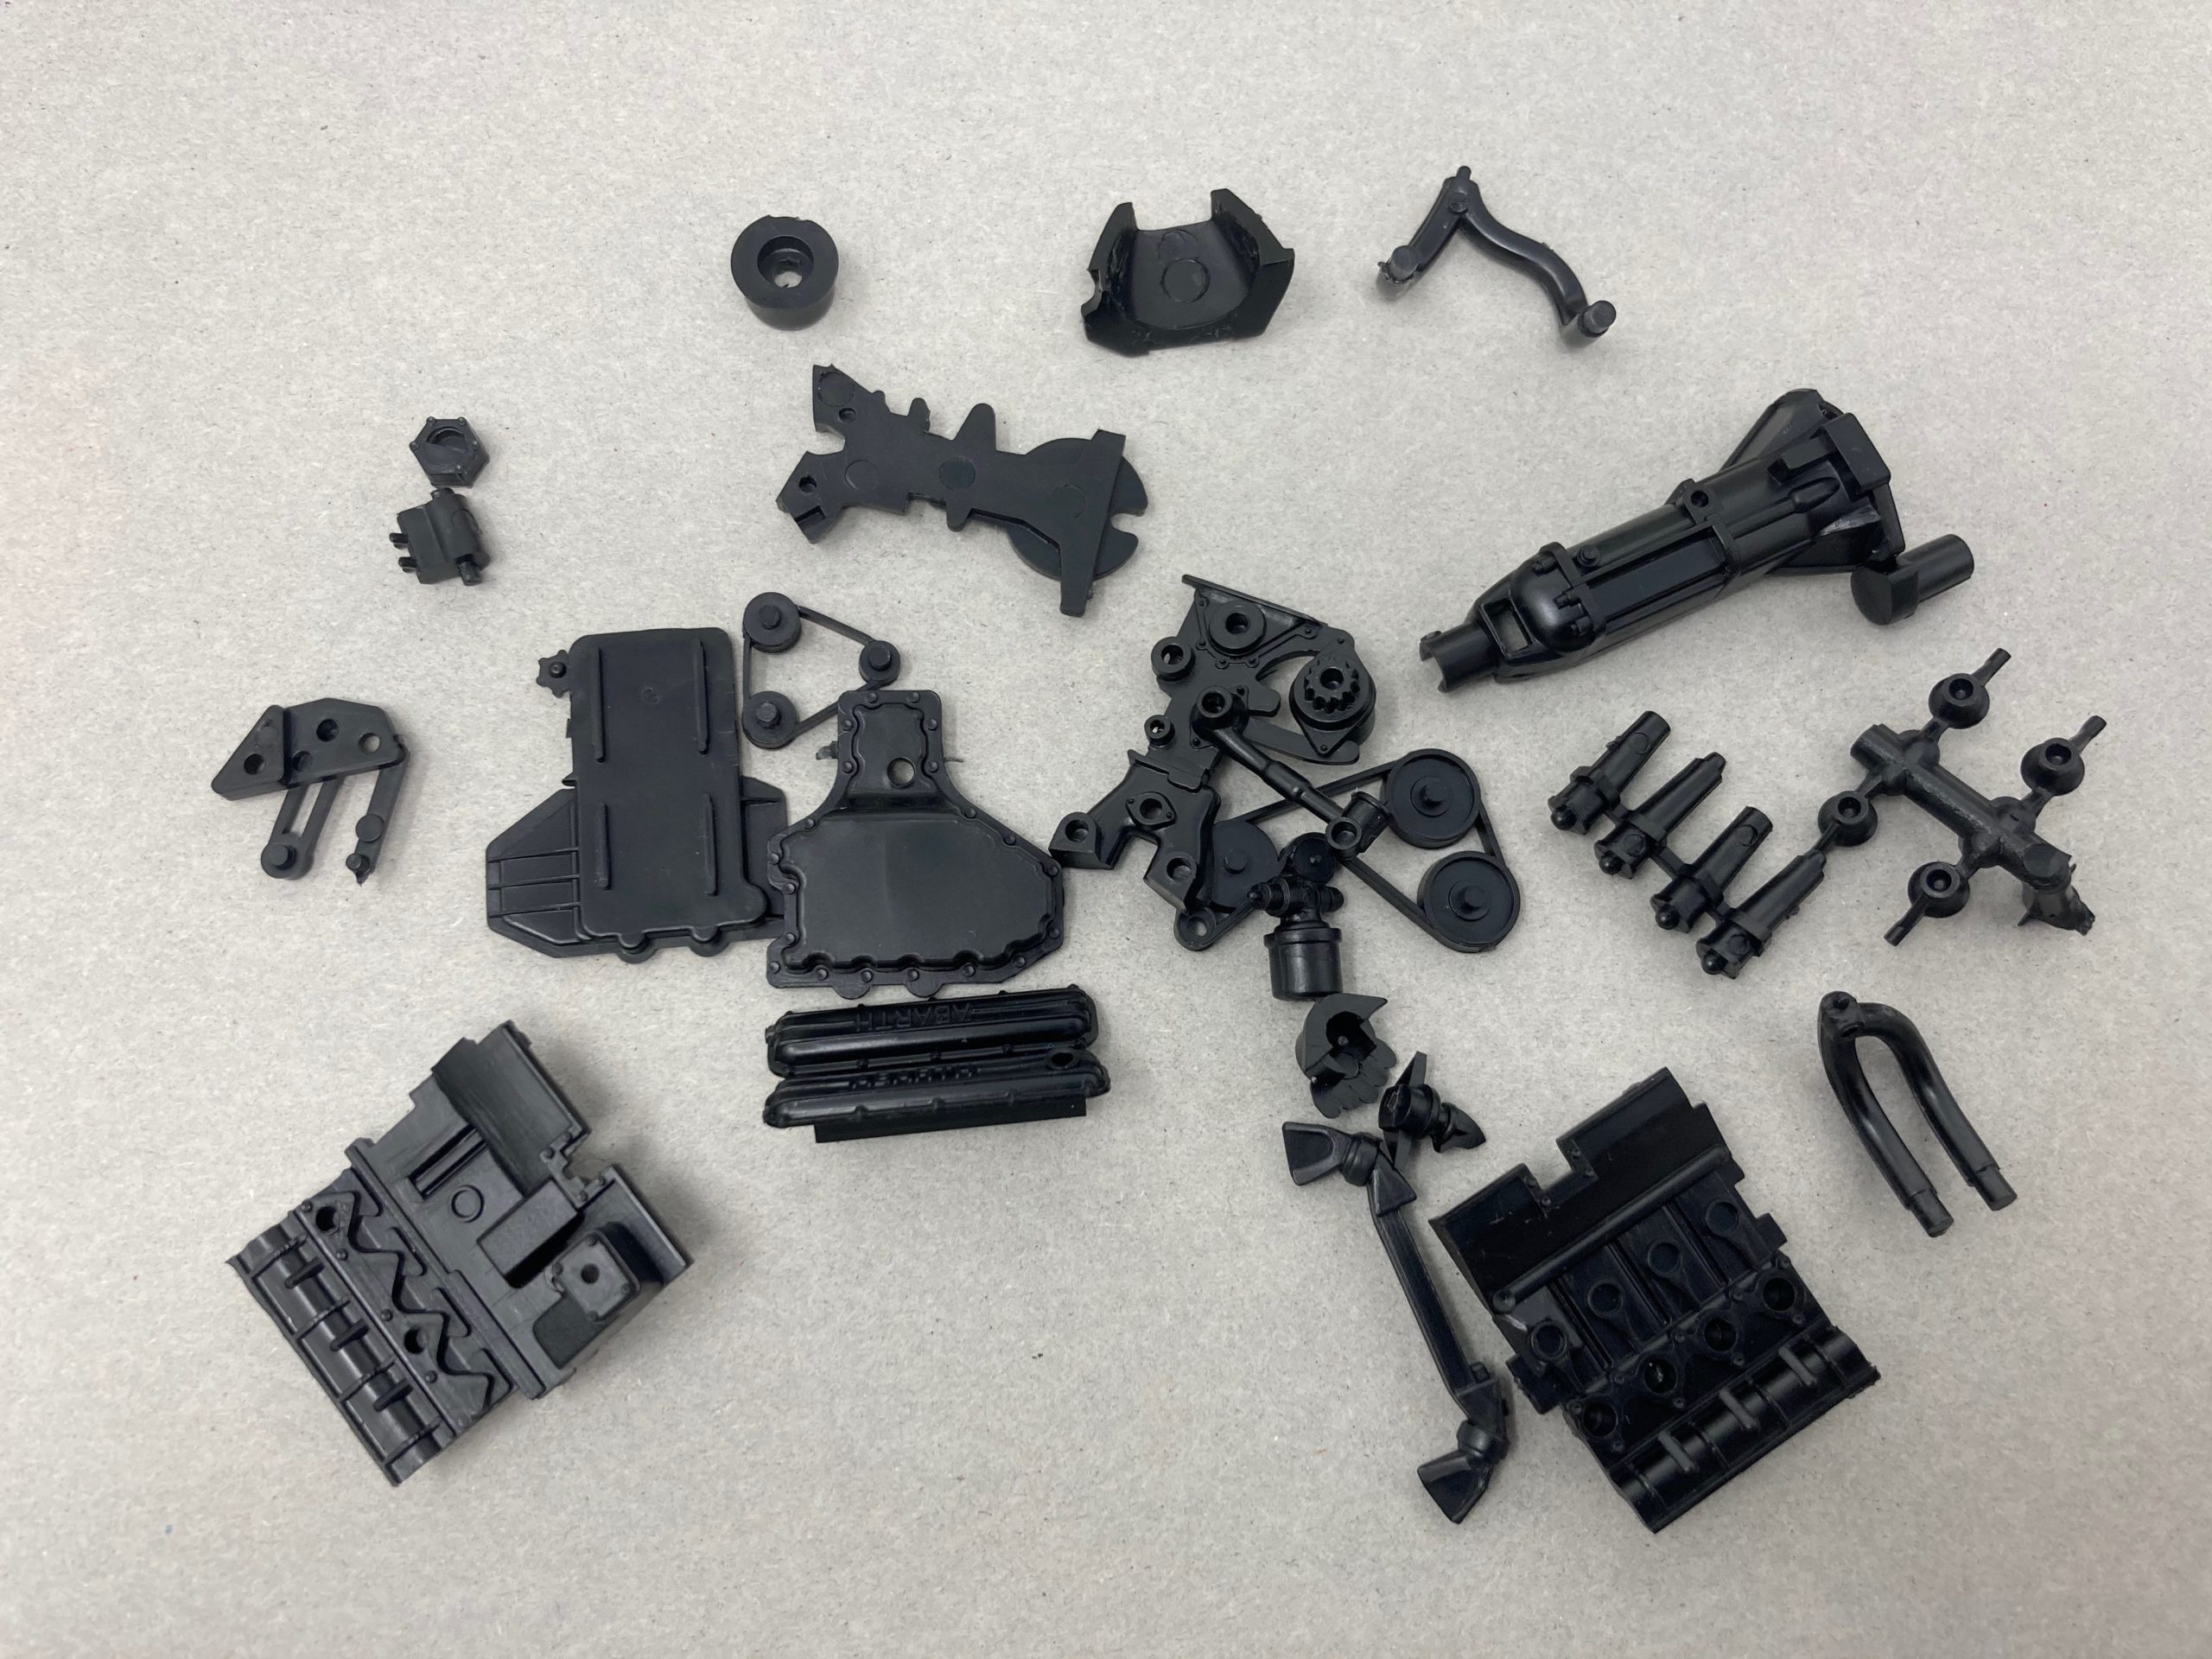
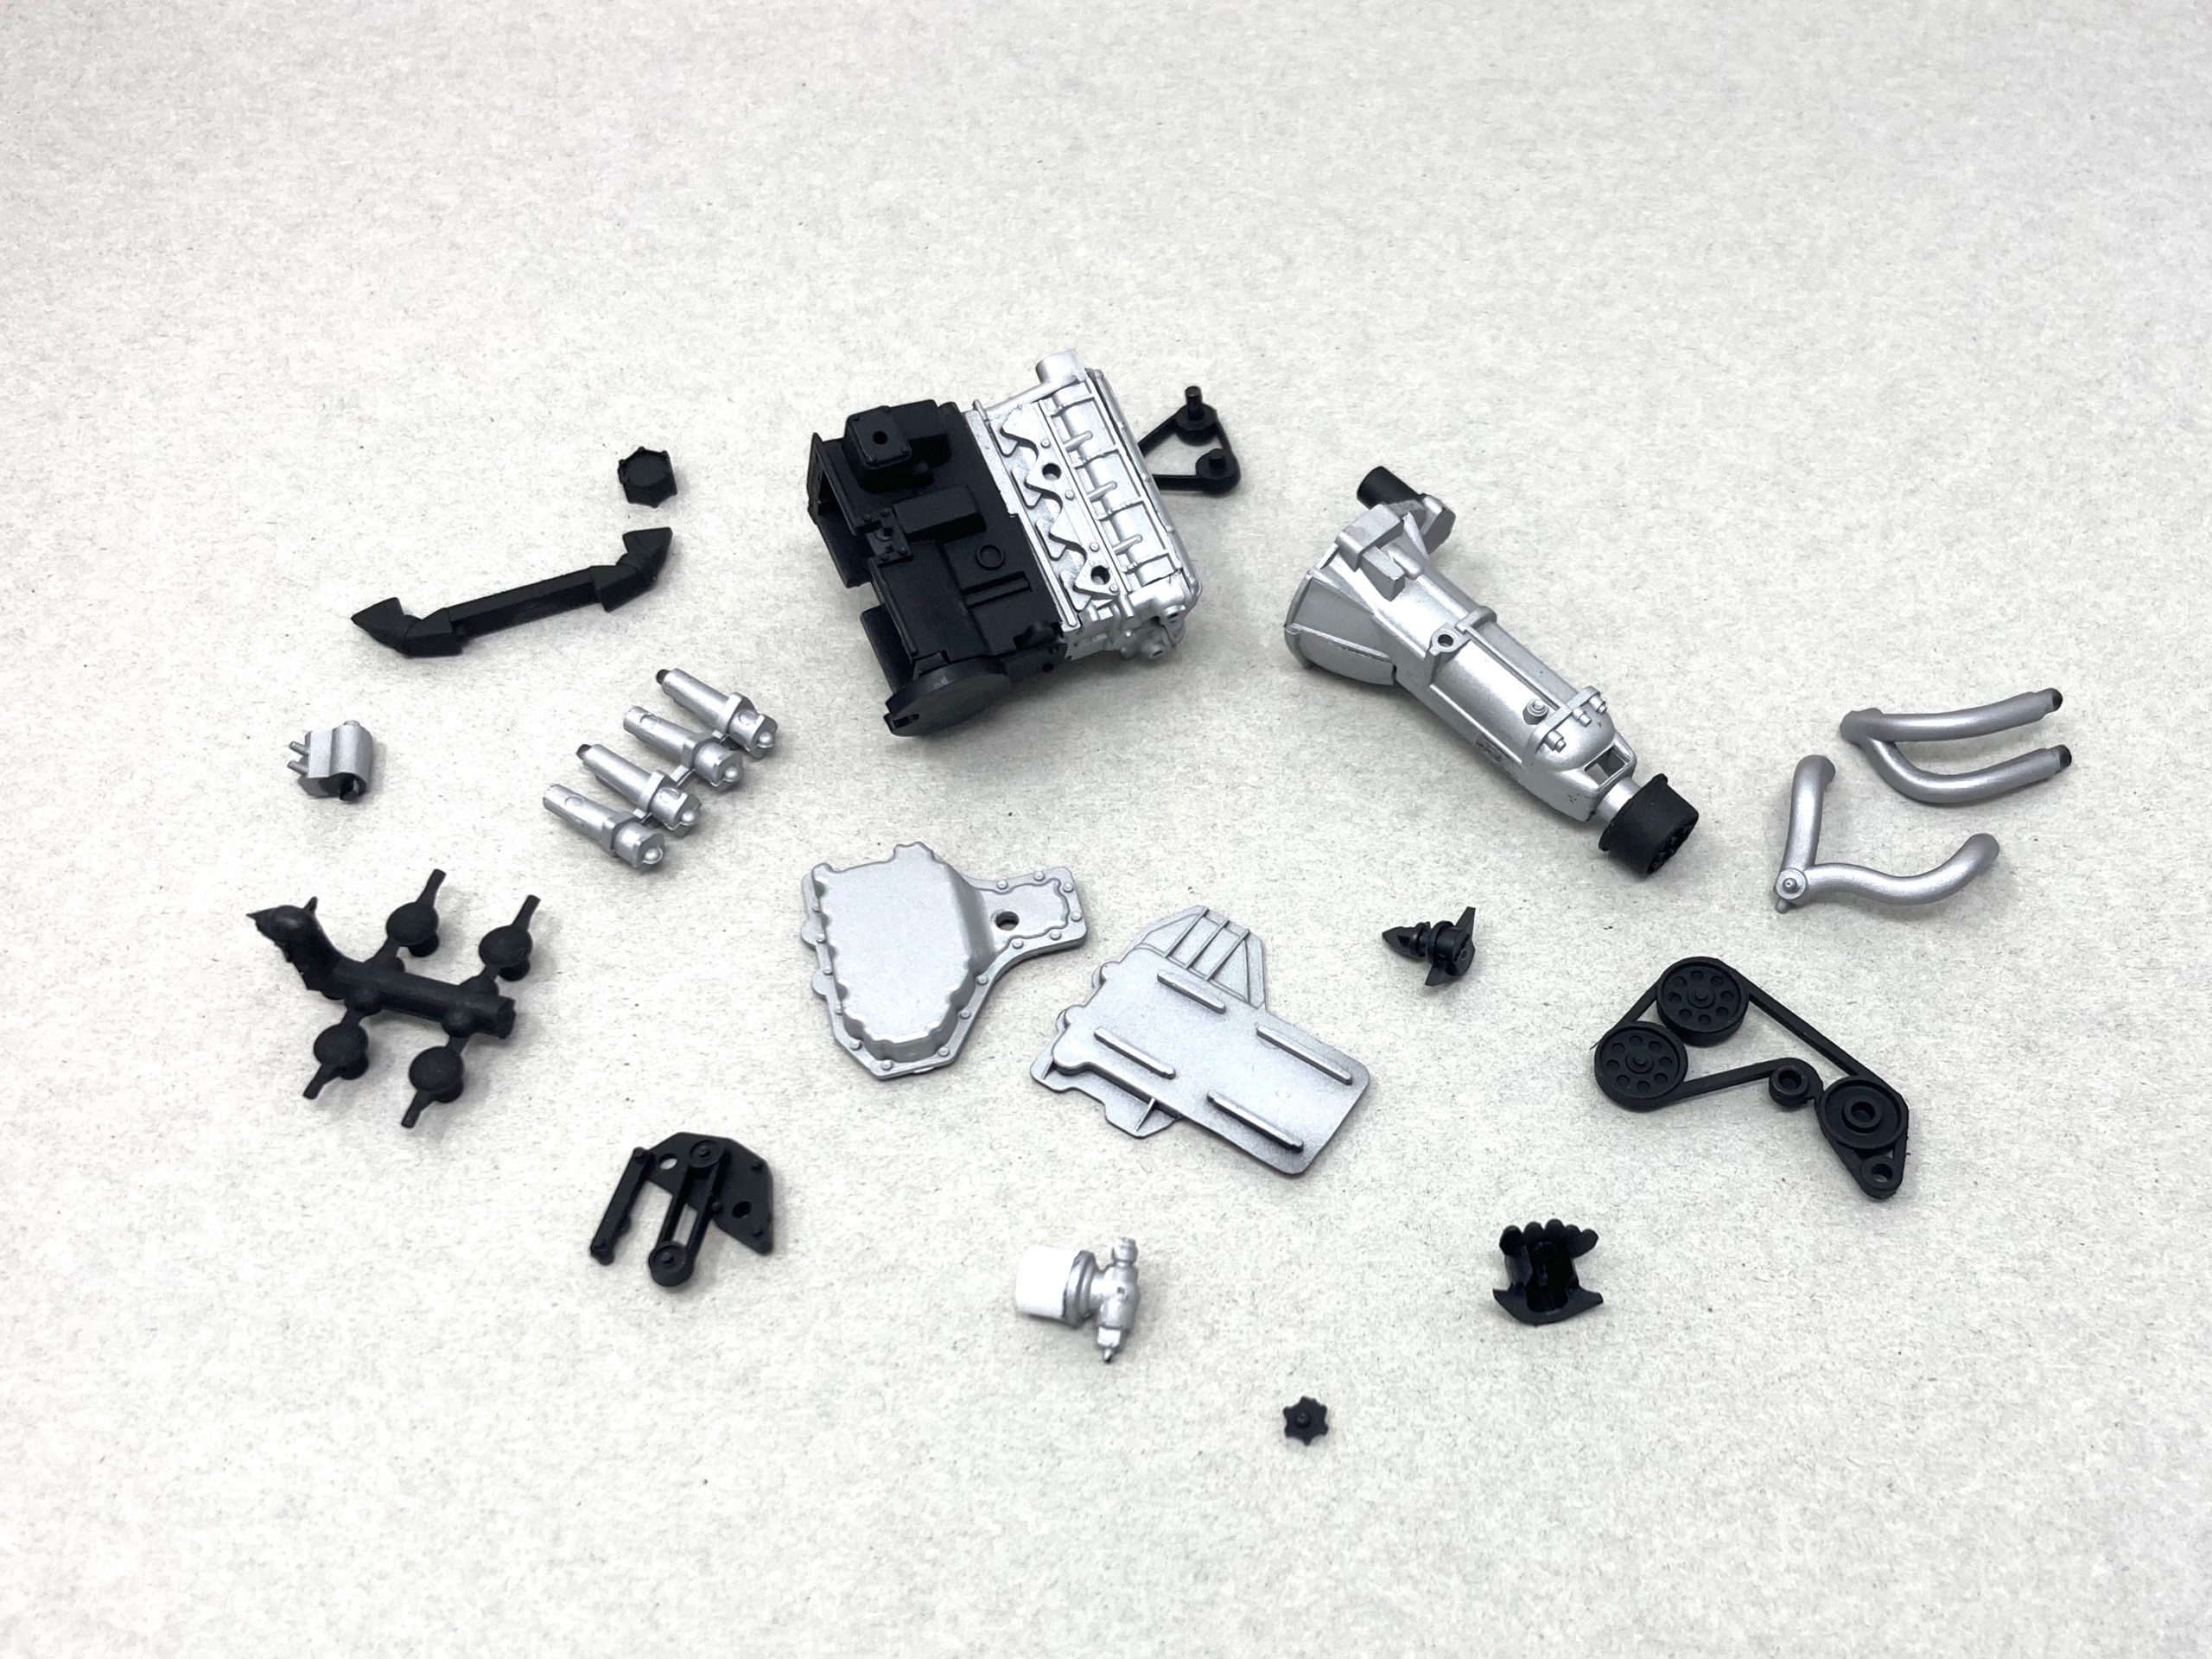
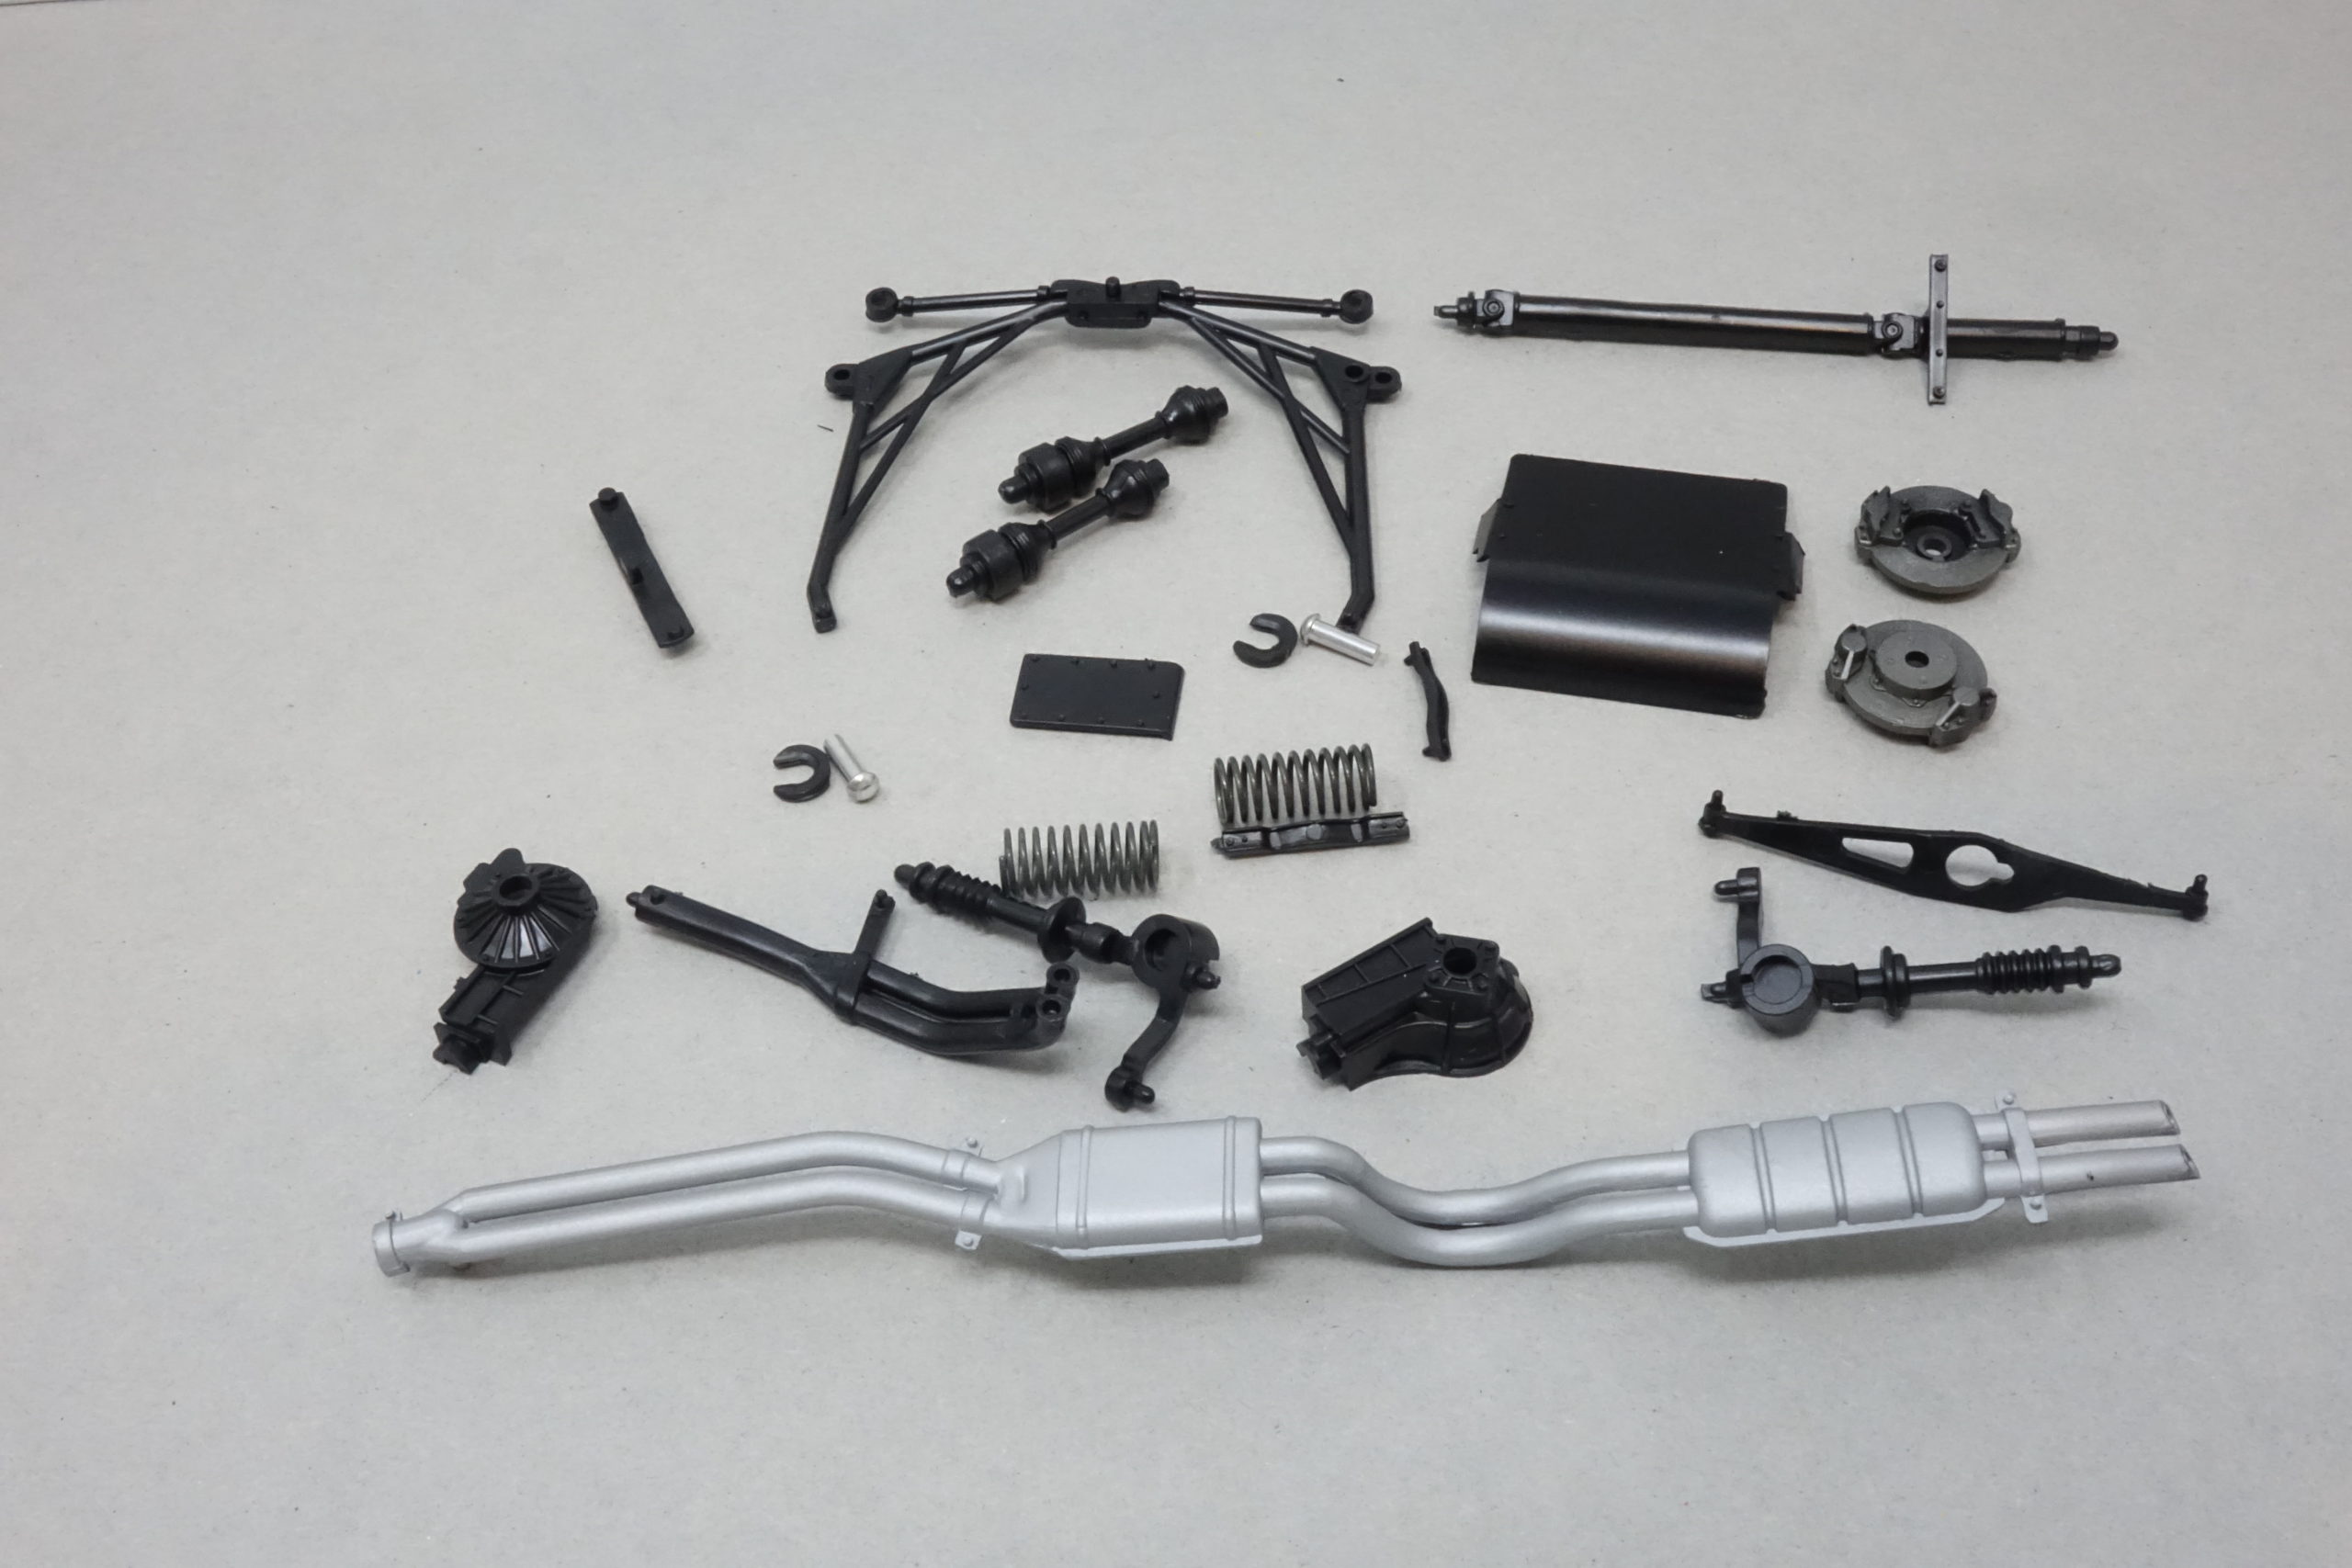
This is what you expect and always get from Tamiya – excellent box graphics ( very useful actually for checking decals and paint scheme), the usual clear and detailed instructions for step by step building, additional ‘hints and tips’ sheet and all sprue and other parts separately bagged. The main sprues are moulded in white and black; wheels and head lamp parts in a ‘satin chrome’; beautiful clear parts for window glass and lighting lenses. Additionally we have very realistic rubber tyres with proper tarmac tread pattern, vinyl tubing for plug leads, metal springs and steering tie rod, metal ‘stub axles’, excellent quality decals and a set of printed, cut out masks for the paint scheme.


The Build
I more or less followed the step by step instructions in sequence – certainly for the first half of the build. As the build progressed I started with the body paintwork in order to allow time between different colour coats for drying – and all the masking that was needed as I got closer to final assembly
I used Tamiya Lacquer Paints exclusively in this build and Zap-a-Gap medium CA adhesive. I try to airbrush all parts and keep brush painting to a minimum. Tamiya LP is excellent for airbrushing and covers so well with a great finish – but I do find that it doesn’t behave well for brushing at all.
It’s worth mentioning here that in the suggested paint colour table in the instructions there is no reference to Lacquer Paint – so you do your own conversion if using LP.
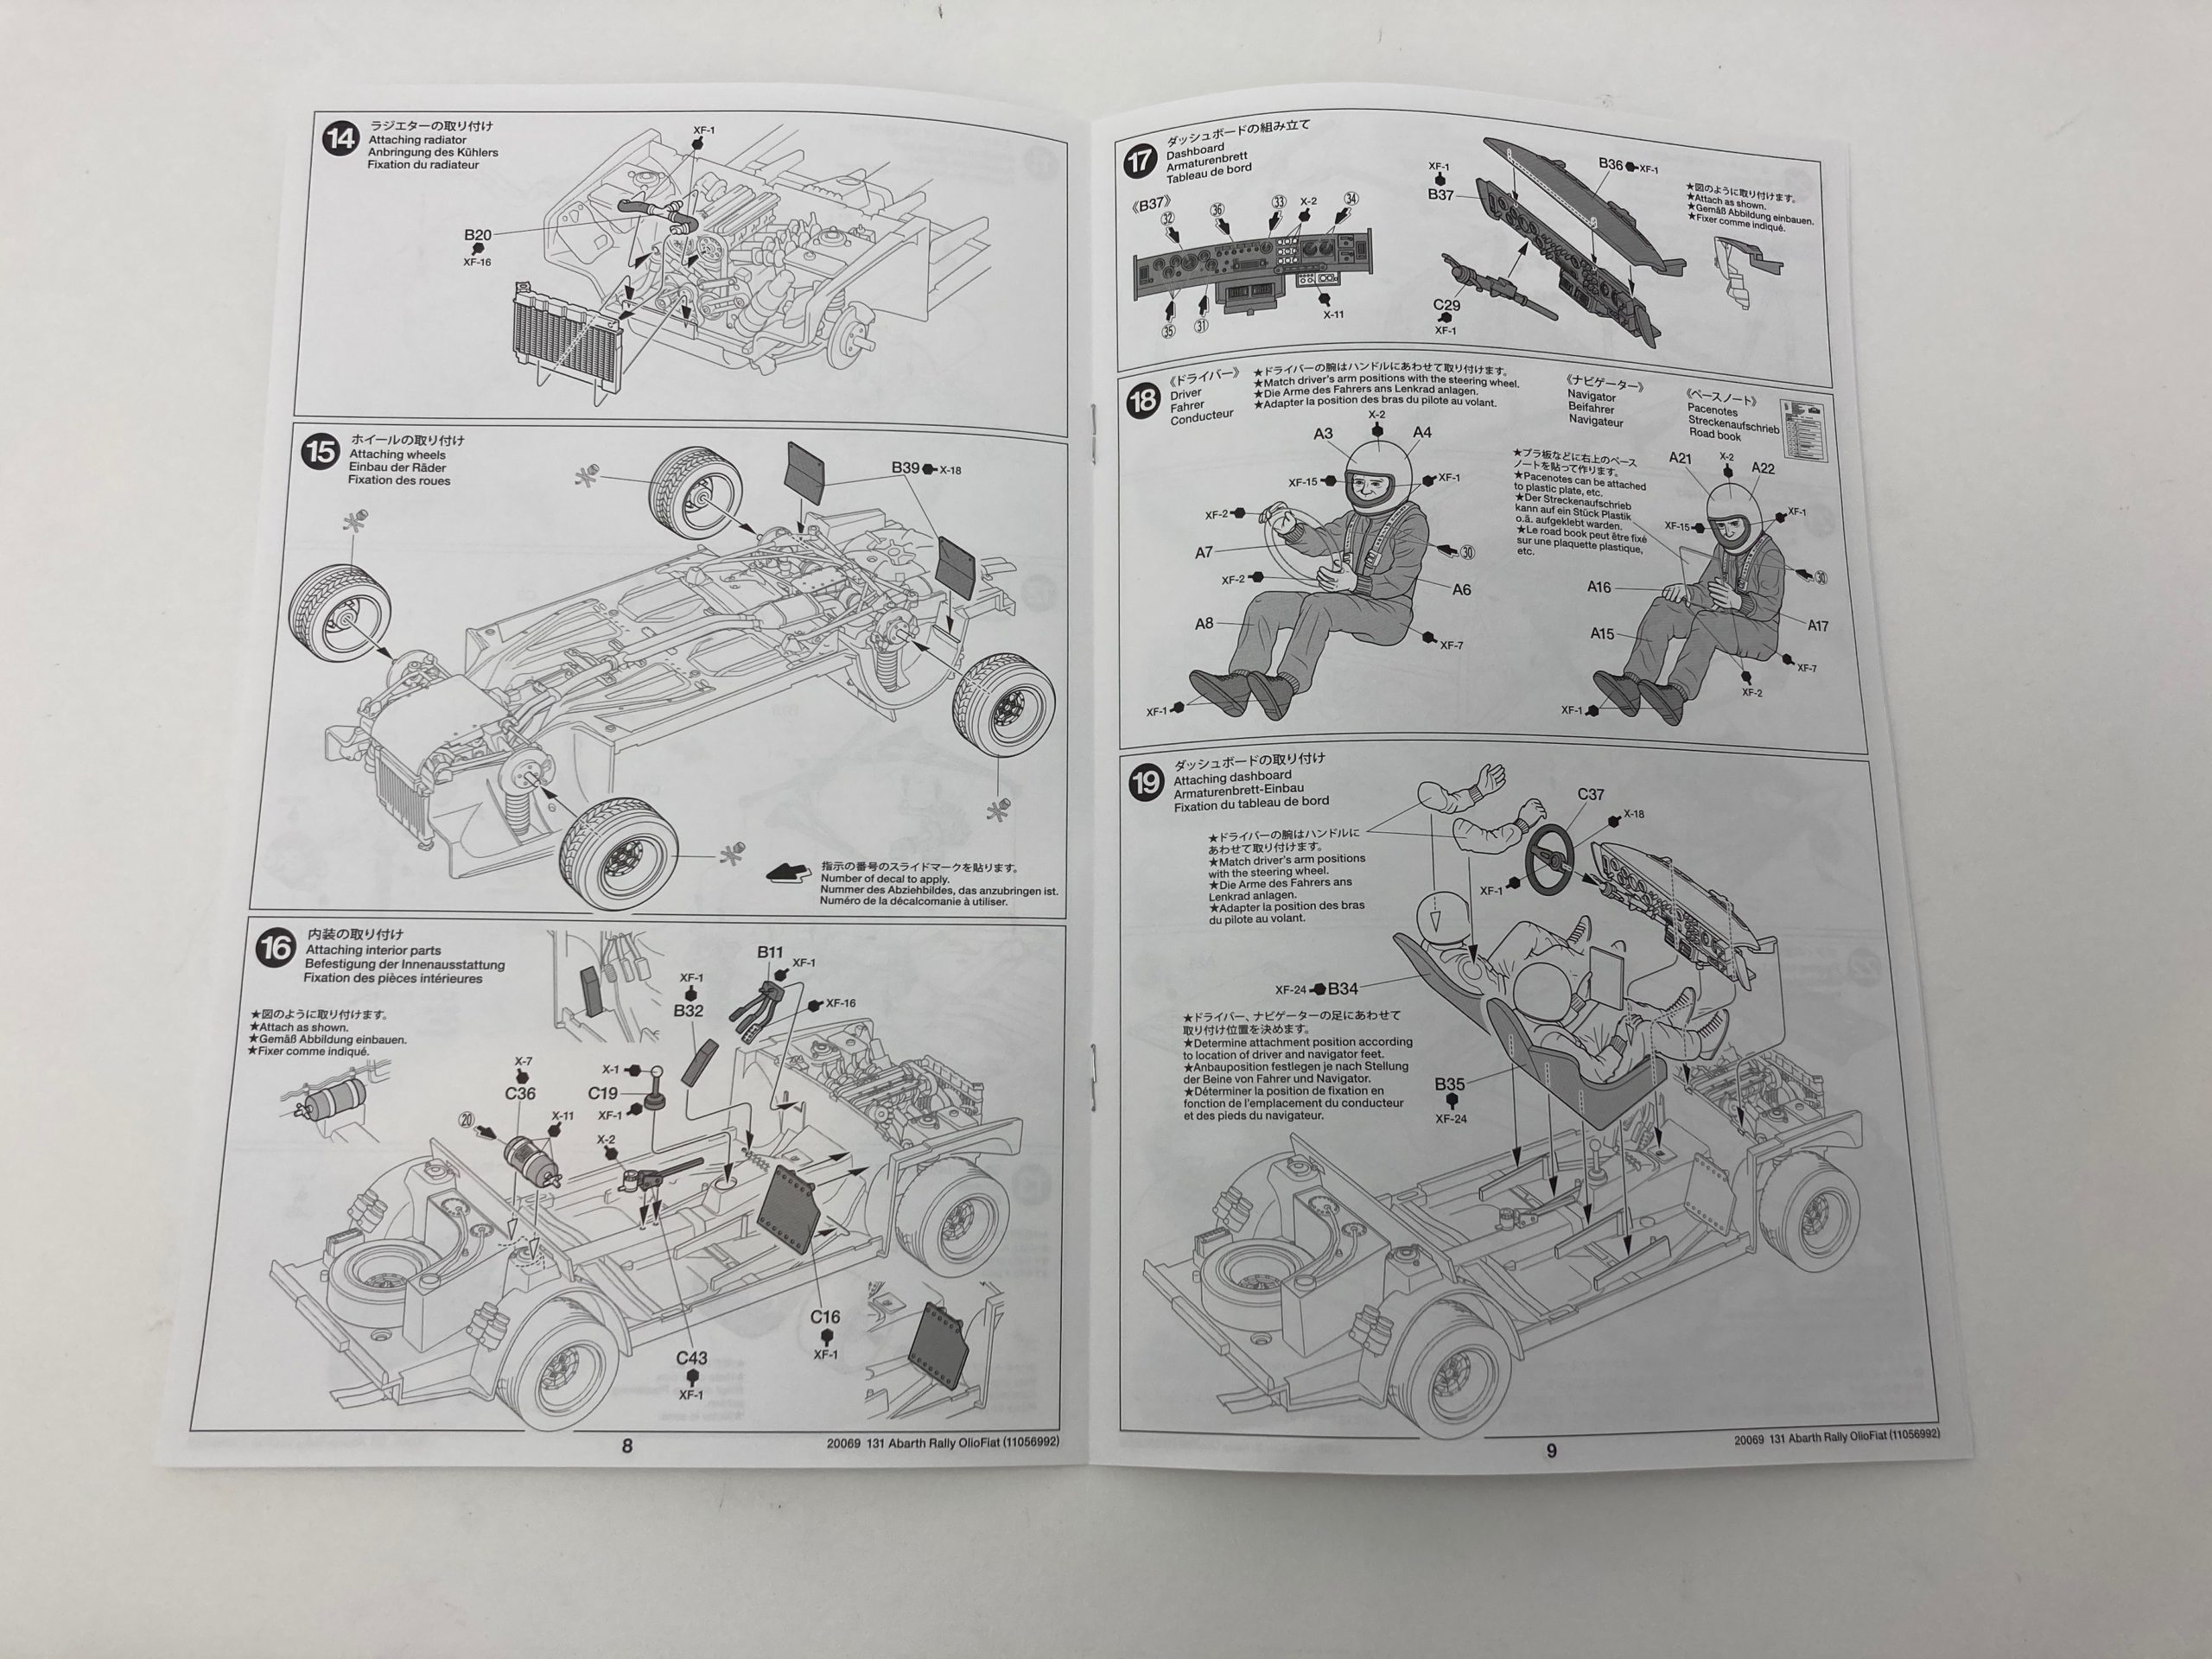
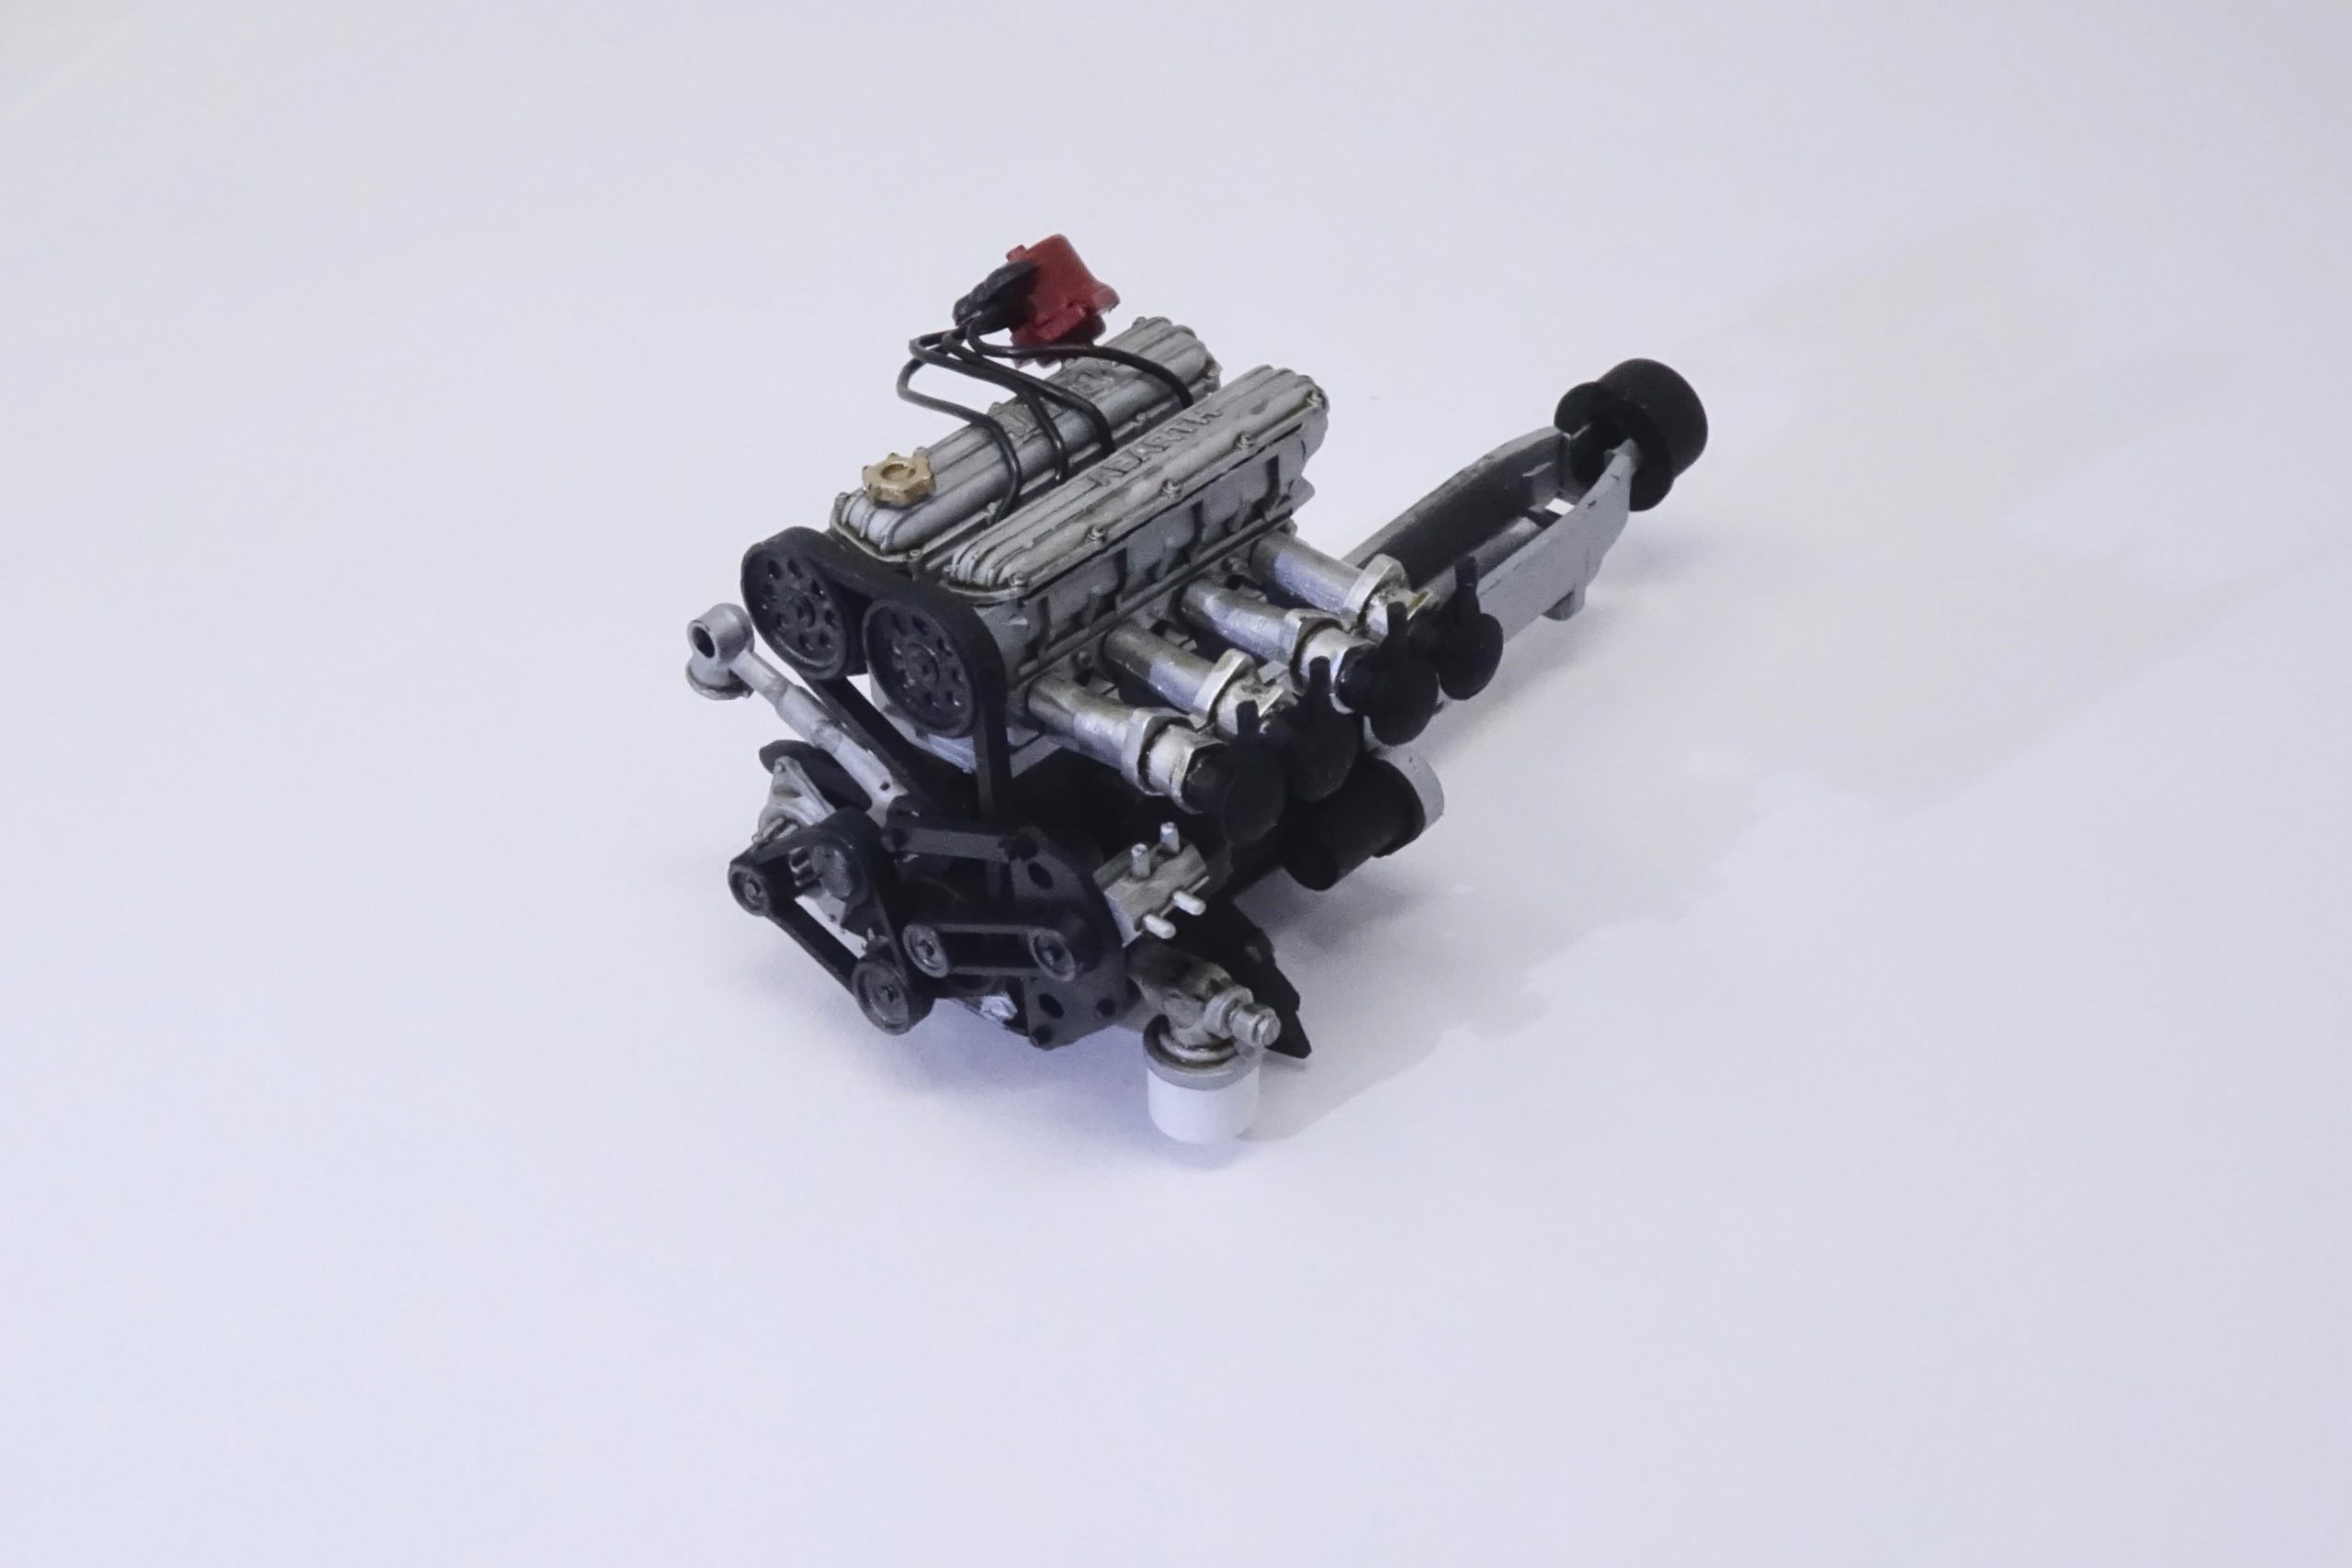
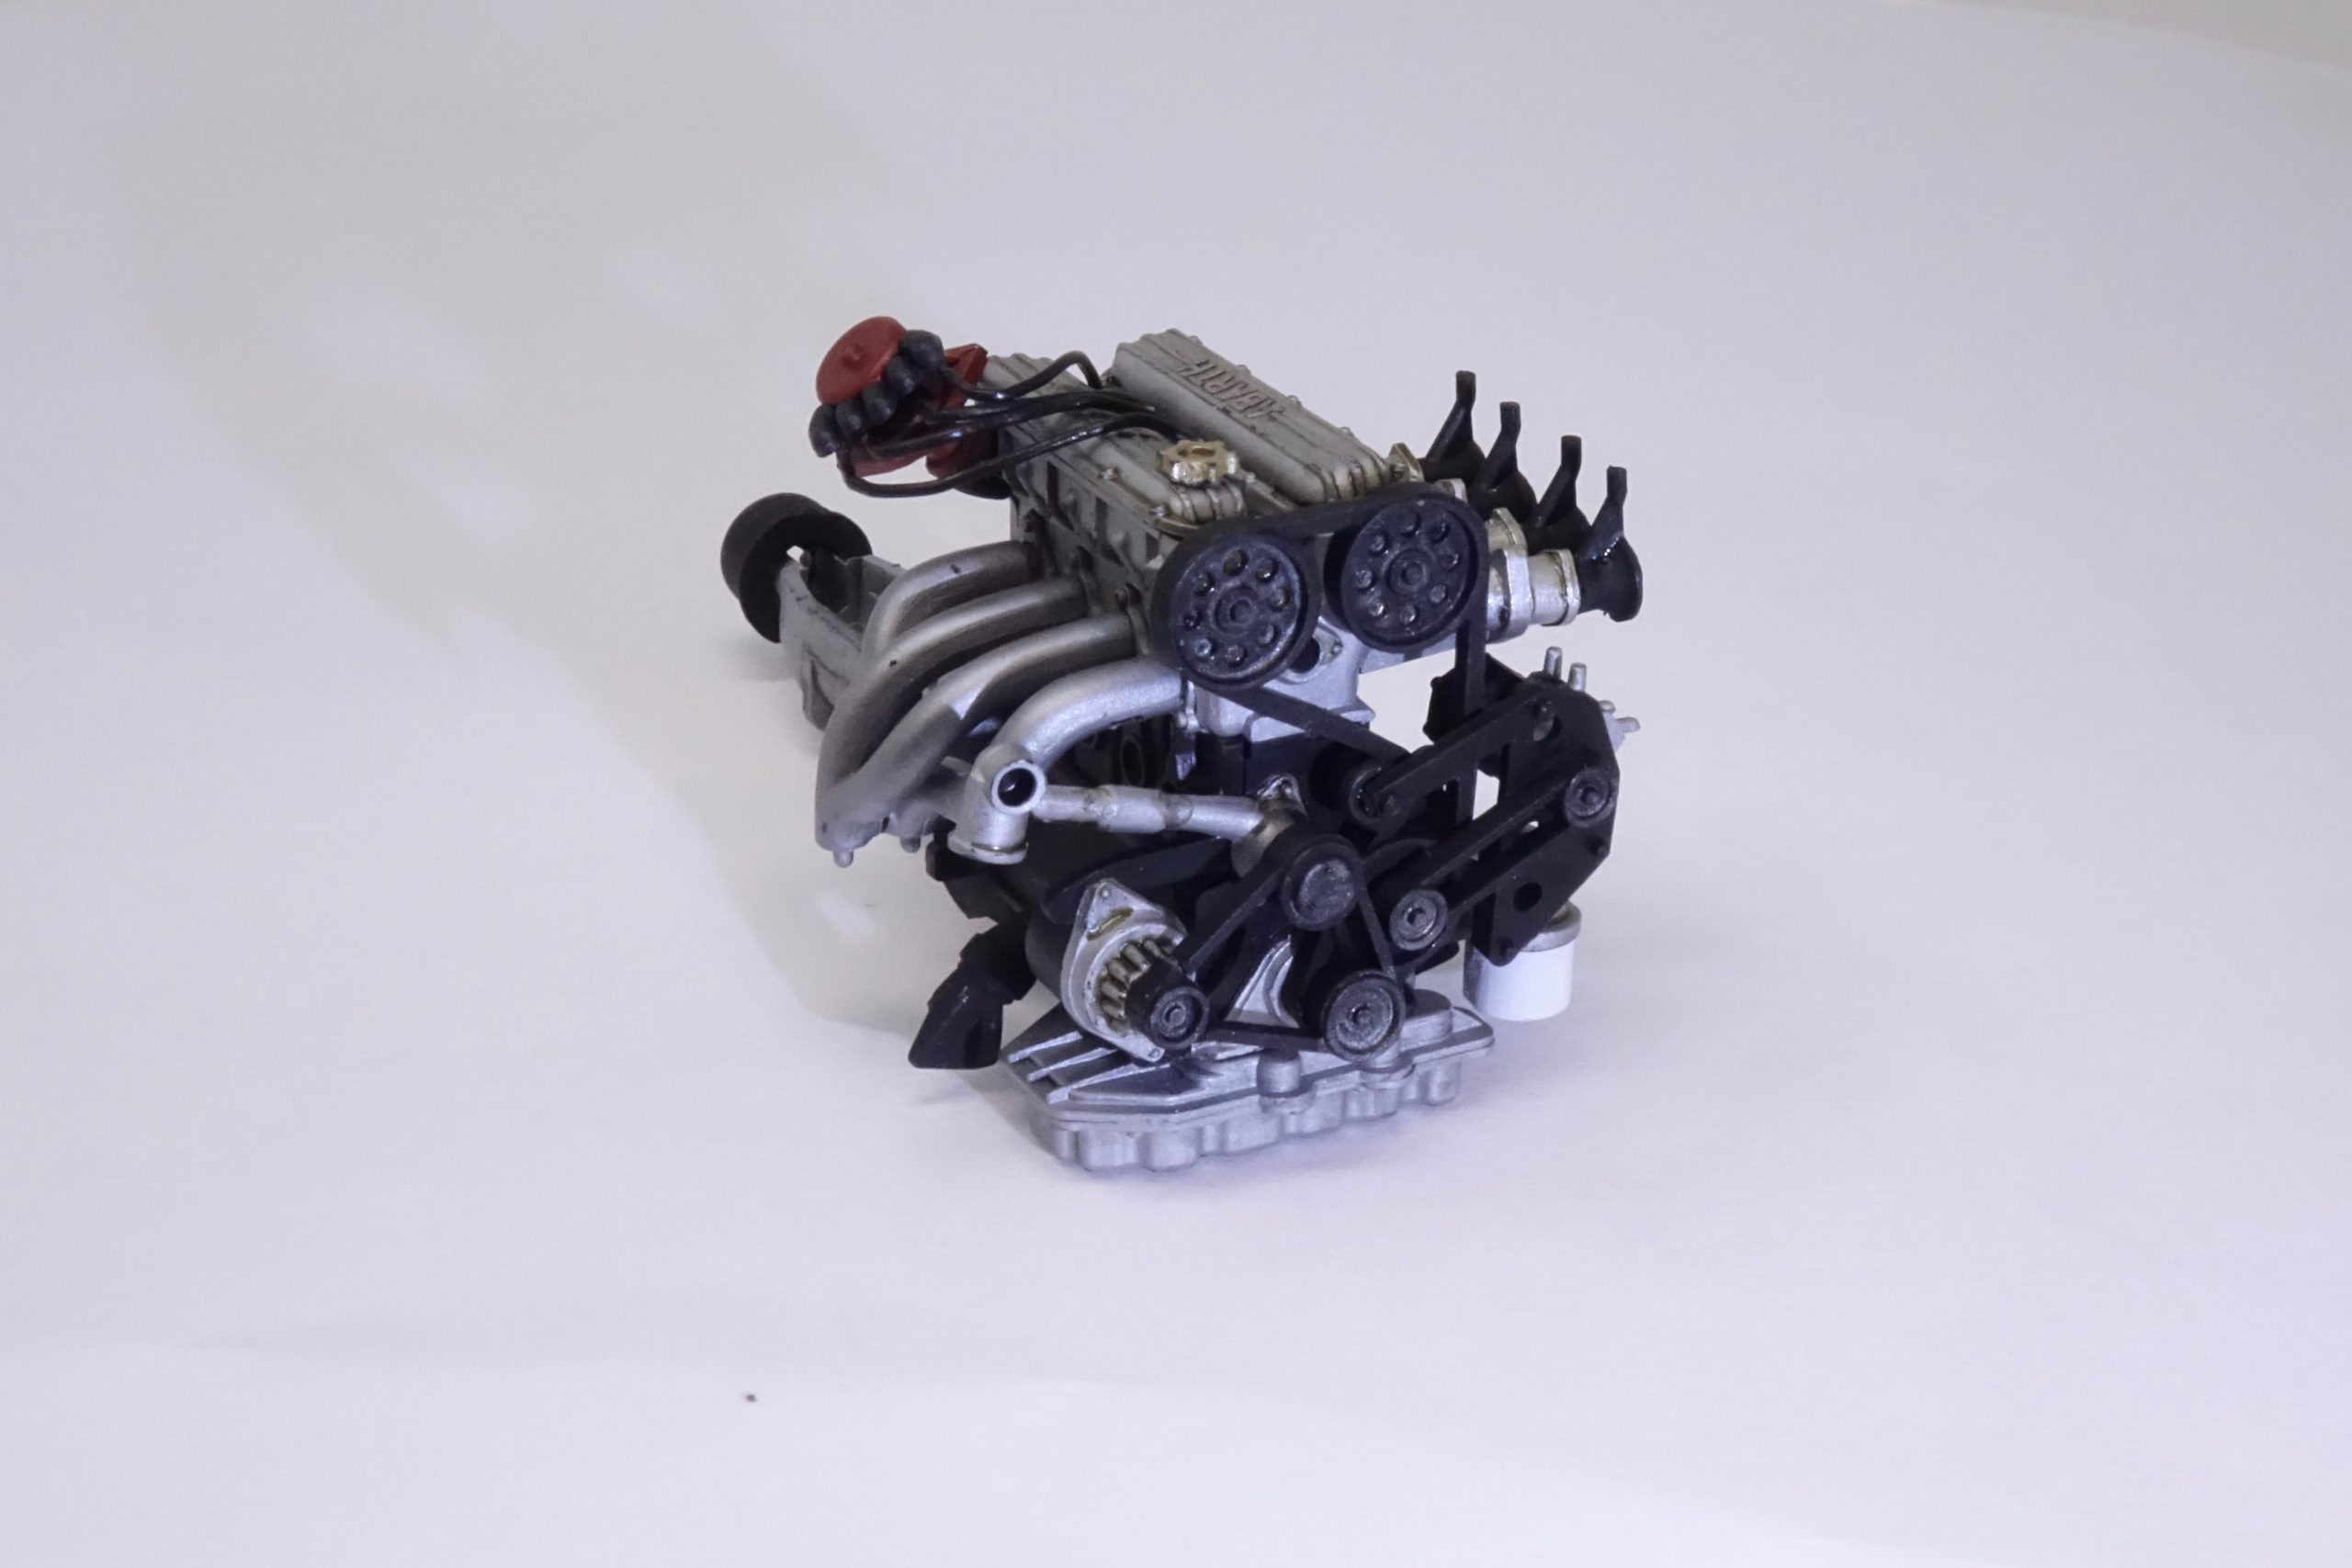
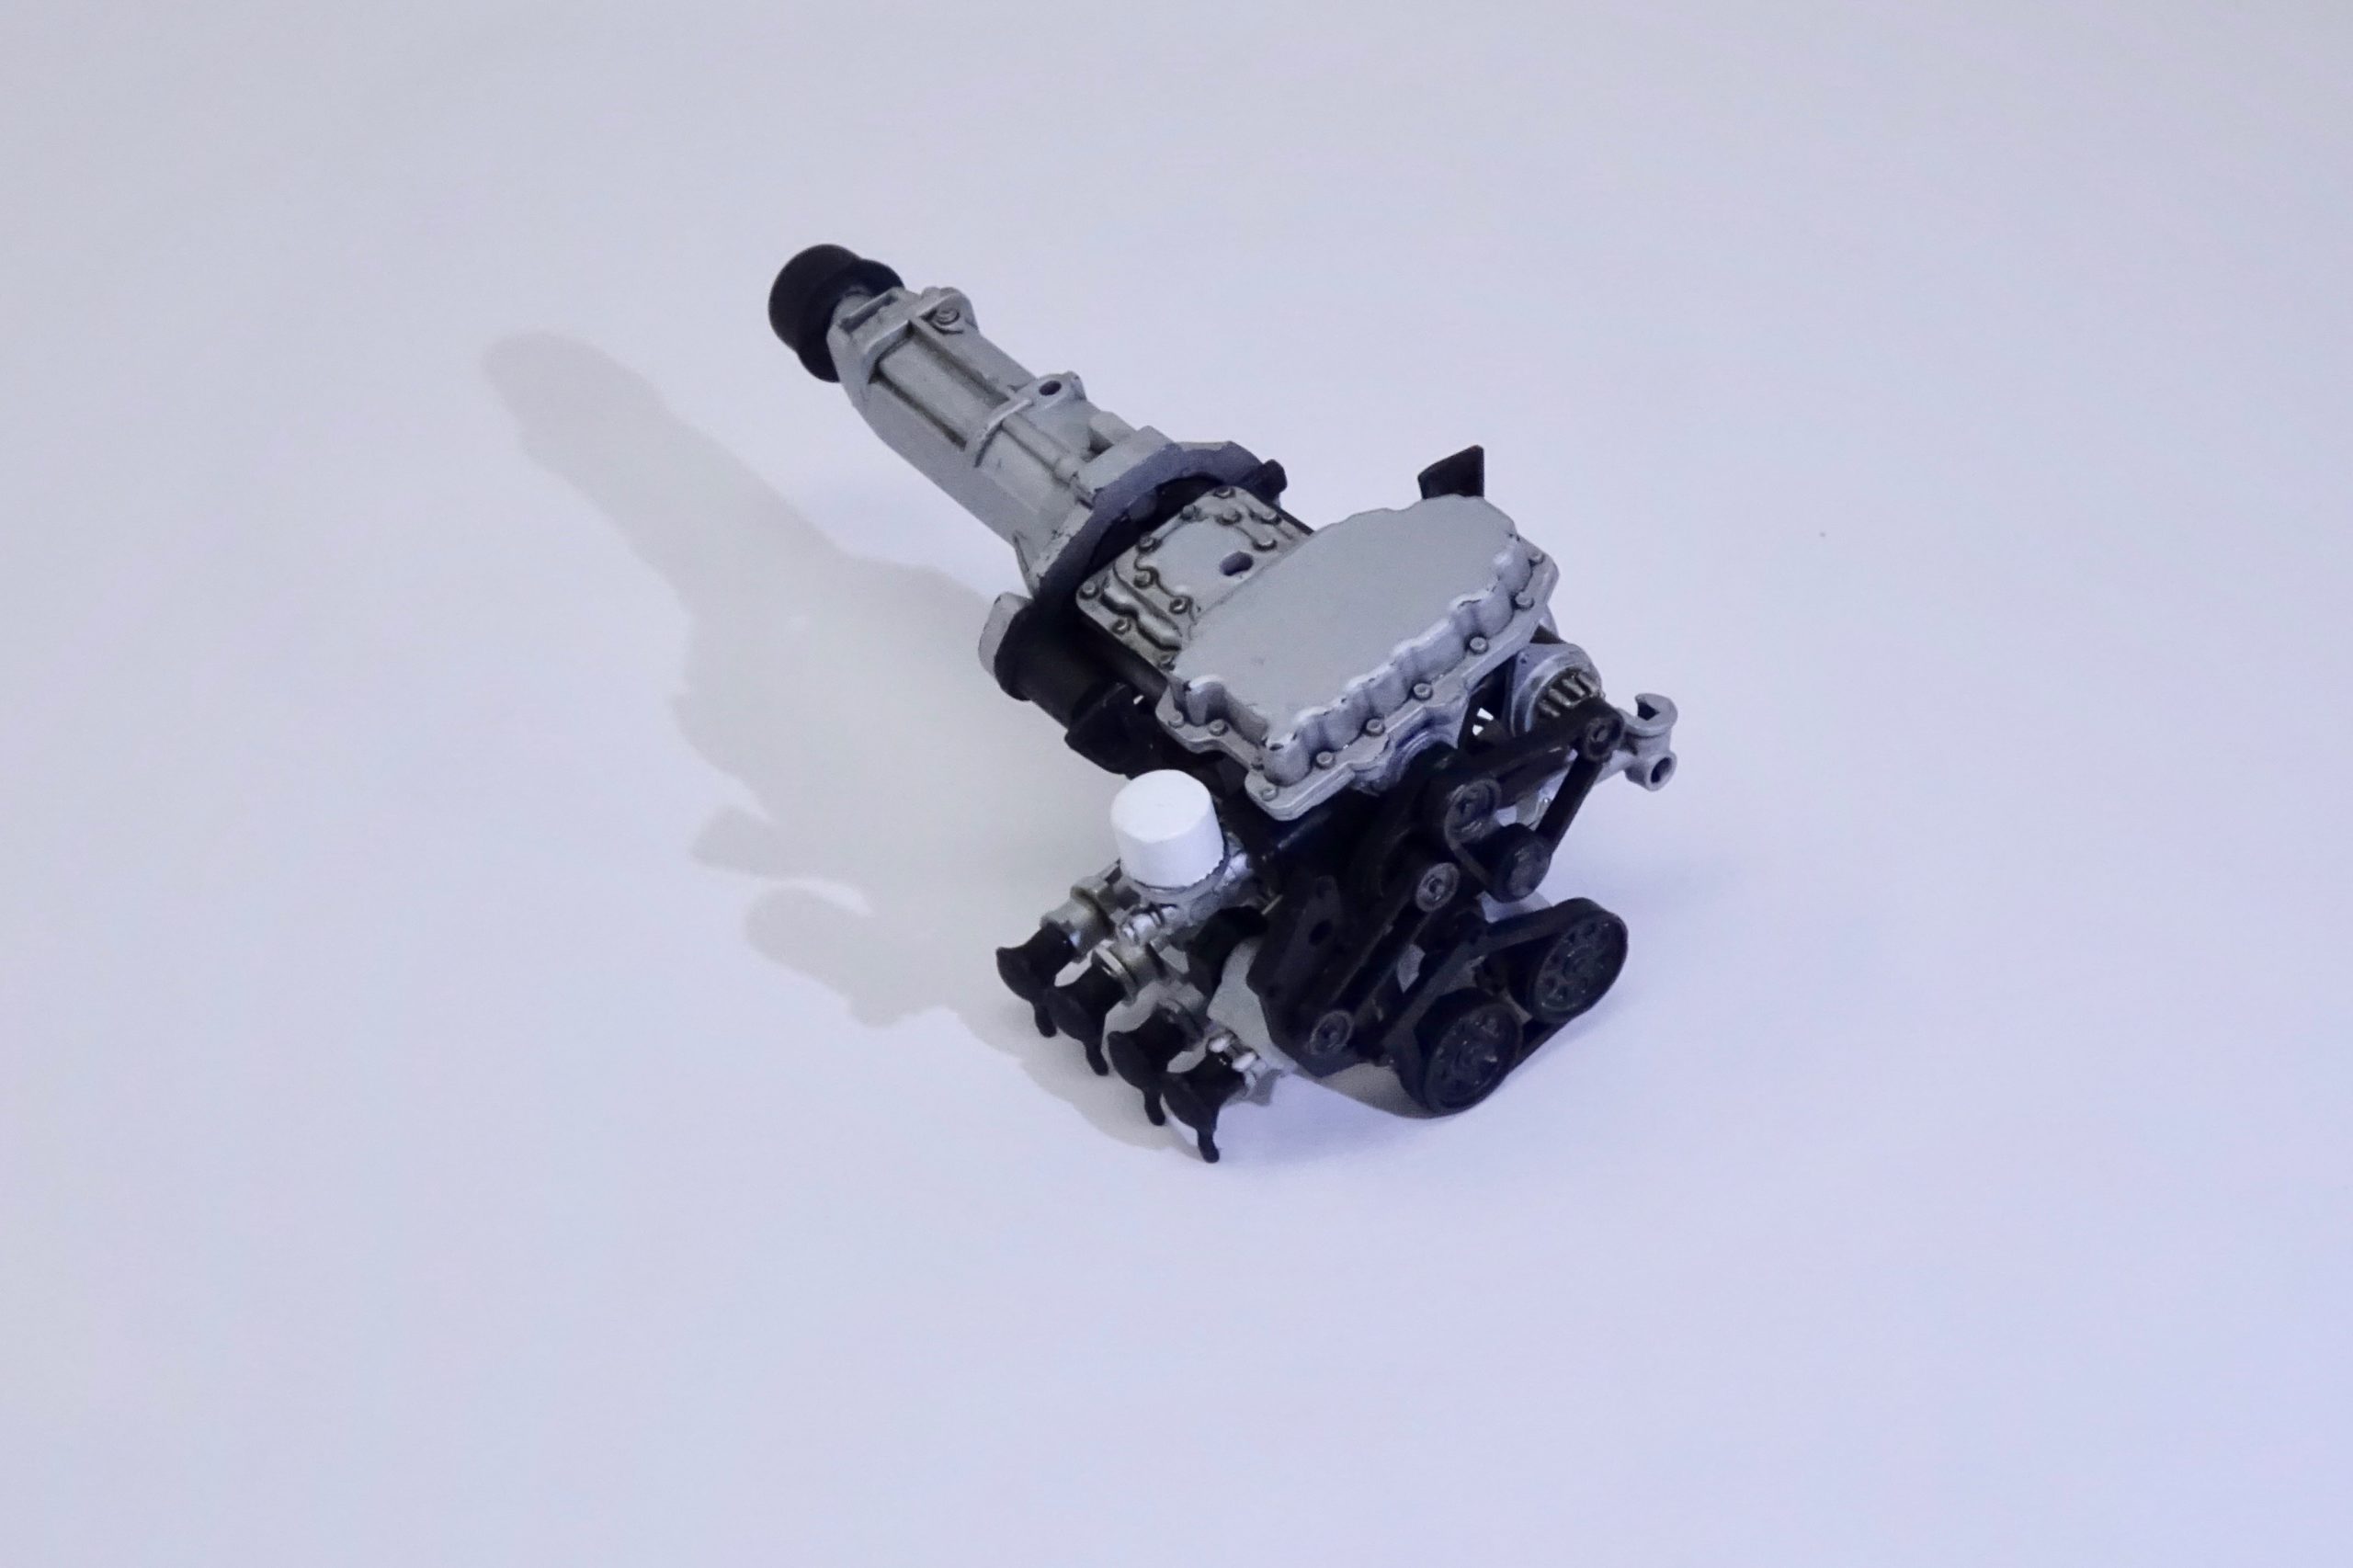
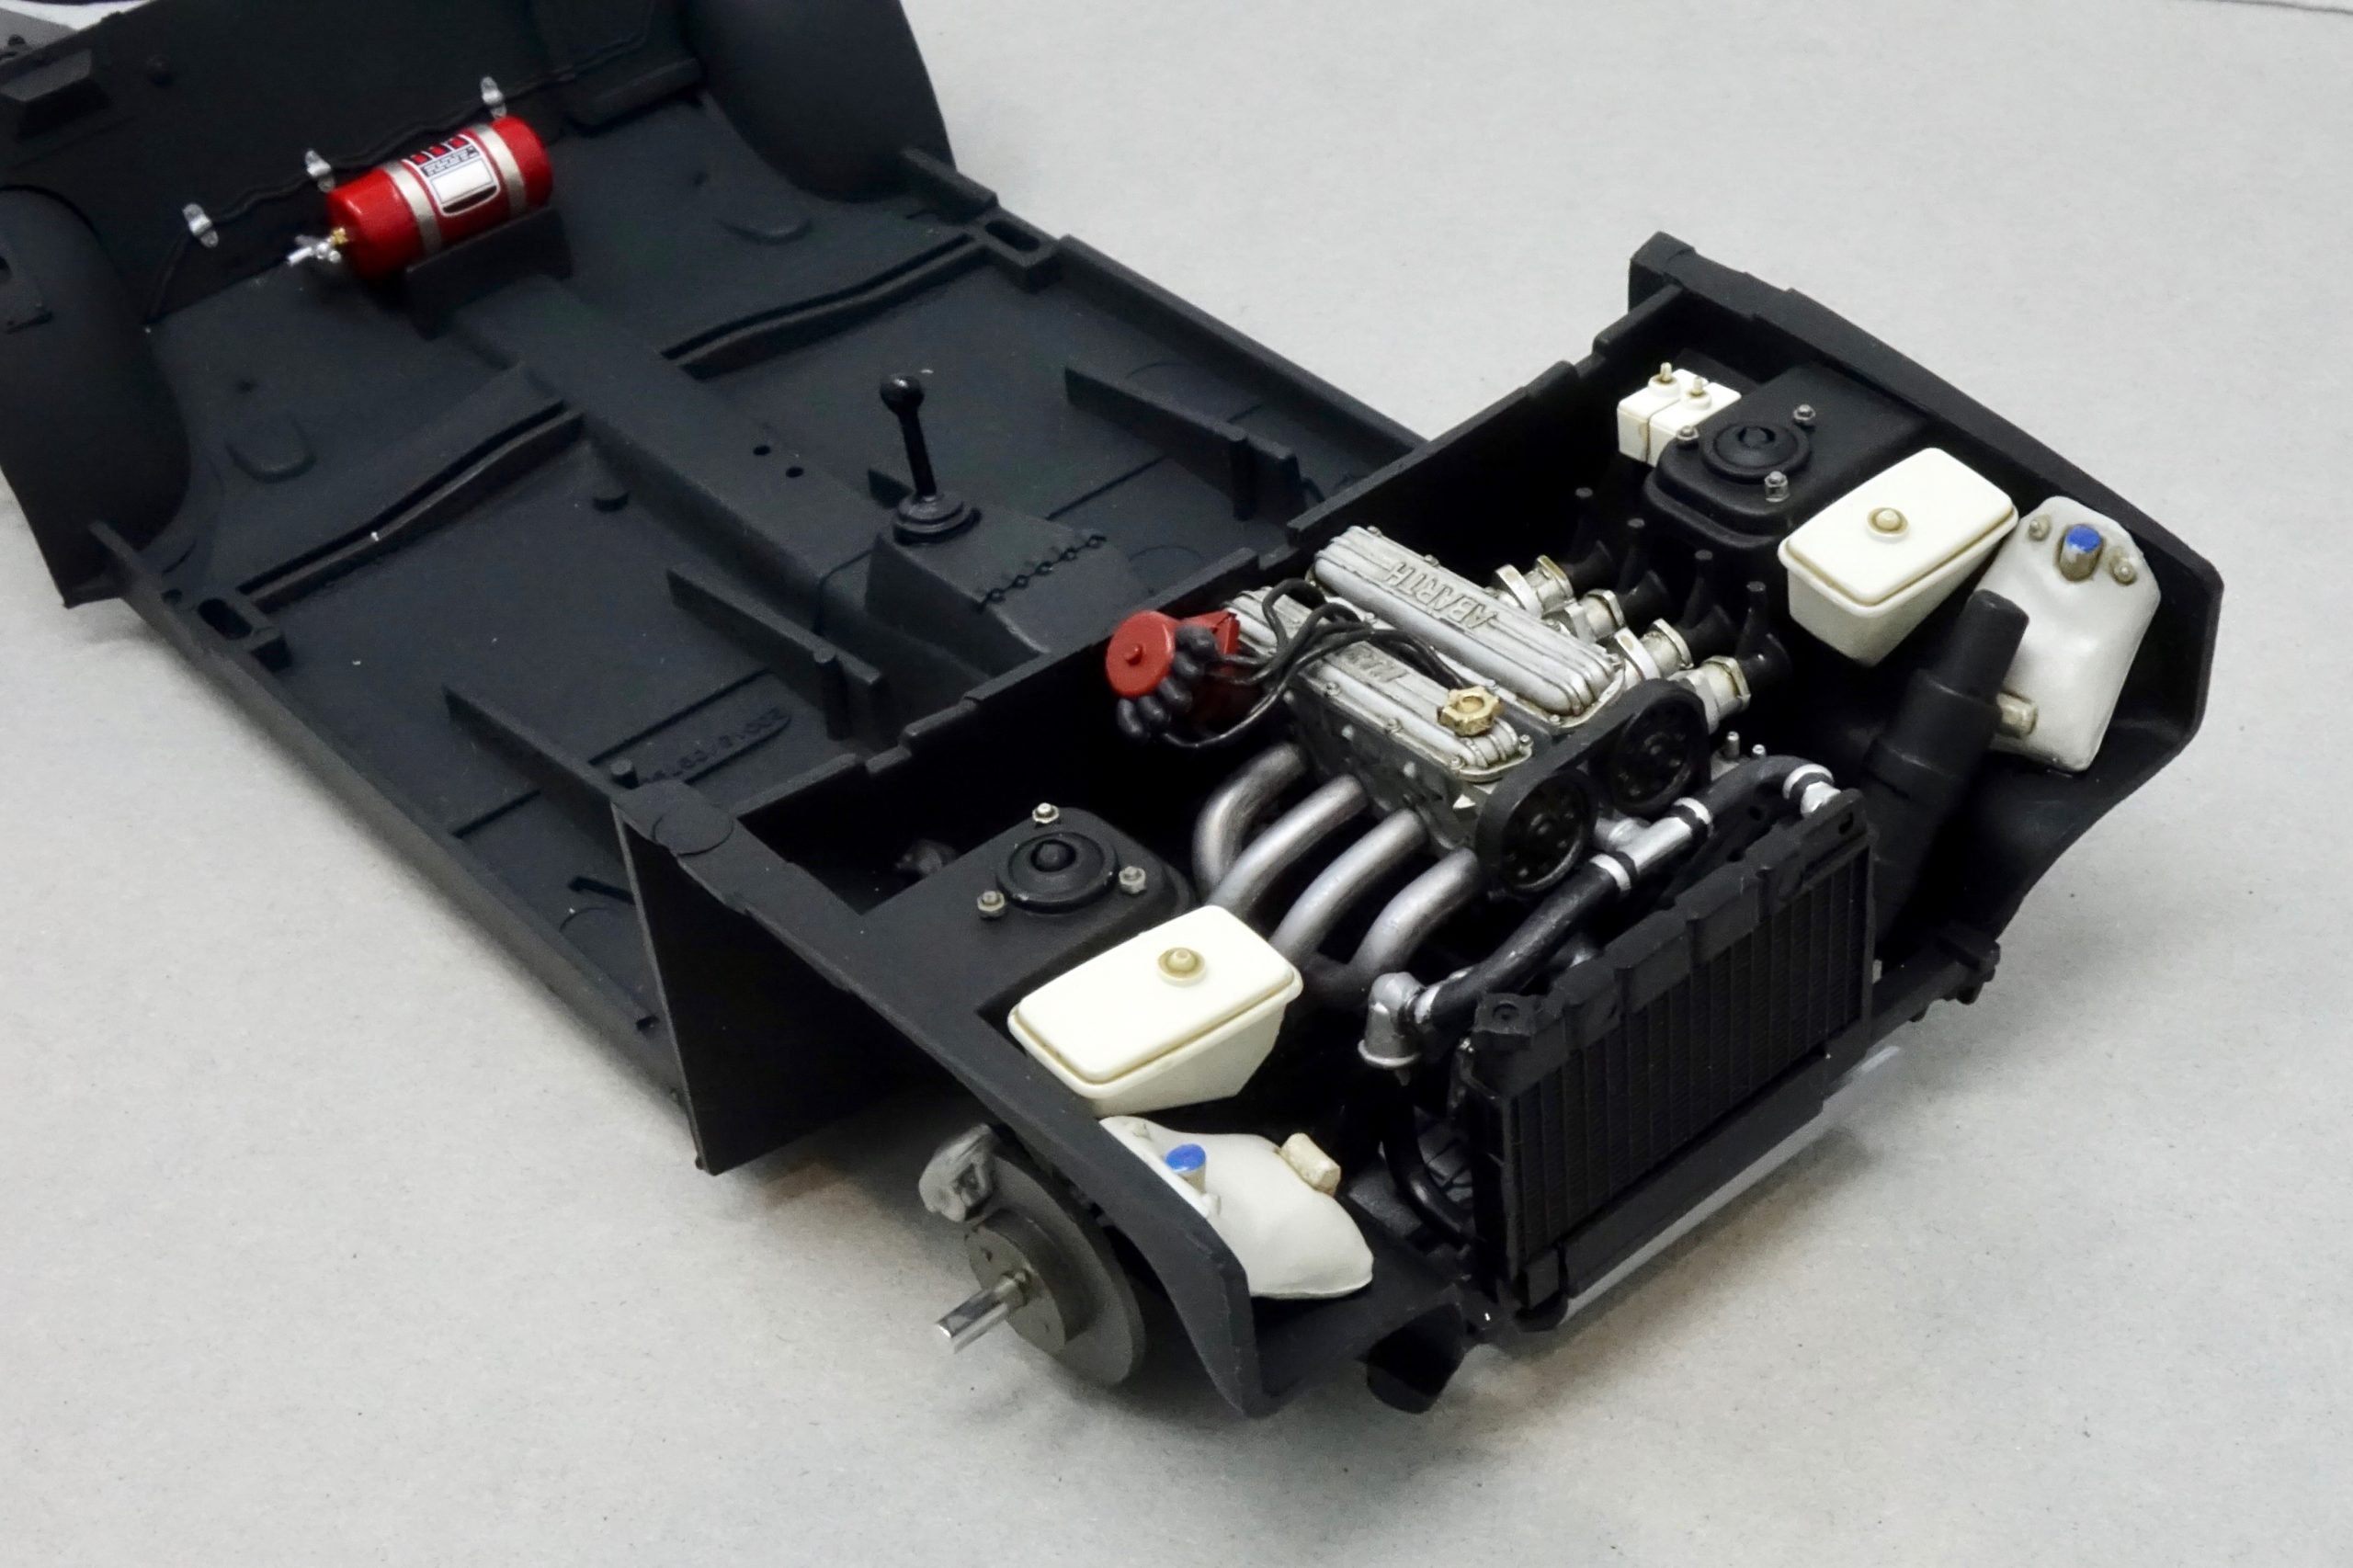
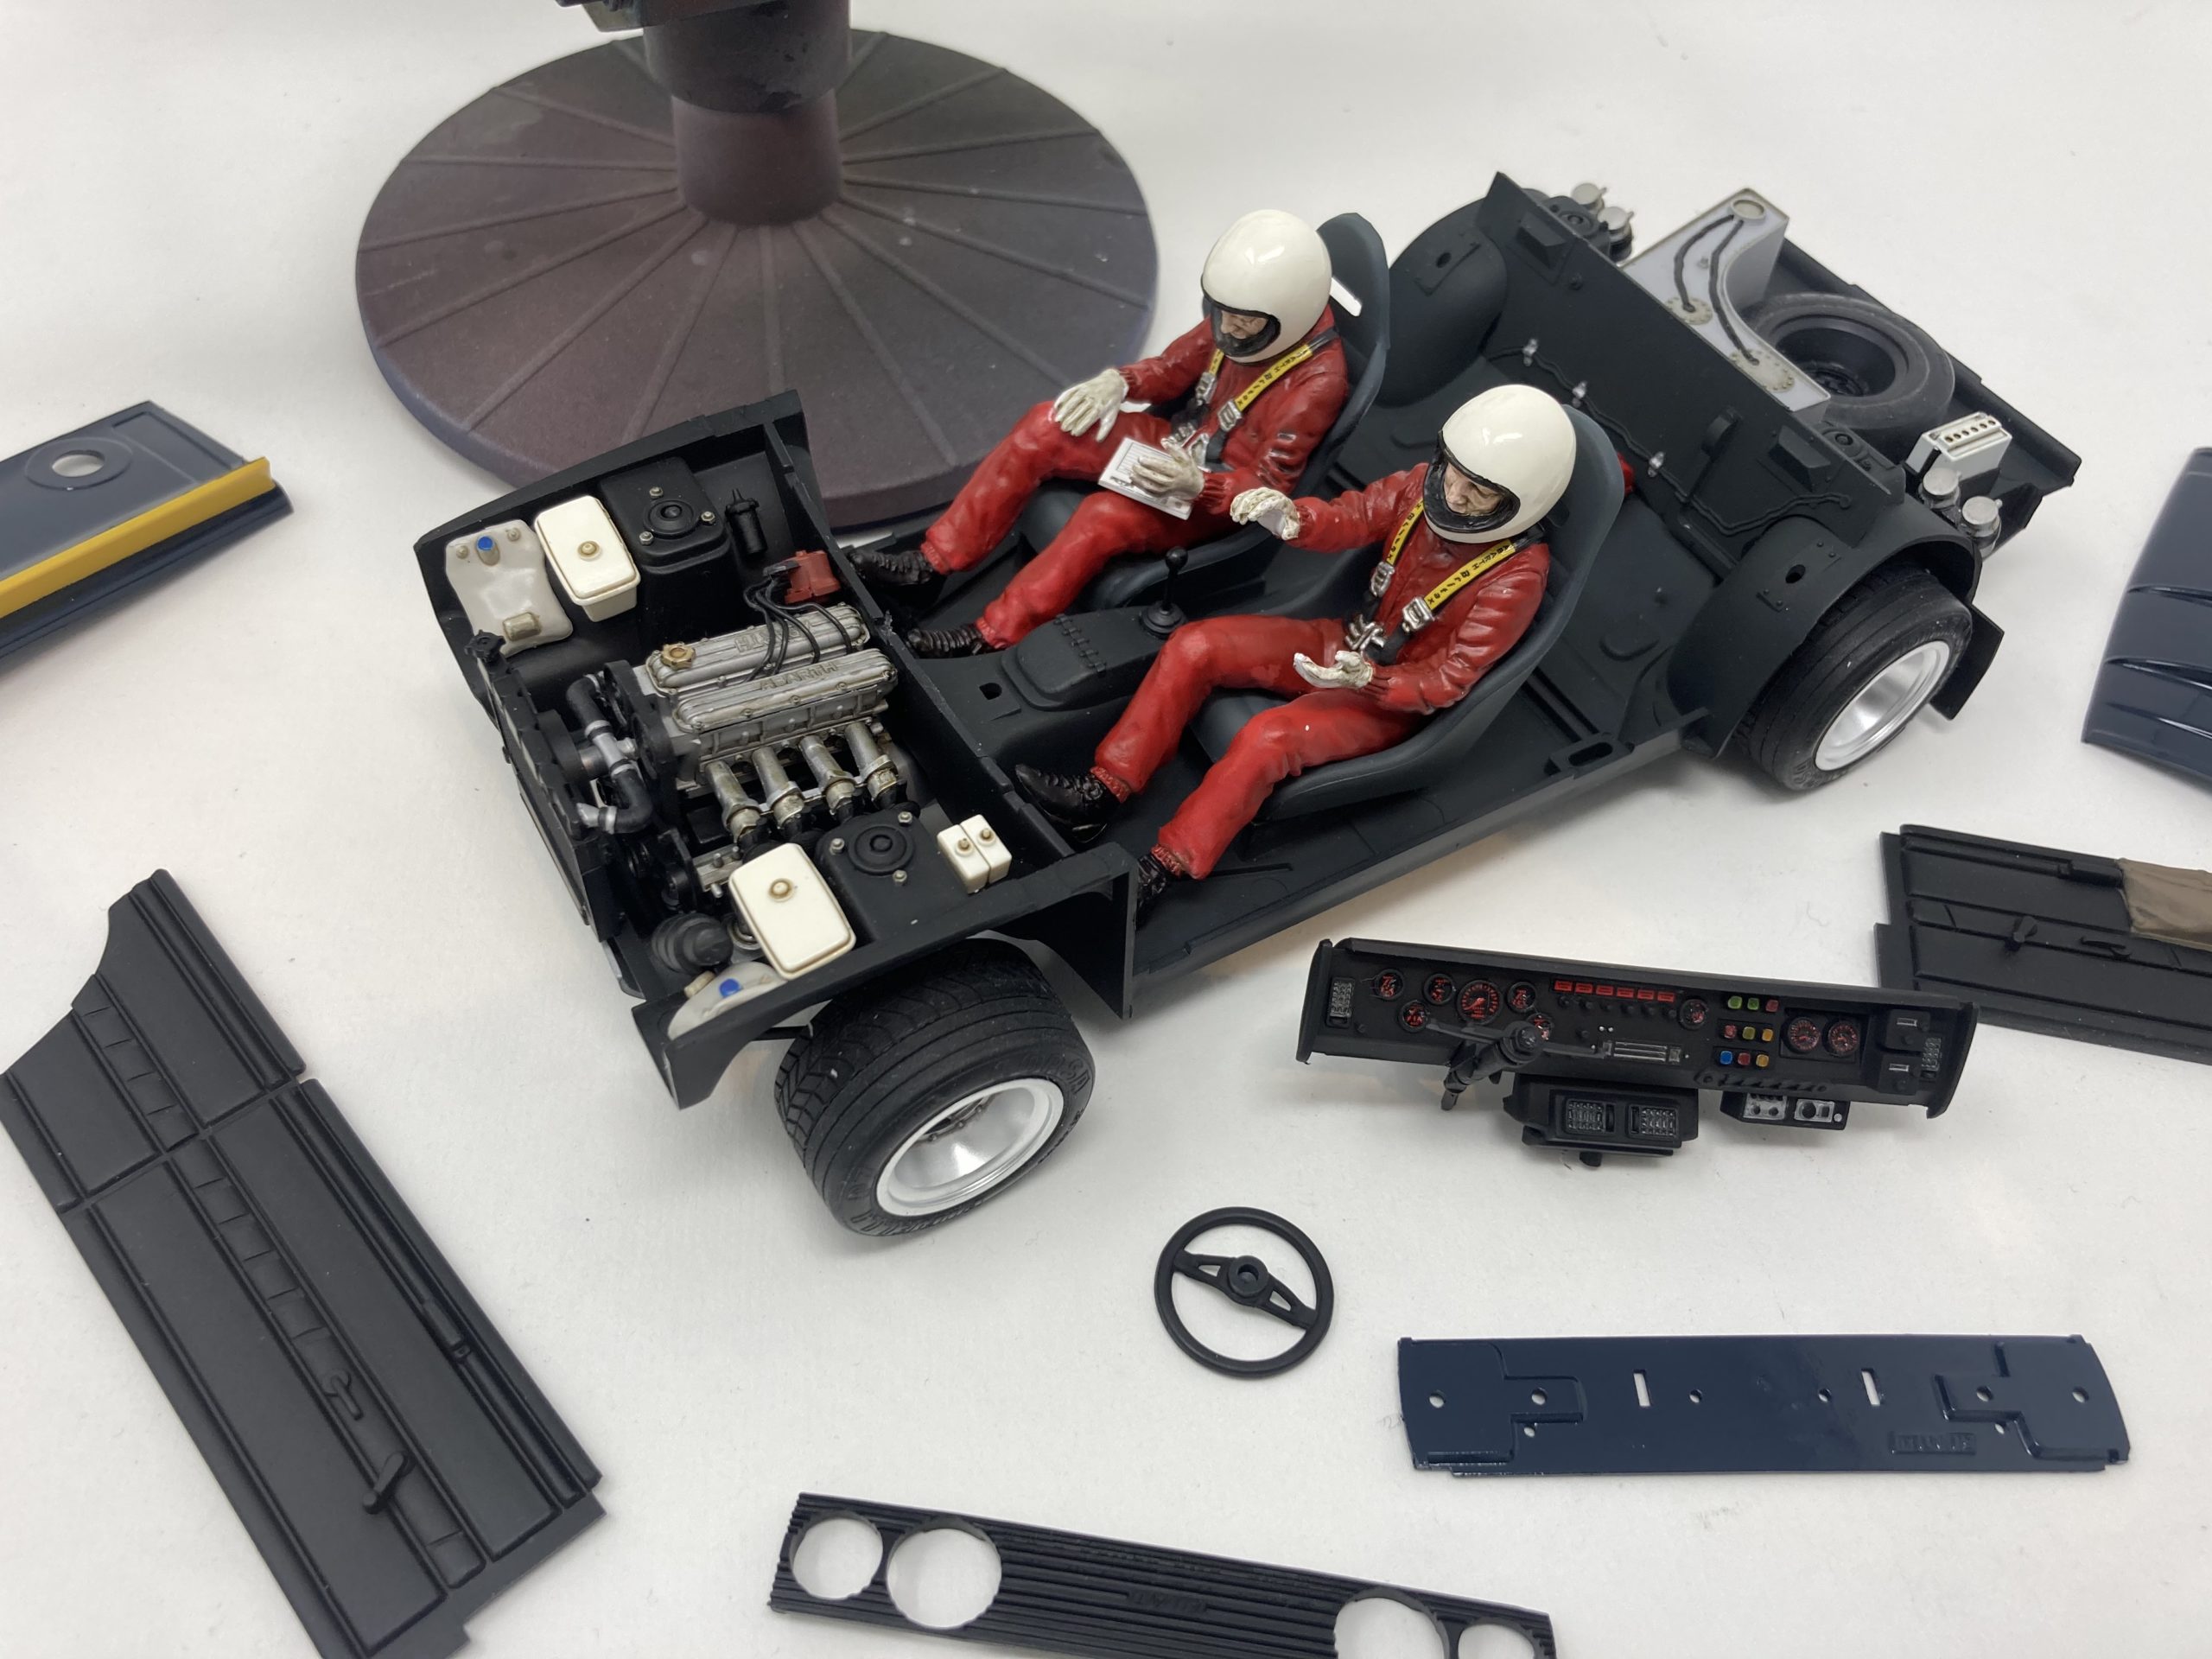
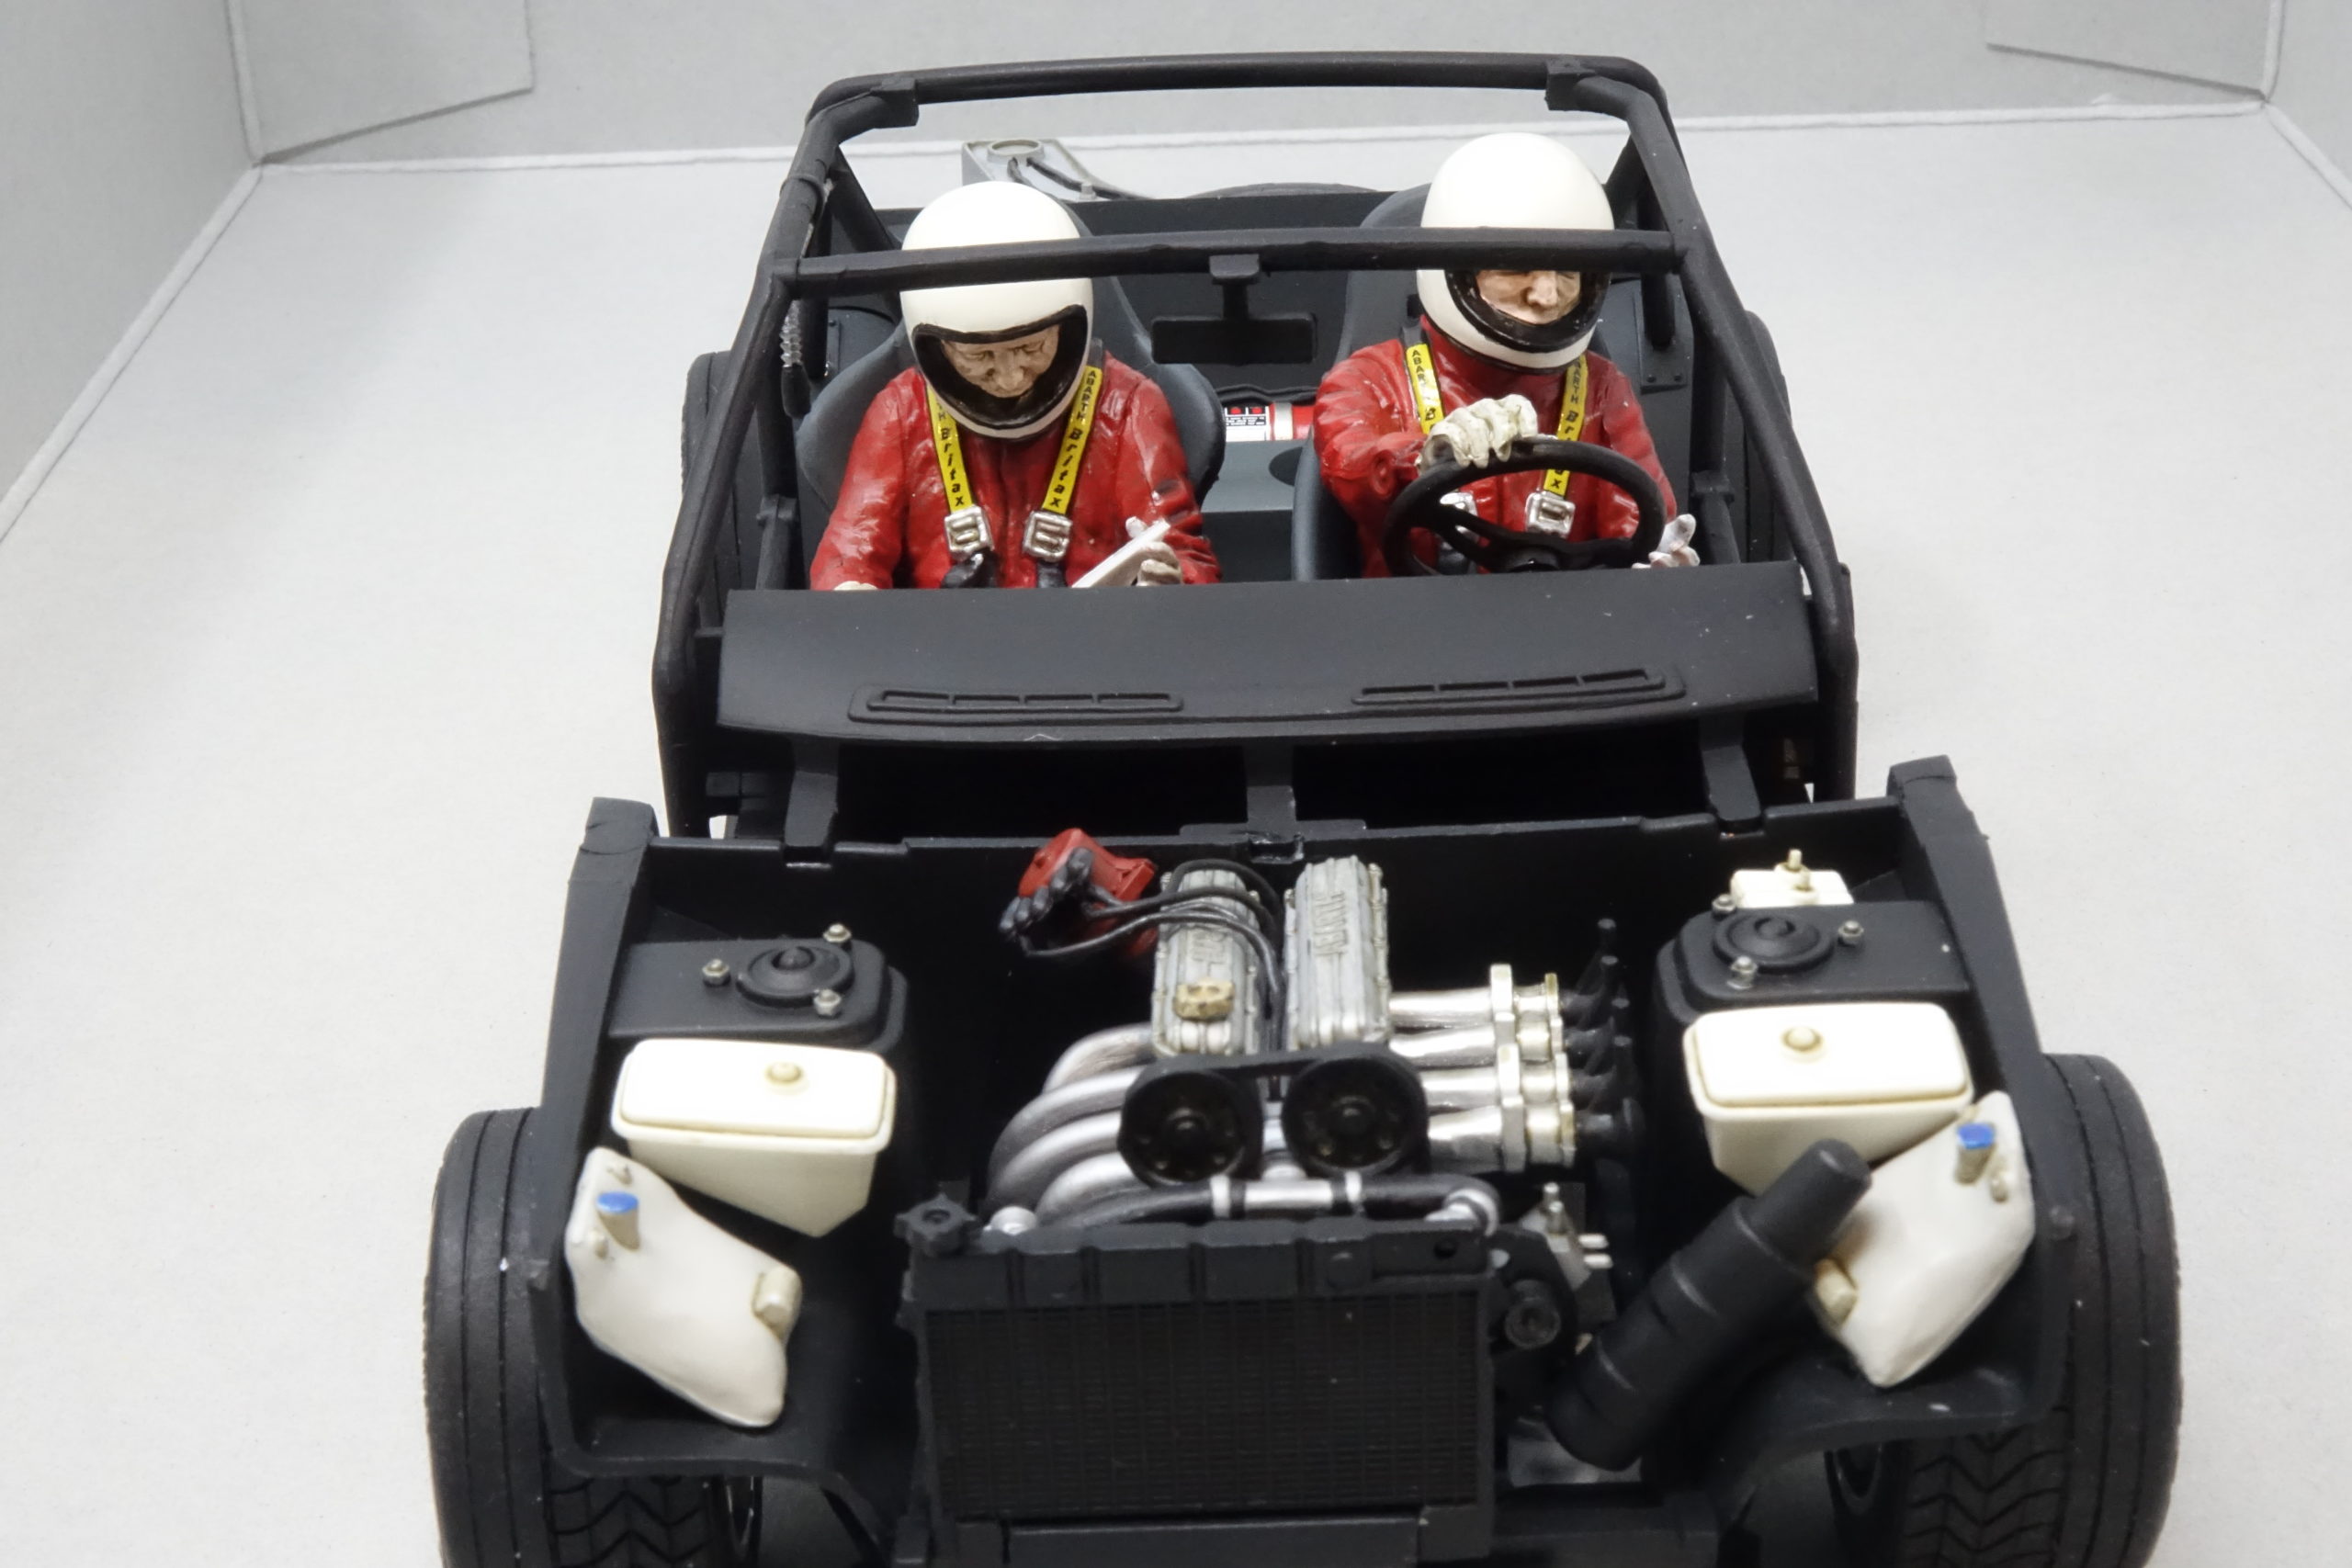
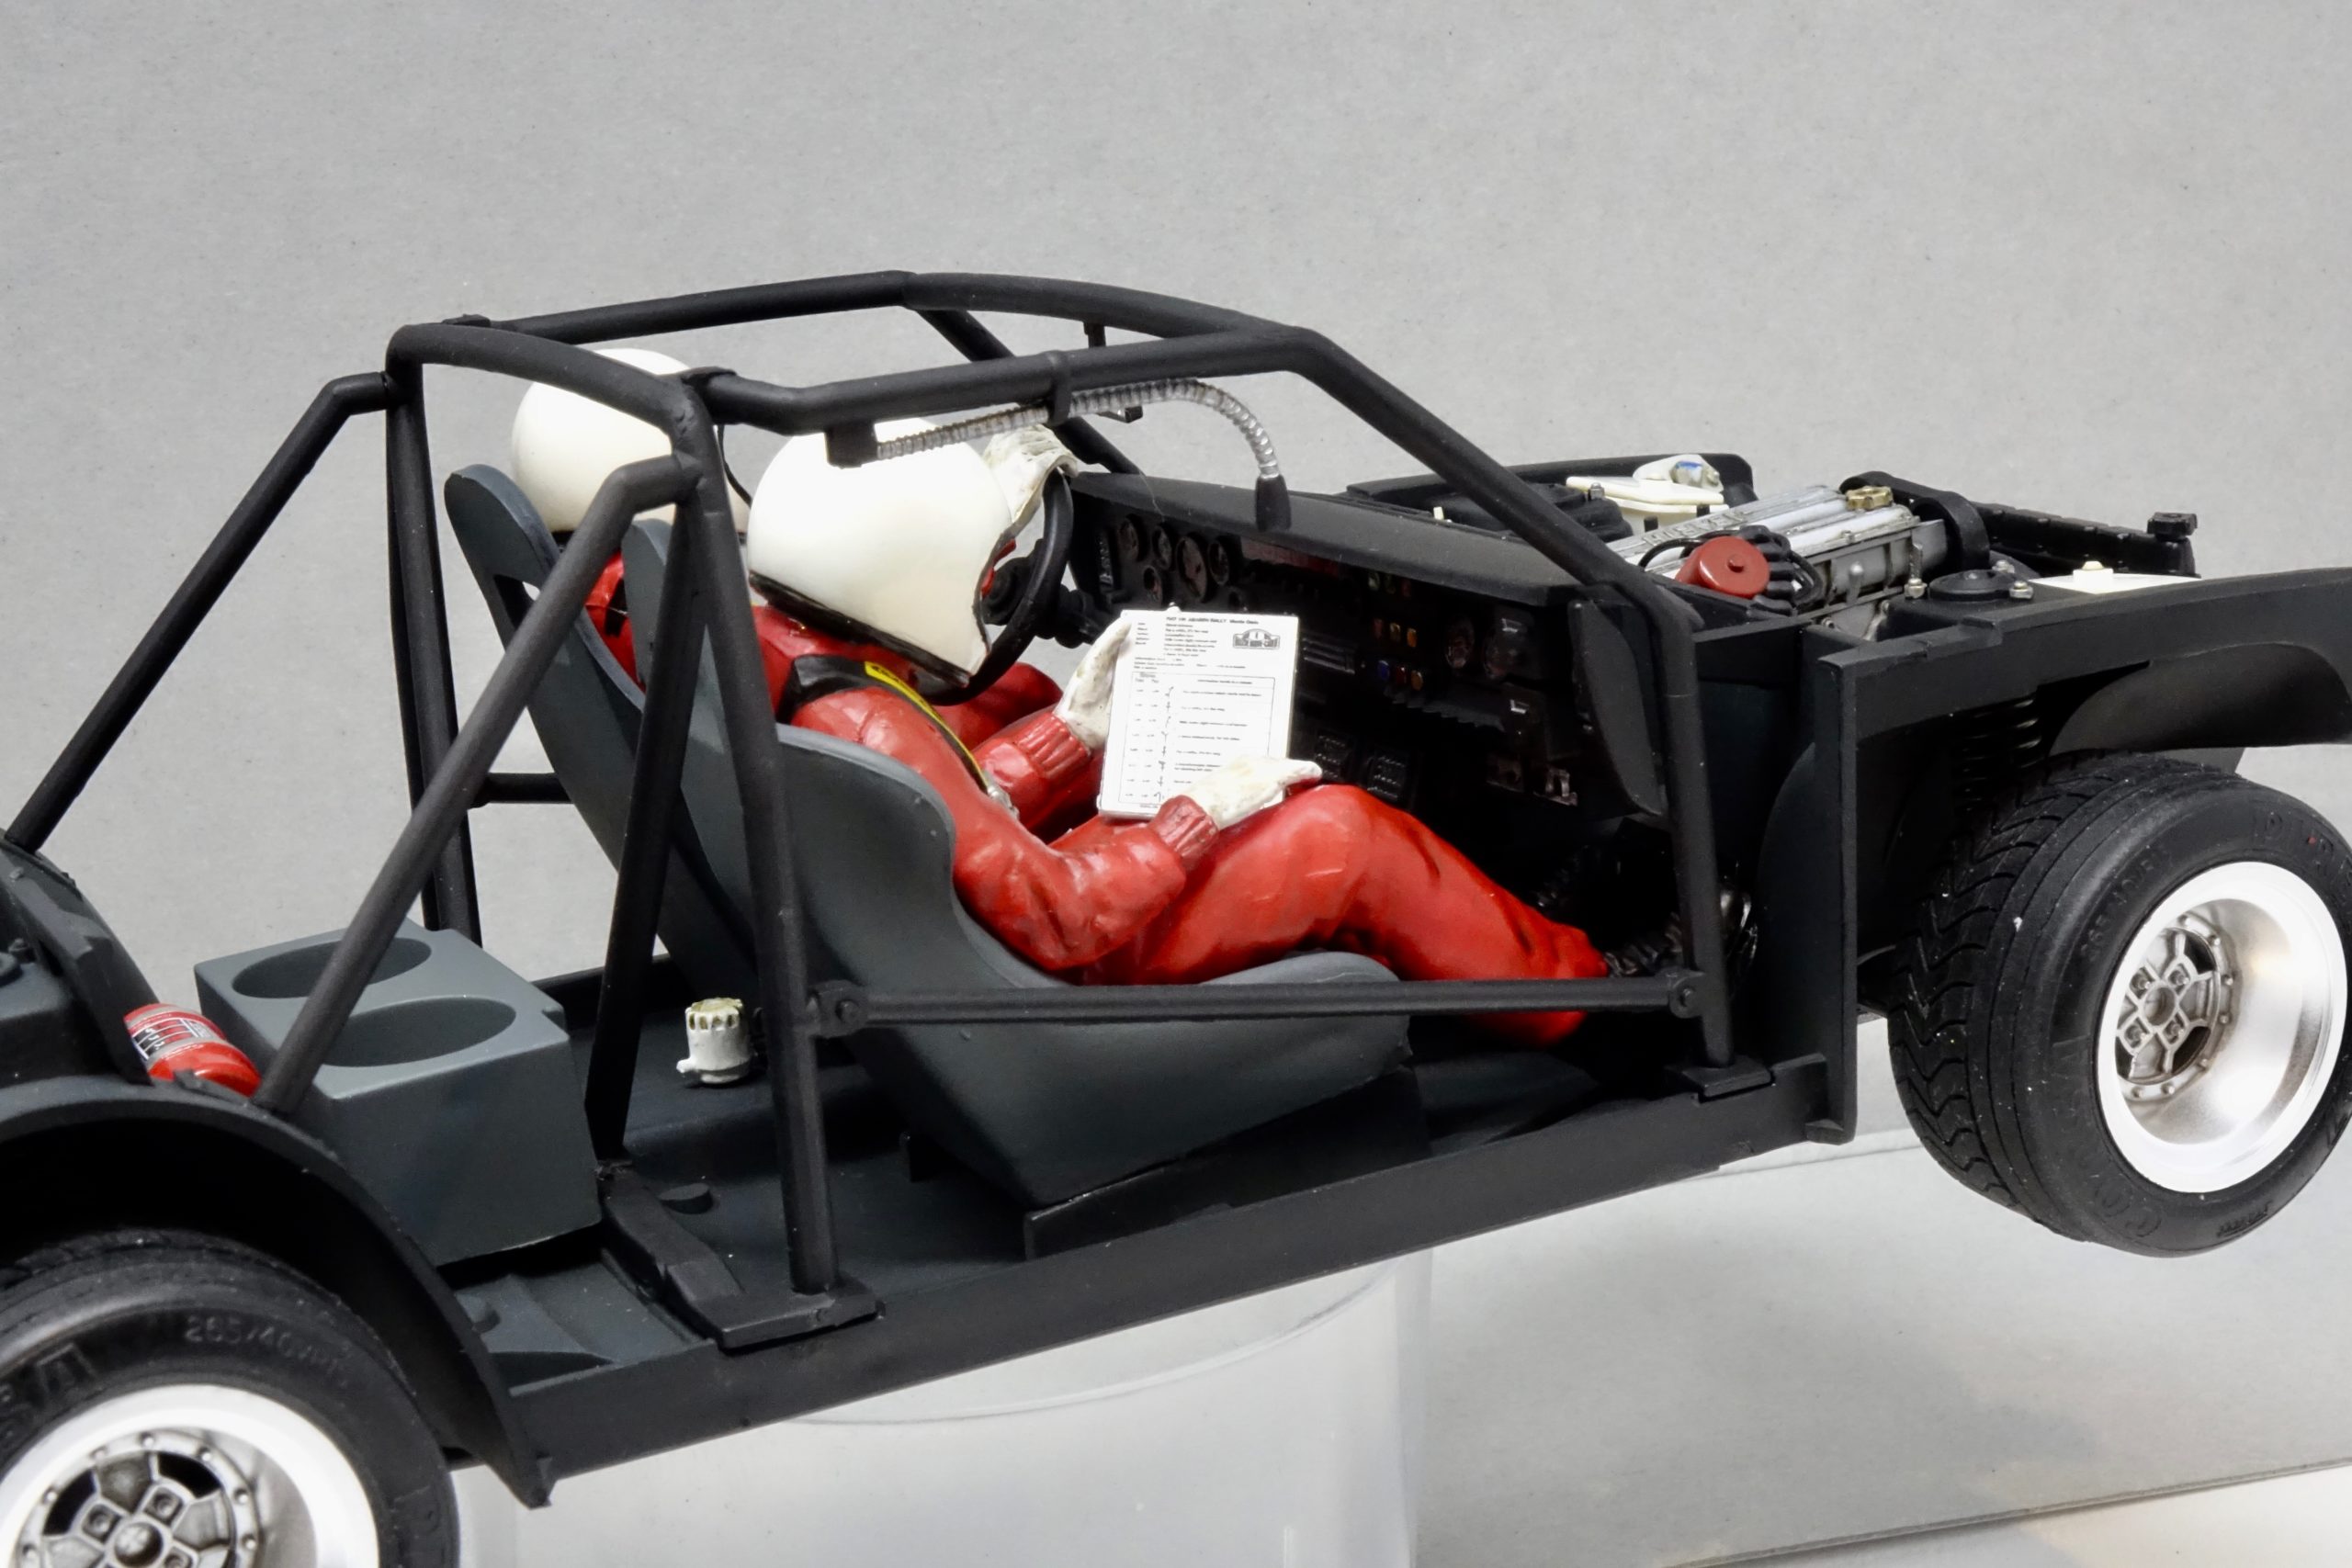
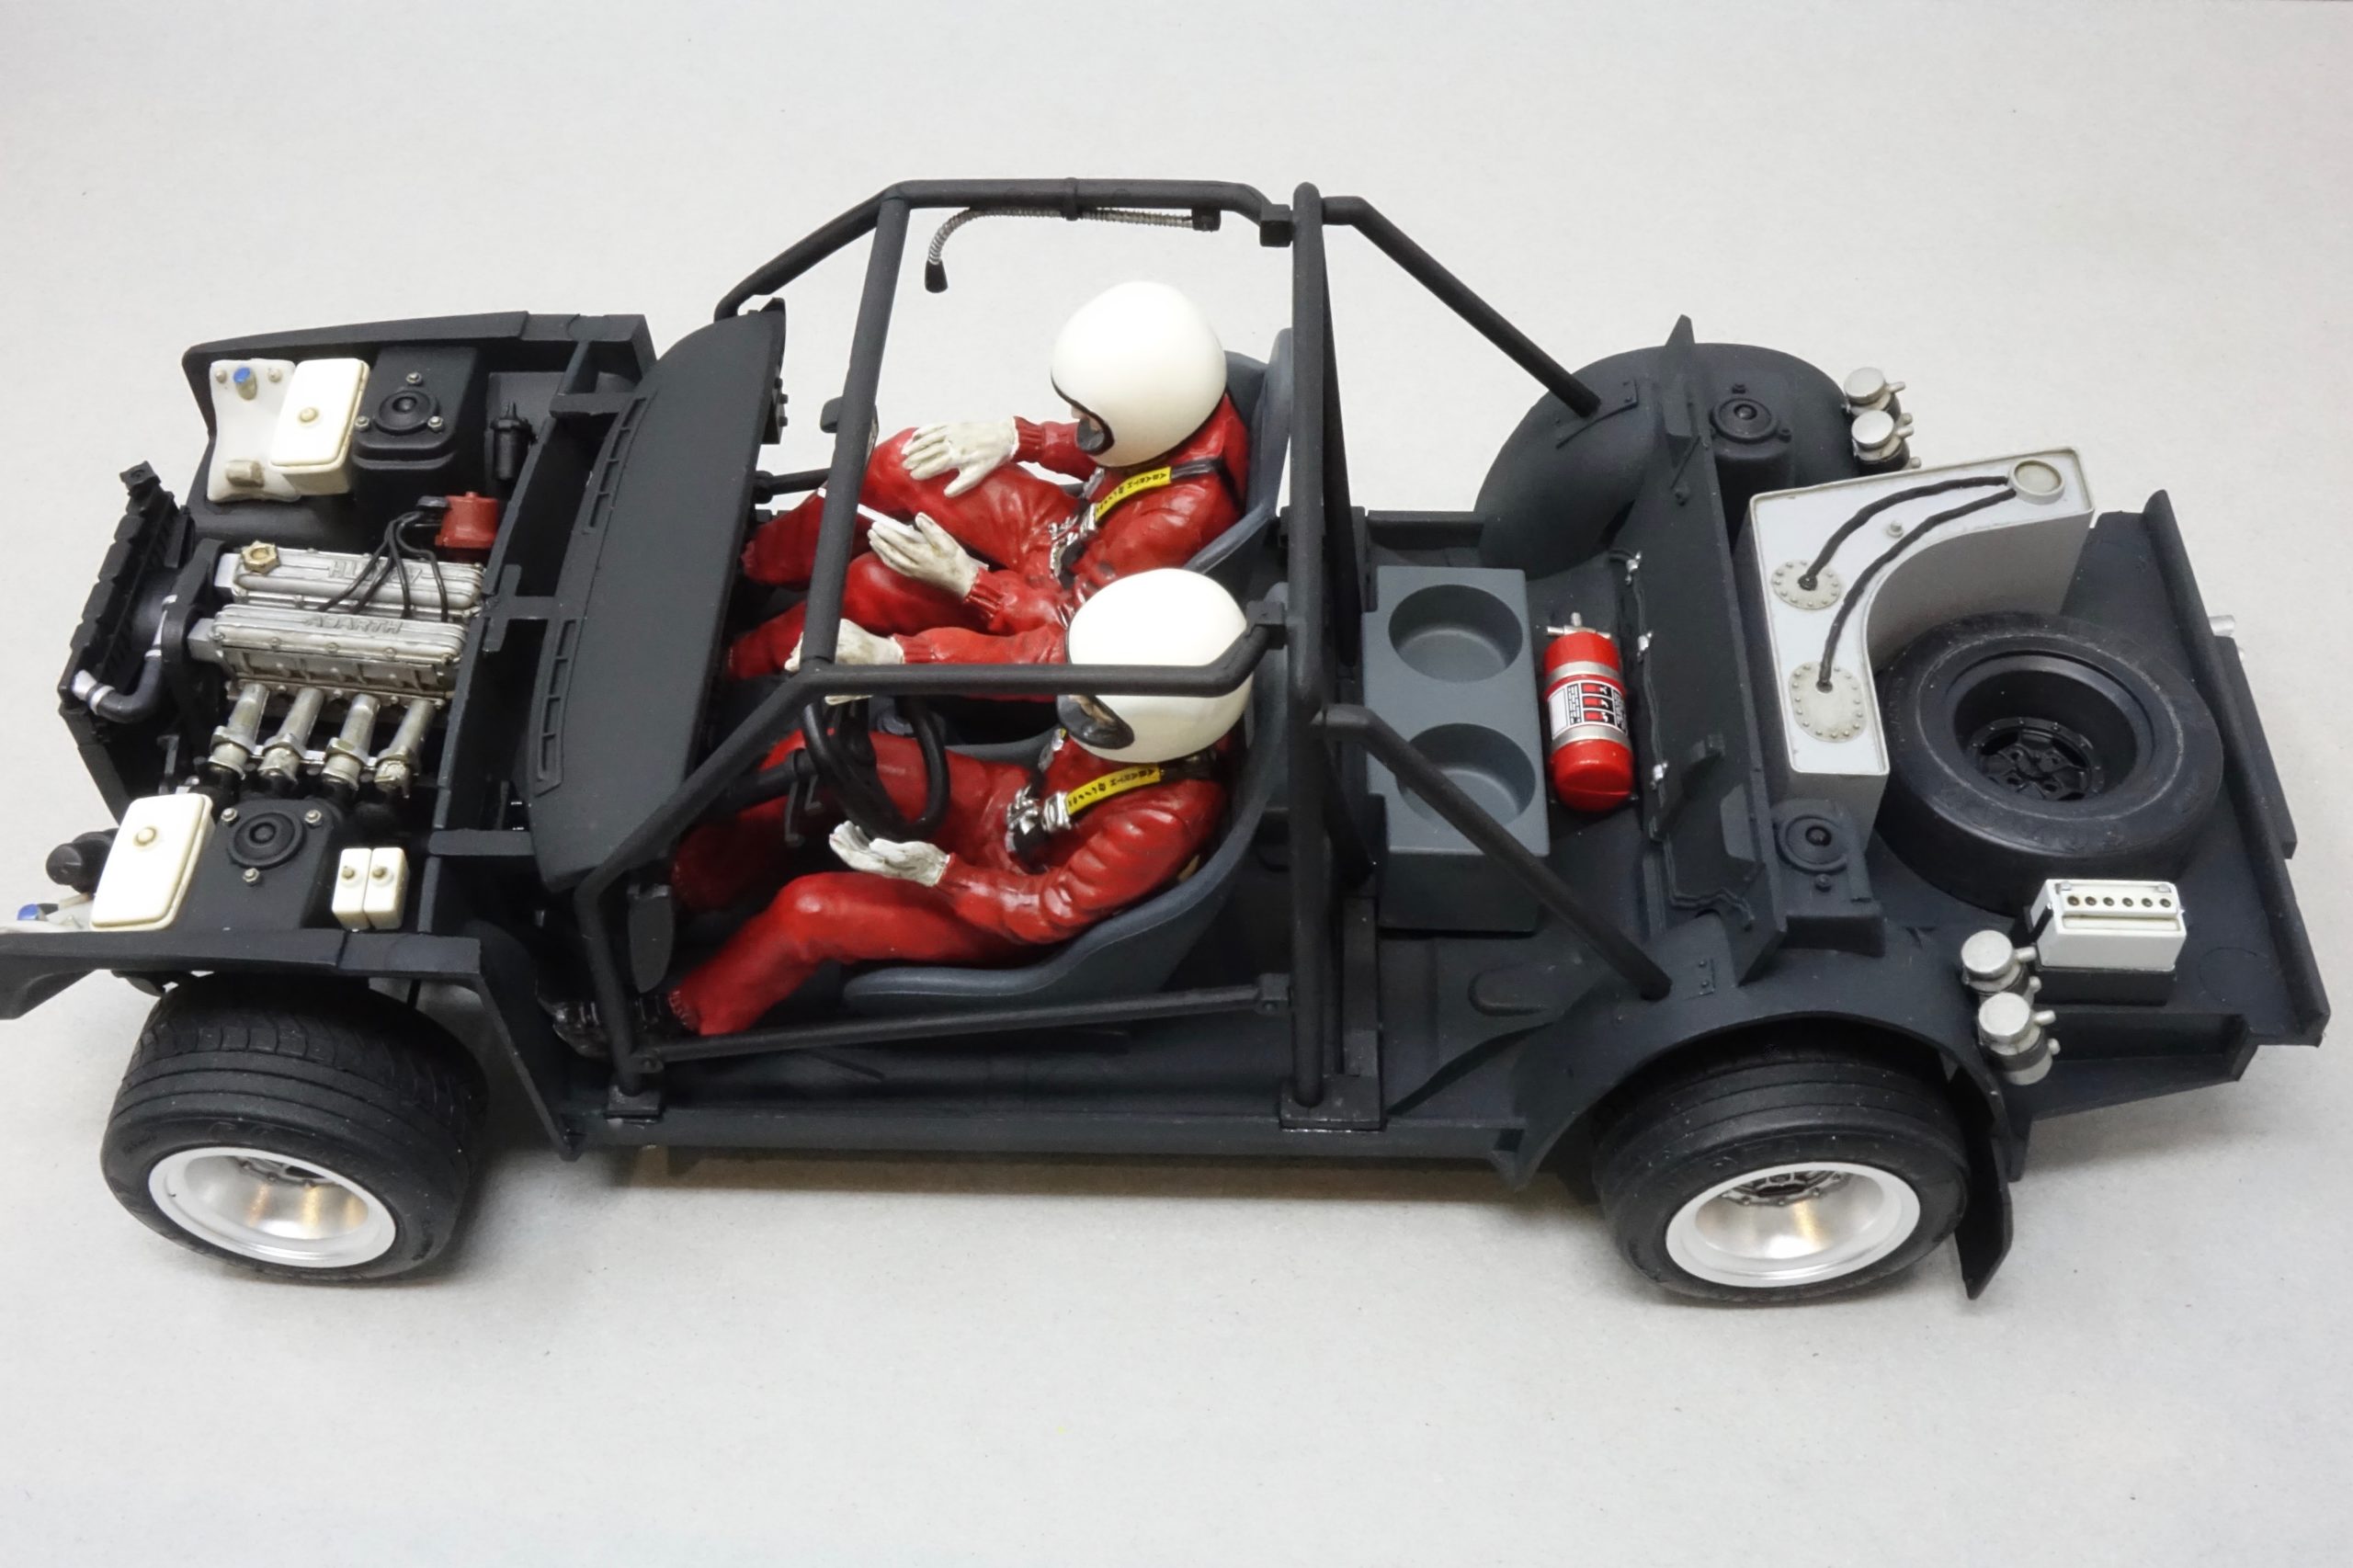
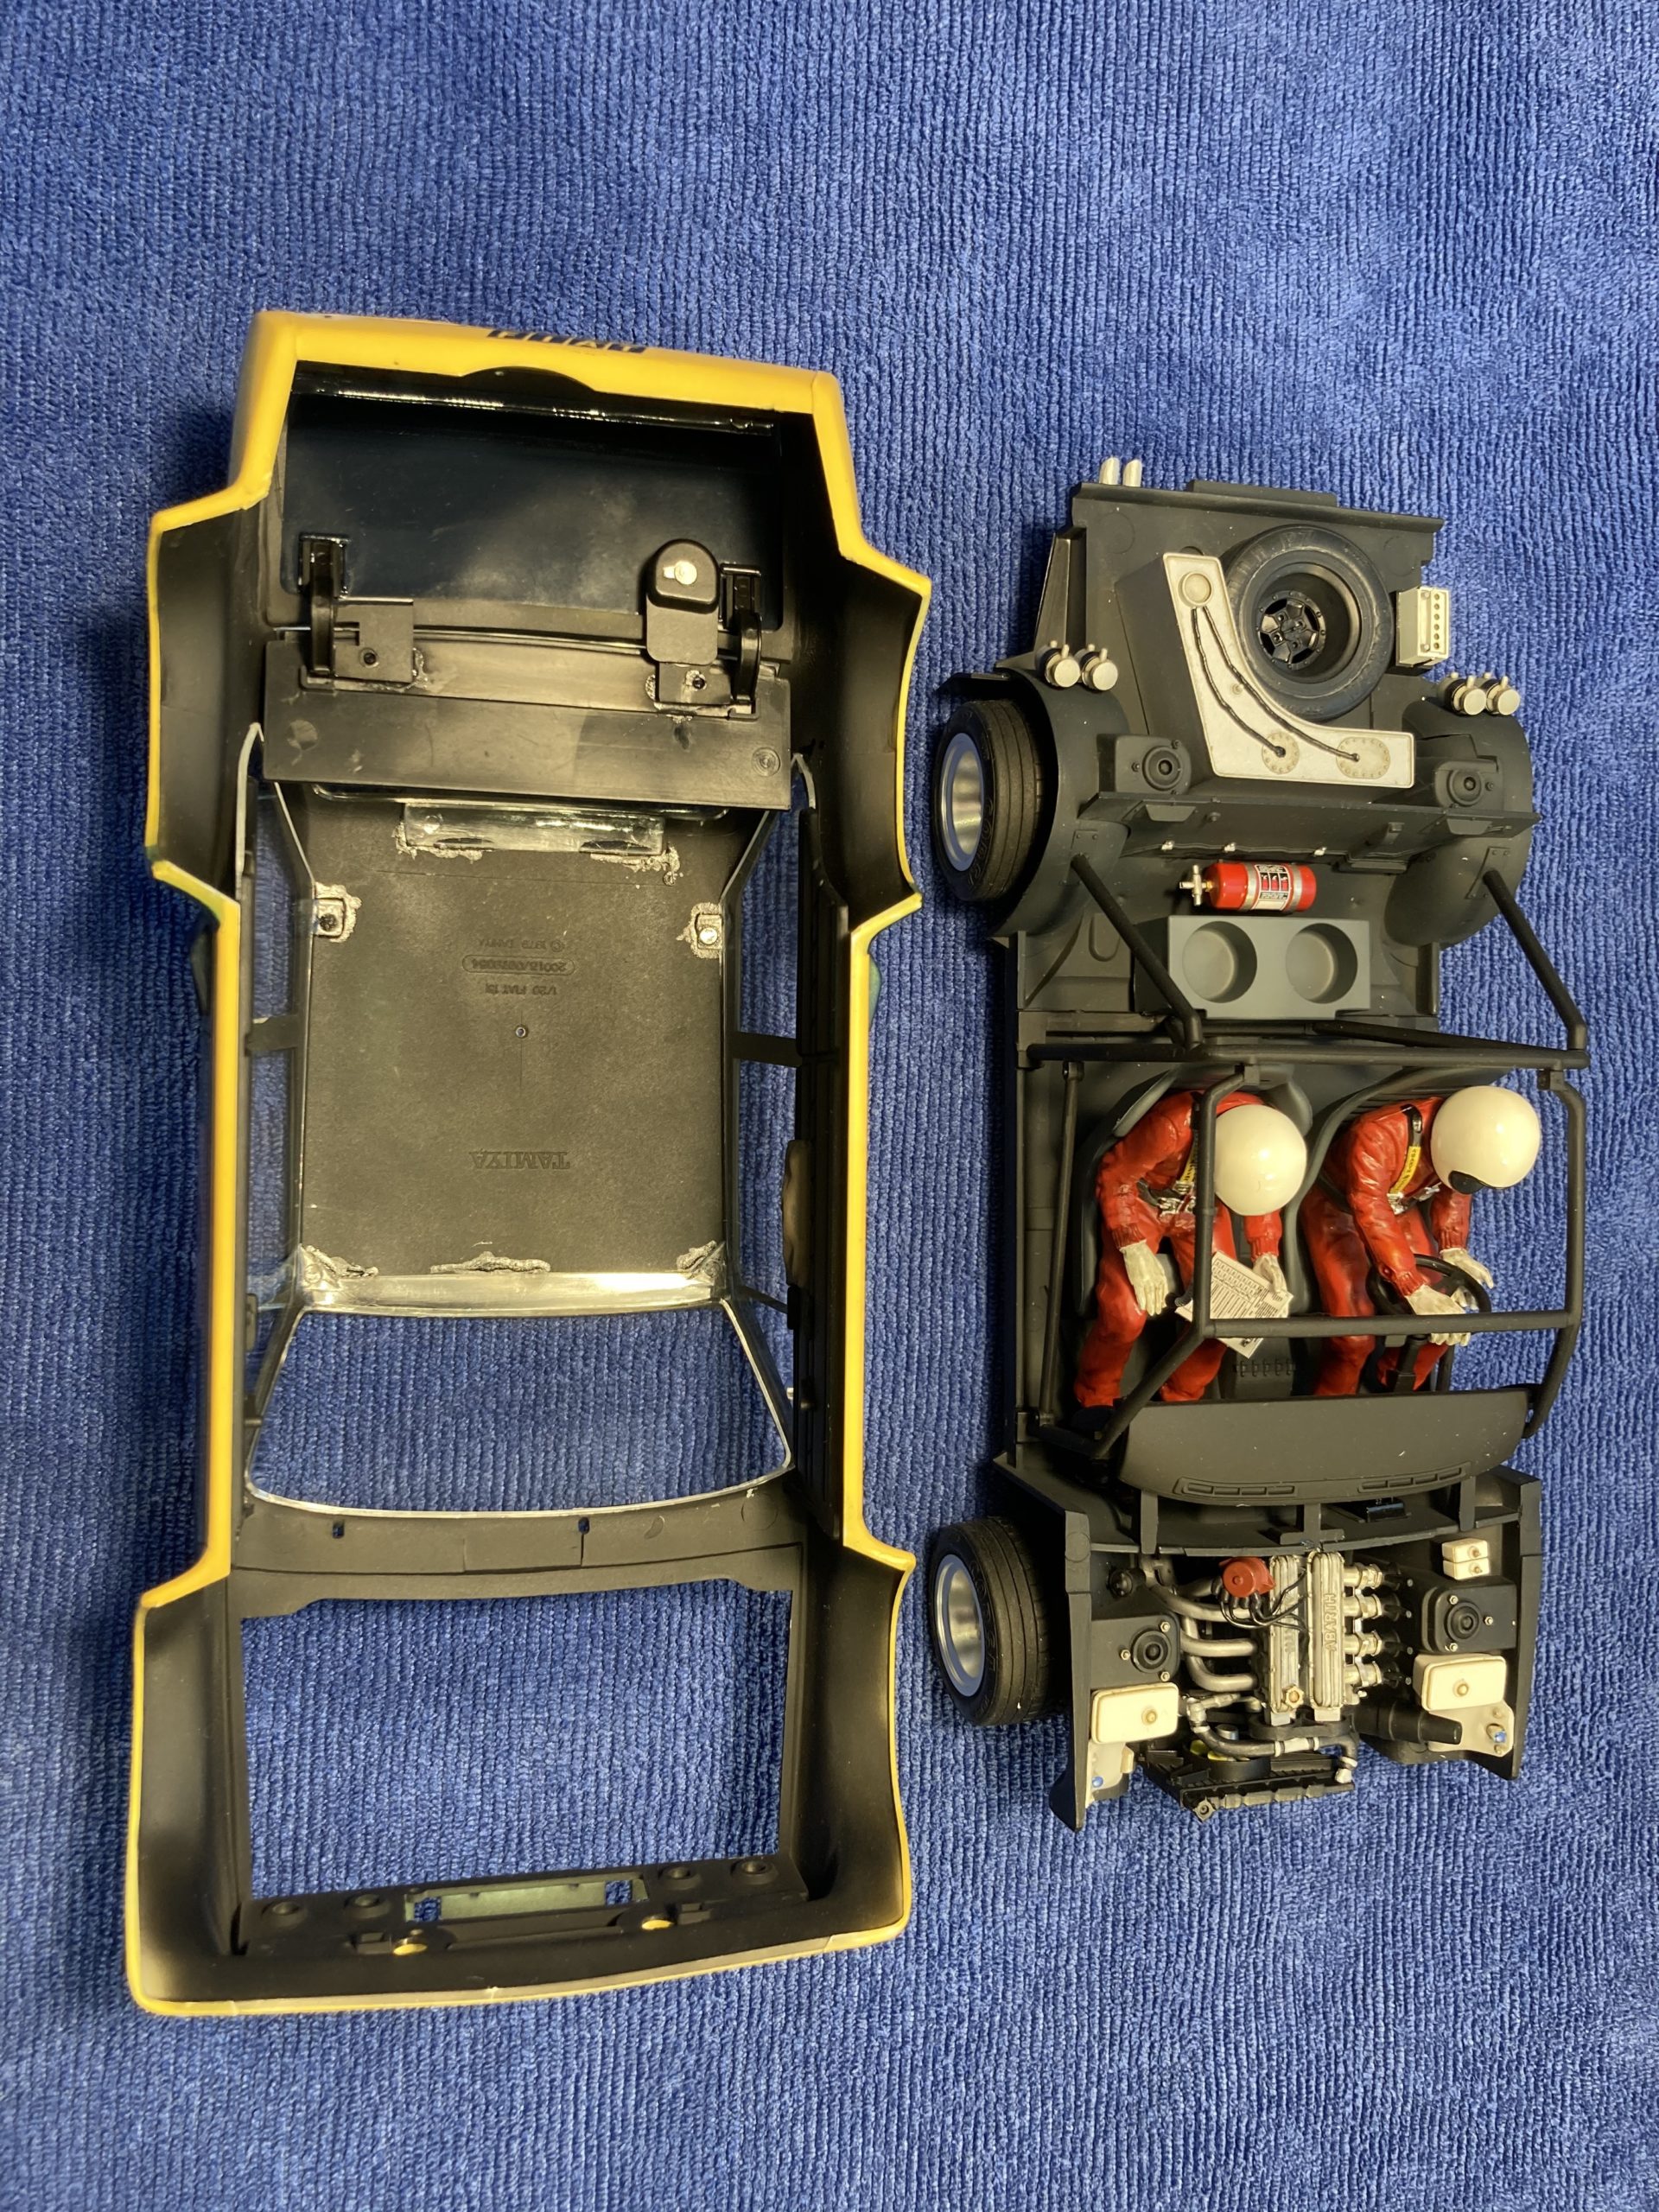
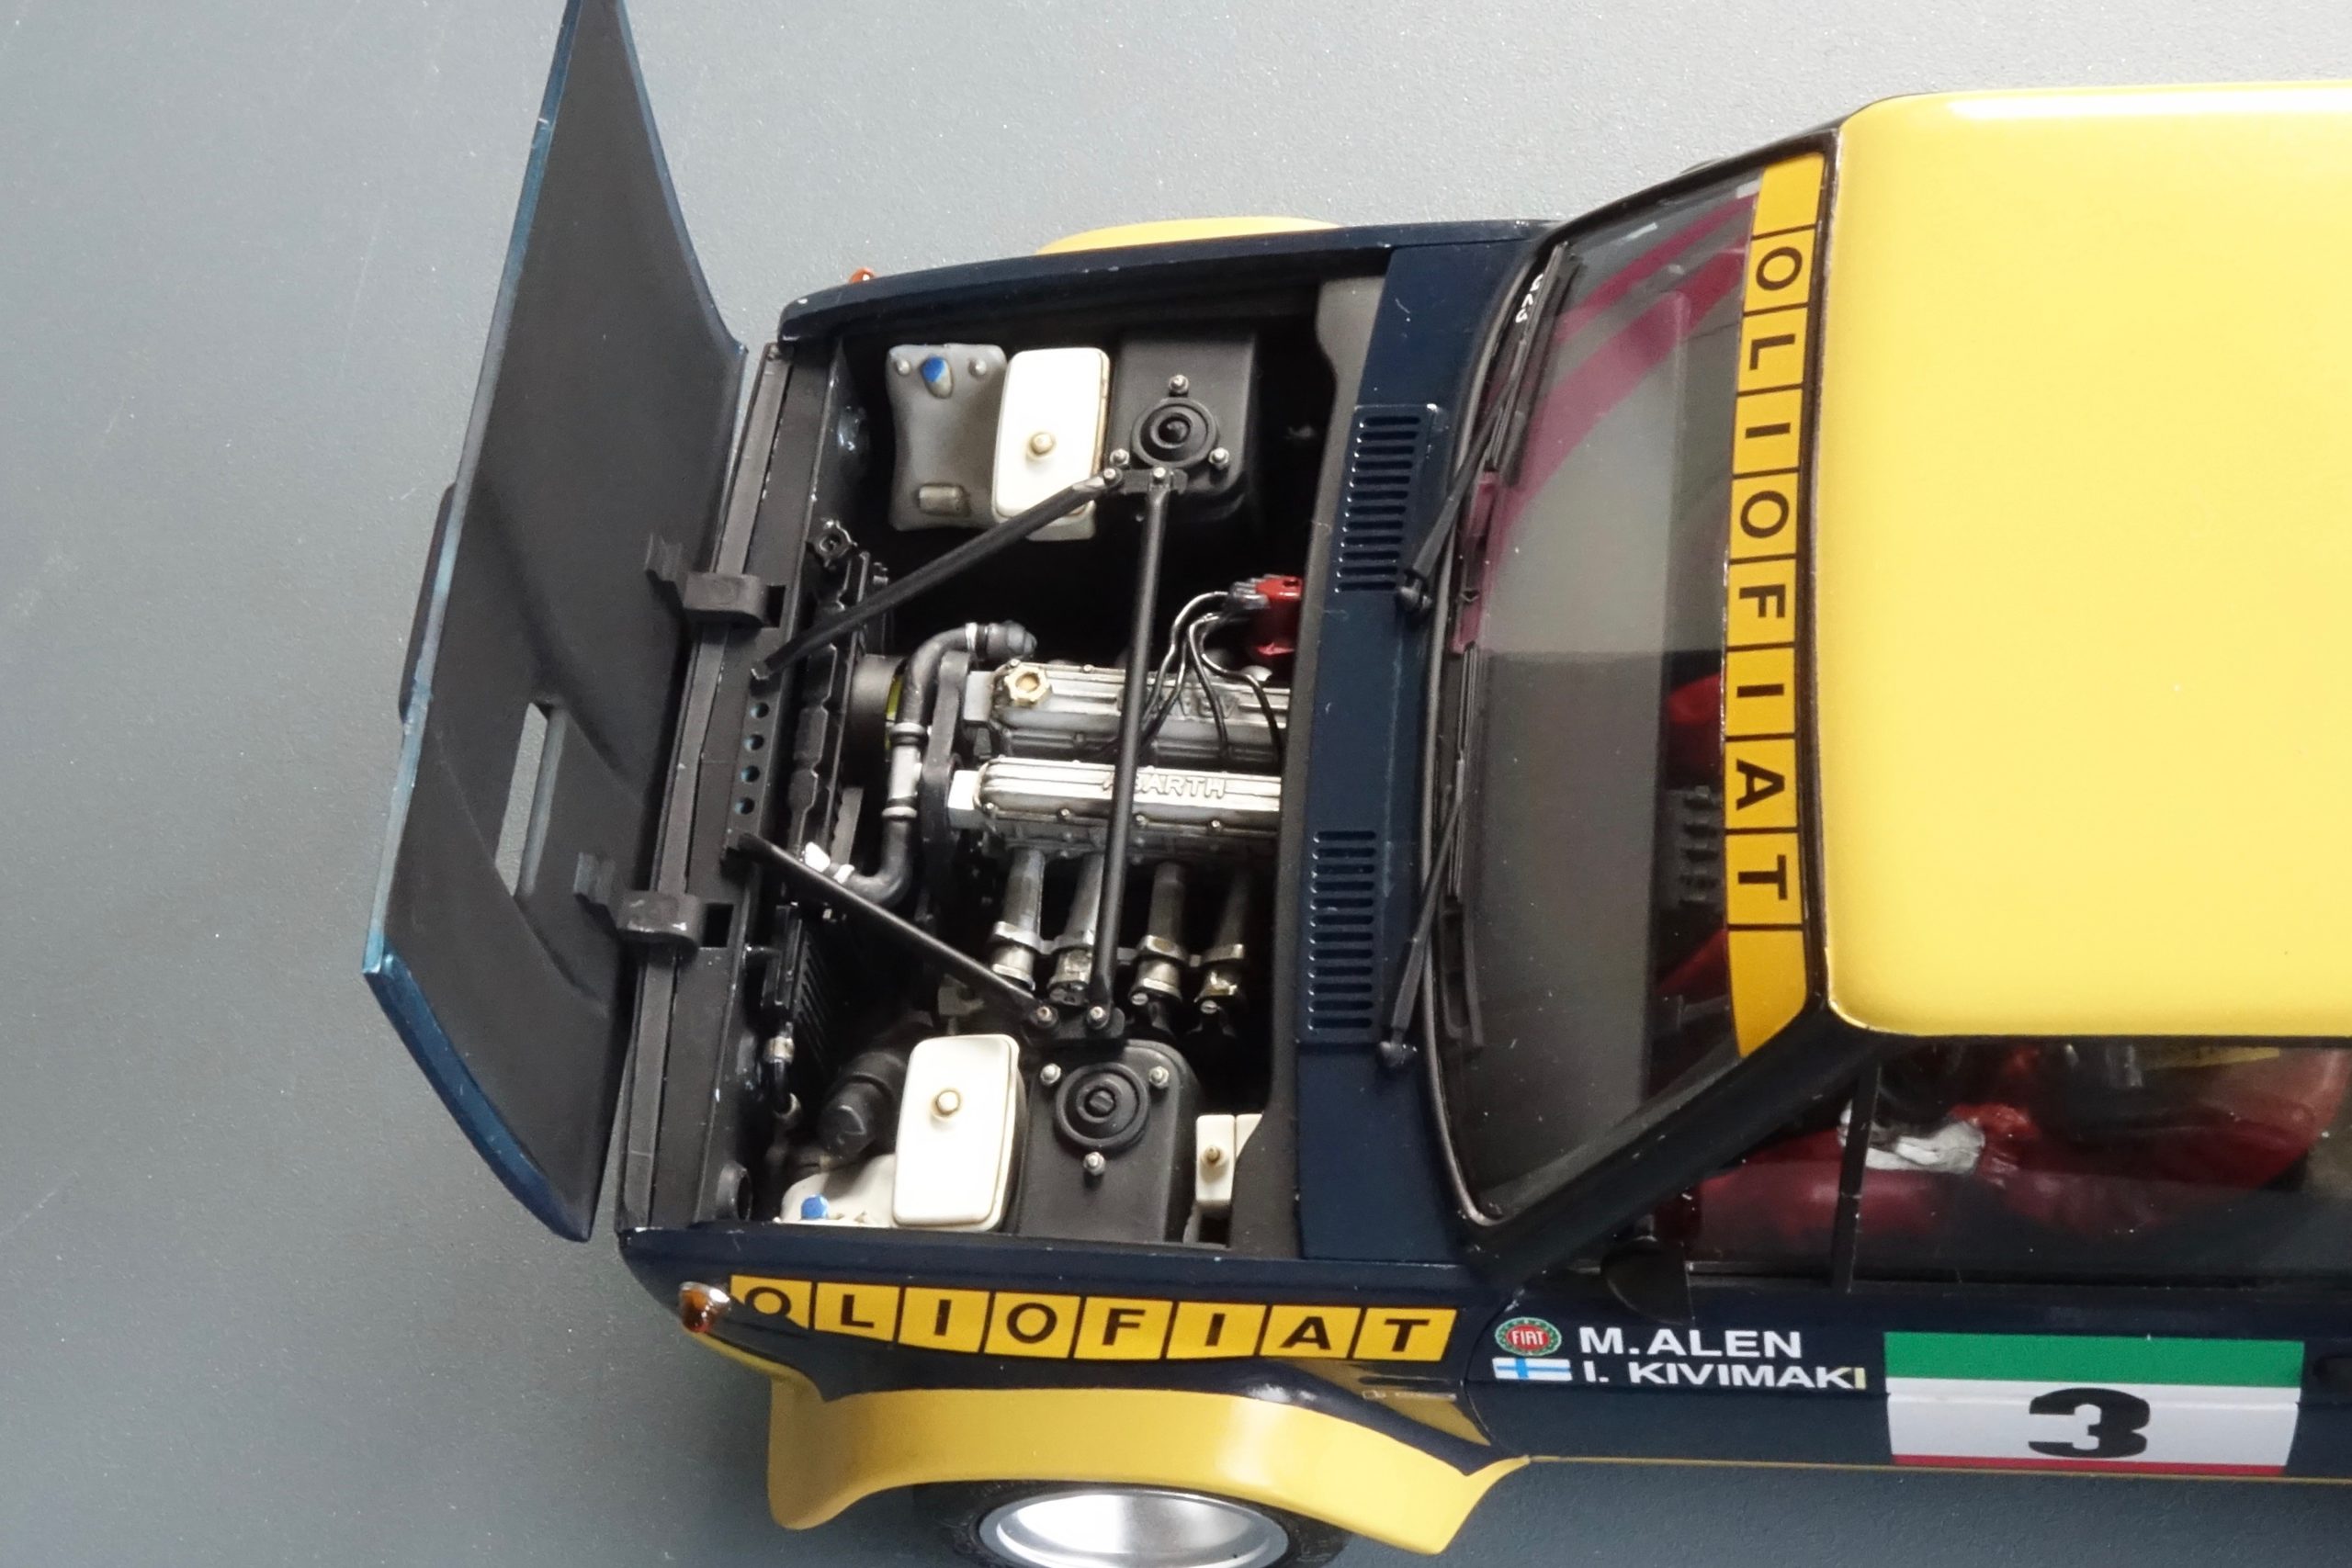
Engine/gearbox
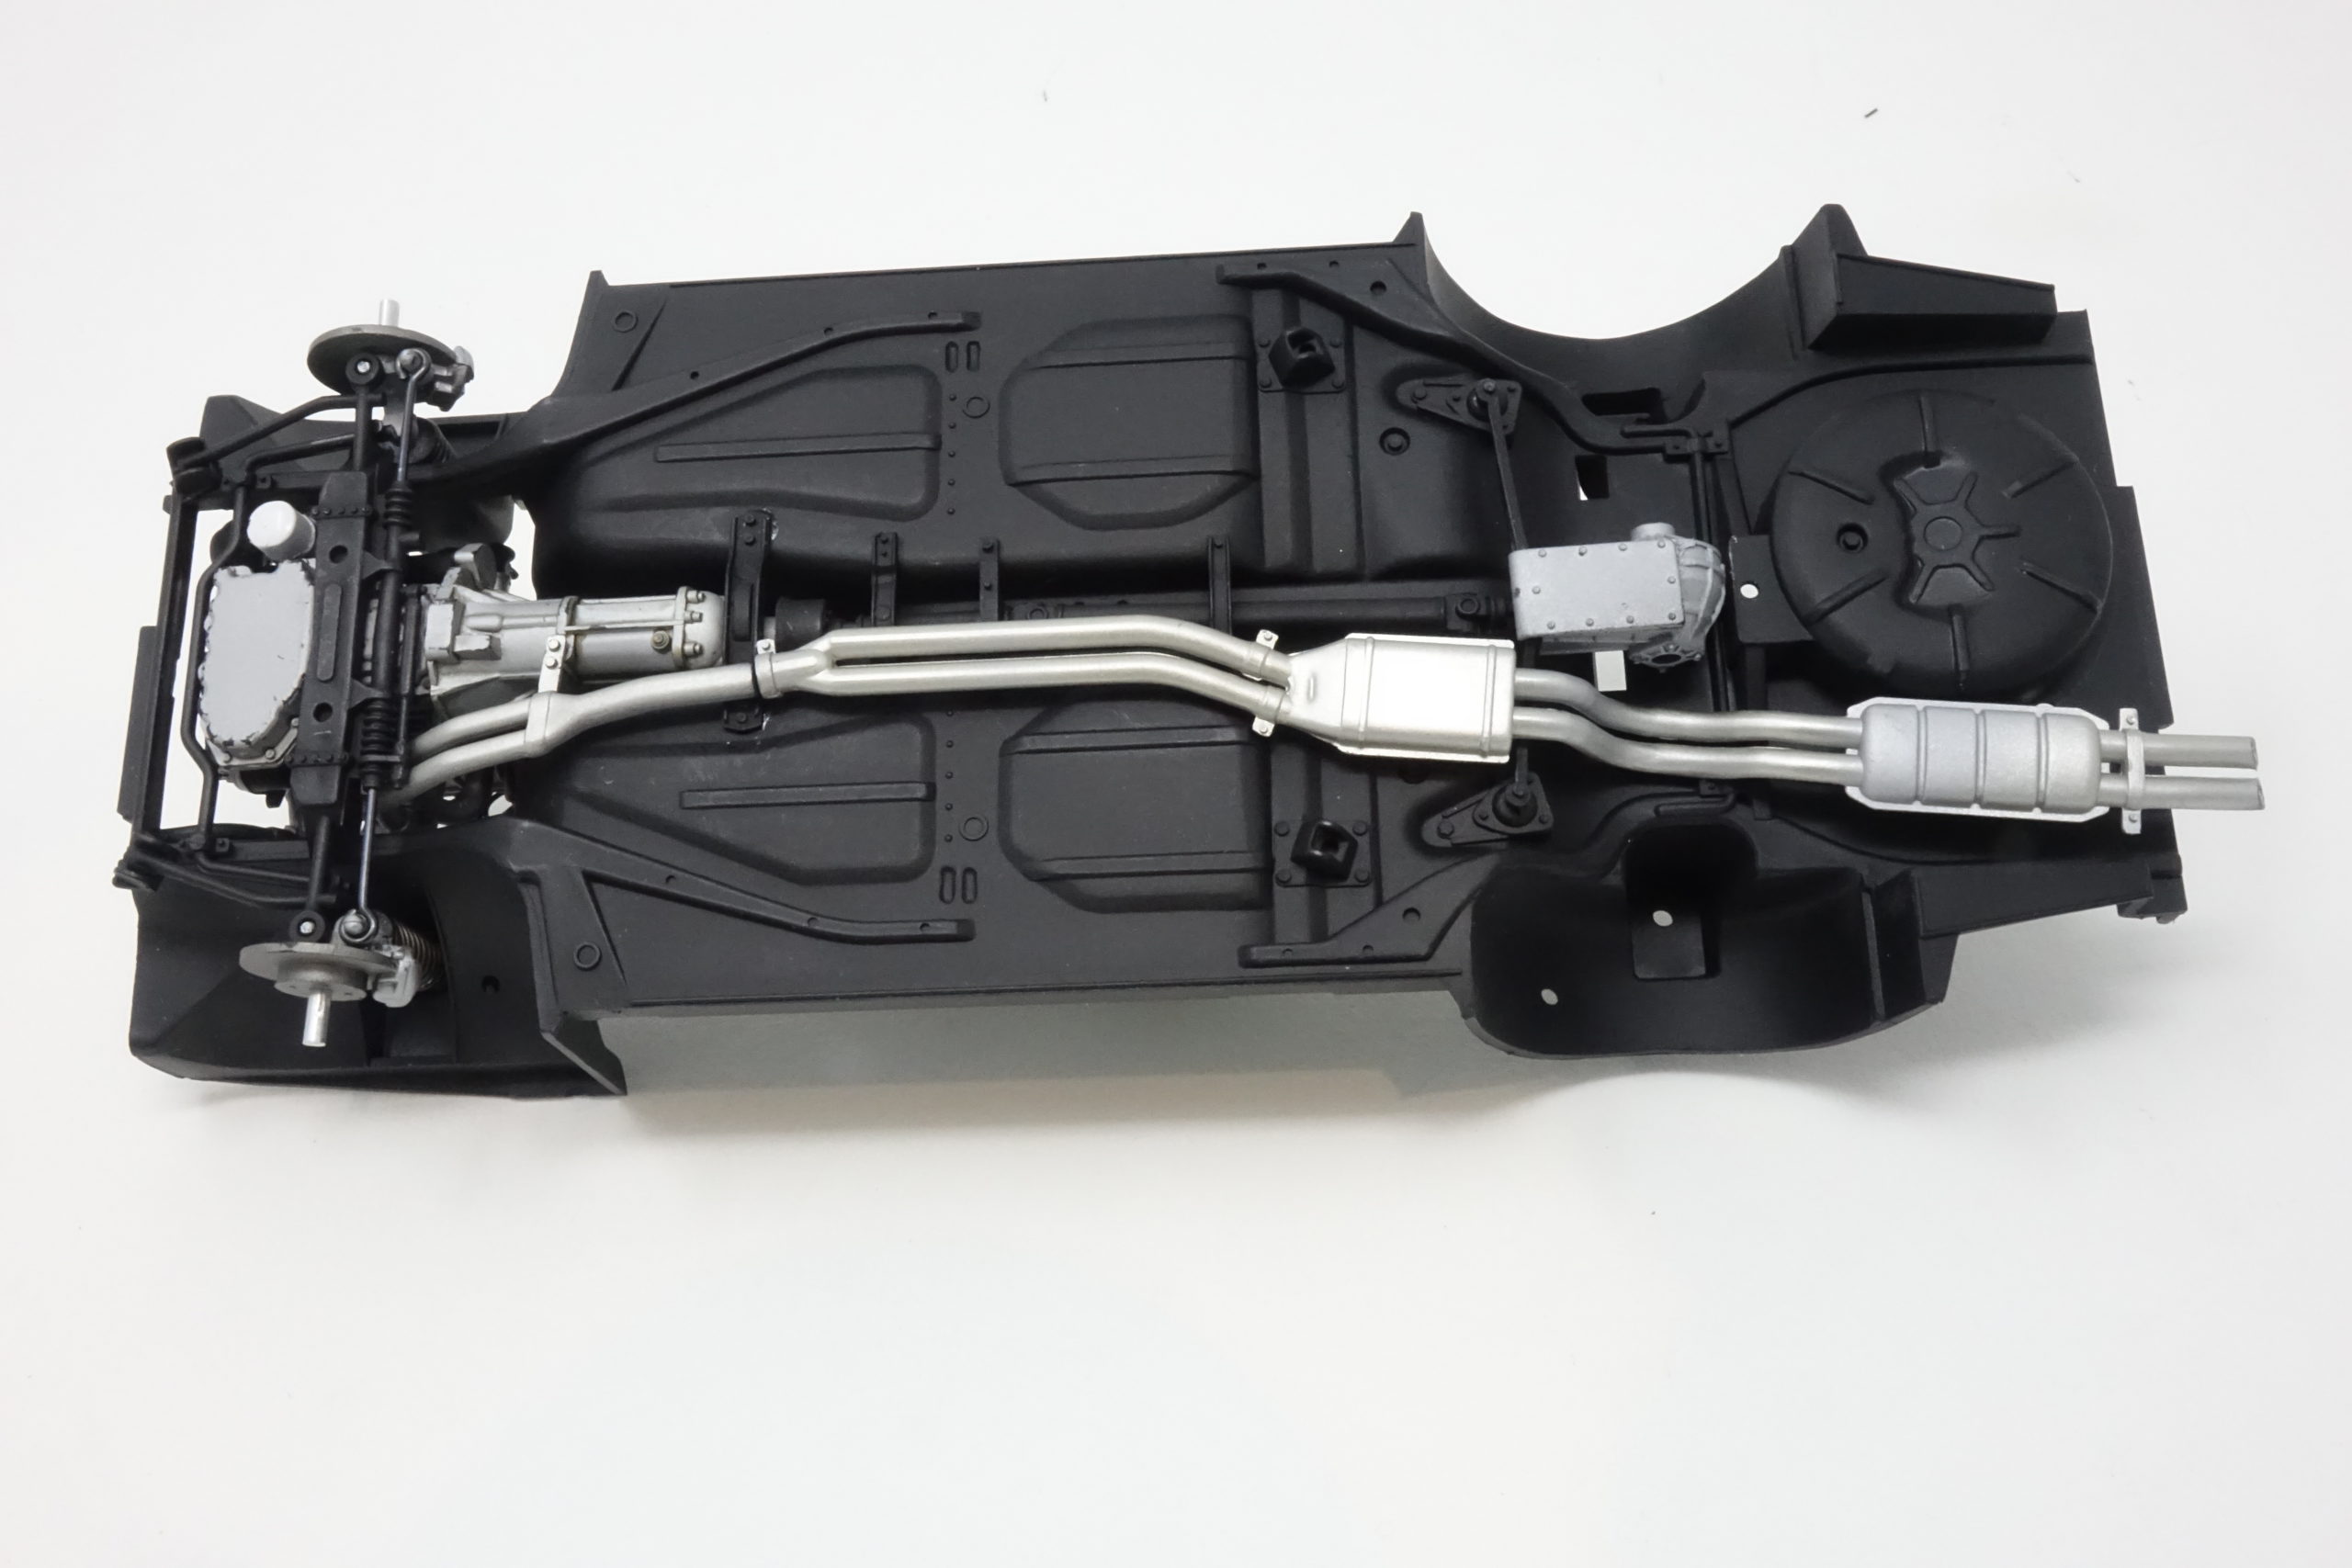
A straightforward build really. Usual high quality Tamiya moulding with very little flash needing trimming. Everything fitted superbly – exhausts, pulleys, hoses etc. No problem.
It was great to have a realistic distributor cap and some vinyl tubing for plug leads in the kit – but, for me the tubing was too thick and too springy, so I substituted it with some thinner, black ‘modelling’ (electrical) wire which seemed much more to scale to me – and, much easier to route into the plug holes in the cylinder head. If you are building this model, just be aware that the wires do need to be tidy and flat down on the engine – it’s quite a tight squeeze in the engine compartment when the strut brace is fitted later leaving clearance for the bonnet closure. It wasn’t a problem – but worth noting.


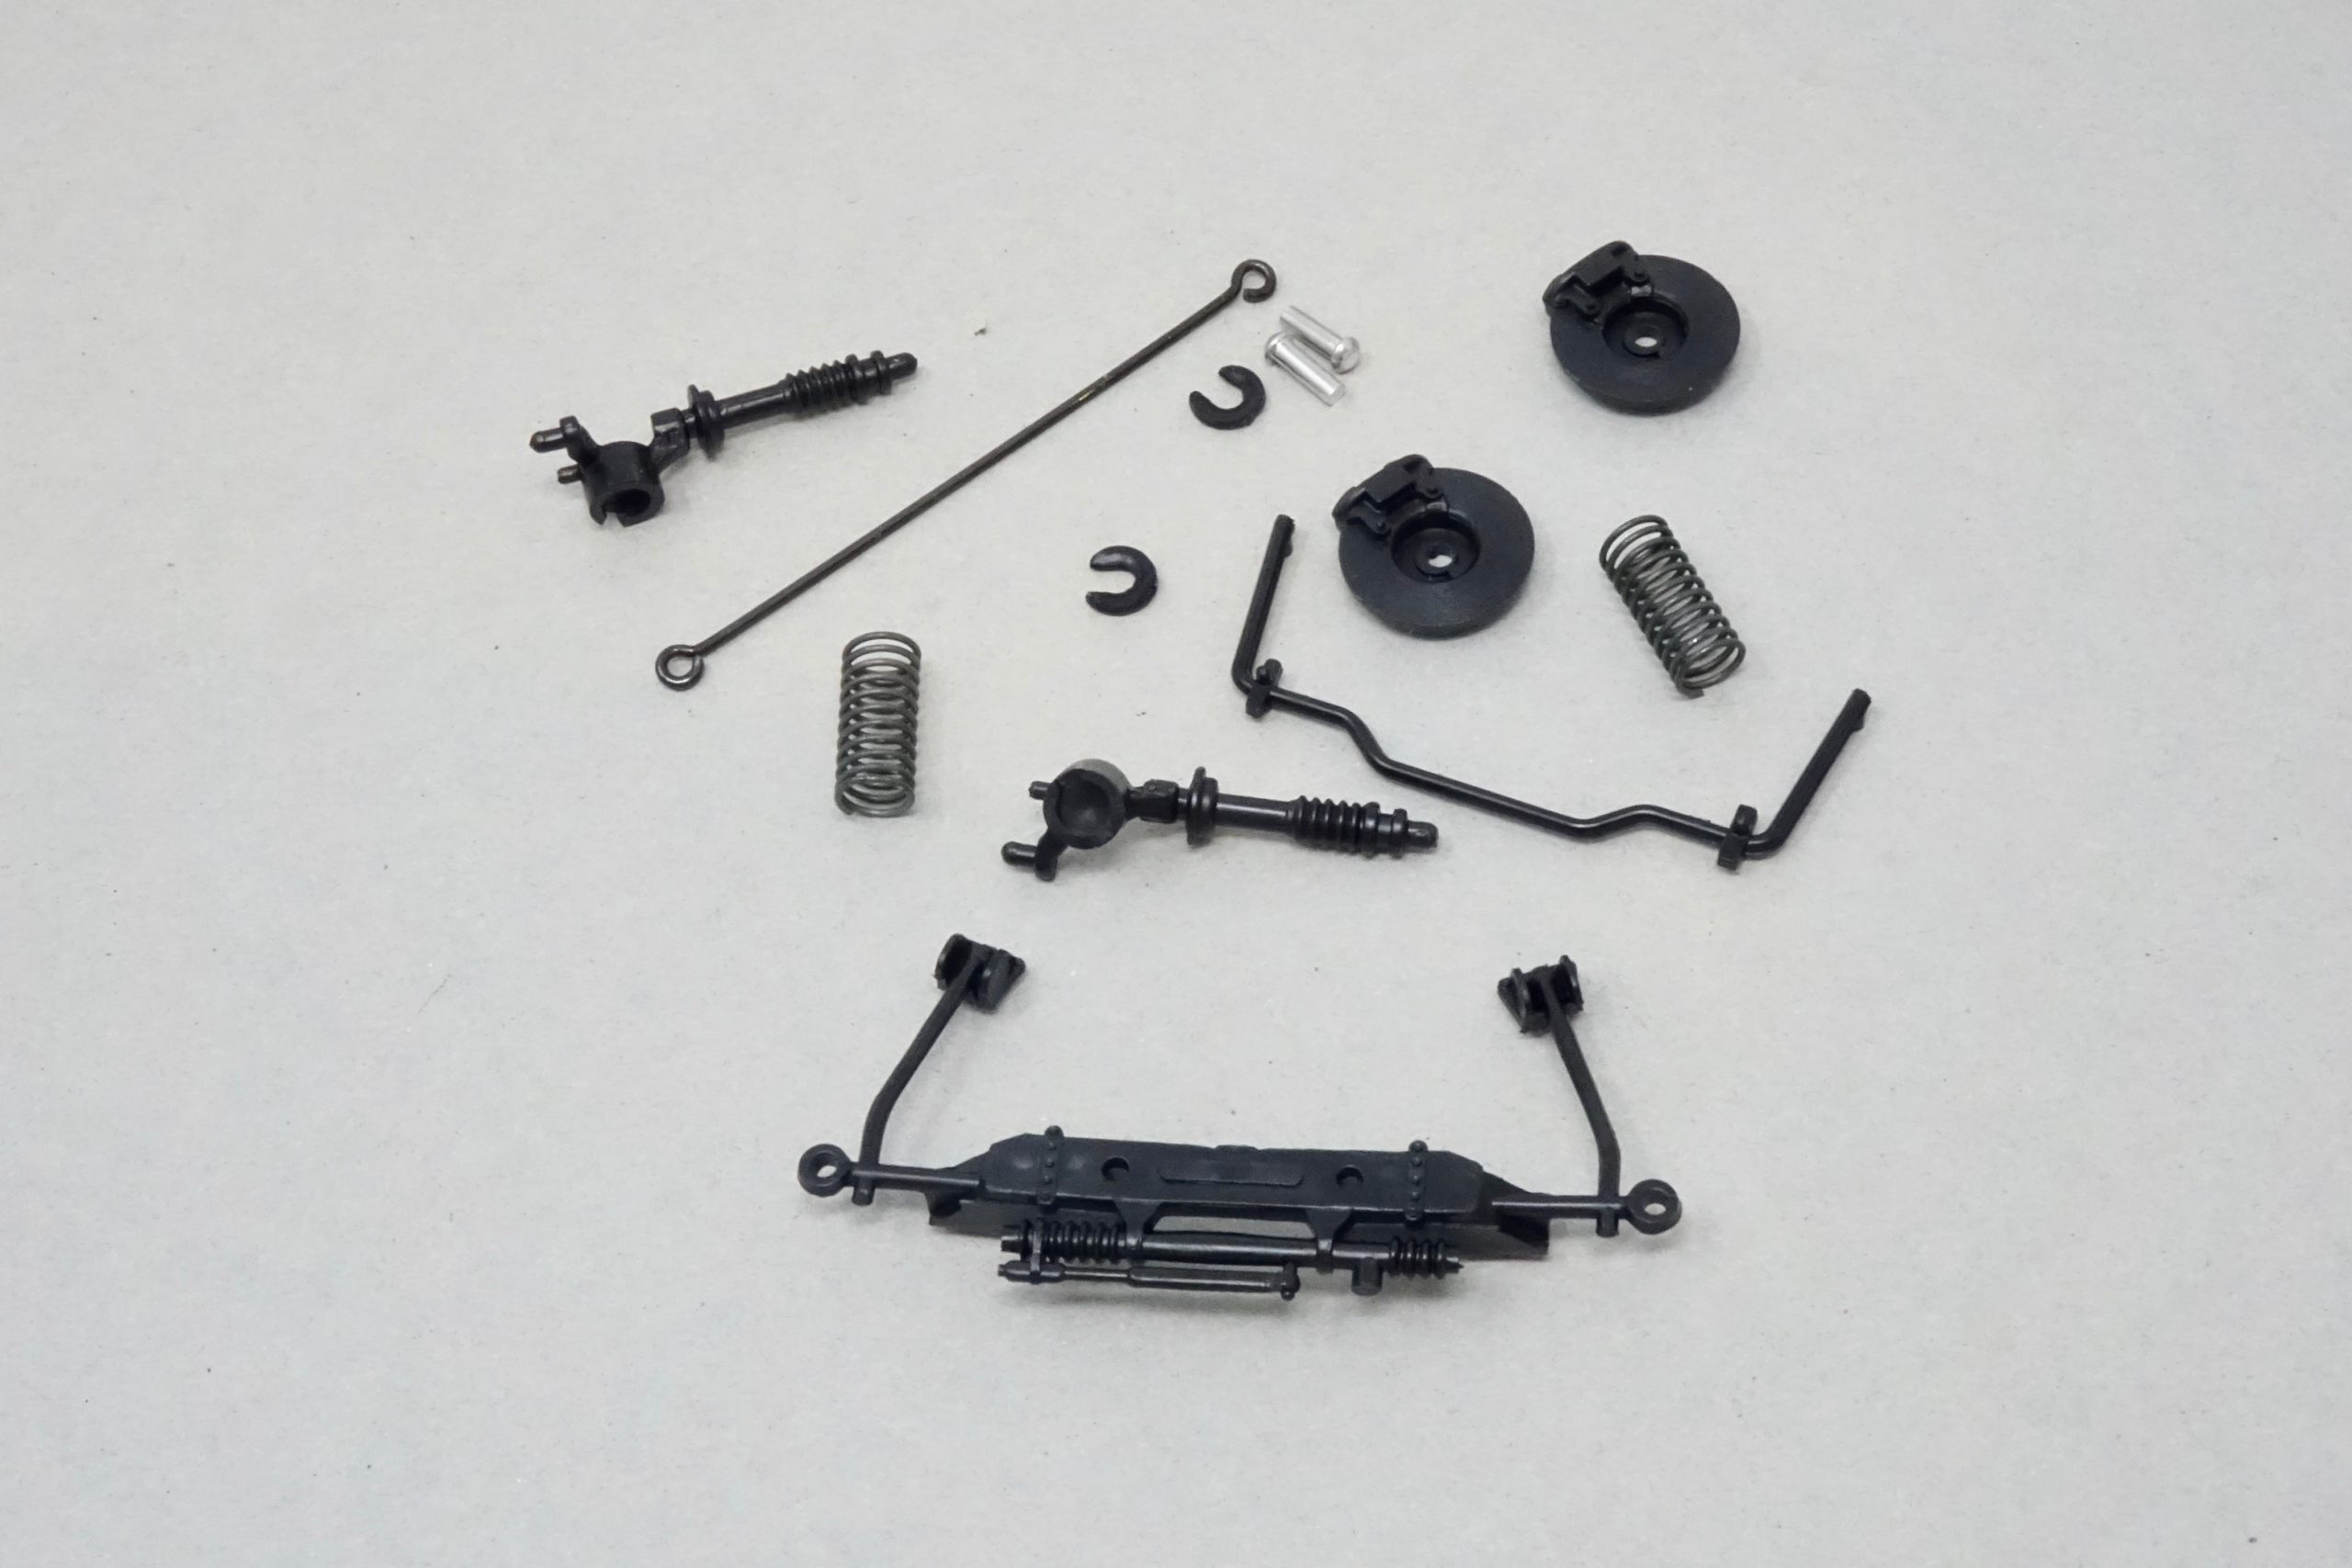
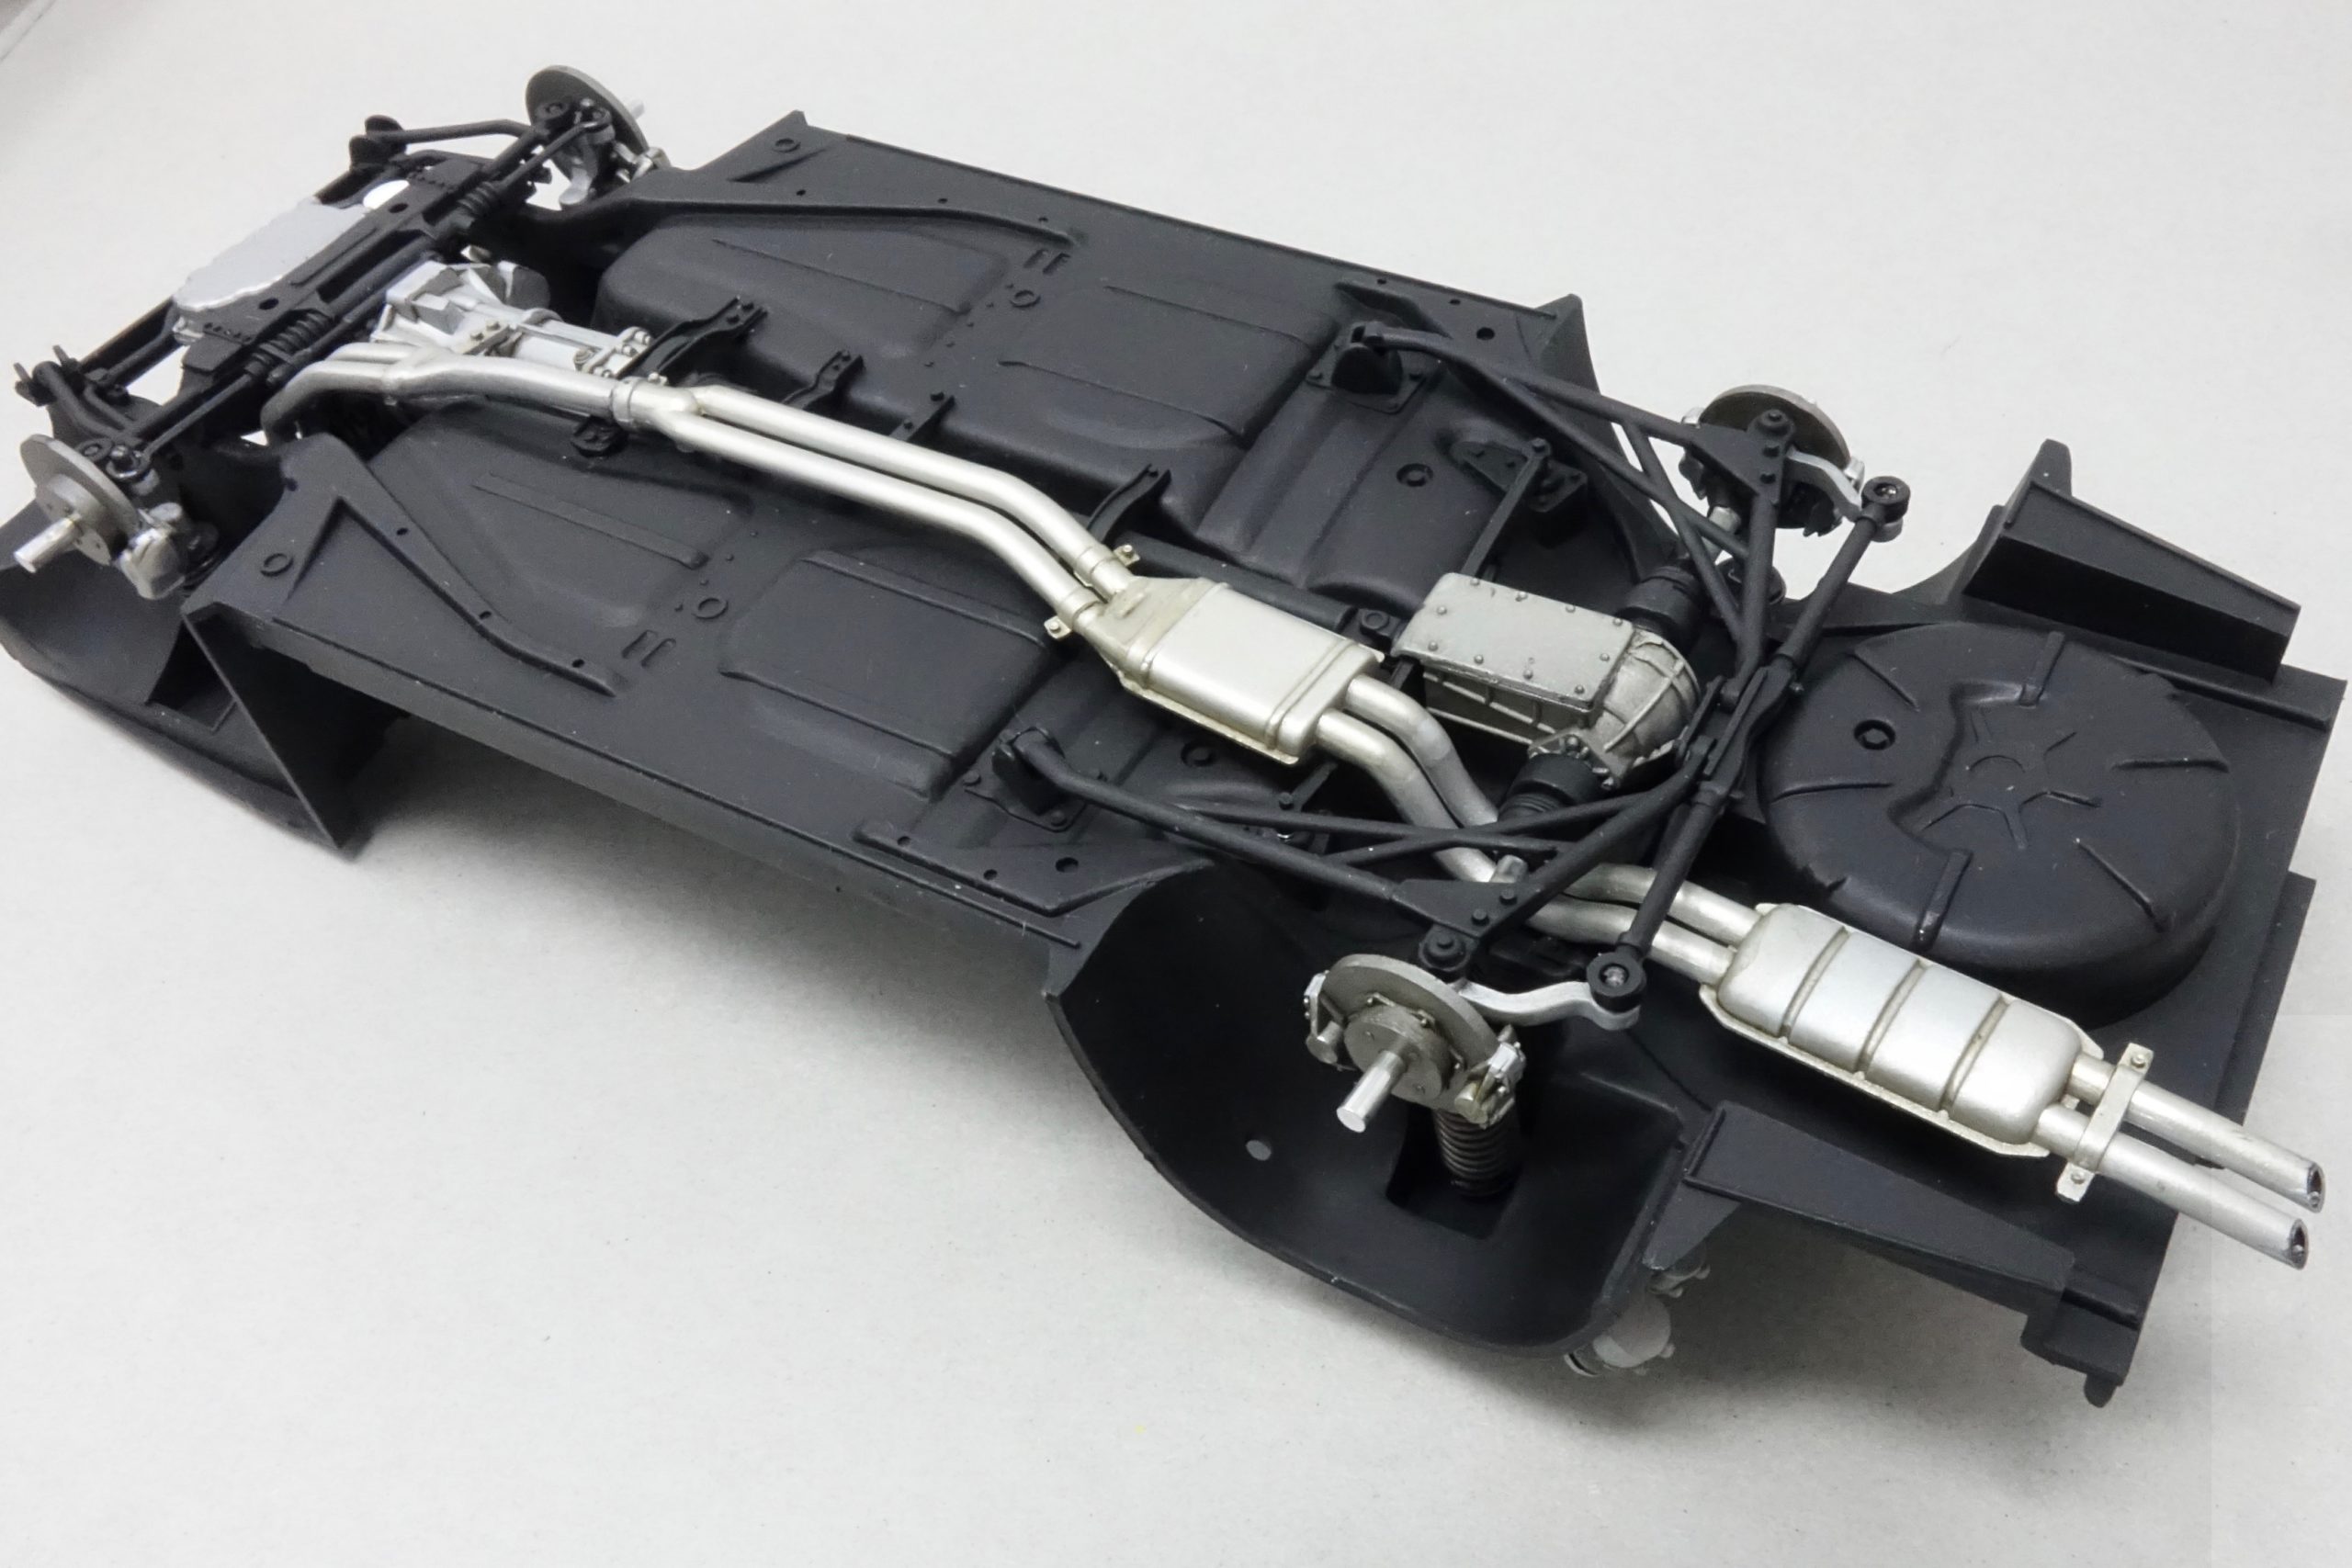
Floorpan/subframes etc.
Again, very straightforward. I painted the underside in Semi Gloss Black and the cabin interior area in Nato Black (LP60), just to add a little contrast.
Exhaust/engine fitting
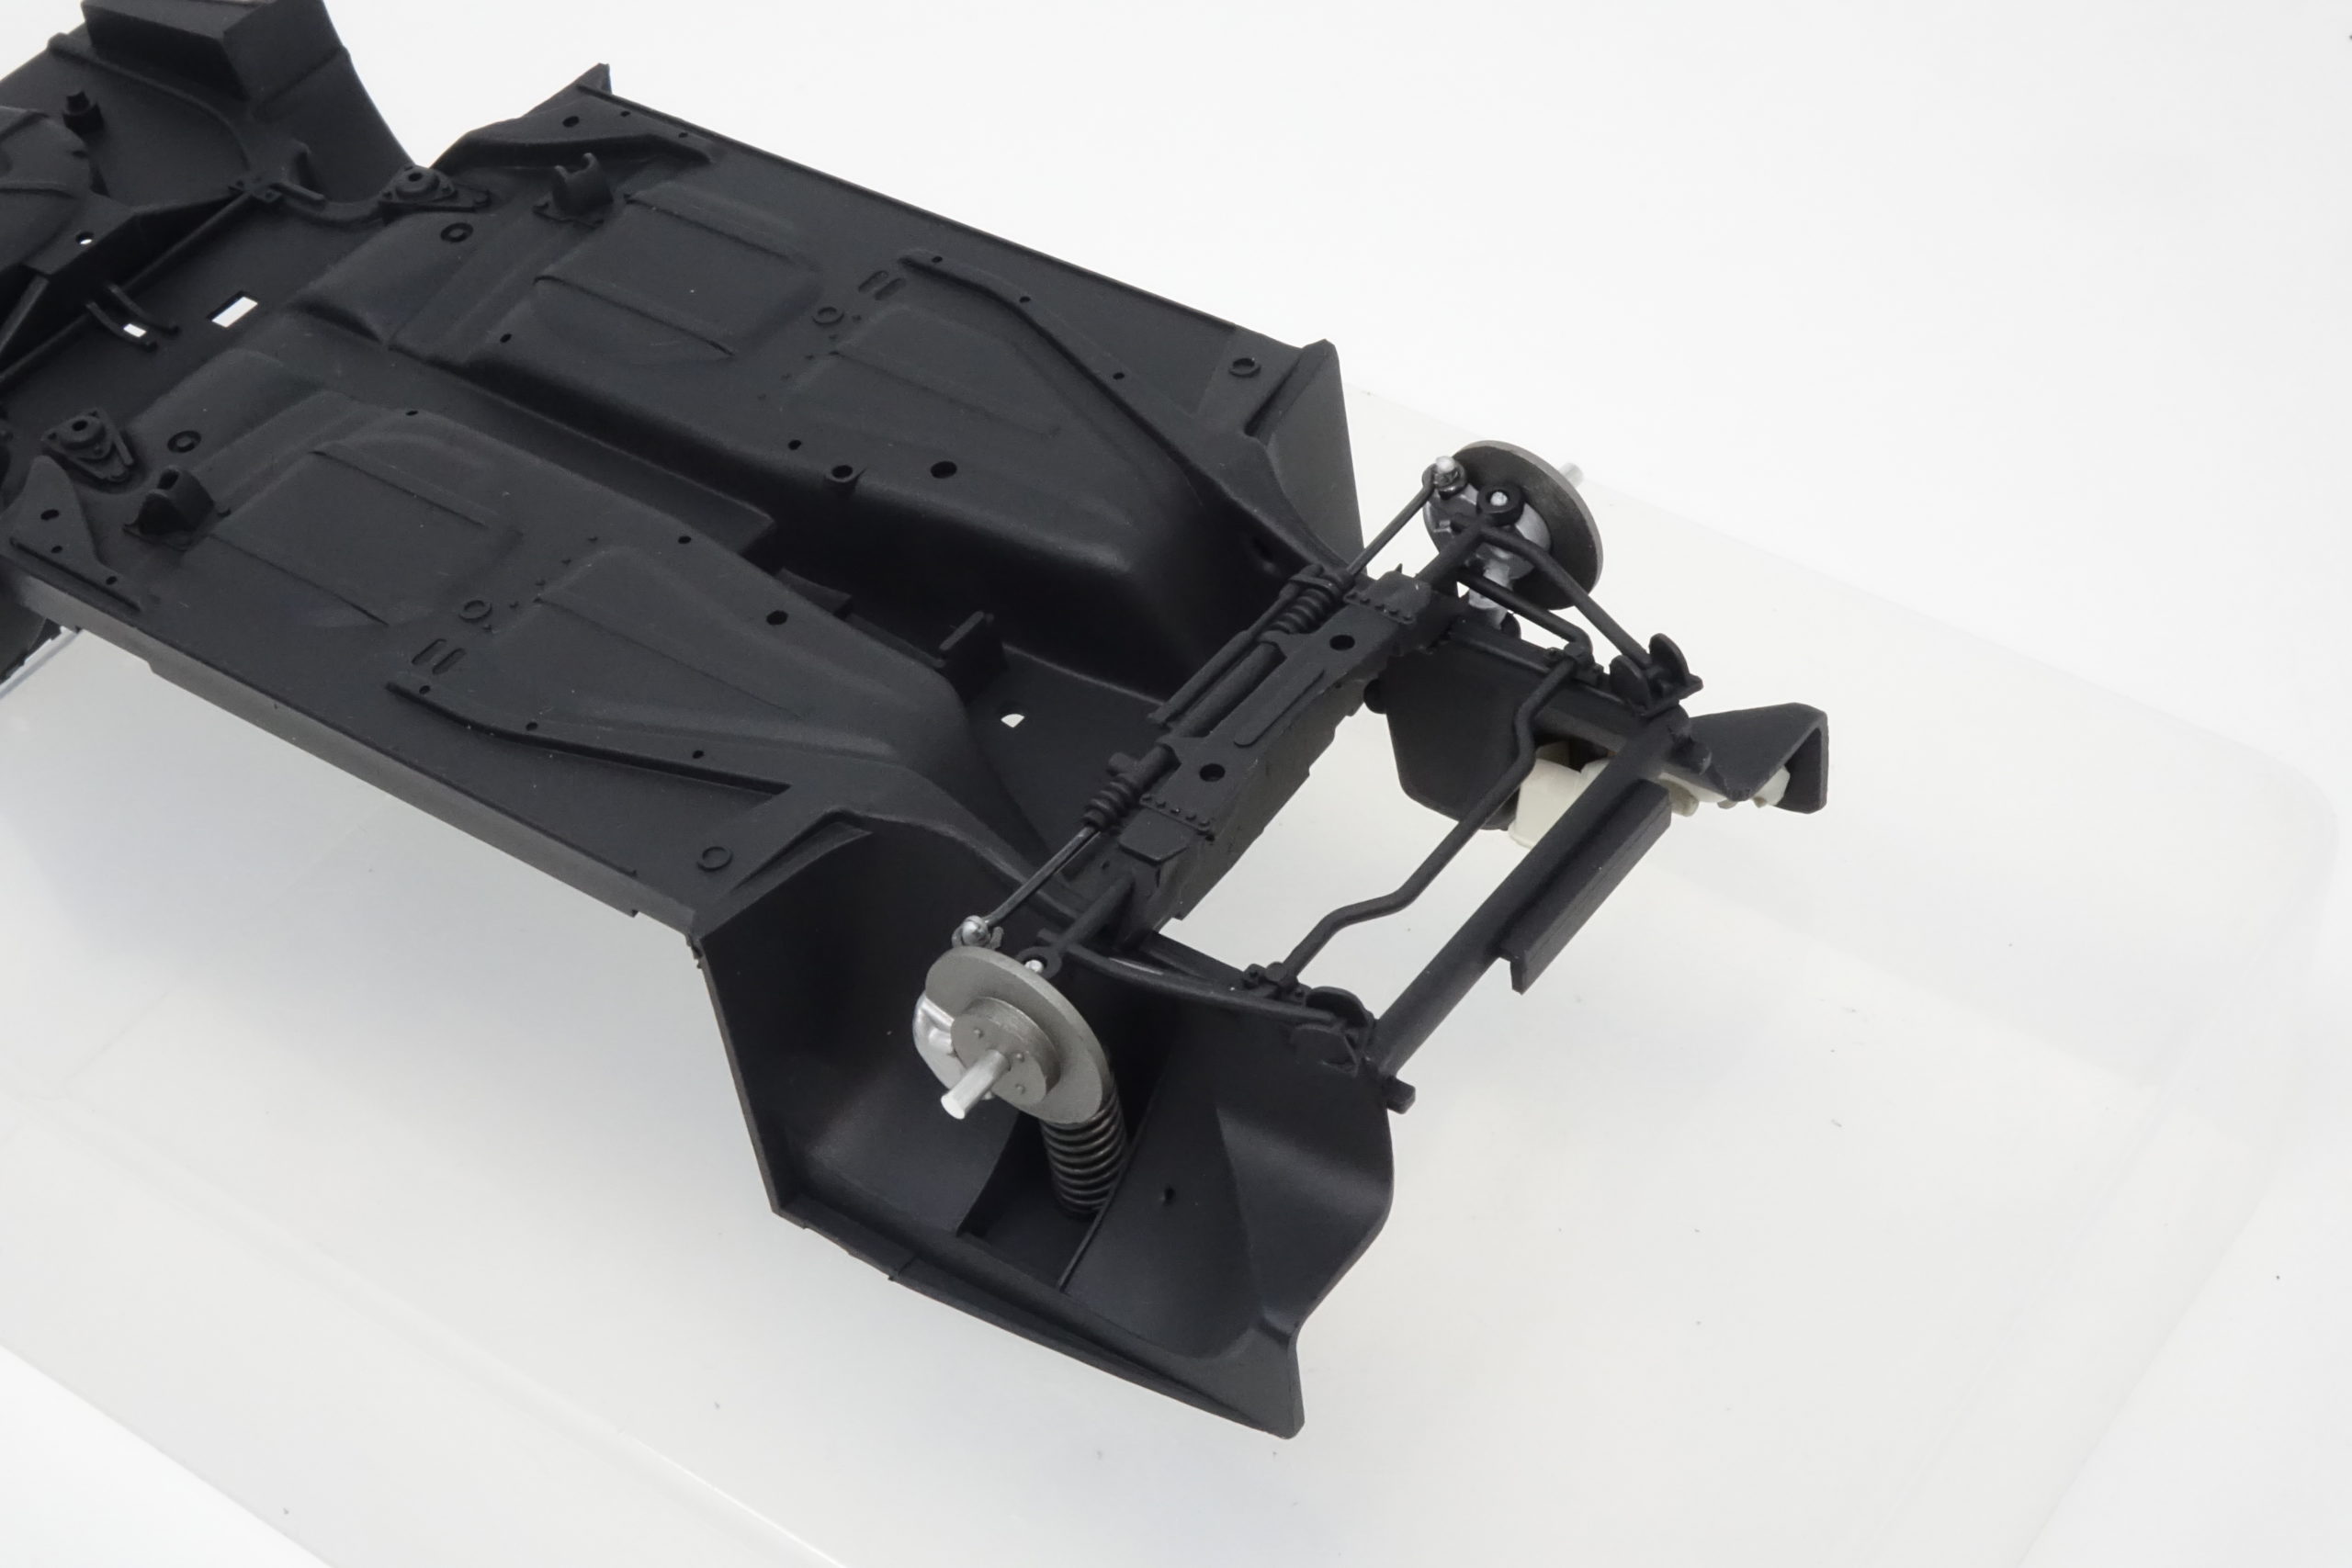
This went very well overall. There are some under bonnet parts to fit before the engine goes in ( washer bags, water reservoirs etc) and it’s important that part C13 is fitted well inwards at the bottom, otherwise it fouls the engine. It’s quite a tight squeeze getting the engine/gearbox unit in place with all the front suspension on – in fact I realised that a couple of the front subframe parts could have been fitted after the engine was in place, no problem. This would have made this step much easier. The anti roll bar can be fitted after the engine is in place.
The only issue/problem I had here was to get the engine/gearbox to fit tightly and pushed well down on the engine mountings. It did take a few goes and a bit of tweaking. I was mindful of the fact that the engine (cam covers etc) fit very high up in the engine compartment and there was a danger that I would have a problem with the strut brace and bonnet fitting later. So I tested all this out as I went through this stage. In the end it was all fine.
Exhaust trimmed, painted and in place – all the mountings fitted perfectly.
The engine ancillaries and other under-bonnet components were then all painted and fitted.
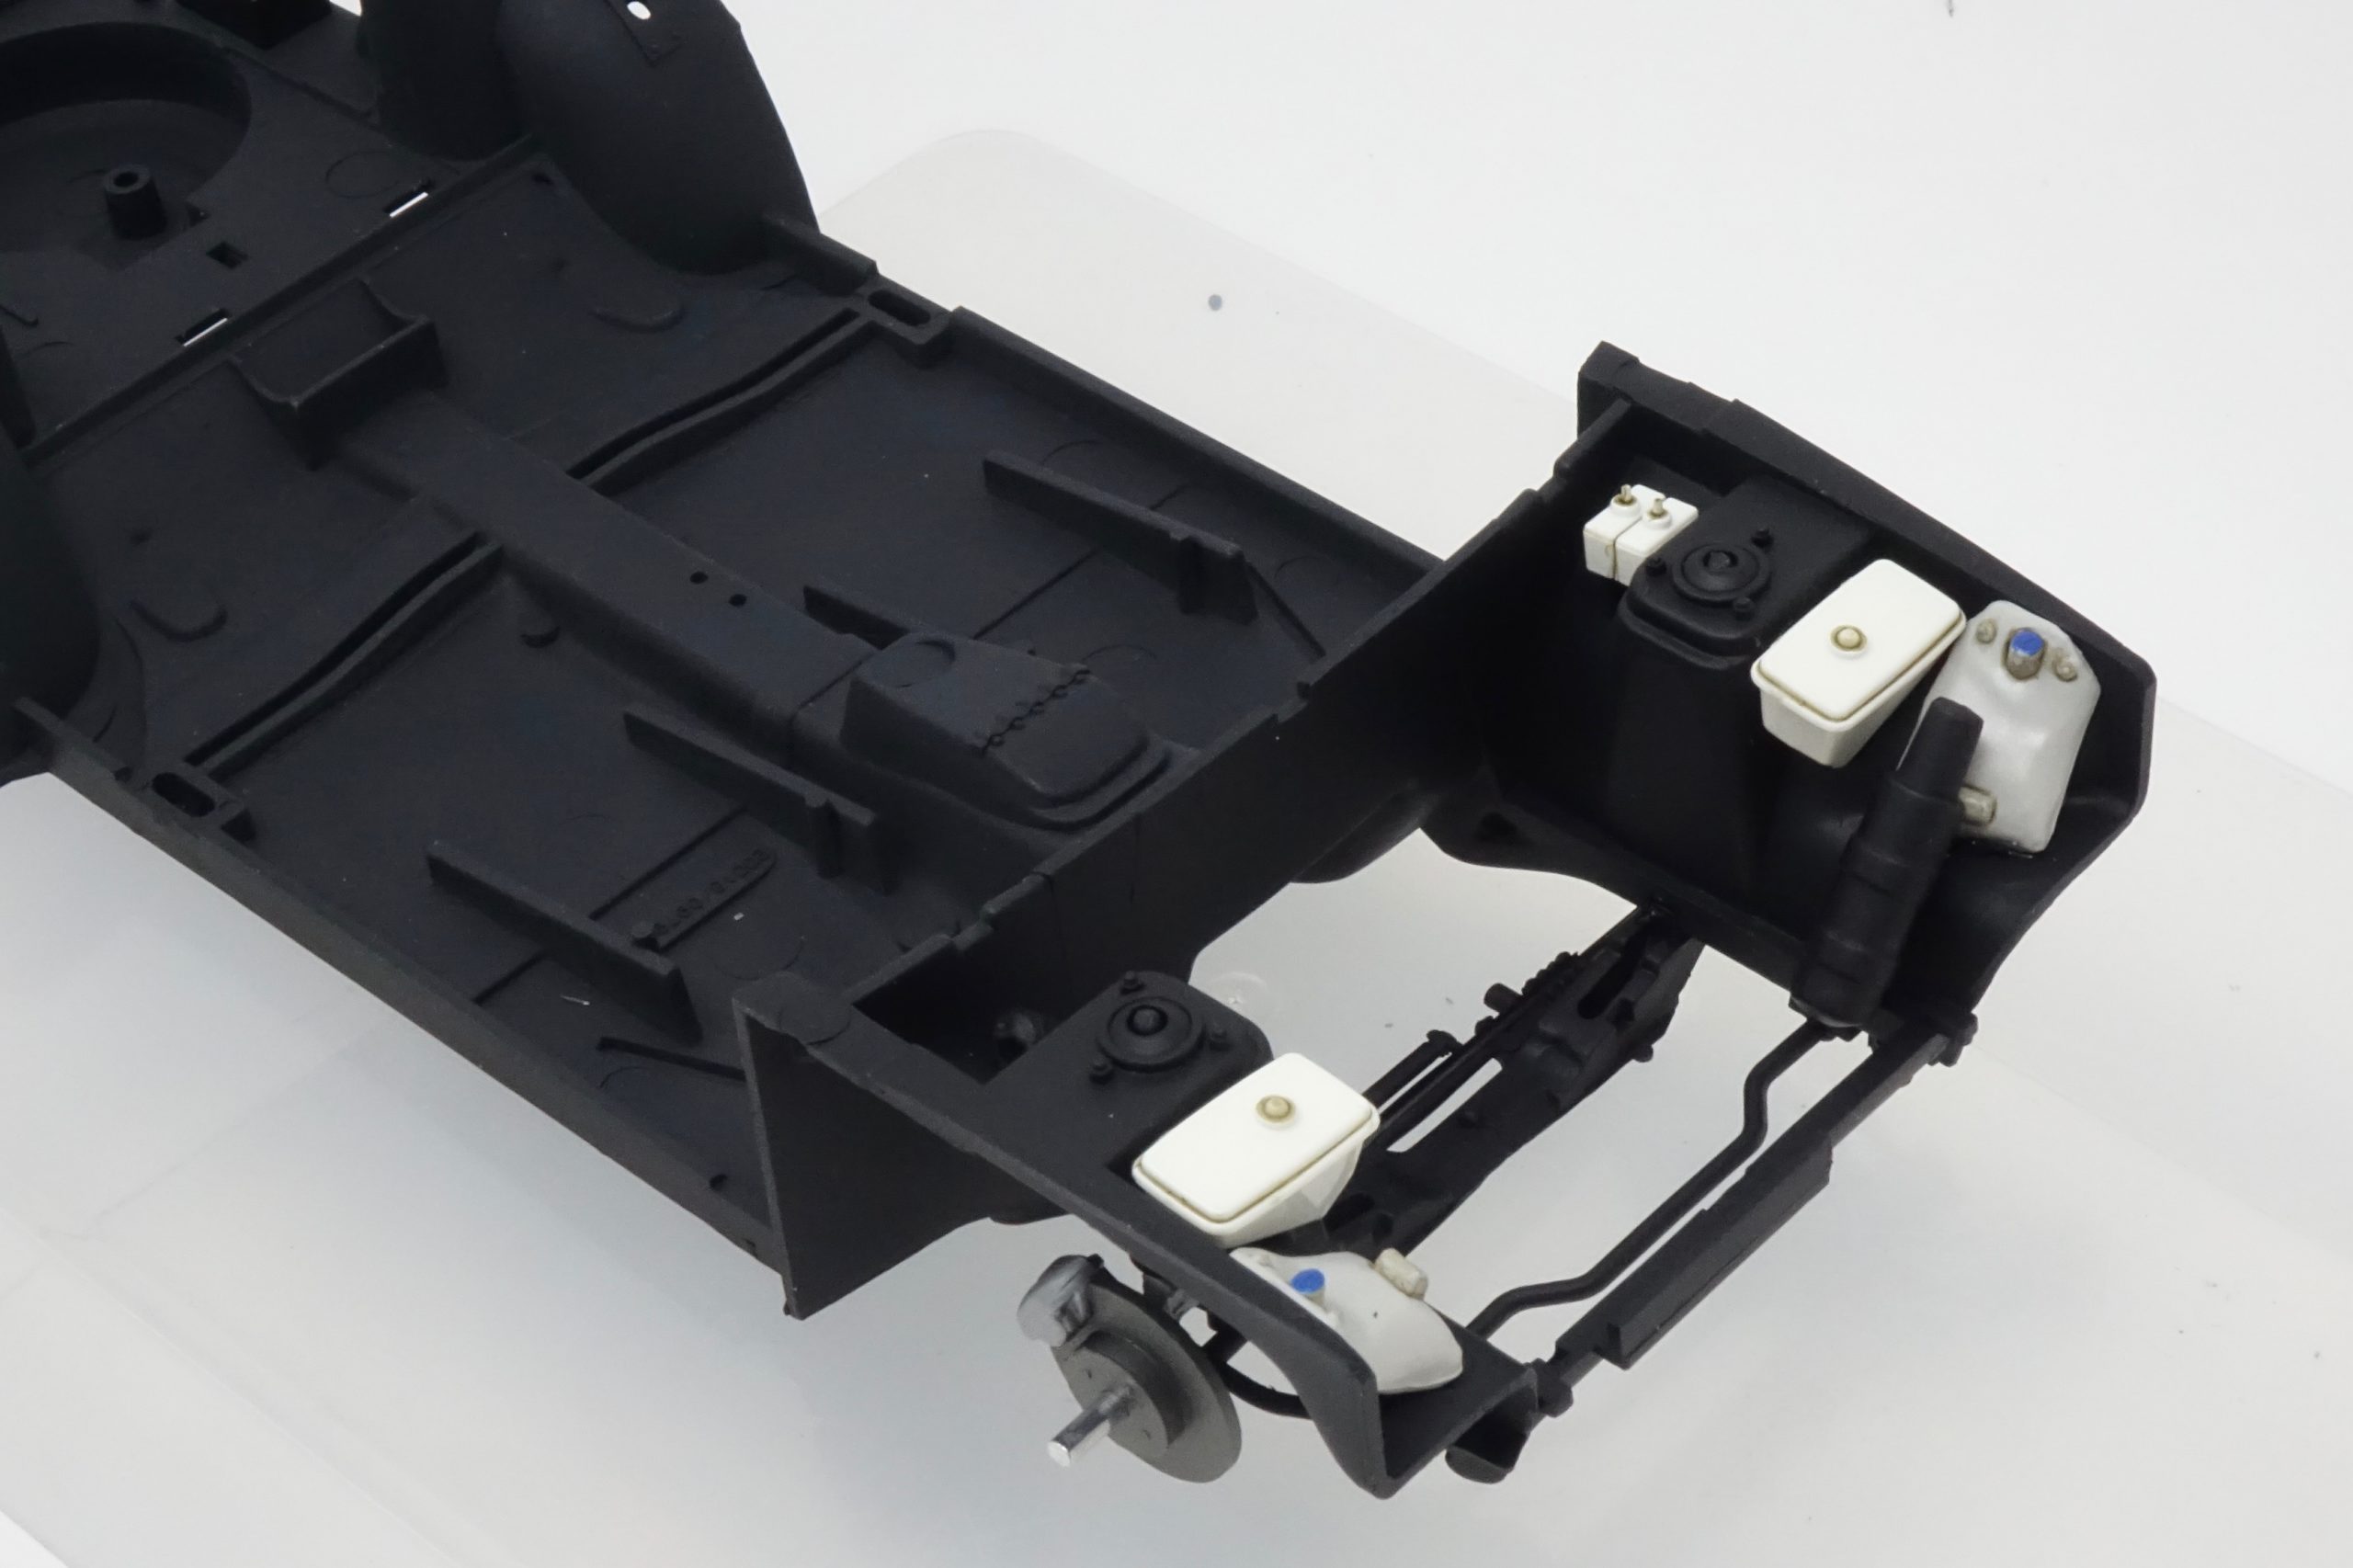
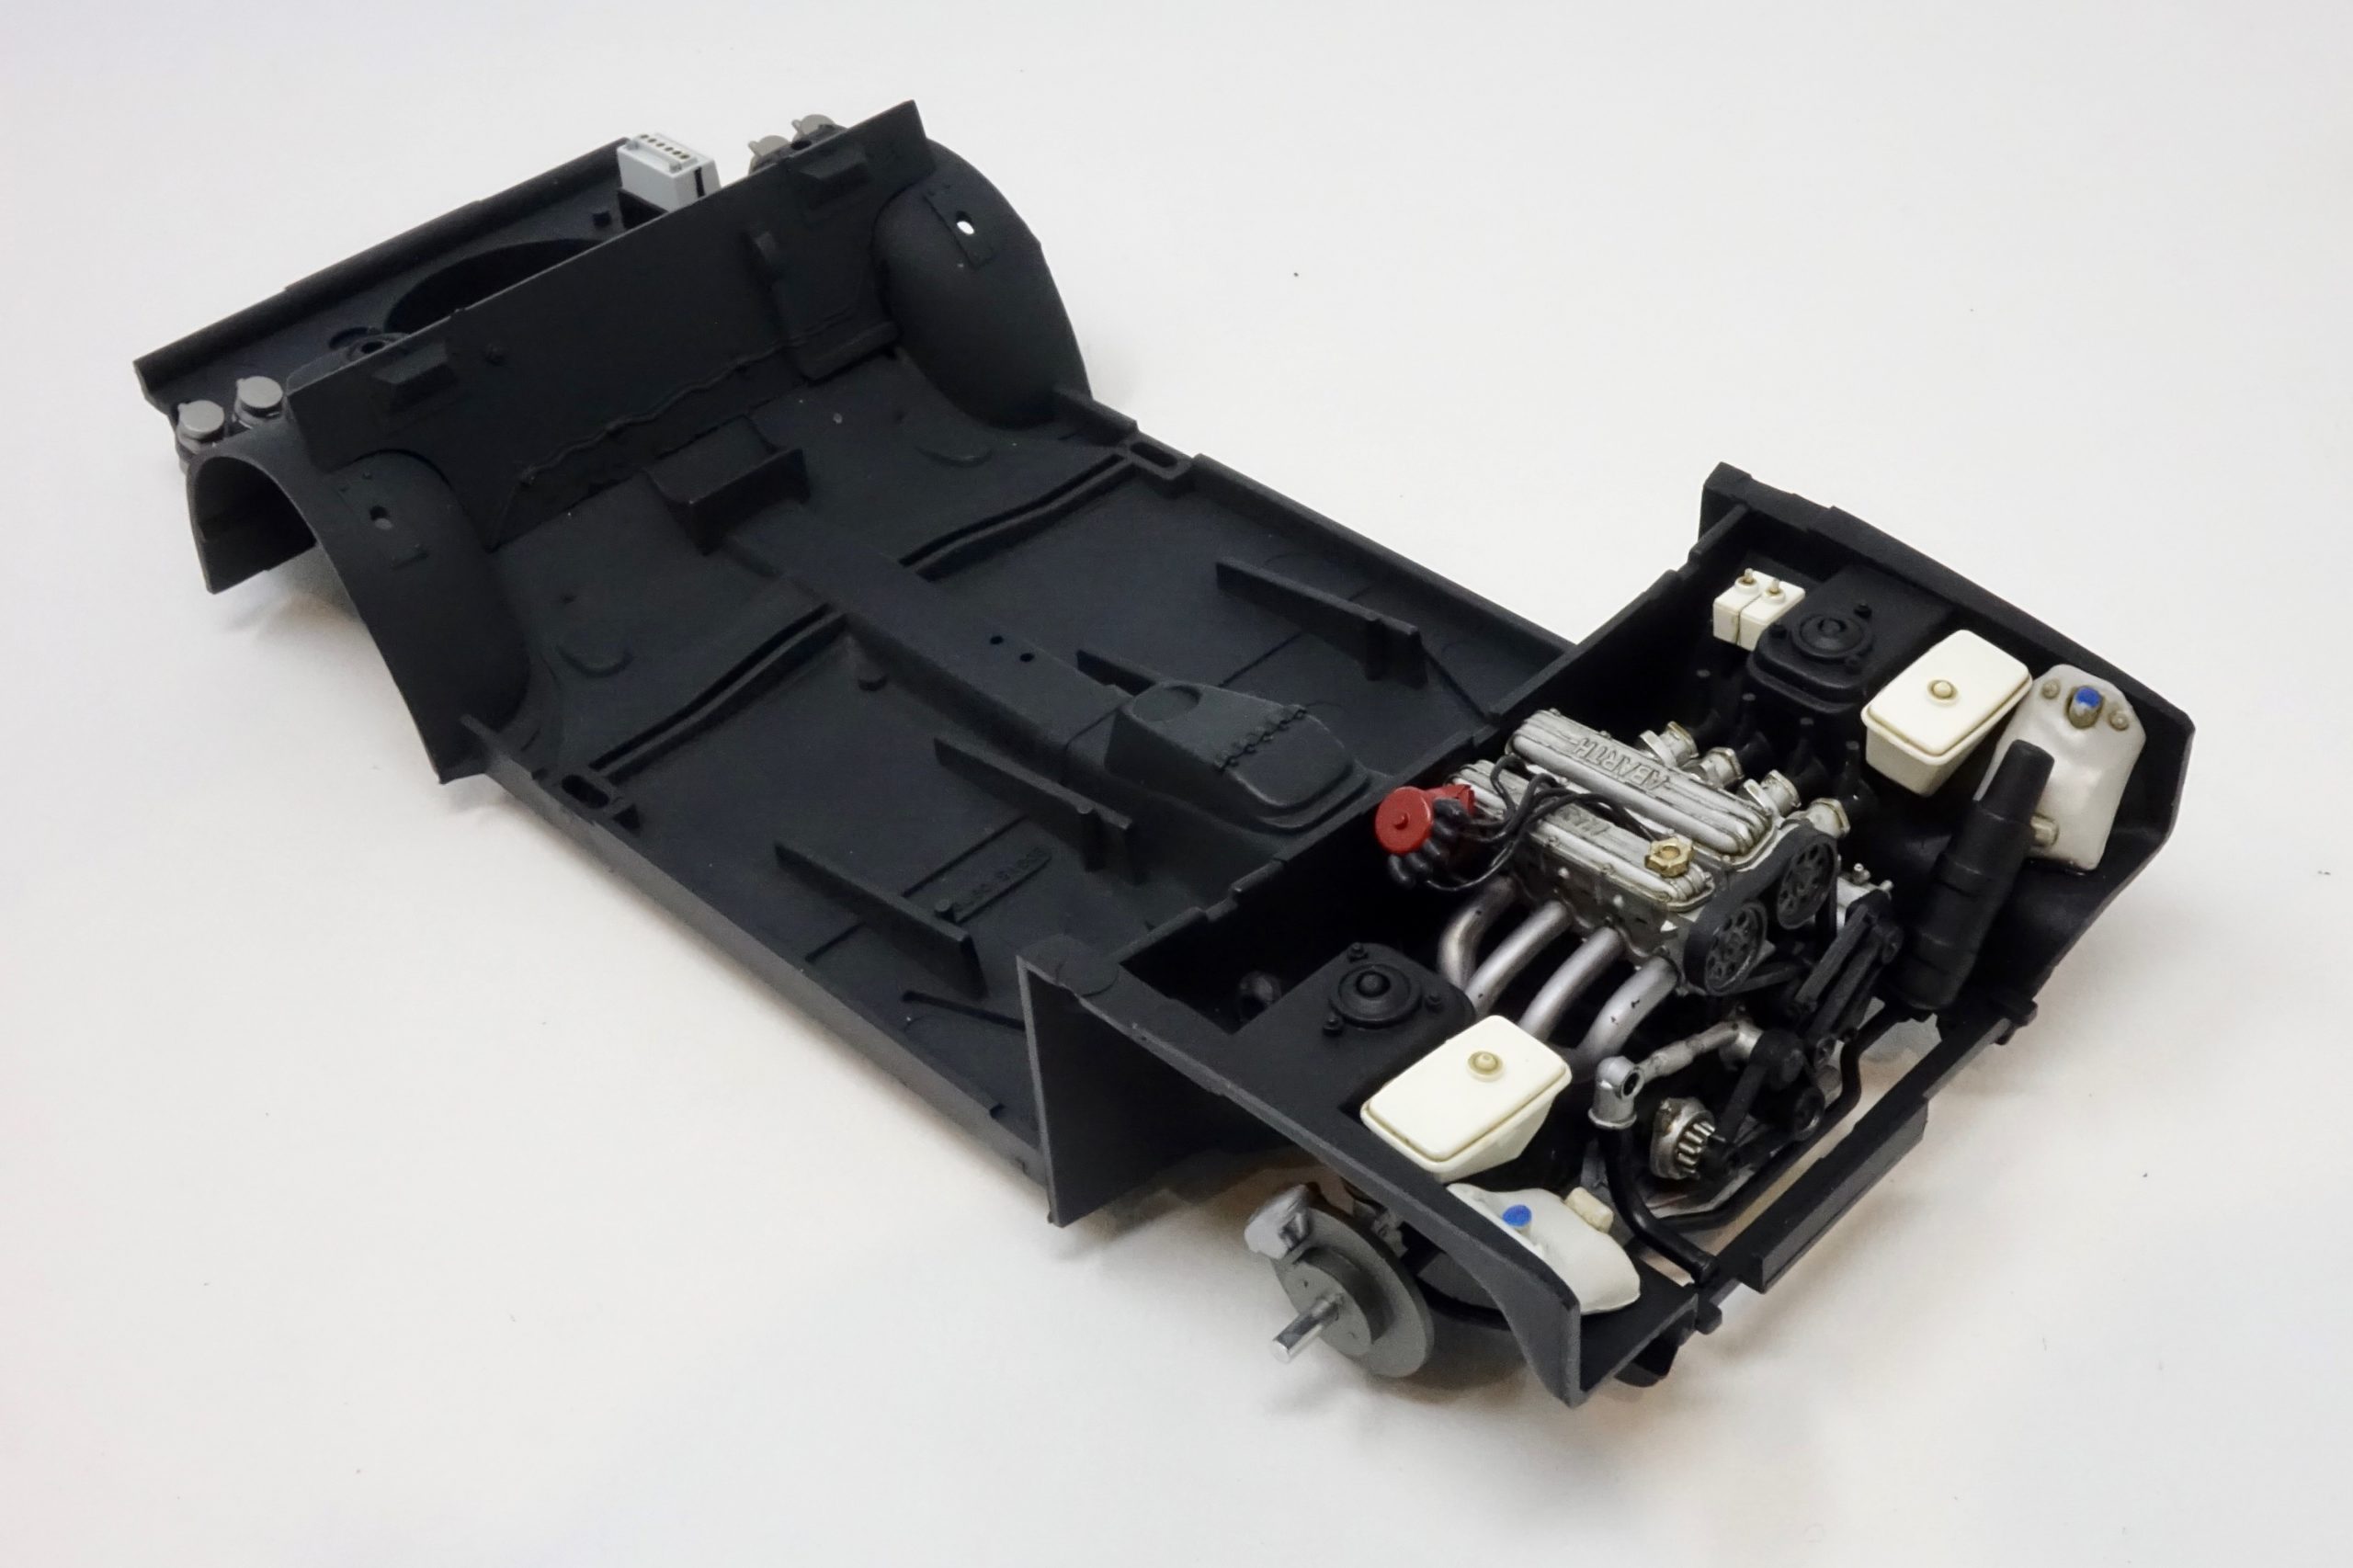
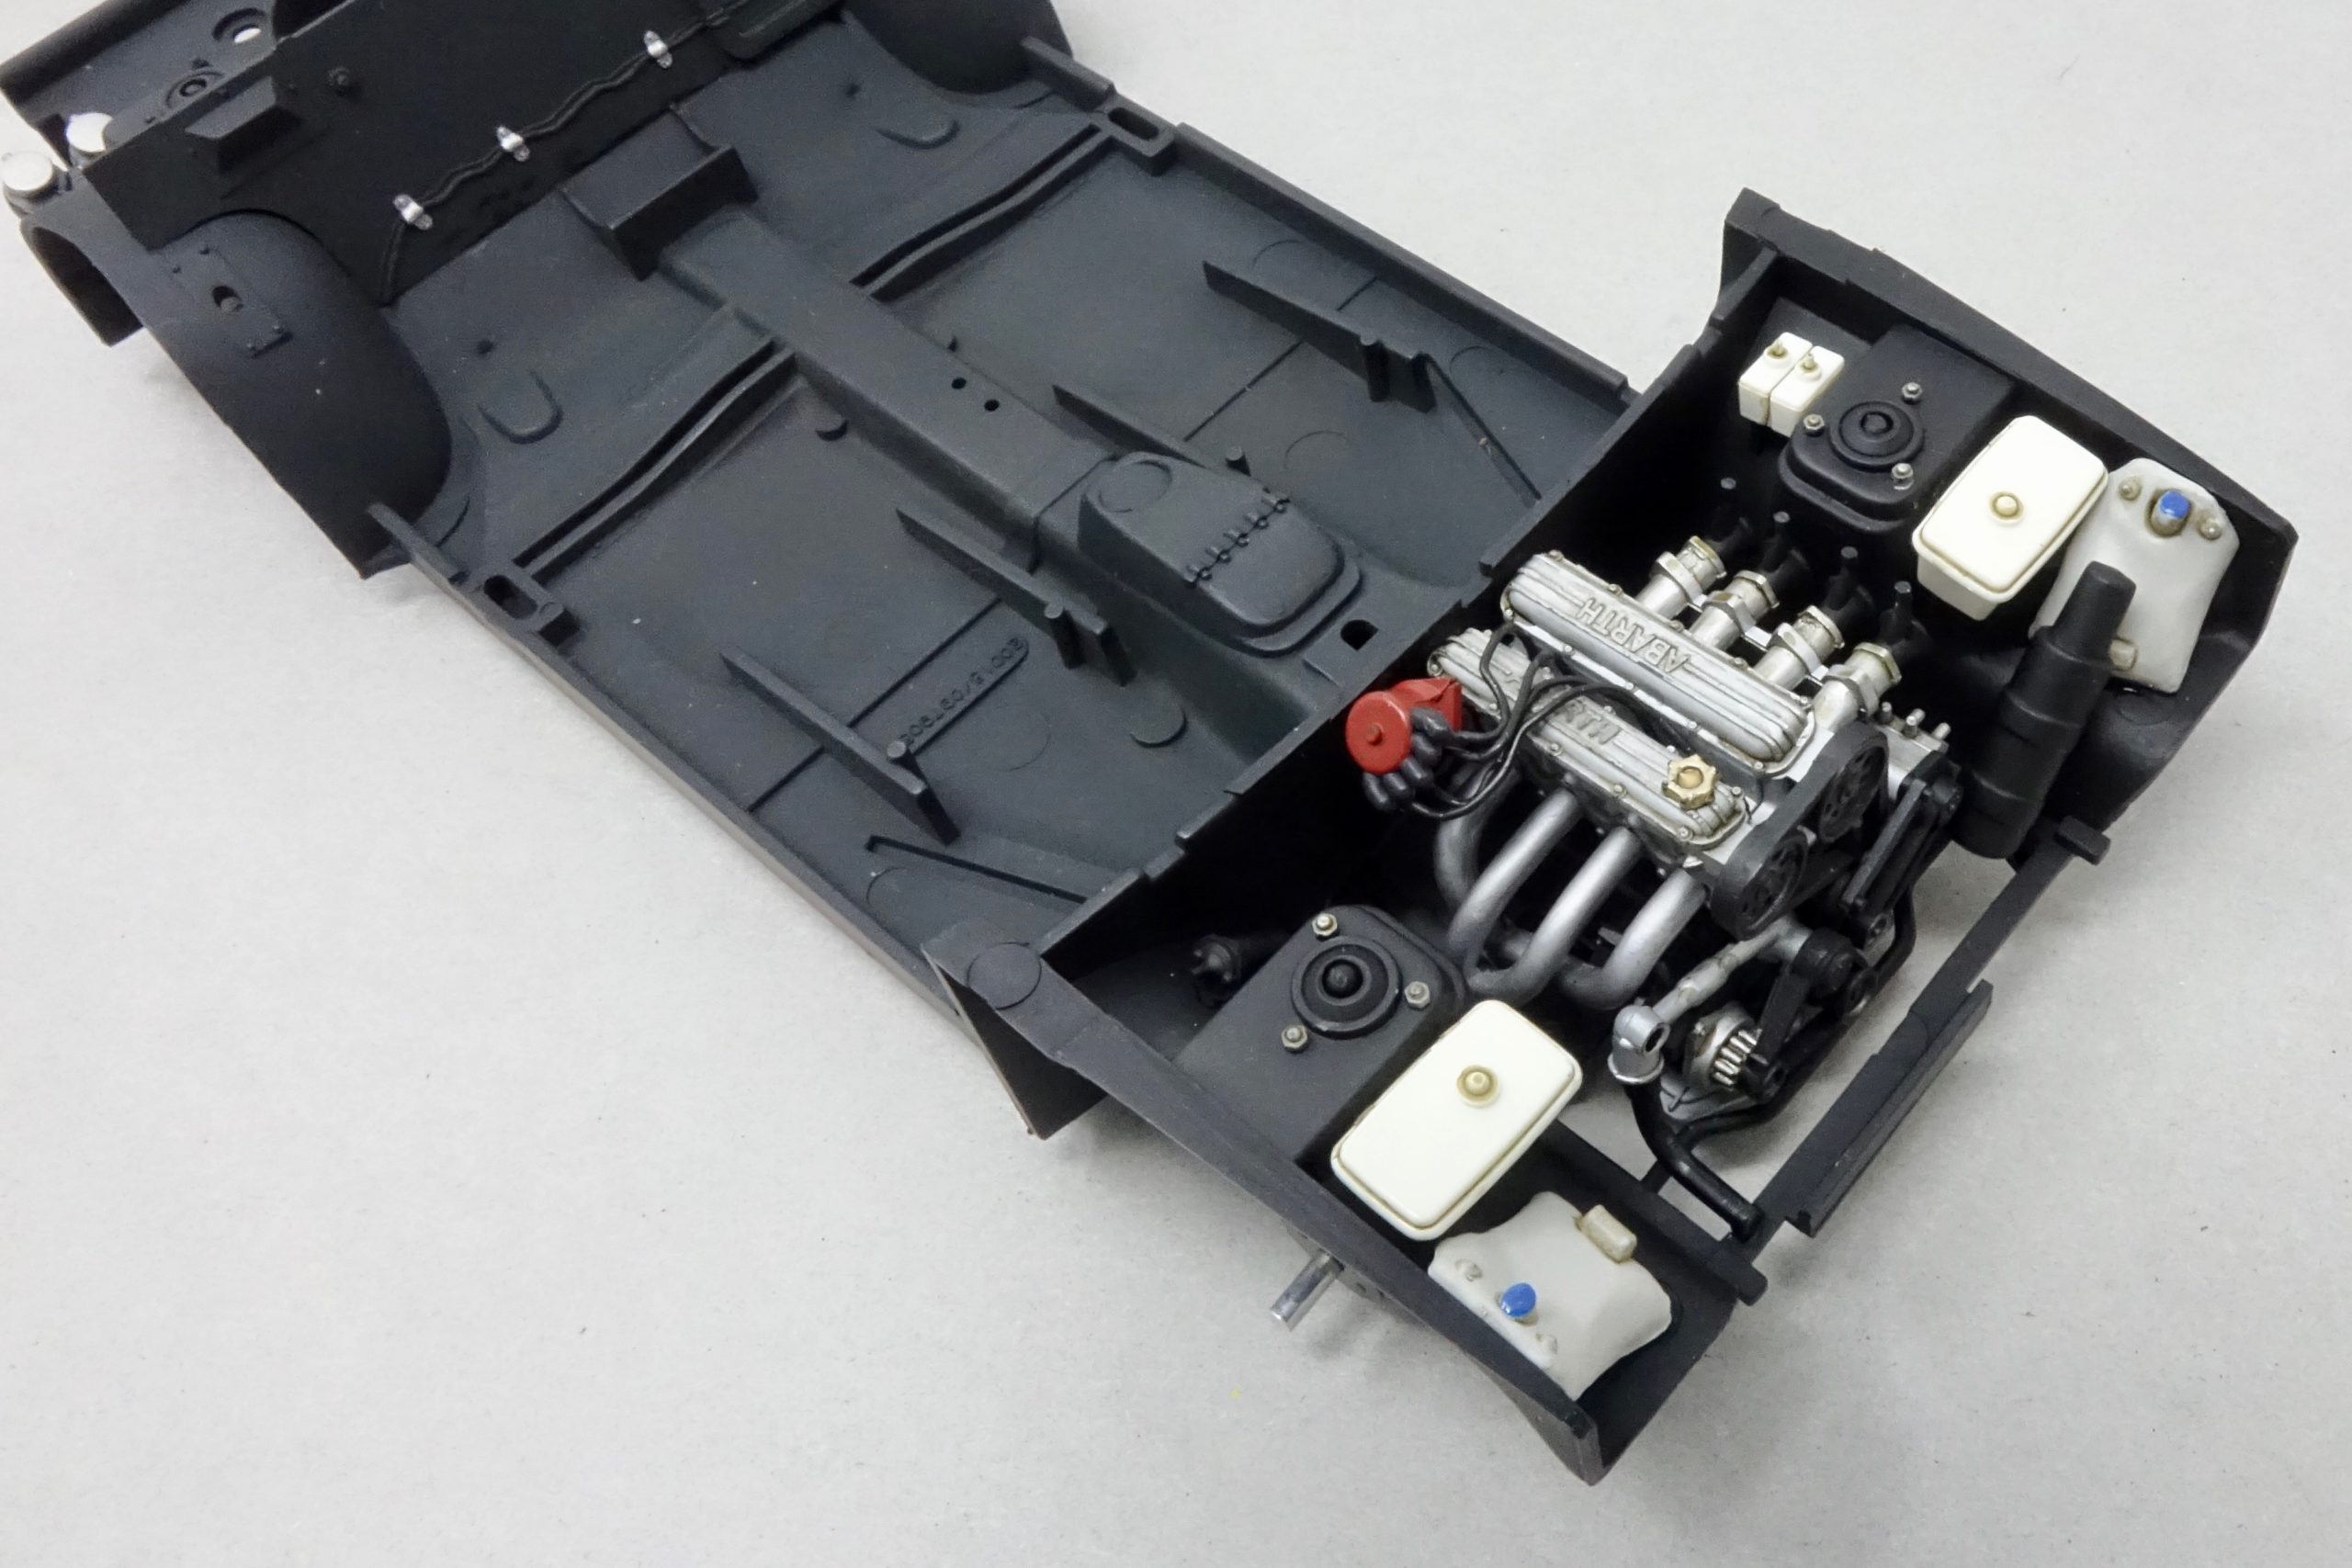
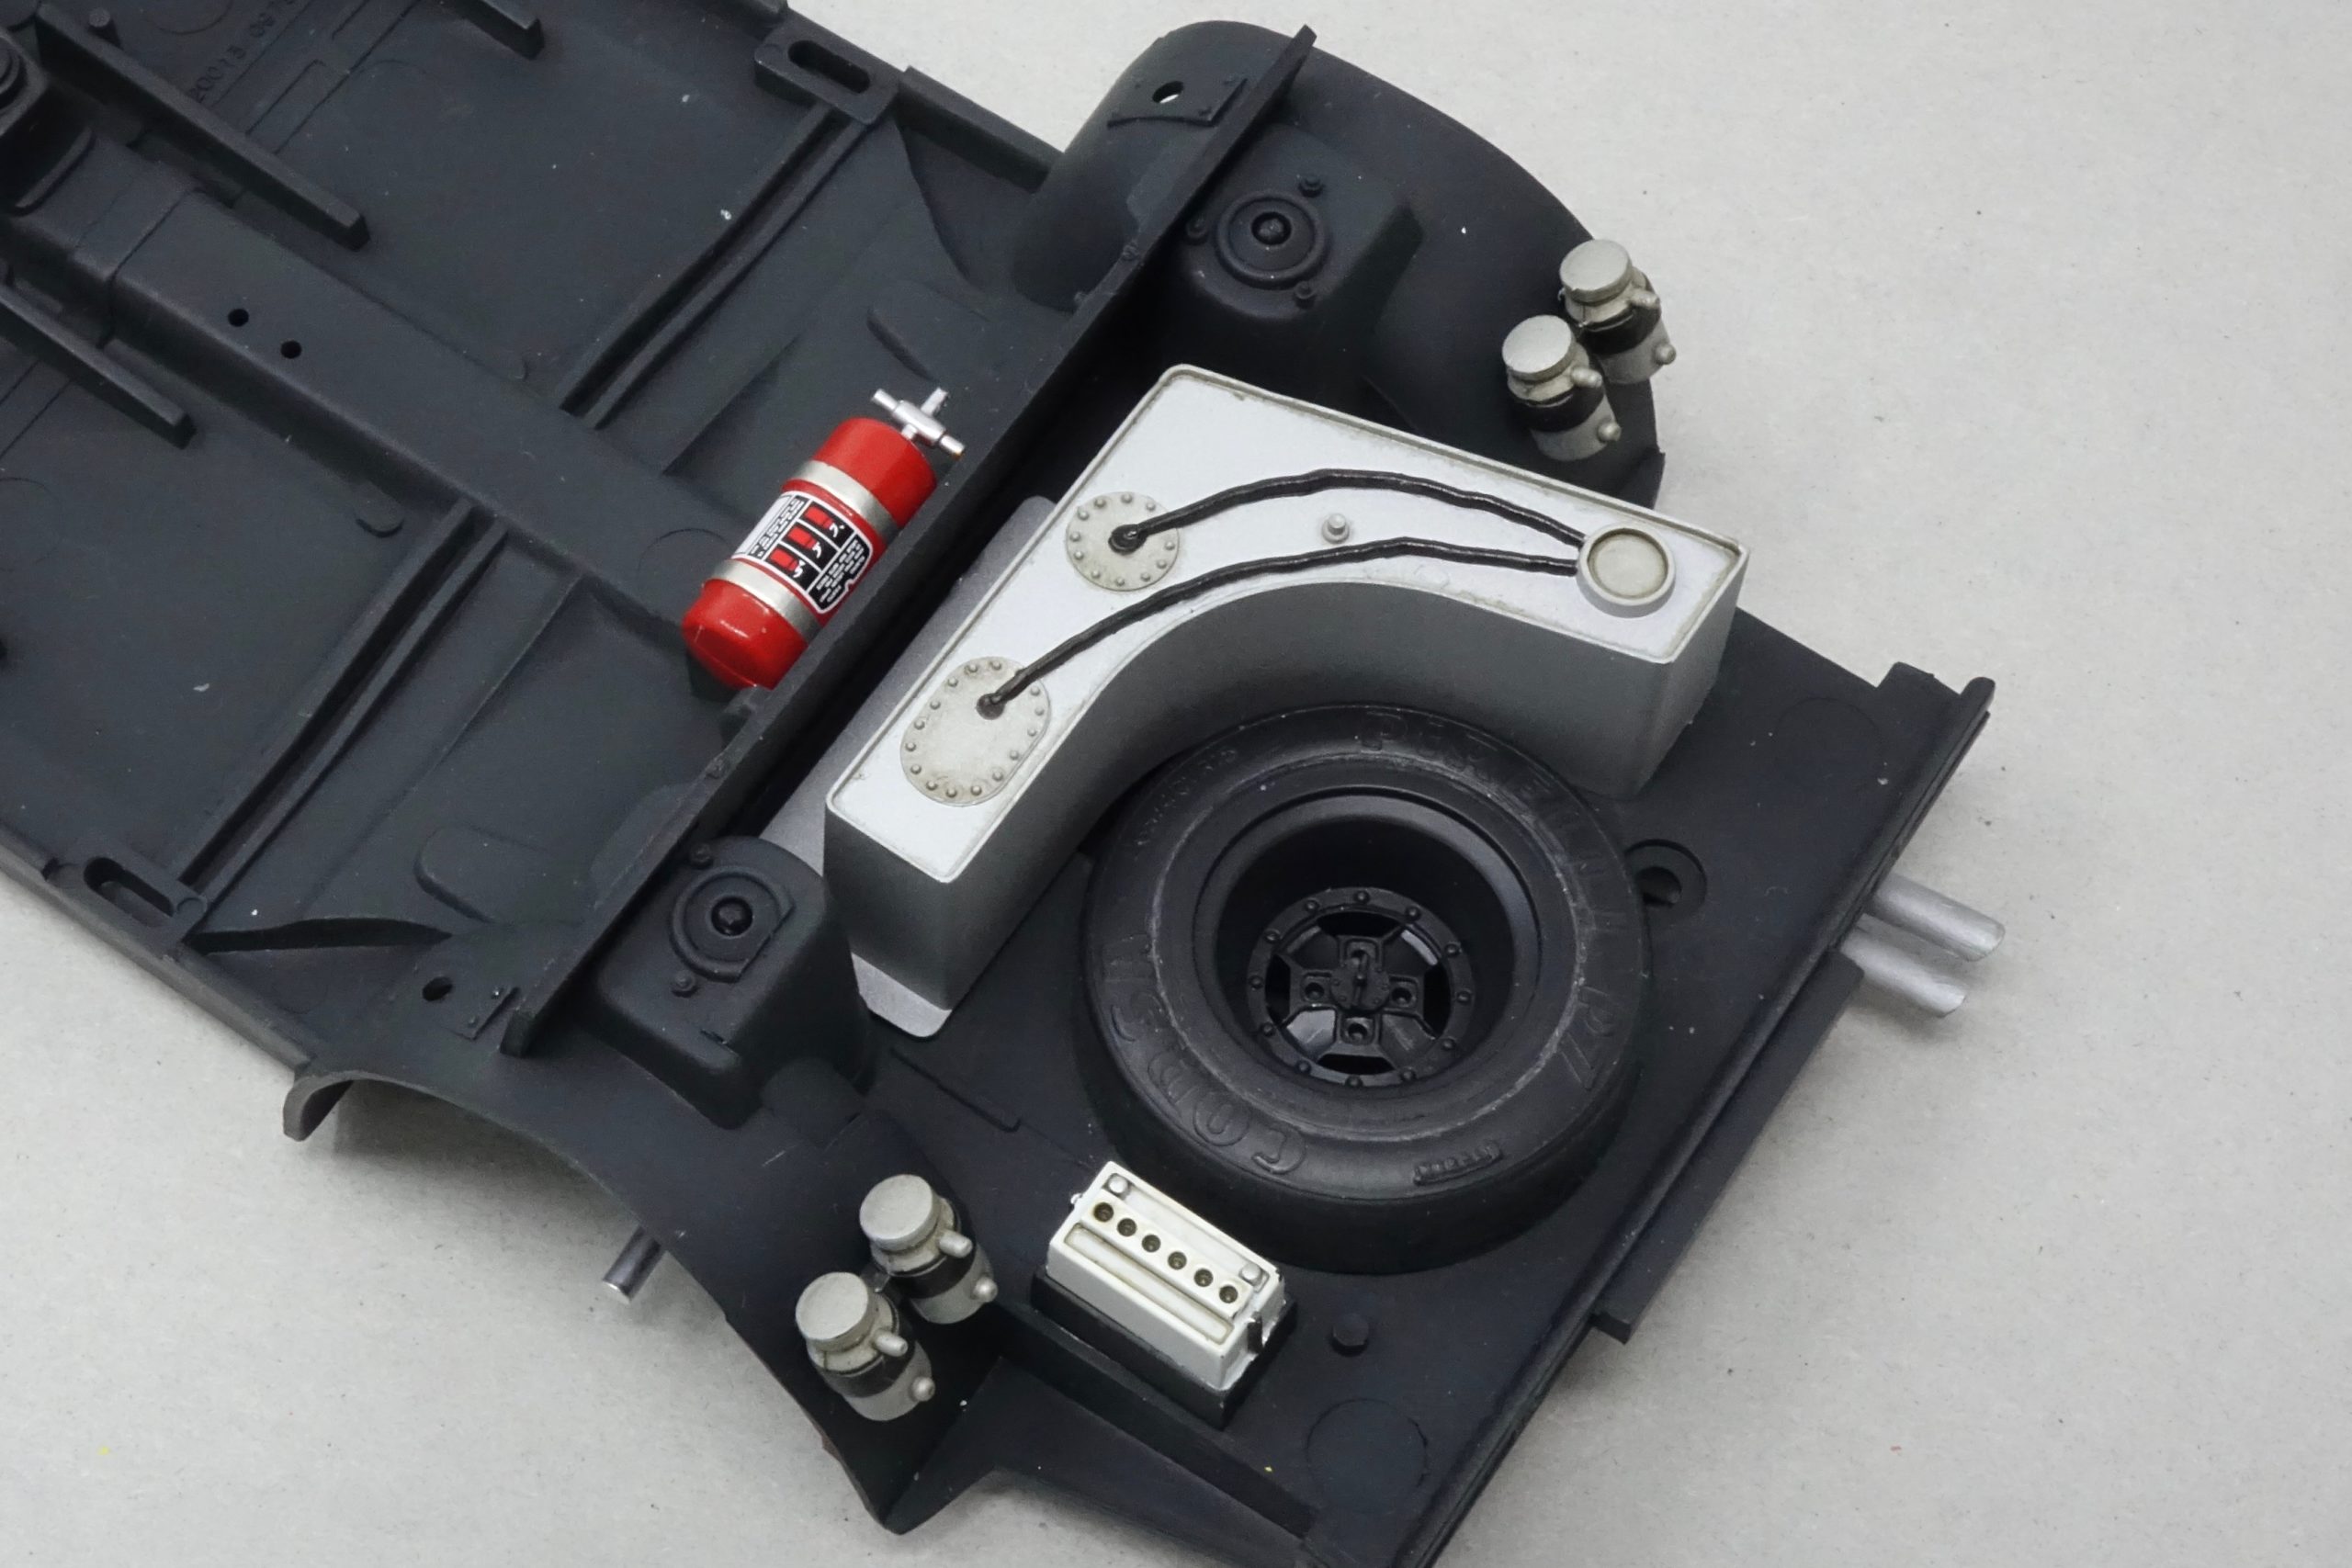
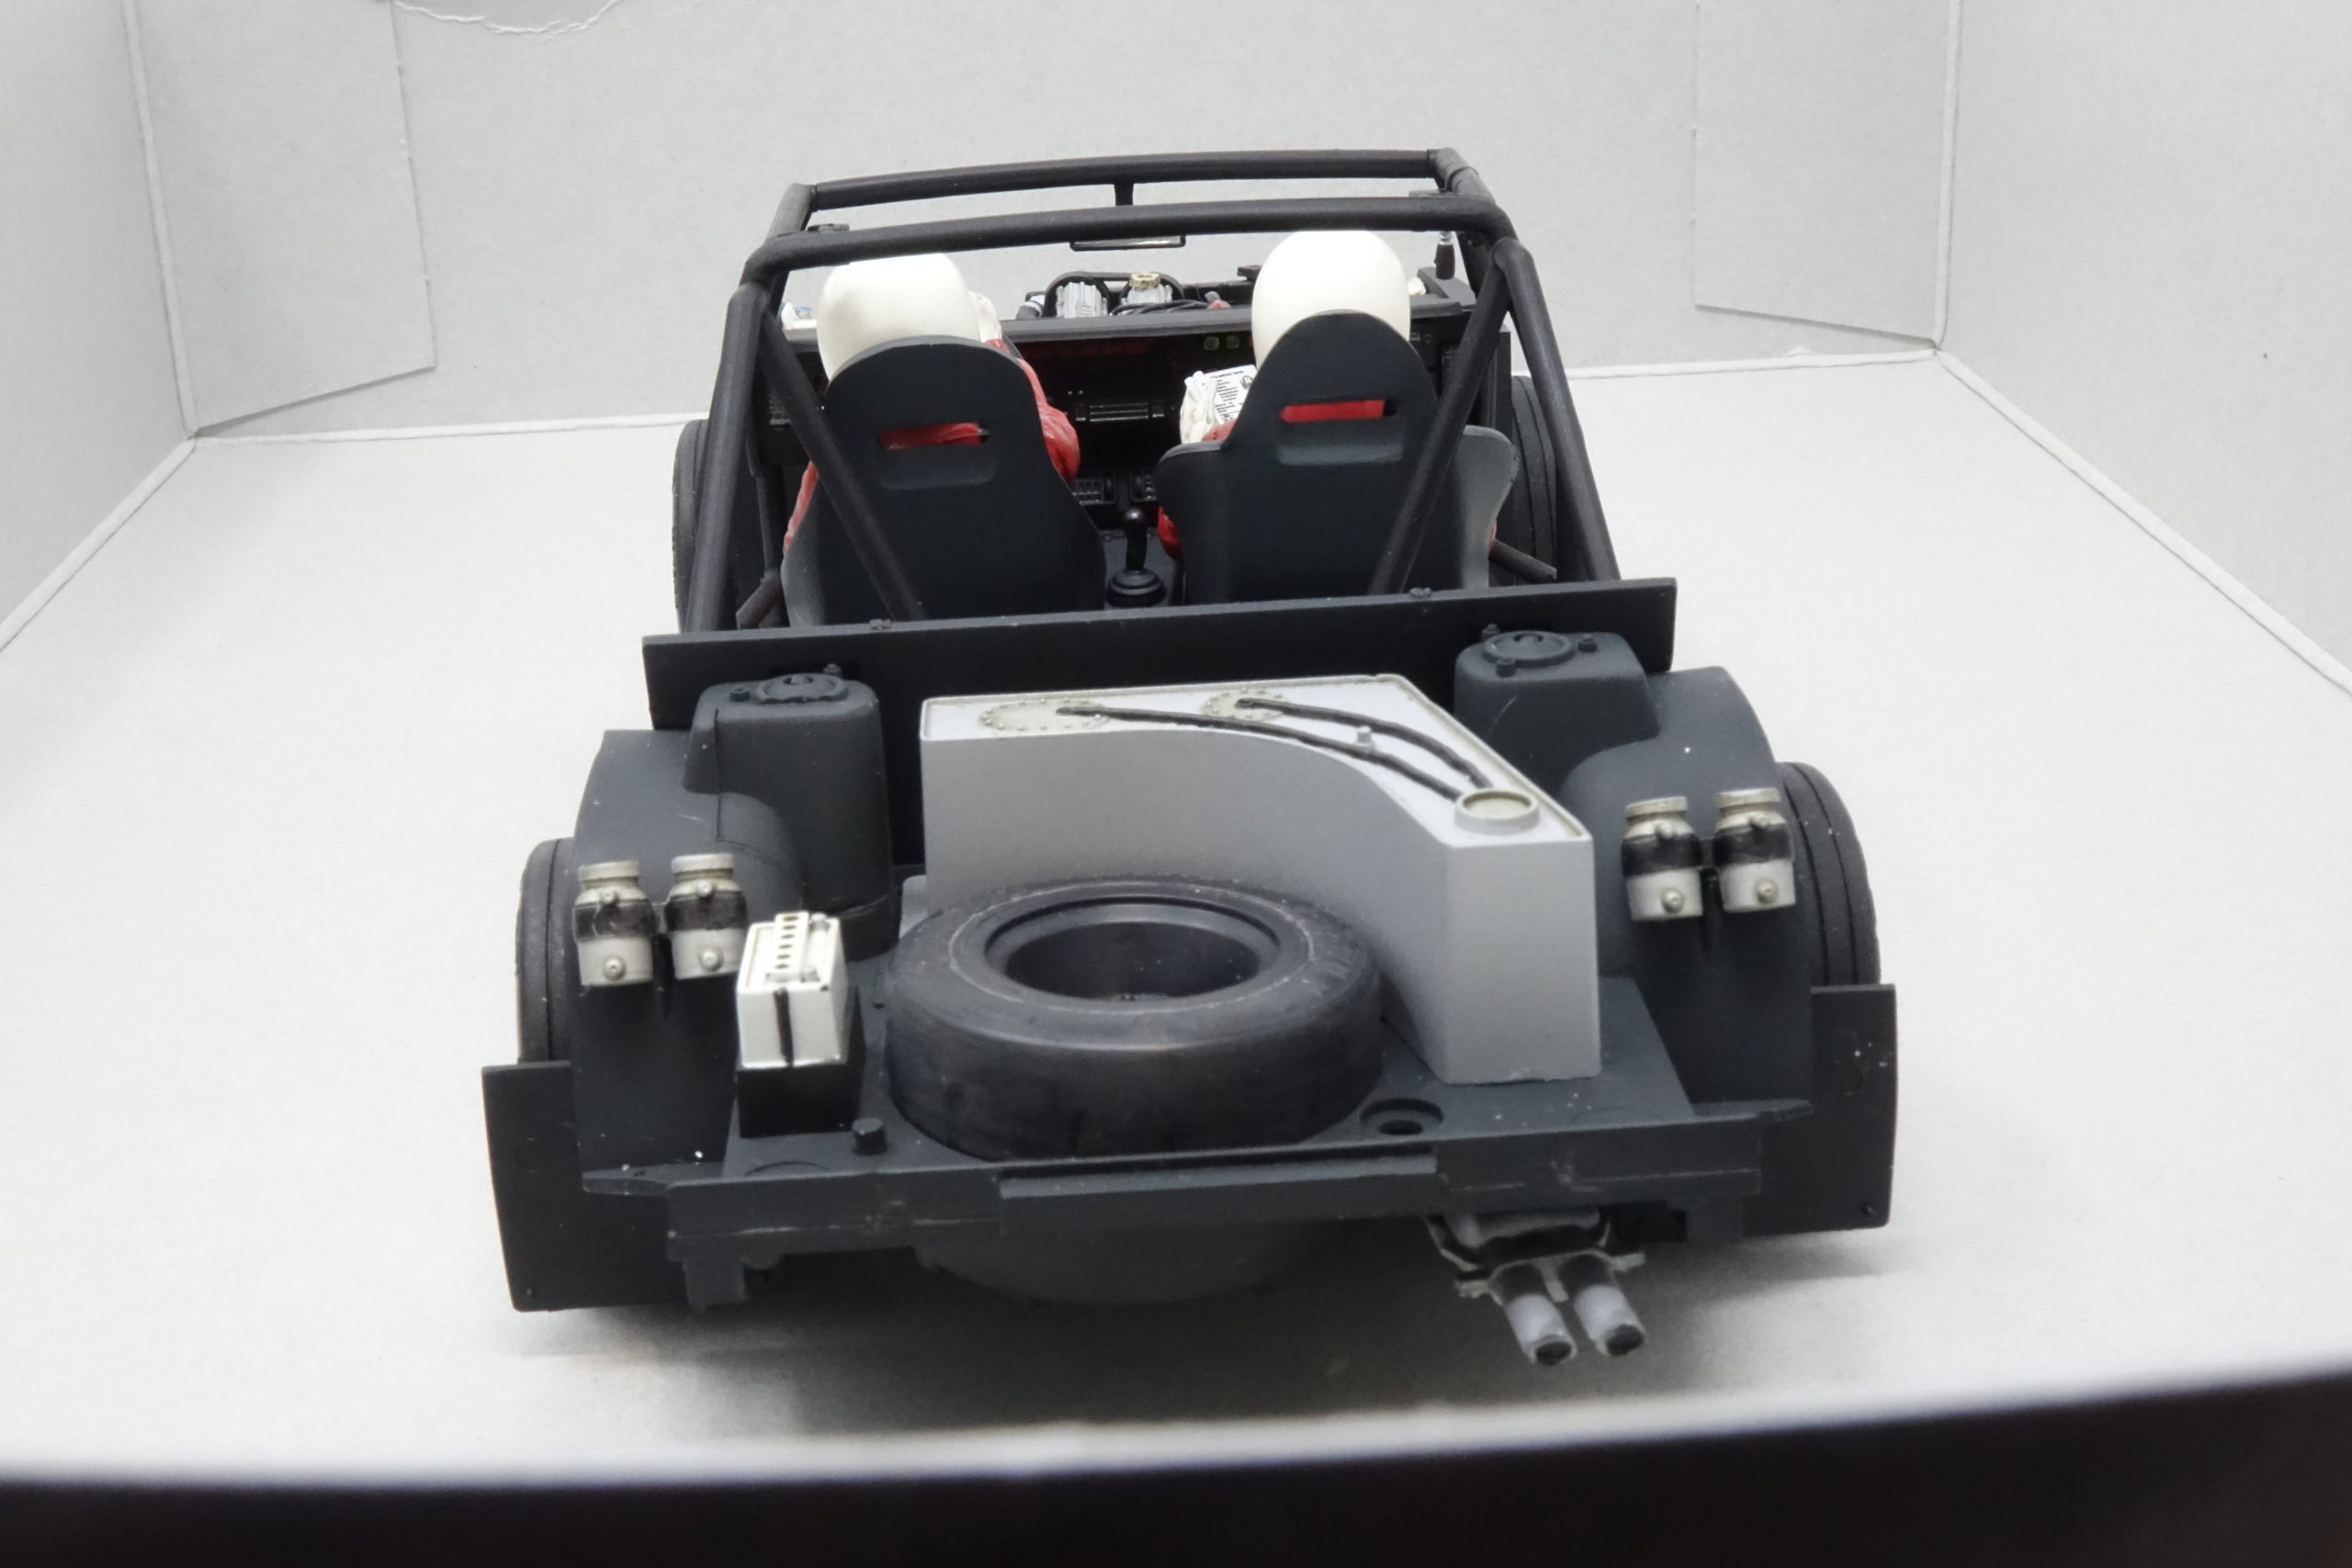
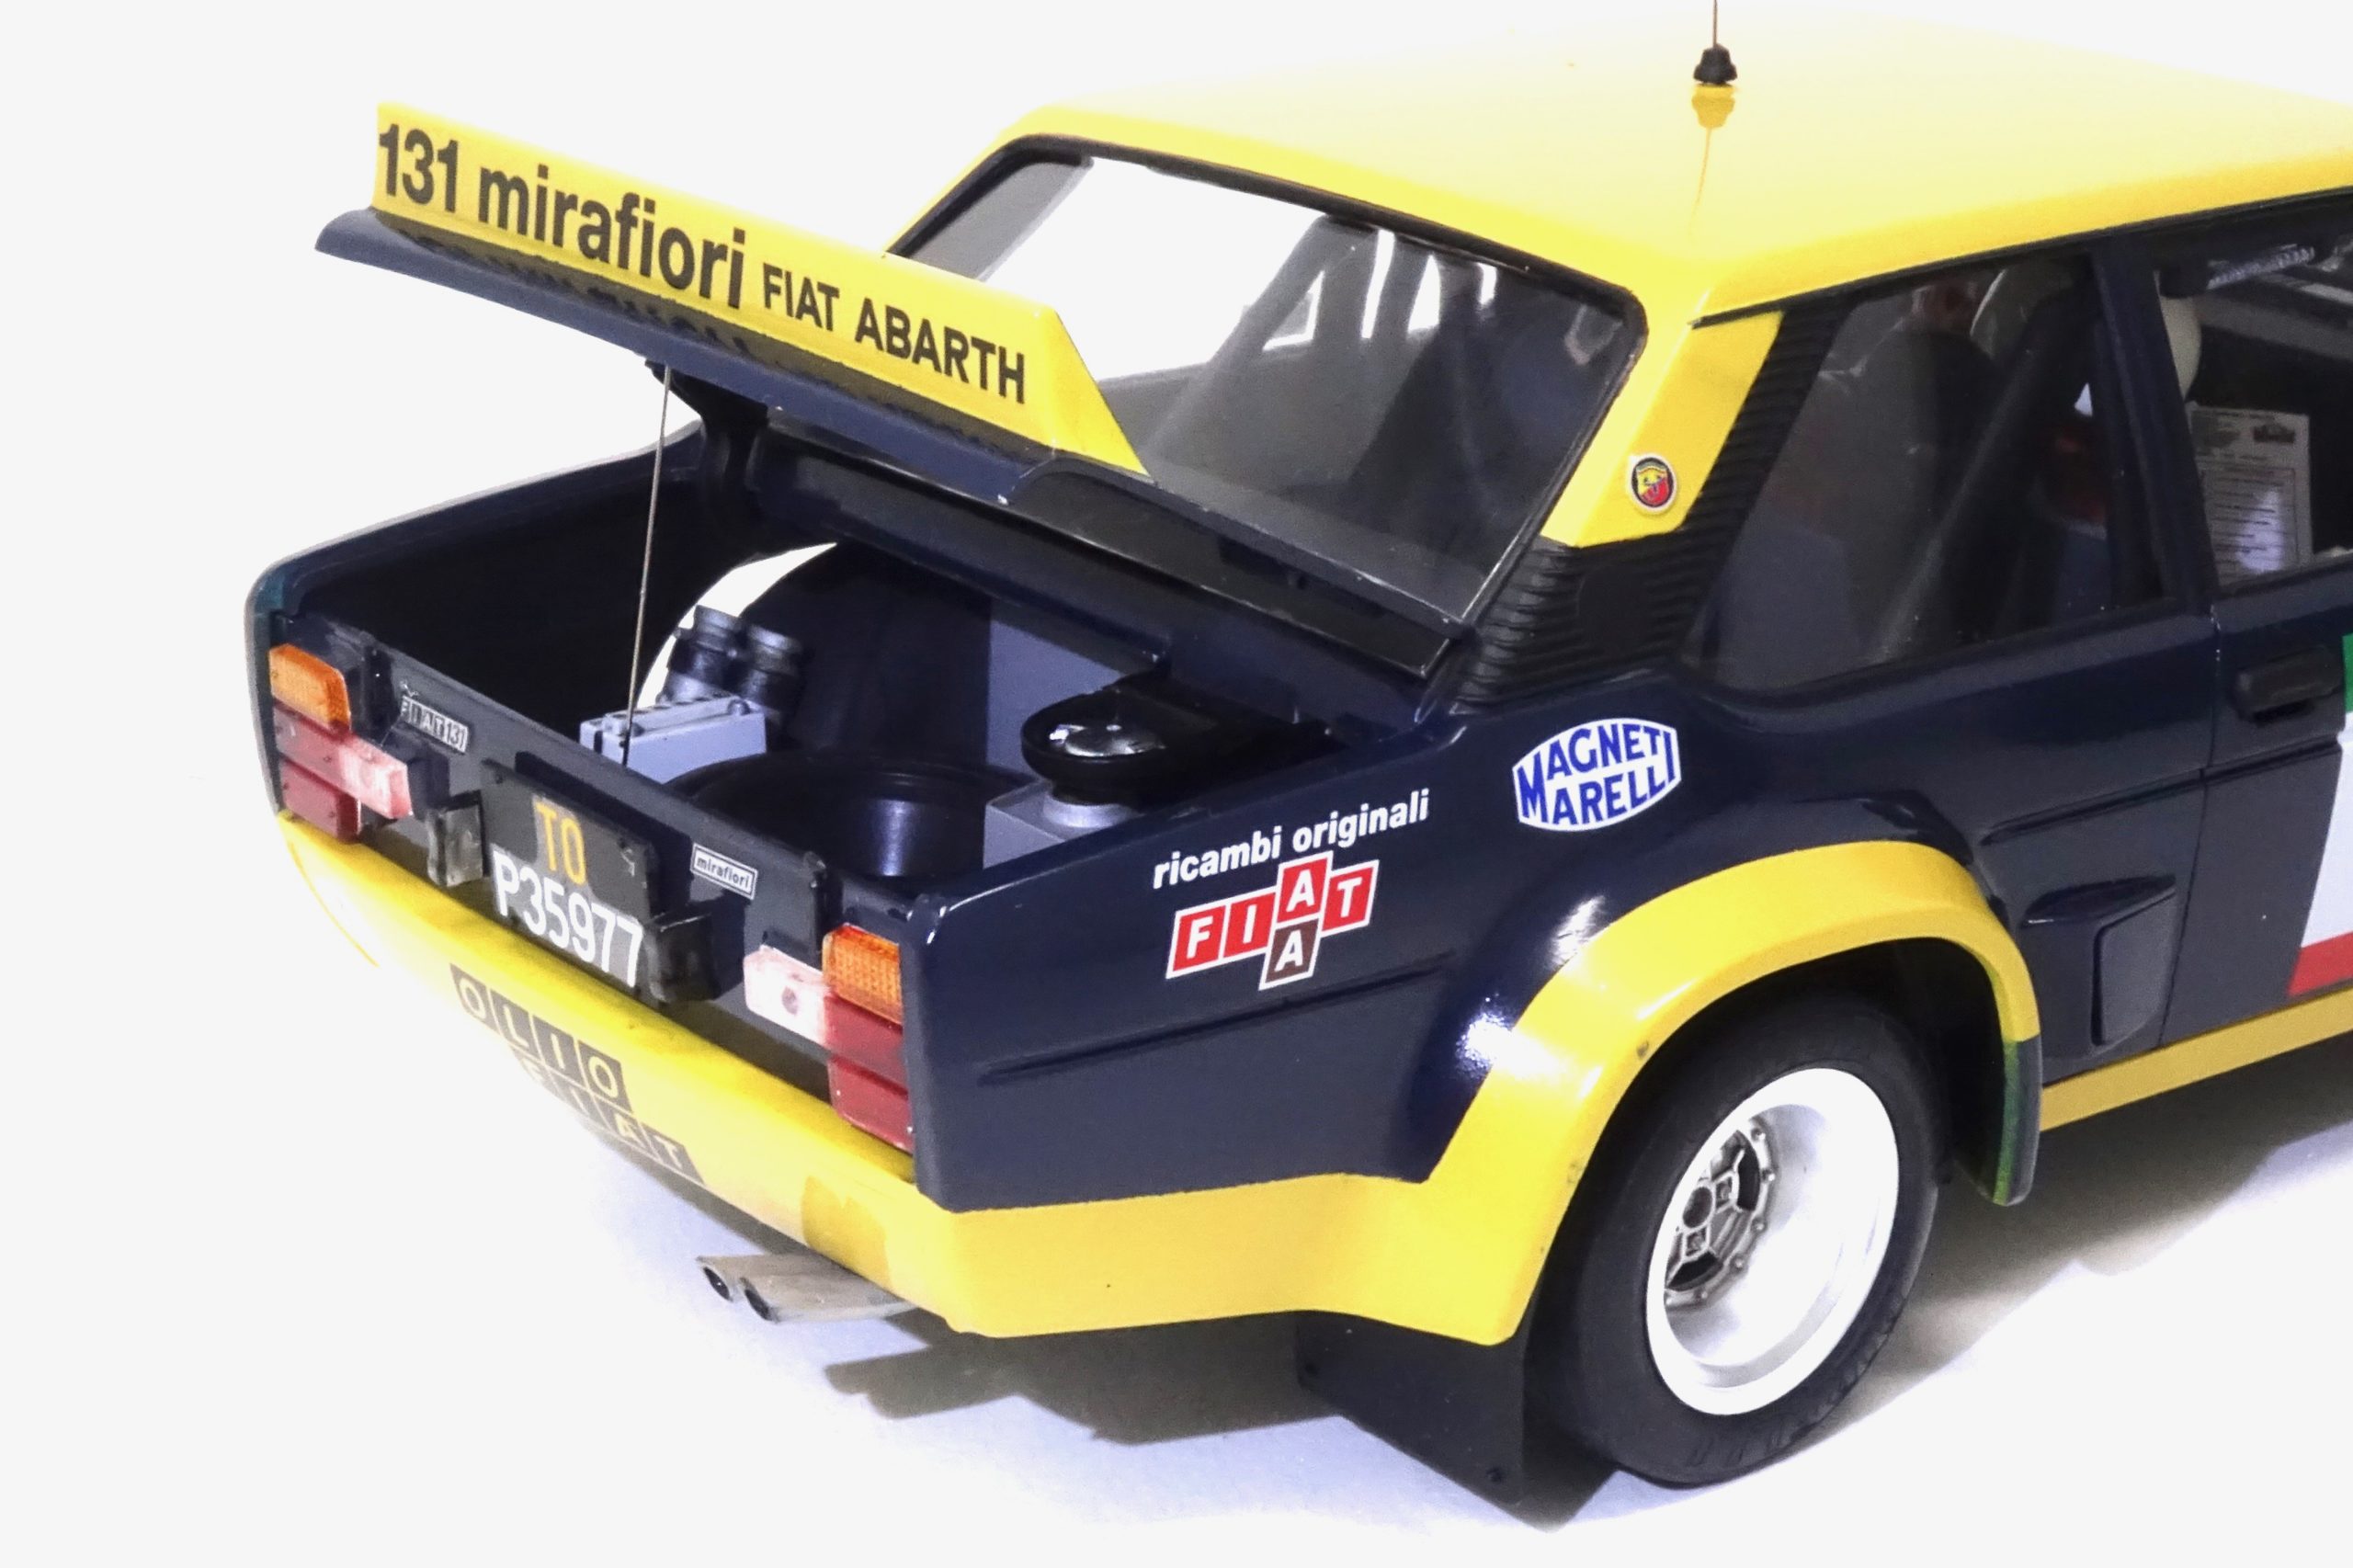
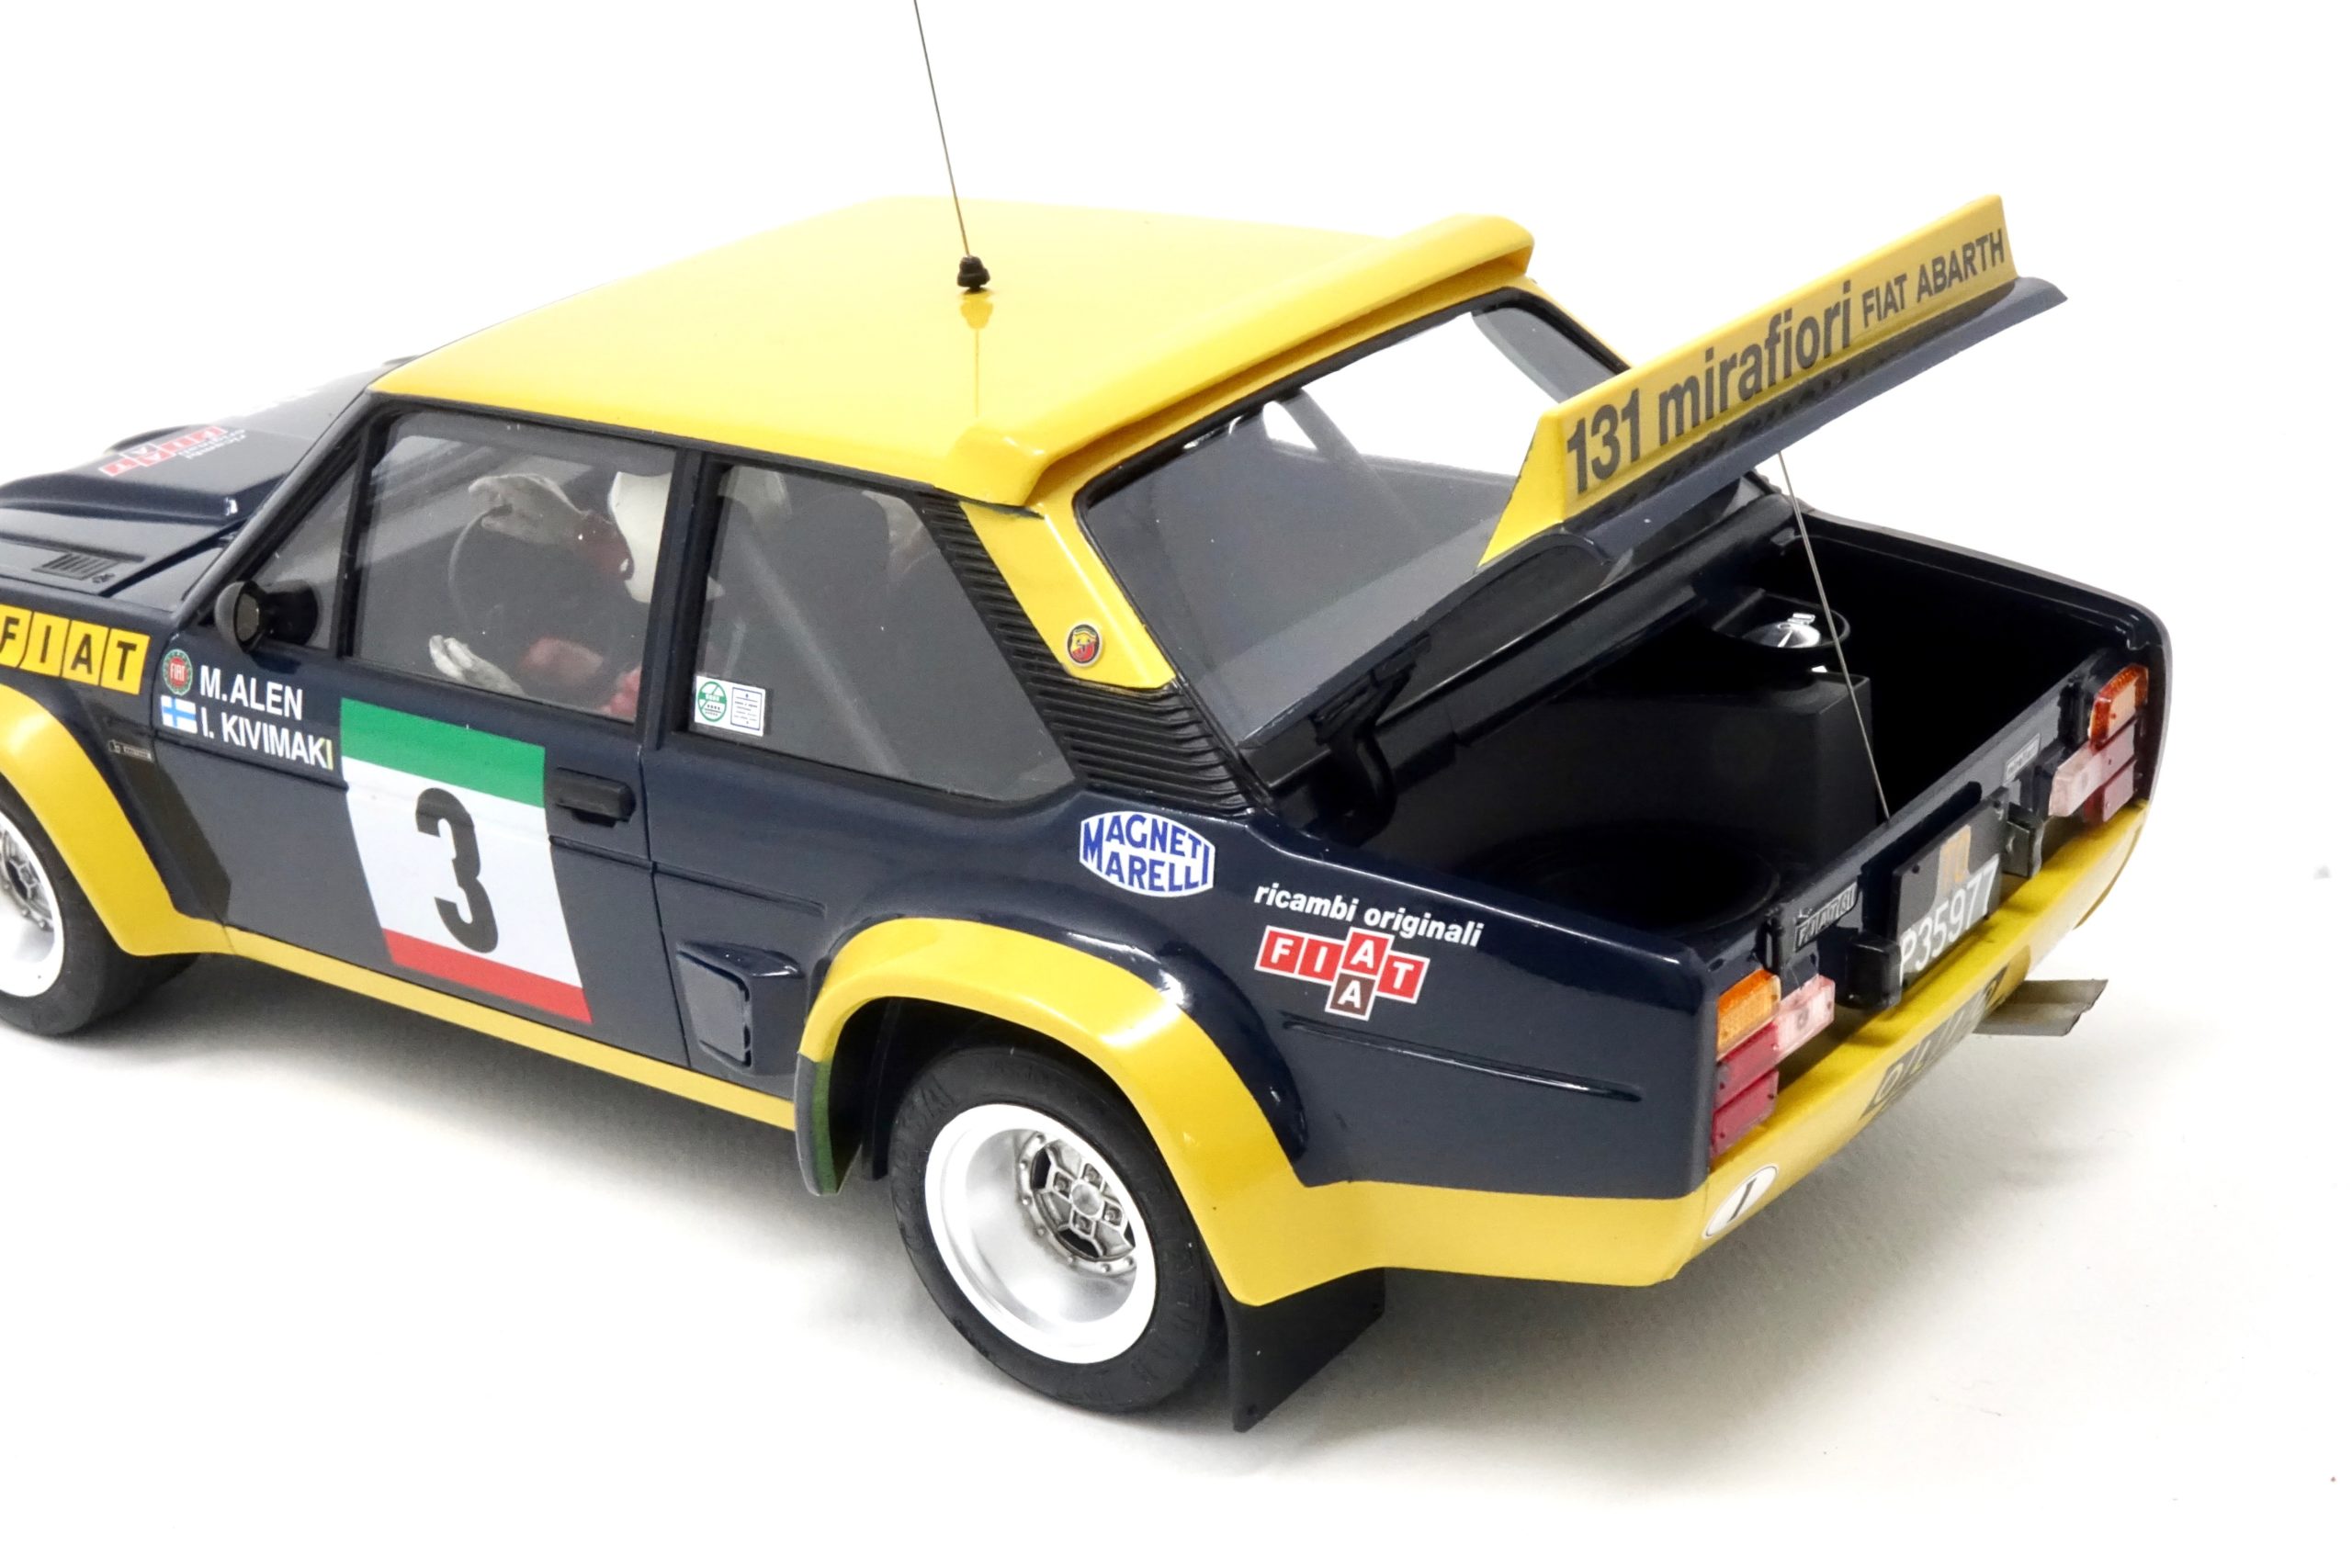
Boot fittings
This was a real bonus for me in this kit – an opening boot with a good amount of detail. Fuel tank, battery, pumps etc. My only slight ‘gripe’ was the spare wheel – which was all moulded in black plastic with no tyre detail etc. The instructions tell you to paint the wheel and tyre – but with a very poorly defined wheel edge for painting I decided to leave its ‘all black’ rather than make a messy paint job. I flatted down the tyre with fine sandpaper and left the wheel in ‘unpainted format’ – it looks ok to me. I also added at this stage the fire extinguisher – painted and decal applied.
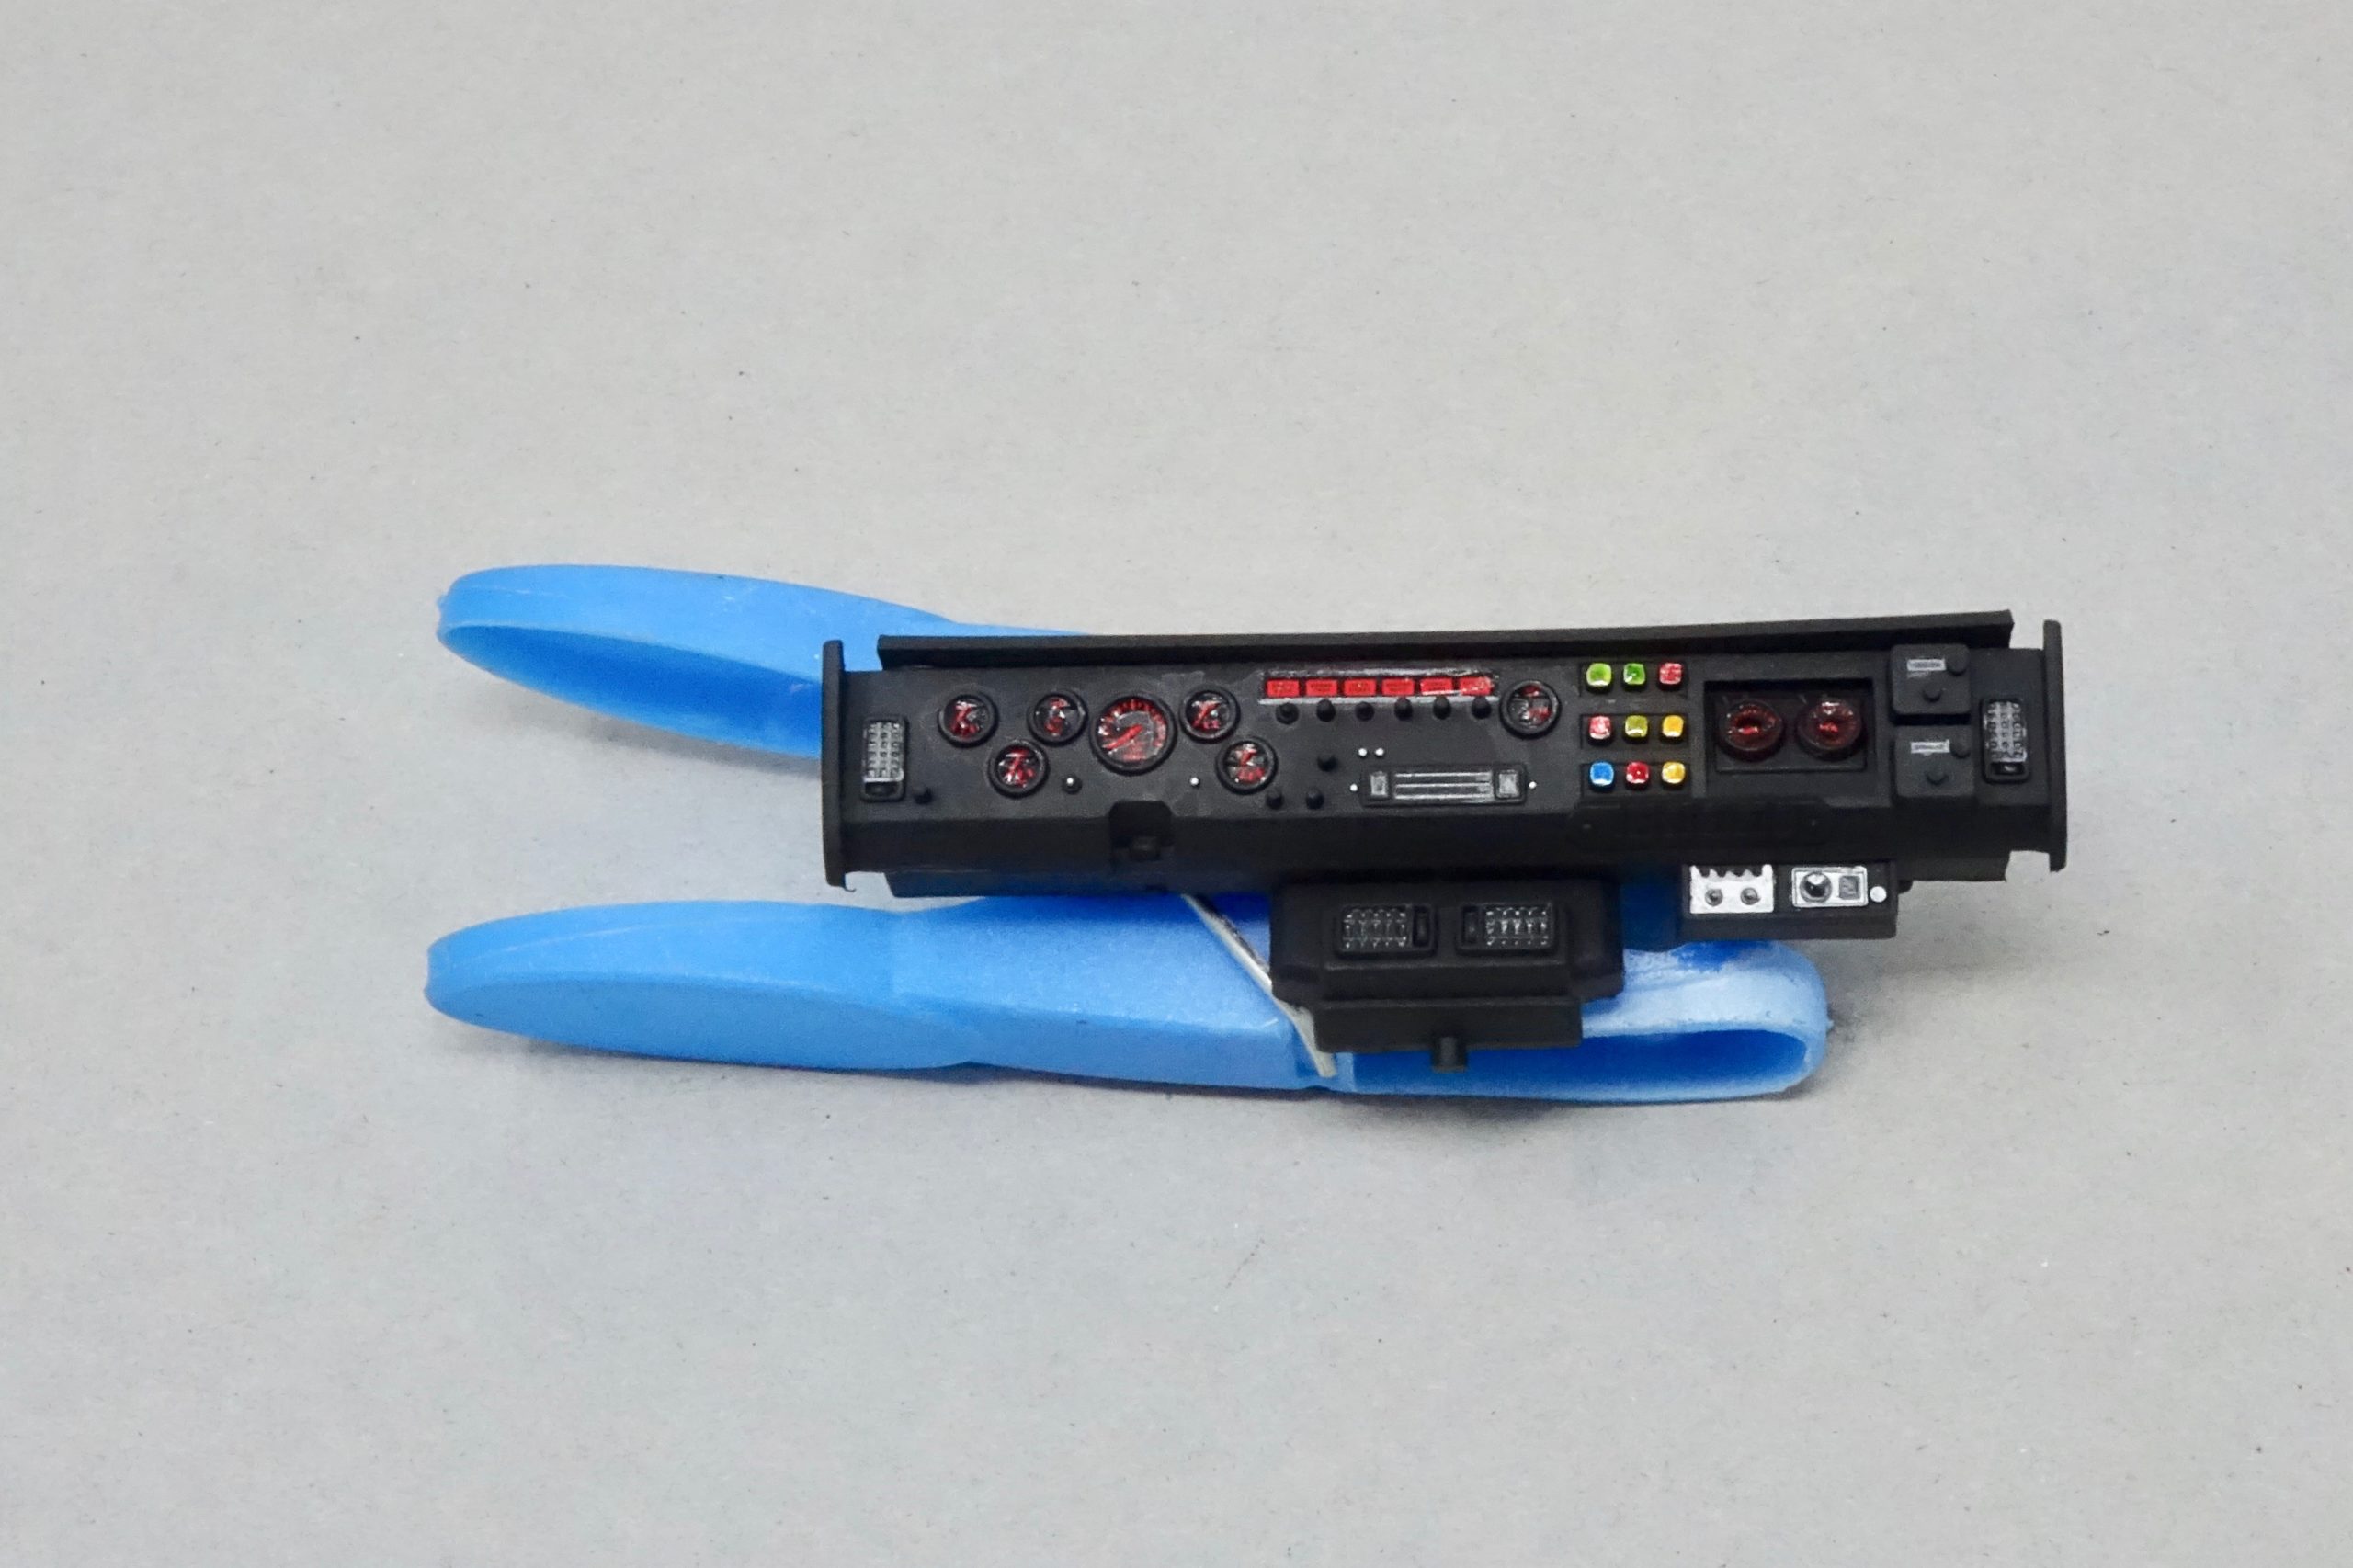
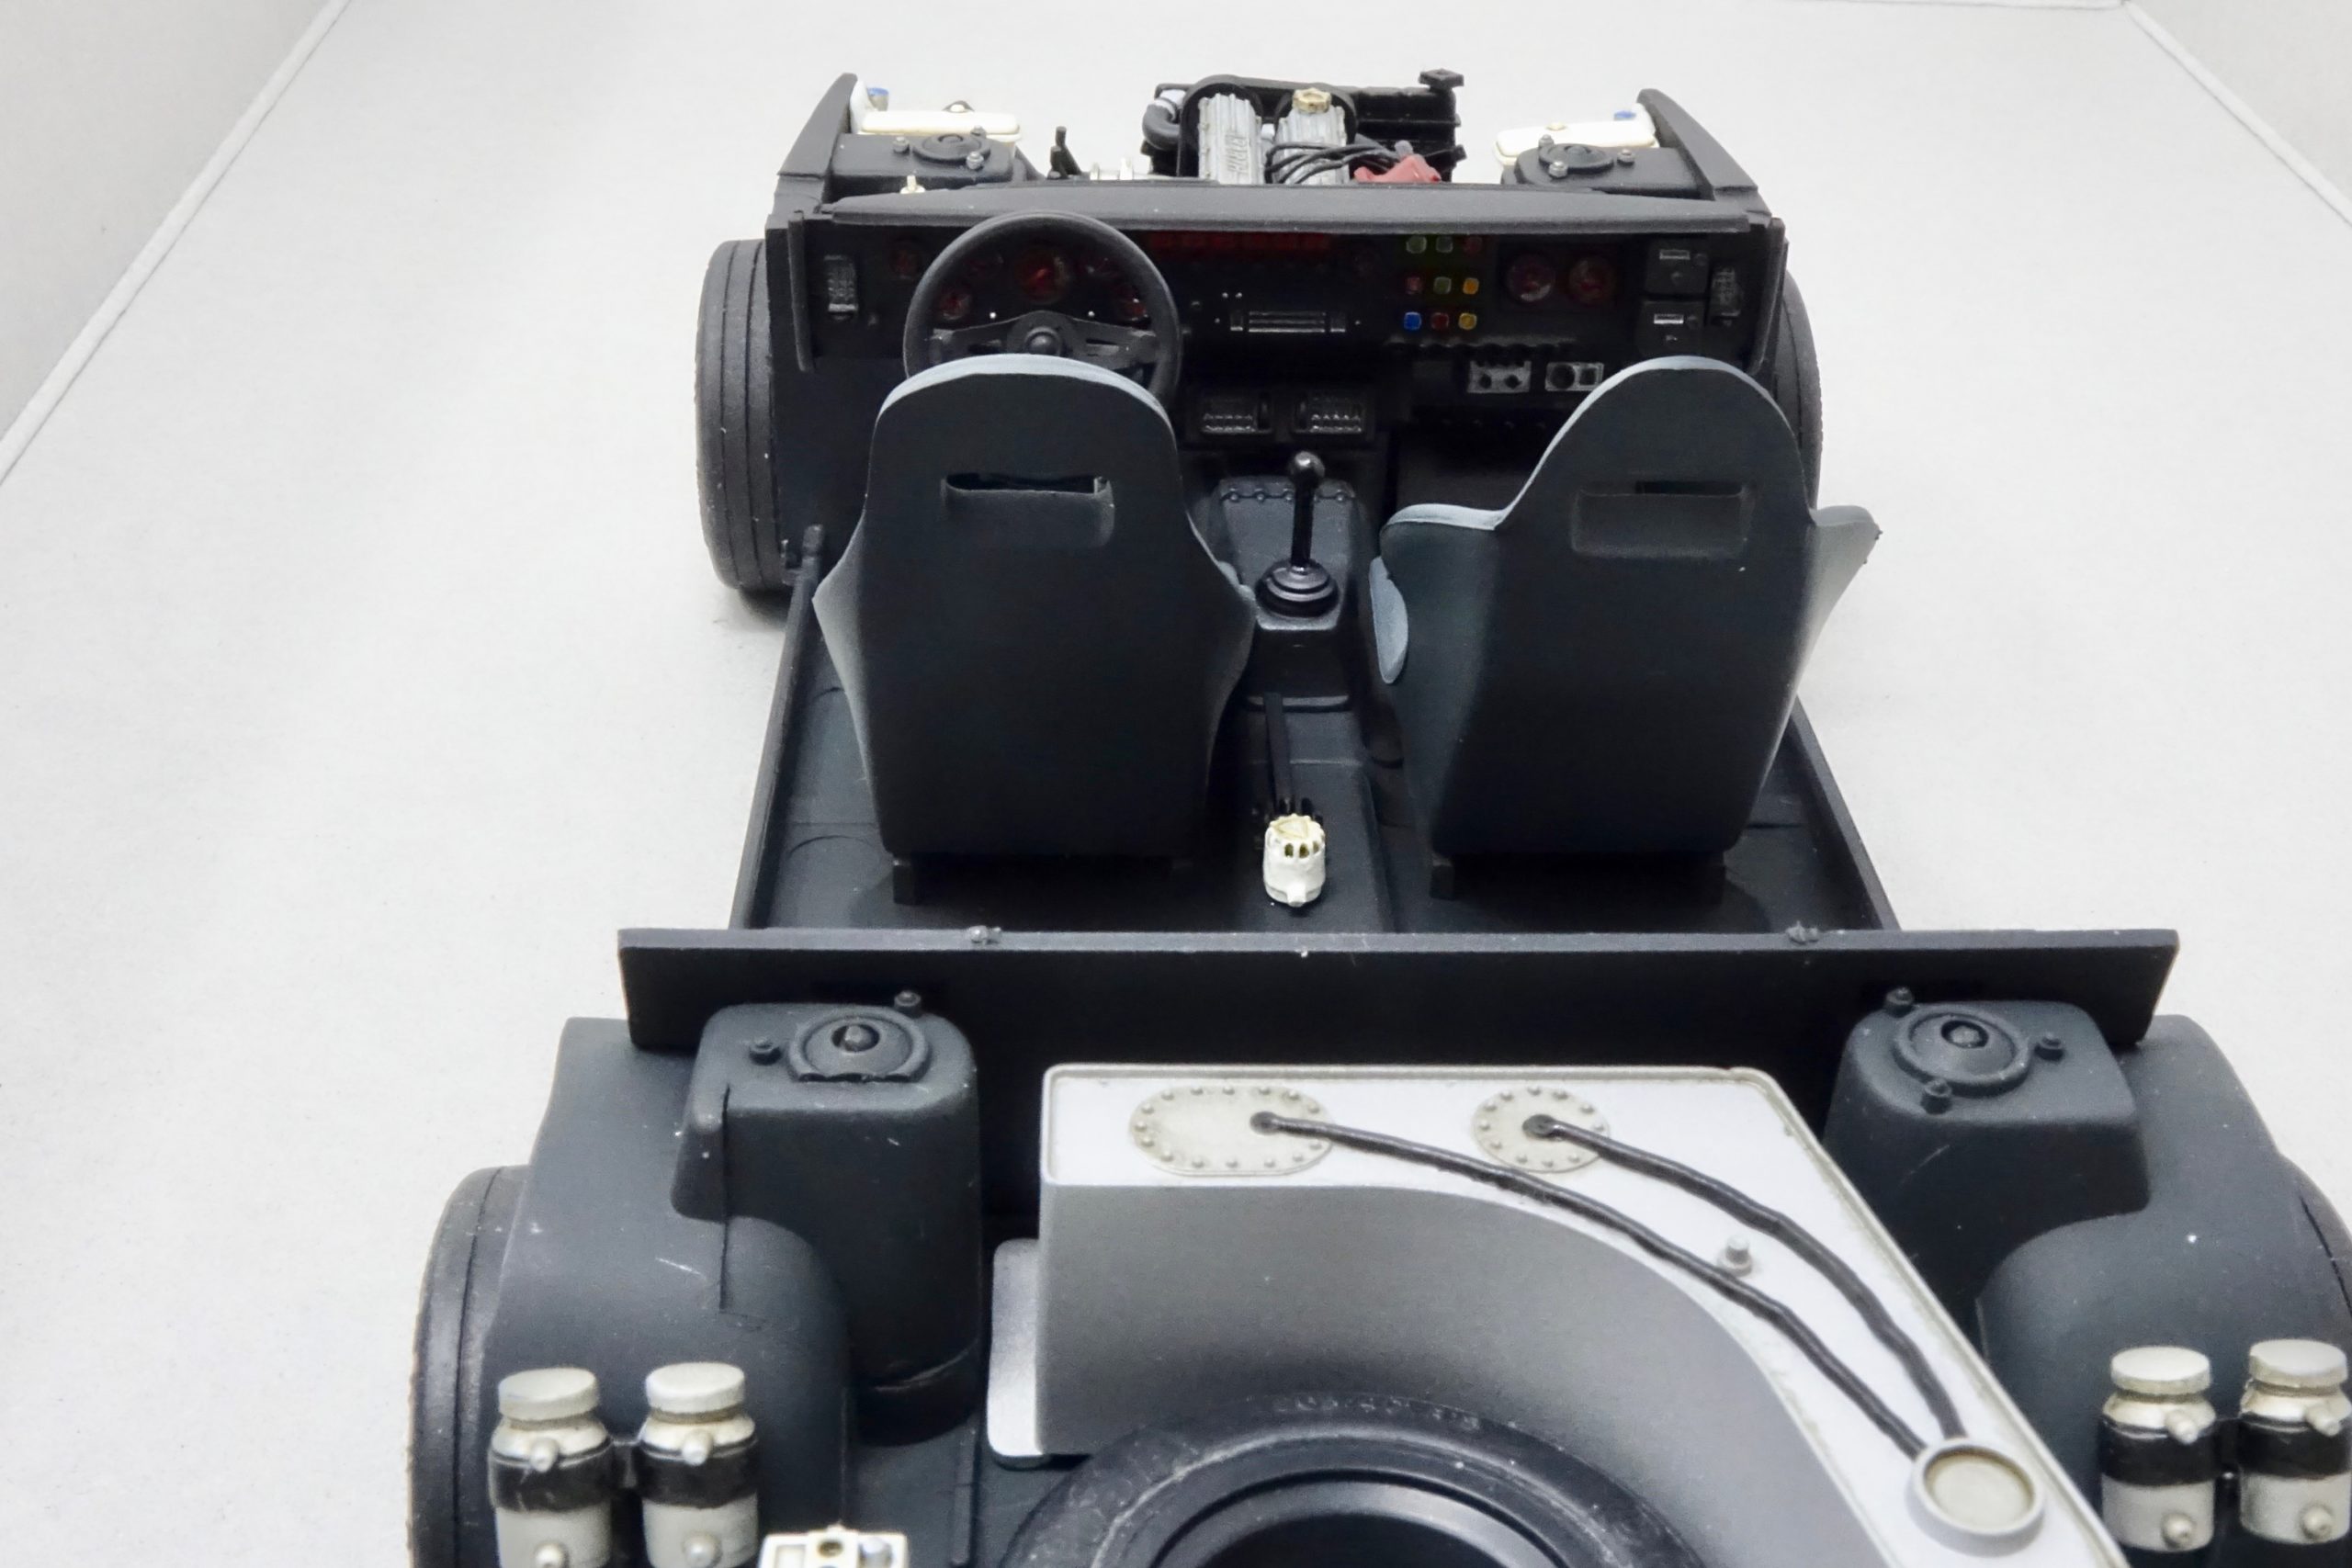
Interior
A really nicely detailed dashboard here – with very clear, accurately cut decals applied. I added a few extra painted details for switches etc by hand. Seats were painted and some of the other interior parts
And then on to the part I was apprehensive about – the drive/co-driver figures! It was actually good fun once I got started. The trickiest bit was where to position their arms so that when put in their seats their hands ended up in the right places! So, a bit of test (loose) fitting with the figures, seats (which have variable location), dashboard (and the steering wheel has to go on after the driver is seated and the dash/seats glued in) – so it did take a while. But I got there. I love the co-driver holding the pace notes (which you can read and see the tulip diagrams!). When arms were suitably positioned I set about painting the figures – airbrushing for the suits and hand painting the rest. Some ‘dirty’ wash was added for a bit of realism. Crash helmets airbrushed in gloss white and detail added by hand. Seat belts painted by hand and decals applied. I then decided to use ‘Blu Tack’ to hold the figures into their seats – it gave me the option of tweaking their seating position if things didn’t line up properly. It all seemed to work quite well – with the figures adequately ’stuck down’.


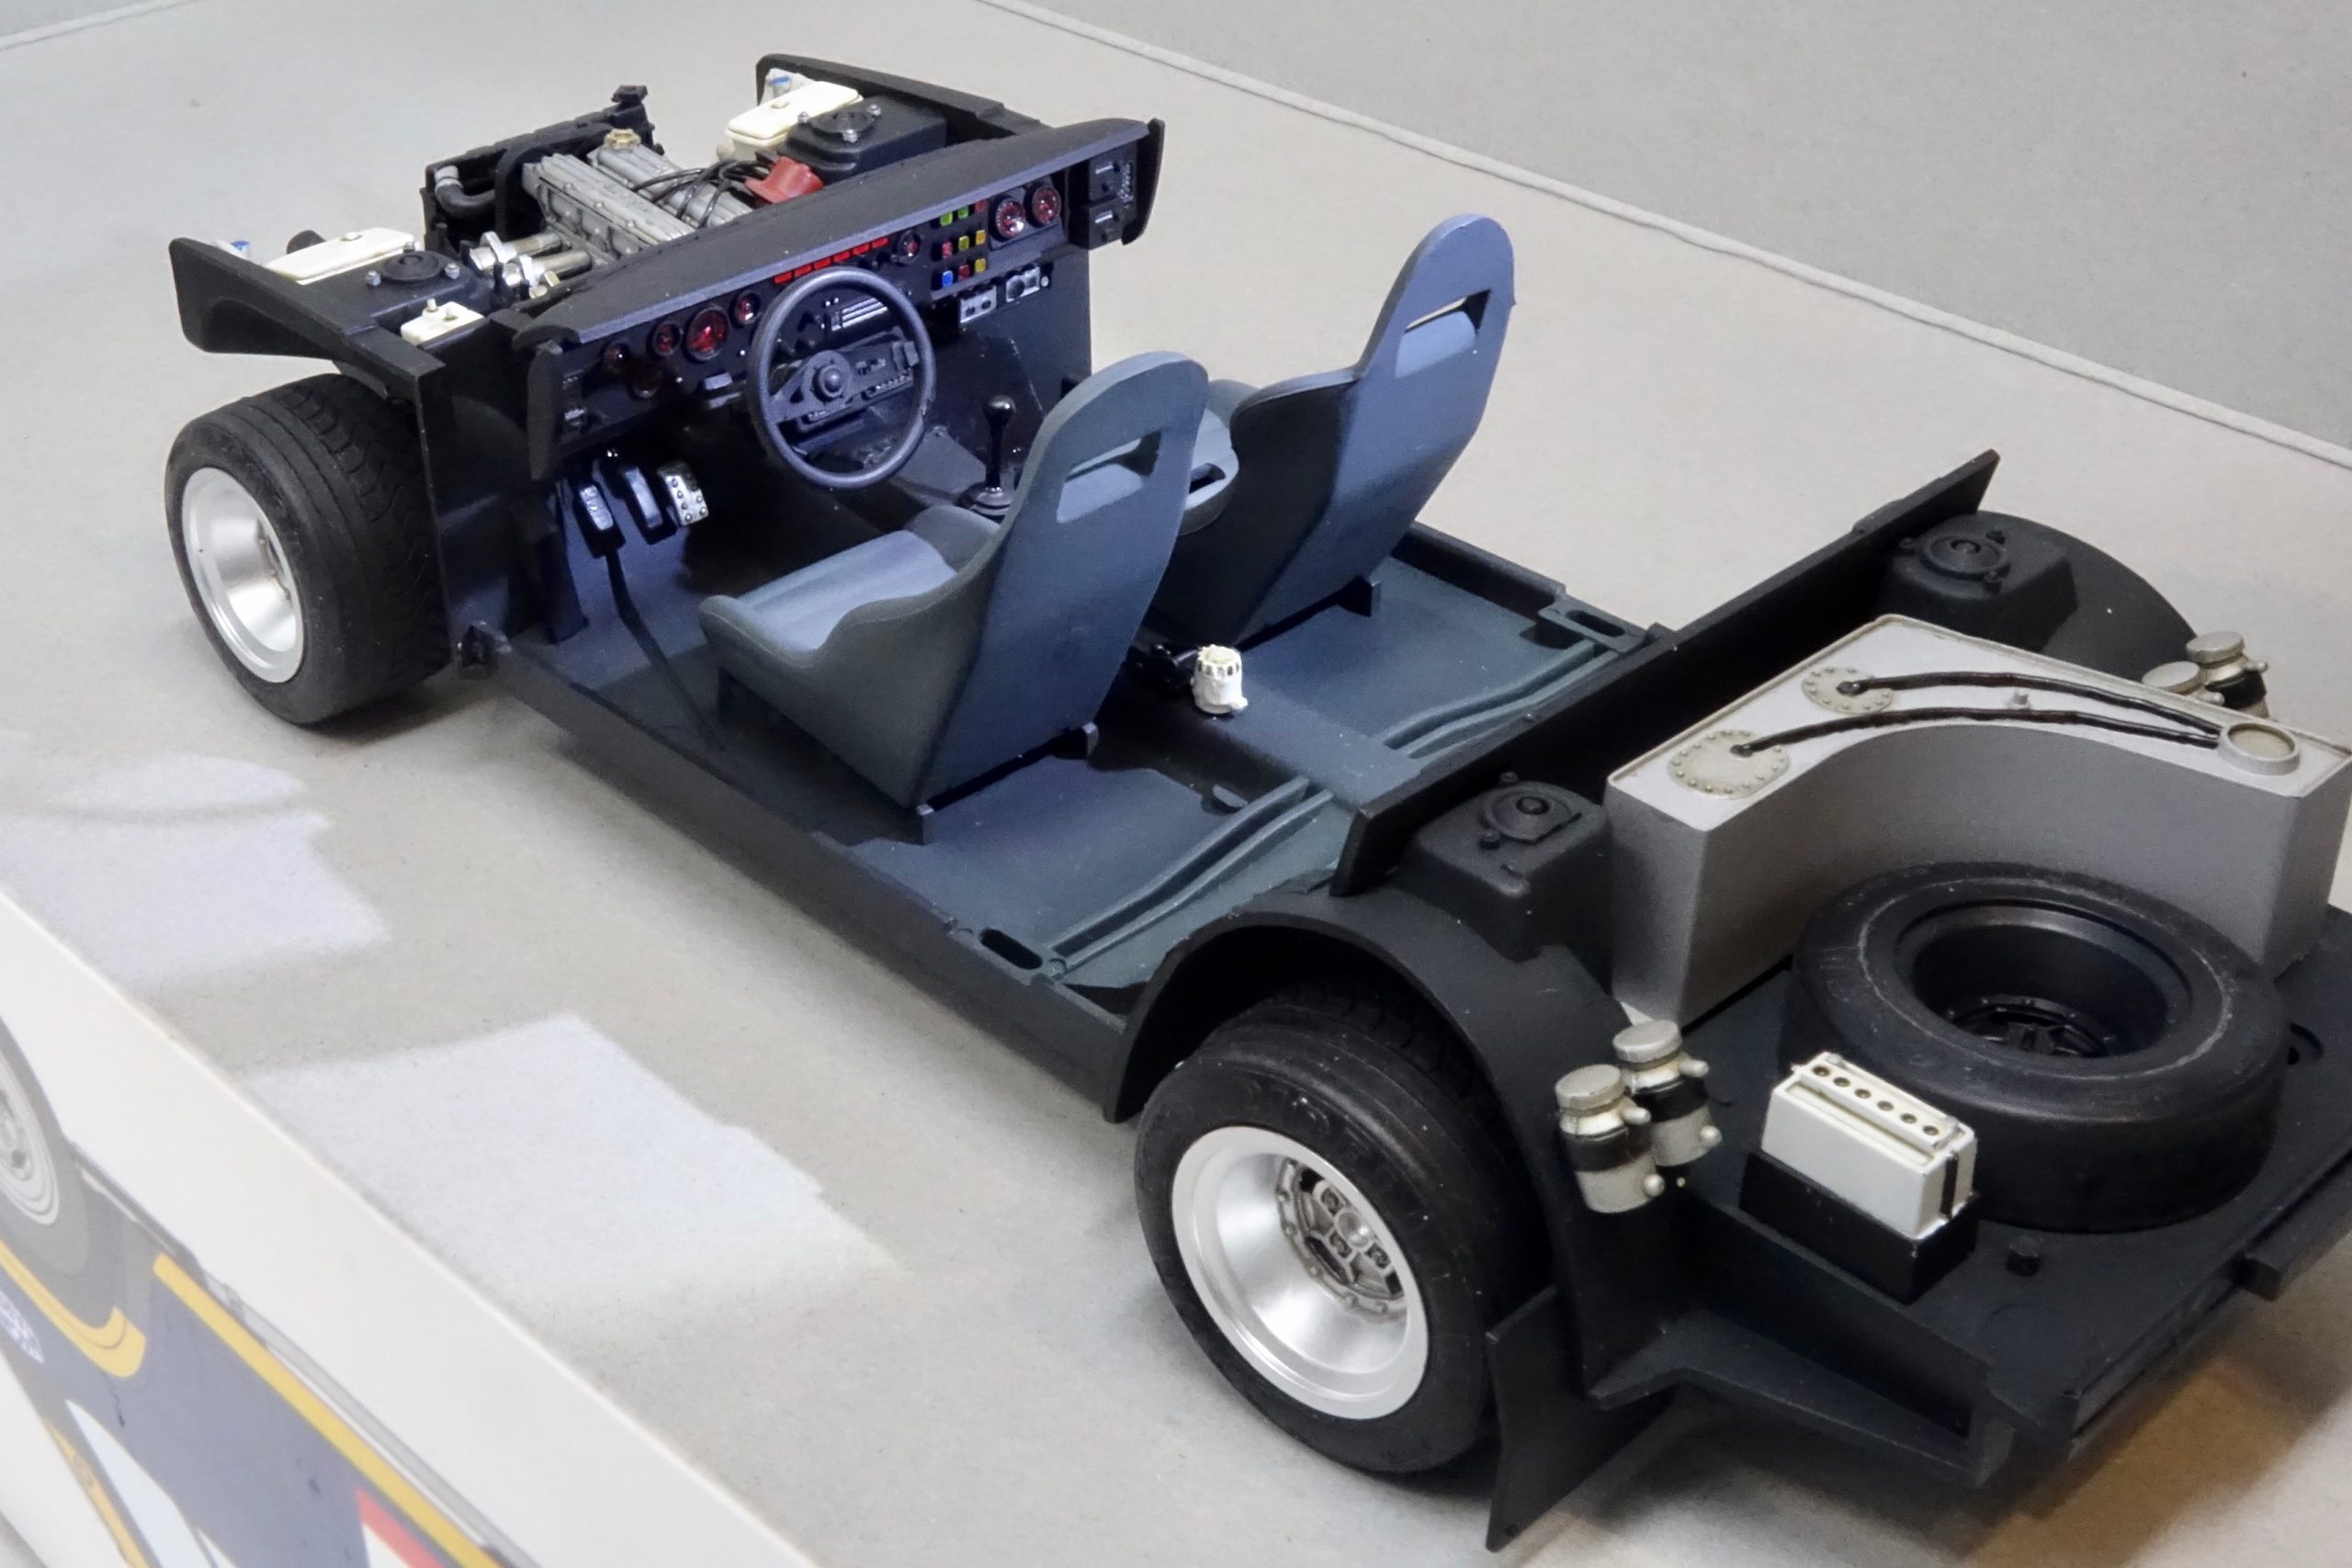


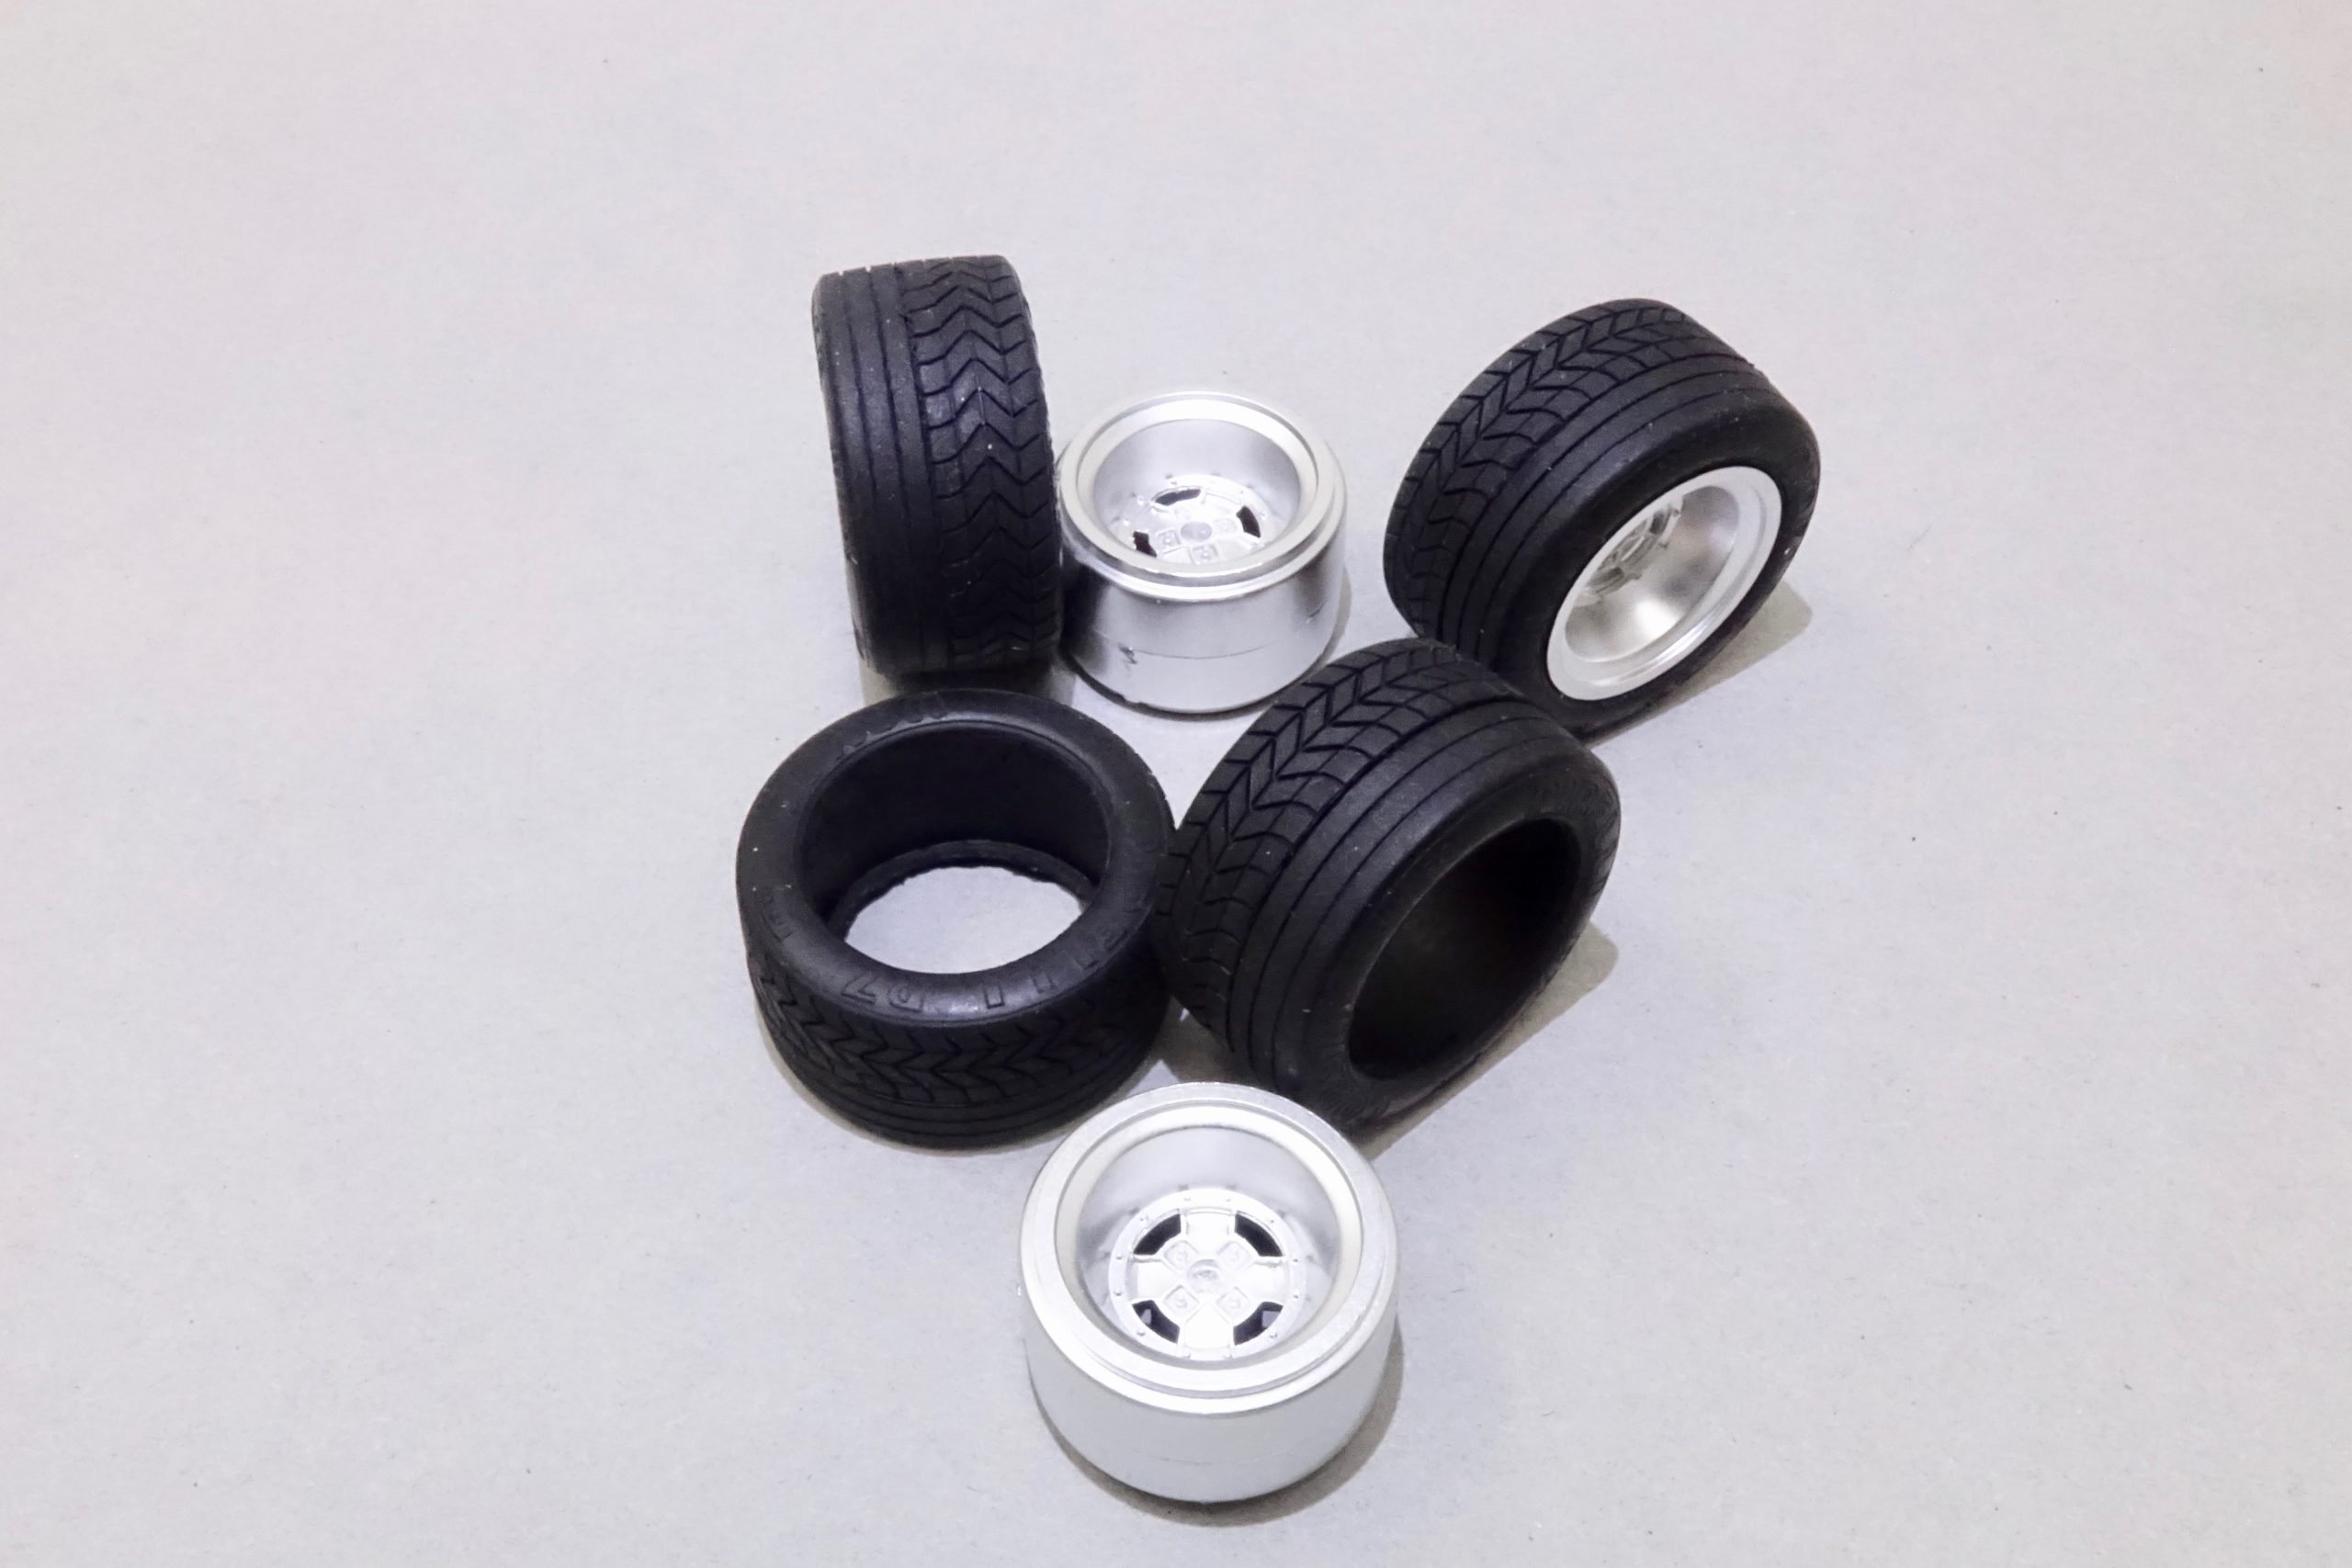
Wheels and tyres
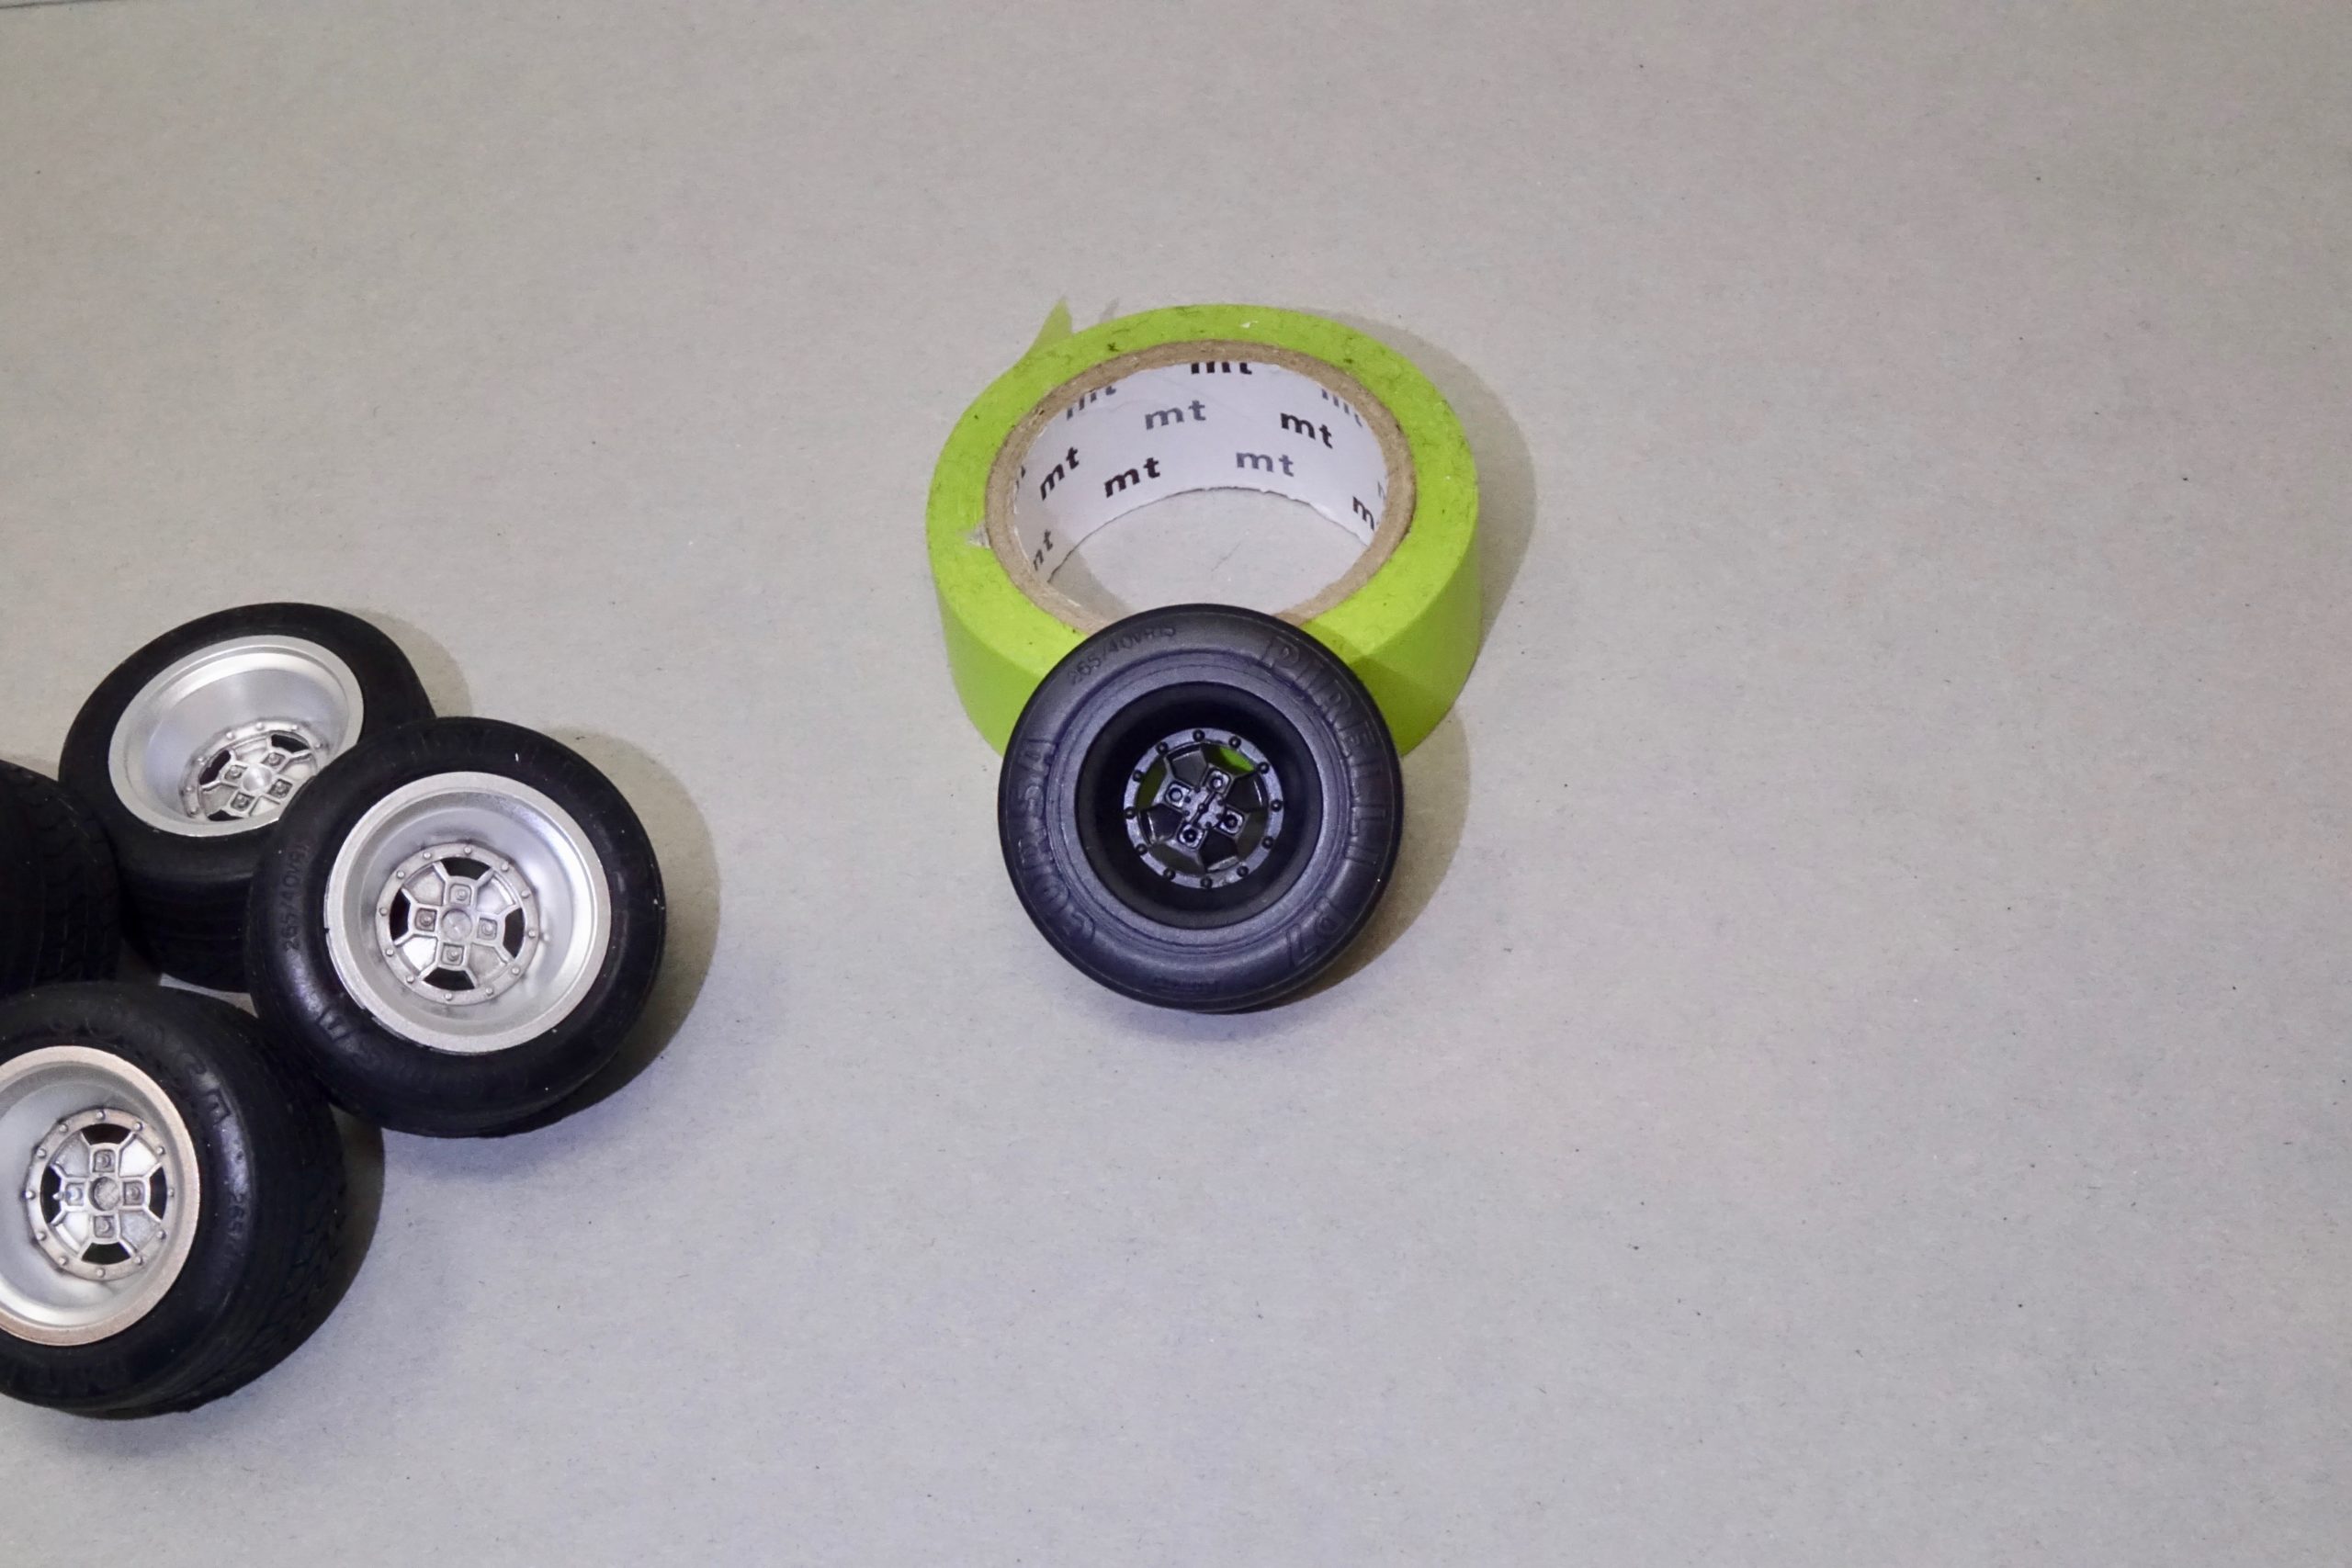
Not much to say here, except that the tyres are very realistic in terms of tread pattern, side markings and material. the wheels had a nice satin finish, so all that was needed was a little dark wash to bring out the detail of the wheel centres.


Roll cage
For the roll cage I assembled it from its parts, tested fitted it into the car before the seats/figures were put in and glued it together. This allowed me to lift it out and paint it all in one piece and then I could simply put it into place after the seats etc had been fitted. All good here – no problems at all.
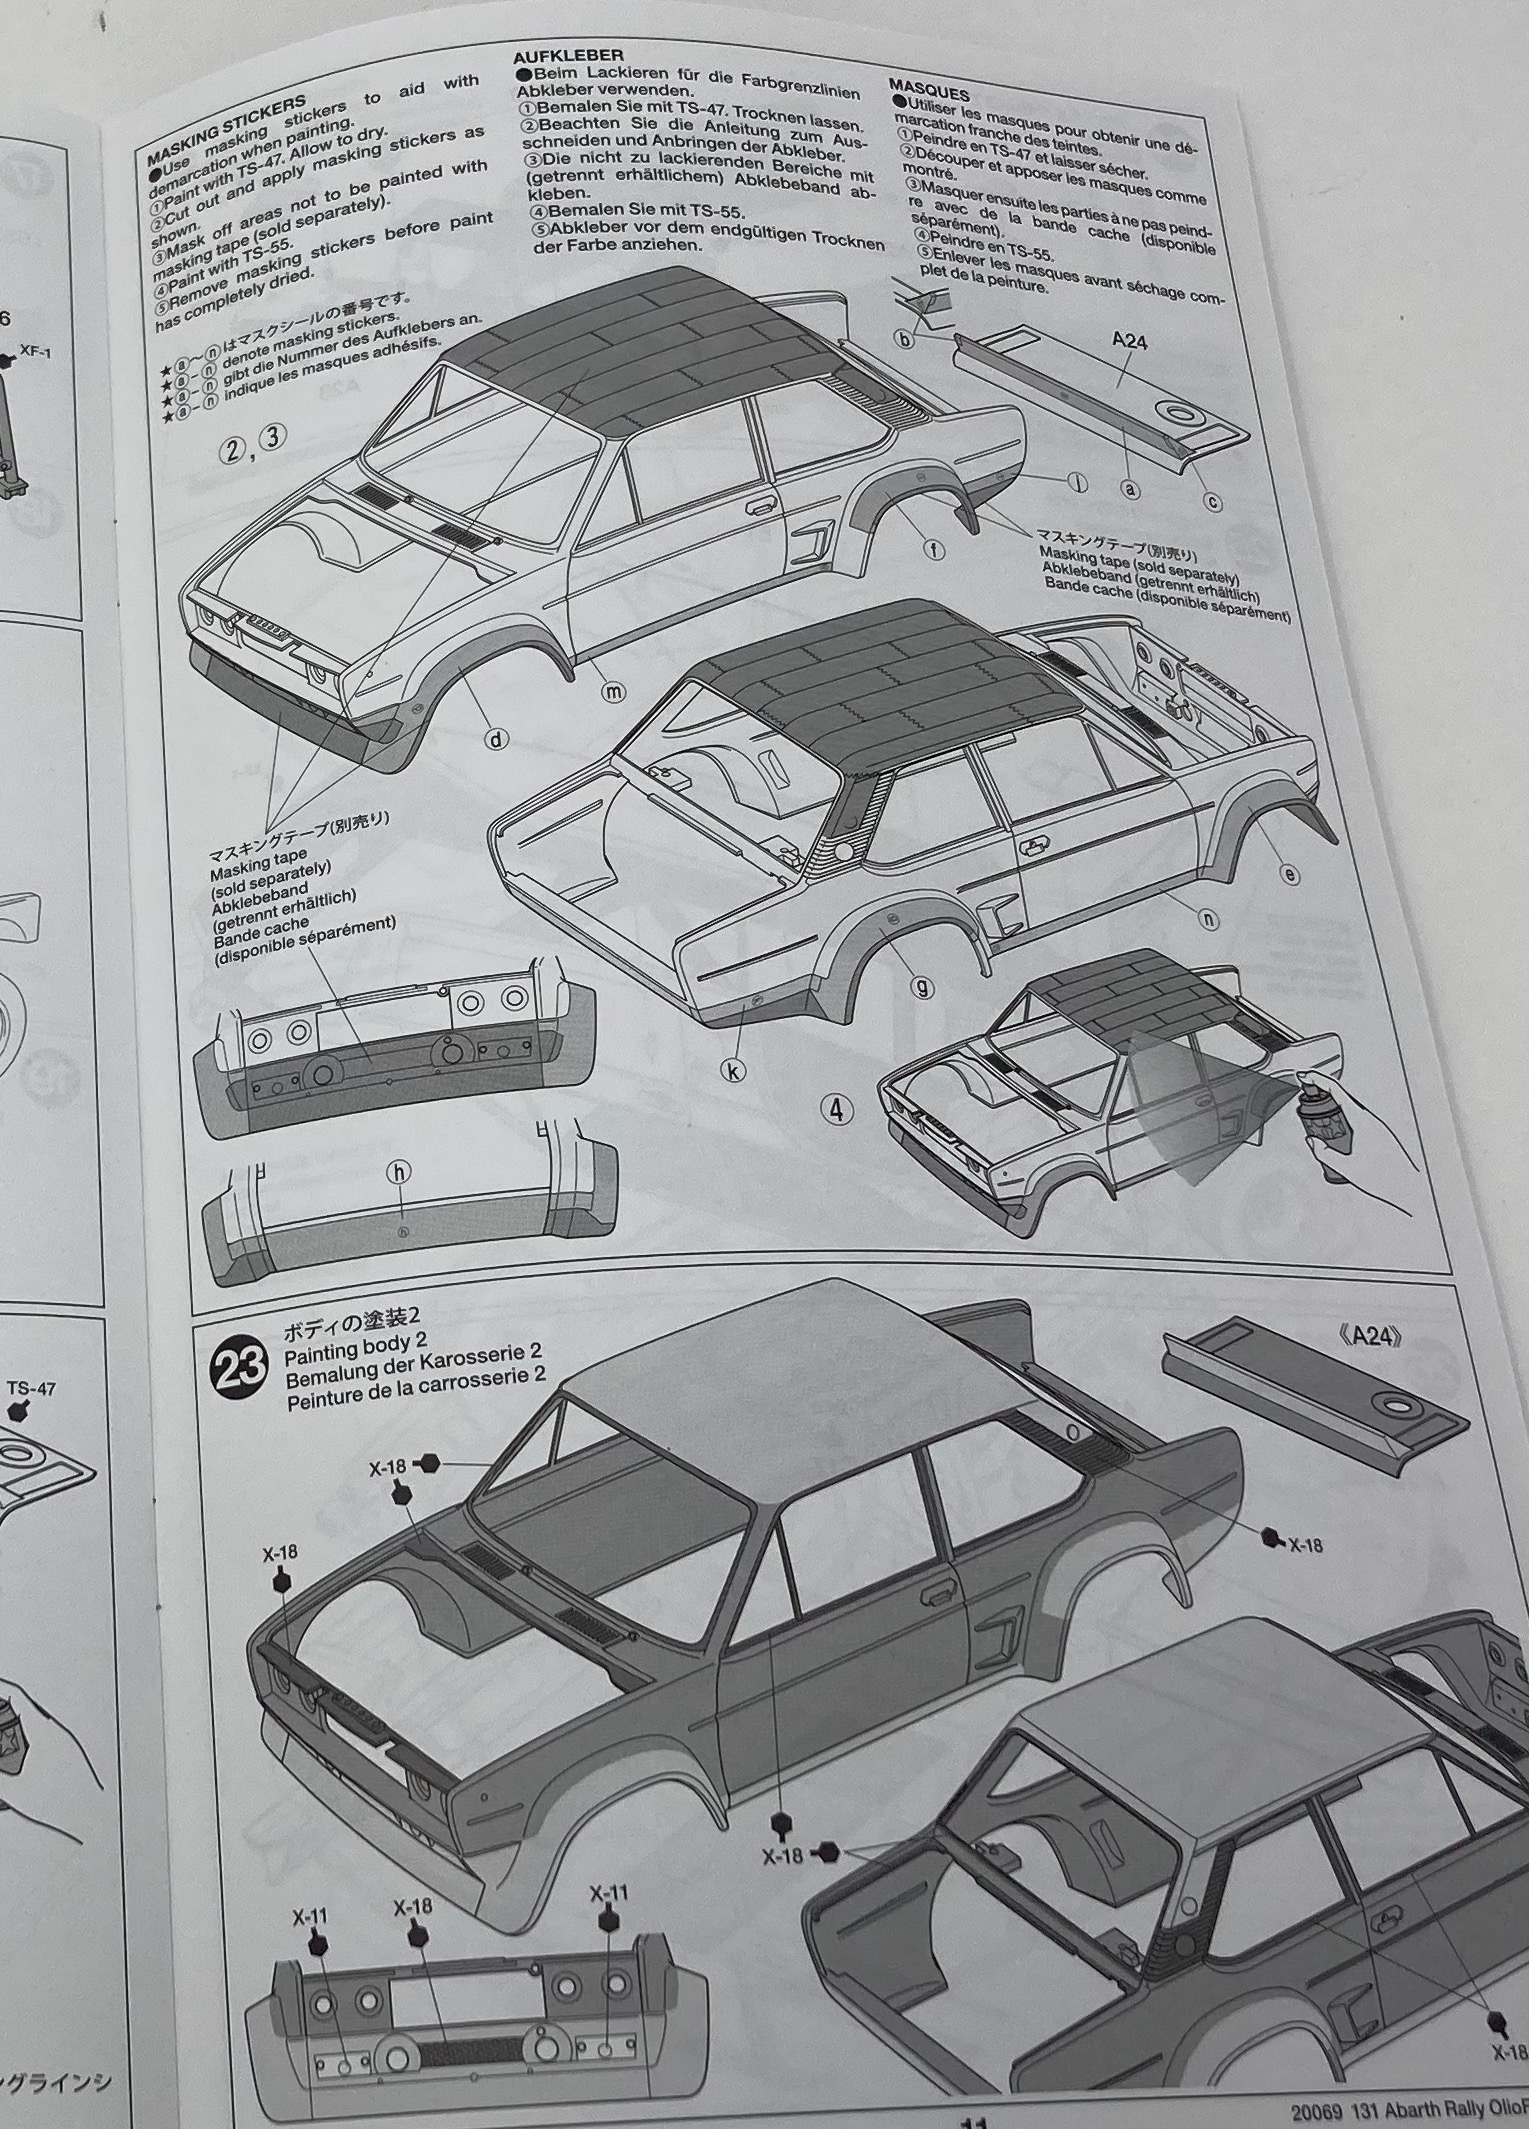
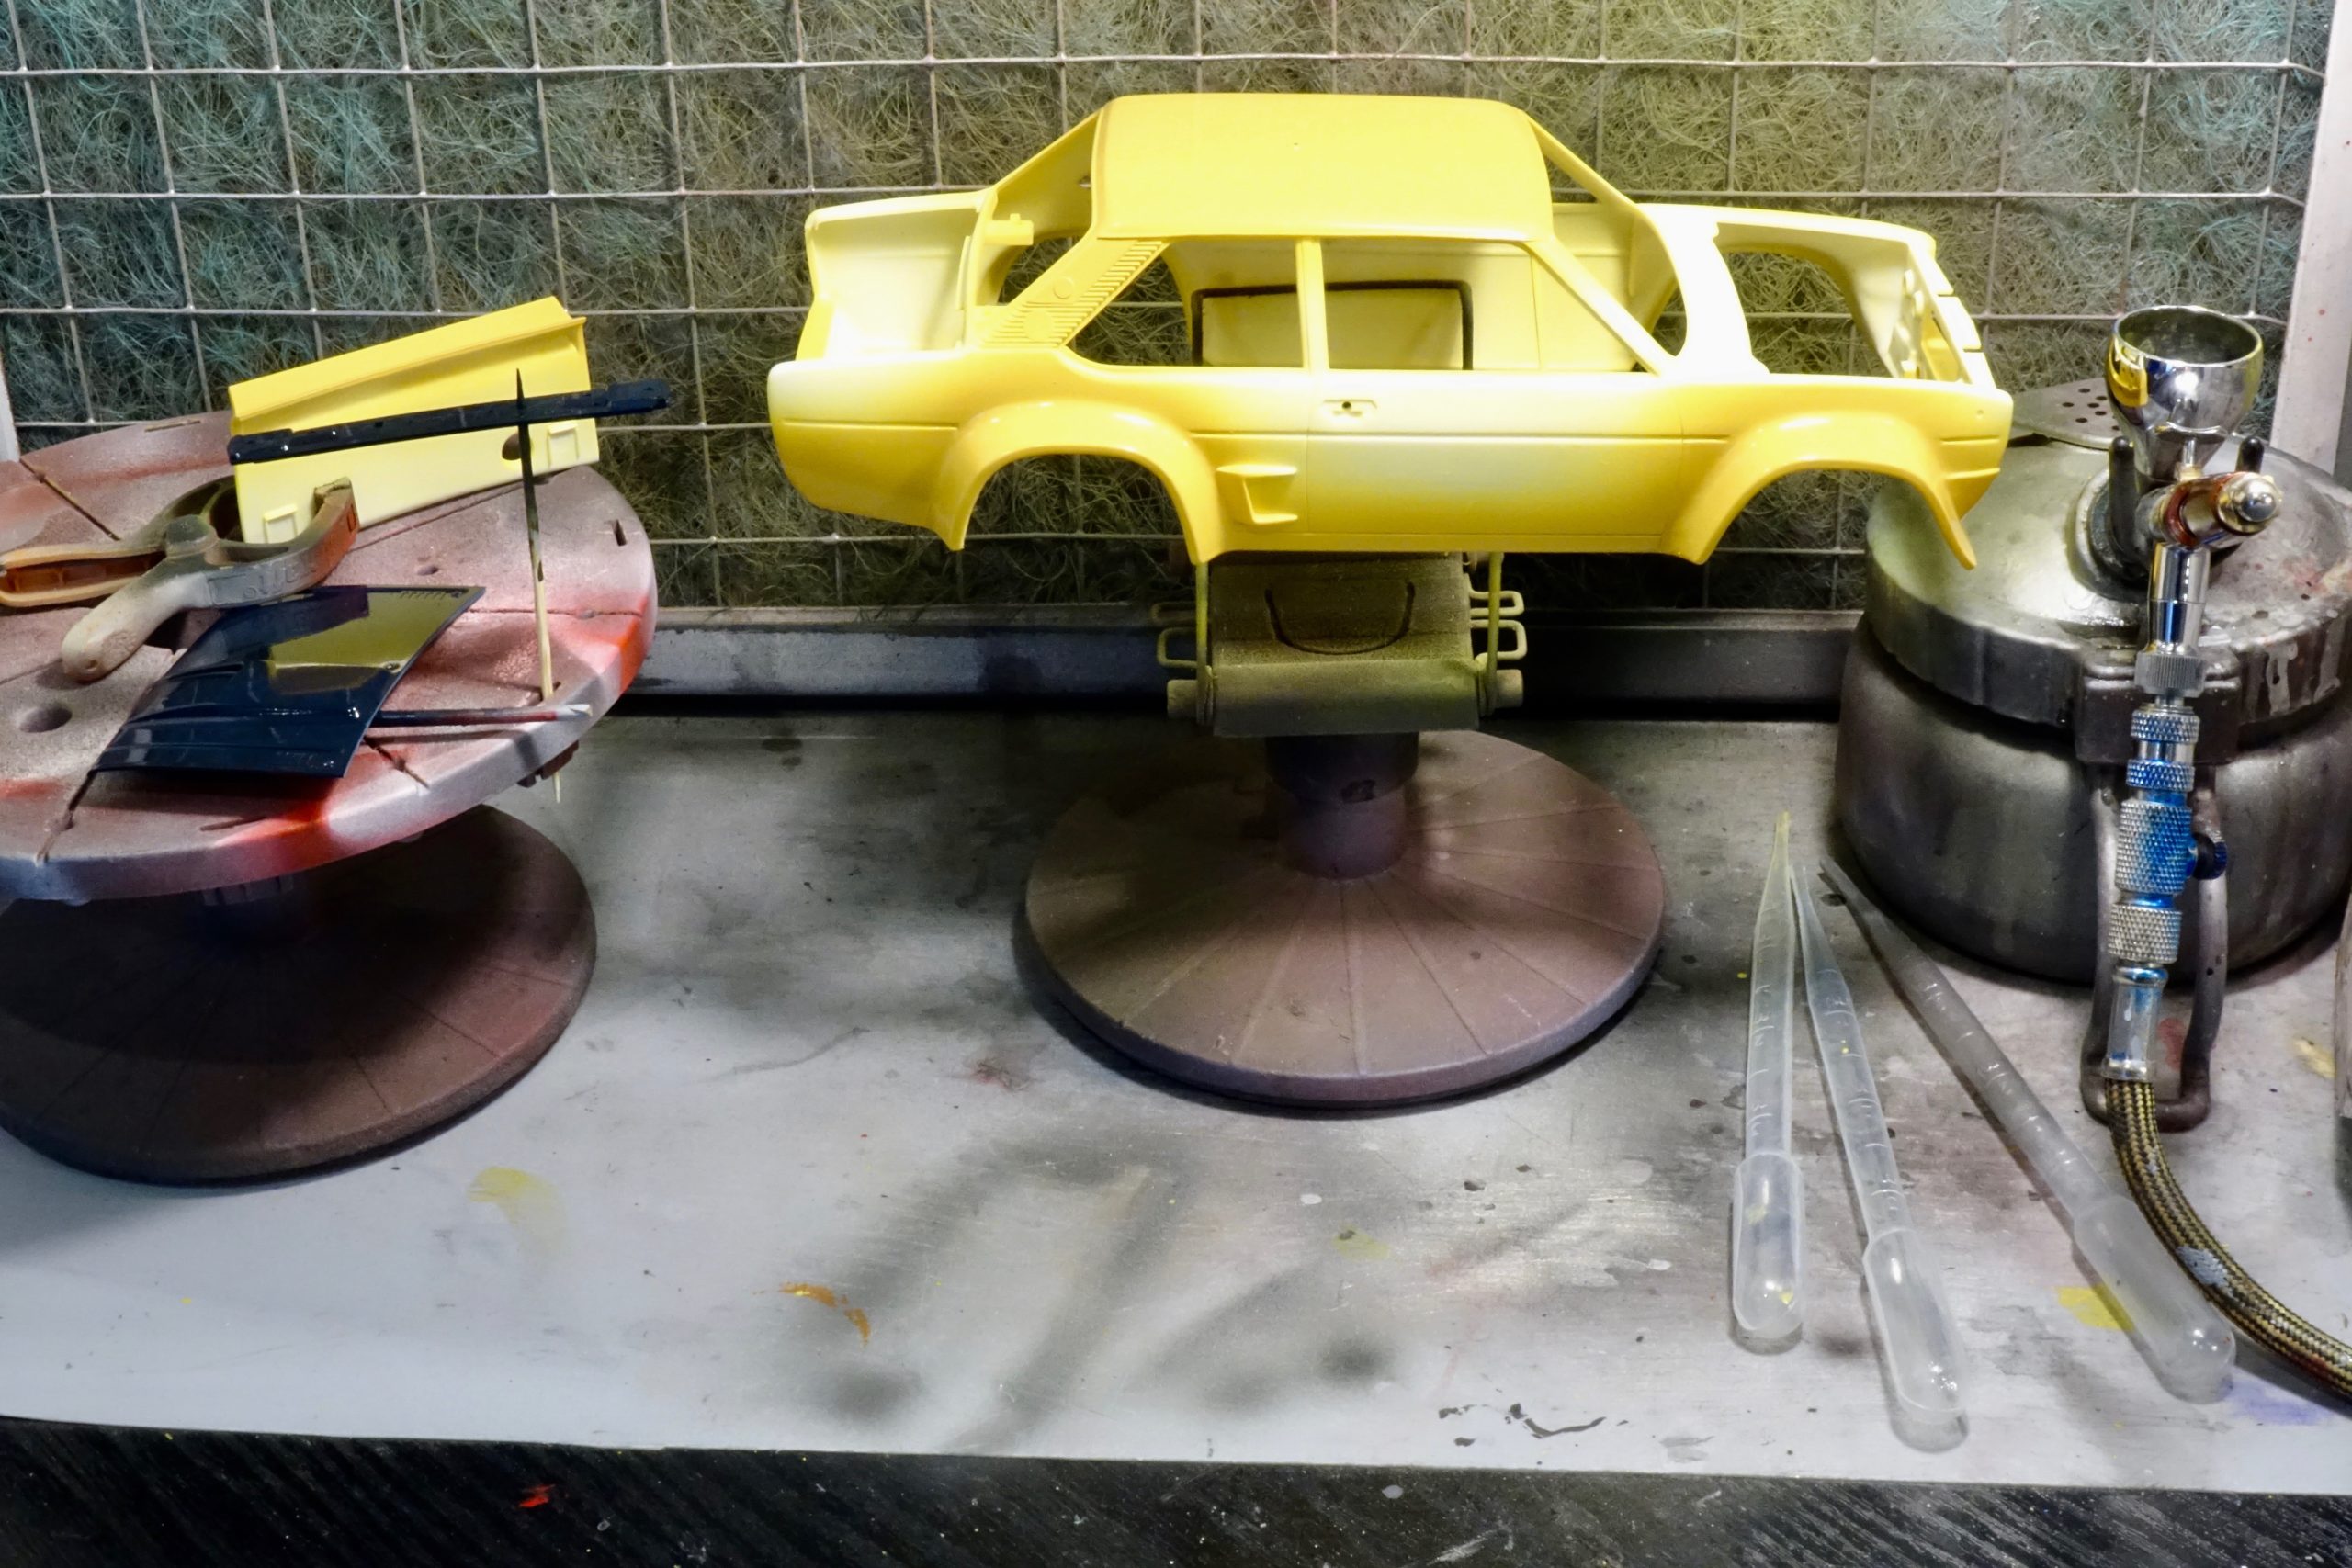
Painting the body
I mentioned earlier that the painting instructions/guidance in the kit make no reference to Lacquer Paint colours – and, in the case of the main bodywork colours, no reference to anything other than aerosol TS colours. So, my first job was to mix up a suitable yellow and blue using lacquer paints. For the yellow it was reasonably straightforward because I had the ‘OLIO FIAT’ decal in yellow – so I could use that as a guide. For the blue I just had to guess a very dark blue. I was satisfied in the end that the colours were ‘near enough’. I test sprayed on the backs of plastic spoons until I got my final shades and then mixed up enough to complete the paint job ( with some to spare for emergencies!). For the yellow I used LP9 Yellow as the base and added small drops of LP76 and LP 51 until I got the shade I was after. For the blue it was Pure Blue LP6 and Black LP1.
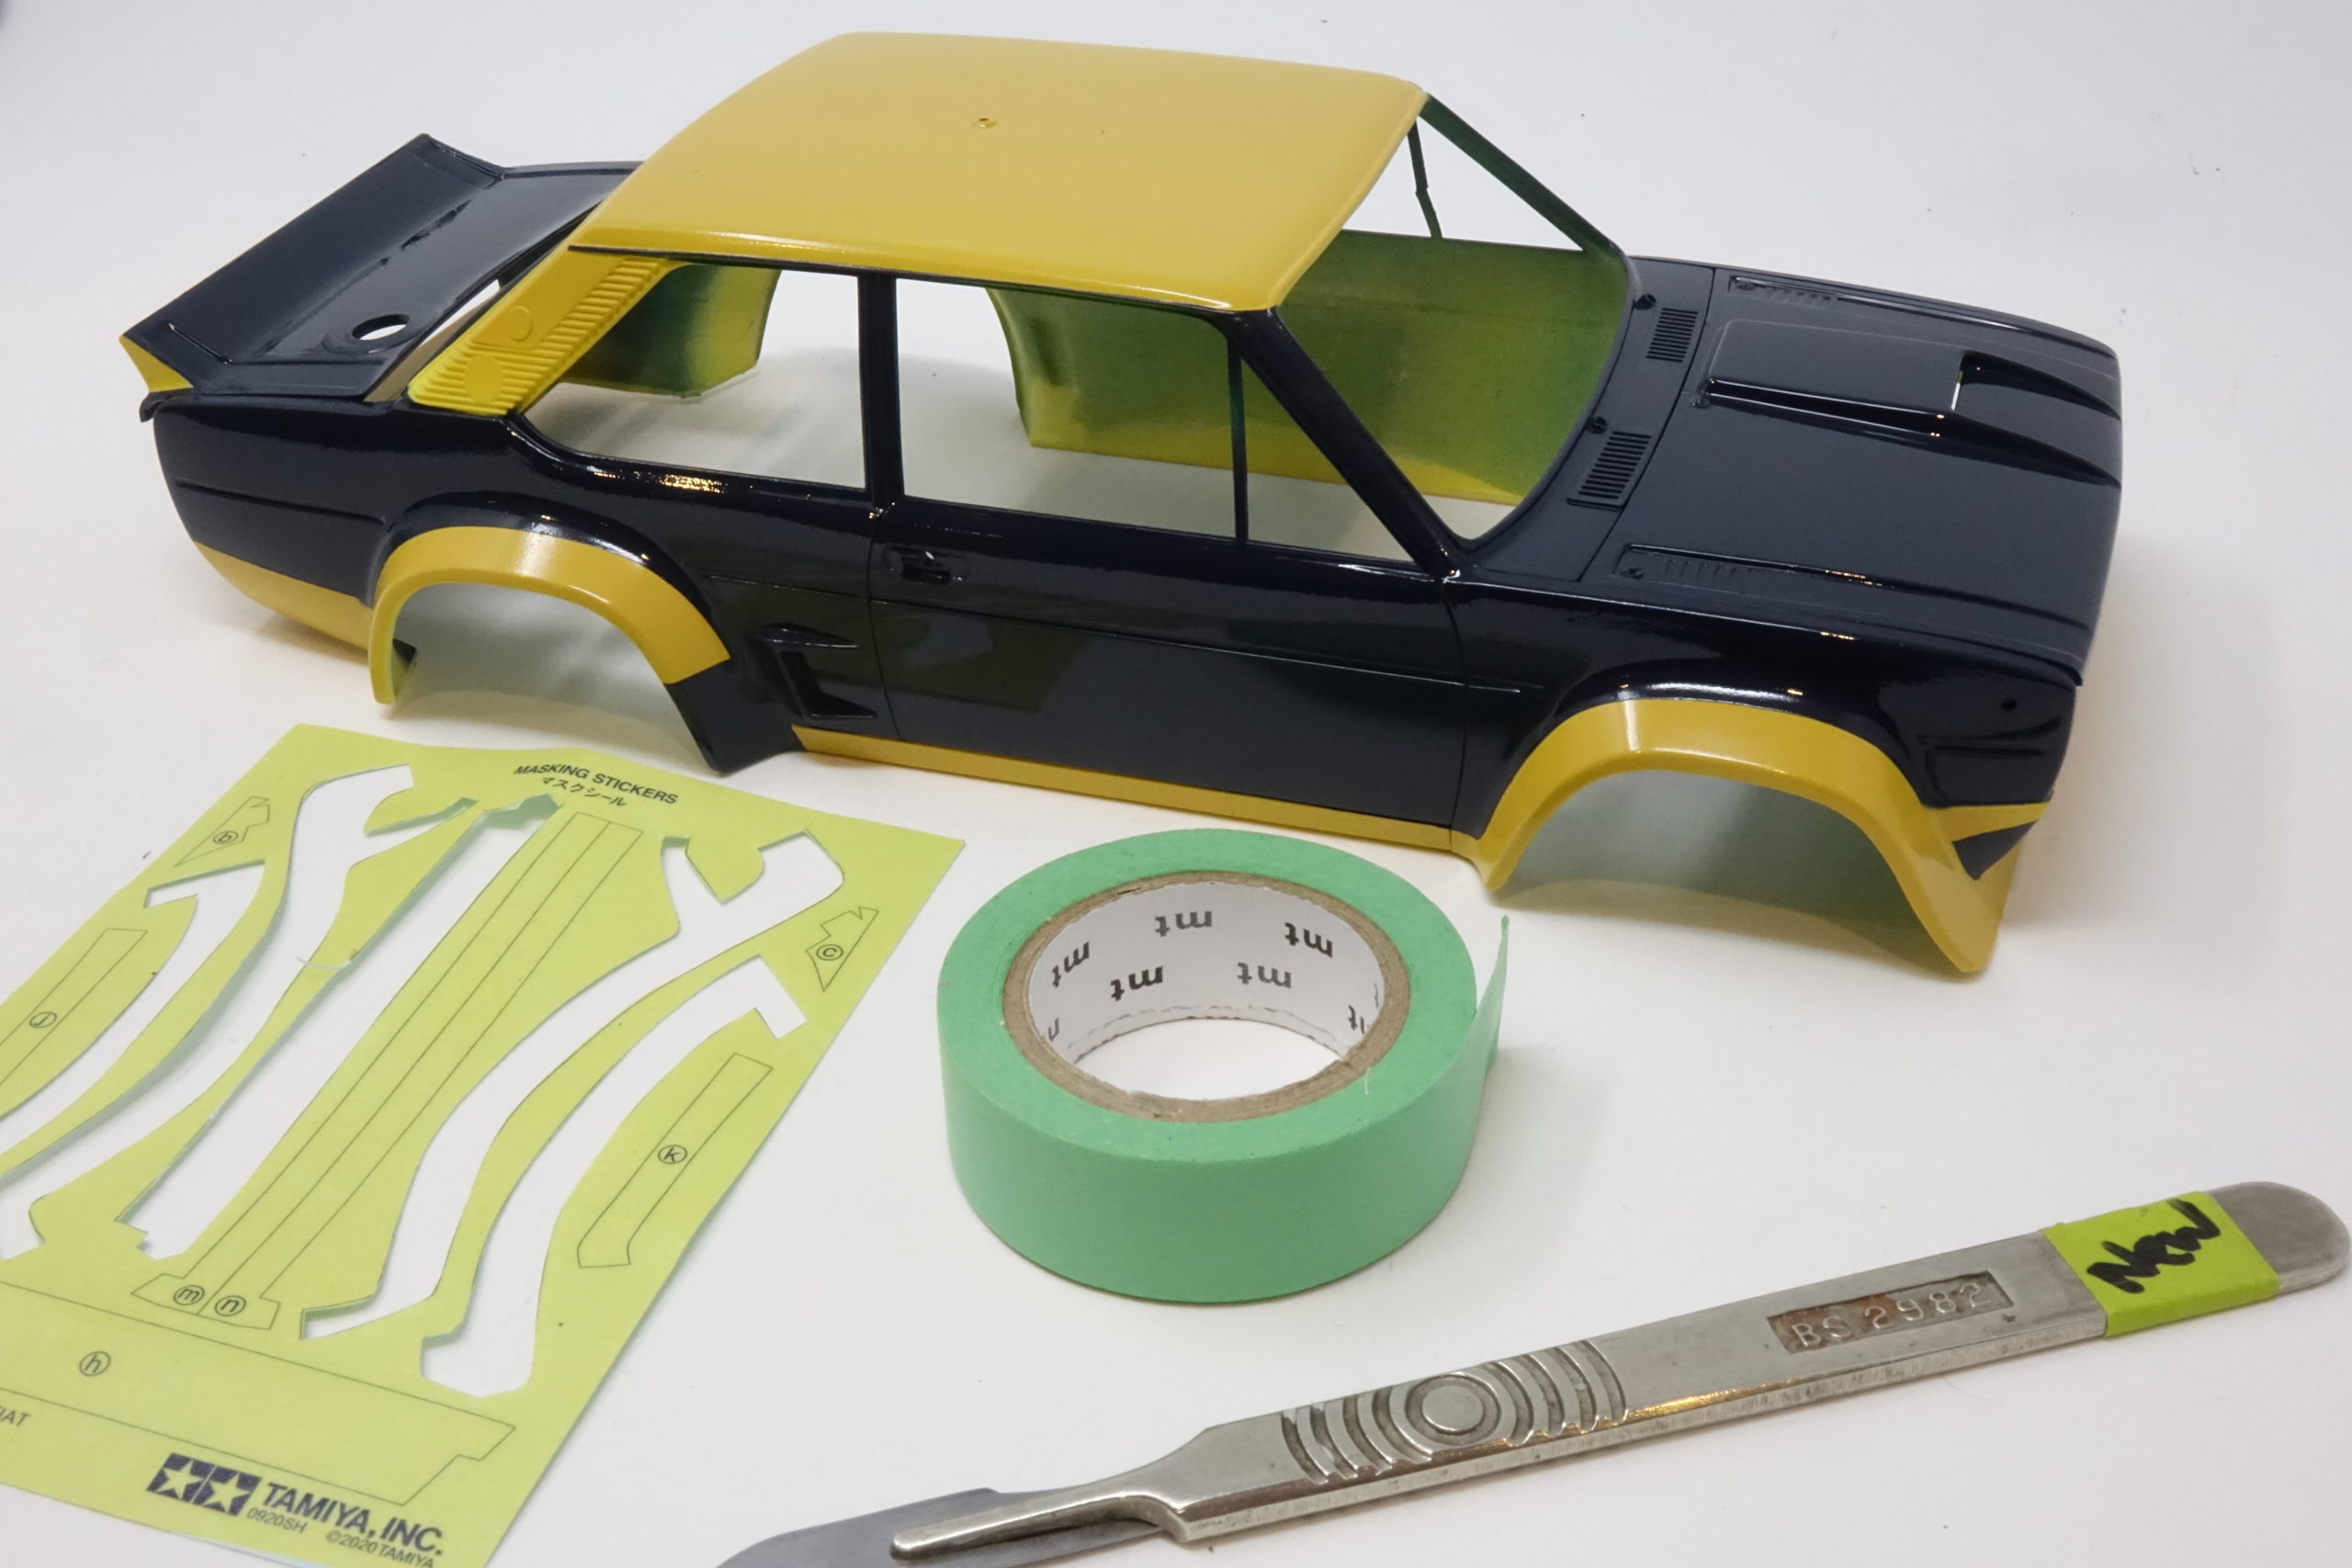
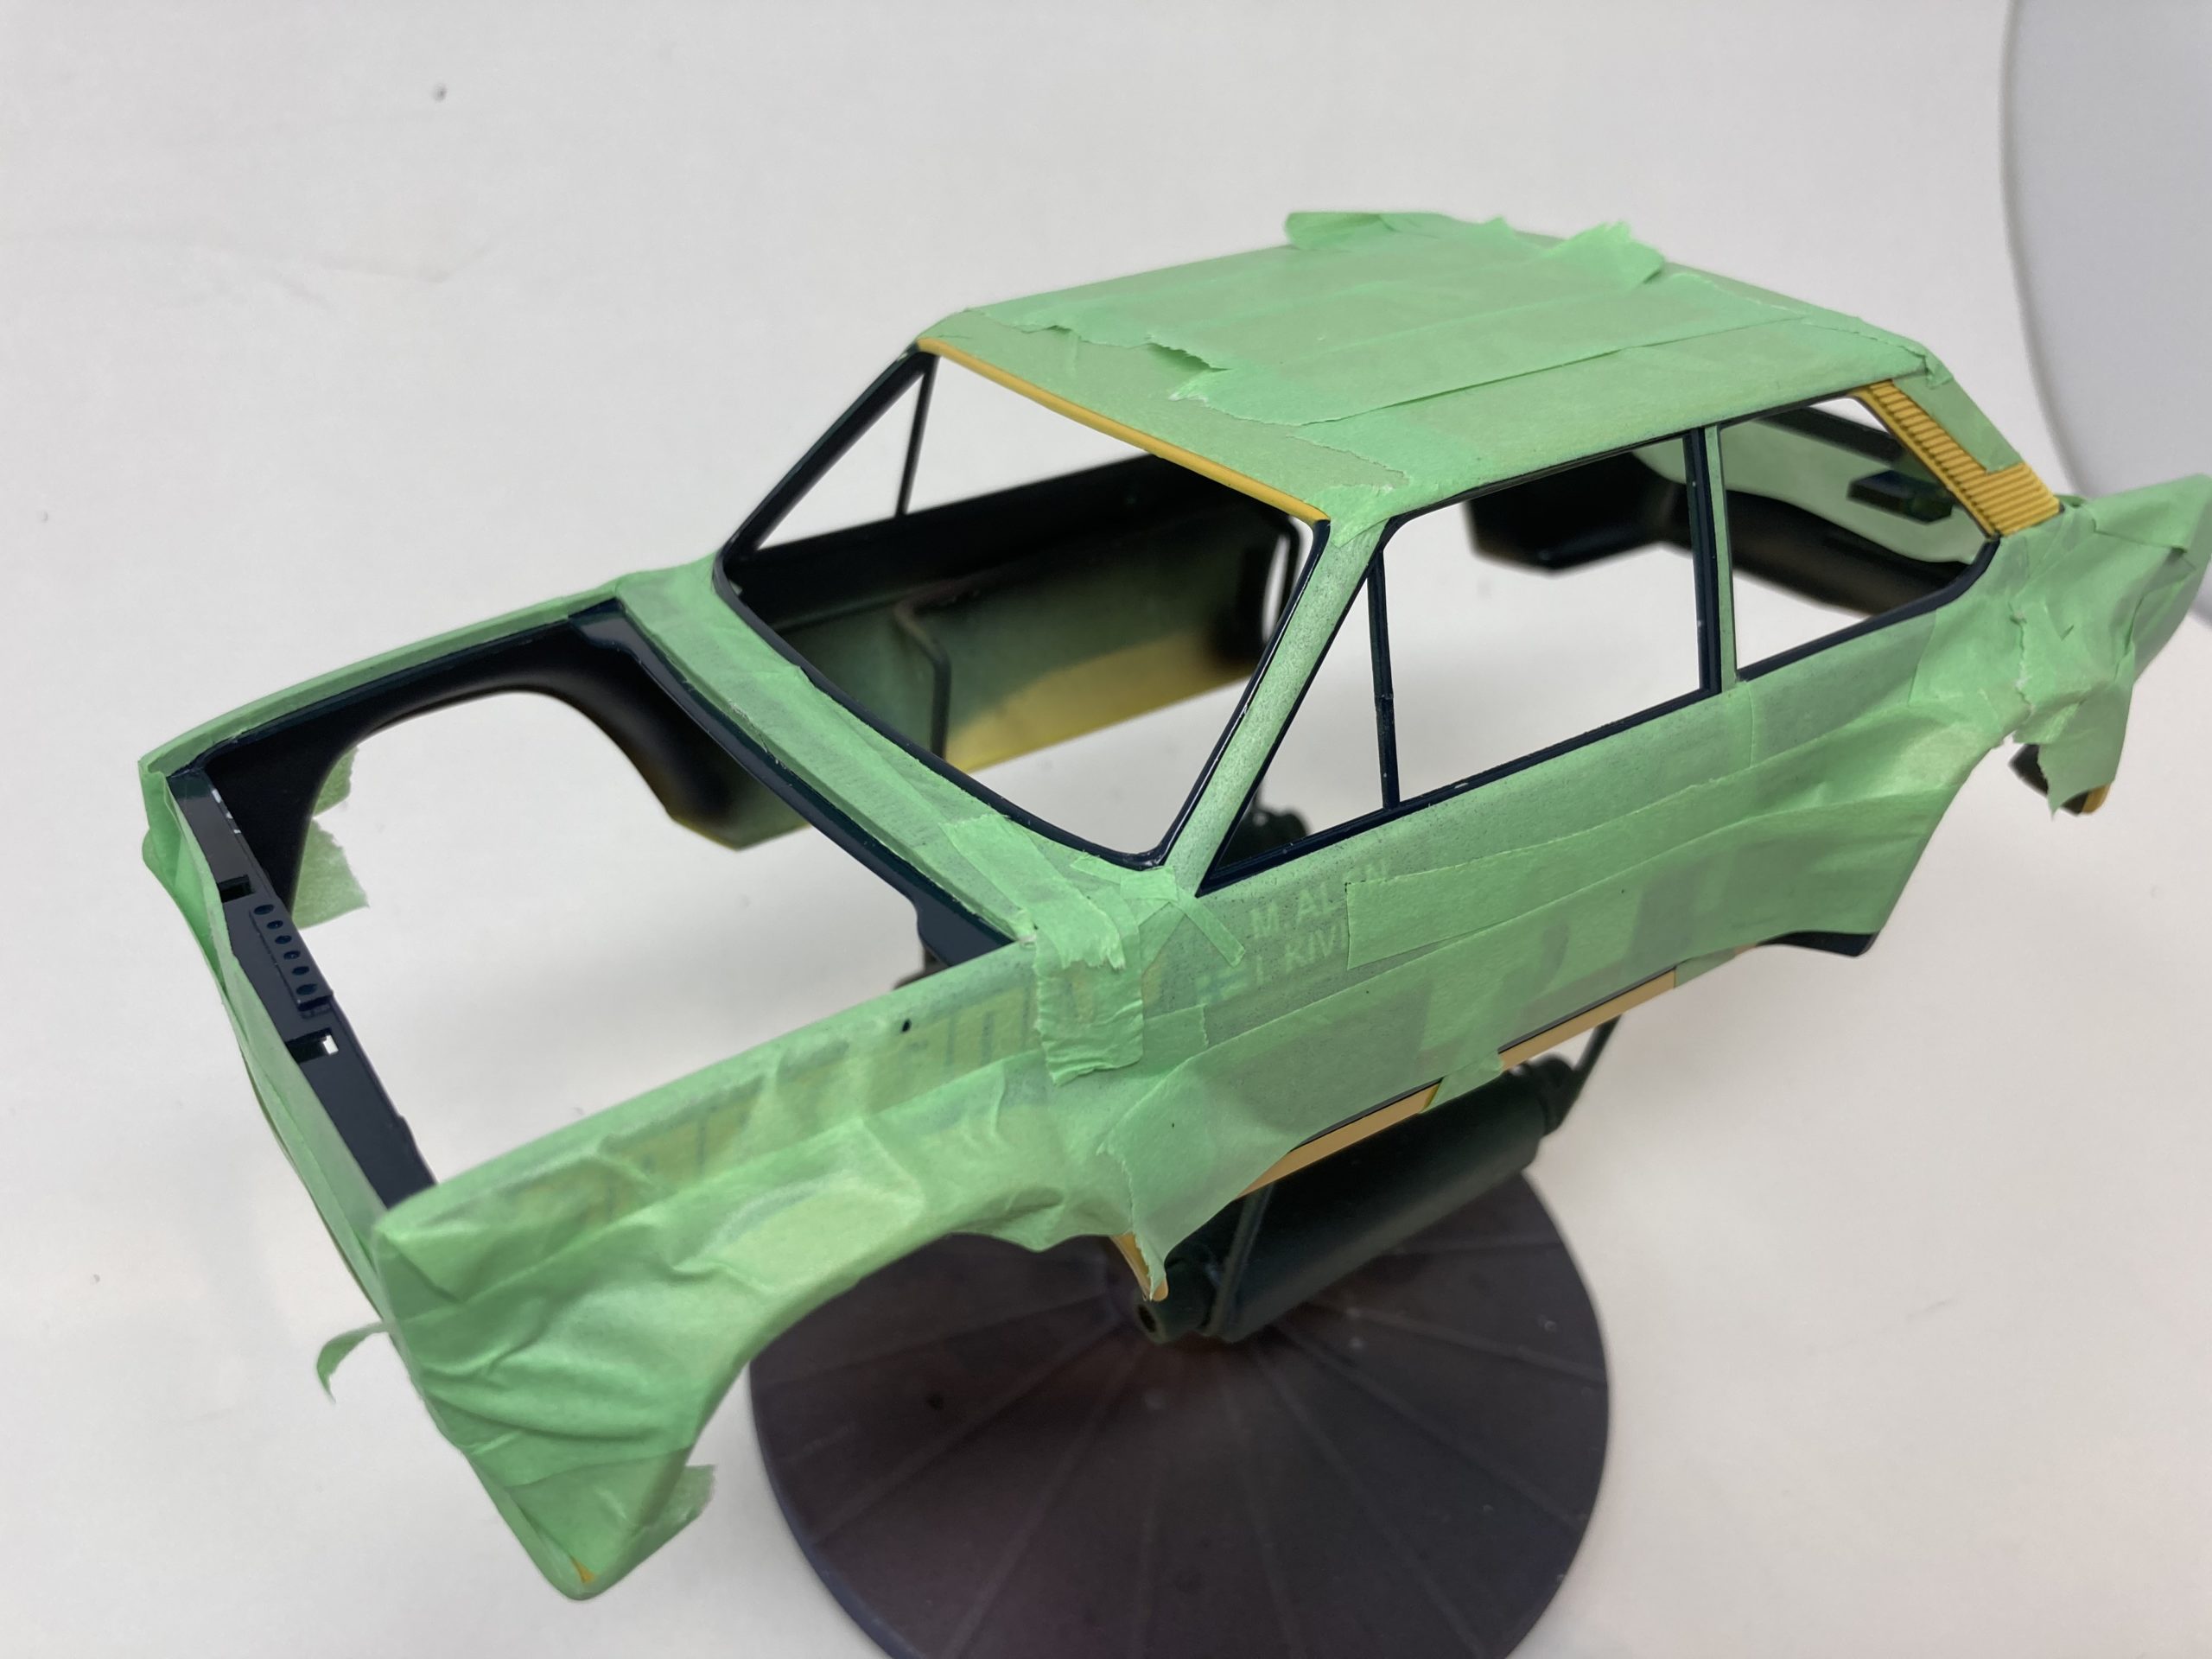
So – all body parts were cleaned and prepared with Zero “Key and Clean”. The areas for yellow were sprayed with an overlap and allowed to dry thoroughly. Next step was to mask over the yellow in readiness for the blue. I was a bit hesitant about using the masking sheet supplied – because in my mind two things were bothering me – the masks had to be cut out from the printed sheet and any ‘not clean’ cuts might allow some paint bleeding and, secondly, I trust my regular masking tape so much that I didn’t want to try something different. Any mistakes were going to be difficult to put right. In the end I used a mixture of both – I used the supplied masks (cut out) for the wheel arch curves, and I used my regular tape (MT Washi tape) for all the other edges, etc. In fact, I had no problems with the masking sheet supplied, so my worries were unfounded. Masking tape is still needed though for the large areas.
It’s a quite complex (for me) paint scheme and it took quite some time for me to get all the masking sorted. But, sorted it was and on went the blue. I tried to apply enough to allow for follow up sanding/buffing, but tried to feather the edges with the yellow a little so as not to get a ridge of paint. It all seemed to go ok.
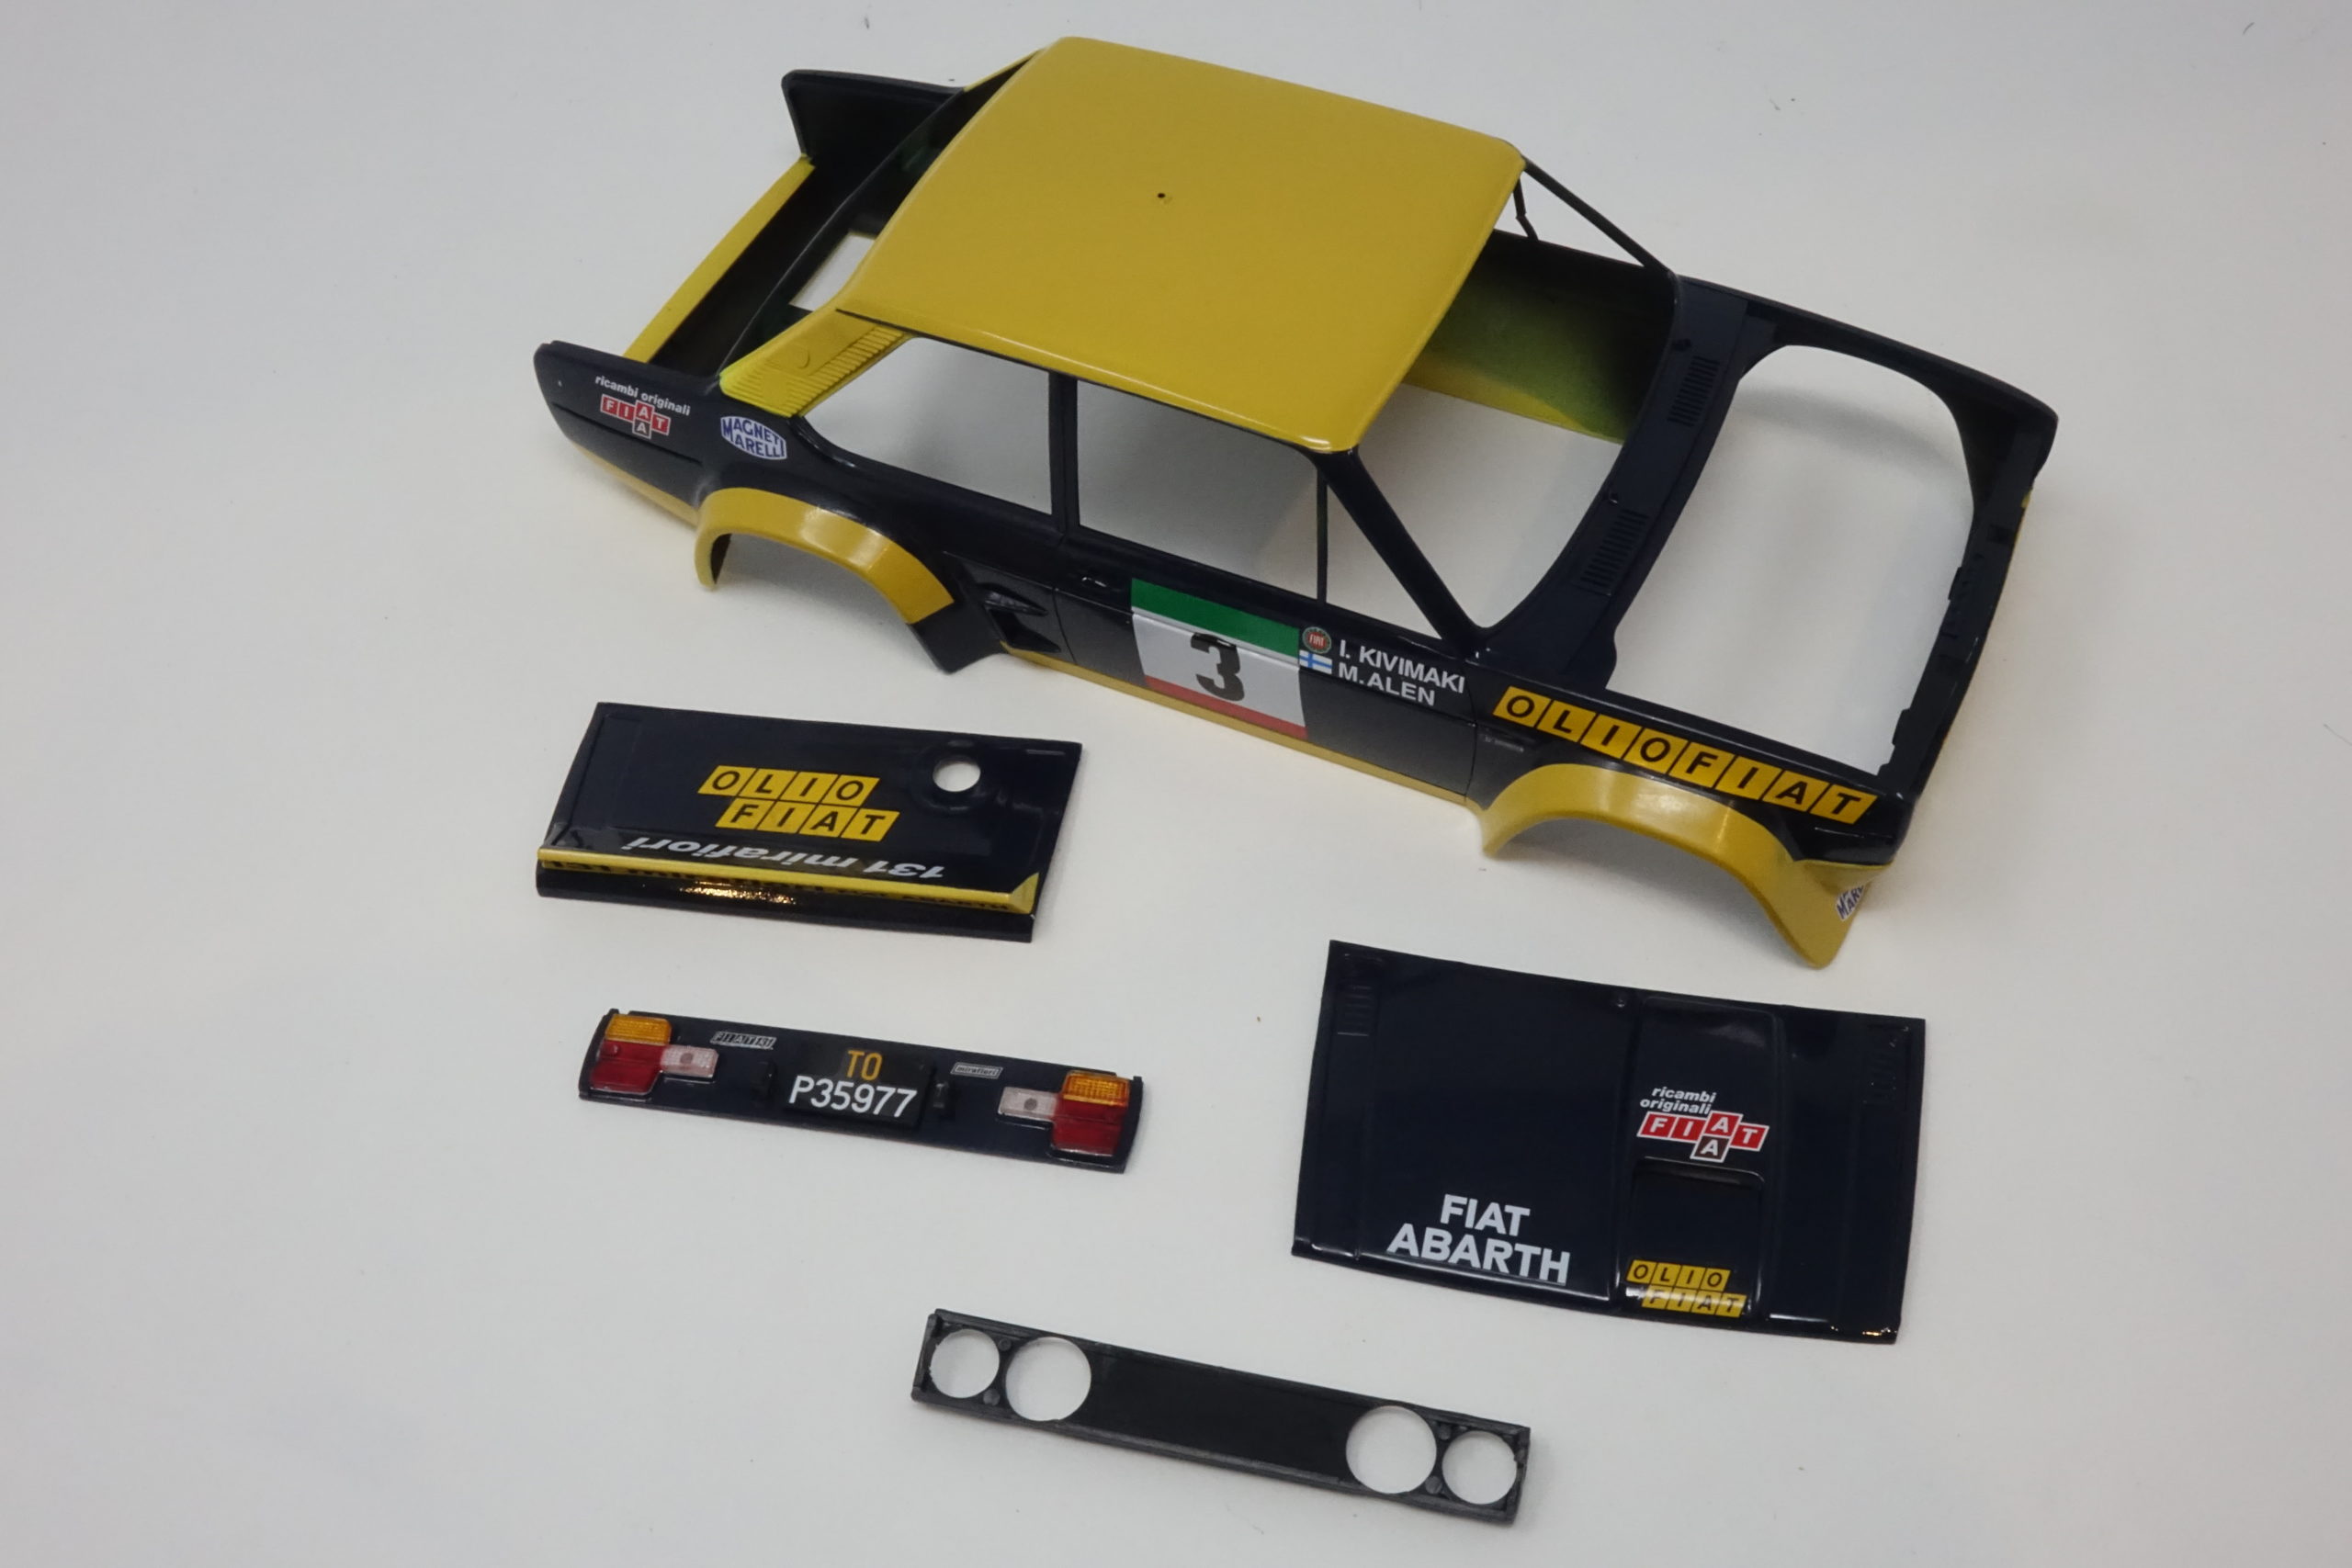
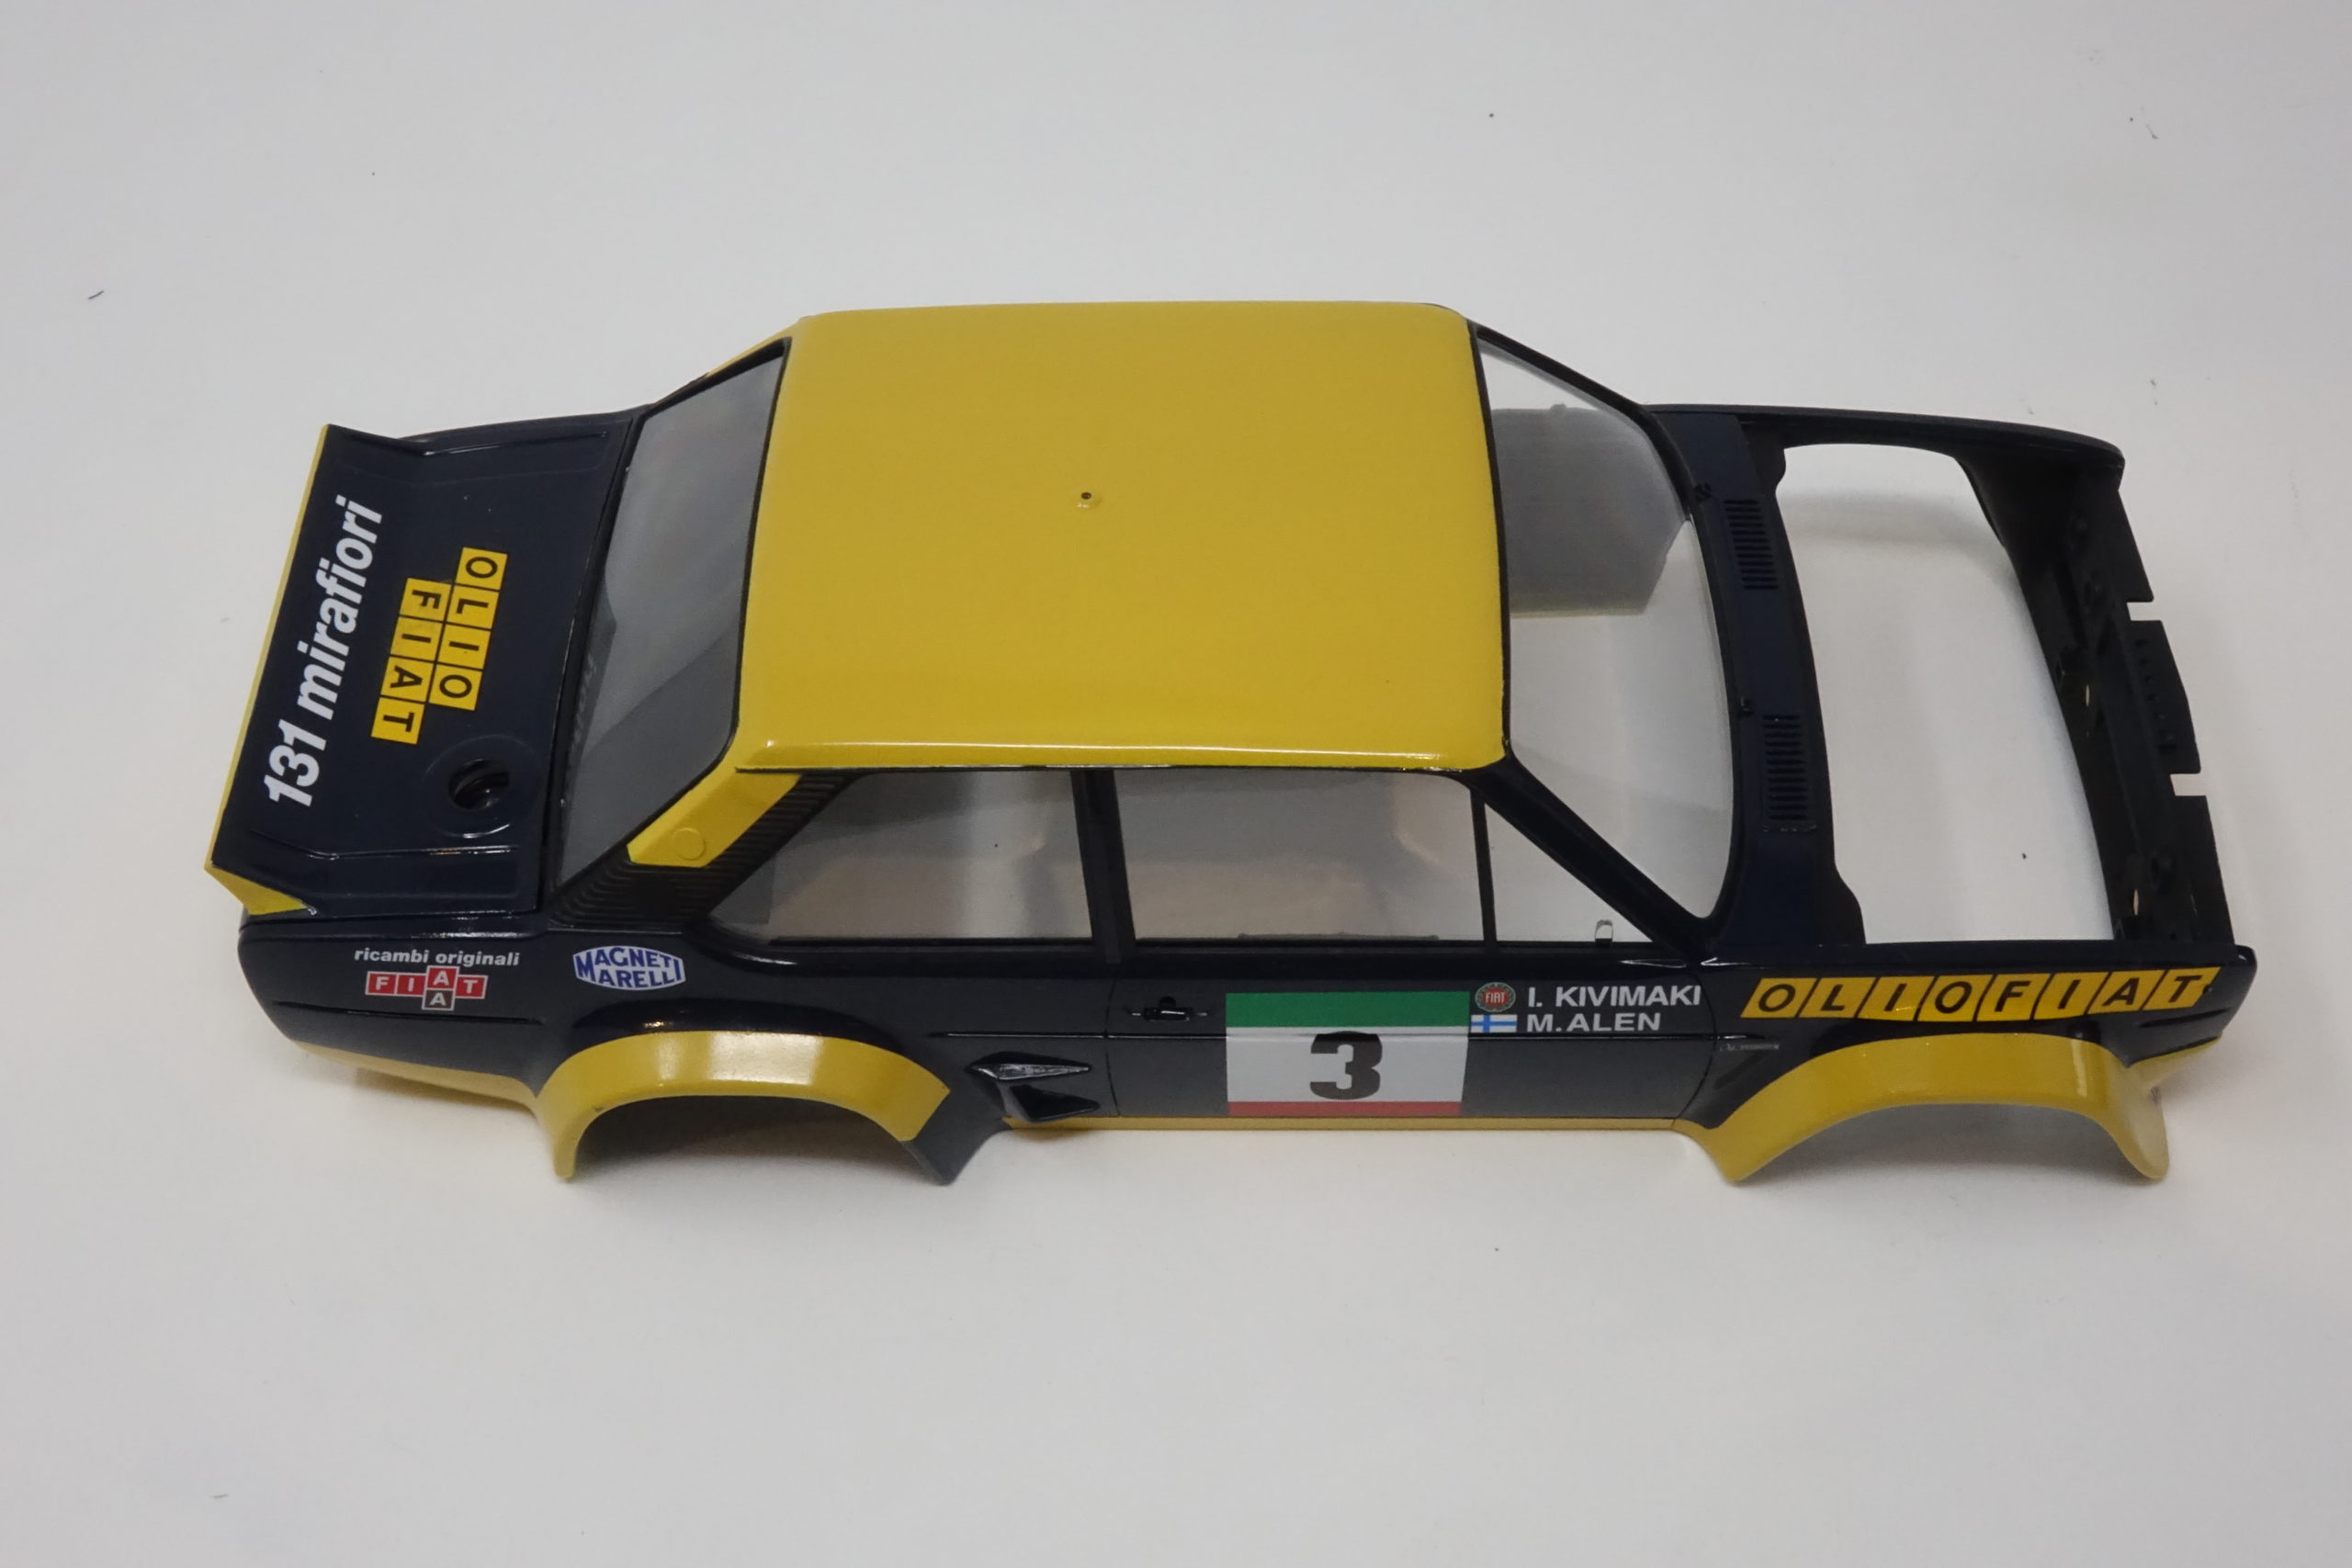
Next step was to sand down any imperfections, dust specks etc and give it all a light buffing (by hand). Then it was on with the decals.
Next was Clear Coat (Tamiya LP again). Allowed to dry thoroughly and then sand/buff/polish to get the final finish. A few areas, where there were a couple of blemishes, were flashed over again and buffed.
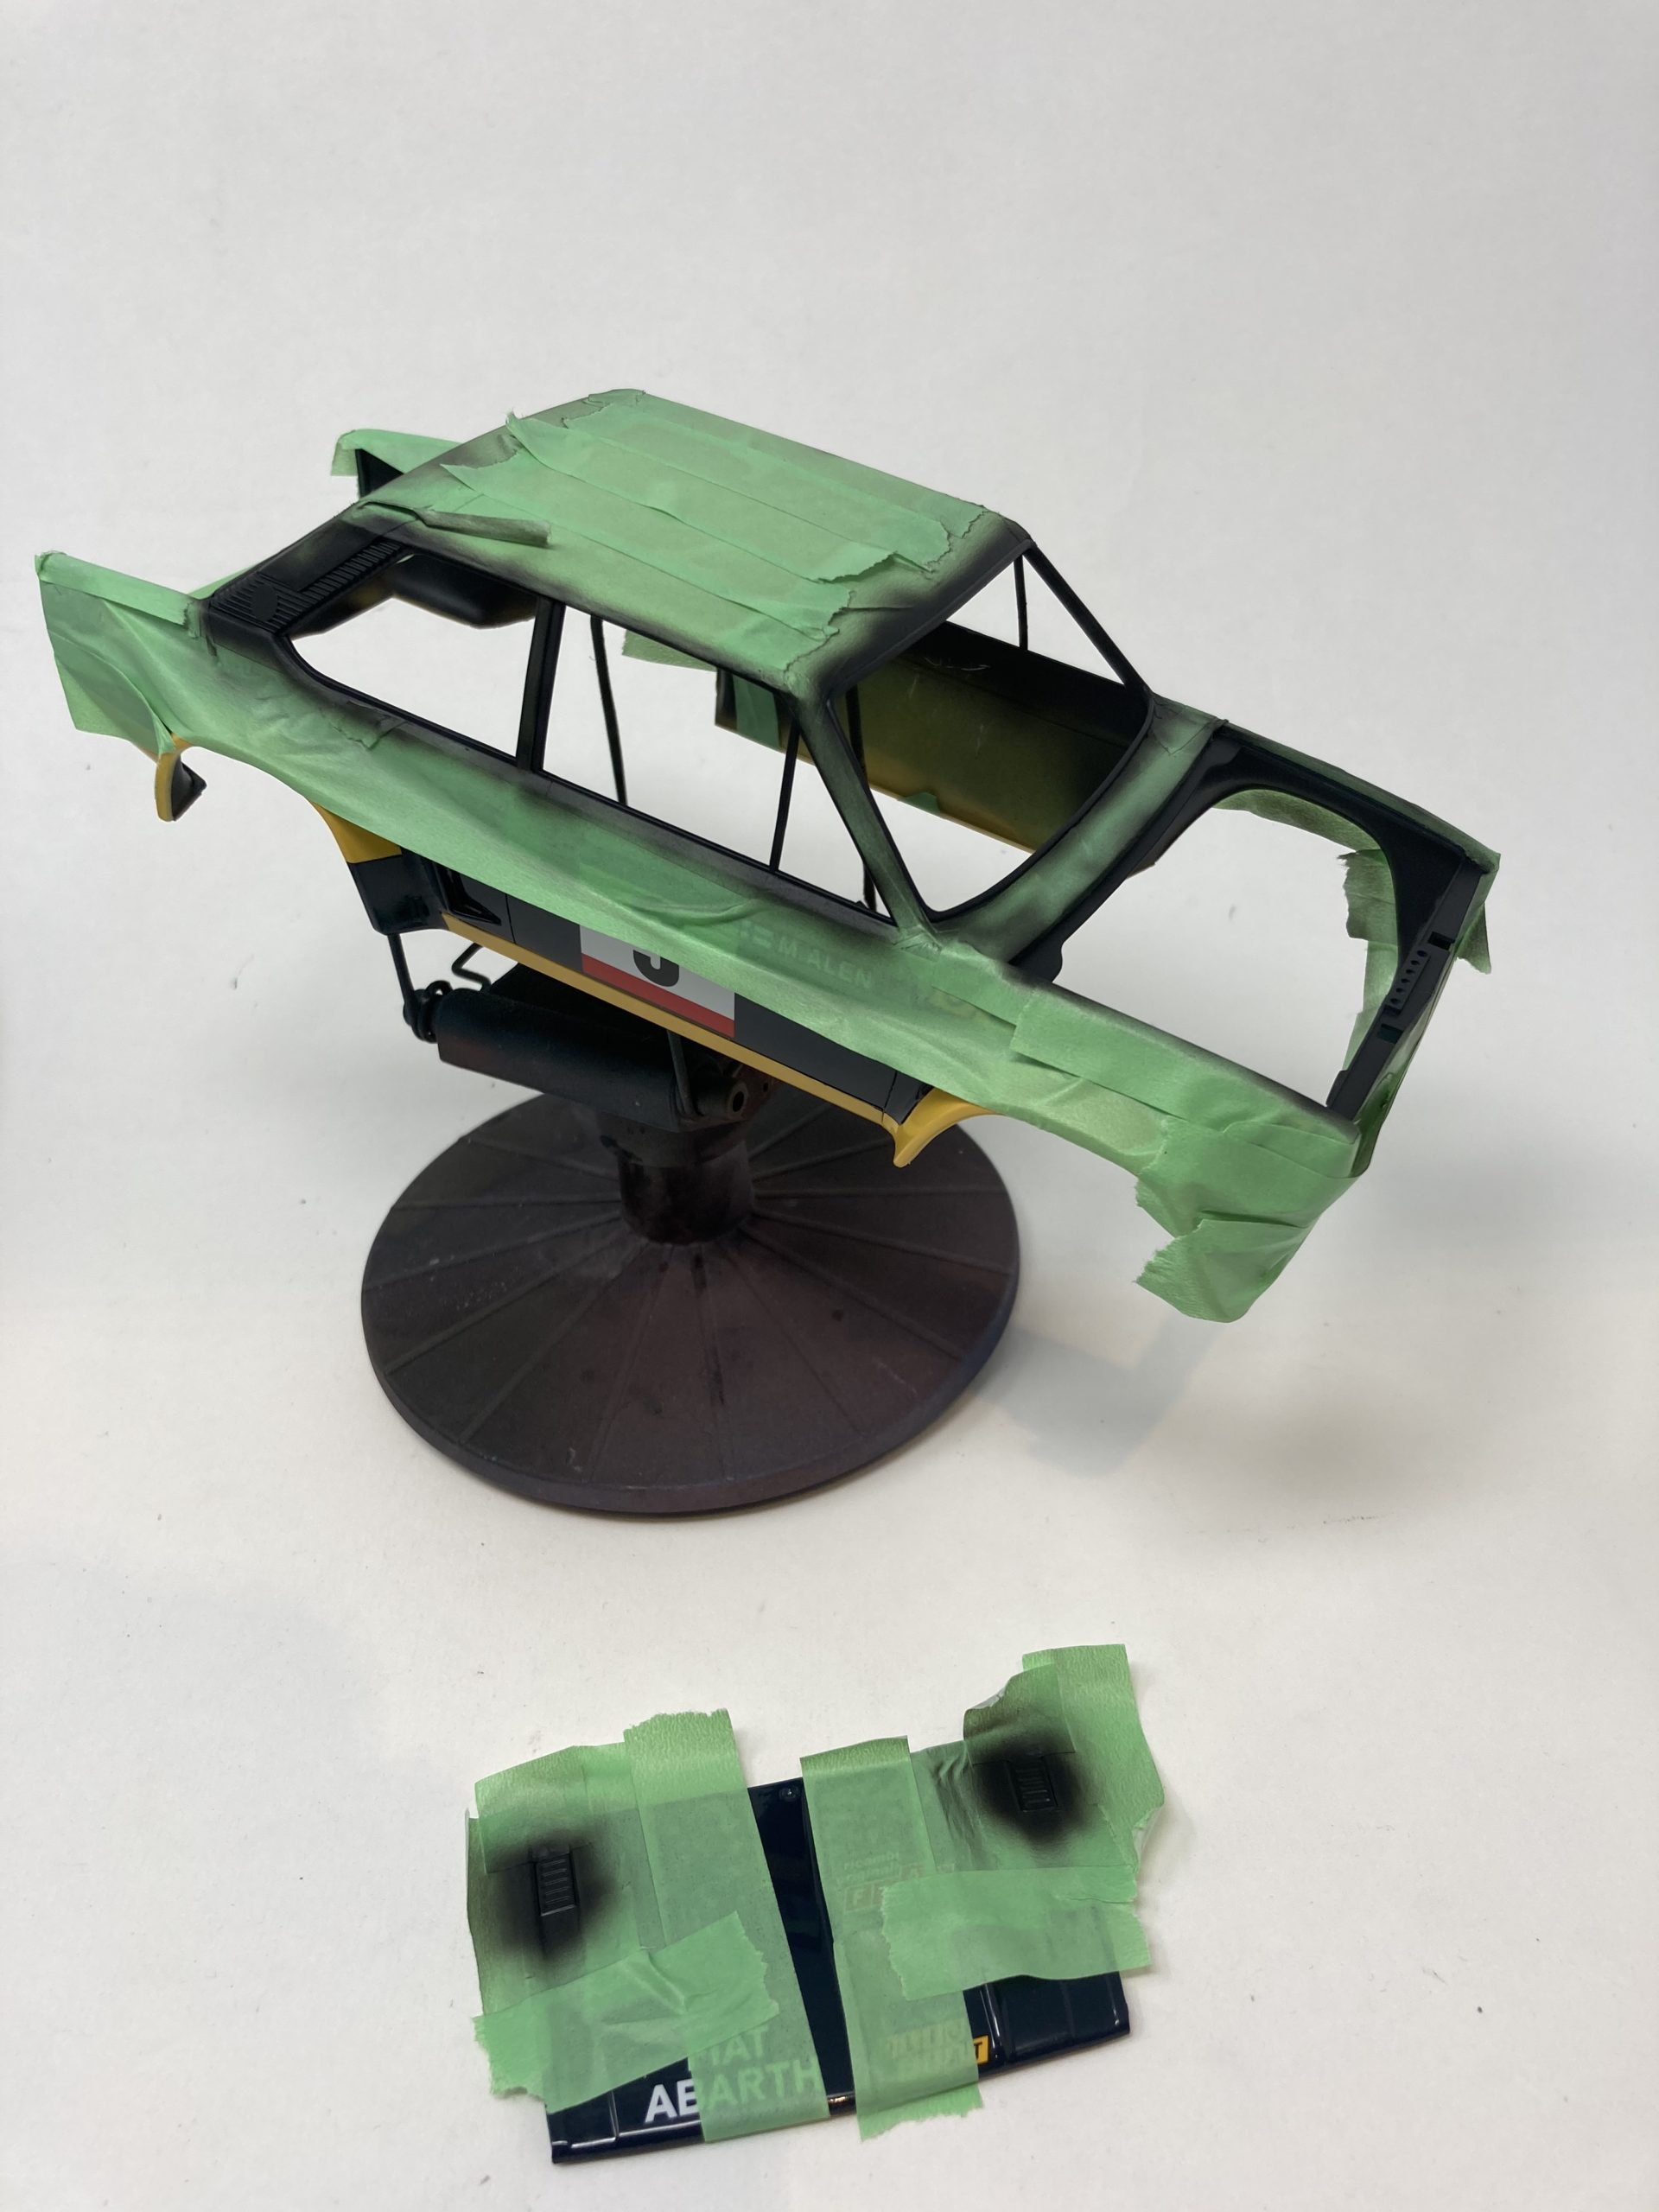
Next it was masking up time again – this time for the window seals/frames and the parts of body trim that were black. This went ok – but, and this was the first time this has happened for me, removing the masking tape this time seemed to affect the surface of the clear coat. I can only guess that the Clear Coat hadn’t hardened sufficiently – so more sanding/buffing/polishing needed to restore it. I got there, but it was a pain – and I’ve never had this before.


Windows, boot etc
The interior of the body shell was now painted in matt black in readiness for the window fitting. Always a nervy stage this for me – I only have to look at clear acrylic parts and they mark! However, with this model it was easy! Only two pieces – one piece does the windscreen and side windows and the second does the rear screen. Both fitted really well and each had a large ‘lug’ , well away from the screen areas, for glueing. So, no problems. I then hinged the boot lid, which fitted perfectly and added the interior side panels – again, excellent Tamiya – perfect fit.

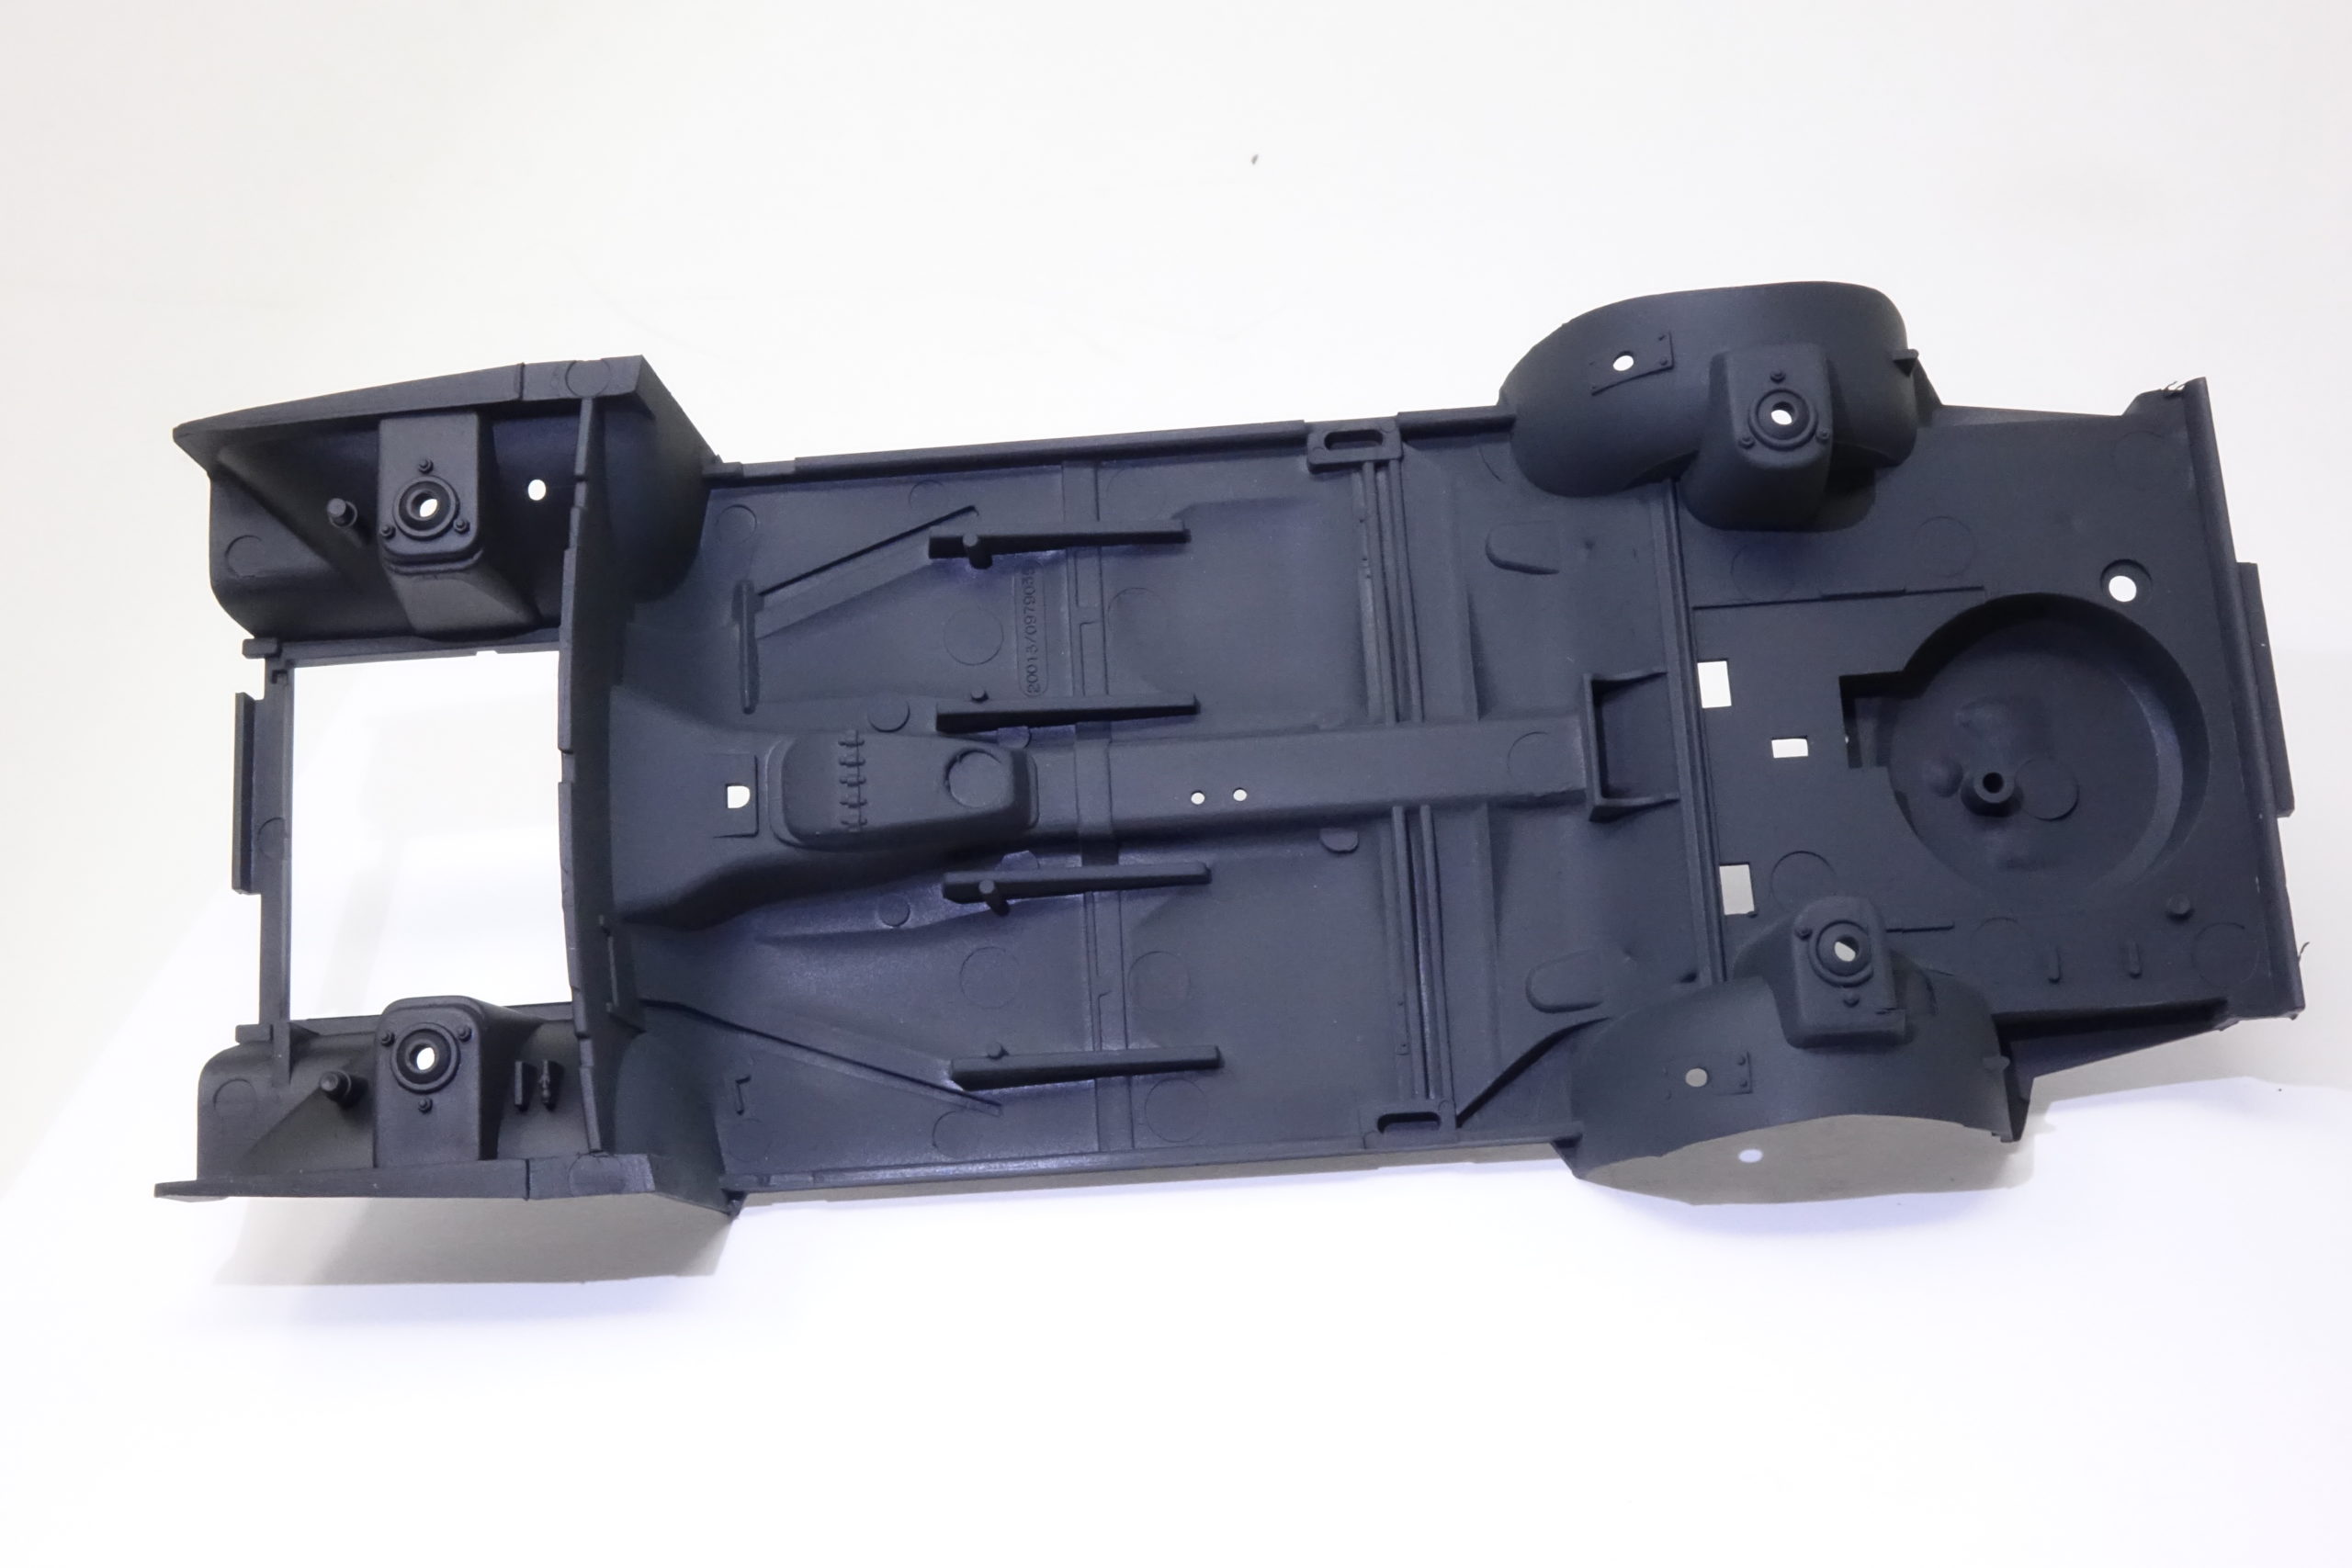
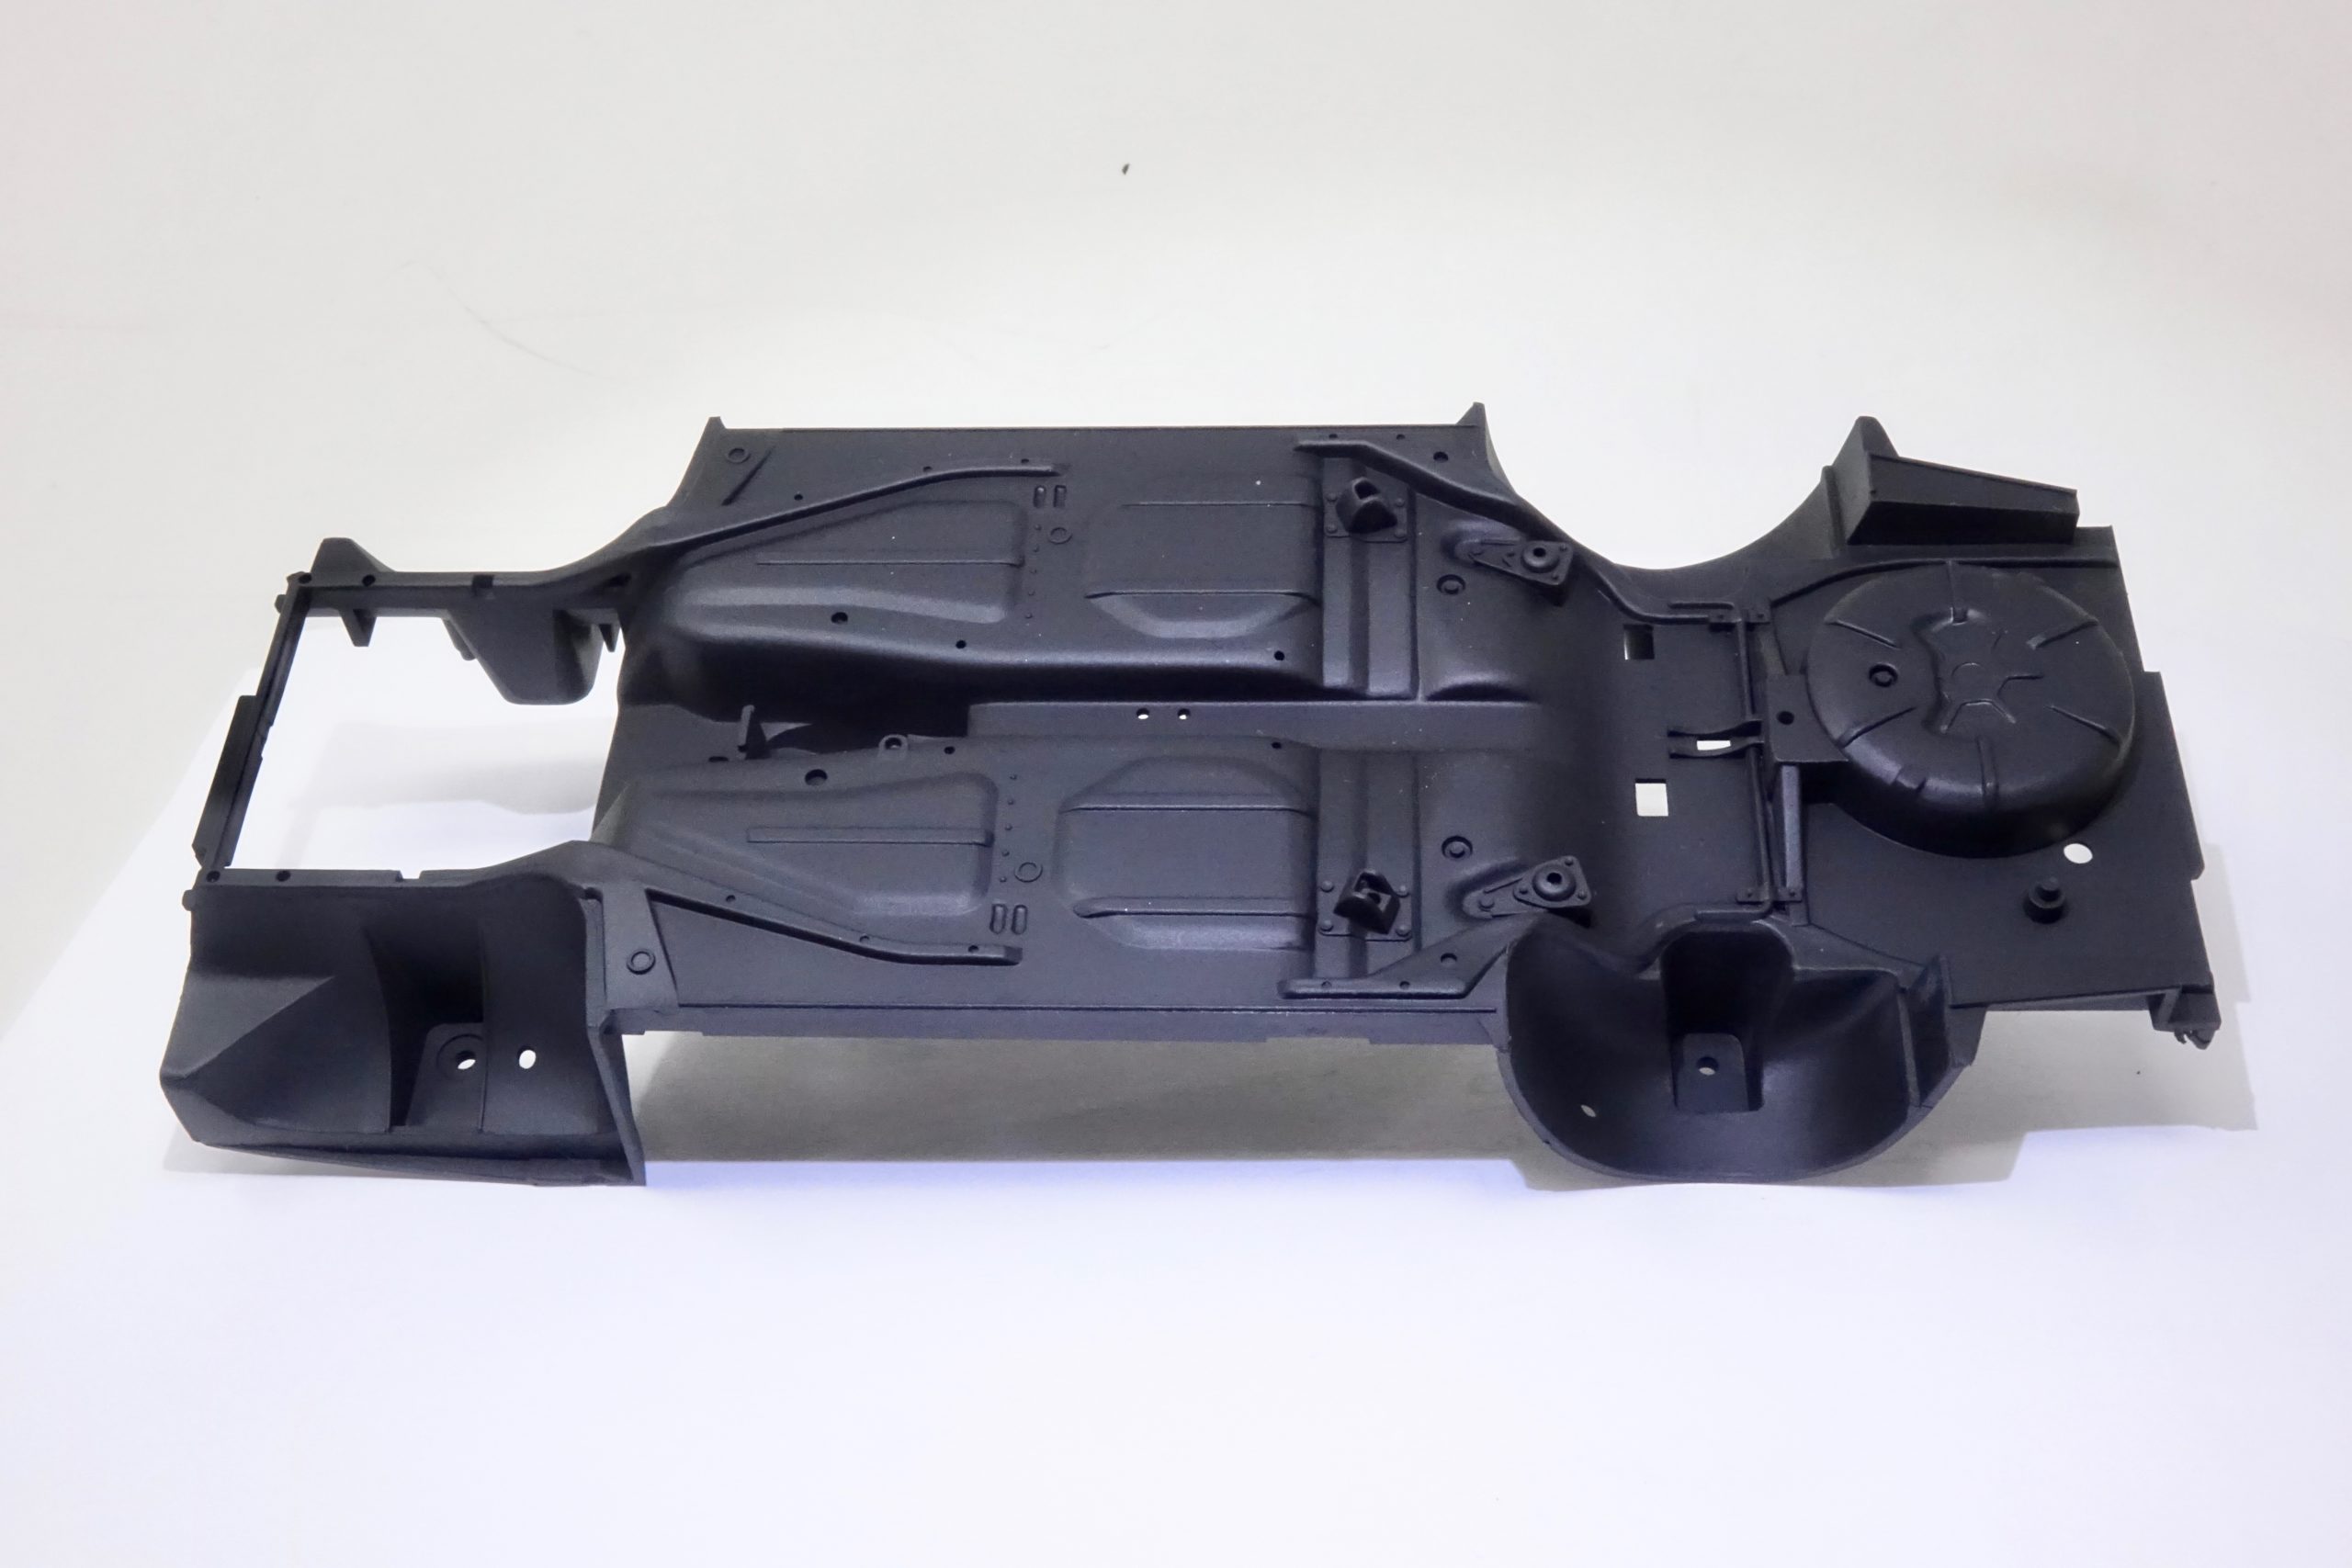
Body meets chassis/interior tub
I had test fitted this step very early in the build and I knew it was going to be tight – but away we went. In fact, even though a bit of heavy persuasion was needed to get the front of the body down over the chassis and quite a bit of springing apart of the body shell, it all clicked into place. Nowhere near as traumatic as I thought it would be. Top marks to Tamiya for accurate parts fit. So, away we go with the rest of the bodywork.
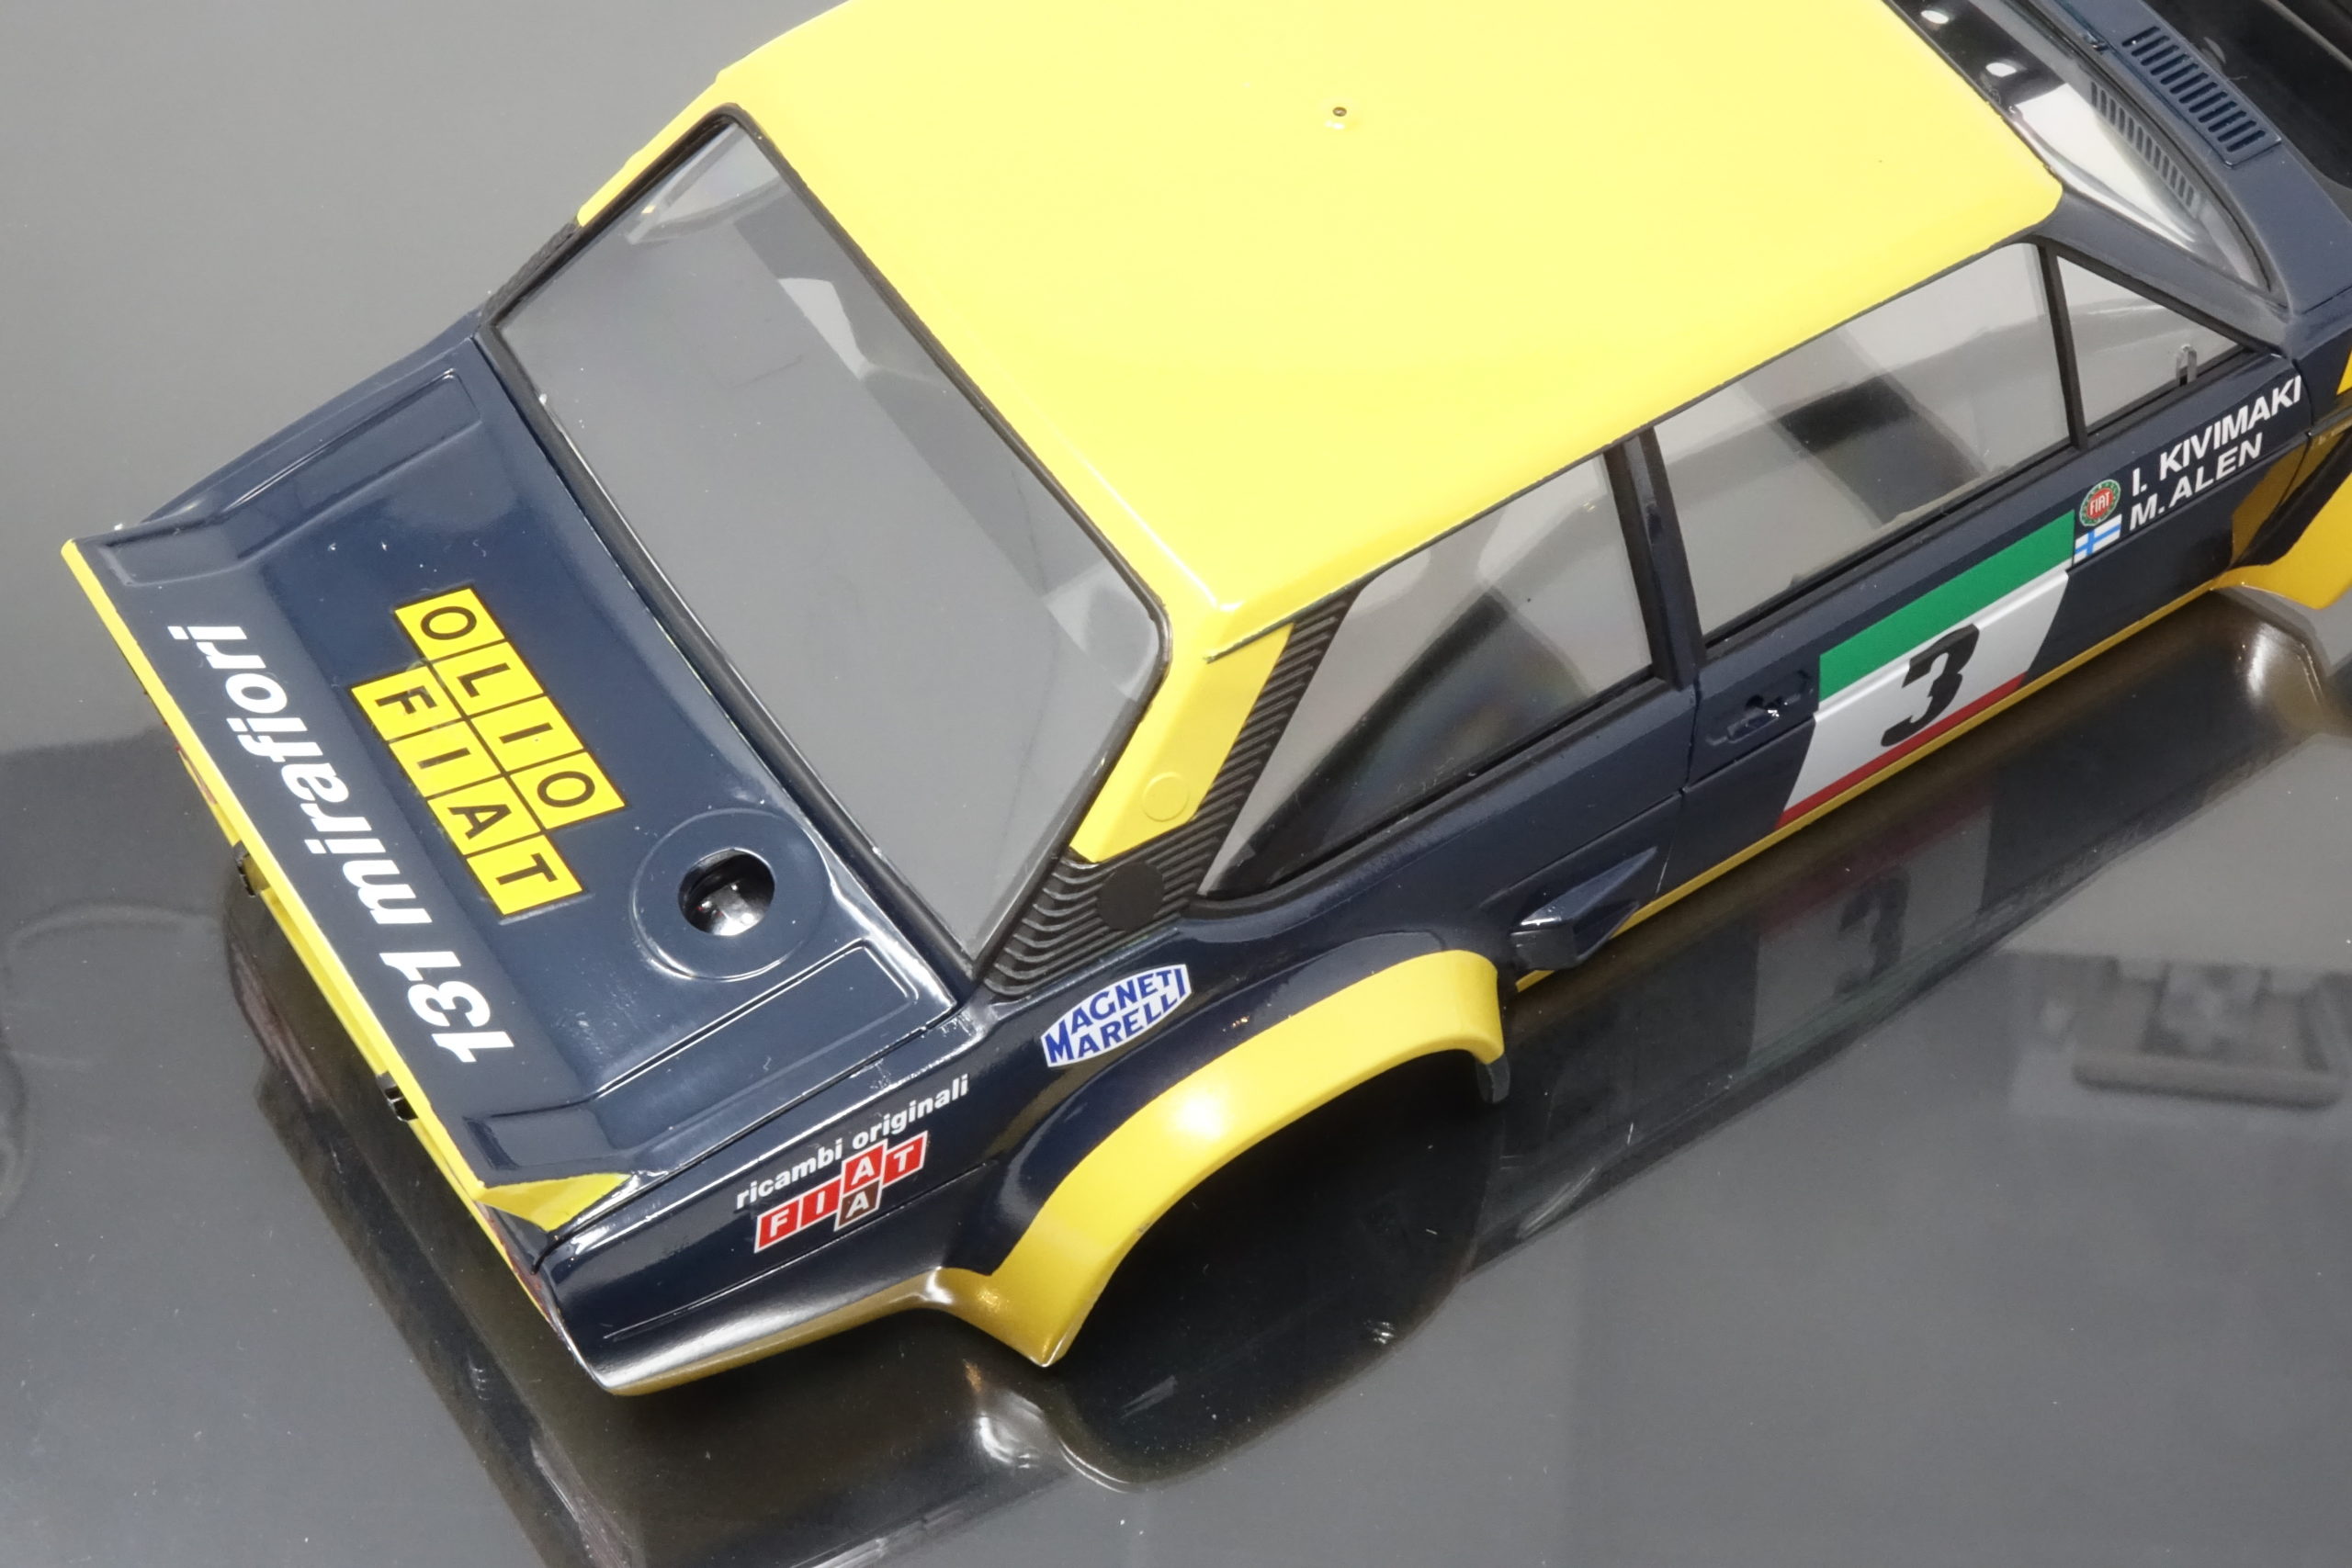
From here it was plain sailing – headlamps/spotlights built up and fitted ( there is an option to put Carello lamp covers on, but I opted to leave all the lamps uncovered). I liked the way the lamp lenses fitted in – with a central pin and no messy glue around the edges. The front grill was fitted, bonnet hinged and fitted. Then we have mirrors, handles, roof spoiler, wipers etc all painted appropriately and glued on. And the roof aerial.
For the backs of the lights (side/tail etc – not main lights) I used pieces of Bare Metal Foil, instead of silver paint, to get a nice shiny reflective backing.


Completed model gallery
And here we are – the completed model. I really like this model – much more than I thought I would. Everything about it – driver and co-driver included!


The verdict on this kit
Build time
About 40 hours in total approximately. Much of this time was taken up with masking, painting and paintwork finishing. It’s a quite complex paint scheme and not to be rushed to get a decent finish – time and care here is going to make or break the final appearance. As you will know, with car models, the overall look is all bout the paintwork first and general ‘cleanliness’ of the exterior. Interior details are important, but time on the exterior is time well spent and very rewarding.
Suggested tools
An airbrush set up is almost absolutely essential I would say here. The kit instructions are to use their aerosol TS paints for the bodywork, but I’m not sure if I could make a good paint job with aerosol cans. Tamiya Lacquer Paint is so good that I don’t use anything else now unless there is no alternative for specialist jobs. Other than that, the usual modelling tools – sharp (new) blades for cutting masking tape, good quality masking tape such as Tamiya ( I use MT Washi tape – it seems to give me a very clean edge and does not lift paint at all), adhesive of choice ( I use CA adhesive, usually Zap-a-Gap medium for all my modelling work), good quality fine paint brushes ( like ProArte) and a selection of fine abrasives for flatting down, buffing and polishing. I’m a big fan of the Micromesh range.
Kit specific advice
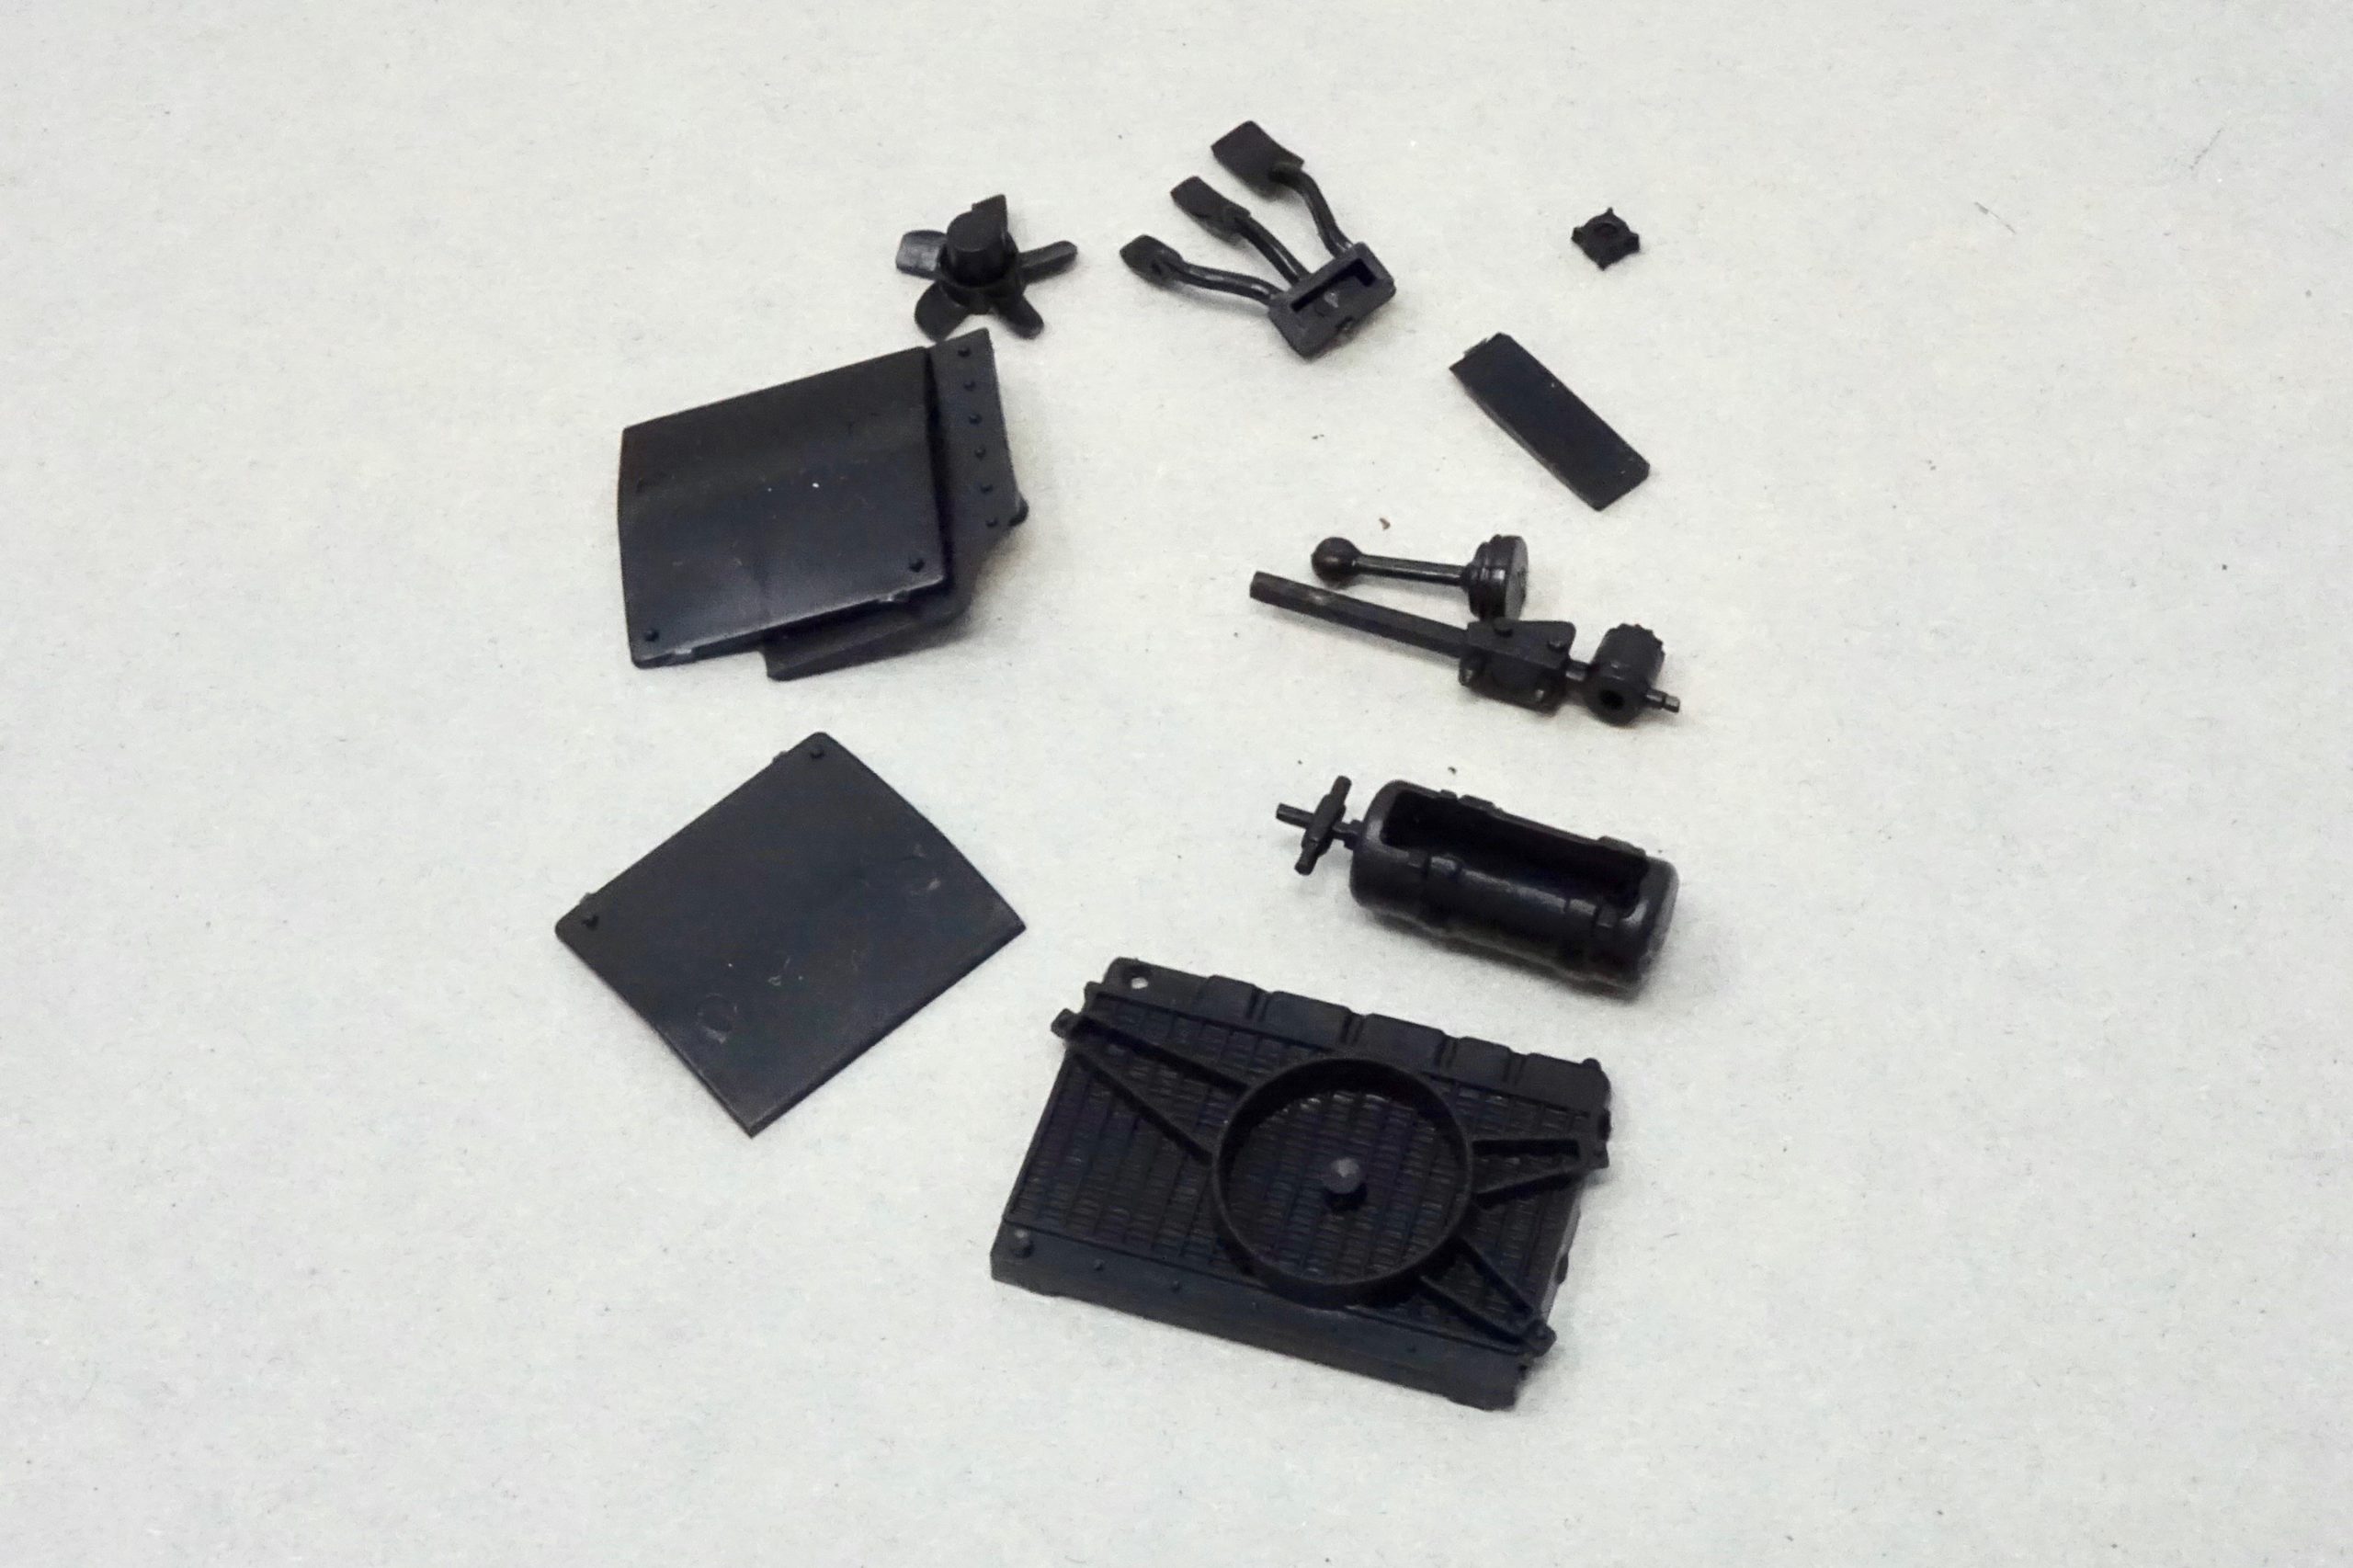
I don’t think there is anything to be particularly aware of, other than what I have mentioned in the build stages. Maybe as a result of being slightly larger scale, at 1/20, I do think that this model really lends itself to some detailing up – such as the boot area, where battery cables, pump tubing, fuel tank lines, etc could easily be fitted – and such things as the fire extinguisher could be piped up as well. Under the bonnet it’s great that the kit comes with convincing distributor and wiring, but without too much extra effort there is plenty of scope for extra detail.
What we have taken away from this build
Firstly – I have really enjoyed making this model and it’s another top quality kit from Tamiya. Rally fans (of which I am one and old enough to have watched these on forest stages back in the day!) will love this kit. A master stroke for Tamiya to re-release this after 40 years or so. It obviously has new decals and livery and new box art – whether there has been any re-tooling I don’t know, but the quality stands up alongside any new kits released today. Everything about it. I can’t really find any fault or niggles at all. It doesn’t have any unnecessary chromed sprues, but it does have some very appropriate metal parts like suspension springs, steering linkage, stub axles etc. No photo etch in here – but I’m not really sure how the kit would benefit a great deal.
So, overall, a big thumbs up from me – and clearly benefiting from being larger scale and more detail. And I love the crew.
I’m tempted to give it the ‘end of the special stage’ dirty rally car look – dust and dirt. At the moment it’s just a thought – we’ll see. Maybe later. I’ll post a photo or two if I do (and if I’ve not made a complete mess of it!)
More please like this Tamiya. How about the Audi Quattro Rally (M. Mouton, Rally Acropolis) kit from around 1983?
Highly recommended.
Happy modelling!