
About the Author
My name is Jon and I’ve been building models now for the best part of 28 years. Starting in my childhood the hobby has followed me throughout my life and I’m still building models in my late 30s and I expect I will be for many more years. I’ve worked with magazines in the past and taken part in competitions and shows in the Southwest of England. My main areas of interest are aircraft and military with the occasional boat as well.
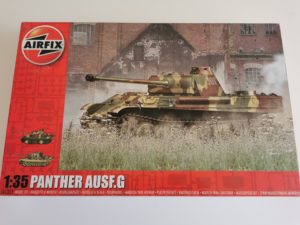
Airfix Panther AUSF.G
Kit Number – A1352
Scale – 1/35
Airfix 1/35 Tanks and Armoured vehicle range Here
Anyone who builds models kit or even those that don’t will know how long Airfix has been around. They are the first brand name anyone will think of when it comes to building model kits that even the hobby of building models kits is referred to as “building Airfix kits”.
Airfix are famous for their aircraft kits of the past and present. One of the first companies in the world to produce the standard injection-molded plastic model kit. One thing that Airfix really did very rarely was to produce kits outside of their comfort zone. There is a few British and German boats and ships along with a small range of 1/72 and 1/76 armored vehicles but this is really there first propper venture into the 1/35 tank and armored vehicle range with has been dominated by their competition.
The Airfix 1/35 Panther G is a kit in partnership with South Korean brand Academy which is given the Airfix box treatment. A partnership used for other 1/35 kits in their range.
When opening the large heavy box the modeller is greeted by a mammoth amount of sand-colored along with four sprue gates of black plastic for the building of the tracks. Which are pictured below (The sprues with the wheels and tracks you are provided with four of each but only one pictured)

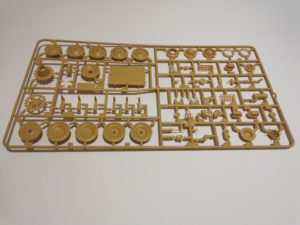
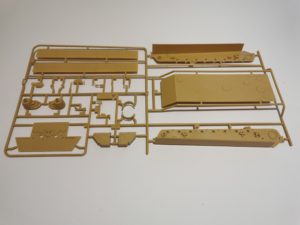
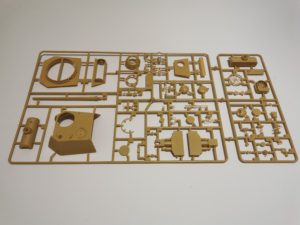
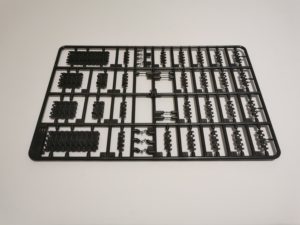
What is clear to the modeller at this stage is the fact that this will be a big project to build with a part count of over 500 parts. One note to add is not all the parts will be required as there are two options provided in the box with some different parts for each option.
The instruction starts the modeler off with building the chassis/ Lower hull of the tank along with the wheels and tracks being added.
Tip: When building tanks they become a little more difficult to paint with the wheels and tracks in place, so if you can get away with it, add the wheels and tracks at a later stage after the main body has been painted. I followed this tip on this build and left the wheels and tracks till later in the build.
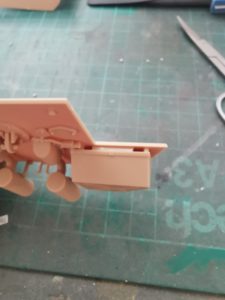
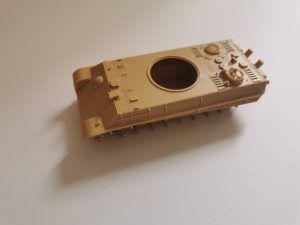
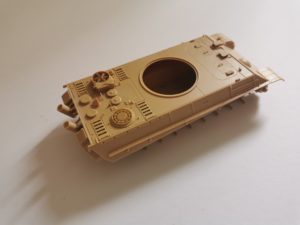
The instructions then direct the modeler to continue the construction of the main upper hull of the tank. This included areas like exhausts, ventilation, and engine compartment covers. This is no interior provided so there is no engine work or crew compartment, the interior is empty and all the construction focuses on the exterior of the tank.
With the main hull completed the instructions direct you to add all the tools, towing cables, etc to the model.
Tip: Paint the tools and cables separately and add at the end of the build. This will prevent the situation of being in the way when painting and reduced the chance of you knocking them off when handling the model.
Some in-progress photos of the hull below.
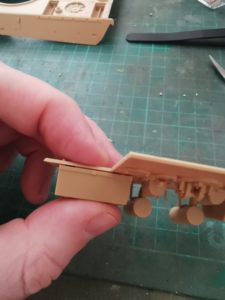
These are photos of the main hull completed before painting, take note that the wheels and tools mentioned in stages above are not added.
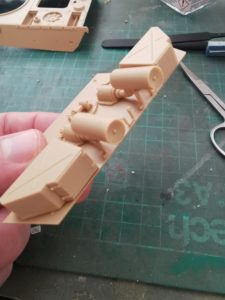
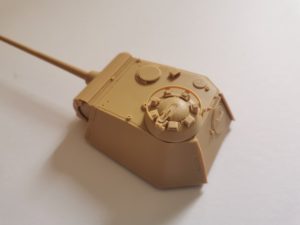
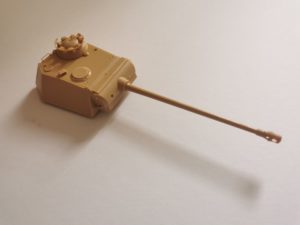
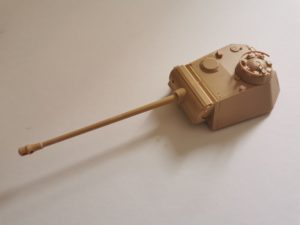
The next stage of the build is to build the main current and main gun of the tank. This step involves building the main casing of the turret, again with no interior and the main gun. There are some multi-choice parts to choose are two different types of gun mounts are provided for the main gun. There are also some smaller parts like handrails that can also be added late in the build to avoid damage when handling.
Below are photos of the completed turret
With the turret now build alone with the hull is was then a case of starting the painting process.
When painting tanks there are two processes I like to follow. The first is to spray paint a primer on the tank. I also like to use black as a primer as it can also act as a pre-shade to produce shadow effects on the model. After I’ve fully sprayed the model black I then highlight a large majority of the model in white. This also help with shade effects on the model and I’ve enclosed images below of this process.
You will see from the photos how painting with a black primer and then highlighting with white can give quite a unique effect to the model before painting.
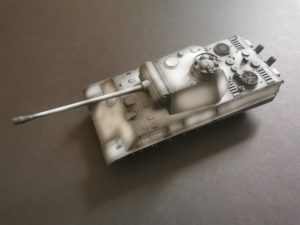
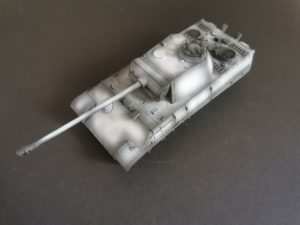
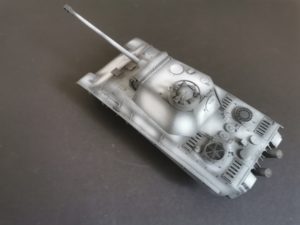
When it comes to painting the tank I went with the option of three colour camouflage. The colours used from the Tamiya range of XF-88 Dark Yellow, XF-89 Dark Green and XF-90 Red Brown. These paints produced by Tamiya are specifically for World War Two German tanks. Airfix does provide painting instructions for the camouflage of the tank but this does also give the modeler a chance of some artistic liecence to paint the camouflage themselves, which is exactly what I did. During the war, the paint was applied in the field by the crew of the tank and in random patterns. The chances of getting the painting guide exact to the tank in question are not 100%, unlike some modern tanks. This gives the modeler that extra freedom when painting. My painting was done freehanded with an airbrush with no masking applied, starting with the lighter colours and ending on the darkest.
Below is a photo of the painting applied
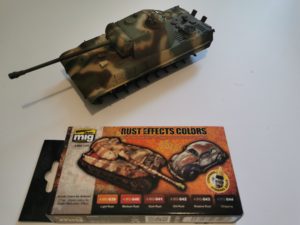
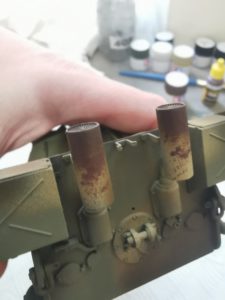
Which the main hull and turret all painted and built it was a perfect time to start adding some weathering. Ammo have some great weathering sets for tanks and I picked up this “rust effects” set from Jadlam for the build. This set came with different types of rush effects and paint chipping effect paints.

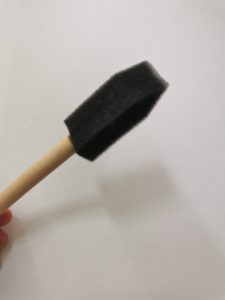
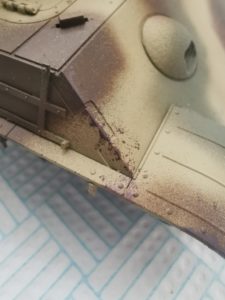
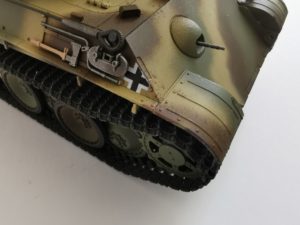
Tip: A great way to apply chipping effect is to use an artist’s sponge brush. Put a couple of drops of paint into a container and dip the tip of the brush in the paint. Then get some kitchen roll or toilet paper and dab as much of it off the brush as possible, because you only want a small amount on the brush. You then take the brush and dap it on areas likely to be chipped, like corners or side skirts of the tank. Areas that might have been damage turning a tight corner by a destroyed building or wall etc. See below for example.
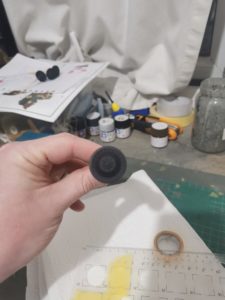
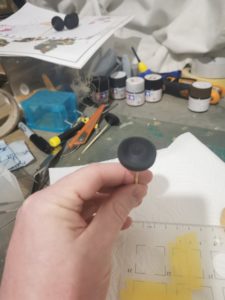
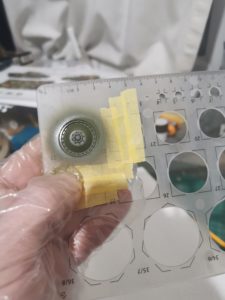
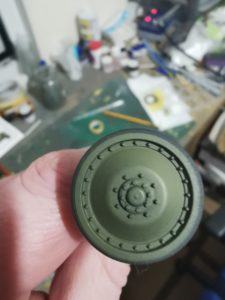
With the main tank painted and set to one side, it was time to paint the road wheels. Tank wheel was often two types, one being simple steel and the other with rubber rims.
Tip: Now when it comes to painting rubber rim types there is a great tip to use. You can buy expensive masking sets but a circle stencil set for 99p from your local stationery shop is much easier and can be reused again and again. You firstly paint the whole wheel black/rubber black then once dry match it up to the circle that masks the rim of the wheel leaving just the center that requires paint. You will see from my images below how this is done. Please excuse the messy workbench in the background.
Once the wheels had dried I applied them to the hull of the tank that was already painted and added the tracks to the model. The tracks were painted dark iron before being applied and the final stages of the build followed.
All the smaller tools and parts were painted and attached to the model. There are also two towing cables to be added but for the cables, you are provided with a short length of string. This string really is not fit for purpose and a good replacement for towing cables is twisting wire. I picked up a meter of 8mm twisted wire off a know auction site for £3 including post and it made the perfect replacement for the string to make the towing cables.
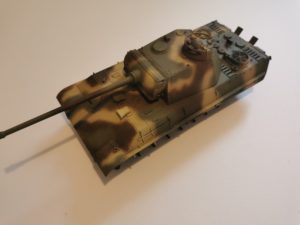
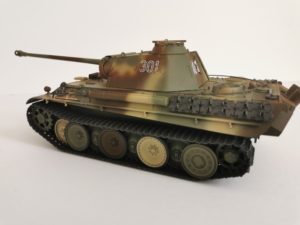
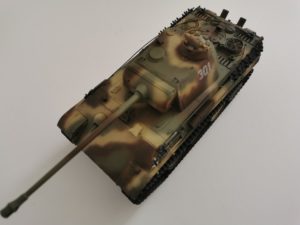
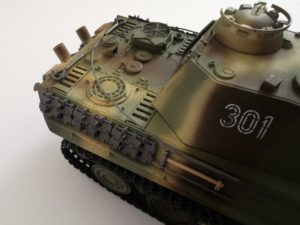
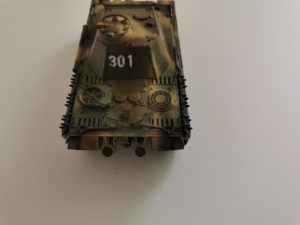
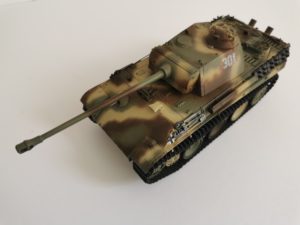
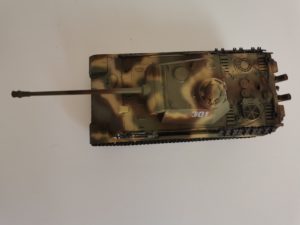
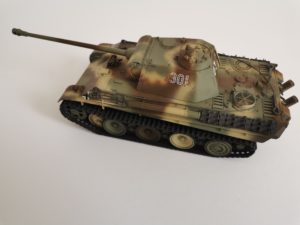
With all the tools added and everything in place, there was a case of adding a couple of decals to the model and it was complete. With photos below
Conclusion
This was a great model to build and really fun at most stages, I did need to add extras to the model like the wire for the towing cables as some items provided in the box needed replacing. Other than this I would wholeheartedly recommend the kit.
Unfortunately, the build took me a lot longer than originally planned due to being a key worker during the pandemic. I was not able to get to the workbench for some time due to the circumstance. During this time the model is now currently out of stock with Jadlam but what I want to follow on from the build instead is on the Airfix 1/35 in general. Yes, this is a partnership with another brand but Airfix have now started working on their own 1/35 models and have released their own Cronwell series which should be cracking kits if this is the base they worked with on how to produce their own products. Without doubt, I would recommend checking out their 1/35 offerings and build one yourself.