
Want a different driving experience? Then go mag-less…
Many home-based Scalextric fans thoroughly enjoy racing without magnets. It’s a bit slower, but there’s more feeling, more realism and a lot less damage when you crash. Almost all slot car clubs race without magnets and magnet-racing can be rather looked down upon. Personally, I enjoy both. It depends on the cars, on the track layout and on my mood.
Running a Scalextric car ‘non-mag’ or ‘mag-less’ is not just a case of whipping out the traction magnet. Scalextric models are designed to run with that extra downforce and they can become a real handful without it. We’ve seen in this tuning series that magnets do solve a lot of issues – from increasing rear-end grip to lowering the centre of gravity. However, if you’ve followed the eight tuning articles so far, you have the perfect grounding to tune your Scalextric car for non-magnet running. You can find all the tuning articles here: https://blog.jadlamracingmodels.com/tag/scalextric-tuning/
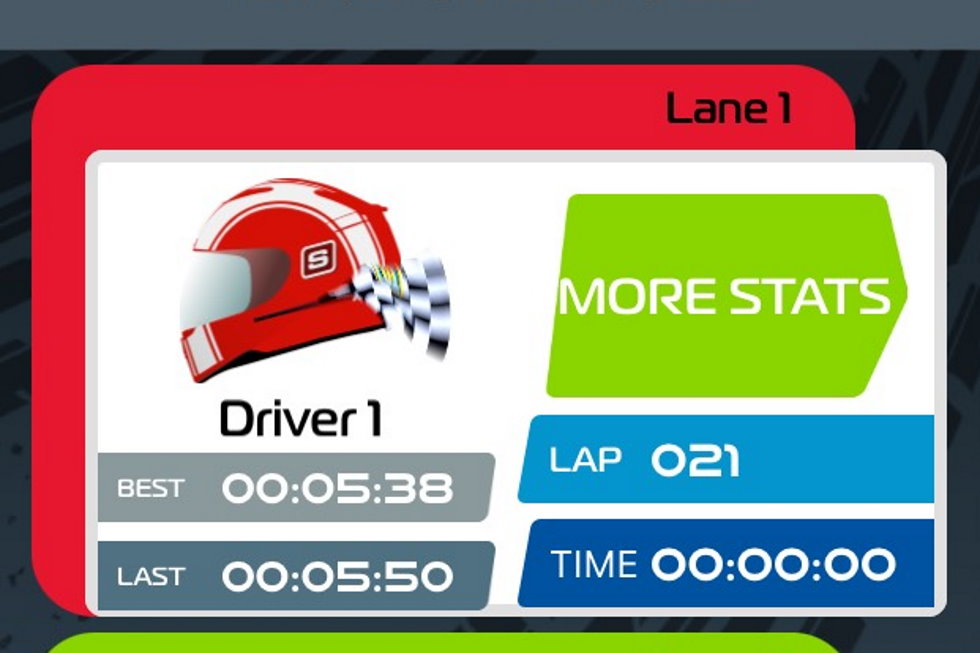
Again, the Scalextric Mustang GT4 will be our test bed – and the Jadlam SL6 layout our test track. Such a short and twisty circuit won’t be ideal for non-magnet running, but it’s what we’ll start with. First, I set a baseline with the car as it finished Part 8 – Using Upgrade Parts – magnet fitted, NSR braids, Slot.it screws and the treated standard tyres. It was a very hot day and I did 26 laps and a best time of 4:30 seconds.
Out With The Magnet!
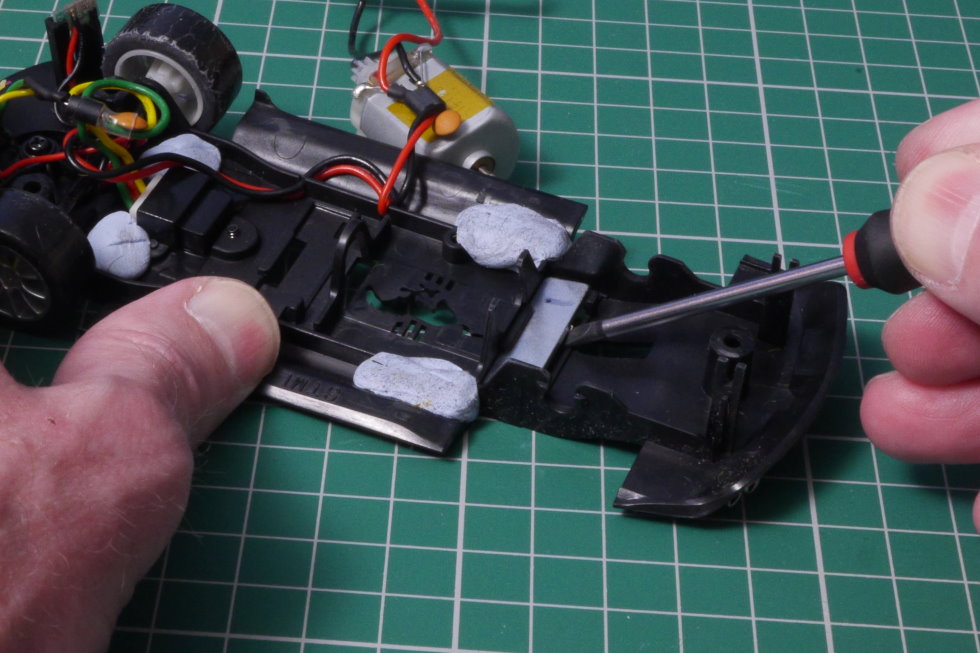
The retaining tabs on the underpan hold the magnet tight and I’m always a little nervous in case I crack the underpan as I try to lever out a magnet (although do read James’ comment below). The safest way is usually to cut off one of the lugs – if you want to replace the magnet, you’d need to glue it back in place. However, the magnet in the Mustang does come out with a bit of firm but careful wiggling with a flat-headed screwdriver. It is important to remove the rear axle and the motor to give plenty of room to work in.
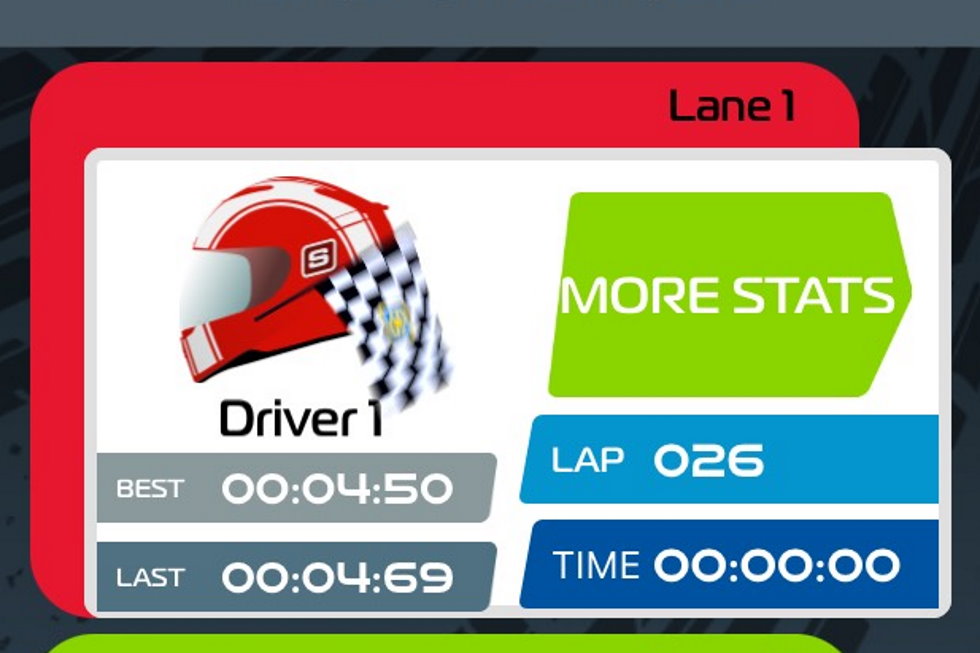
The first thing to do with the Mustang is try the magnet in the alternative pocket in front of the motor. I mentioned this way back in Parts 1 and 4 of this series – and I’m finally going to do it. This is the magnet pocket for the Drift 360 Mustangs – there is less downforce on the rear wheels with the magnet in this forward position. I put the Mustang on track and it wasn’t too different at all – a little more ‘give’ at the back, but really enjoyable to drive. In two minutes, I did 26 laps and a best time of 4:50 seconds – not far off today’s baseline score. The Mustang is unique amongst current Scalextric models to have this option, but some ‘front-mag’ Mustang GT4 racing might be a lot of fun – especially with all those tuning tips and upgrades we’ve looked at.
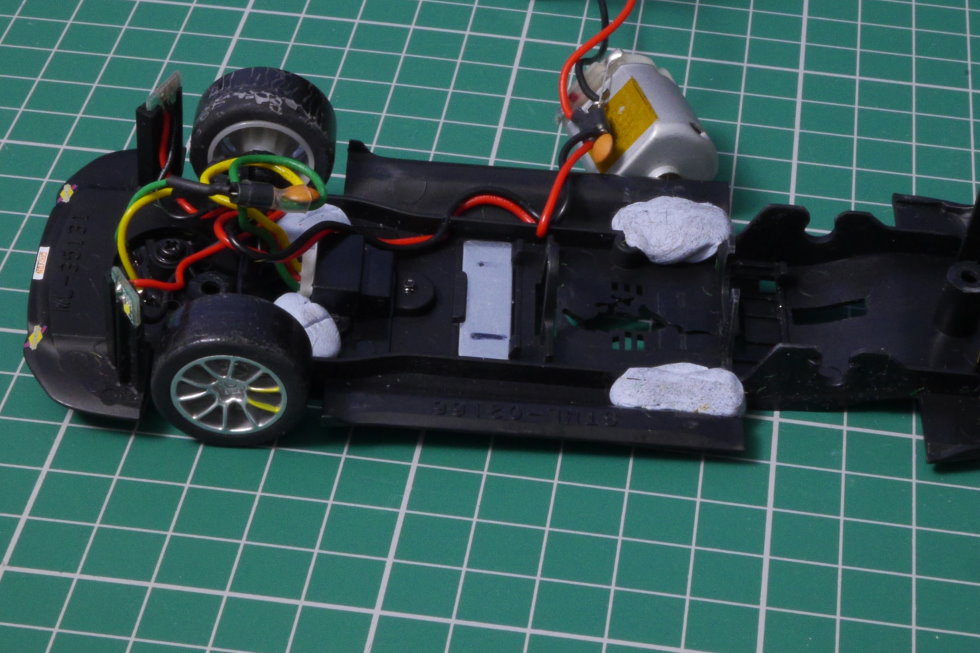
Okay, so after that brief ‘less-magnet’ interlude, I’ve removed the magnet entirely and stuck it on an old metal lighter fluid tin on my workbench…

First Track Test – Tyre Choice
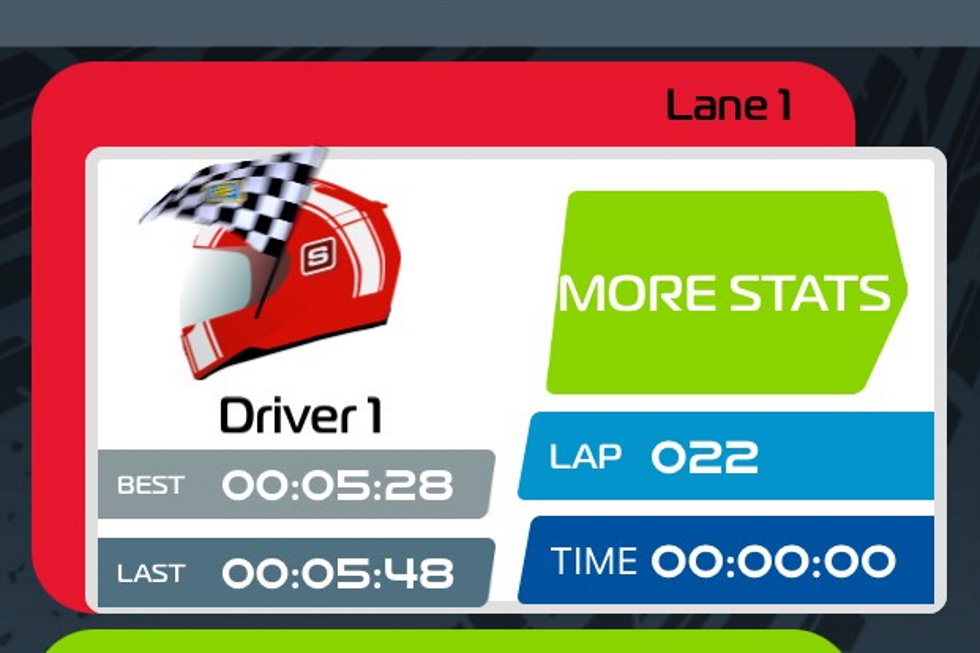
My Mustang is already nicely tweaked and developed. There’s a little bit of weight front and back; trued and softened rear tyres; trued and varnished front tyres; upgraded and re-profiled braids; tightened guide stem; tabs and braces removed from the body; plus loosened Slot.it screws. I needed a non-mag benchmark, so I ran my Scalextric Aston Martin Vantage – which has been my GT race car at our digital club. In two minutes, I did 22 laps and a best of 5:28 seconds.
Driving without magnets is different. Without the downforce, the rear of the car is more twitchy in corners, but it’s also very smooth when you get into a rhythm. The lower cornering speed takes time to get used to, but there’s more scope to be right on the edge of grip – you can feel it, catch a slide and it’s not the ‘on-or-off’ cliff-edge that is so common with Scalextric cars fitted with magnets. If you find the transition to non-mag driving difficult, reduce the power – either the Max Power setting in the ARC app, or by using an adjustable power supply with a traditional analogue powerbase. The ARC app also gives a choice of throttle ‘curves’ – I’d recommend ‘Profile A’ for non-mag running.
The Mustang isn’t perfectly set up for non-mag running yet… It took me a few runs to get into the non-mag vibe, but when I did, the ARC app scored the Mustang at 20 laps and a best time of 5:73 seconds. It was fun to drive – certainly tail-happy, but smooth. What I did notice was a lot of wheel-spin and ‘wheel-hop’ accelerating hard onto the main straight of the test track – a sign of grip issues at the back. This was with the standard tyres I’ve worked on. It might be improved with different tyres, but eliminating the ‘hop’ entirely will need gluing of motor and bushings to the underpan – something I’ll look at in the final part of the series.
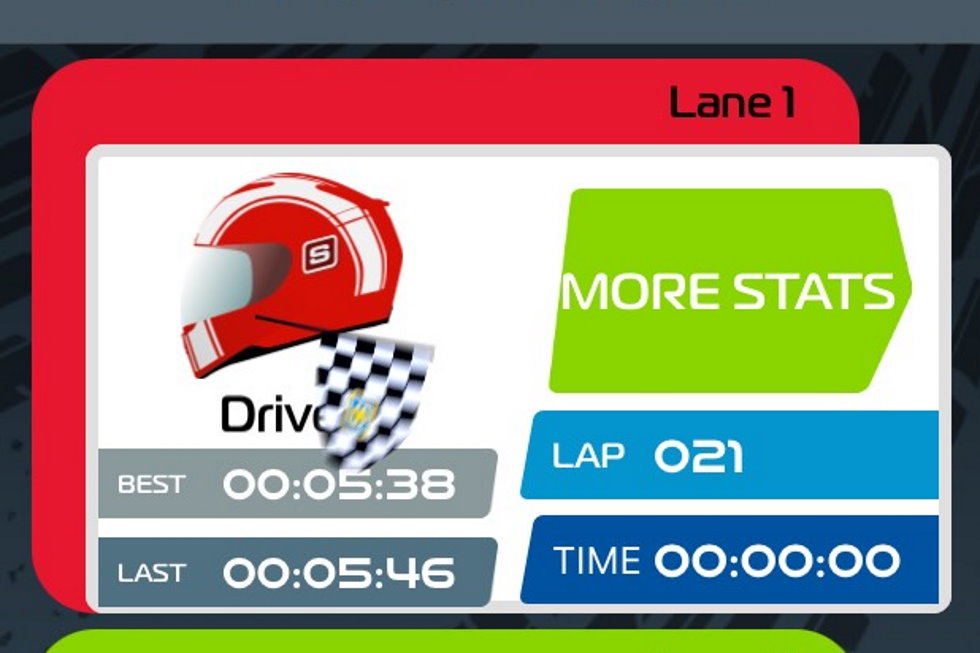
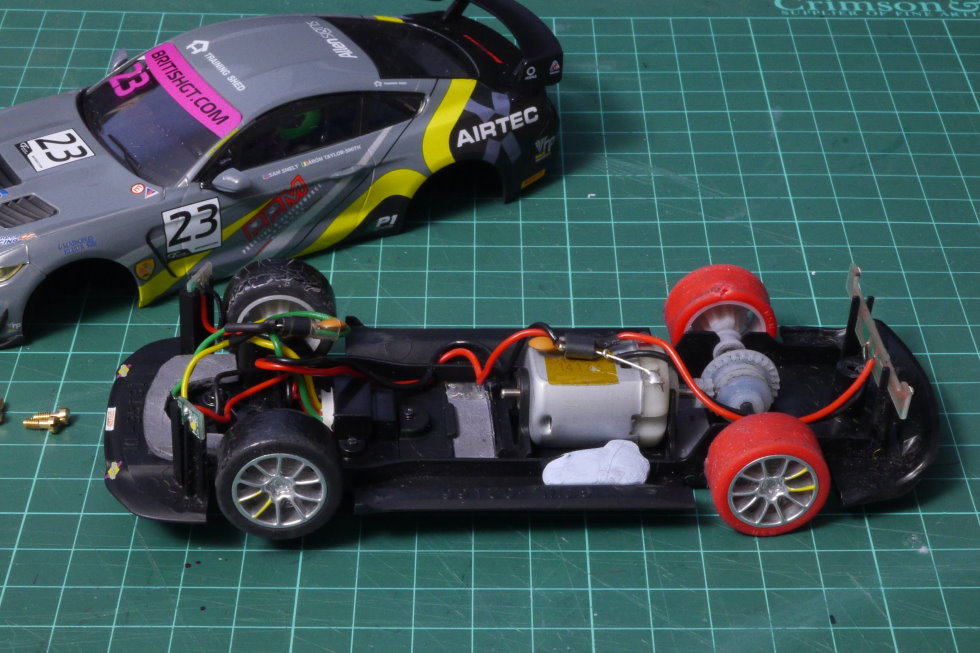
Swapping to Slot.it P6s improved the grip, but there was still wheel-hop. A two minute run gave 20 laps (almost 21…) and a best lap of 5:61 seconds. Changing to the red NSR RTR tyres that were so good in Part 8- Using Upgrade Parts gave even more grip. The wheel-hop was gone and the car was much more grippy – but less predictable – in the corners. I had to adjust my driving style again, but I managed a timed run of 21 laps and a best lap of 5:38 seconds.
Weight Distribution
The Mustang is not too far off the Aston’s benchmark time. The Aston is an easy car to drive – I often share it with novice drivers in our GT team endurance races and they get to grips with it pretty quickly. The Mustang with the NSR tyres handles very differently. I’m going to have to tweak the weight to try and get it more predictable and less ‘tippy’ – the inevitable challenge of a car with a higher centre of gravity.
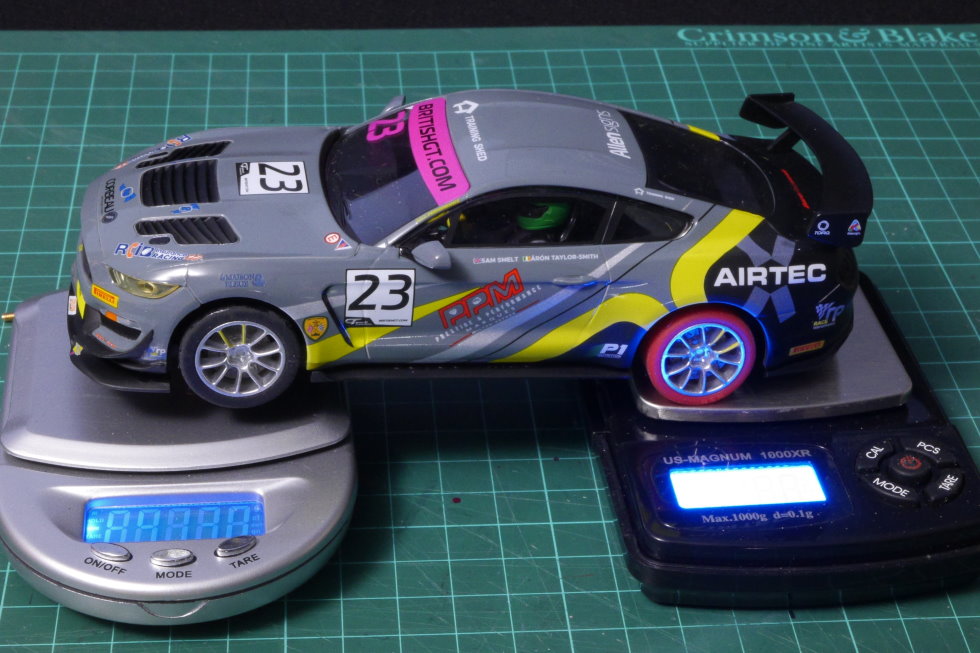
There is an established formula that weight should be distributed 60:40 – that’s 60% at the back and 40% at the front. You can measure this with two scales – one under the back wheels and the other under the front. However, any formula is only a start – the characteristics of the car, the track layout and the driver’s style all mean that plenty of fine tuning will be necessary.
Another way to look at it is more pragmatic – if the car understeers, it needs more weight just behind the guide; if the car tips, it needs more weight in the centre to lower the centre of gravity; and if the car is too tail-happy, move weight forward – but not too much that the rear wheels don’t bite.
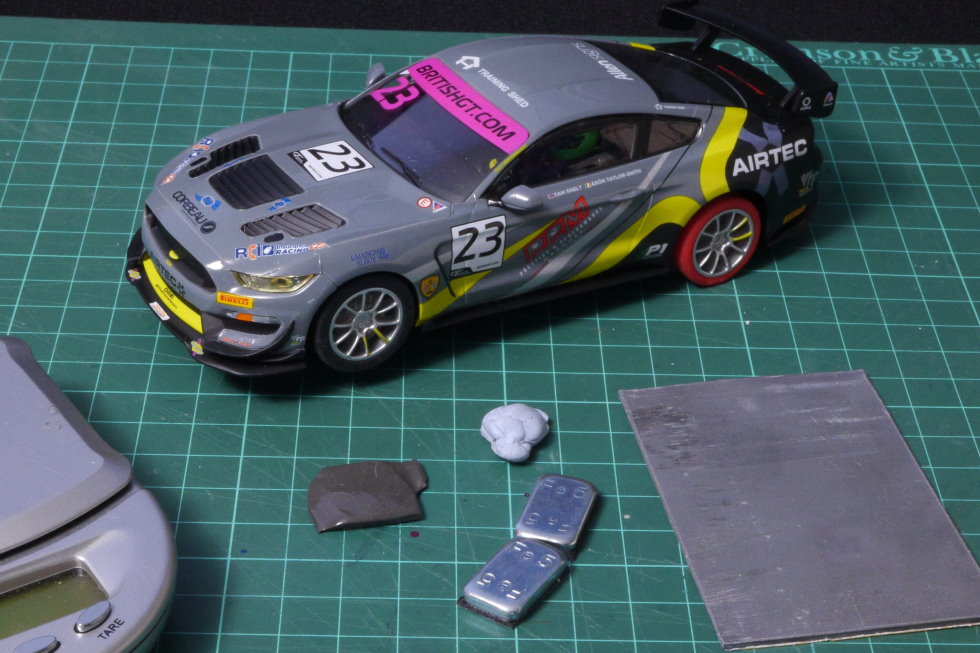
There are various options in terms of adding weight – the Blu-Tack we’ve used before, lead sheet, adhesive lead wheel weights (5g sizes) and tungsten putty. The important factors are that the weight is added as low as possible in the underpan – and that it’s firmly attached. It’s also a good idea to weigh and take a note of each piece of ballast you add to the car.

Tweaking The Non-Magnet Mustang
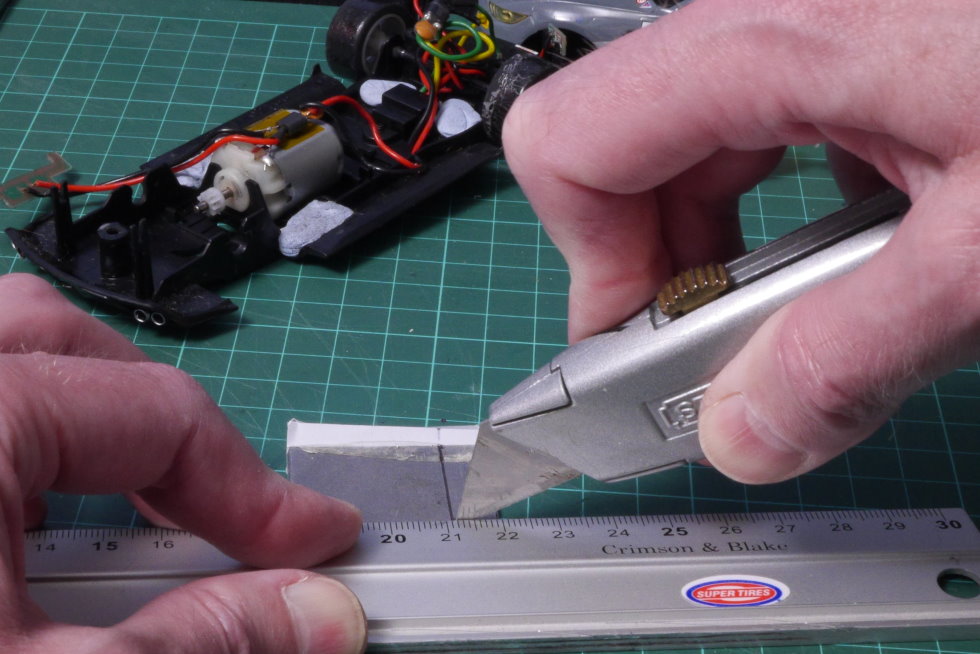
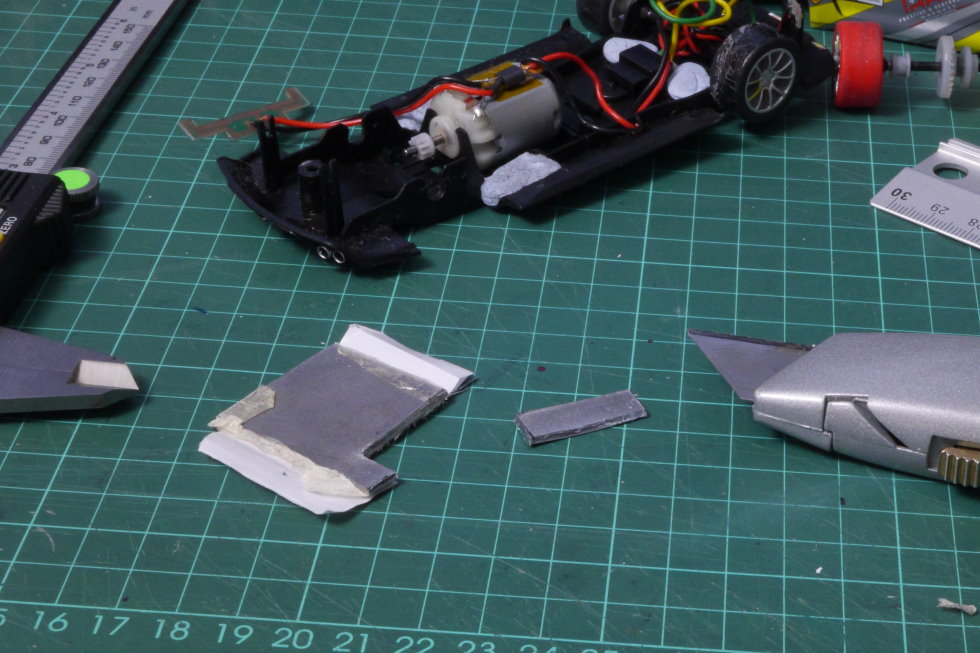
I will keep an eye on the weight distribution, but I’ll follow the pragmatic route with the Mustang. The first task is to fit some 2mm thick lead sheet into the rear magnet pocket. I measured this at 25 x 7.5mm. The lead is soft, so can be cut with a Stanley knife, using a metal ruler as a guide. I take care when I cut and always wash my hands after handling lead. The piece of lead weighed 3g and fitted perfectly into the rear magnet pocket.
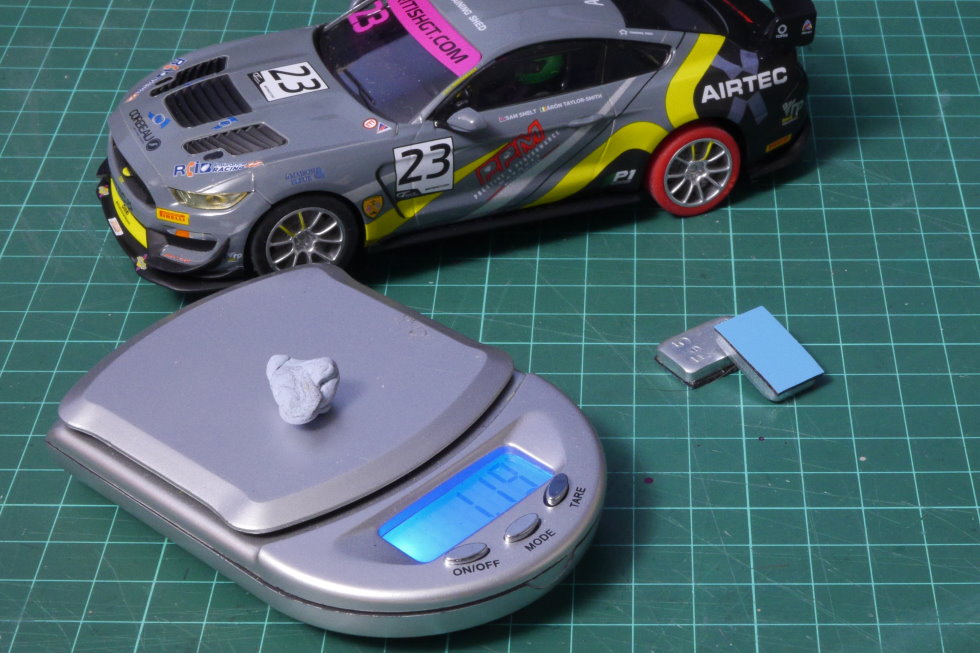
A first test wasn’t good – I’d upset the balance of the car. Remembering how well the Mustang handled with the magnet in front of the motor, I cut another magnet-sized piece of lead and fitted it into that front pocket. I also removed the Blu-Tack at the rear. That was 6g added and 1.75g taken away. The car felt much better on track, although there was a little bit of understeer. A two-minute test run gave 21 laps and a best of 5:32 seconds.
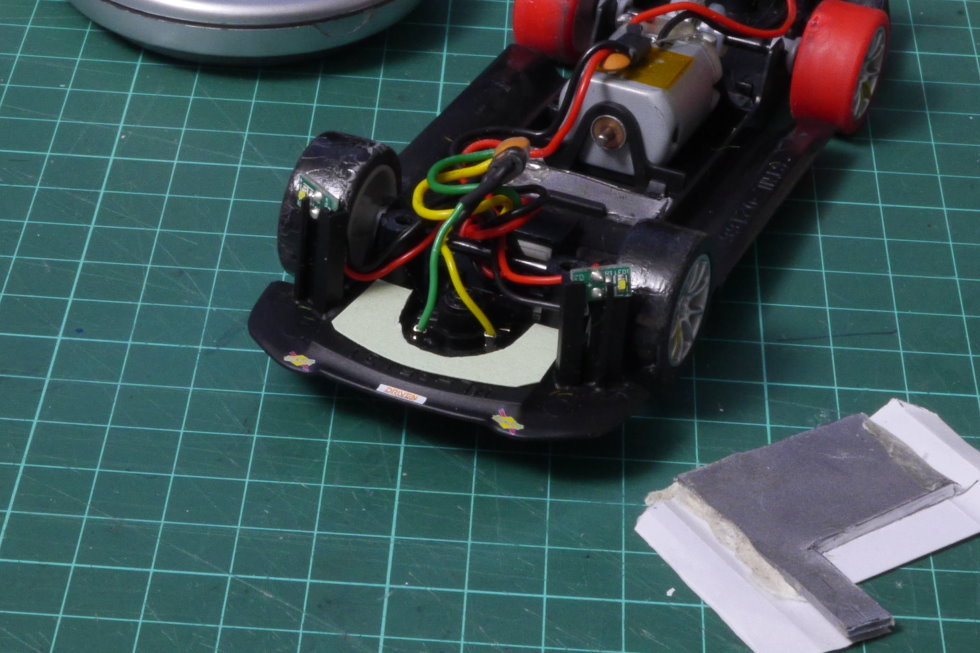
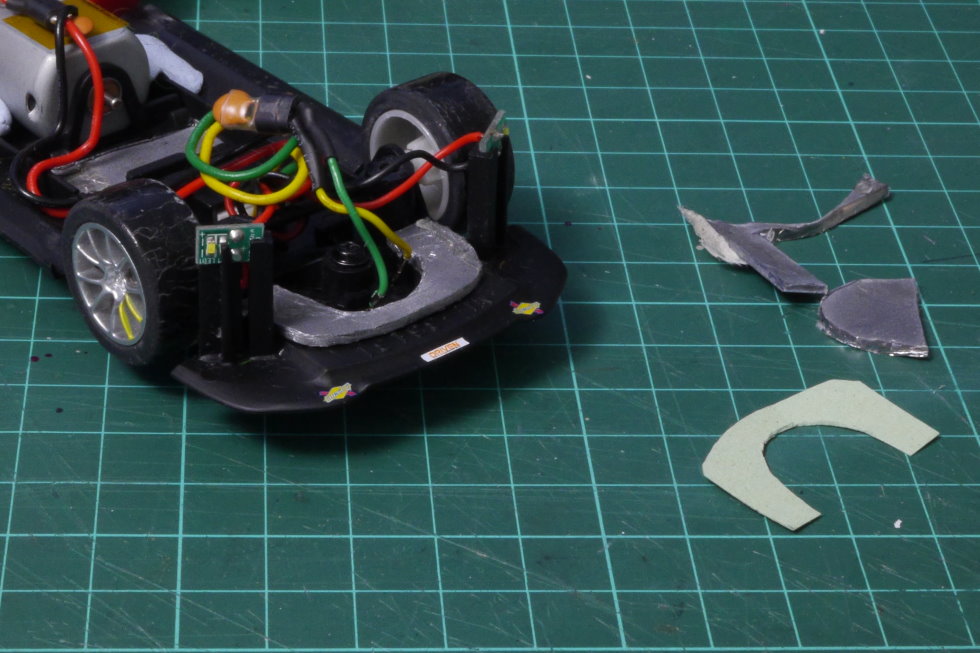
Next, I wanted to add some more weight to the front of the car. I removed the Blu-Tack (1.25g) and looked to added 4.25g of lead weight in front and either side of the guide. I need to leave the DPR hatch clear (this will be a digital car), so the front was the only place to put it. I cut a stencil from paper and then cut the lead sheet using the stencil as a guide. The new weight needed some trimming and sanding and was then temporarily fixed in the car using double-sided tape…
Back on the test track, the extra weight had altered the handling again. The car was much more planted at the front, with a bit more ‘give’ at the back. I liked the feel and the Mustang was certainly easier to drive, lap-after-lap. A timed run gave 21 laps (almost 22) and a fast time of 5:38 seconds – no tangible improvement in the fastest lap, but the better handling did mean the Mustang travelled further in the two minutes. That’s what I want from a race car.
More Tyre Testing & Fine-Tuning
I tried the car with the Slot.it P6 tyres again – just in case they were better with the extra weight. The Mustang was extremely fun to drive – rather loose at the back, but easy to control. The wheel-hop I had earlier was much improved. I thought the performance would be better, but a two-minute run gave just 20 laps and a 5:55 second best lap – pretty much the same as before.
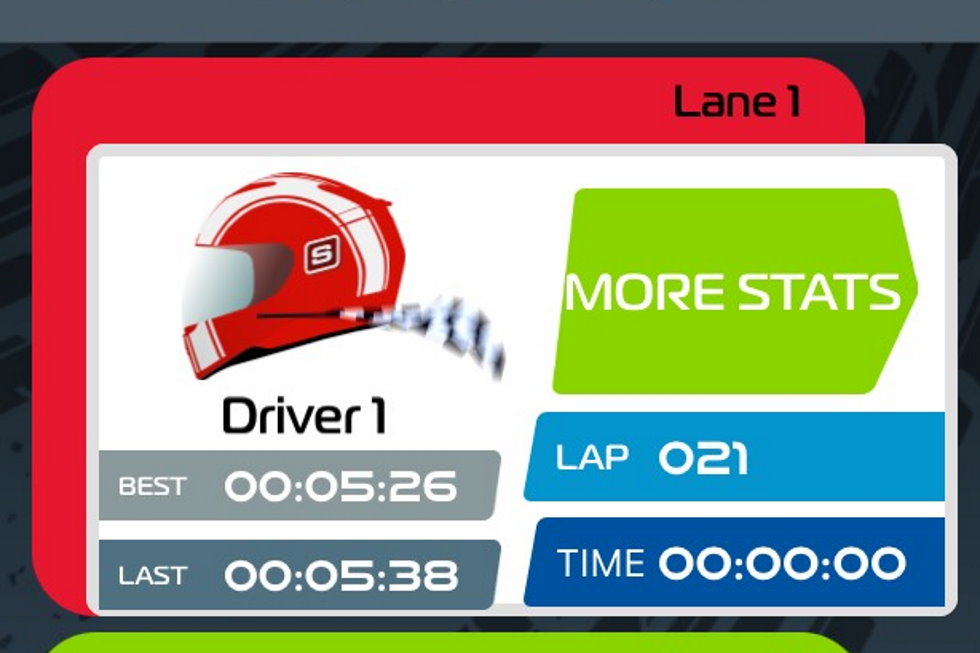
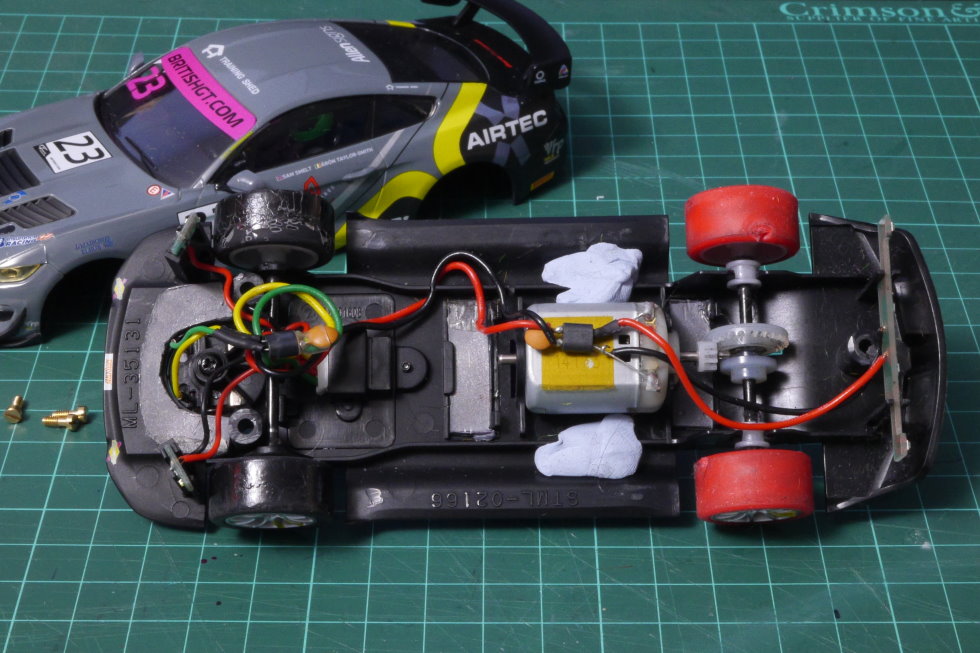
I wasn’t perfectly happy with the car with the NSR tyres, so I added 1g of Blu-Tack either side of the motor in front of the rear wheels. That made the overall weight nearly 93g – it is starting to feel too heavy for my liking. However, the balance of the car was improved slightly – I managed 21 laps and a fast time of 5:26 seconds, two-hundredths of a second quicker than the Aston’s benchmark. I called it a day on the test track.
Going back to the weight balance formula, this final version of the car weighed 92.8g in total – 50.8 at the back and 42g at the front. That’s a ratio of 55:45 – not far off the recommended 60:40. Maybe it’s a little too much at the front – or it could do with a little more at the back… In any case, the tweaking has not ended – it will continue when I race the car at my club. Before I glue the weight in the front, I will trim it down to just over 3g. And then I’ll fine-tune the weight alongside the motor. I’ll be doing this tuning for the big, flowing Scalextric Sport layouts we race on, rather than a tight, twisty home track. But I think I have a decent car to develop.
I hope you’ve found this introduction to non-magnet tuning useful. It is an entirely different driving experience. If you decide to try it out, do experiment with different amounts of weight. Some people prefer heavy cars, some prefer their cars as light as possible – most like something in between. Whatever gets you the most laps in 2 minutes is the right set-up for you.
In the final part of this Scalextric Tuning series, I’ll look at the process of developing a race car. From crunching data to taking notes at the track, we’ll be using many of the techniques we’ve learned so far to get the best out of the Mustang. Plus I’ll introduce a couple more to maximise performance. Don’t forget, you can find all ten Scalextric Tuning blog posts here: https://blog.jadlamracingmodels.com/tag/scalextric-tuning/
Hi,
Great tips in your ‘Scalextric Tuning No9’. However you did mention “I’m always a little nervous in case I crack the underpan”. There is no need to “lever out the magnet or remove a lug” (I’ve got the teeshirt), there is a simple way to remove the magnet from a Scalextric car without damaging the underpan. Just hold the underpan on both sides and in line with the magnet, with thumb and index finger (thumb on top), then very gently flex (bend) the underpan downwards (push down with thumb and simultaneously push up with index finger) and the magnet will ‘pop out’ or at least one side of the magnet will, which is then simple to remove the magnet.
Hope that helps.
Thanks James! That certainly makes me more confident to try. Who knows, I might try that with the samples that Scalextric loan me for previews – I’d really like to try those both with and without magnets.