
Have you ever wondered how a Scalextric car is made?
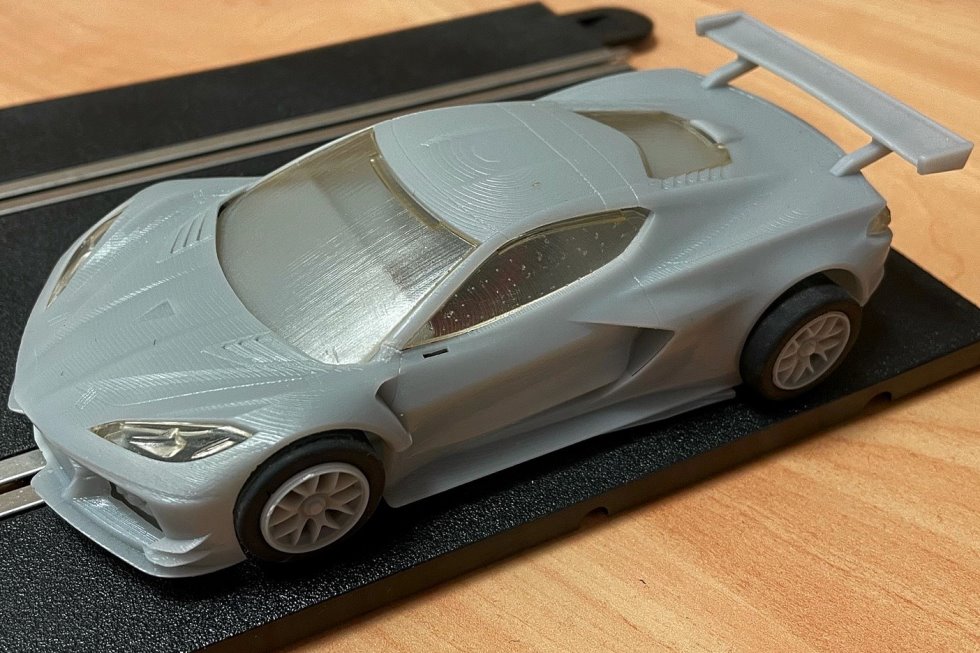
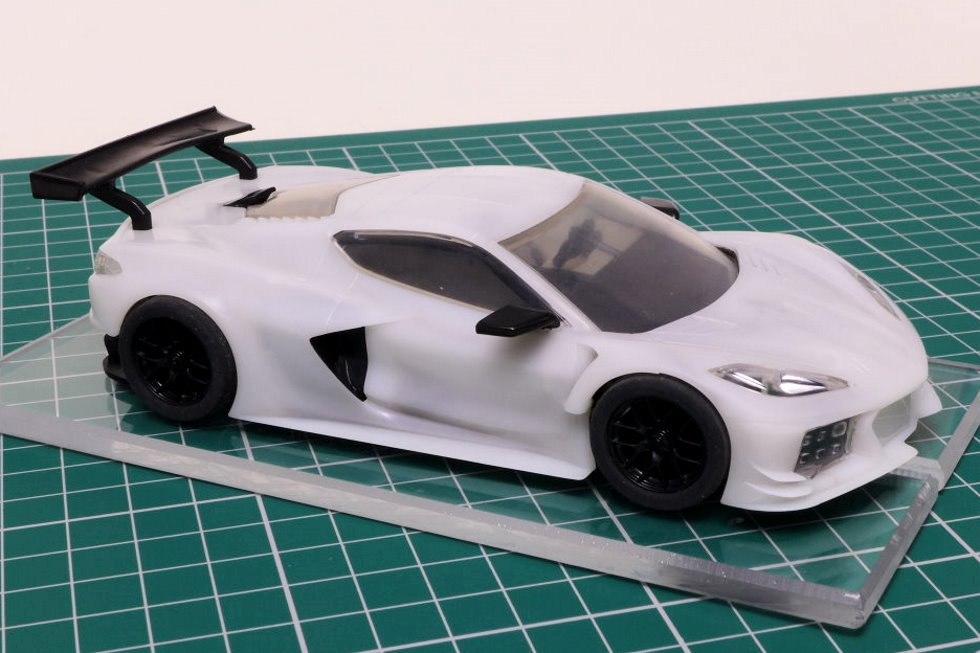
We’ve been following the journey of the new Corvette C8R through its development from CAD file to delivery. Back in February, Scalextric designer Caitlin Williams explained the design and prototype stage and then we had a look at the ‘first-shot’ sample. The next step is the decoration – and Hornby graphic designer Dan Cornwall will be walking us through the process. Dan also loaned me a signed pre-production sample to have a close look at. Here is that sample, flanked by the prototype and the first-shot…
Initial Artwork Design Process
Dan has re-created real-life liveries on lots of Scalextric models. He started work on the Corvette this time last year – based at home, due to the coronavirus pandemic. He told me that this didn’t impact too much on the graphic design process, apart from slowing communication a little within the Scalextric team. This first step took about a week for Dan…
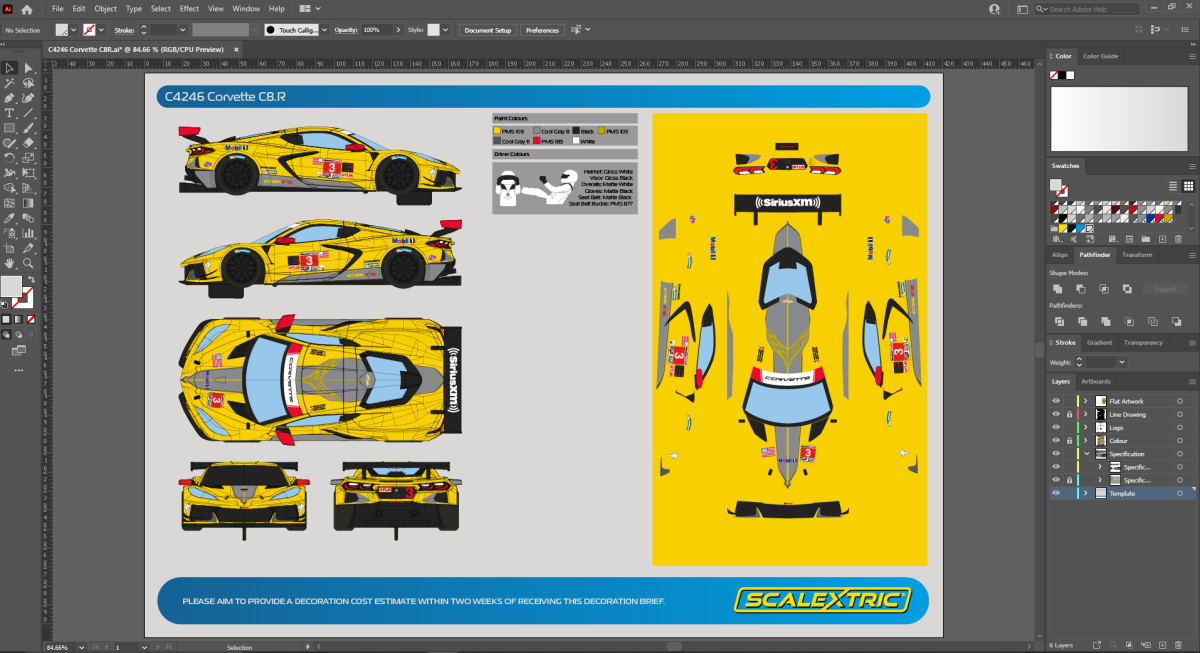
Software. “I used Adobe Illustrator for creating vector-based graphics for the highest quality artwork and enabling more detail to be included.”
Research. “The process starts with identifying the exact car you are working on – usually through a series of pictures, but it can also be PDF files of artwork from the team or manufacturer, or we look at detailed models. This material is usually supplied via the researcher – Simon – but can come from books, the internet, teams, manufacturers or even drivers.”
Line drawing. “The next stage is getting the correct line drawing of the car generated from the CAD. Using the research material, the CAD designer – Caitlin for the Corvette – produces an assembly with the correct parts and then generates a line drawing to create the product artwork from. This requires communication with our CAD designers to make sure we are as accurate as we can be, to get the line drawing and artwork correct.”
Base colours: “The line drawing now acts as a base to create the artwork from, the first thing is to colour all base colours – along with small features that don’t have any artwork on, such as the door handles, fuel filler caps, windscreen wipers, that sort of thing. This means selecting a main colour and finish for the car, usually resulting in a discussion about the correct colour, to ensure it is as accurate as possible – or to acquire a colour swatch from the team, manufacturer or driver.”
Stripes and artwork: “The base colour is followed by recreating any stripes or artwork that appears on the car. This is usually when the car starts to look like the real thing.”
Logos: “The final piece in this stage are the logos. Each logo needs to be recreated or sourced. These are then sized and placed as per the real car.”

Approval, Changes & Factory Artwork
One thing I learned from Dan is how much the artwork is checked and – if necessary – changed. After the initial design process, this is what happens…
Scalextric team check: “At this point the artwork is now sent to the rest of our team, for everyone to have a check and make sure I haven’t missed anything or made any errors. There are usually a few comments over logo positioning, colour, sizing – or any general issues that may need to be mentioned.”
Creating artwork for the factory: “Once all these changes are made and approved by the rest of the team, I can create the flat artwork. This is where all the logos are flattened out into one sheet, so that the factory in China can re-create the artwork accurately.
“From the line drawing to reaching this point can take anywhere from a few hours to 2-3 weeks, depending on the complexity of the artwork – and also if a similar version of the car has been done already. The Corvette took around about 3-4 days to complete as most the logos had been created for the other car.”
Licensor approval: “This is where the artwork is sent out to the licensor – the manufacturer, team or driver – for approval. The licensor may come back with changes, in a similar way to when the design was checked by the team. These comments must be changed and implemented for approval. Once any changes are made, the artwork will be approved by the licensor and is now ready to be sent to the factory.”
Decorated Samples
The final chapter of the graphic design process starts when Dan and the team receive decorated samples from the factory. This happens in three stages – a ‘Base Sample’, a ‘Decoration Sample’ and the ‘Signed Sample’…
Base Sample: “This is a moulding of the body in the main colour of the car.”
Decoration Sample: “This is the first time we will see the car fully decorated – and provides us with the opportunity to make tweaks to the decoration to get the car as accurate as possible. This sample must also go to the licensor for approval – they can make comments, from which we have to makes changes.”
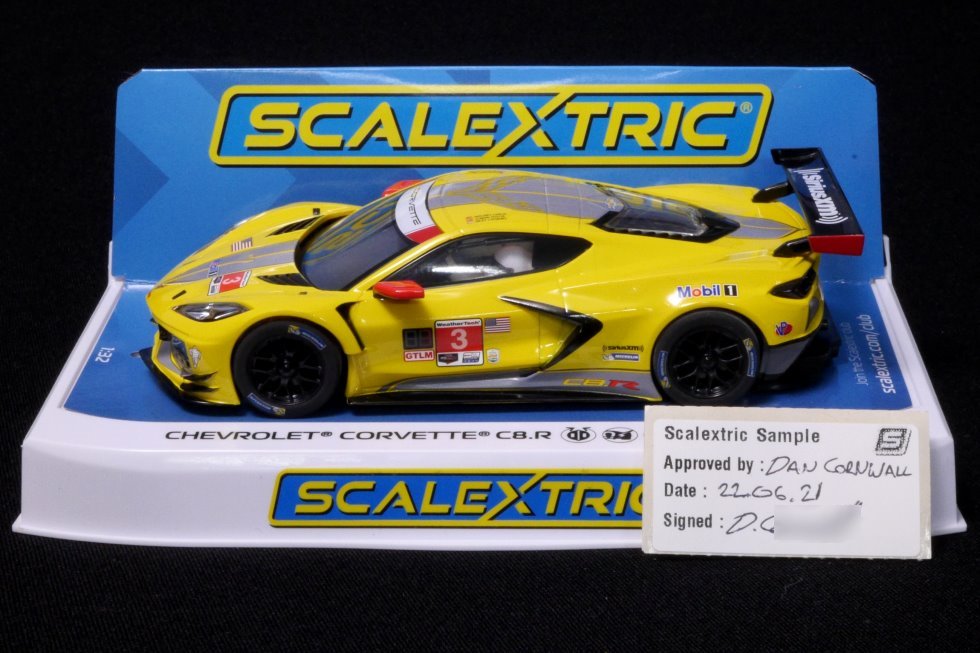
Signed Sample: “Once we’re happy we have got a good decoration sample, we move to the signed sample. This is a fully boxed and functioning version of the car. These signed samples are checked both functionally as well as decoration-wise. These cars must be perfect in order for approval – and any changes from previous stages of the sample must be implemented. Once the sample is approved, it is signed off for production and is the last stage of our development of the car.”
Timescale: “This whole graphic design process can take anywhere from 3-9 months to complete depending on changes, complexity of artwork, licensing issues or manufacturing issues. In terms of the Corvette, there were very few issues outside of the usual debate over colour, and the odd logo adjustment in size and position. This is, in part, down to the wide availability and range of different photos due to the Corvette being a modern GT car that raced in a big international race – the 2020 24 hours of Daytona.”
The Signed Sample
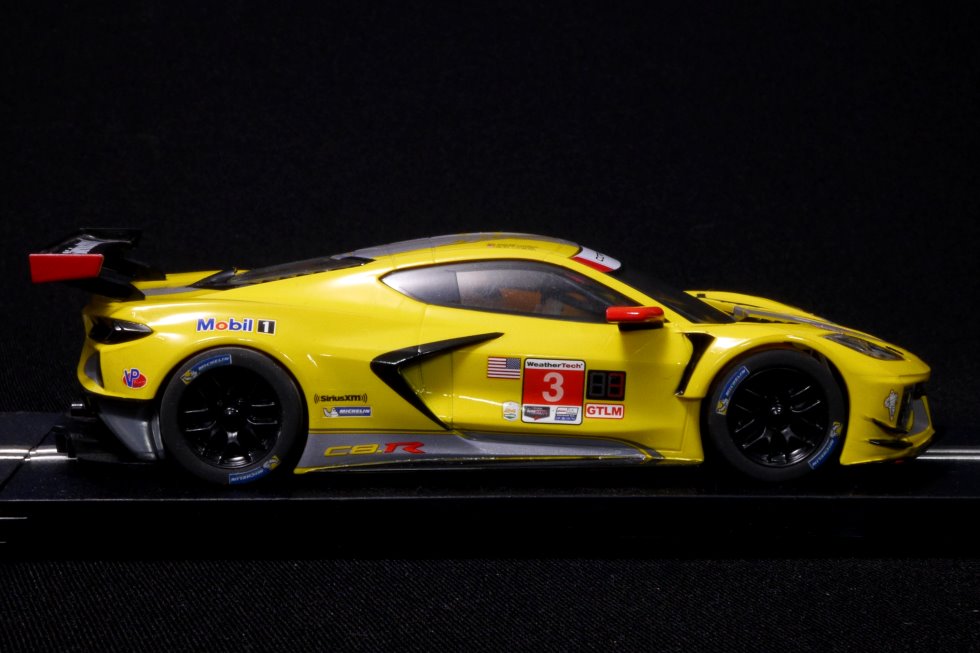
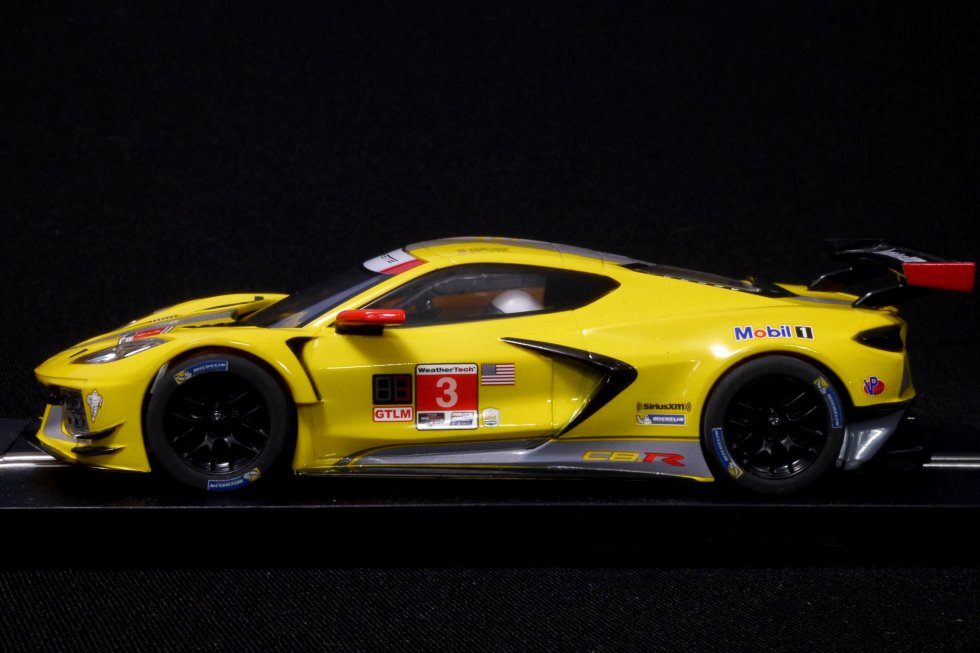
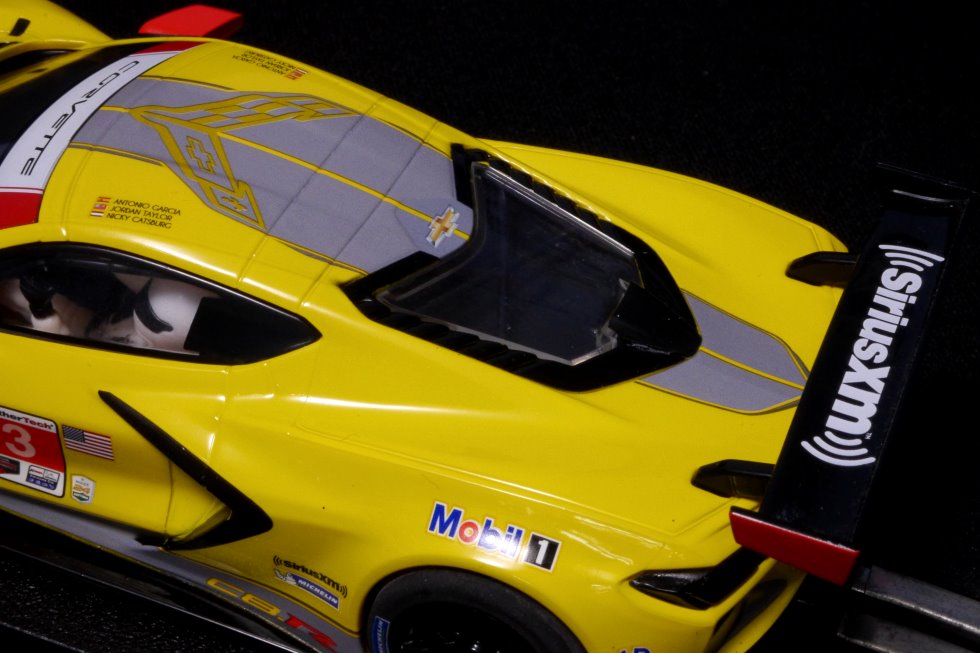
I think you’ll agree that Dan’s graphic design work on the #3 Corvette C8R has created a very striking model. It certainly reveals far more of the shape and the detail of Caitlin’s design than we saw with the prototype and the ‘first-shot’ samples.

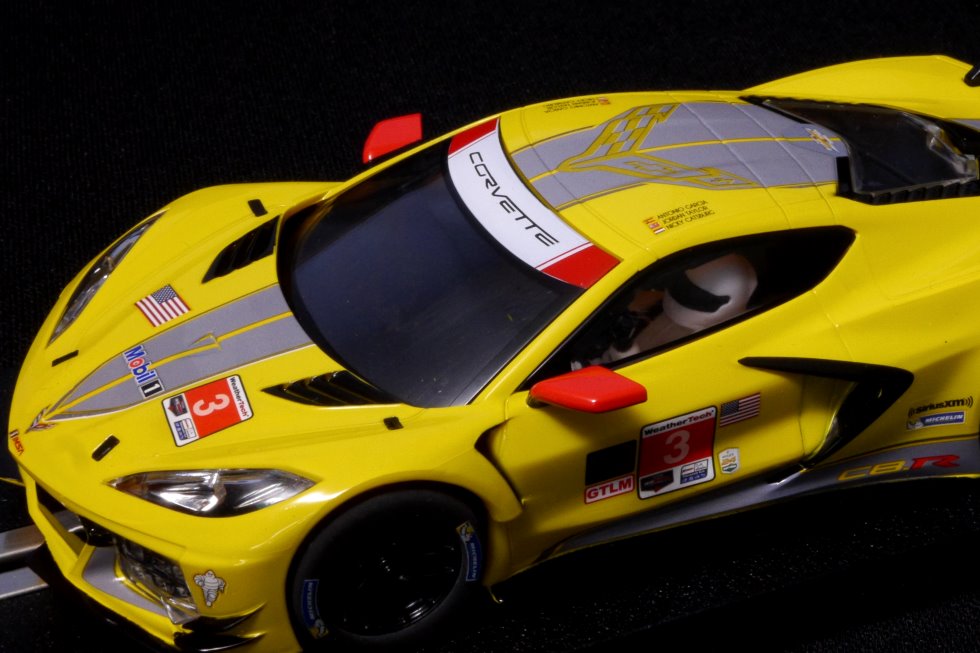
This finally looks like a replica of the real car. Although I do like the C8R in silver, the ‘Corvette Racing Yellow’ is sensational – particularly with the black, red and grey highlighting and the Corvette artwork on the roof…
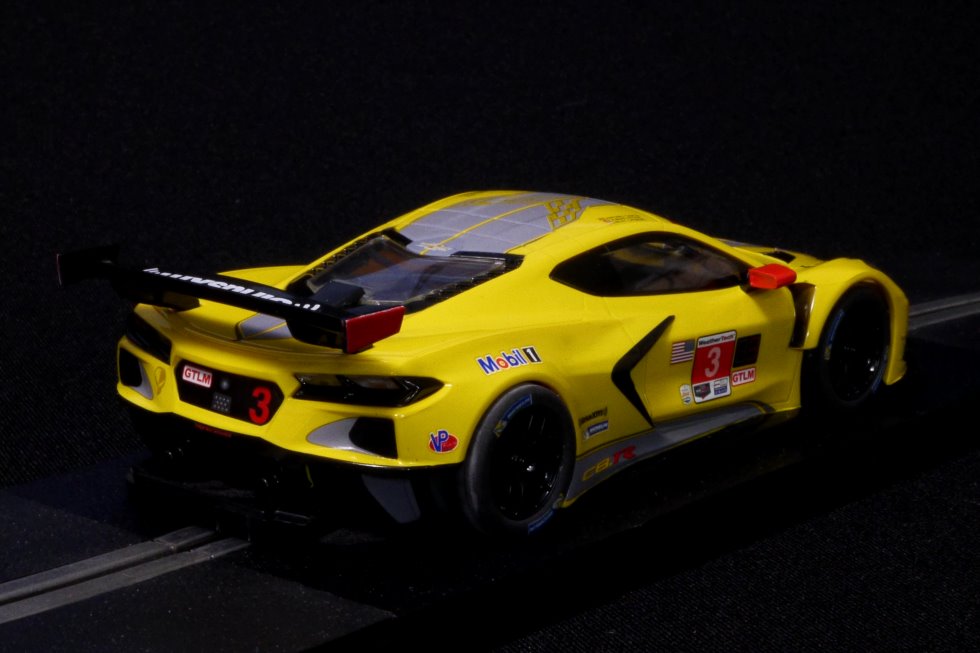
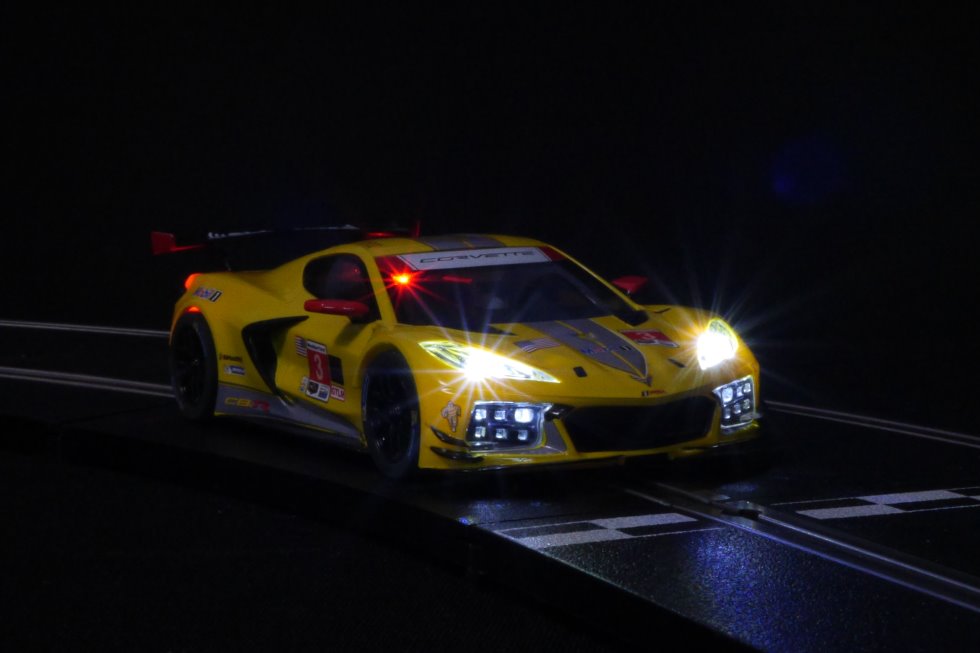
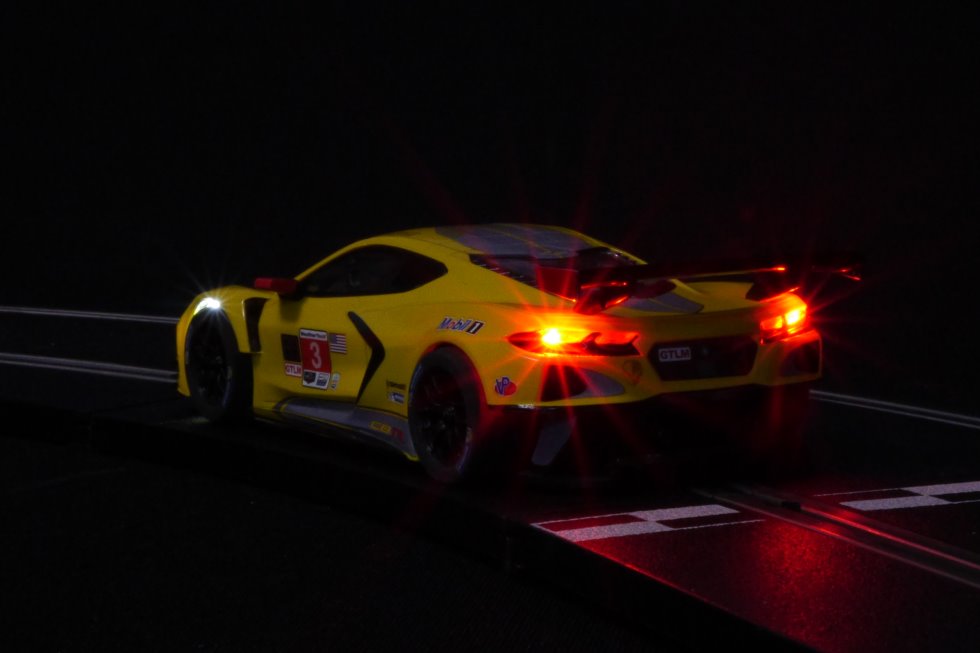
The collaboration between Caitlin, Dan, the rest of the Scalextric team and the factory gives a stunning-looking modern GT car, including in the dark…
I hope you’ve enjoyed the Corvette story so far. Next time, I’ll be getting the ‘Vette on the Jadlam SL6 test track – but I’ll finish for now by thanking Dan for taking time out of a busy day to answer my questions and for loaning the fabulous pre-production sample.