Well-maintained track should give you years of trouble-free enjoyment.
However, poorly-maintained track is a recipe for glitchy power, endless frustration and not much fun. It is definitely worth spending time on getting the track connections right and keeping the track rails nice and clean. And please – never, ever put anything abrasive anywhere near those lovely, shiny, rust-resistant nickel-plated rails…
Scalextric Sport Track
The Scalextric Sport track system that we have today dates back to 2001 and is the basis of all modern full-size Scalextric layouts, whether digital or traditional ‘analogue’ – and for all the ARC systems.
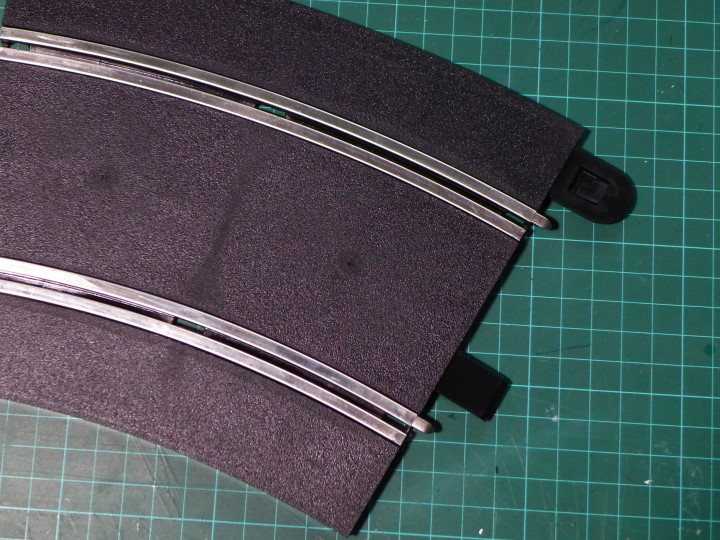
Like most 1/32 scale slot car track systems, Sport has a plastic roadbed with metal power rails sitting either side of a slot. The steel rails are plated with a very thin layer of nickel to keep them shiny and prevent the steel underneath from rusting.
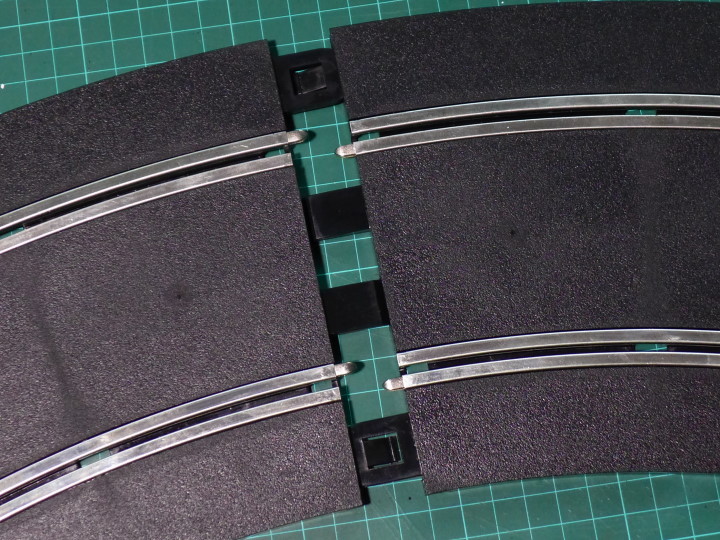
The Sport track pieces connect via plastic tabs and metal prongs. The plastic tabs hold the track together and the two metal prongs connect the electricity. If a connection is loose, it will cause problems with the flow of electricity around the circuit.
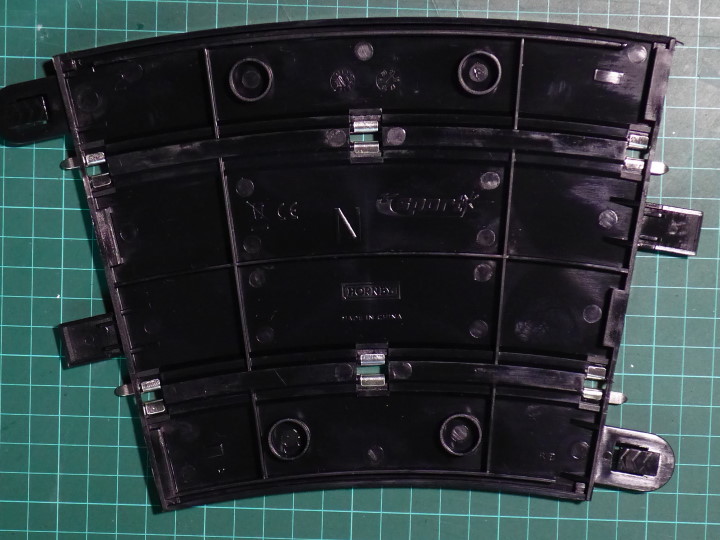
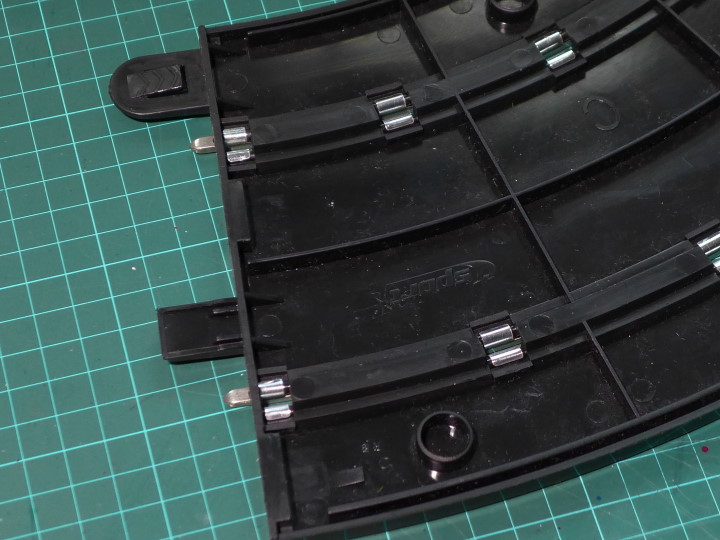
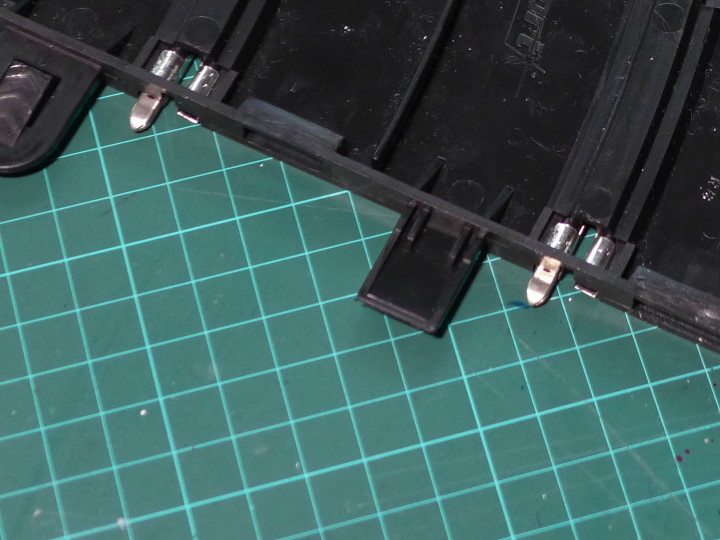
Underneath, you can see the metal rails are held onto the plastic track surface by three pairs of metal tabs. The tabs at each end play an important role in keeping a good electrical connection between track pieces.
Good Connections
When you build a track, the final two pieces don’t always line up perfectly. A wonky and forced connection is just asking for electrical problems. If you are following a track plan, carefully lay out all the track out again. If you are building your own design, maybe you need a half, quarter or short straight or a different radius corner? Having a selection of the various straights and of Radius 1, 2, 3 and 4 curves is really handy in joining up a track design. You can see what’s available here: www.jadlamracingmodels.com/scalextric-slot/track
With new track, the plastic tabs can sometimes be very tight – or the ridged clips in the middle of the tabs don’t lock in place. The ridged plastic clips can be bent up slightly, if necessary. It is definitely worth spending time to make sure every connection is secure. With time, the track connections will loosen up. That’s good for the plastic tabs, but not so good for the metal connection that carry the electricity.
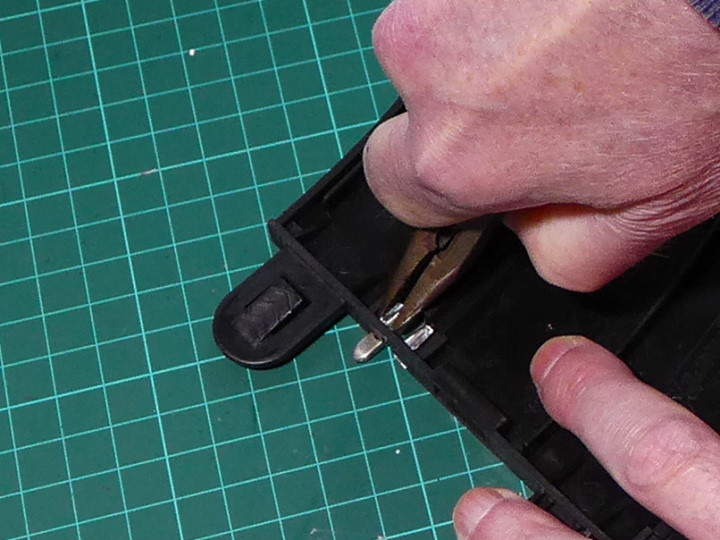
Remember the metal tabs that hold the metal rails in the plastic track? Over time, these do get loose – which means the electrical connection becomes unreliable. If most of your cars are stopping on the same bit of track, that’s almost certainly the reason why. These metal tabs need to be tightened with a flat-head screwdriver or a pair of pliers.
What you are aiming to do is to push the end of the metal tab in and down, so it is ‘crimped’ over the plastic ridge next to the slot. You will notice how this stops any movement of the rail away from the track surface. You can routinely check for loose tabs as you are building a layout – or wait until there’s a problem with cars stopping. If you are building a permanent track – or keeping a track up for a week or two – it’s definitely worth tightening tabs beforehand.
Keeping Scalextric Track Clean
The two parts of the track – plastic and metal – require different cleaning techniques. The plastic can be wiped over with a slightly-damp clean microfibre cloth. These are great for lifting dust. Even better is covering your layout with a dust sheet when not in use. Some people use a small portable vacuum cleaner – but please be careful not to hoover up your lovely scenery and trackside figures!
If you are carefully lubricating your cars and keep sticky fingers and food away from the layout, you really shouldn’t need anything more heavy-duty that a light wipe with a moist cloth. Like a real track, the Scalextric Sport surface will build up a layer of rubber over time to give more grip. This is a good thing and you don’t want to keep wiping it away.
Next, it’s time to clean the metal rails. Remember – they are made of steel, plated with a very thin layer of nickel to protect from rust. The rails will get dirty and possibly tarnished with use, but when we clean them we want to be very careful with that nickel plating. Anything abrasive (sandpaper, track rubber, even metal polish) will wear away the plating and the rails will rust. Please don’t be tempted by a quick fix – keep abrasive cleaning products away from your Scalextric track!
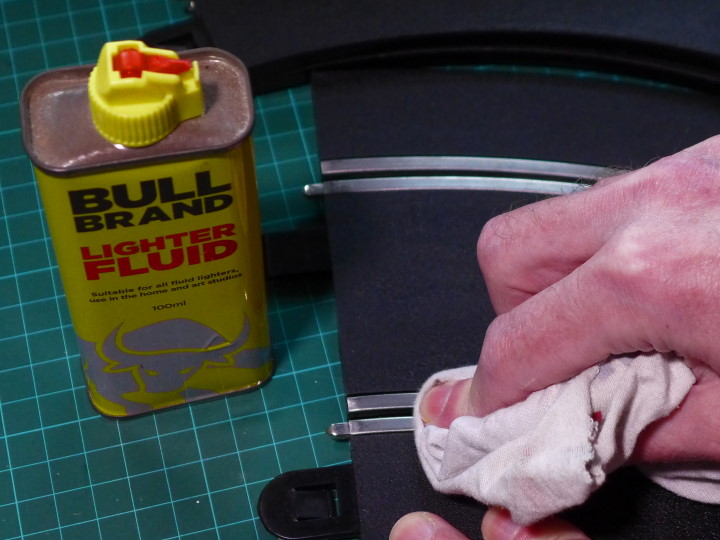
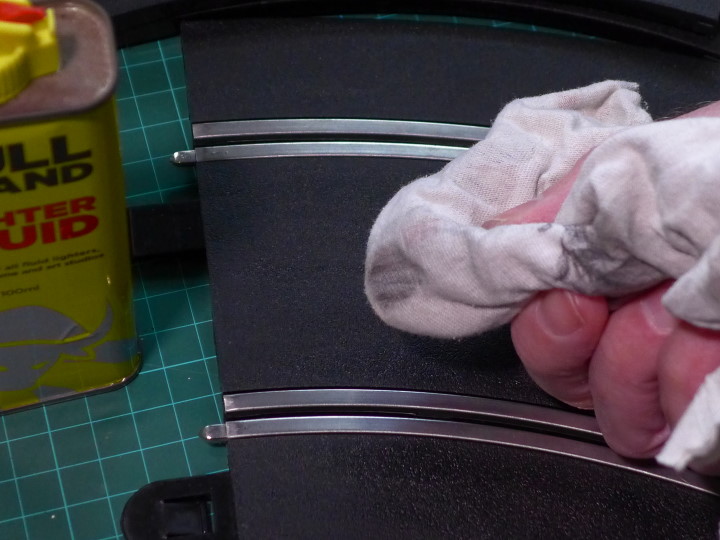
The first part of my cleaning regime is using lighter fluid (naptha) on a rag. I buy tins of lighter fluid from the pound shop and the rags are re-used worn-out cotton t-shirts. It’s pretty much what my dad was doing with his first Scalextric set in 1959 – except he used methylated spirits. The naptha is flammable and hazardous, so it is best to wear rubber gloves and clean your track in a well-ventilated area.
Soak a little lighter fluid on a small, clean patch of the rag and run along the metal rails and over the prongs at each end. Depending on the filthiness of the rails, more pressure may be needed. It pays to take your time and to clean regularly. Dirt left on the rails will gradually damage the nickel plating.
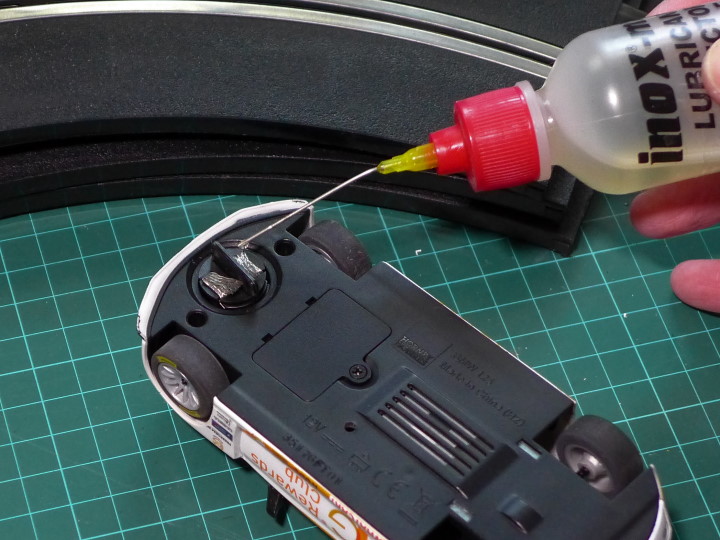
The second part of my rail-cleaning routine is to condition and protect the metal. To do this, I use INOX-MX3, but WD-40 is a reasonably good alternative and easier to find in the UK. Whatever you choose, please use it sparingly. INOX gets extremely messy if used in excess and WD-40 can damage the plastic track surface. The best method is to put a couple of drops on the braids of a car and run the car round the track a few times. On a digital track, don’t forget to use the lane changers and go through the pit lane.
Both INOX-MX3 and WD-40 are sold in sprays – the fluid should be decanted into small dropper bottles (eg vaping fluid bottles) to be used sparingly. I use INOX-MX3 a lot, yet a 60 ml bottle lasts me about five years.
If you clean the track before setting up and then condition it with cars with INOX or WD-40 on their braids, you will have a clean track with an anti-moisture covering and (especially with INOX) you’ll have exceptionally good rail to braid electrical conductivity. This is why many Scalextric Digital enthusiasts say a bottle of INOX is a must-have accessory.
Because the INOX or WD-40 protects the metal and drives off moisture, you want to leave it on the rails when the track is not being used or is in storage. So don’t clean the track rails before you put it away – leave the tiny layer of INOX or WD-40 and then clean before you use the track next time.
Resurrecting Rusty Track
If you look after your track and never use anything abrasive that risks removing the nickel plating from the steel rails, you should never see any rust. However, it is amazing how quickly and easily the steel rails rust when the plating is removed or damaged. To be honest, the sensible thing to do is bin the rusty track and replace it with new pieces. However, I have restored original Classic track – and very occasionally modern Sport pieces – and this is what I do…
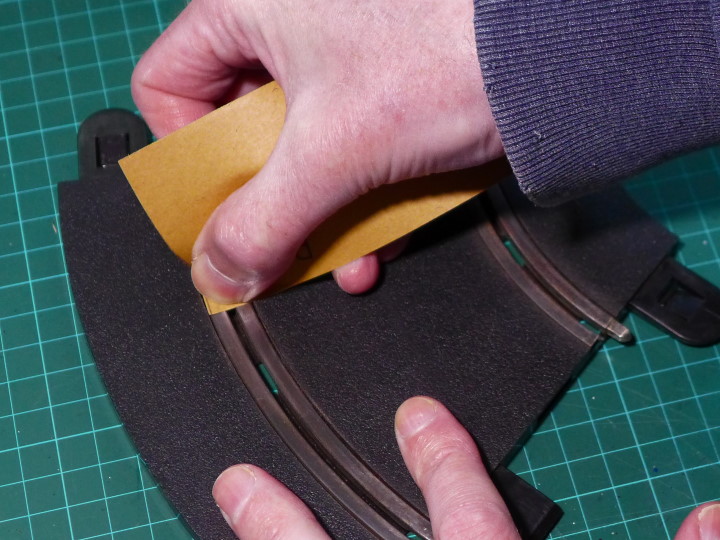
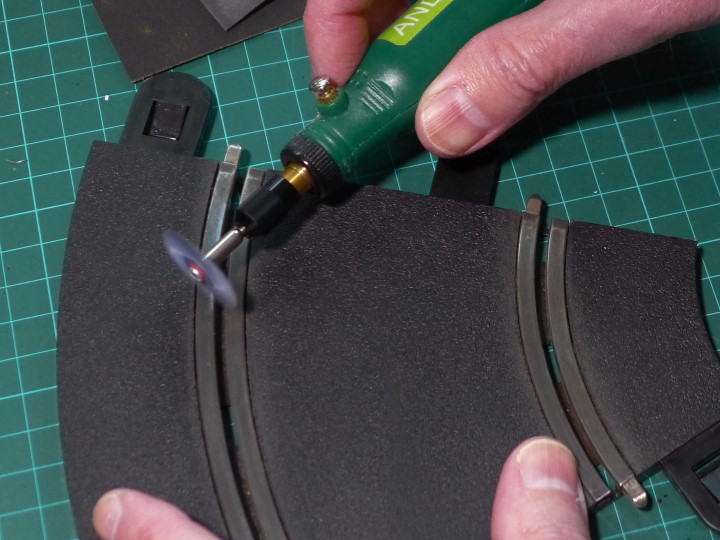
First remove the rust. This is the only time anything abrasive gets near metal track rails. Go in with some medium-grit sand paper (400 or 600) and – once the red/brown rust is off and the rail smooth – follow-up with a finer grit paper (800 or 1200). I then polish the rails with a 3M nylon polishing wheel on a Dremel. This is probably overkill, but it gets a really nice shine.
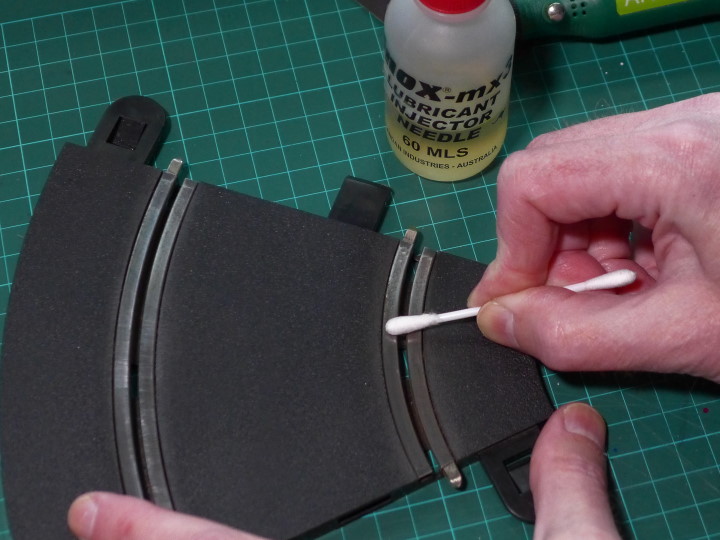
Secondly, condition the rails. Using INOX-MX3, WD-40 or 3-in-1 oil on a cotton bud (Q-Tip for American readers), run a very light coating along each rail. This is much more than normal, but is necessary. Leave the track piece for a few days to condition and then apply another layer. After another couple of days, wipe down the rail with a dry, clean cloth. This is just to remove any excess INOX, oil or WD-40, don’t use any solvent. The track will now be ready to use – it won’t look perfect, but should work okay.
Without the conditioning, the rails will quickly rust again. With restored track rails, you should repeat this process every year, in addition to the regular cleaning and conditioning routine.
Bent Track & Rails
Scalextric track pieces can lose their ‘flatness’ after a while – usually through wear and tear and less-than-perfect storage. You’ll notice this when your cars are bumping their way down a straight as if someone has installed speed humps on your layout. It is easy to flatten out a concave piece by gently bending it over your thigh. Do be aware of wrinkling the inside of the slot…
If a track piece is trodden on or bent, you may find the rails on the inside of the slot become ‘wrinkled’ and catch on the guides of your cars. In the worse cases, this may stop the car from moving – something that can easily blow a chip in a digital car. Once the track is flat, use a plastic ice-lolly stick or small spatula to flatten the wrinkles out. Simply running the plastic tool through the slot usually does the job. If you need more leverage and require a metal tool like a screwdriver, you must unplug the power from the track, otherwise you’ll get quite a shock. Don’t ask me how I know that…


Gday, my track was quite dirty with patches of rust, to the extent my cars would not run. I read your post and spent a couple of hours with scouring pads, wd40 and cloth. Perhaps a bit harsh but the cars are running well again. Thankyou for your advice.
I’m glad that we could offer some help and that you’ve got the cars running smoothly again! 😃