
A note from the author…
I’m Rob the modeller, a normal guy who just enjoys making his model kits. I’m not a ‘professional’ and represent your average modeller! All views and opinion expressed in every review are my own, I don’t want to be buying the bad models either! Hope you enjoy each post and find it useful, happy modelling!
Featured in this review is the REVELL McLaren 570S 1:24 Car Model Kit 07051. Want one? Shop here!
The McLaren 570s was launched back in 2015 and was the first car in the “Super Sports” series, designed to massively increase McLaren’s output by 2020. Its price puts it in the same market as Audi’s R8 V10 and the venerable Porsche 911 Turbo S. Since its launch the car has spawned a number of variants including the “baby” 540C – a lower power version more focused on every day drivability, the 570S Spider – version w…. thats enough. Find a car forum for more info!
The last car I built was a BELKITs Manta GTE and that was almost a year ago. That turned out really well, but of late I have spent most of my time on aircraft and the occasional piece of armour. I enjoy making car kits, but they take a different set of skills to military. No weathering to hide the mistakes…
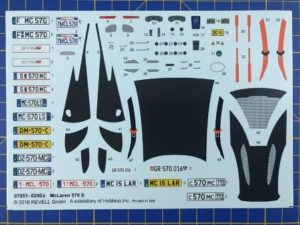
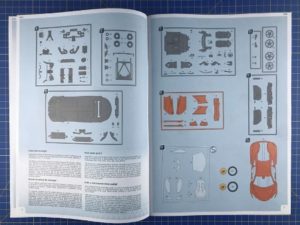
Here is the box art I was so taken with, I personally think the car looks great from this angle. The instructions are what you would normally expect from a modern Revell kit, full colour, clear with colour call outs on each part. Decals are fairly comprehensive with number plate options for a variety of countries, instruments and different seat belt options. Large carbon fibre decals for the roof, engine covers and the side panels are a nice touch too.

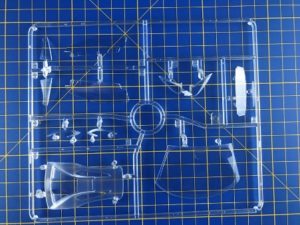
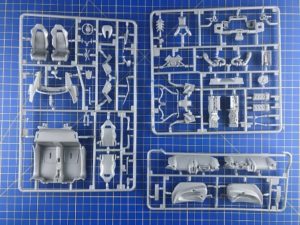
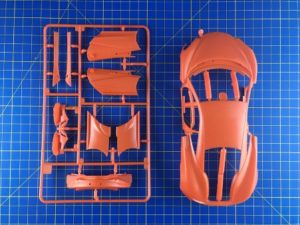
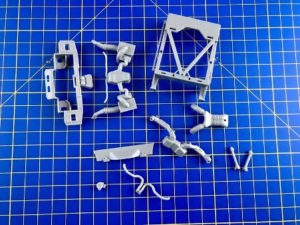
Moving on to the sprues. The kit is moulded in orange and light grey styrene. Detail is crisp and the plastic is decent quality. As normal with Revell though there is some flash to deal with, but it’s not too much of an issue.
One of the nice things about this kit is the ability to pose the doors open or closed. They aren’t workable though so you need to make a decision during the build. Another nice touch is the inclusion of dashboards for both left hand right hand drive variants. Last parts in the kit are the tyres which appear to be okay, but not quite up to the standards set by other manufacturers.
The instructions start with the engine and transmission. This is a bit of a surprise really as the parts are really quite detailed. One of the re-occurring comments of the actual car is how little of the engine is accessible, or indeed visible. With that in mind I won’t go too mad with the detail.
The block, Cam covers, intake plenum, exhaust manifolds and turbo parts are painted in aluminium and assembled to the block with a wash added. It’s starting to look like an engine now…
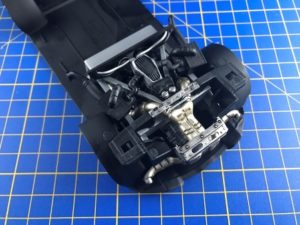
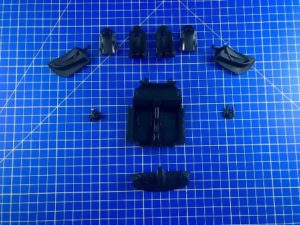
Now let’s get the engine into the car. Step one is to install the engine subassembly to the base and then the aluminium rear sub frame is secured in place. The exhaust system can now be added. Air boxes are the next addition.
I did some very light dry brushing on them to make the detail show up. The top of the rear sub frame goes on next. A light wash finishes off the engine bay, so far so good. This is looking pretty nice…

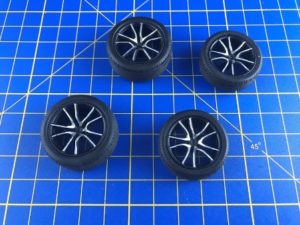
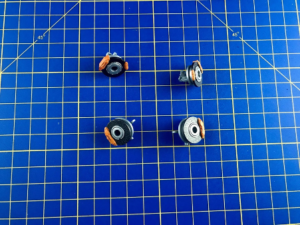
On to the wheels; a coat of matte black paint is the first action. I decided to go for the “Diamond cut” style of rims. If I were specifying my own car I would probably stick with matte black, but wanted to try and show a little more detail.
I used a Molotow liquid chrome marker to apply the diamond cut effect. The next step is to assemble and paint the suspension uprights, brake rotors and callipers. The brakes are once again nicely detailed. Small decals are provided for the McLaren logo on the callipers – I painted these orange to match the body.
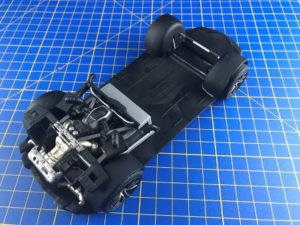
The wheels are then assembled to the brakes/uprights. Lower suspension wishbones are first painted in Tamiya AS12 out of a can before masking and an application of matte black. With the addition of a few other remaining chassis parts we now have a rolling chassis!
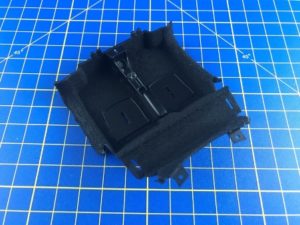
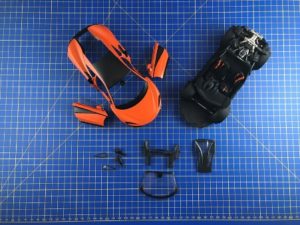
With the chassis complete attention is turned to the interior. Once again this is all very nicely detailed. The first step is to paint the tub in matte black.
There is a real risk of the interior becoming a sea of black, so I decided to use a technique to provide some texture to the tub to replicate a carpet. The initial step is to mask the mounting points for the seat and along the transmission tunnel. I then coated the areas to be carpeted with PVA glue, embossing powder was applied to the wet glue to simulate a carpet texture. It looks okay, but the effect isn’t as uniform as I would have liked.
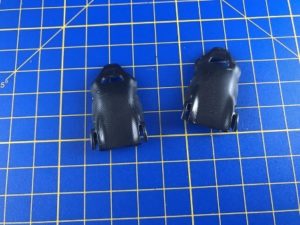
Once fully dry I gave the tub a coat of matte black to bring everything together. Moving on to the seats. Each seat comprises of two pieces, the first is the back or “shell” as it is sometimes called. Once again these parts would normally just be matte black, so to add a little variety I thought I would use some carbon decal sheet I have had kicking. Firstly I cut out a piece the rough size I required for the seat. I know some people make masking tape templates, but I’m not too worried about a little bit of waste. Next I moistened the decal in water in the usual way. Once applied to the seat I would normally use decal softener to make the decal conform to the complex shape. I had read a different technique in a recent magazine build of a Tamiya motorbike. The model maker used Tamiya X20A thinners to soften the decal, so I thought I’d try that. I think it worked out well, although I did manage to put a small nick in the decal near the harness cut out. Very annoying, but won’t be visible in the finished model.
Onto the seat cushions and dash. I originally planned and indeed painted the bottom half of the dash in orange, but didn’t like how it looked. I decided to try and approximate an alcantara finish instead using the tried and tested embossing powder method. Whilst not entirely scale accurate it looks better than a sea of matte black.
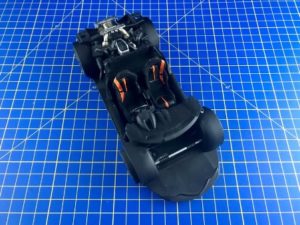
Finally time to put the interior together. First I applied the decals for the instruments, seat trim and belts. It looks okay, not my best work, but just plain black would have been too easy (but probably what I’d do if I ever built this kit again) Once the interior tub is installed into the rolling chassis you can see how this is coming together. I’m quite pleased…

Onto the bodywork, this is where a car project lives or dies. If I get it right then all will be well.
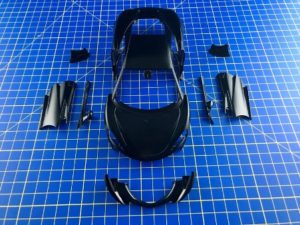
What could possibly go wrong? Quite a lot of moulding marks etc. on the body, so out with the trusty #11 blade and Tamiya sanding sponge. After several hours of work I was satisfied the body was ready for primer. Due to the various scoops and aerodynamics of the car the body is made up of several parts. Unusually the doors are separate too and can be displayed in the open or closed position. It should be noted that they aren’t workable. The remainder of the parts were prepared in a similar way to the main body.
When it came to the front bumper I had a bit of a dilemma. I couldn’t work out a way of satisfactorily masking the parts that would eventually be black from the ones that would finish orange. I took a bit of gamble and decided to cut the part along the masking line with a razor saw. This would either be a genius move or a disaster. No turning back now…. Masking would have been a nightmare, i suppose there is always the option of assembly after paint, but previous bad experiences have put me off that idea.
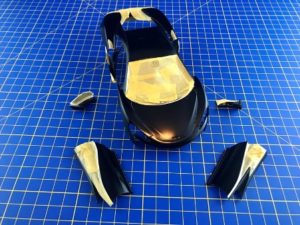
The next step is to decide which of the main colours to apply first. For some bizarre reason I thought the black would make masking a lot easier. I did consider just having a black car, but as I had invested in a Tamiya rattle can for the orange I thought I would stick with plan A. Lots of masking was required prior to the application of the orange coat. So far so good.
Time for the top coat. Unfortunately this hasn’t gone too well. The paint isn’t anything like as opaque as I had bargained for. This has meant I have had to apply many very fine coats to build up the colour. This has led to thicker paint then I would have liked and a slight loss of definition. It was also difficult to get good coverage in a lot of the detail. The bottom line is I should have put down the orange paint first and then just had a slightly more difficult job on the masking. I’m still reasonably happy with the result.
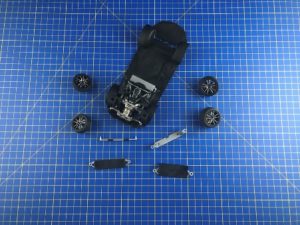
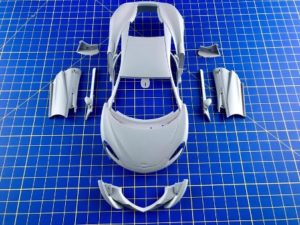
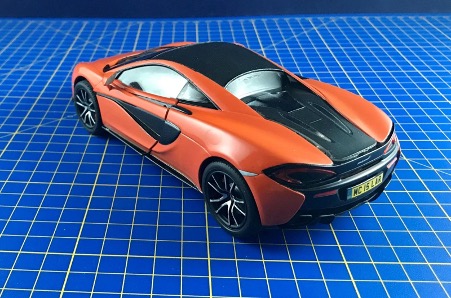
So here are the parts ready for final assembly. Overall it’s been a bit of a struggle and I’m not very happy with the rough edges. I’m tempted to bin it, but don’t want to give up.

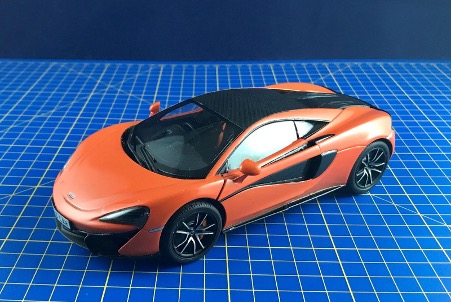
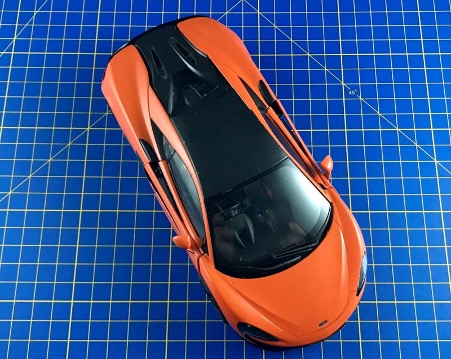
So here it is, the mediocre McLaren. As mentioned I have made a few mistakes which have resulted in this not turning out quite as I had originally hoped. Whilst I am happy to take the majority of the blame for this it’s not an easy kit for a number of reasons.
A great example is the way the body locks onto the base. Great from a certain point of view, but it also makes dry fitting essentially impossible. Try what I may, I just couldn’t get the body to sit right. I think it’s a problem with a stack up of tolerances. I now see this as unfinished business and can see me building this kit again, but with the benefit of hindsight. So don’t be surprised if you see another 570S at some point.
The verdict on this kit:
Build Time:
Start to finish the kit took only 8 hours, not bad for a fun little project!
Suggested Tools:
The sanding sponge came in very useful more than once, you’re going to need your own colours and glues before taking on the kit.
Kit specific advice:
On the body shell it’s worth the harder masking and painting the body orange followed by black.
What we’ve taken away from this build:
All things considered this is a great little kit which can be completed straight out of the box, no need for an extensive array of tools and paints. As an introduction to the hobby for a beginner or even as a fun back to basics build for a more experienced modeller its a great kit with a rewarding finished result.