
A note from the Author
Hello fellow model makers! I’m John and, although I’m no expert at all – just a car enthusiast and keen model maker – but I always strive to improve and achieve the best results I can. I’ve built models from being a youngster – competition/sports cars of the 60’s/70’s are my number 1 ‘thing’ – and now I’m fully retired I can put the extra hours into this wonderful hobby.
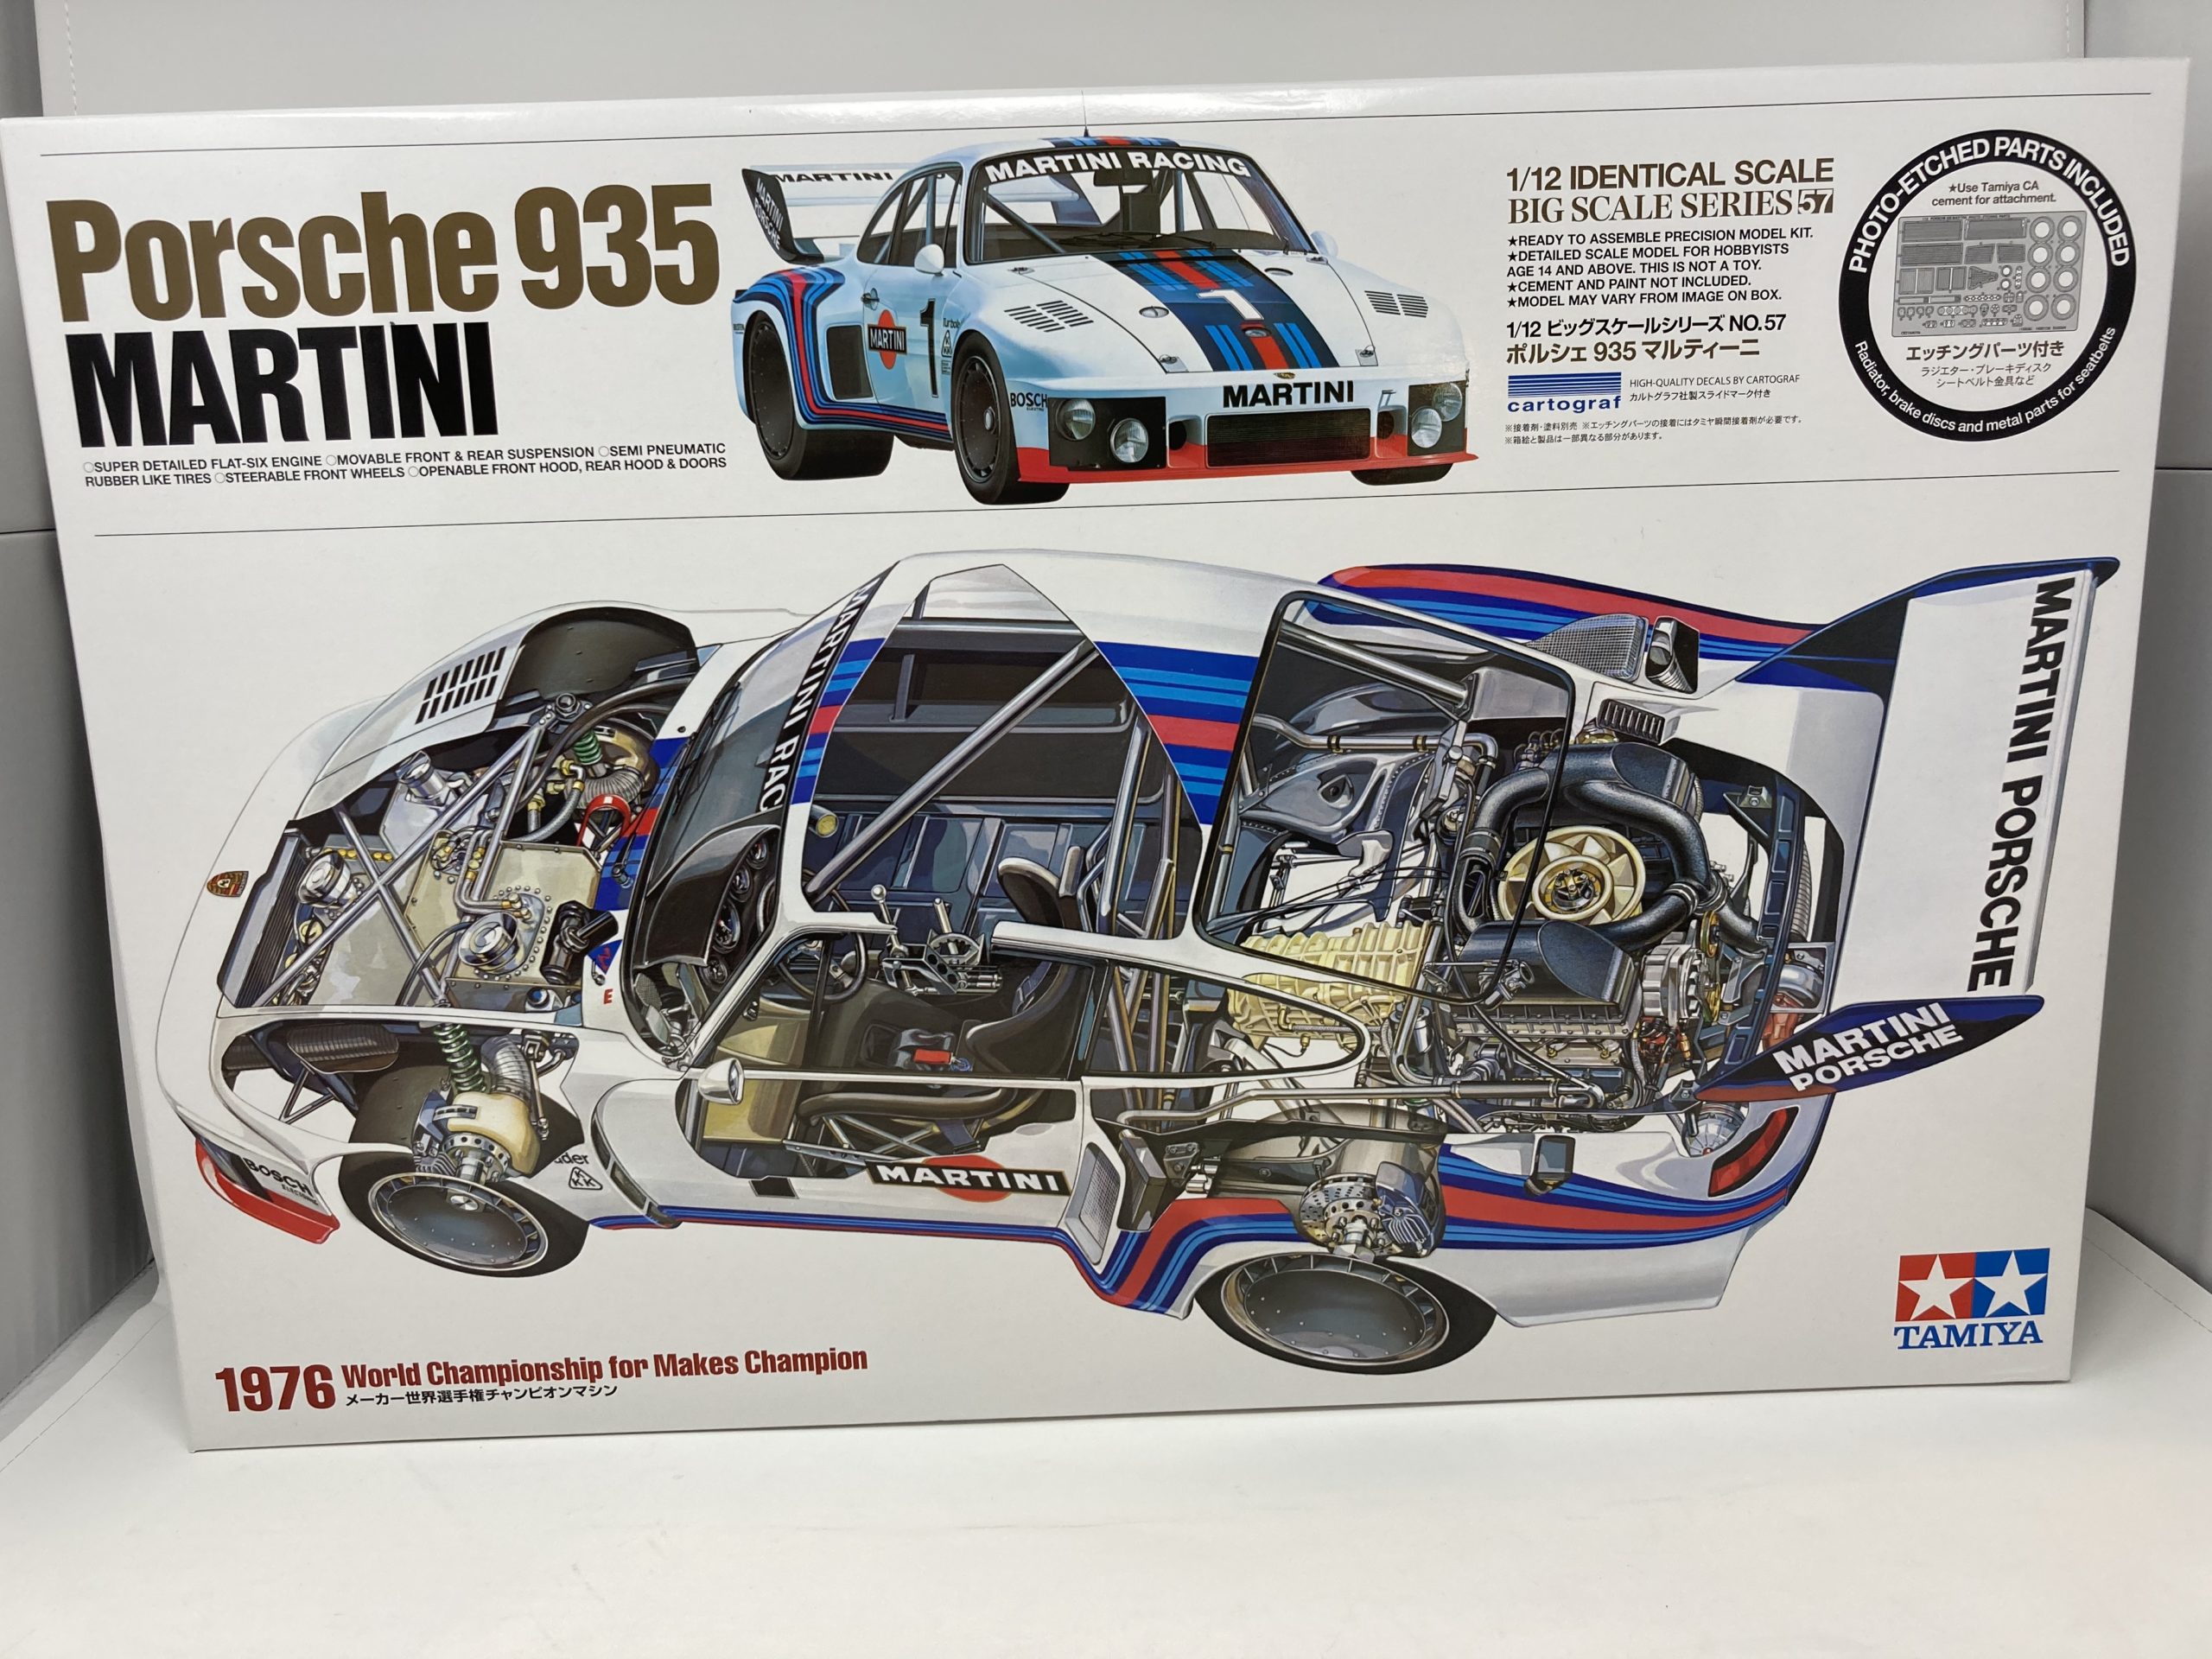
Name – Tamiya 12057 Porsche 935 Martini 1:12 Plastic Model Car Kit
Number – 12057
Scale – 1/12
Price – £132.95
Availability – IN STOCK – Available to Buy Now! Buy yours here!
Introduction
Having built the Tamiya 1/12 Jagermeister 934 at the start of the year, I was really excited to see the 935 as the next Tamiya release – and it’s here! The 934 was such a super kit in every way, so I knew that the 935 would not disappoint – in fact I’m hoping that it actually surpasses the previous model. As I write this I haven’t started the build yet, but I can tell from just seeing what’s in the box, the instructions and just the overall quality of what we have here, that this is going to be really good.
My ‘brief’ for this kit is to build it straight out of the box – no added extras, no detail up parts – just as it comes and in line with the instructions. I’ve given myself some leeway with the painting of the underbody parts – just using the instructions as a guide. I think I probably will re-do some of the chrome parts – they were the only thing on the 934 kit that didn’t look quite right. We’ll see. When I did the 934 I added a fair amount of extra detailing (at a fair bit of extra cost – as well as time), which I’m sure many people who build this will all want to do. But here I’m interested in what can be achieved just using the box parts.I’m confident it will be just fine!
And, just to say, there will be many a modeller out there reading this who will have far more experience than I have – but I’ve tried to include some hints and tips in here for the less experienced modeller – specifically for this kit and generally such as prepping and painting.
Here we go…!
Some pre-build information
I make a photocopy of all the instructions – then I can write on them and make my own notes – eg ticking off parts as I remove from sprue. I tend to remove all the sprue parts for a particular section – eg rear suspension and put them all into a plastic tub(s). Also – I highlight steps which are easy to miss and need to be done in advance of later steps eg painting (bonnet pins example).
All the painting was done with Tamiya Lacquer paints – I find these to be very ‘user friendly’ – they cover superbly, don’t need a primer, dry quickly and when a gloss finish is needed they really excel. The metallic, matt and semi-gloss finishes are superb.
I use modellers grade CA adhesive throughout – such as Zap a Gap Medium – but there are lots of others.
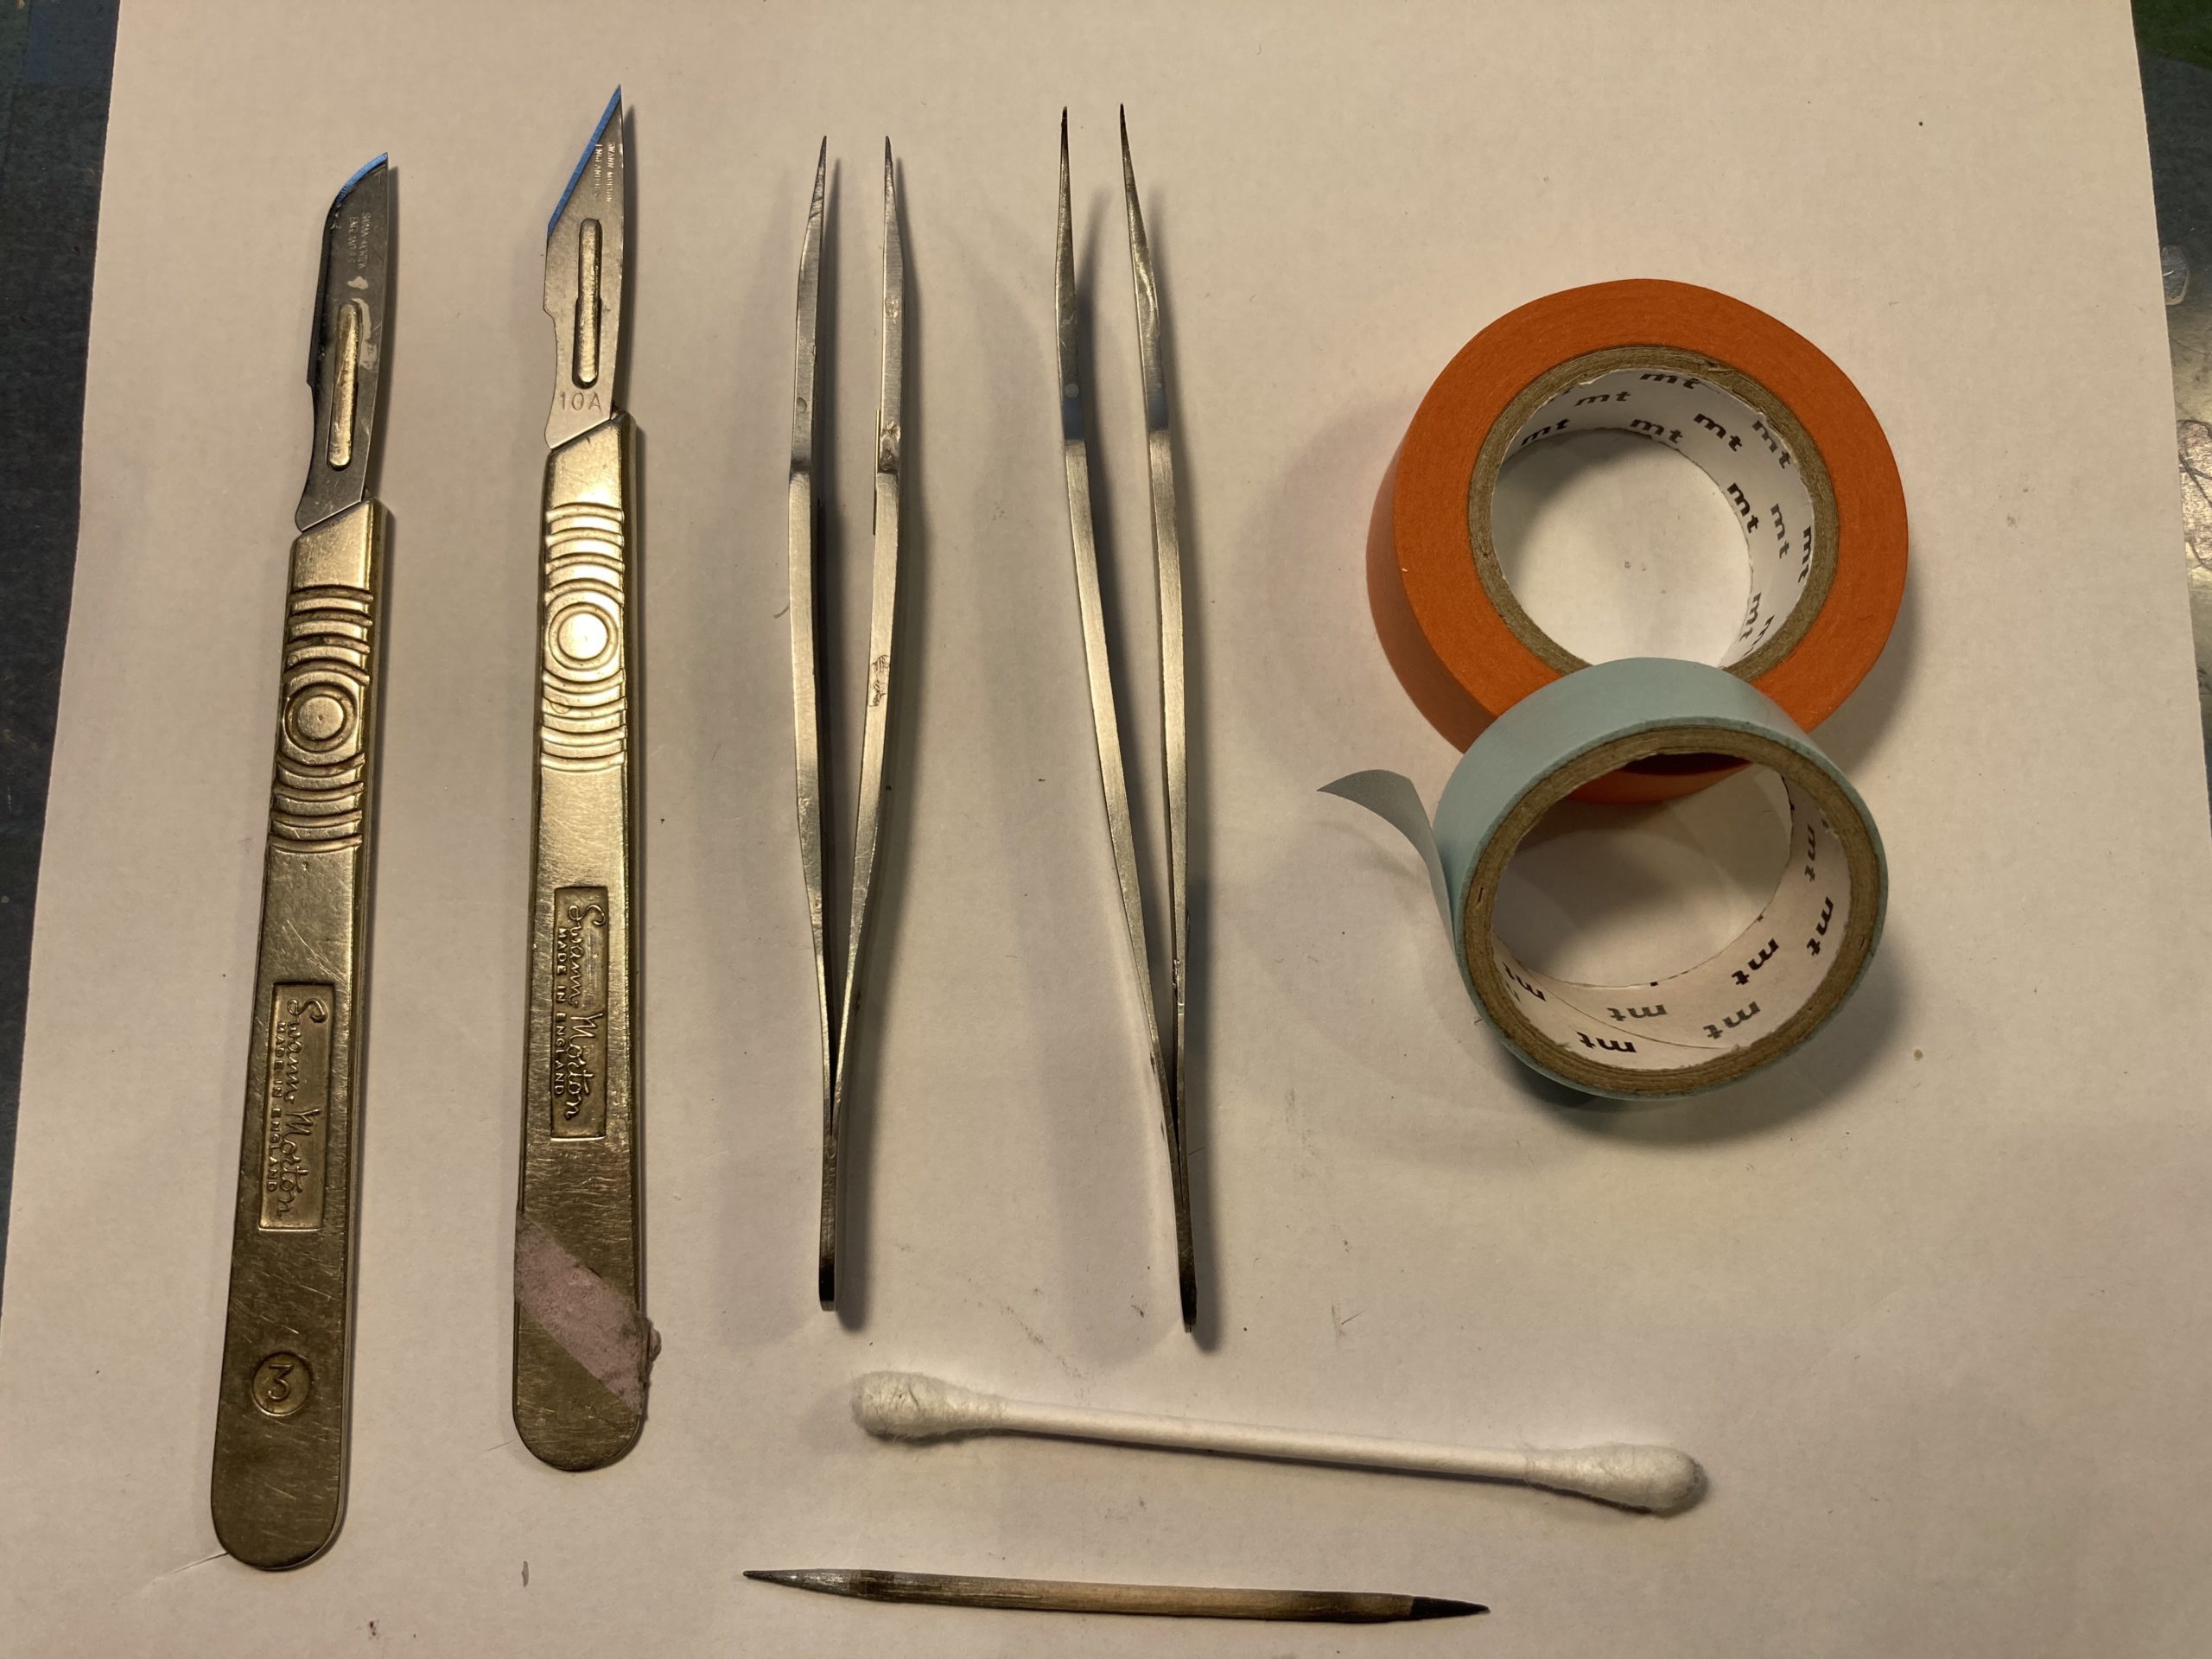
At the end of this review I’ve made a list of essential and ‘good to have’ tools for this build.
I’ve set out this build and review in instruction manual order – but, as I often do, I started with painting the main body work first. This allows sufficient drying time whilst other steps are being done. There are some notes later in the build about painting – some steps have to be done first – before paint is applied.
And, as with all Tamiya kits, my building motto is ‘if it’s not fitting properly then I’ve got the wrong part or misread the instructions’!
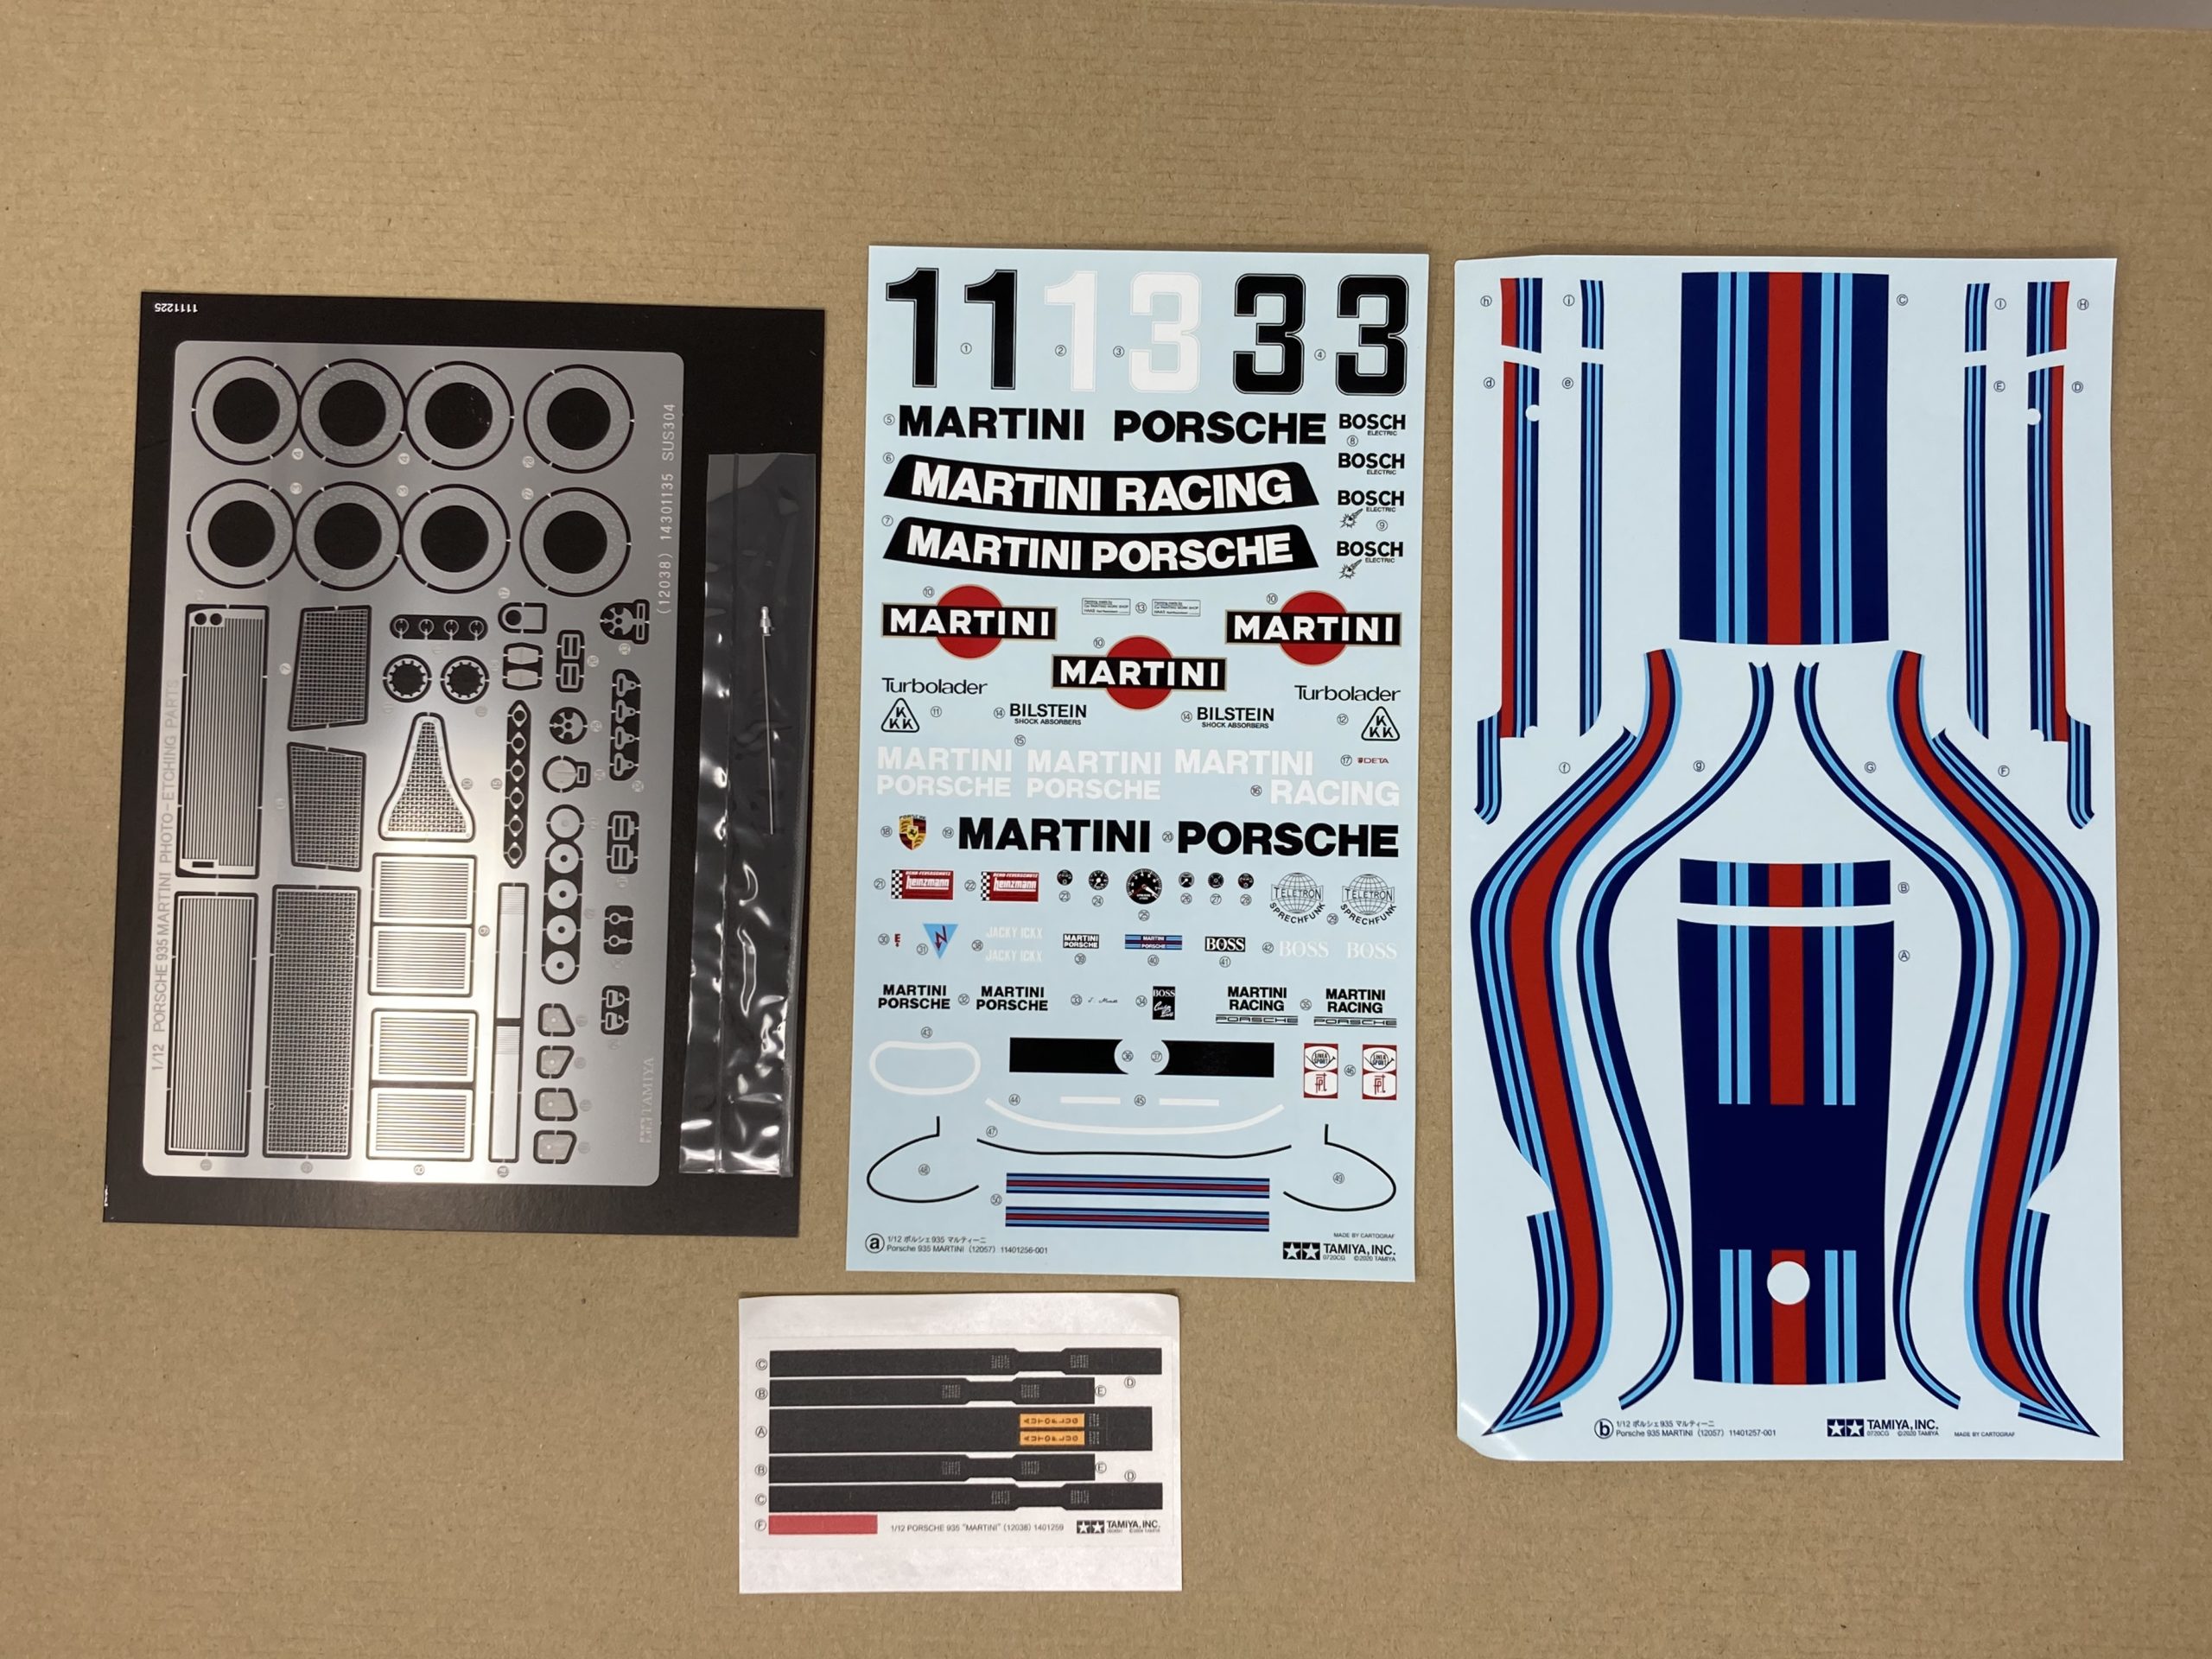
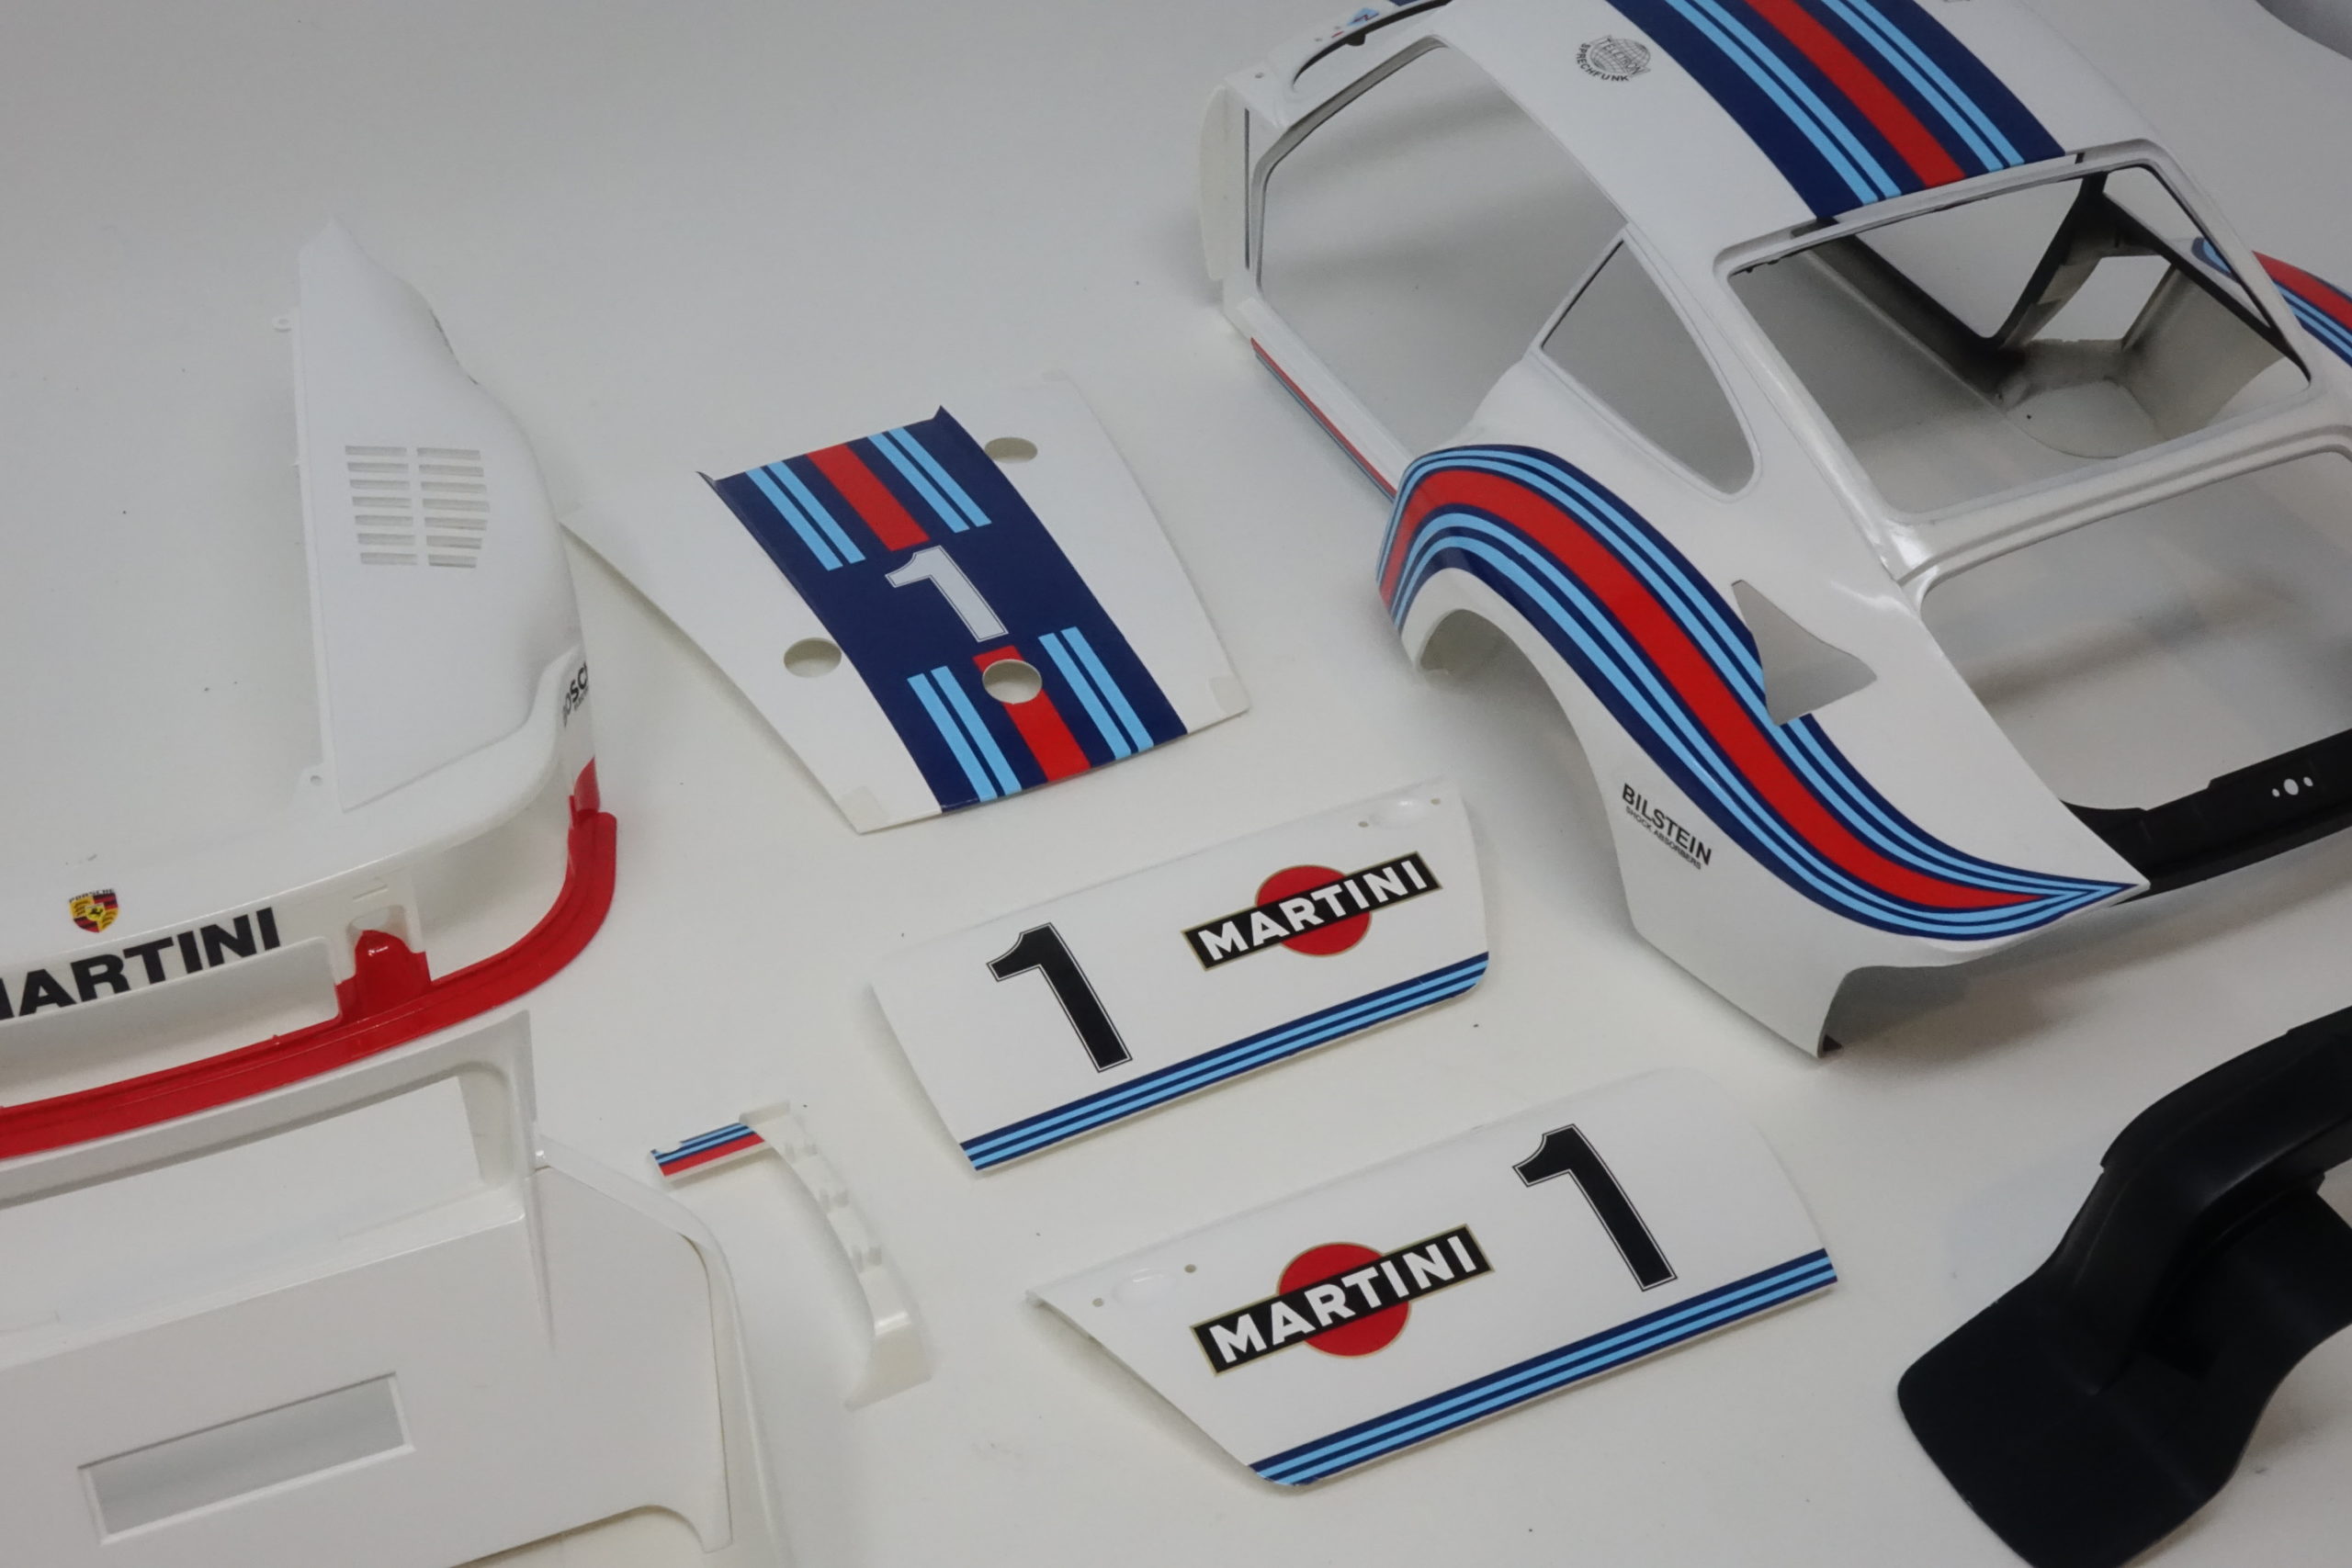
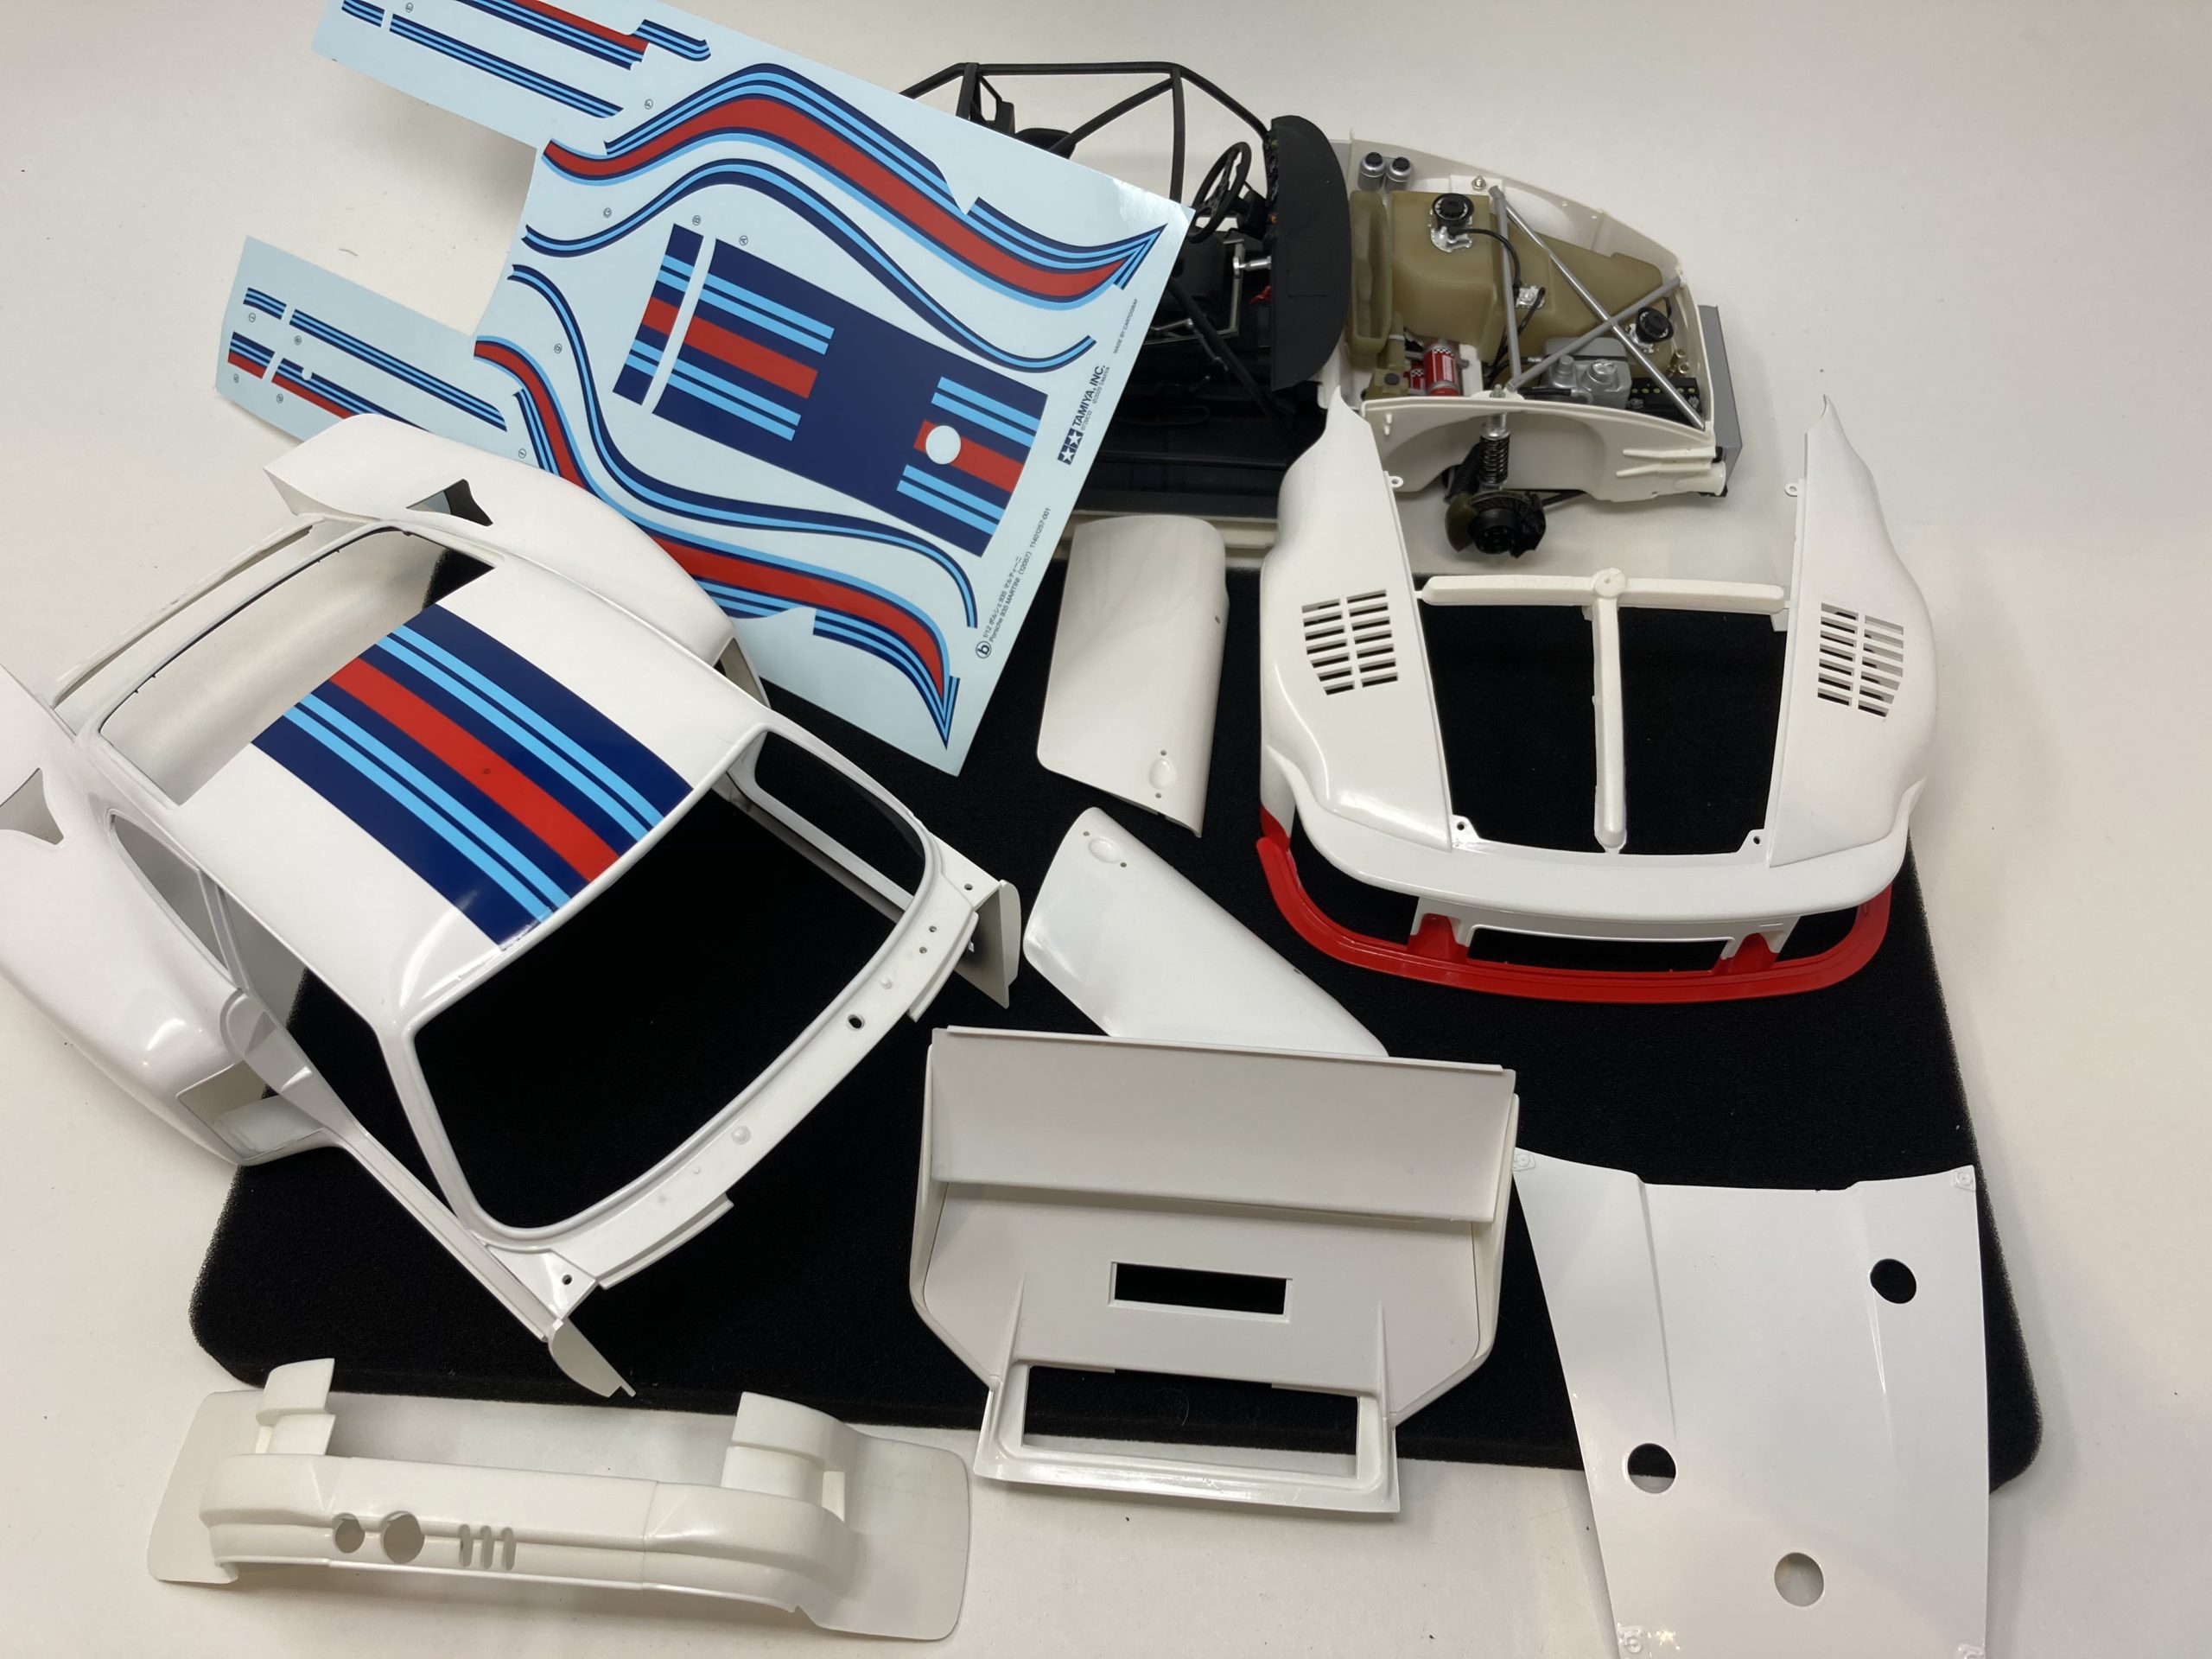
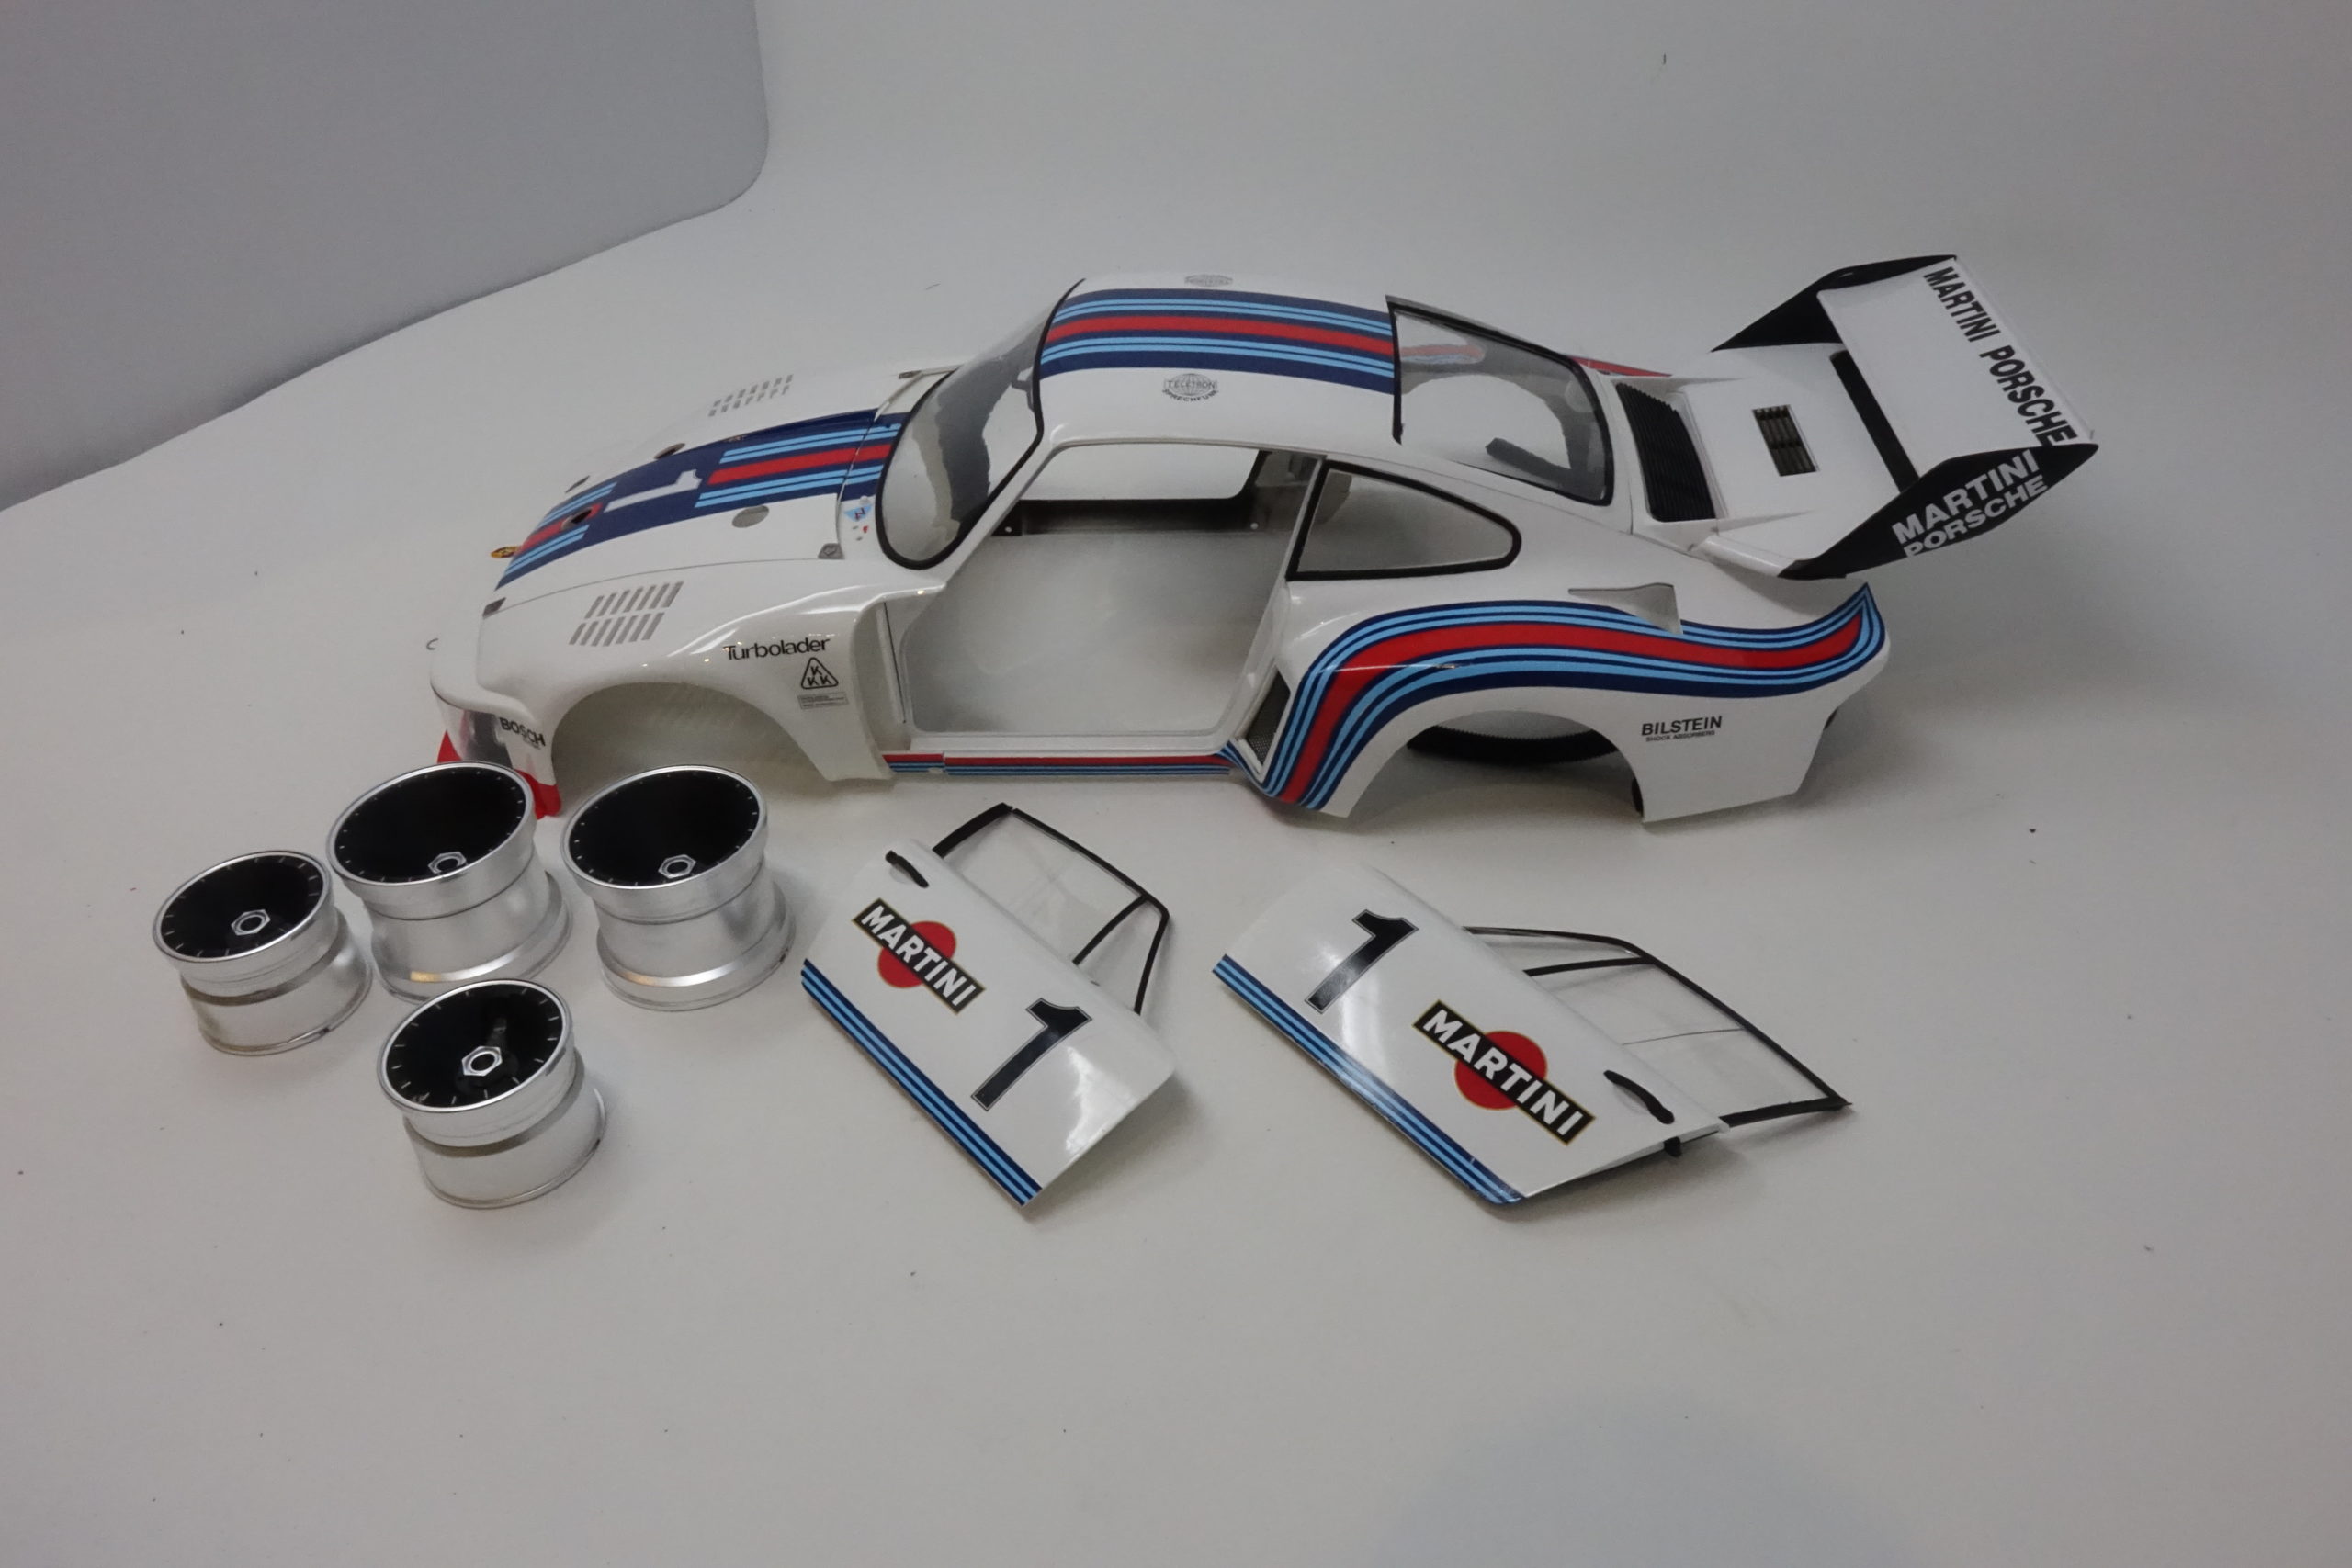
What’s in the box?
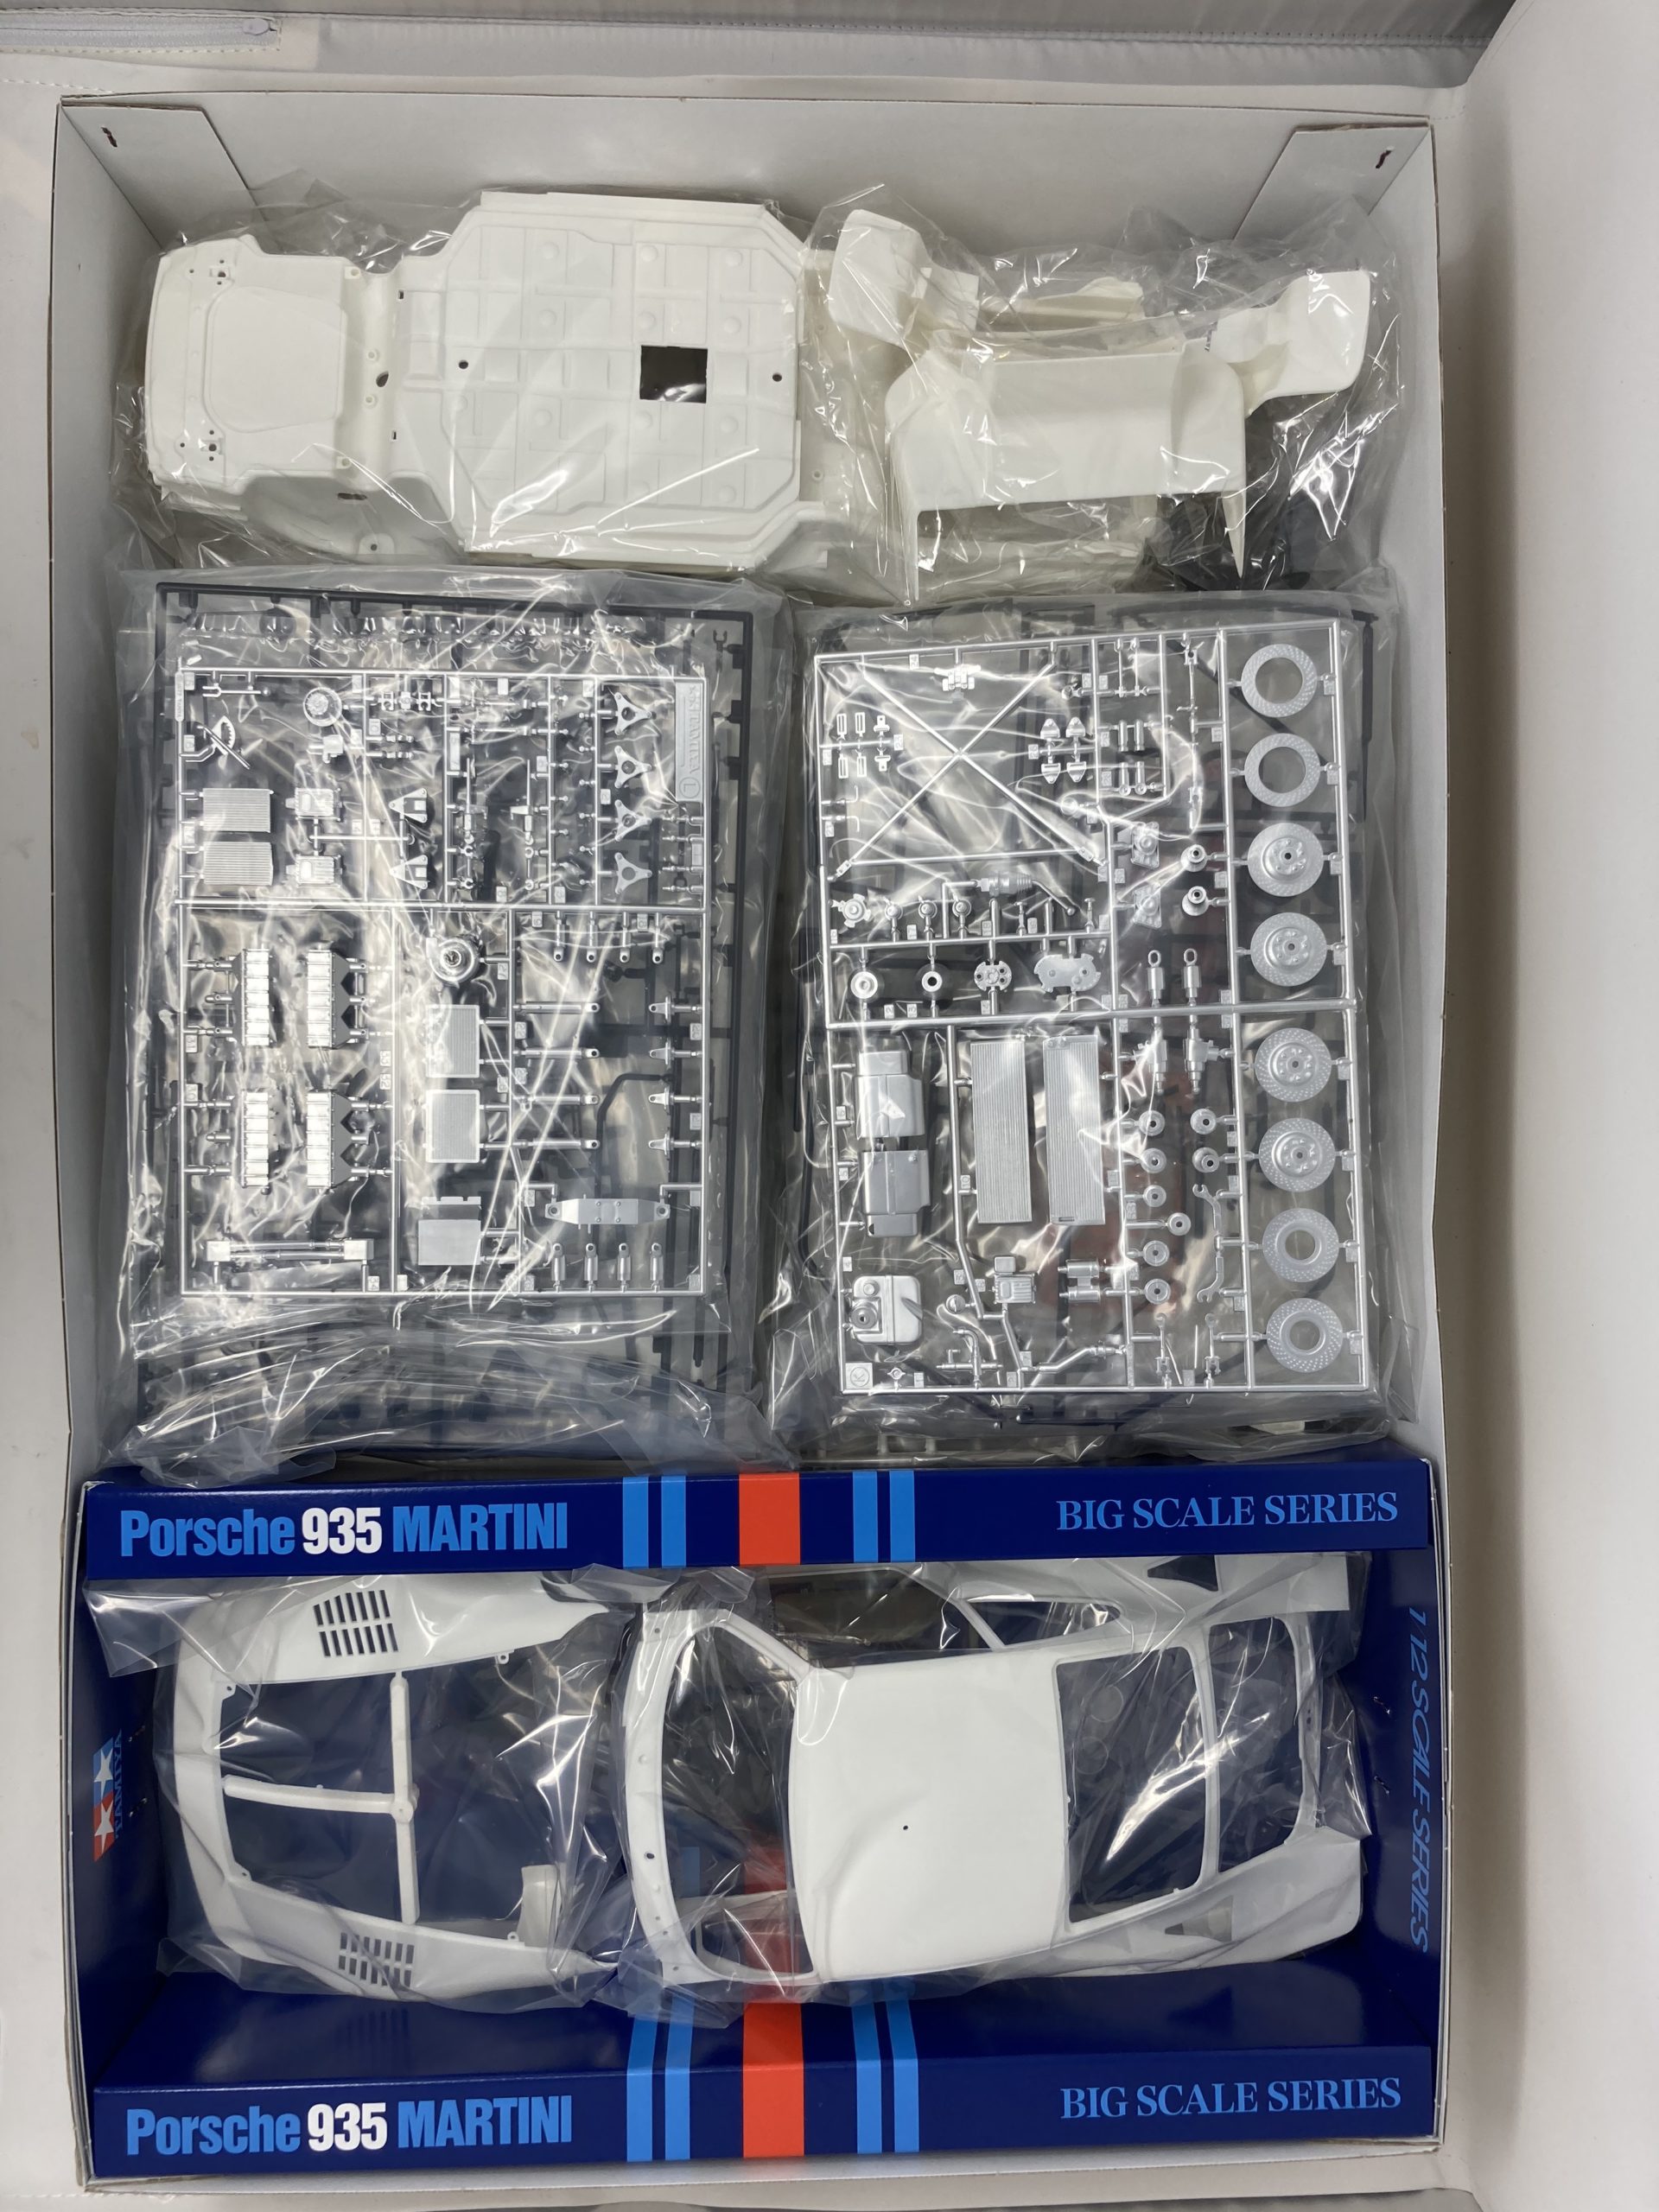
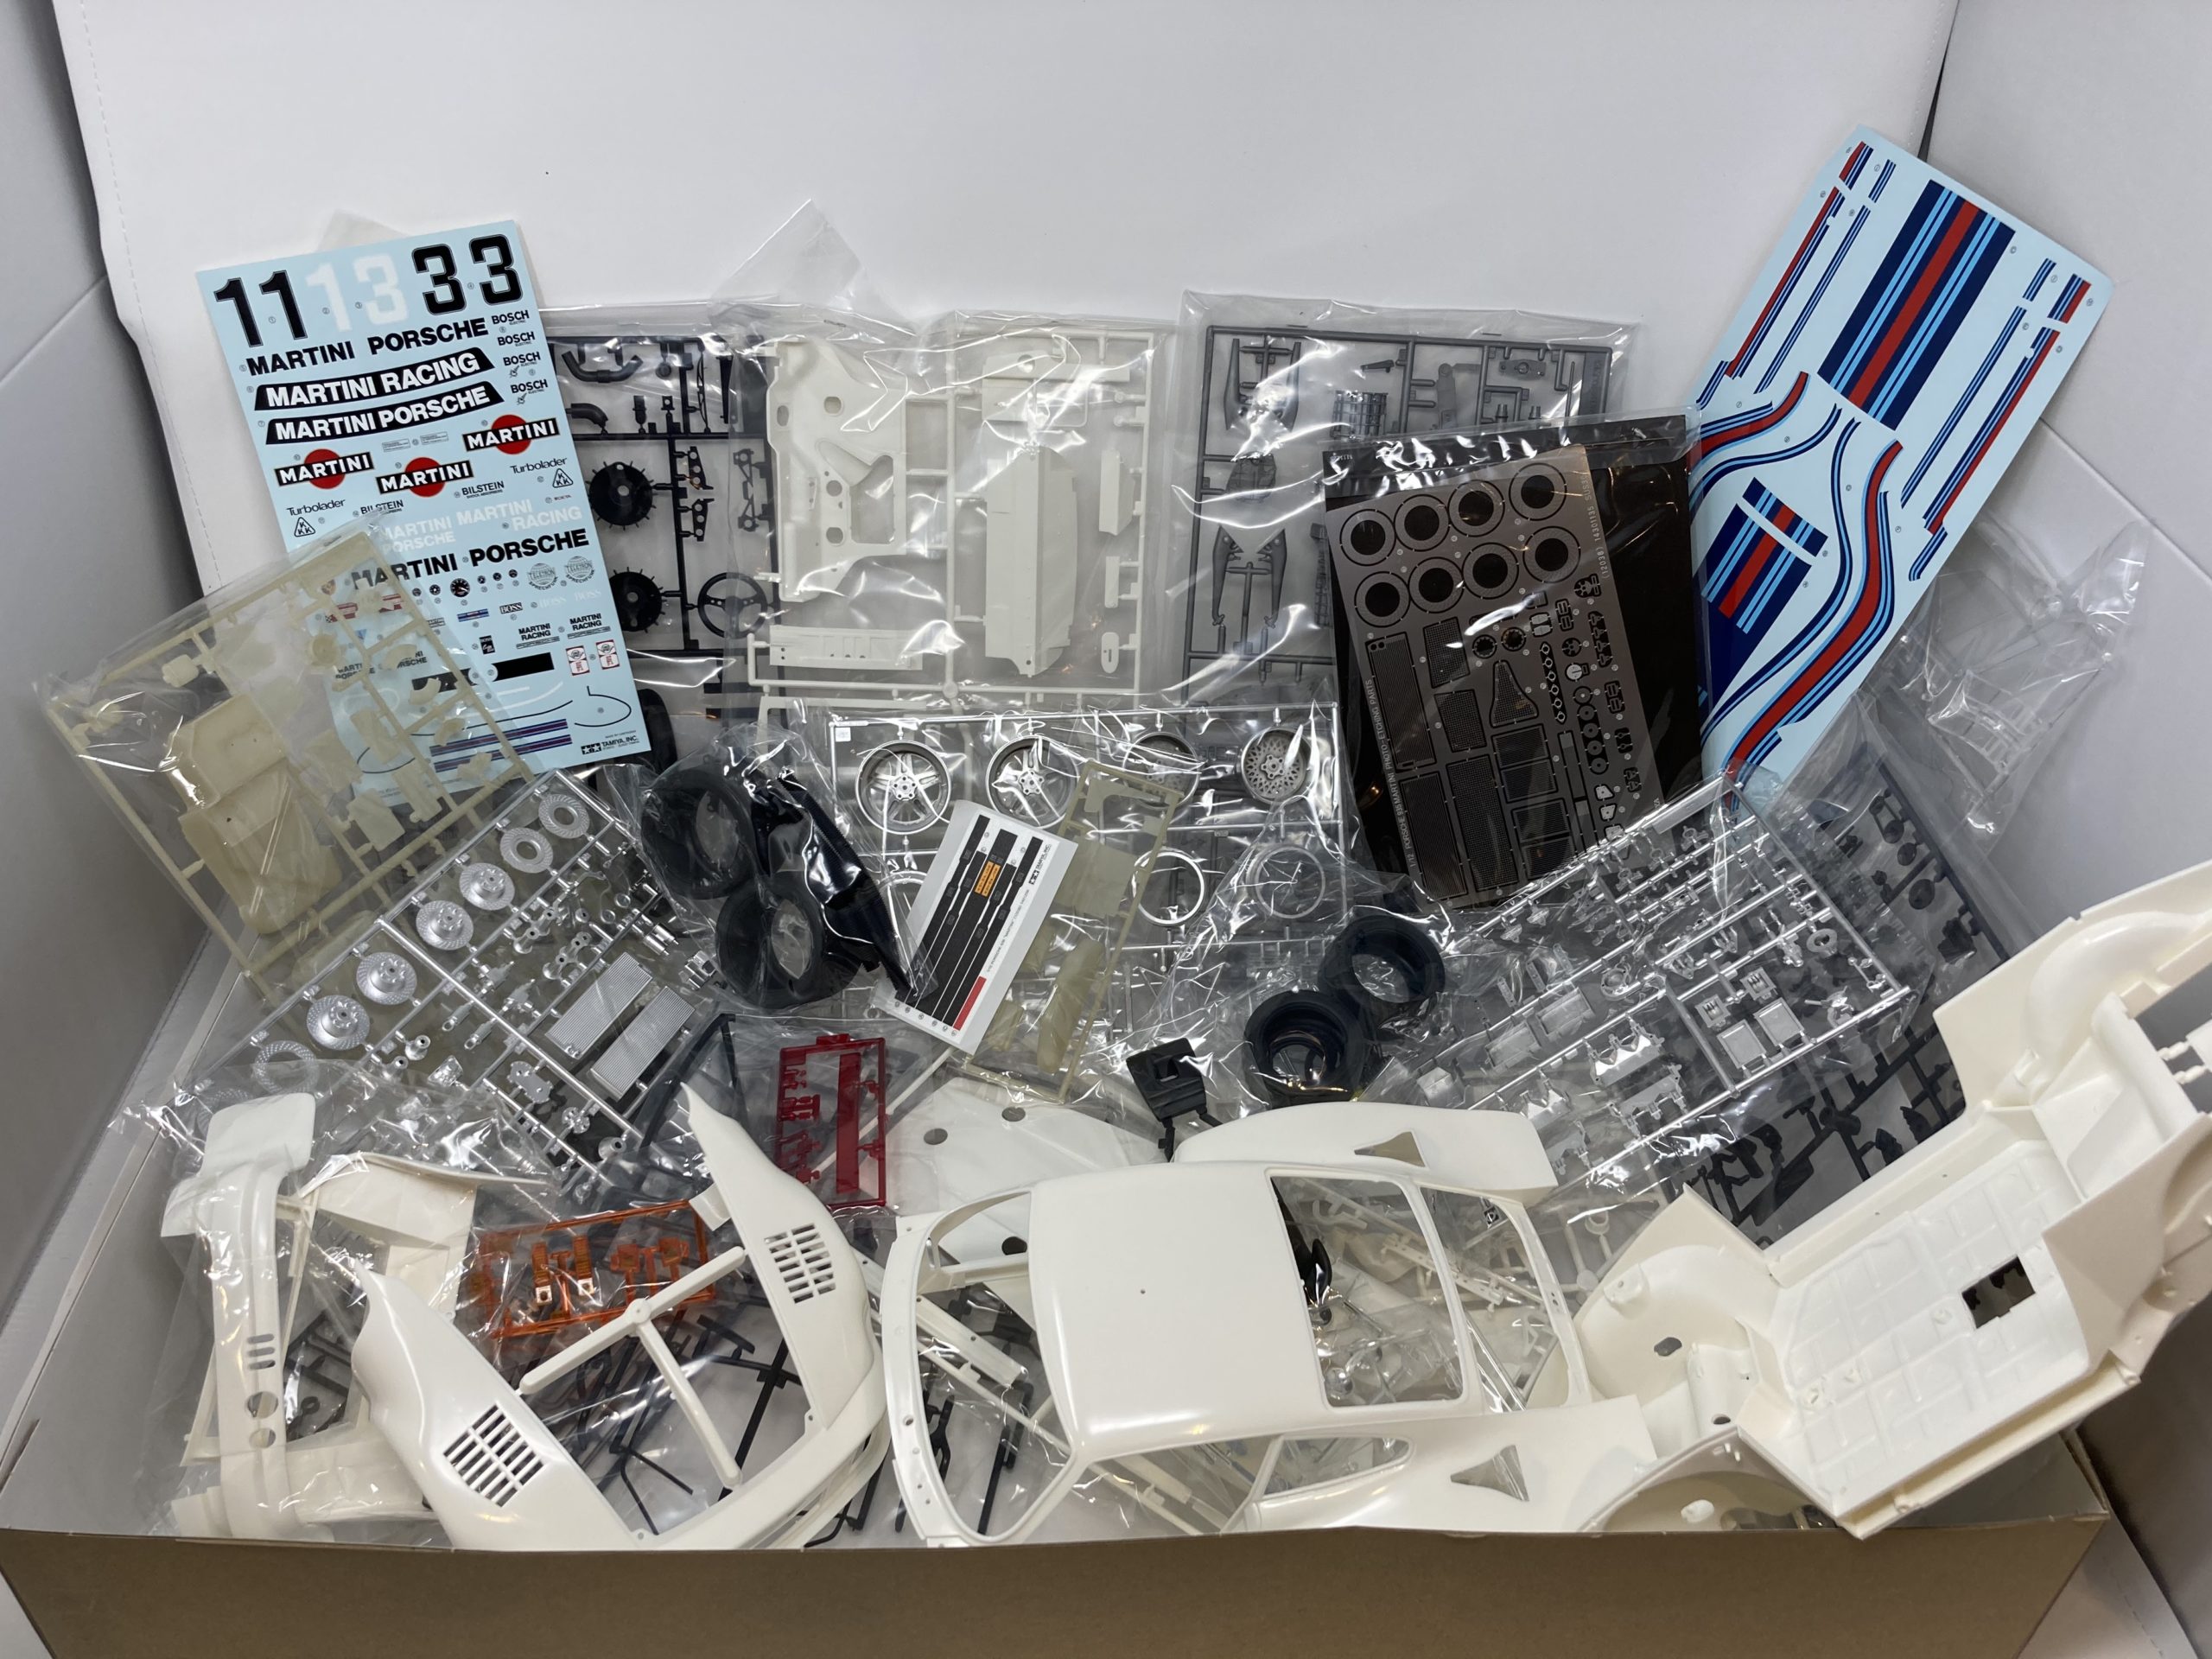
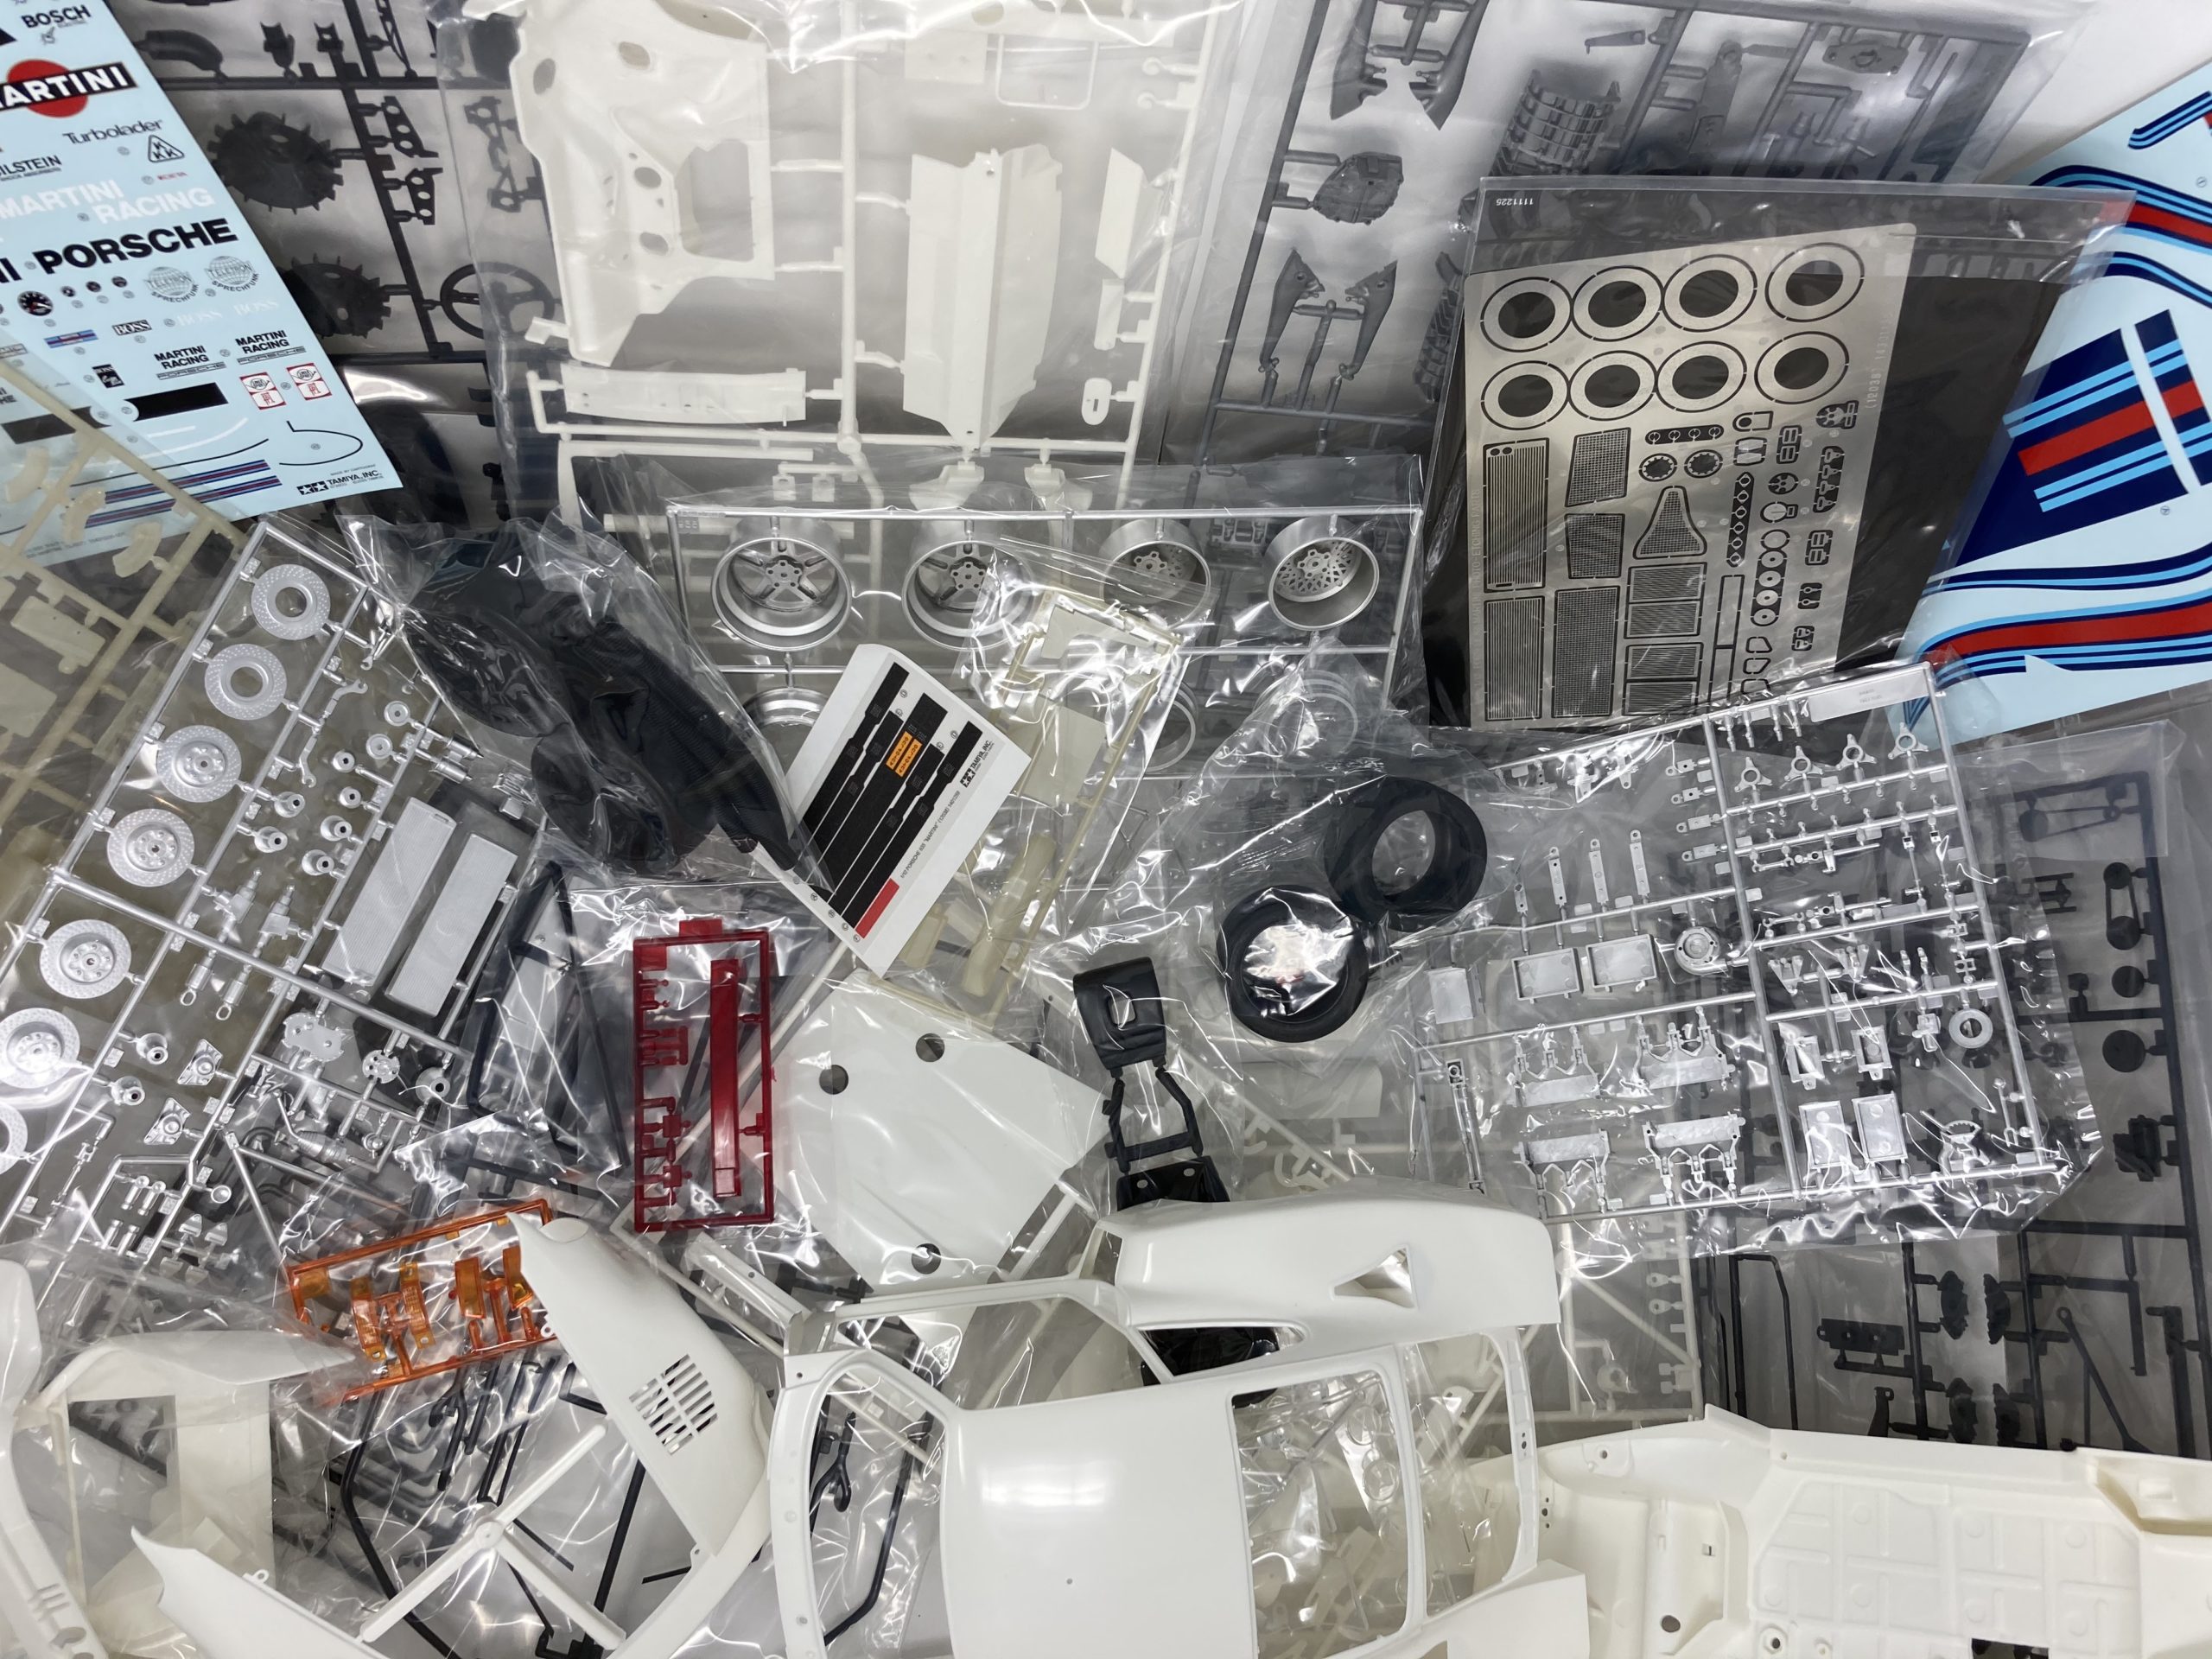
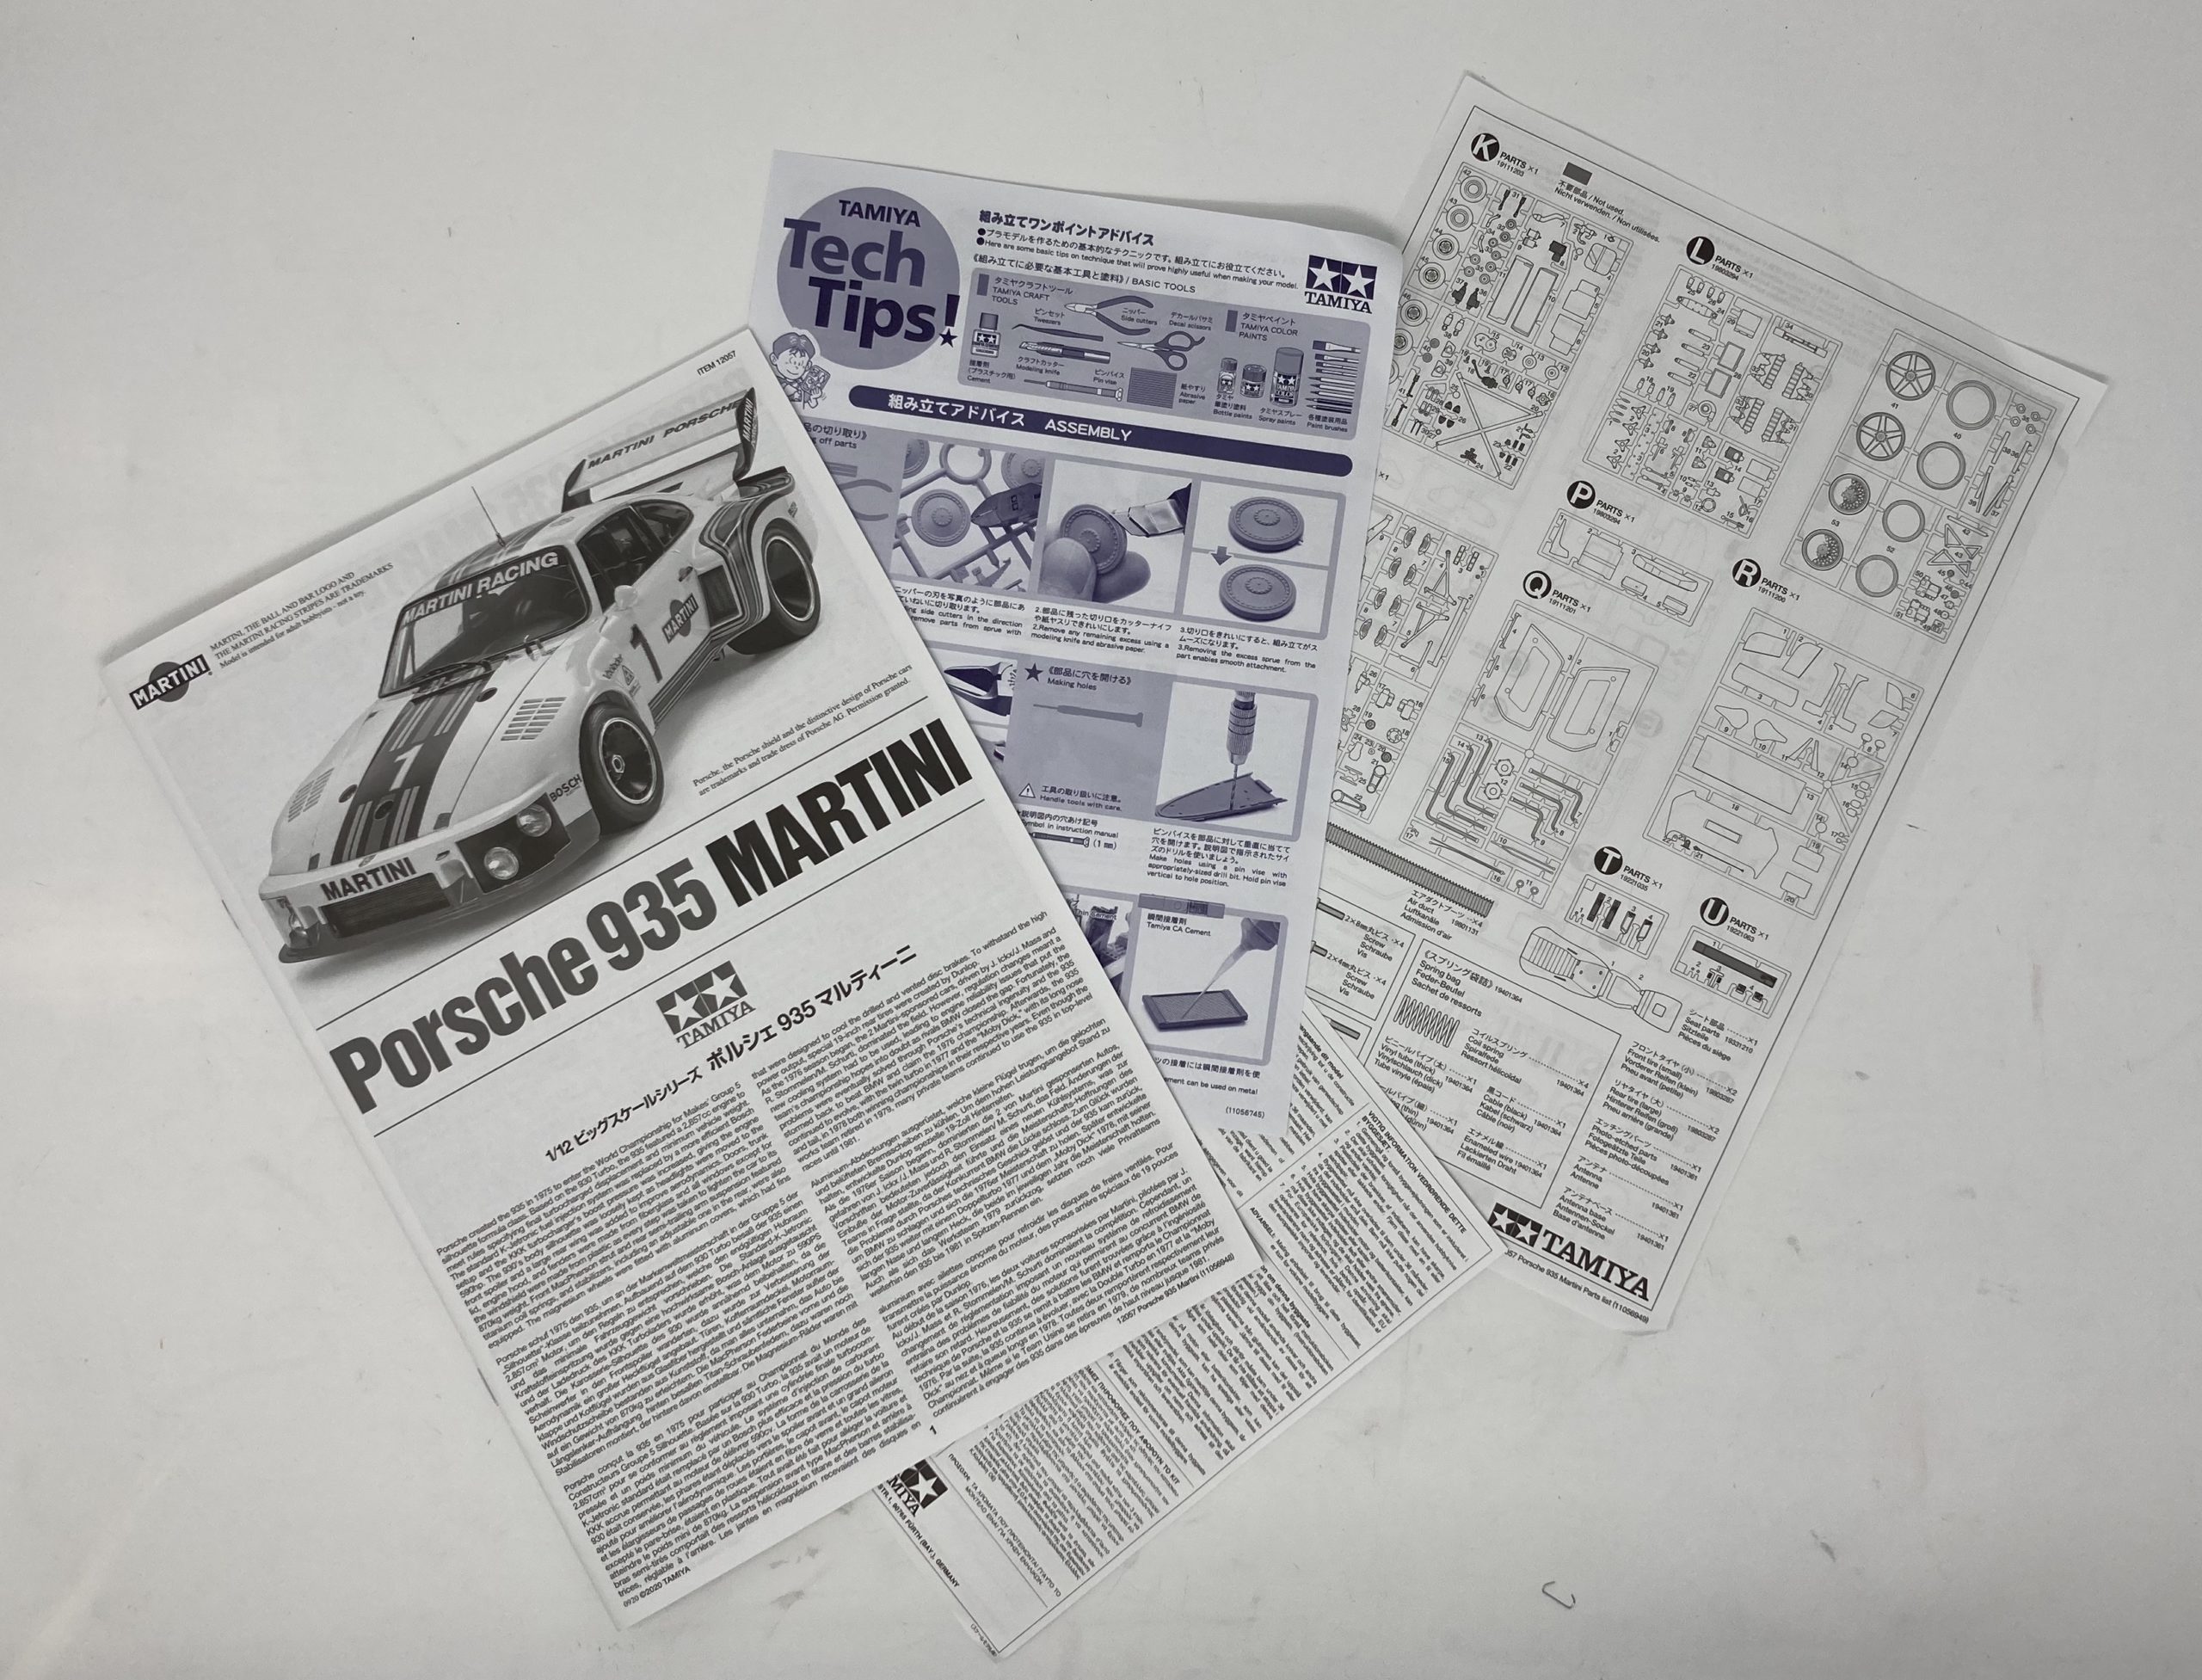
The first thing to say is – ‘lots’!! As with all Tamiya kits, this model is superbly boxed and packed. The many sprues are all bagged separately – with the main body parts in a separate box section. As you would expect with a kit of this size and complexity, there are lots of parts ( about 450 + tubing, metal springs, screws, etc) on a range of sprues in white, grey, black, synthetic rubber, ‘chromed’, clear, translucent etc. It’s all the usual Tamiya high quality. And the excellent instruction manual.

The build
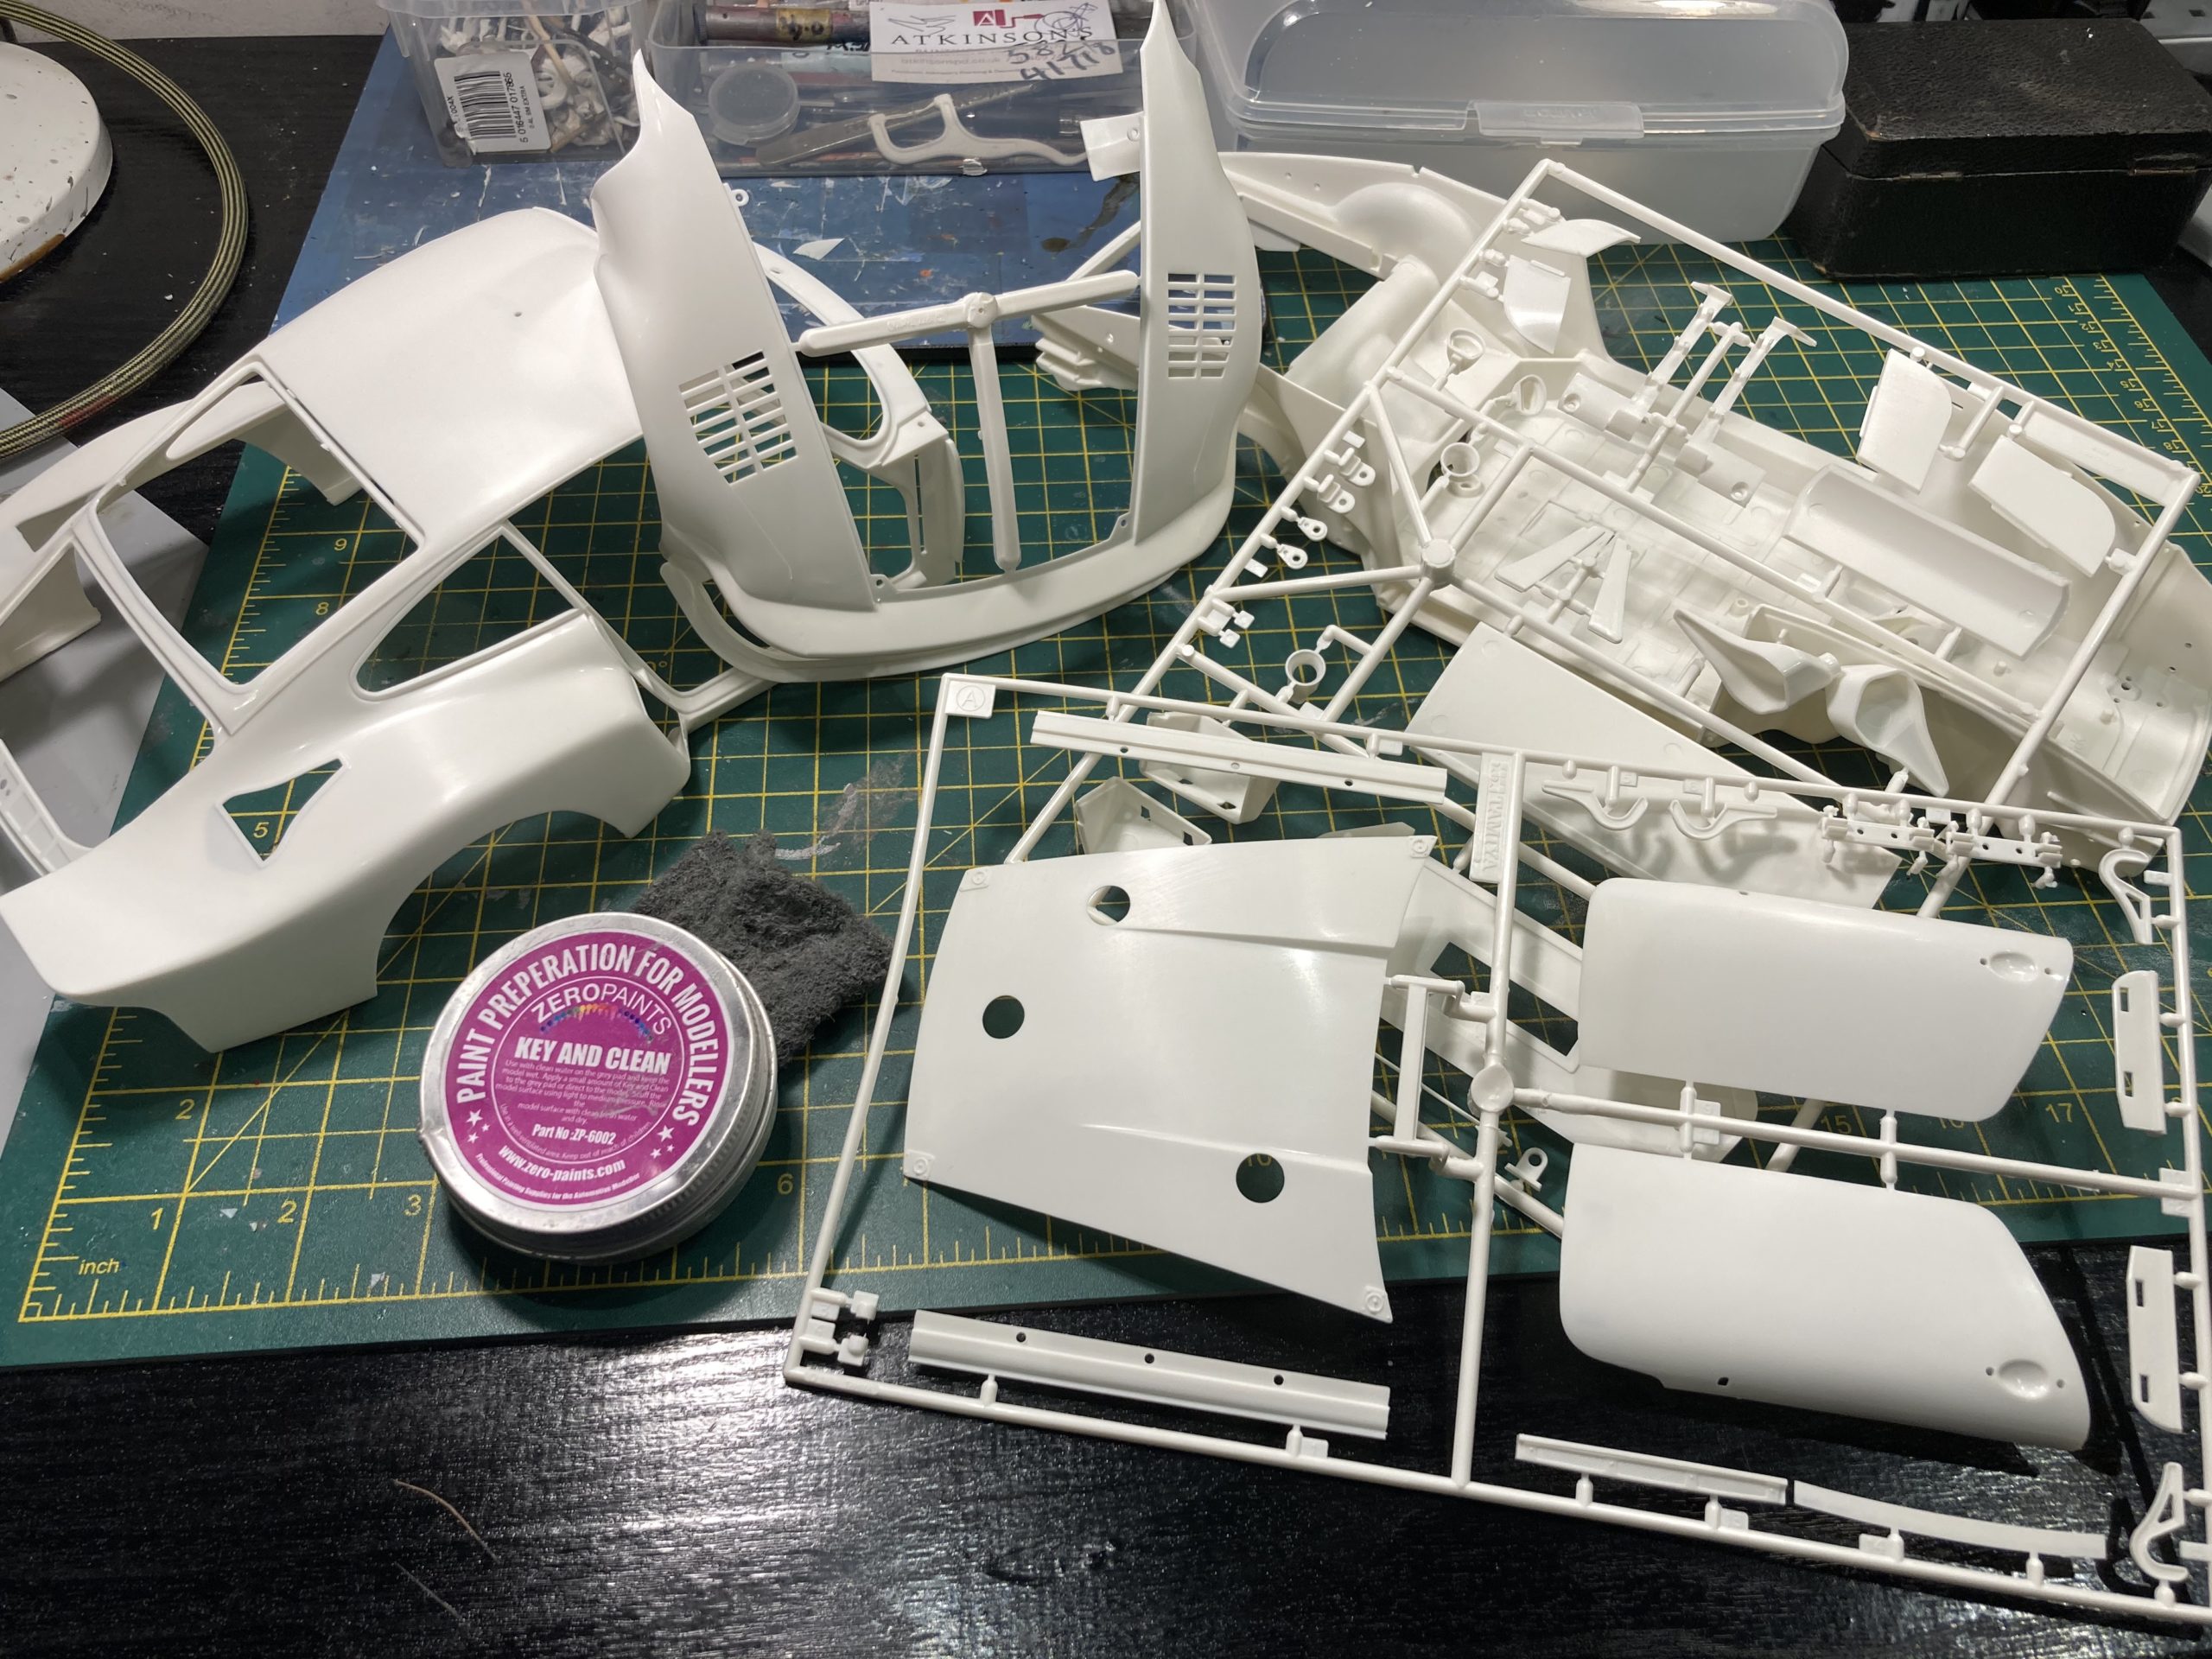
General preparation
All major parts cleaned up with Zero Key and Clean. I’ve been using this quite a bit recently and I find it to be very effective – getting rid of any residue and flatting down the surface of the plastic ready for painting. I don’t use it on the small parts, but certainly on larger painted body panels where paintwork is likely to be masked over it’s essential to use something like this to get paint adhesion. I’m sure other model makers will have their ‘go-to’ products for this step – but whatever is used it’s essential to get the manufacturing residue off the parts and very lightly flat down the surface of the plastic. A gentle Scotchbrite pad and some mild kitchen abrasive (Jif comes to mind) would do the trick. The Tamiya lacquer paints then get a really good adhesion and there should be absolutely no problem with paint lifting after (good quality) masking tape has been applied on top.
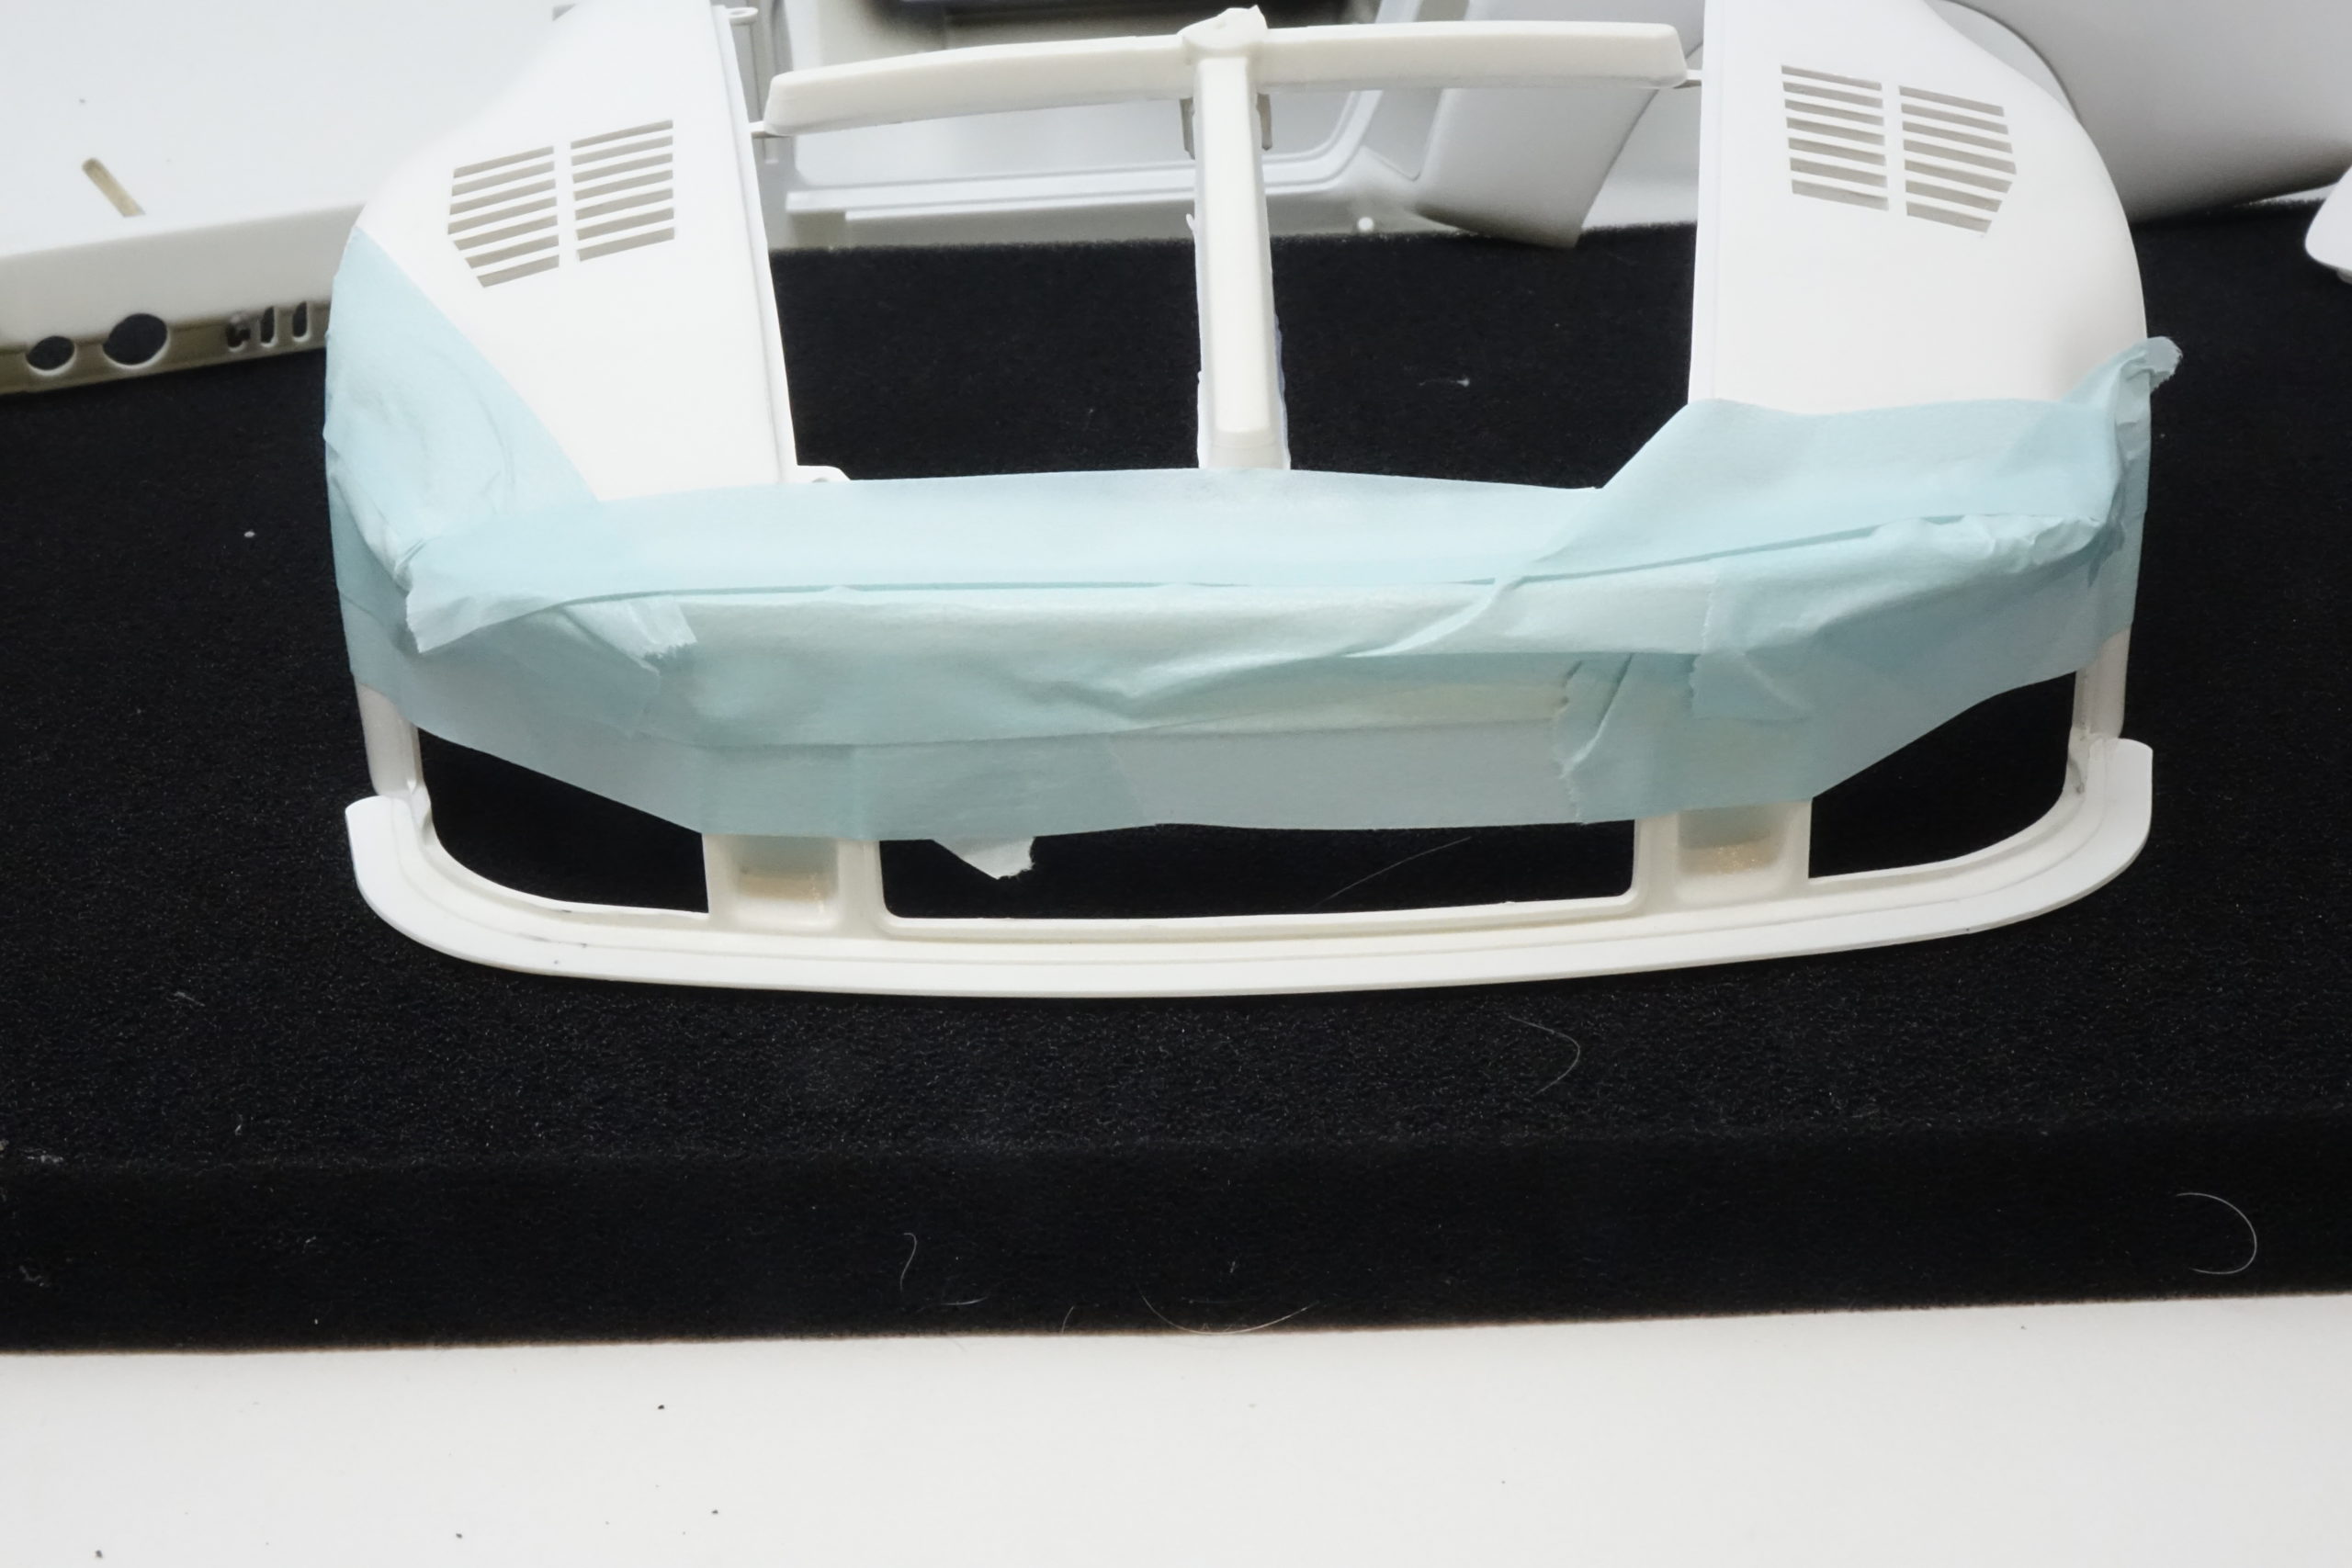
For masking I’ve been using MT Washi tape for a while now and I find it to to be excellent.
First steps
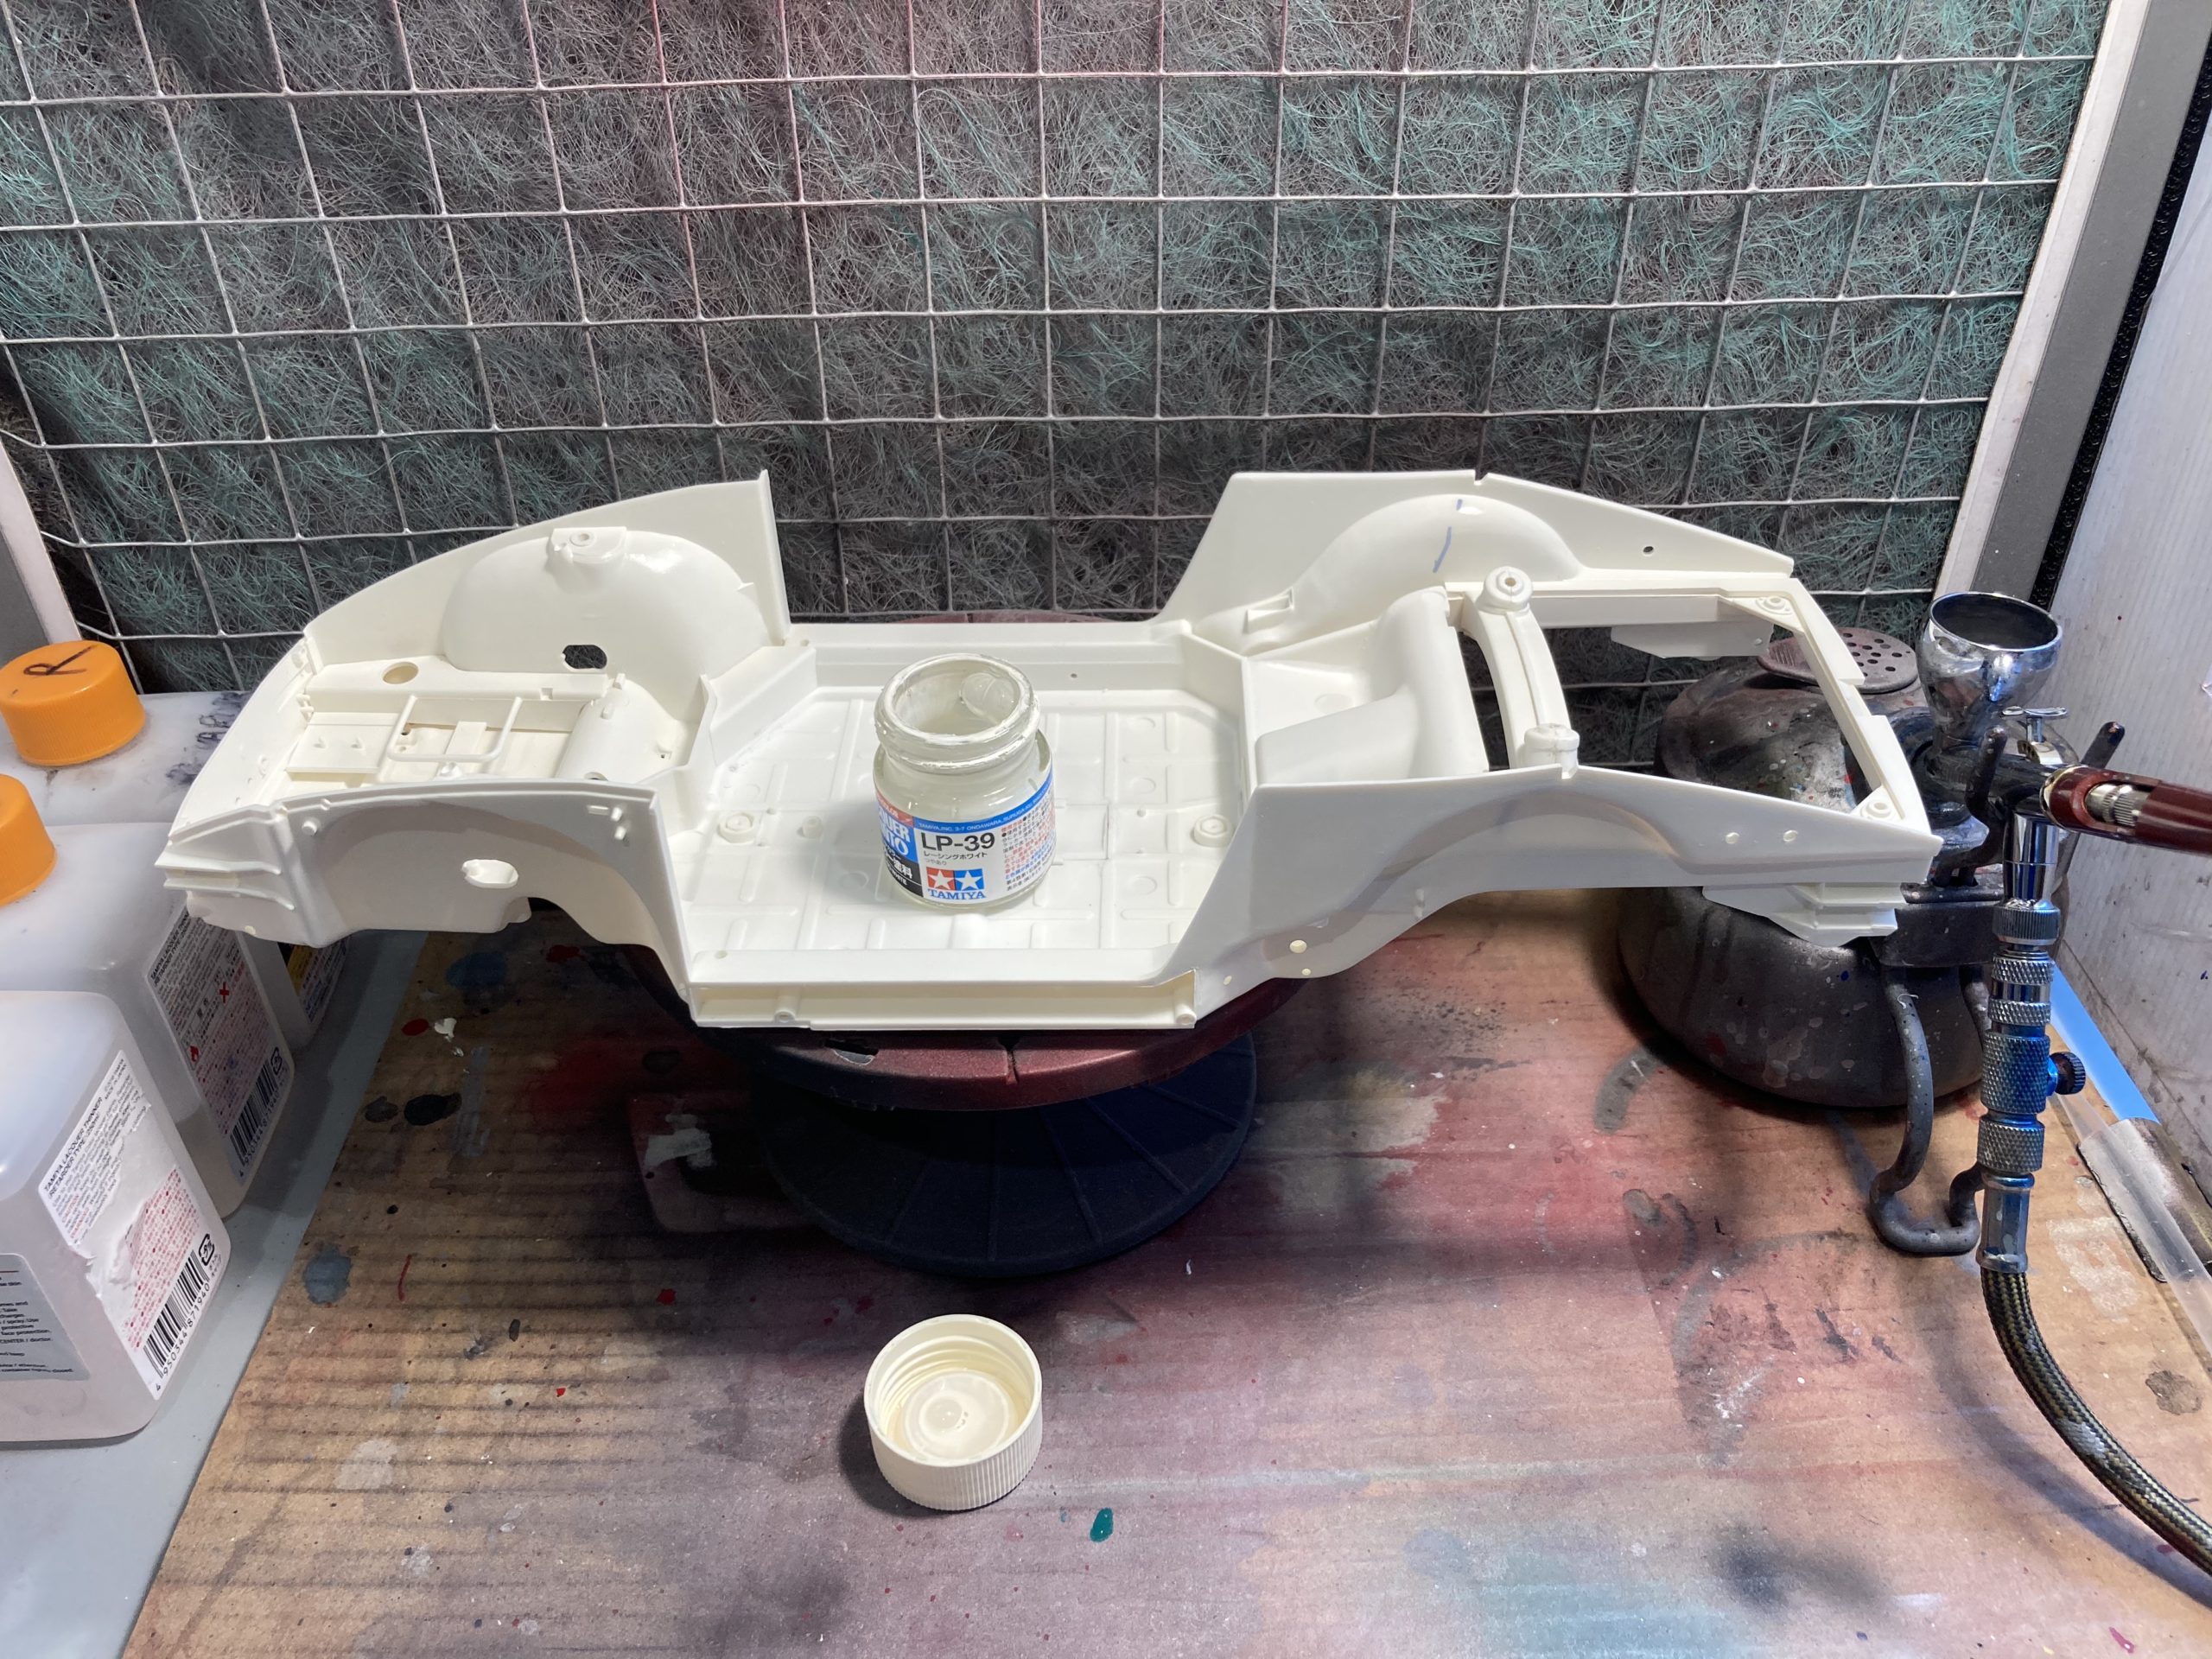
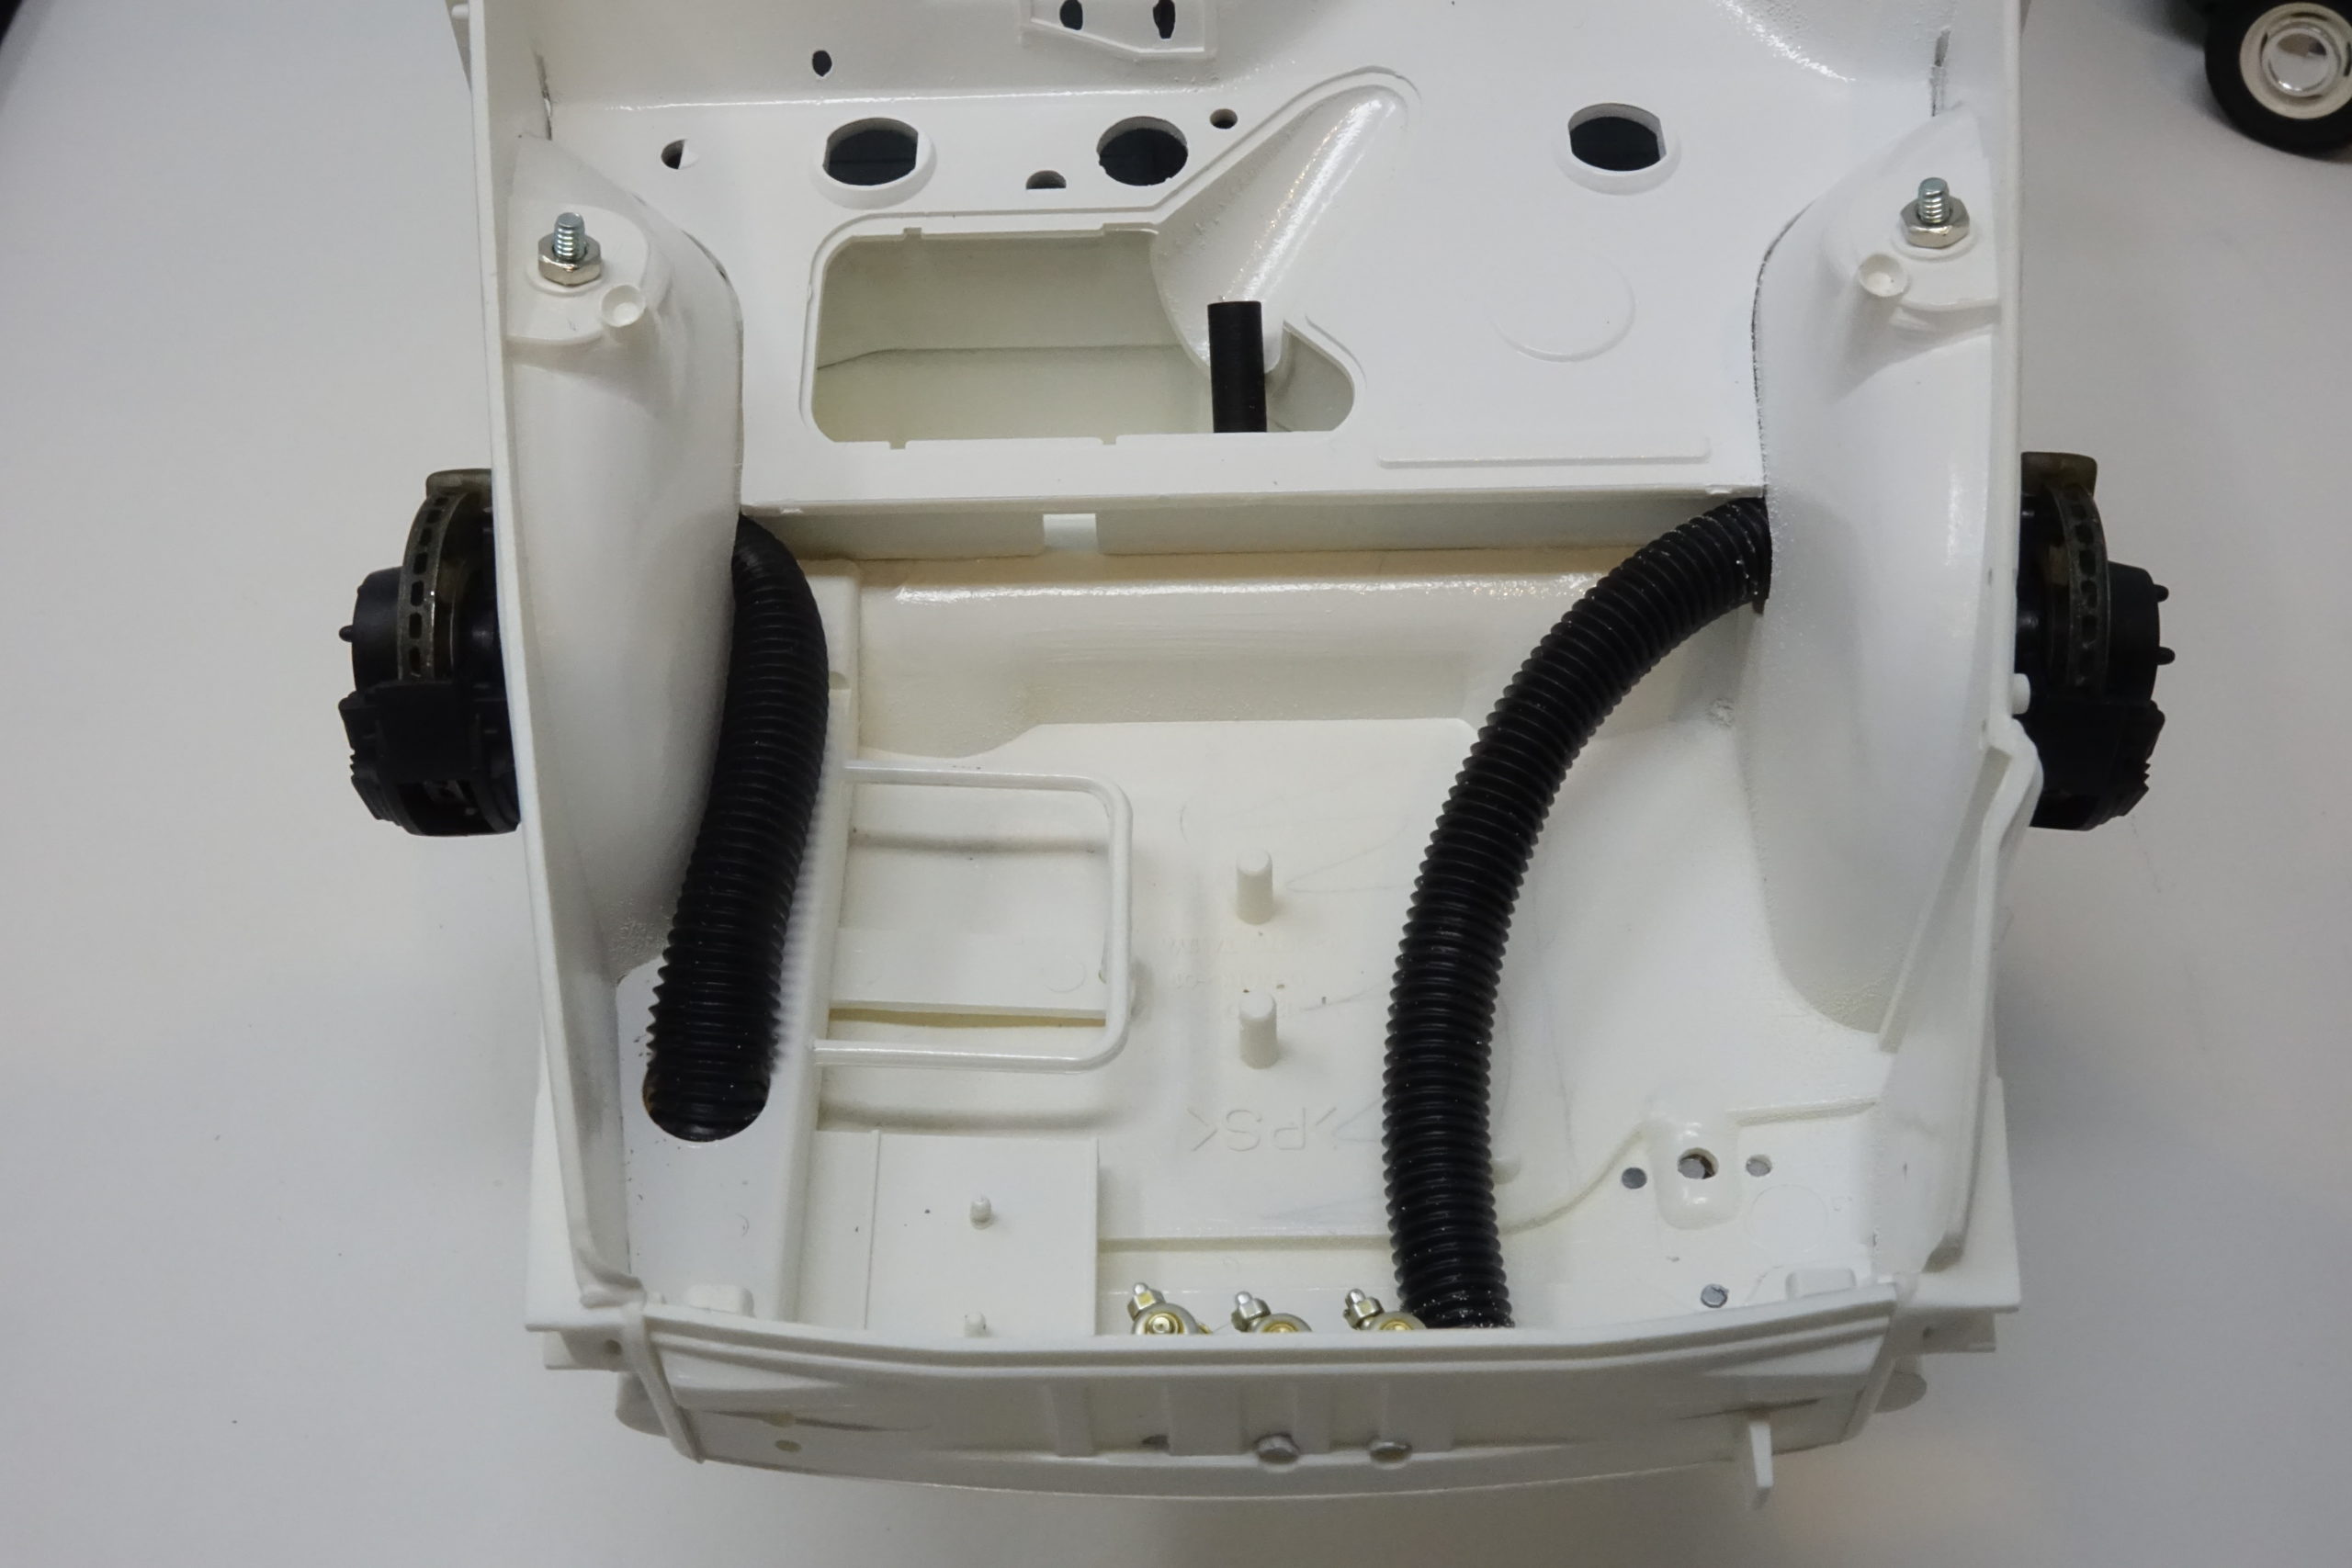
To start with the chassis/floorpan had some components from step1 added prior to spraying white body colour, and some body parts fitted.
The white paint used throughout this build is Tamiya LP Pure White LP2. I considered, and tested, and started with LP39 Racing White – but this model needs a really clean, bright white. So, LP2 it had to be. I repainted the few areas I had already done in LP39 and away I went….
The floor pan was painted and the rear panel sprayed LP3 Flat Black
For the front scuttle – LP3 inside/LP2 on engine top side
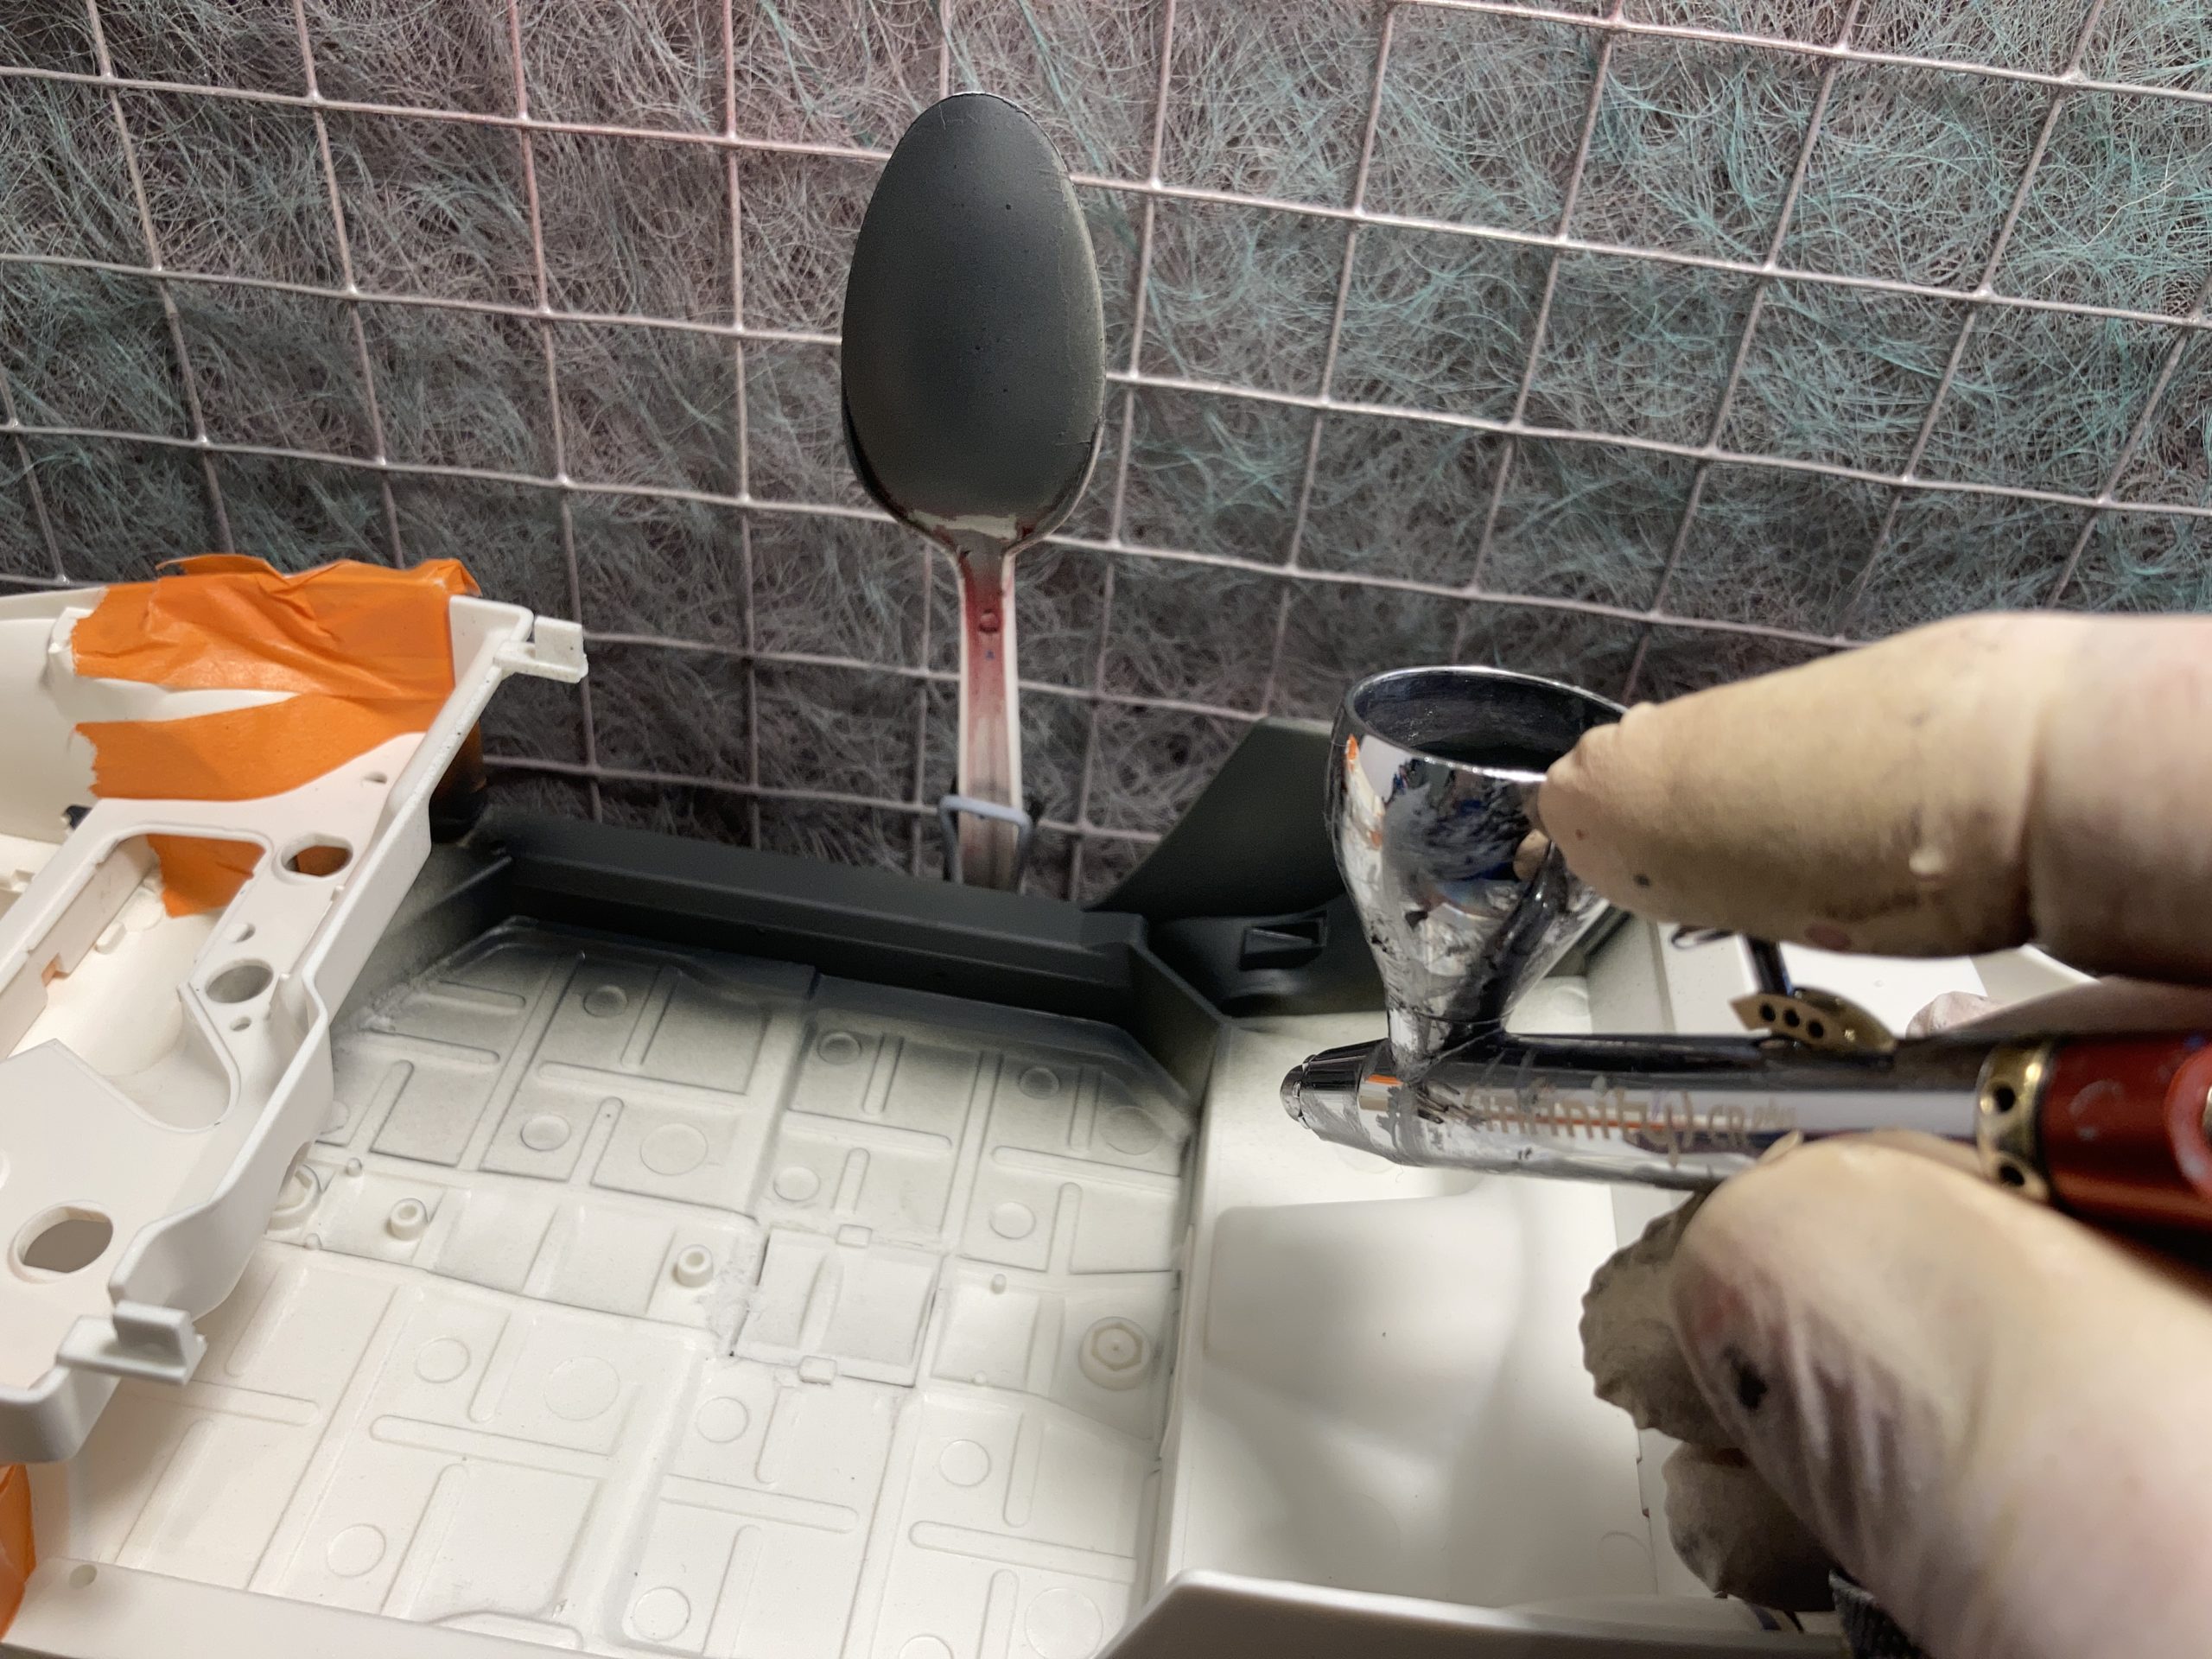
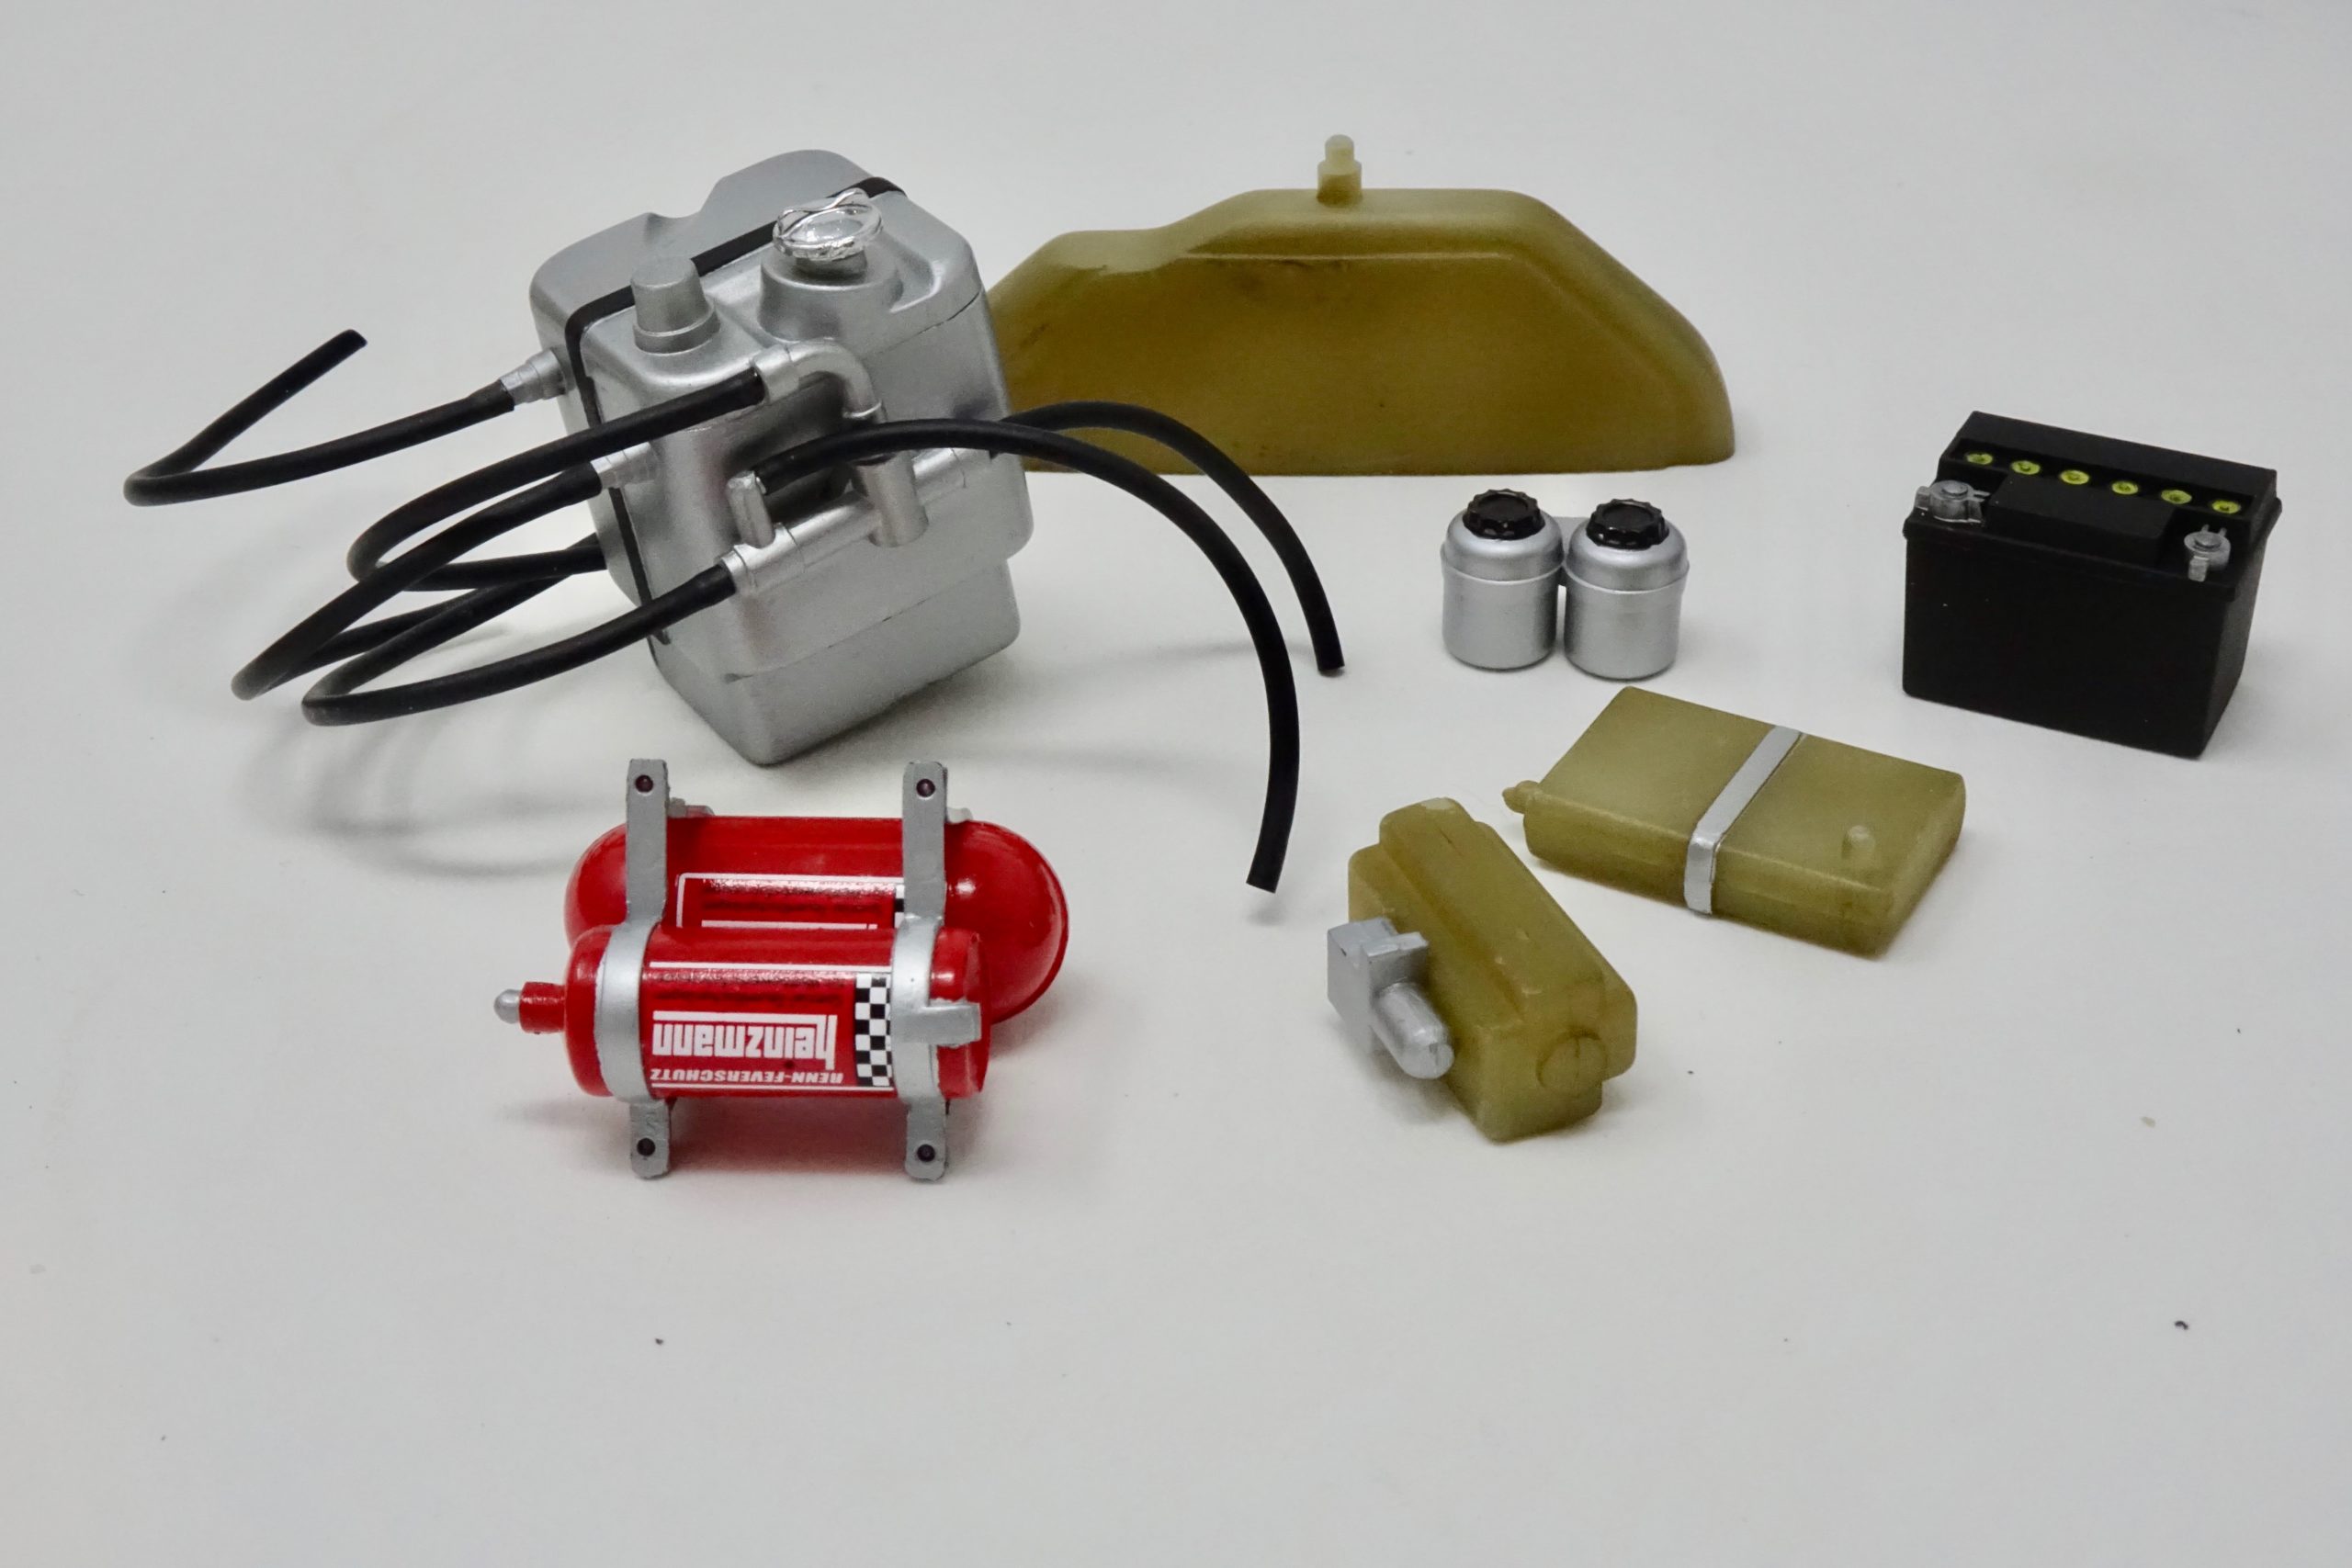
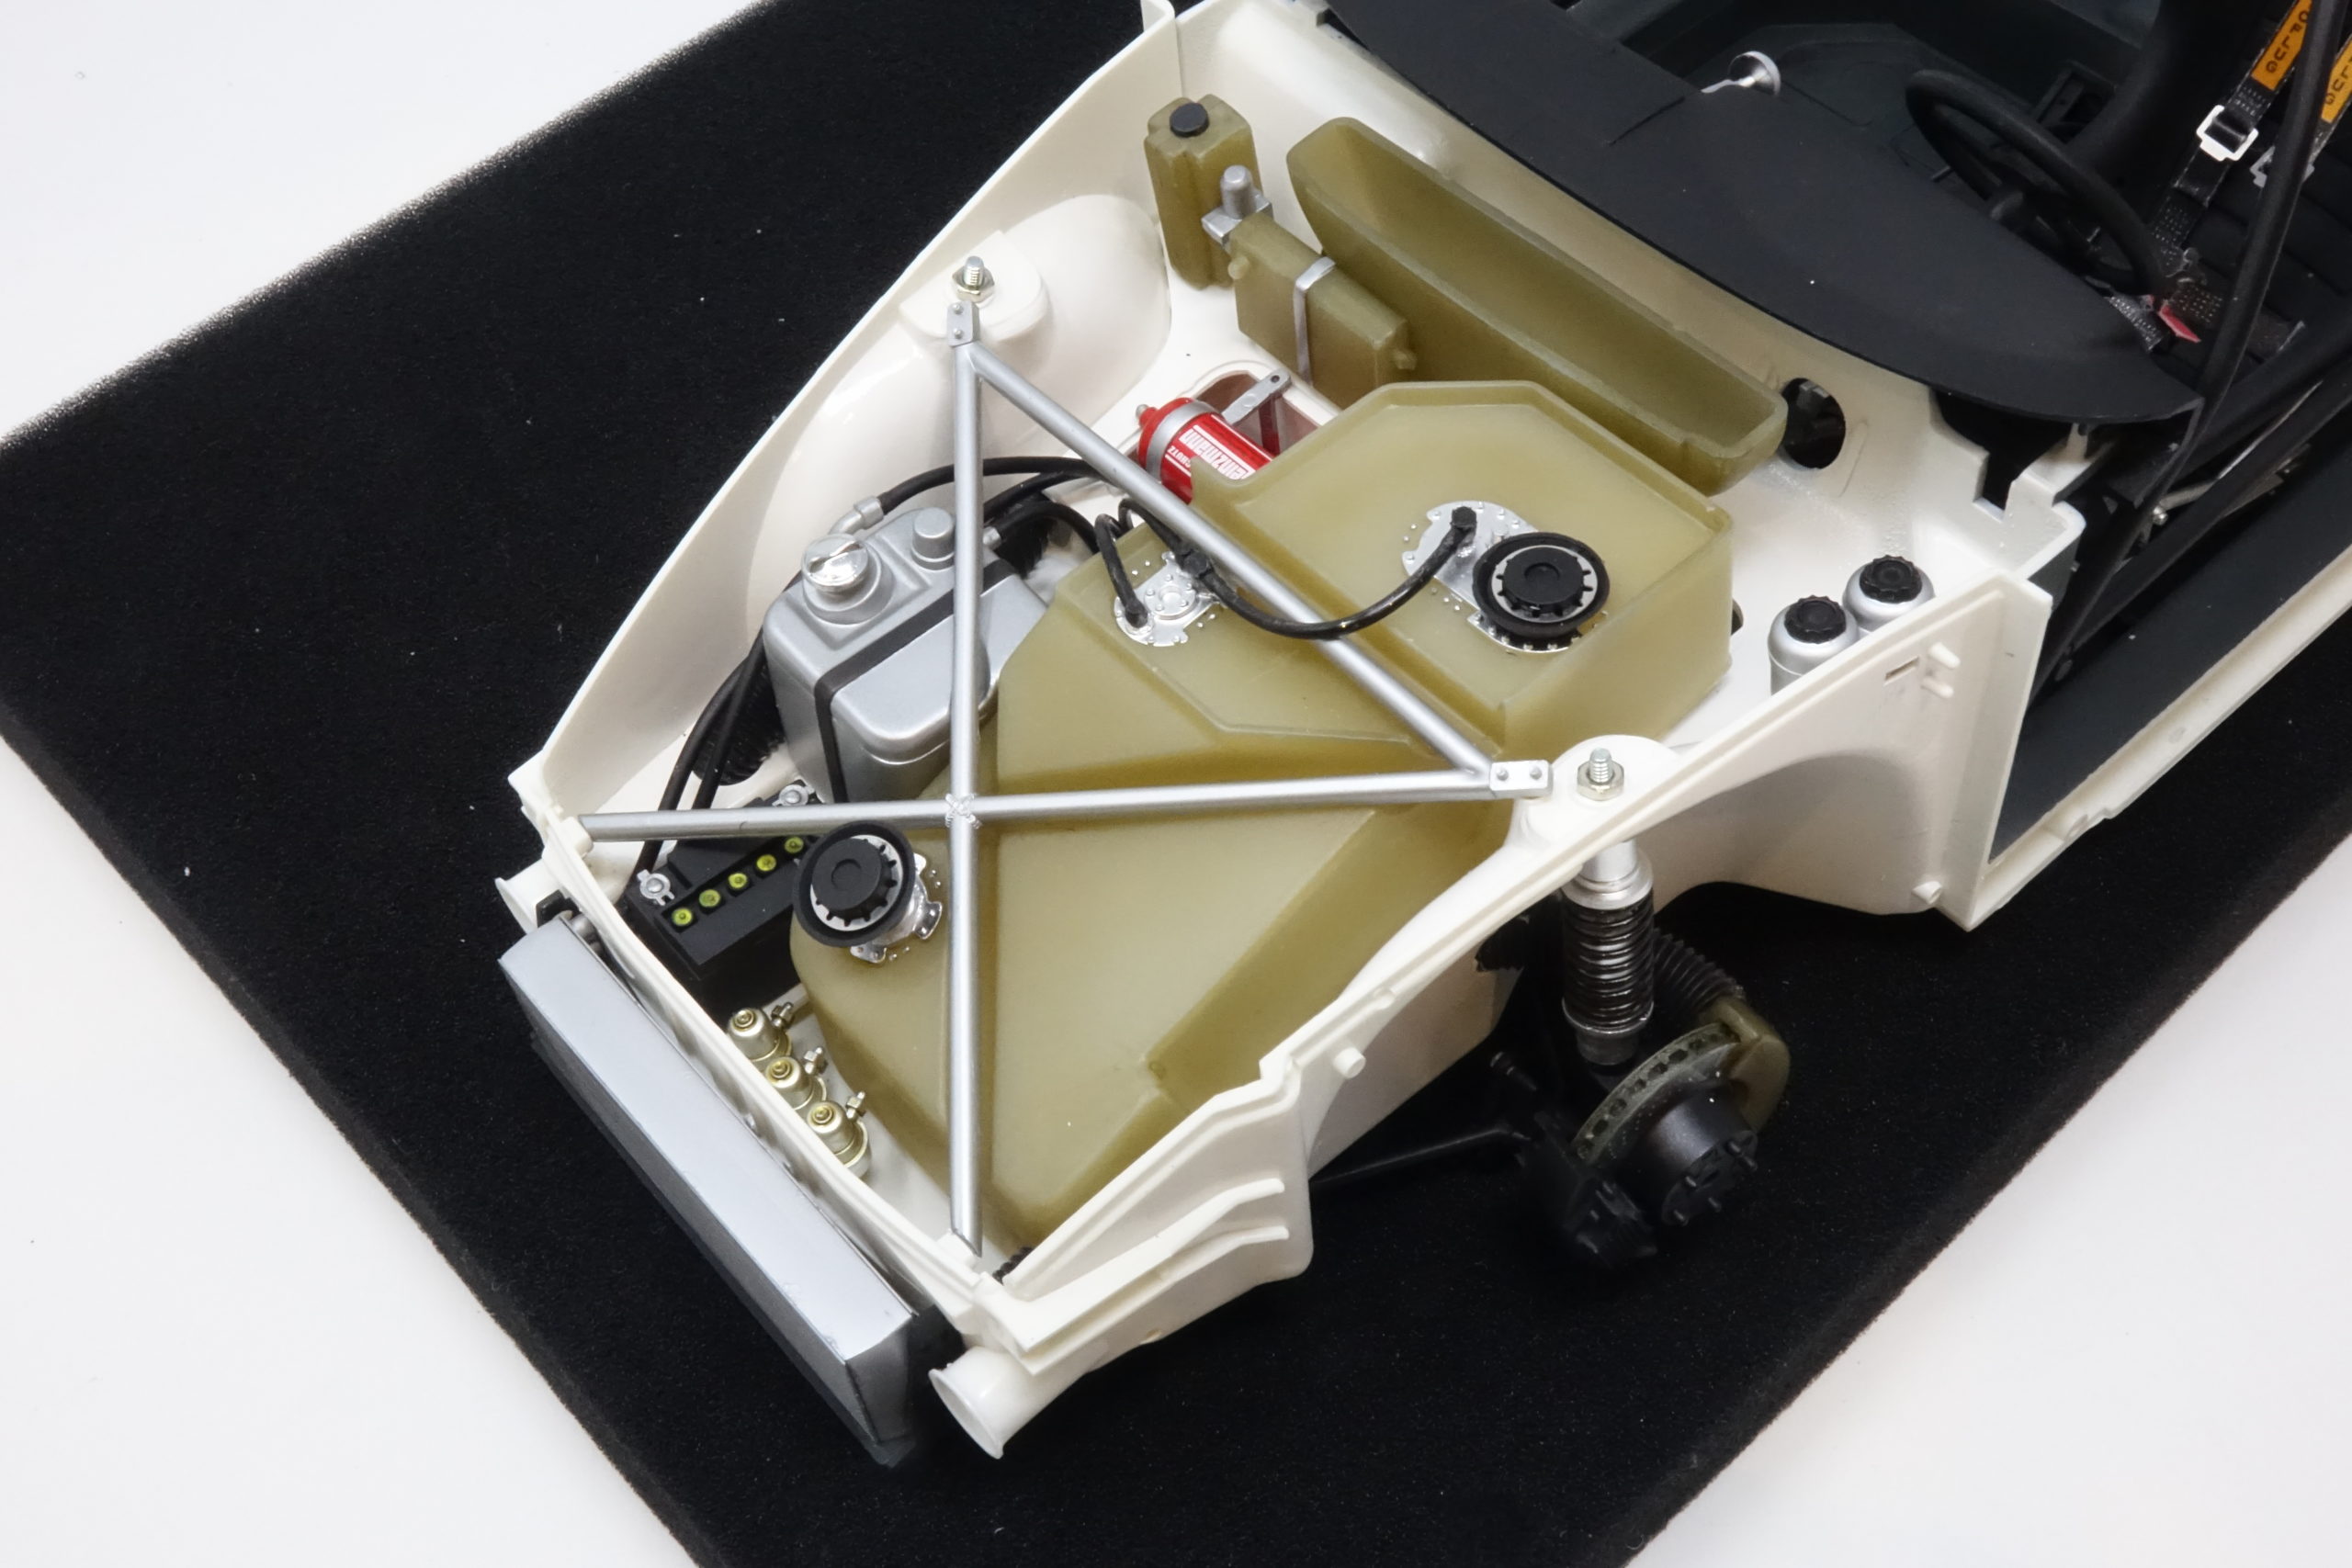
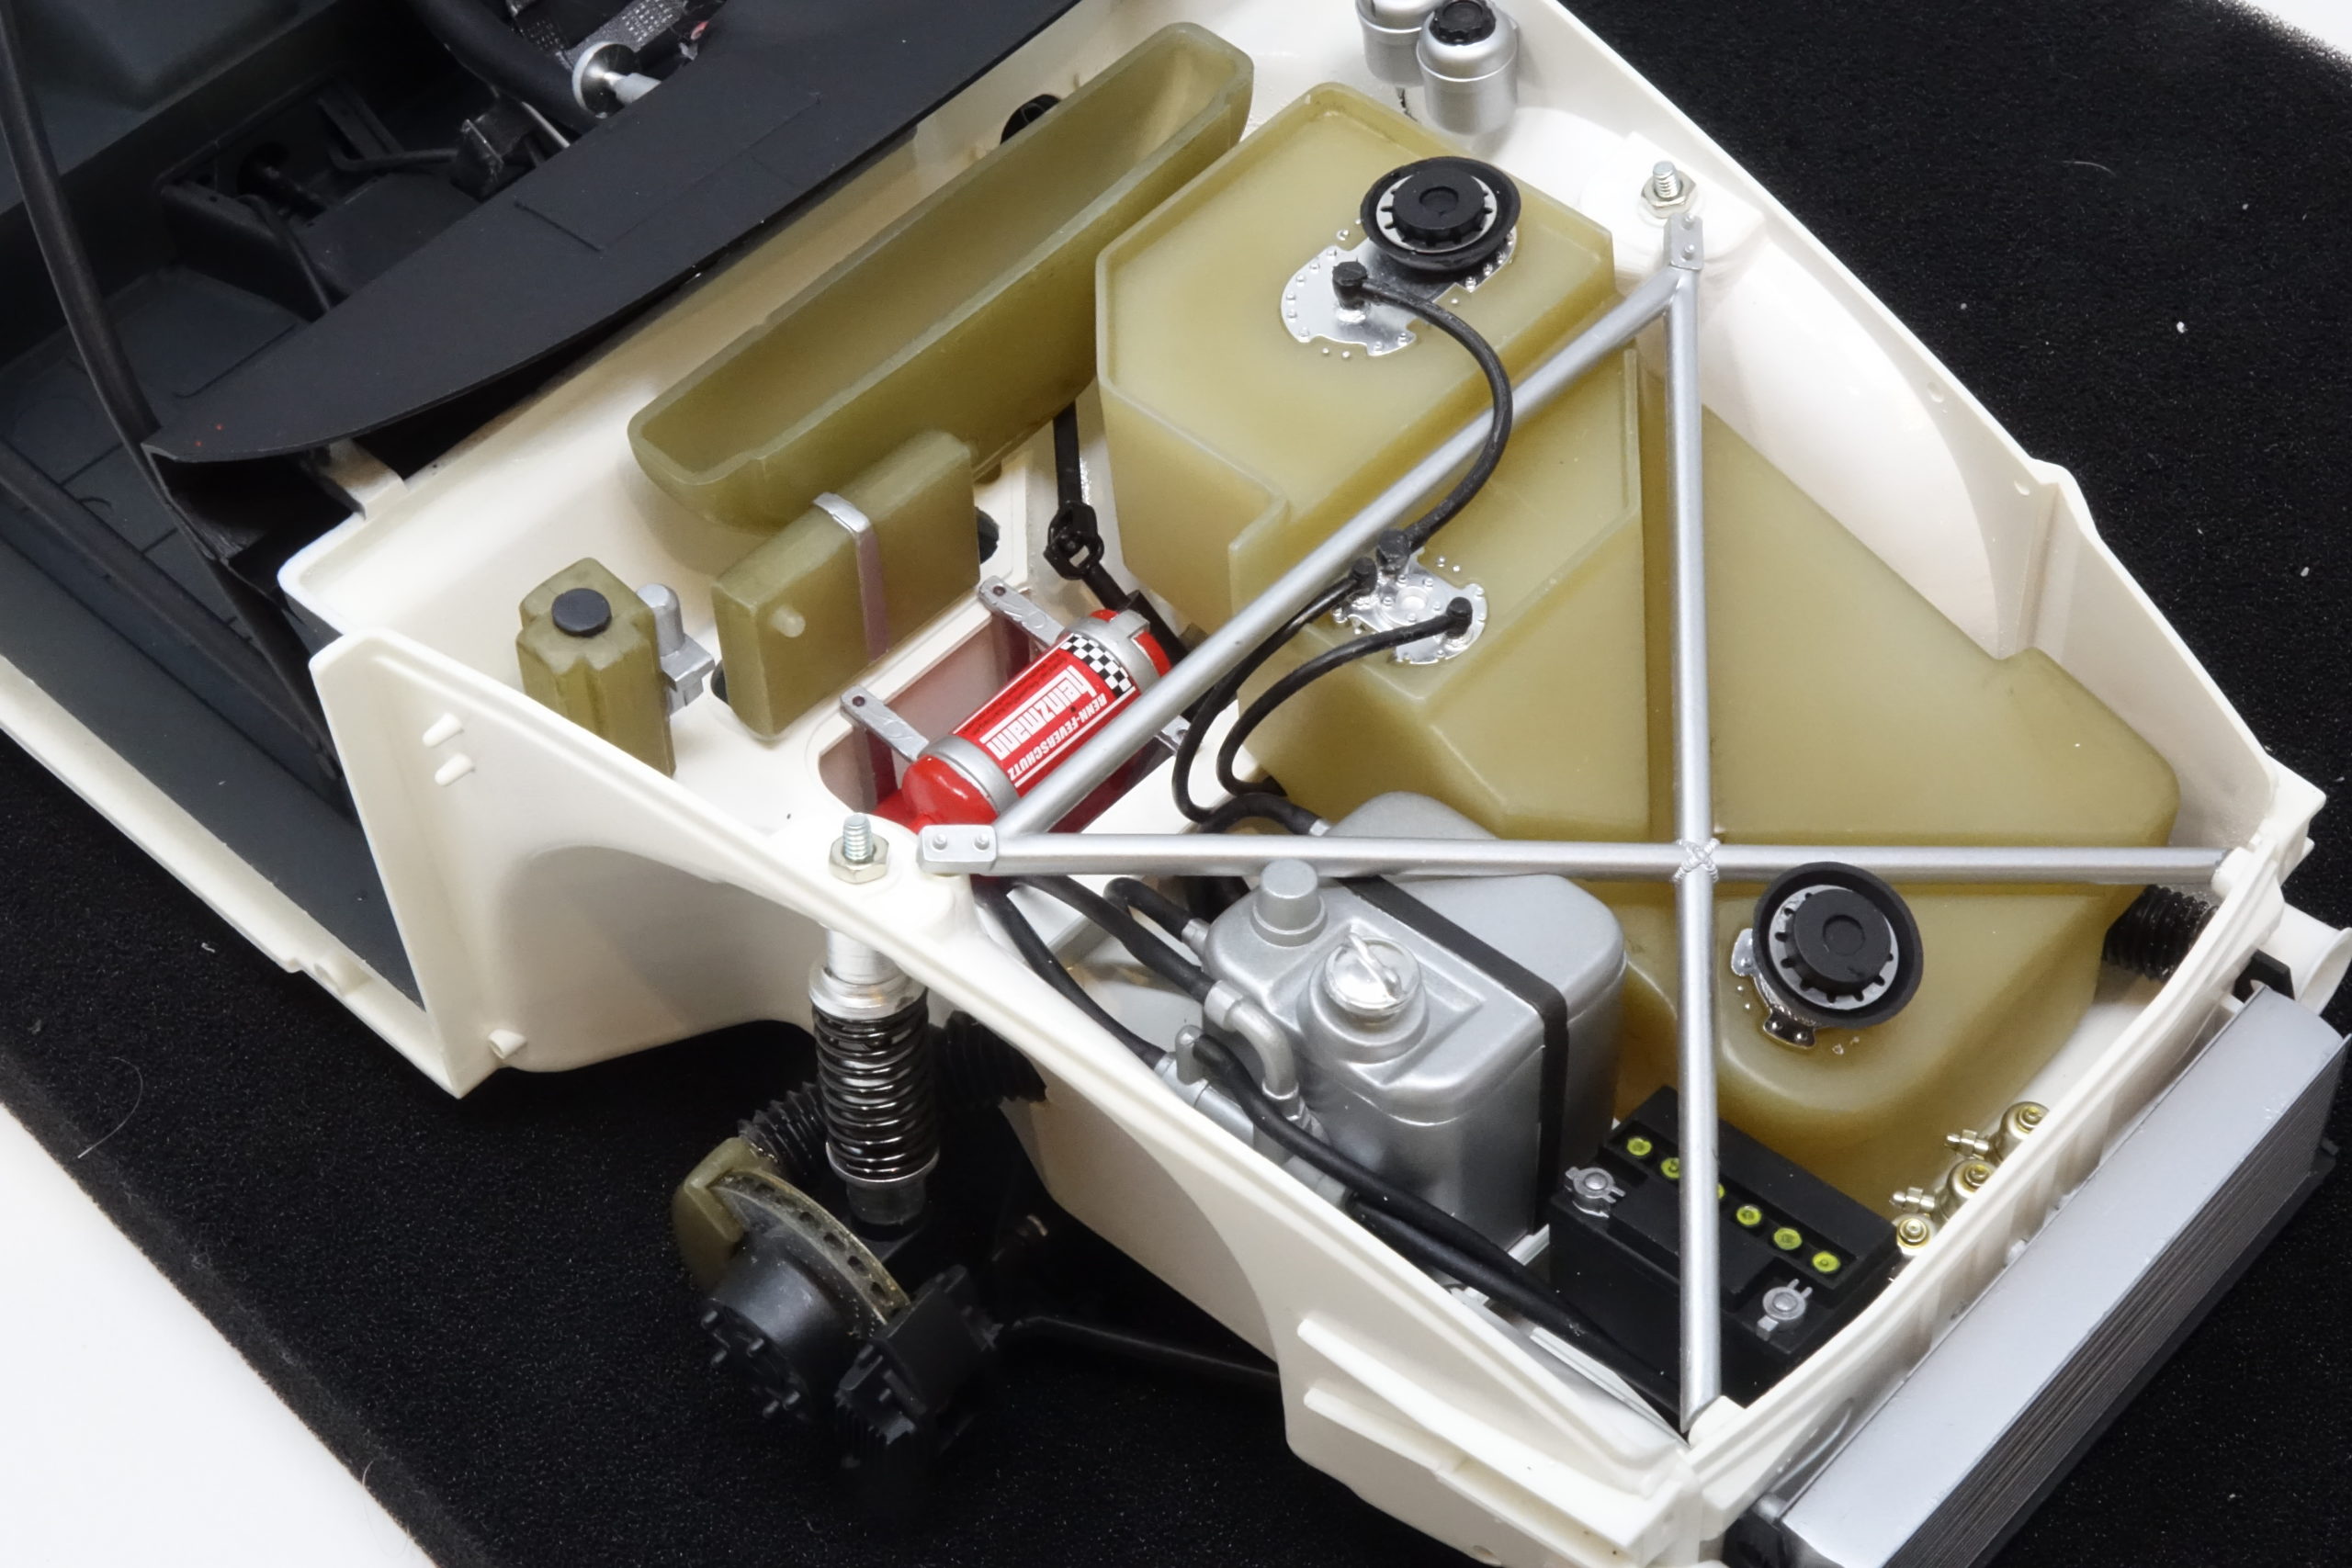
The 3 x pumps from the chrome sprue were fitted on front valance with oil/dark wash added to bring out detail.
Throughout the build any washes applied were mixed with Tamiya Acrylics (the Acrylic is less likely to affect any previously Lacquer Painted areas – so a few drops of Clear Orange + a few drops of Black mixed in a few mls of Acrylic Thinners. The tone/density can be changed by just varying the mix and then it’s try it and see. I usually mix a small quantity in a spare bottle and adjust it as I go through the build.
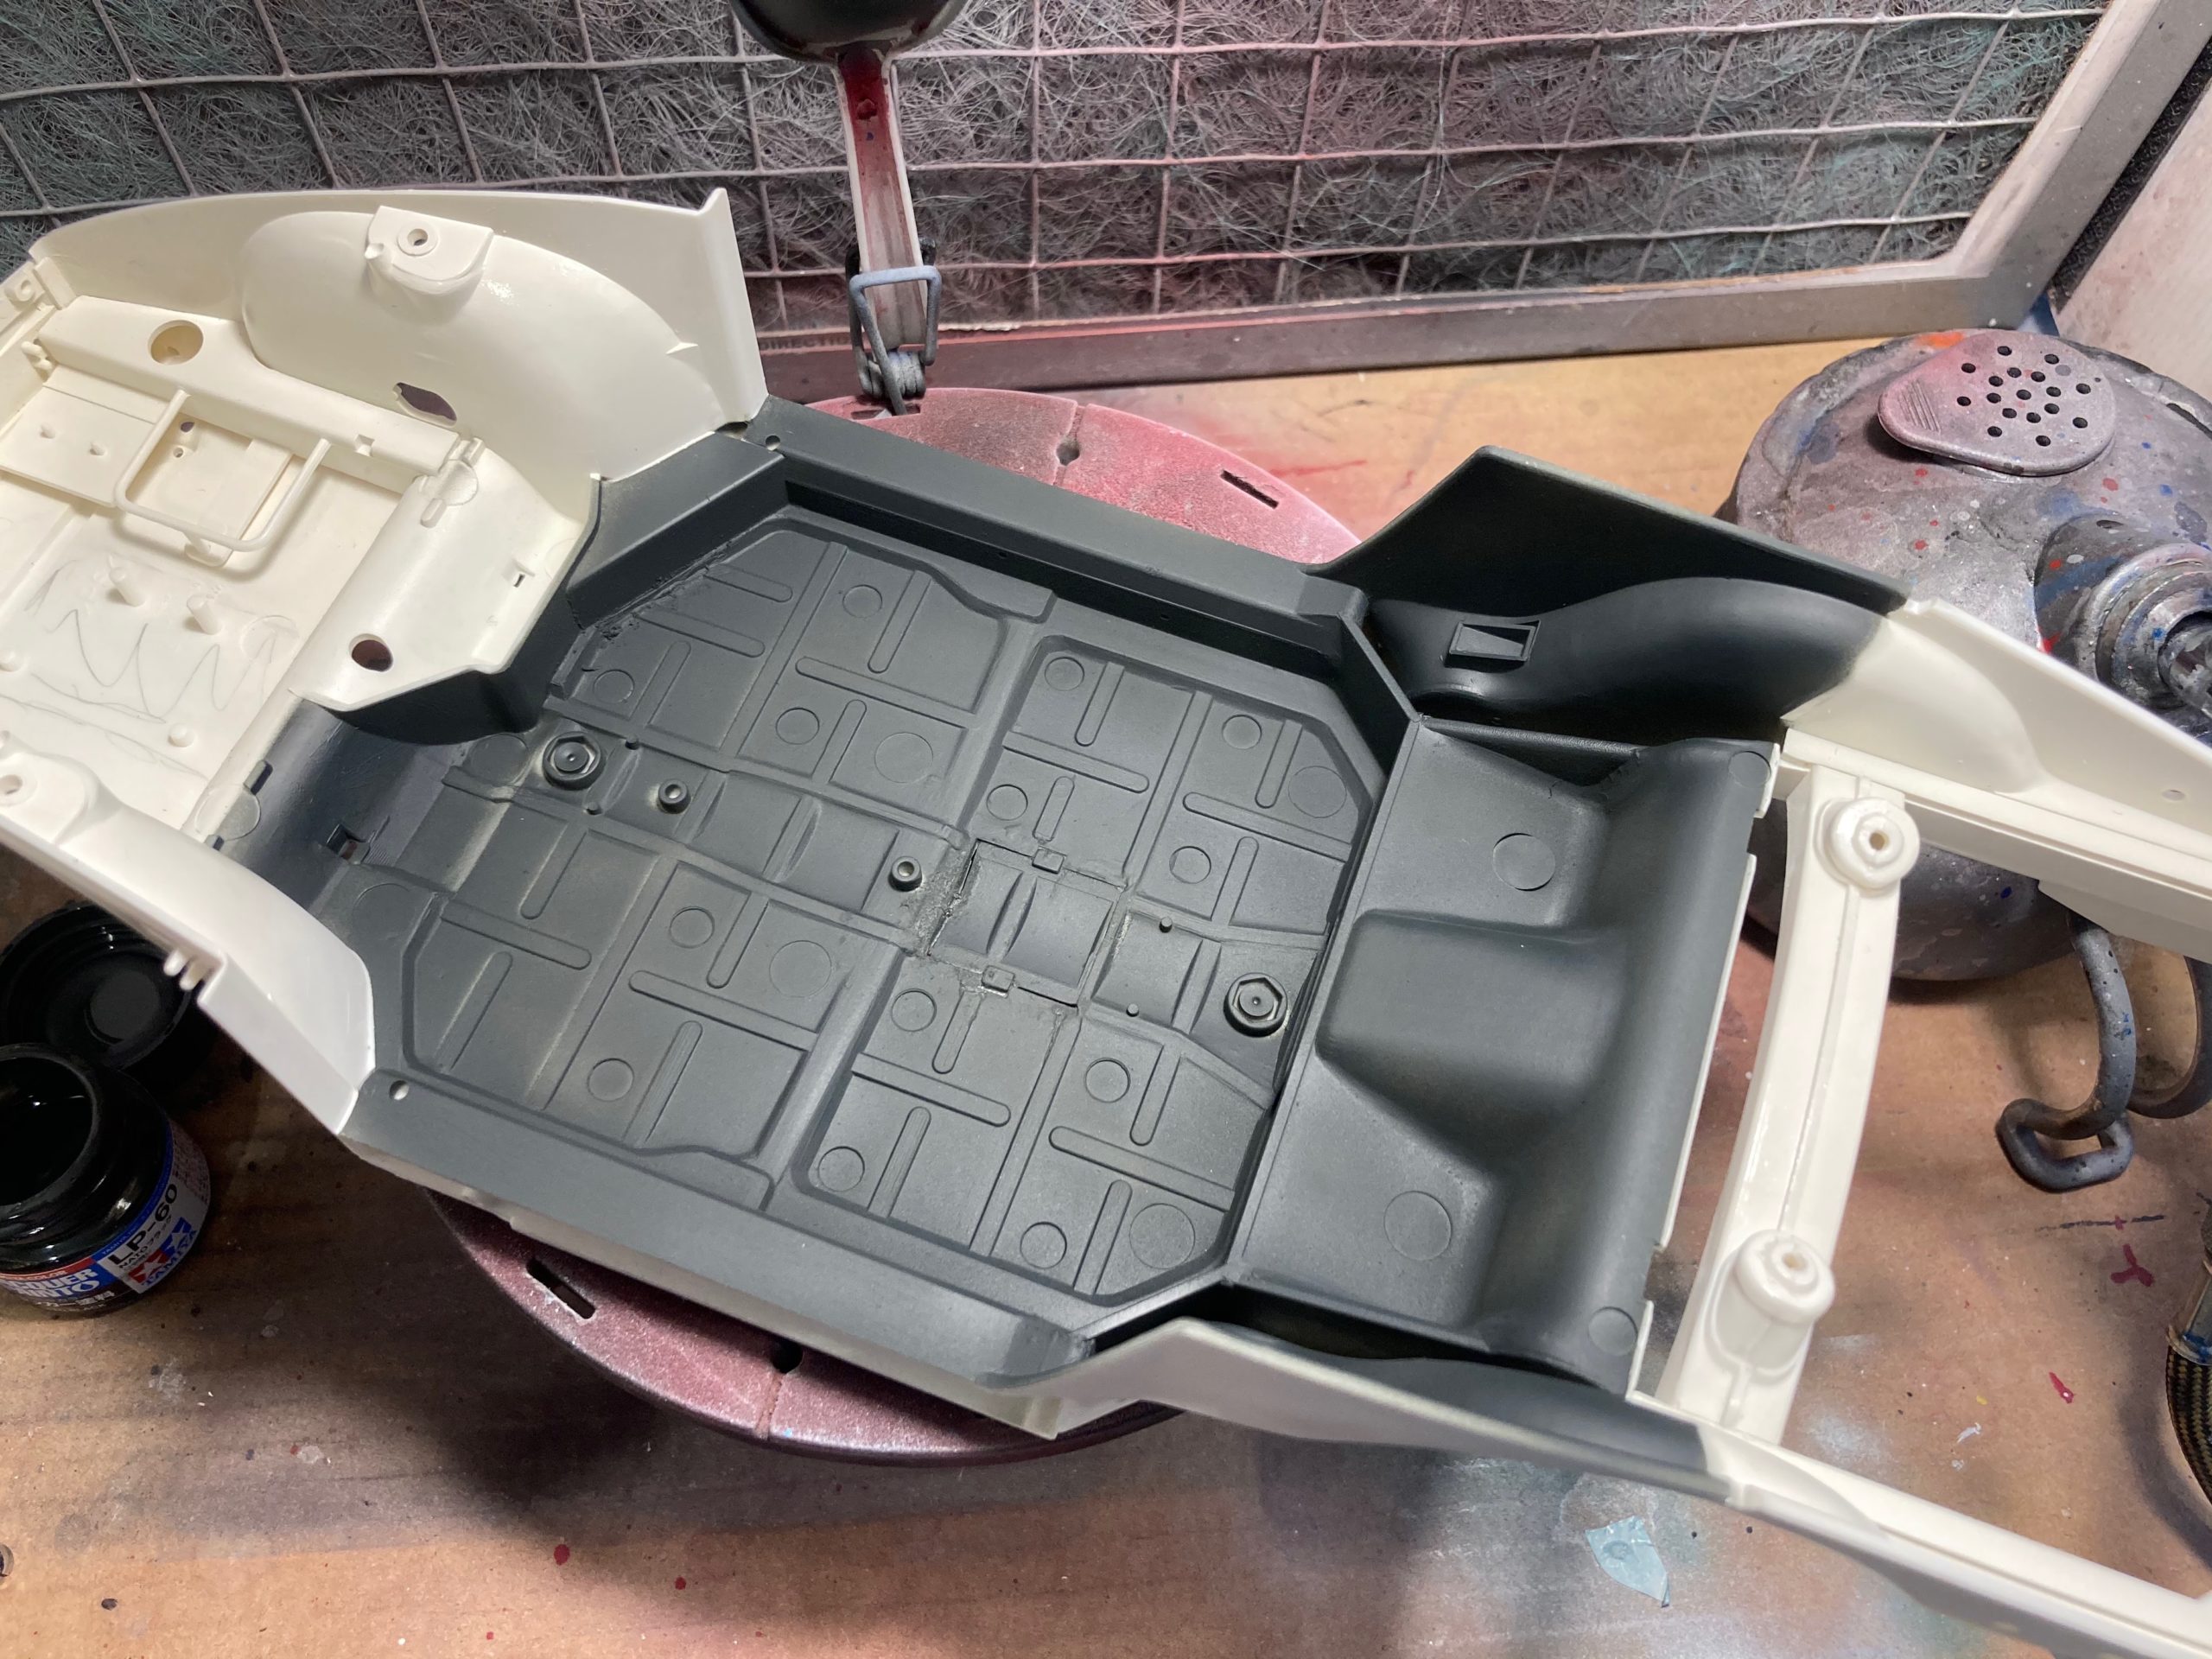
Floor pan was masked off and centre section sprayed Nato Black LP60- for a bit of contrast with the Matt Black panels being added

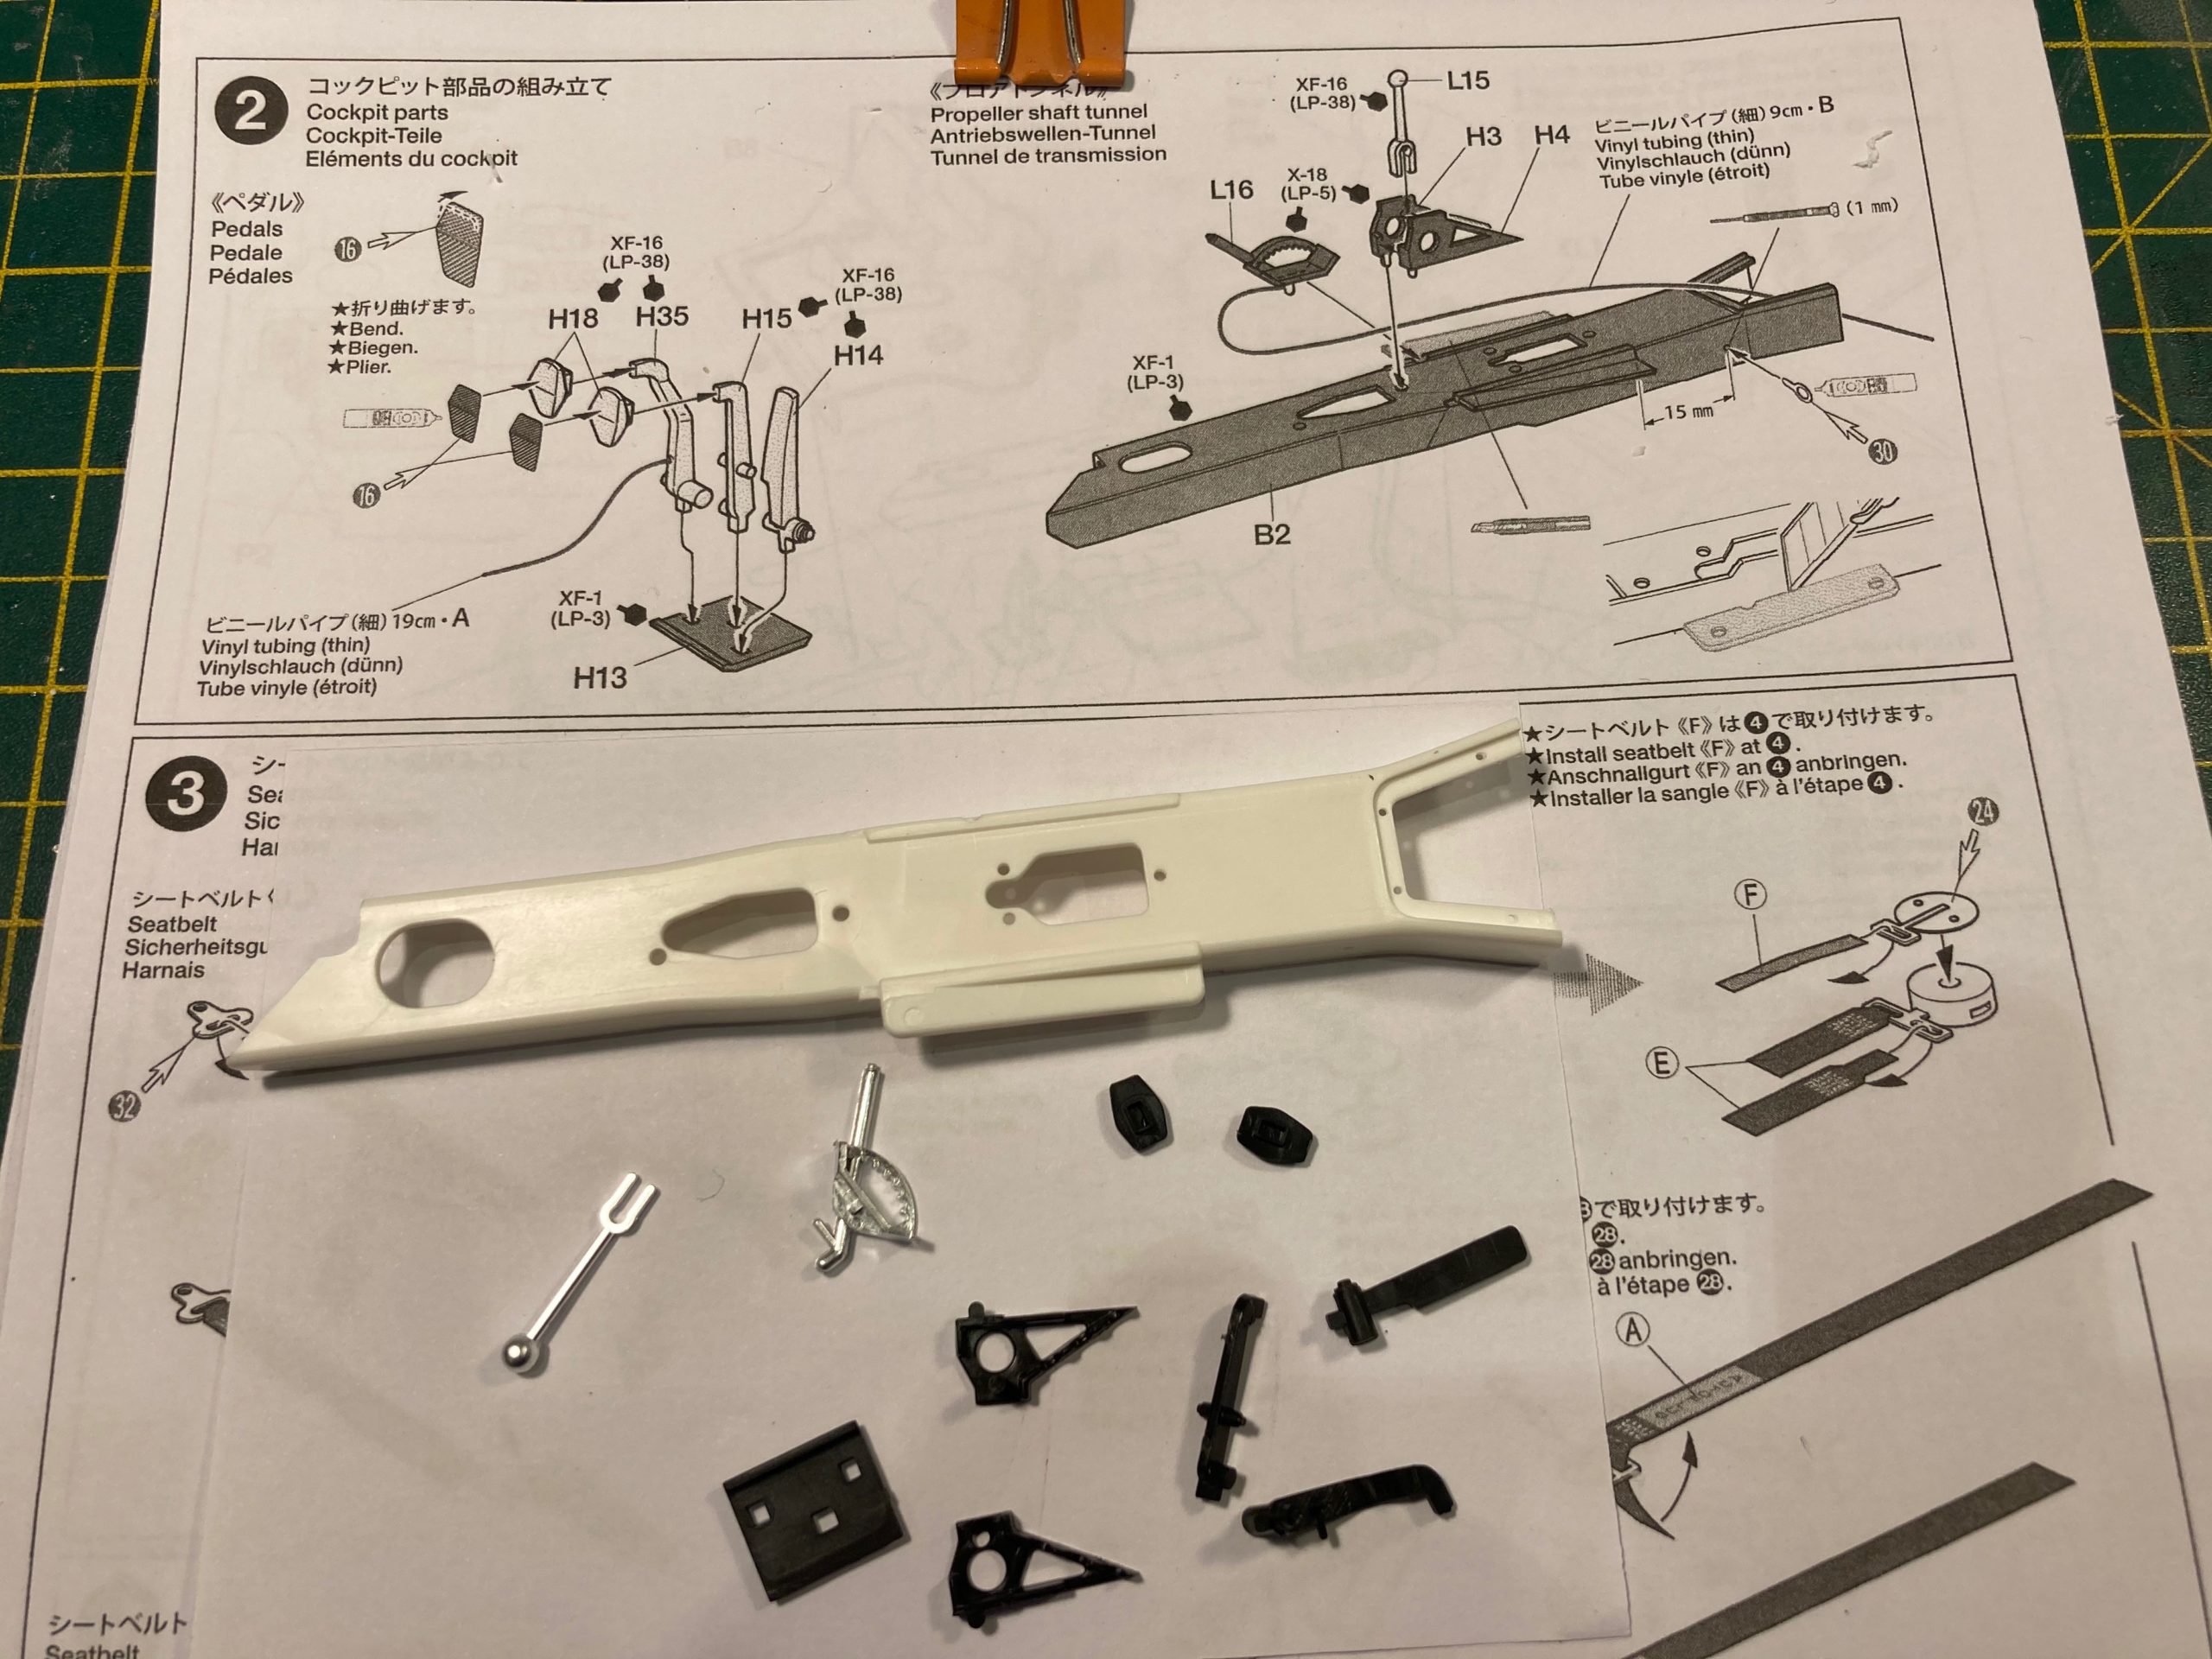


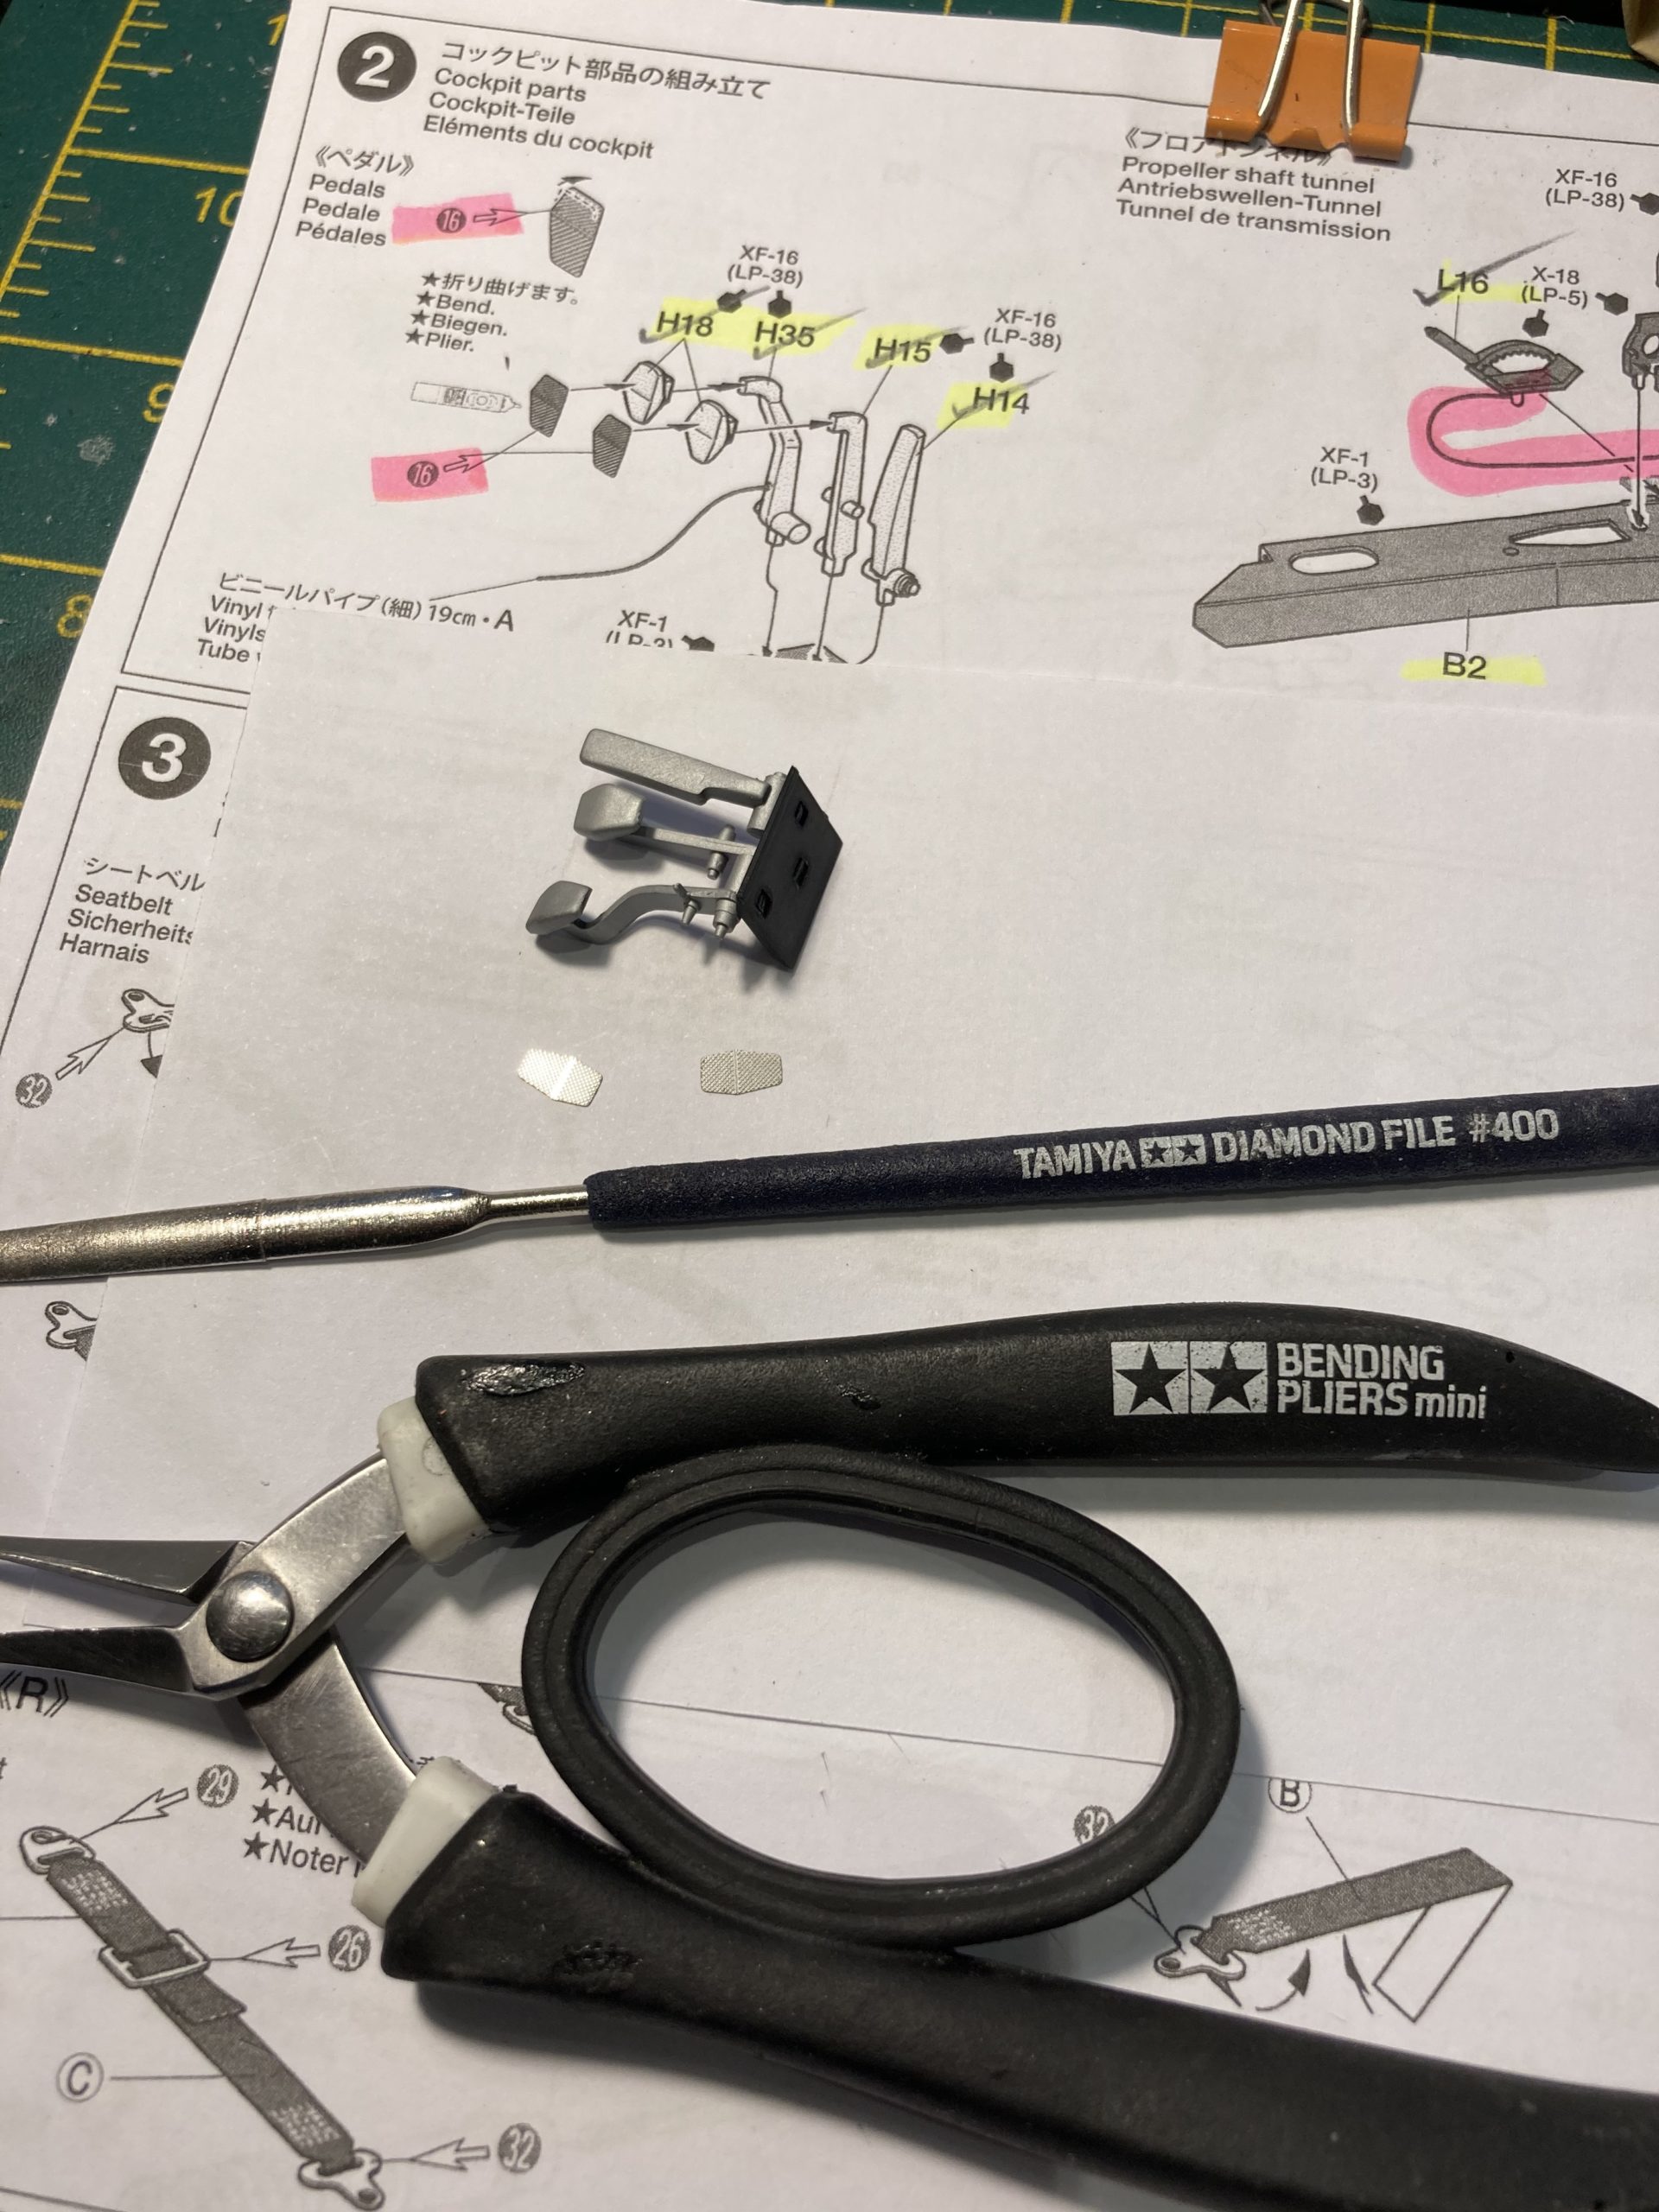
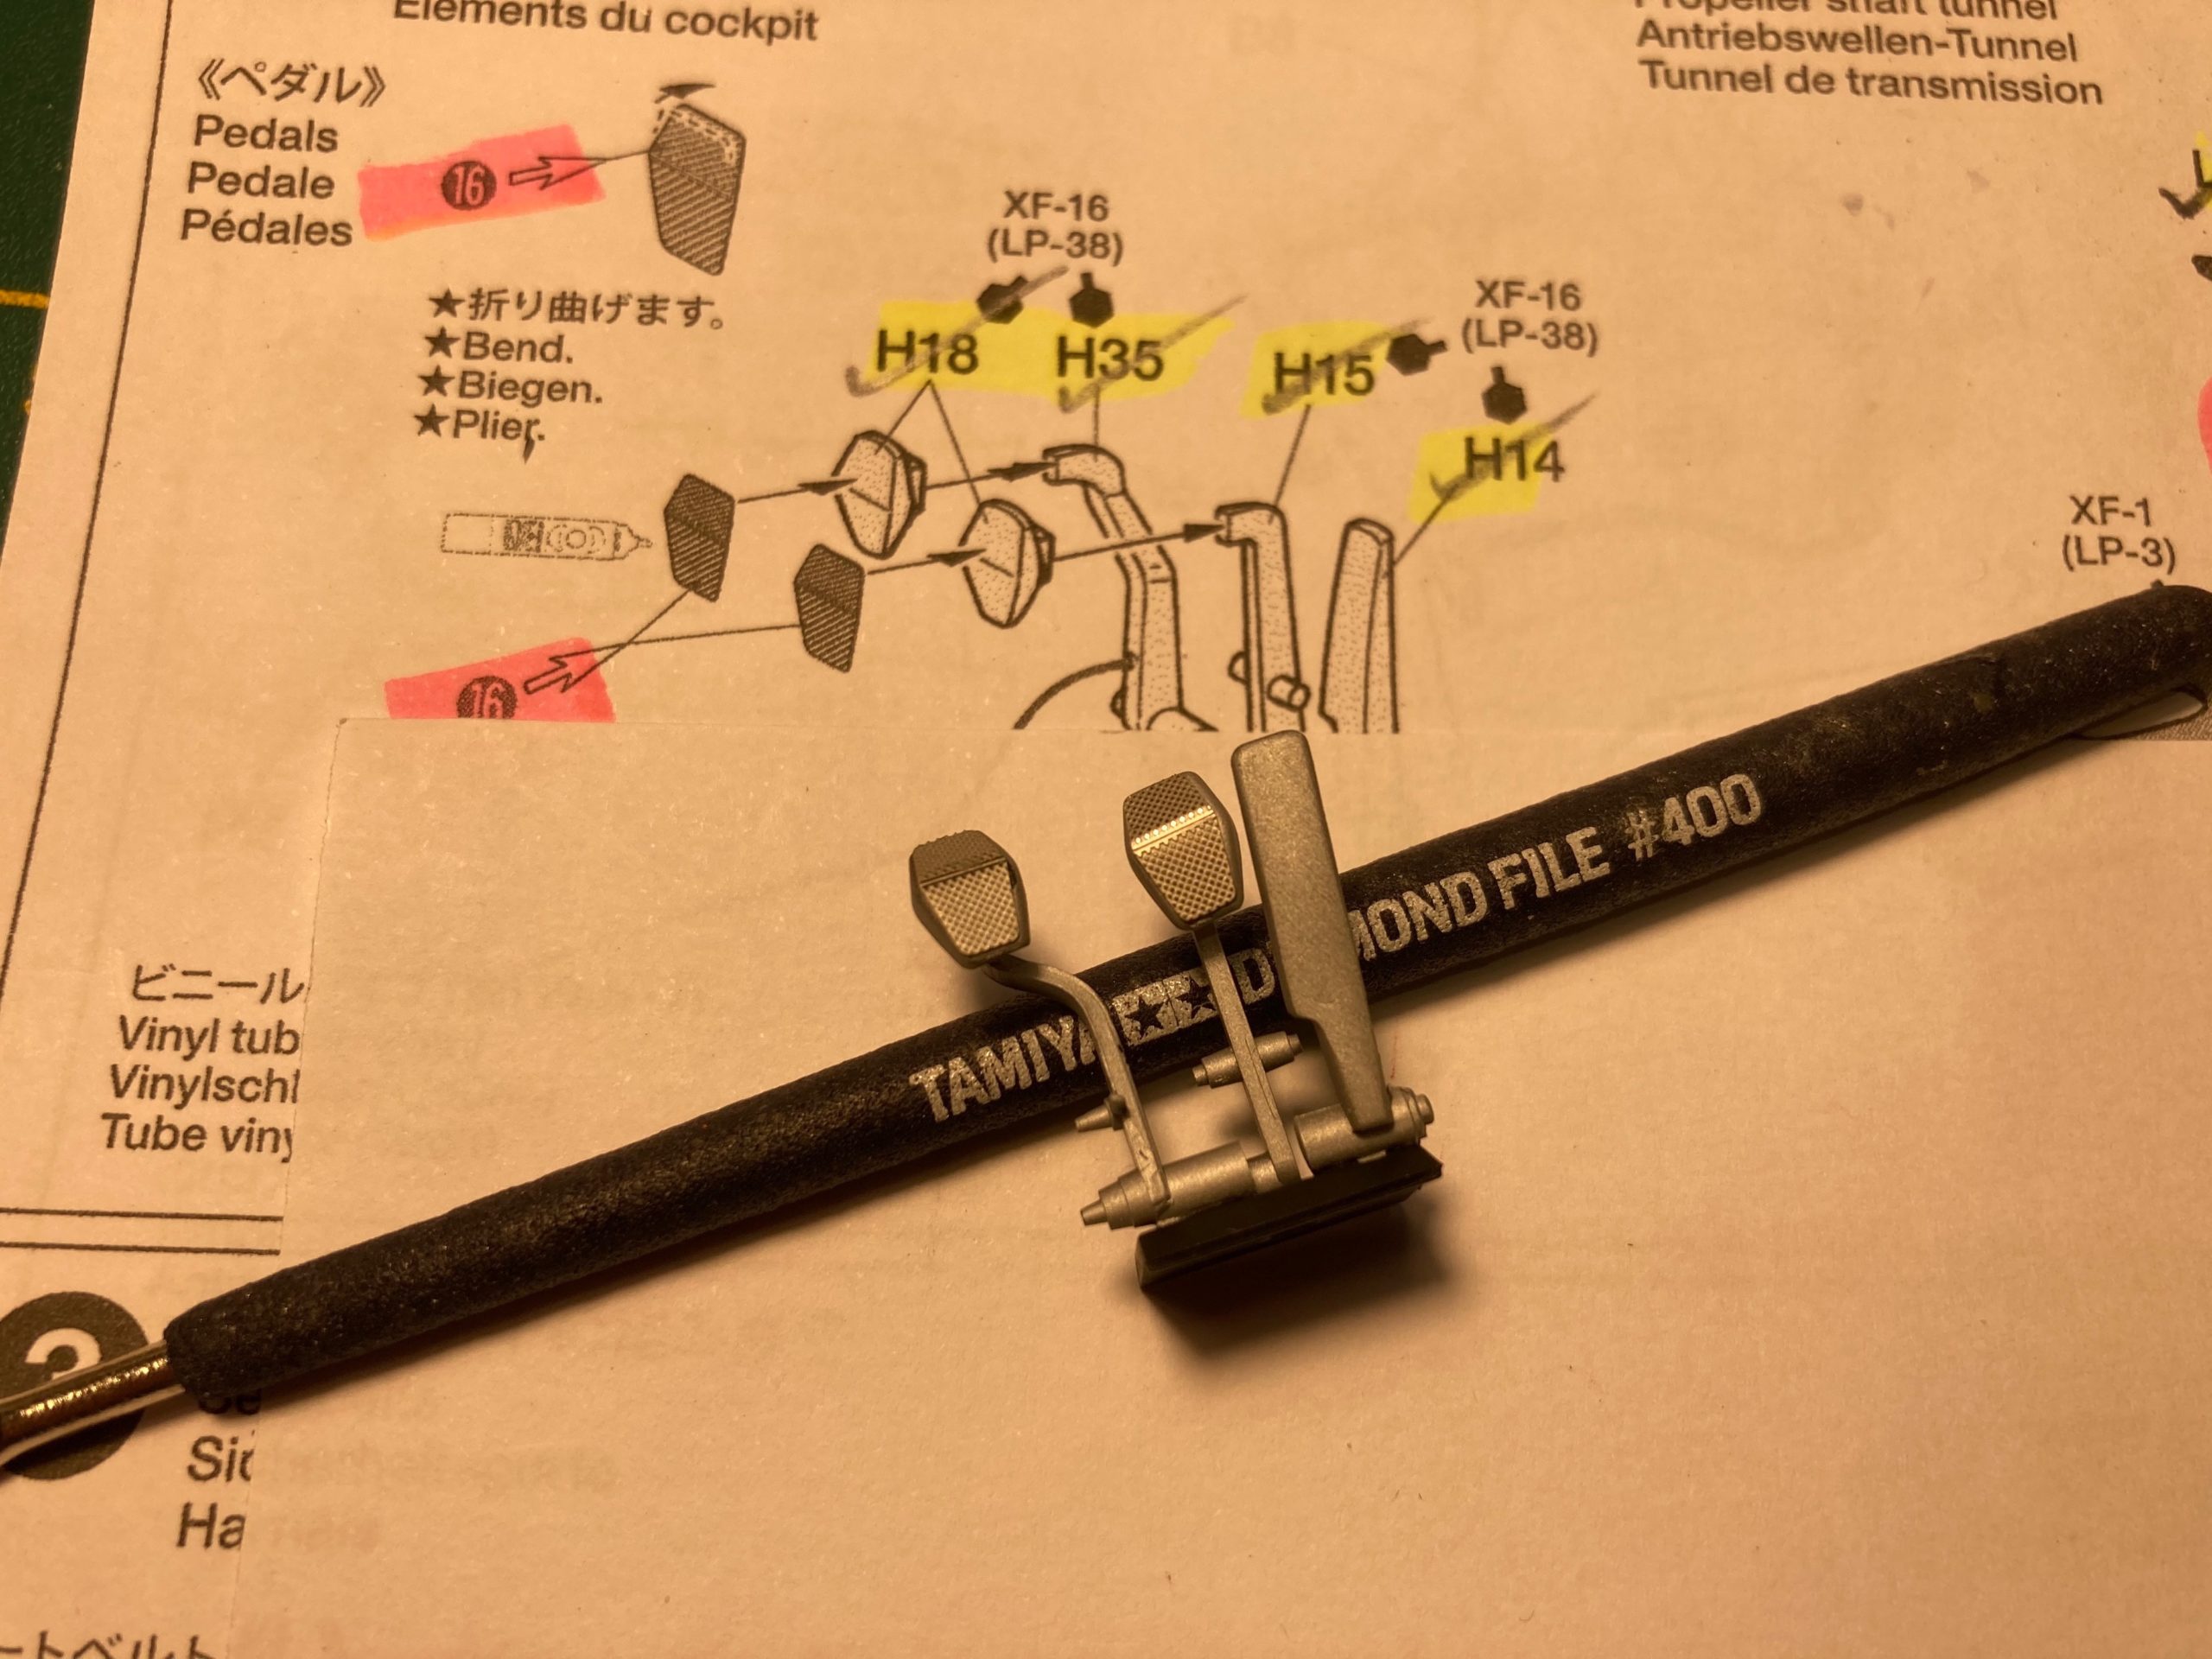
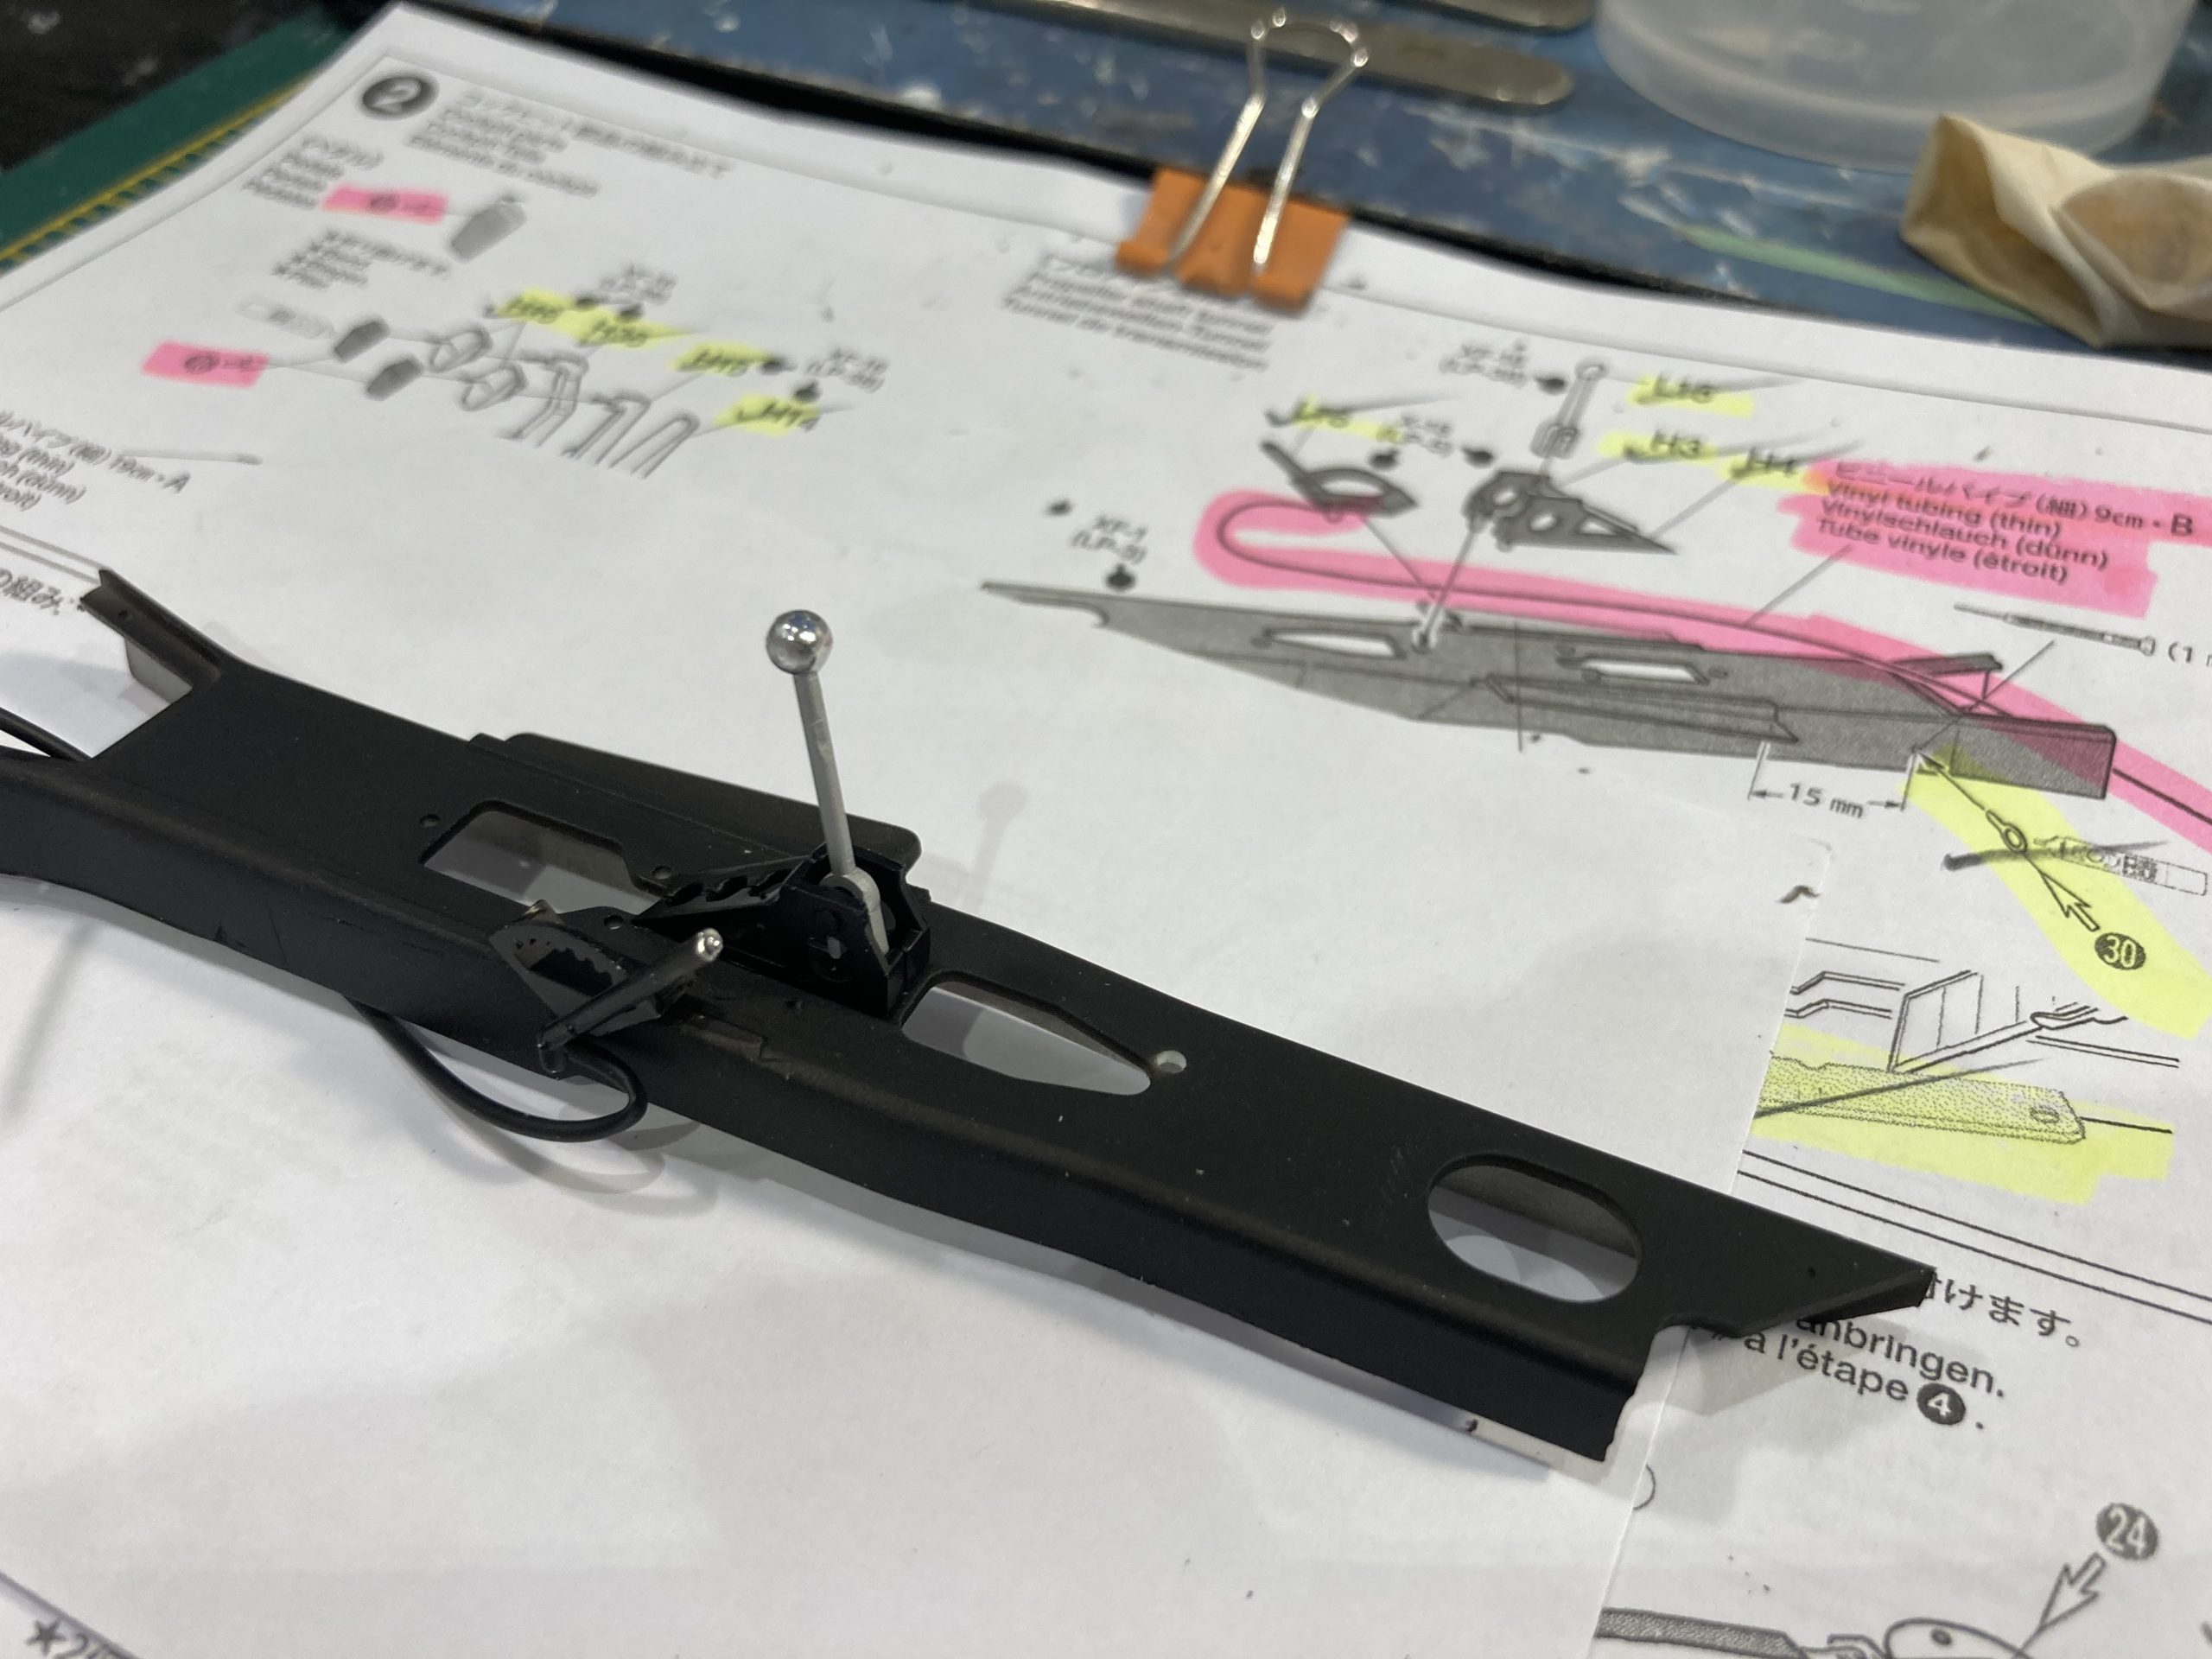
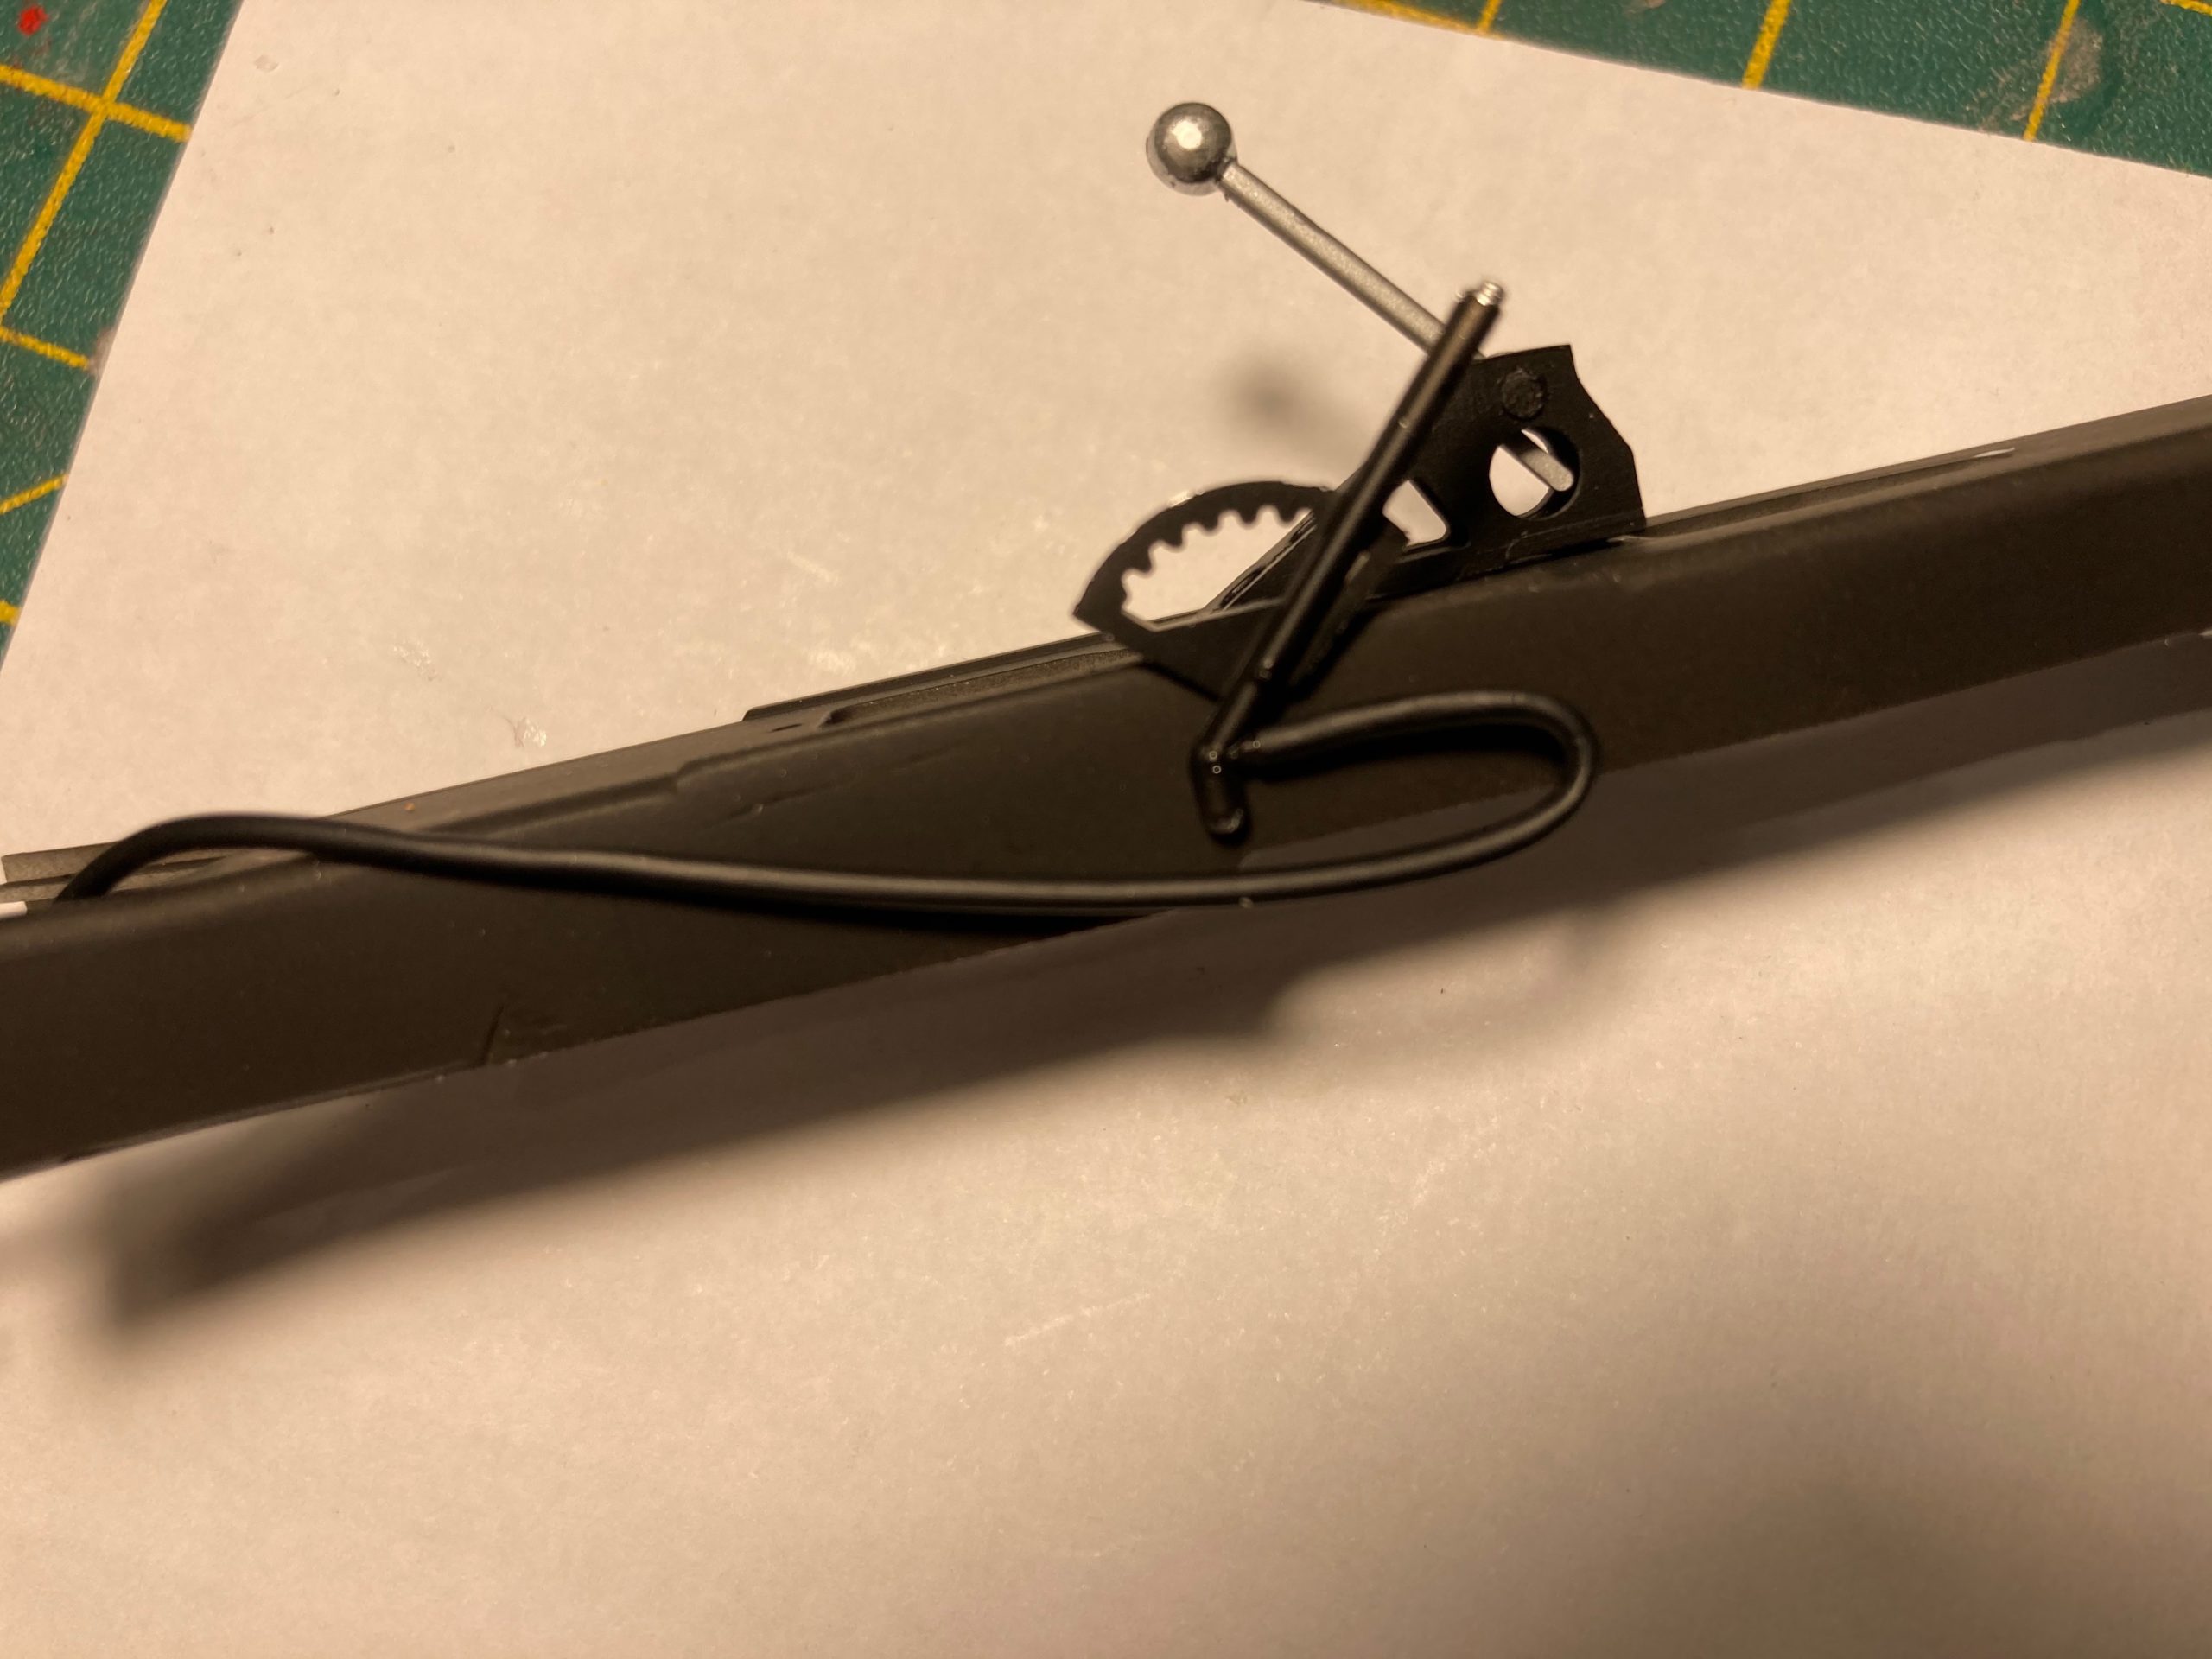
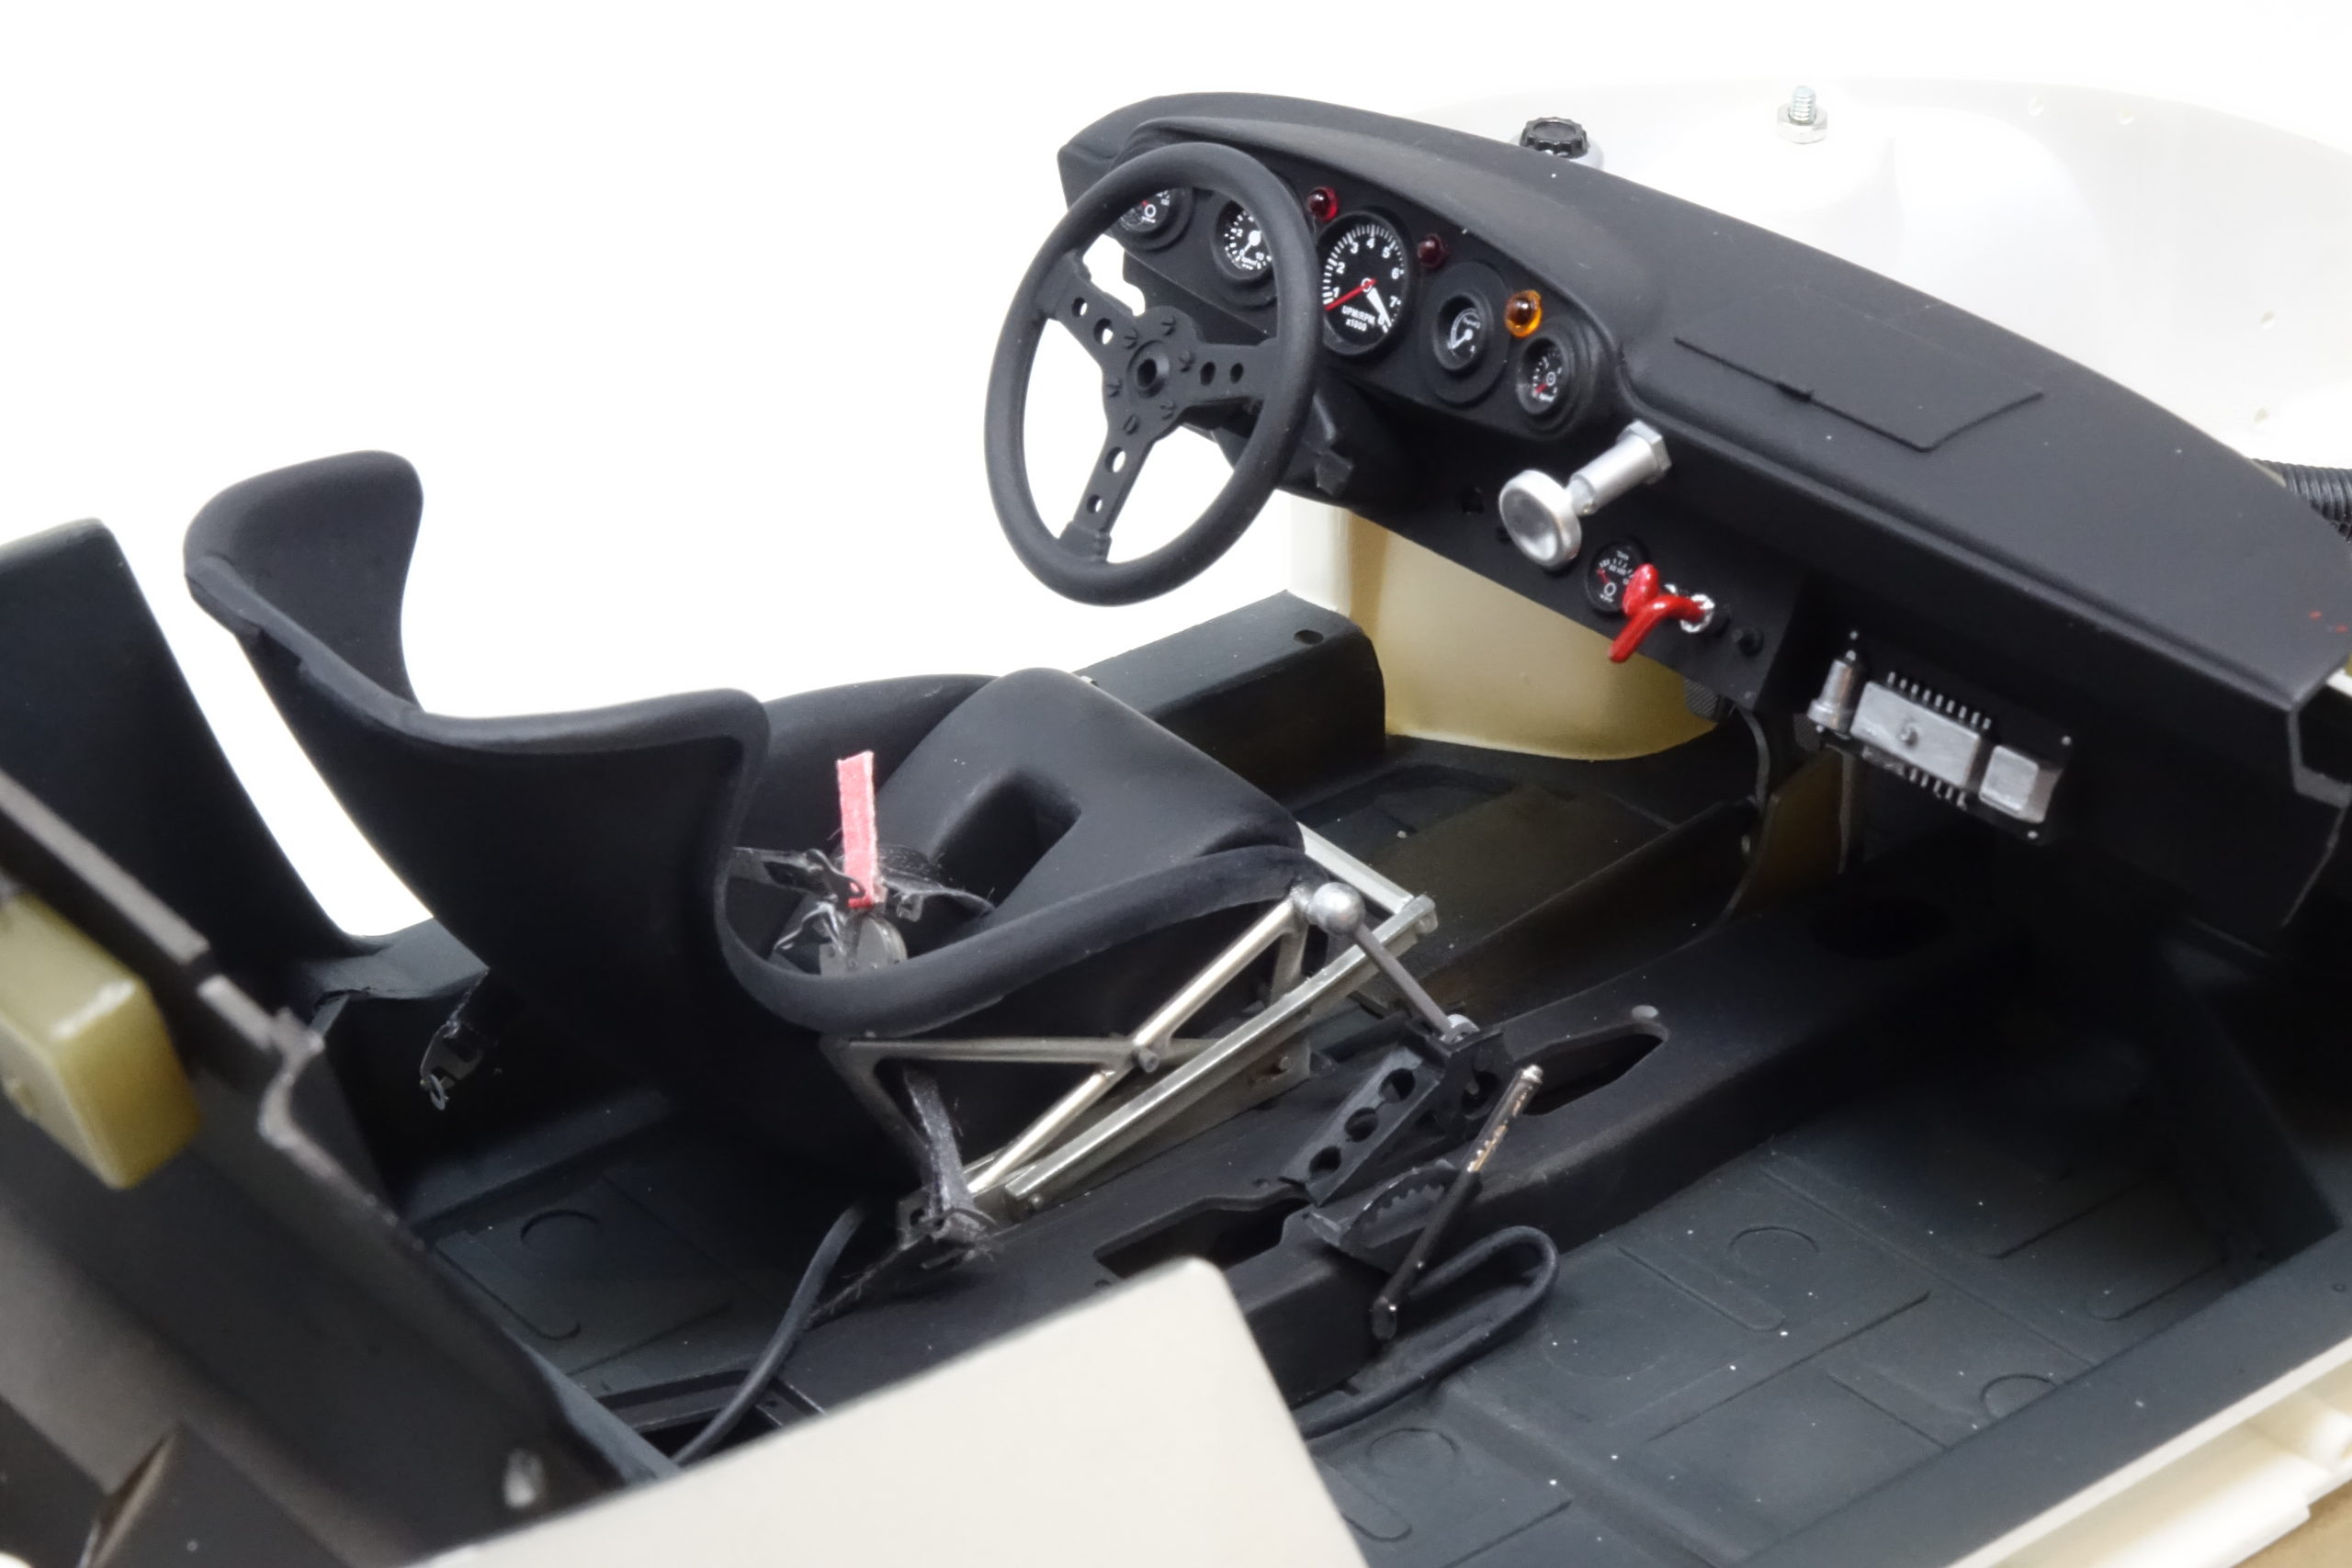
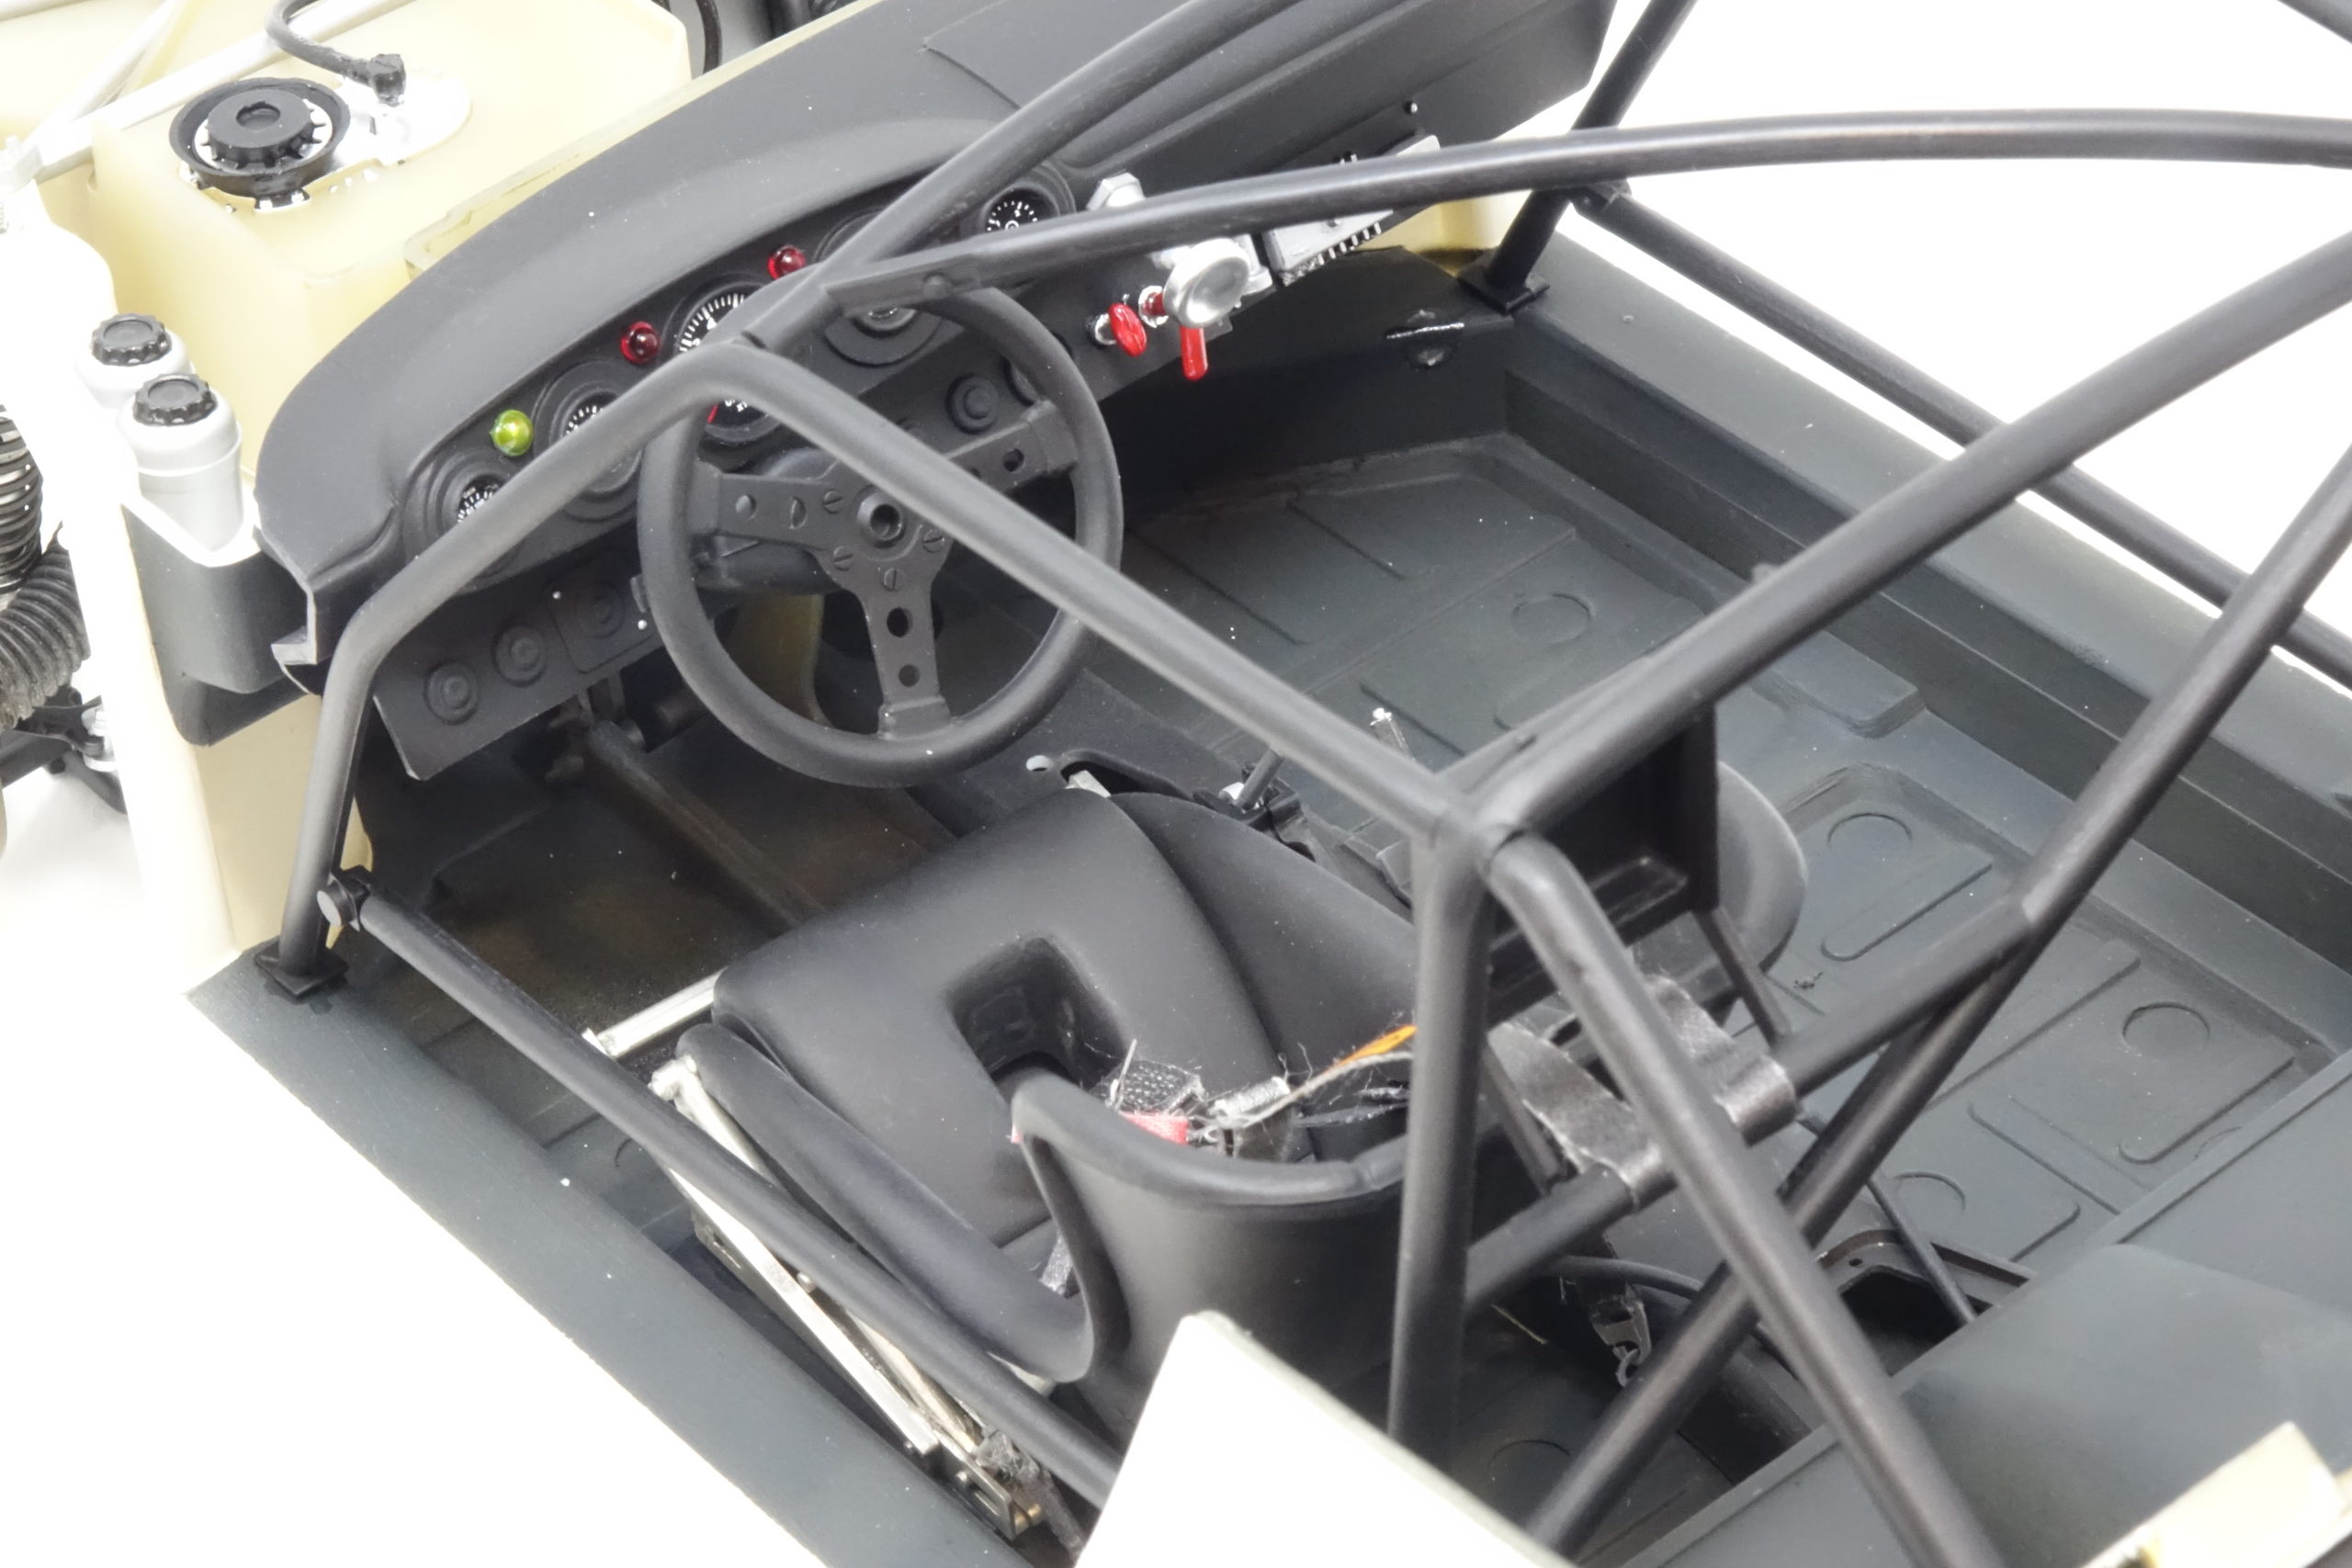
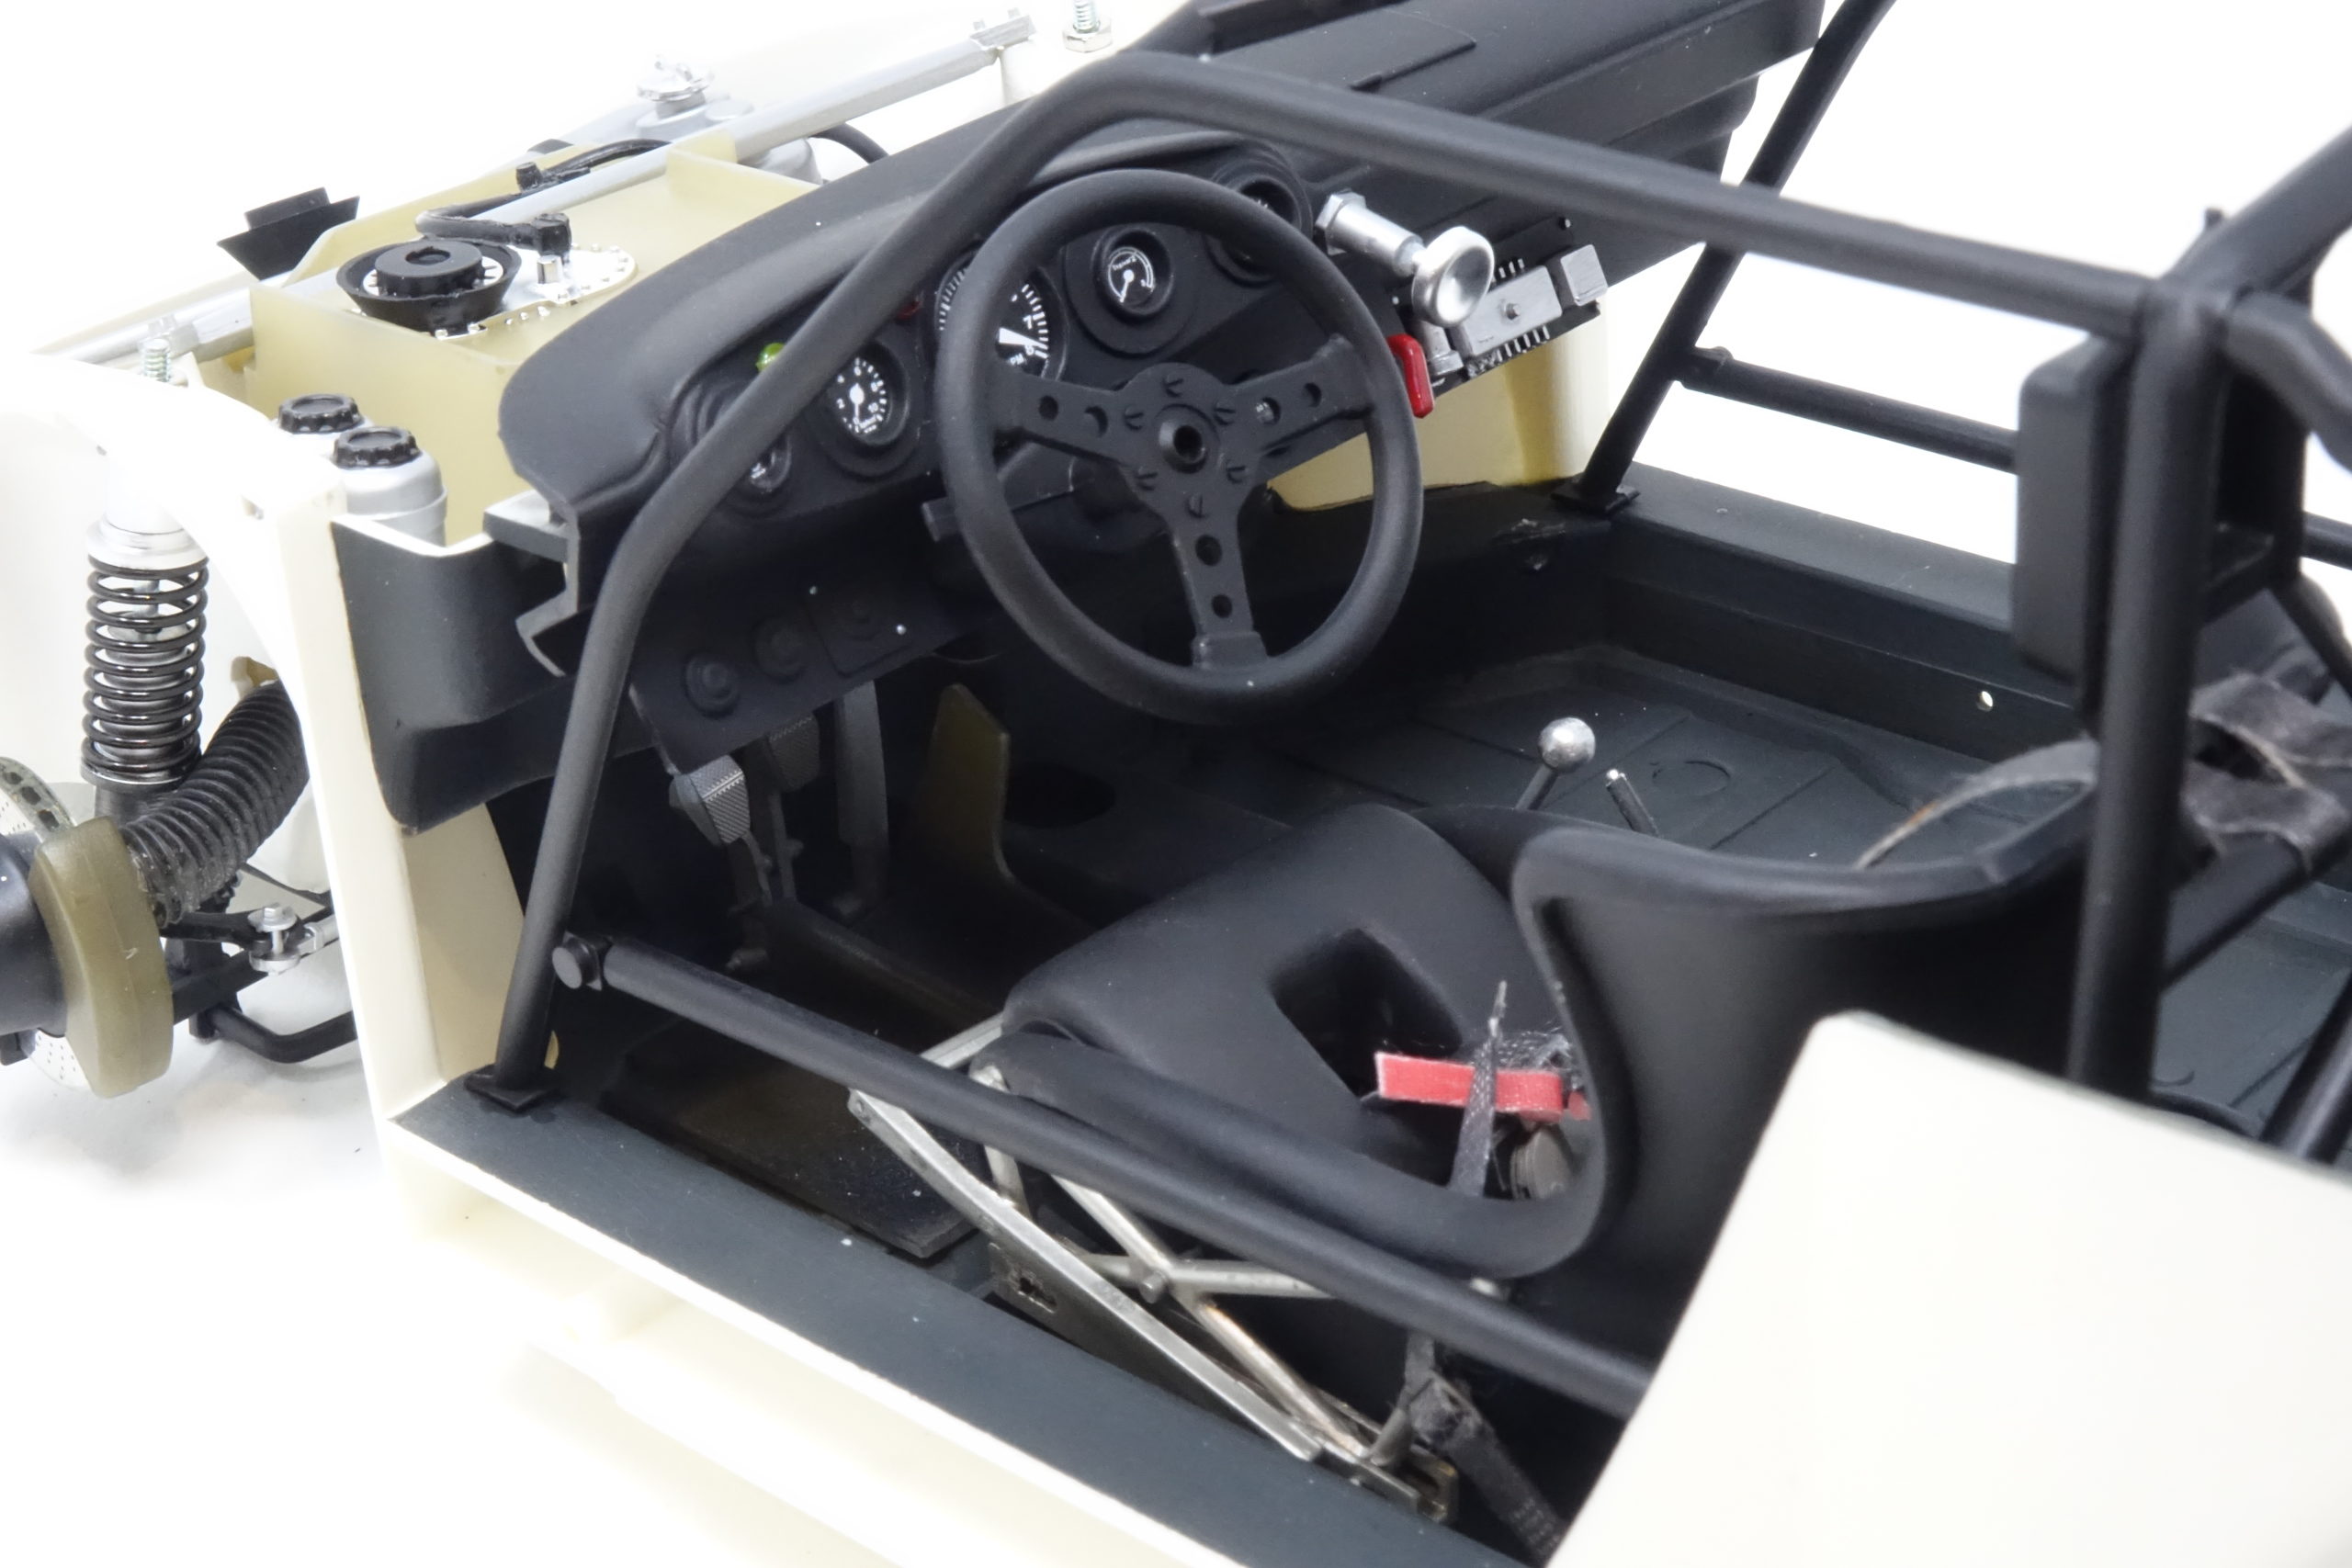
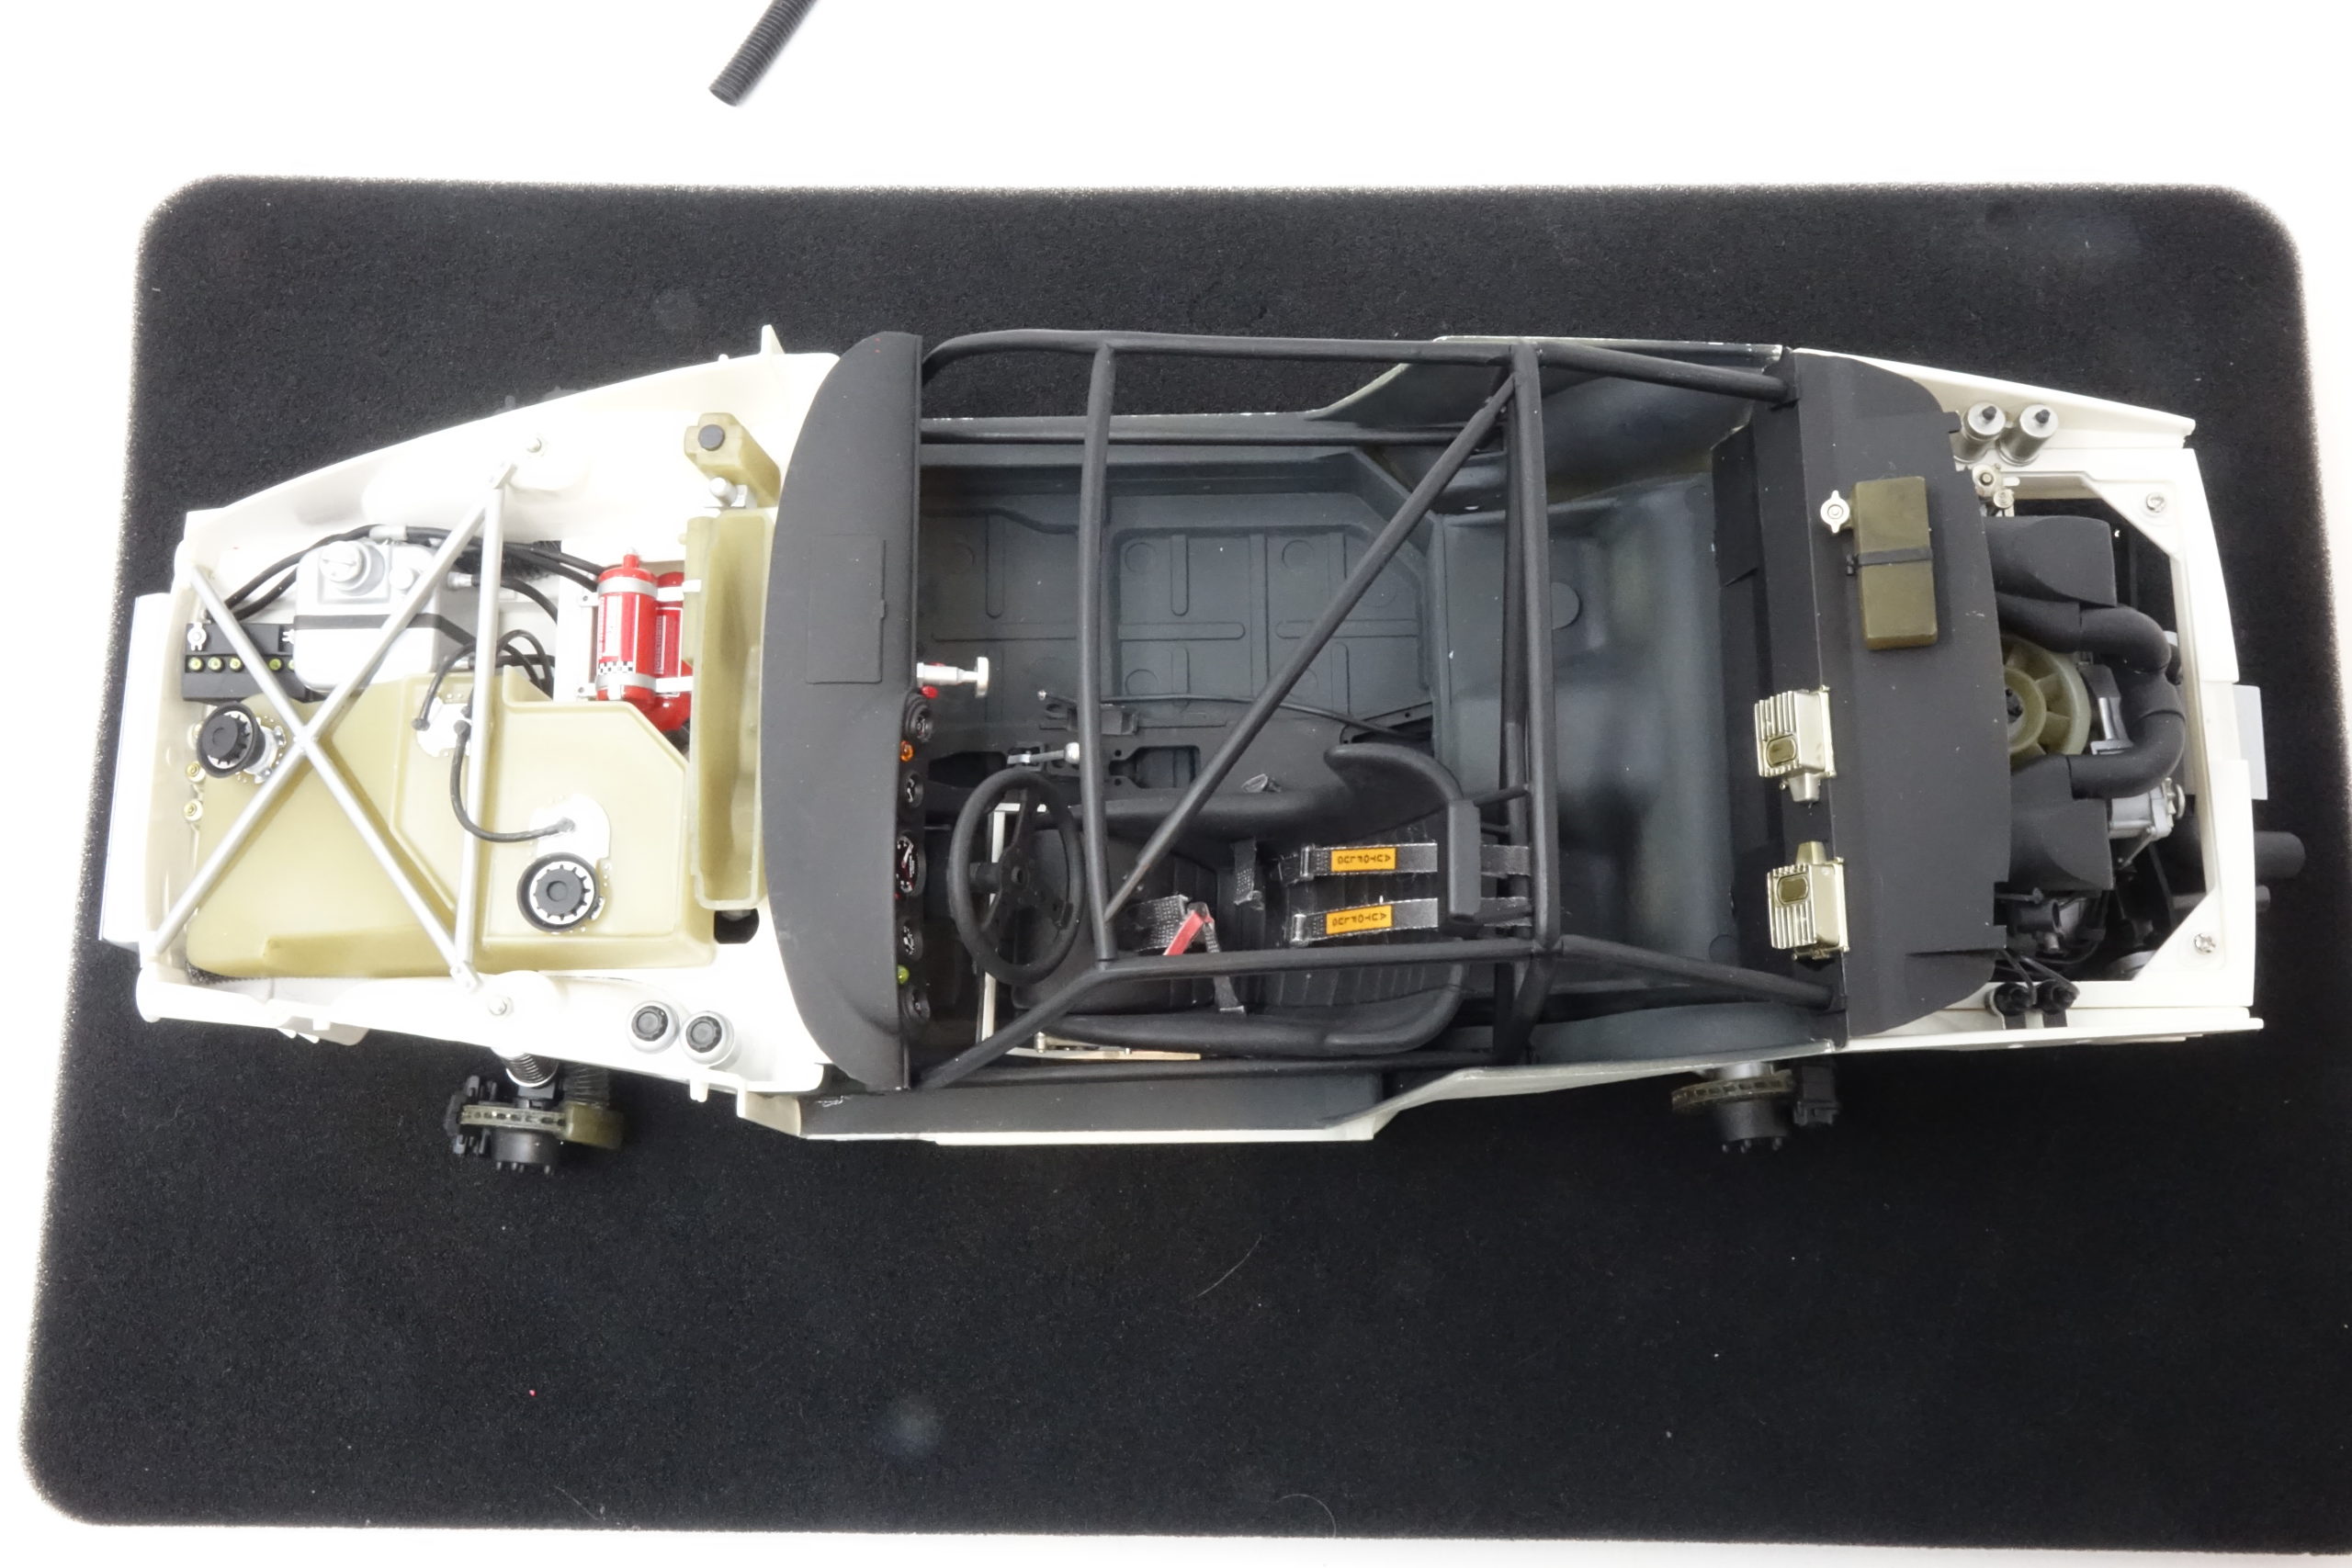
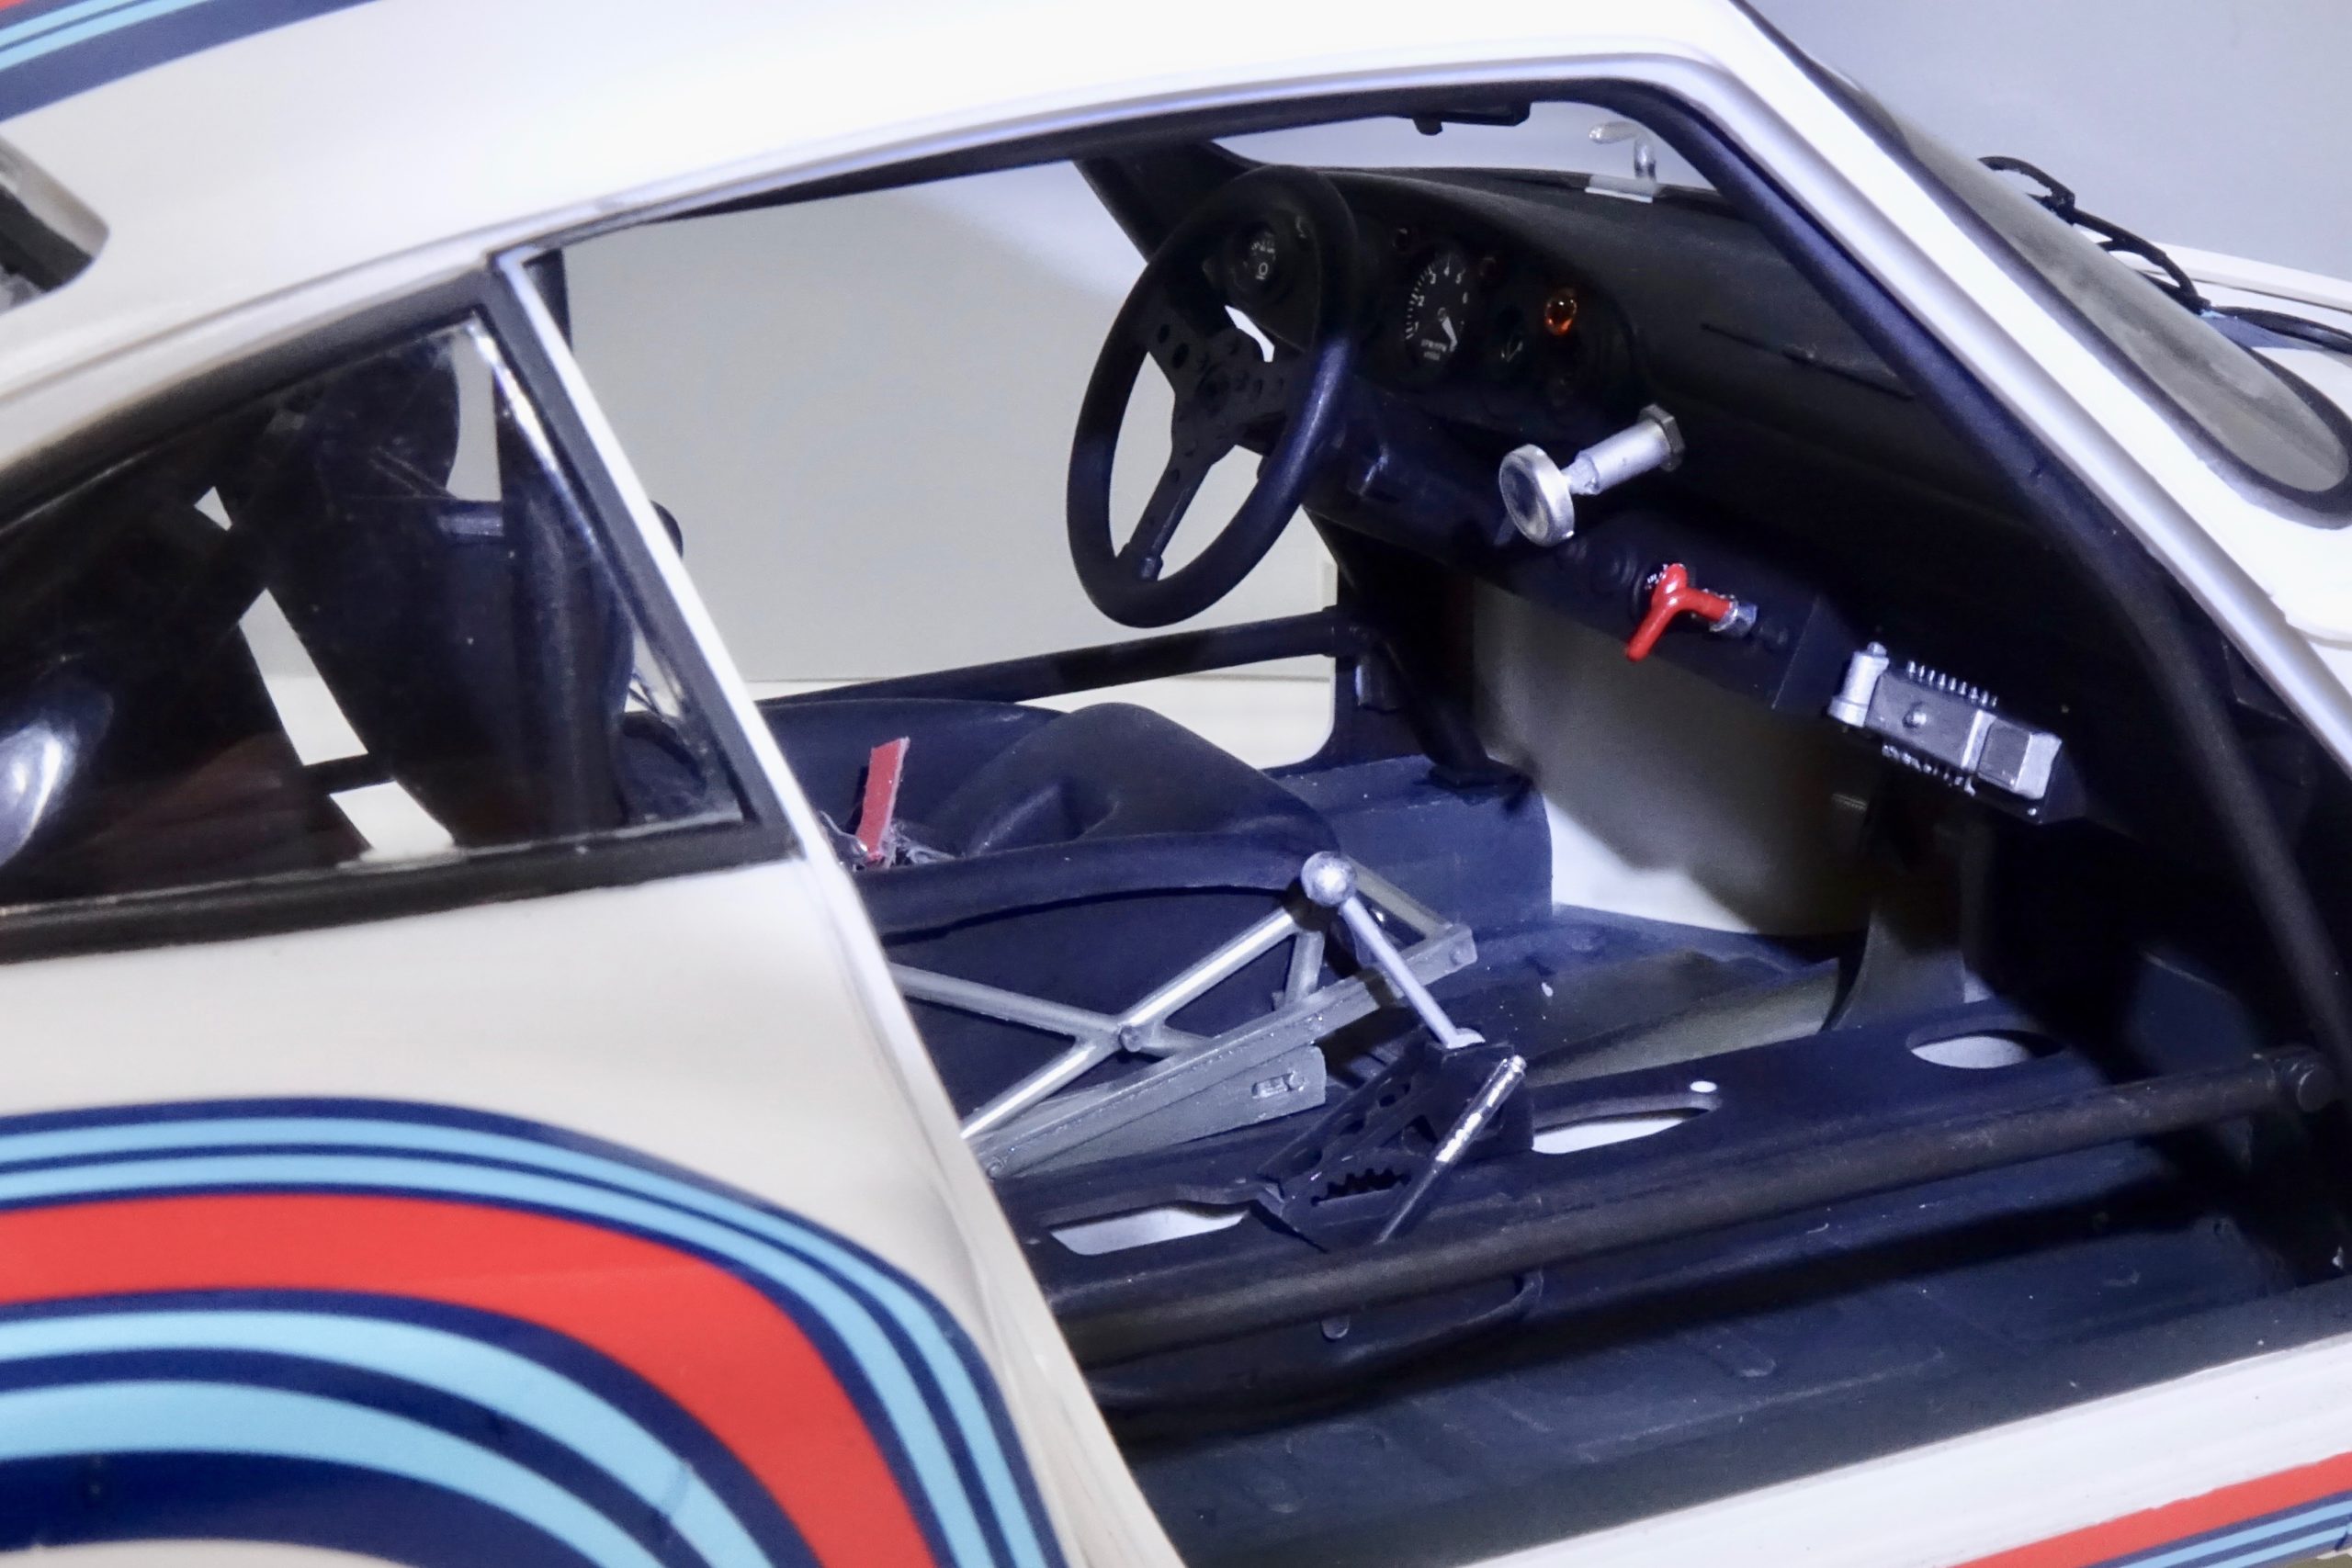
The centre console built up. Pedal box with PE parts, painted and built up. The thin tubing for the handbrake cable has a tight curve in it, so to prevent the tubing flattening at the curve I pushed some 30A ‘old school’ fuse wire down the tubing to allow the tubing to bend without flattening. Very handy stuff is fuse wire!

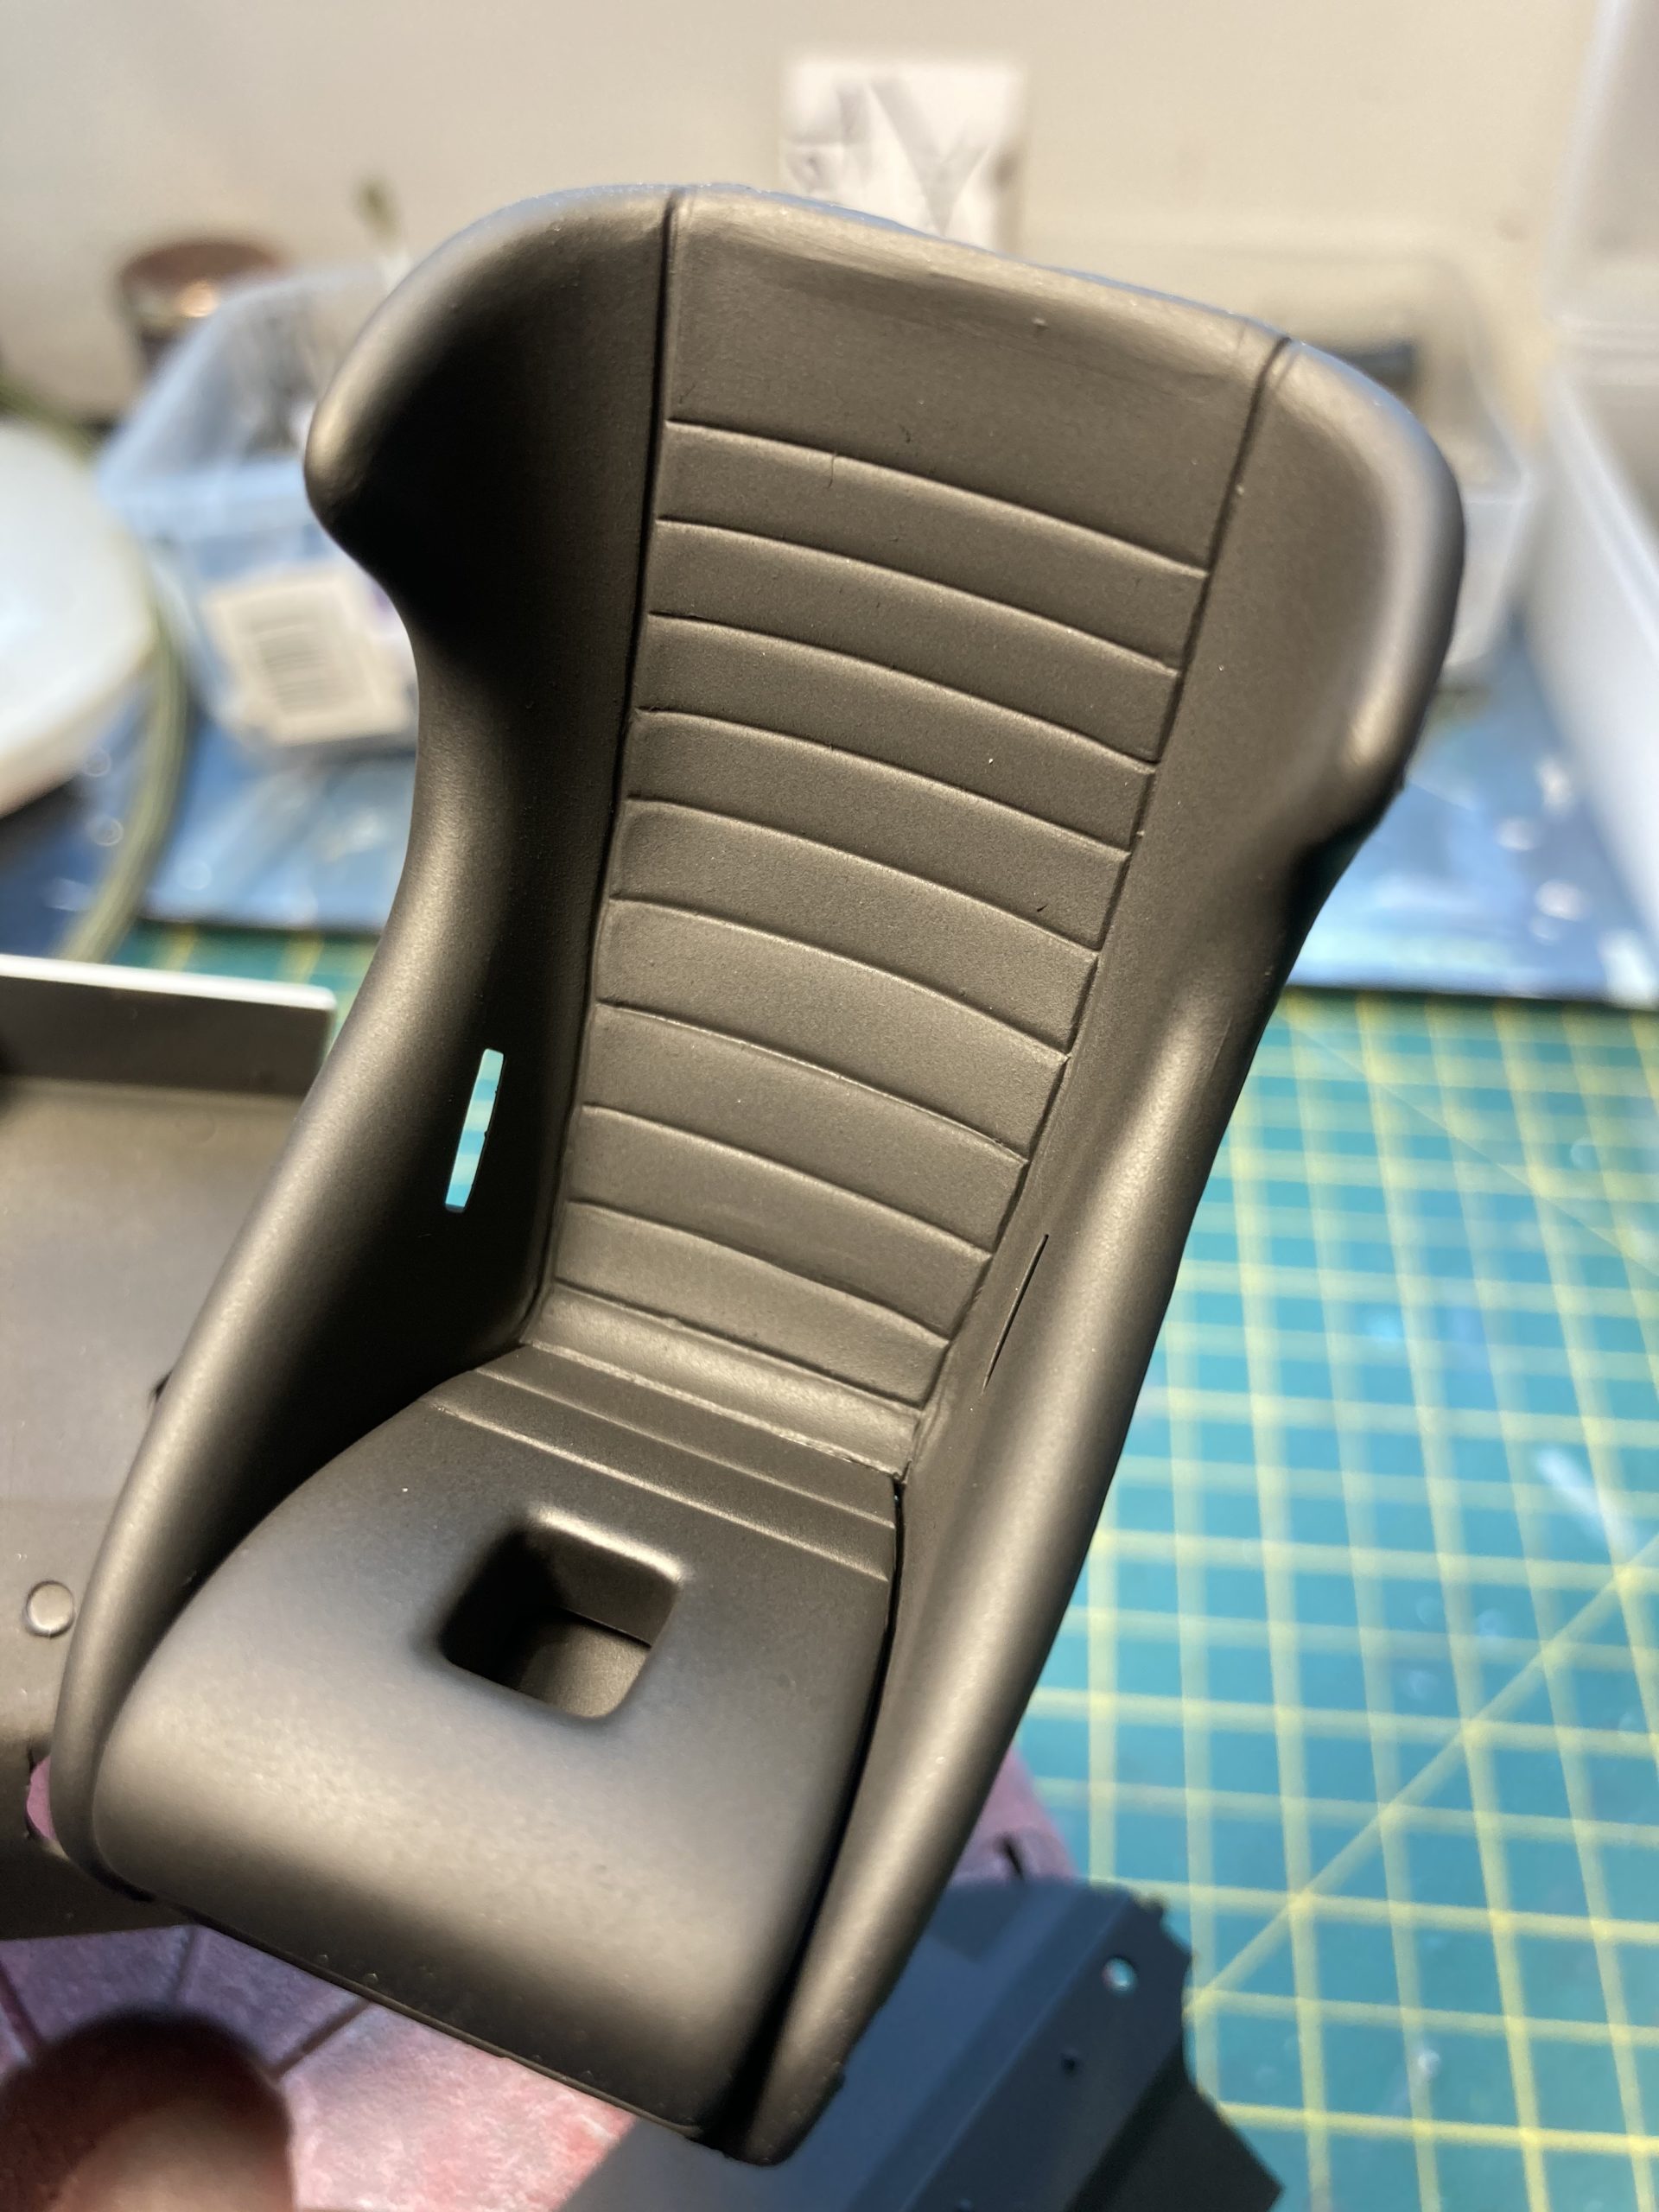
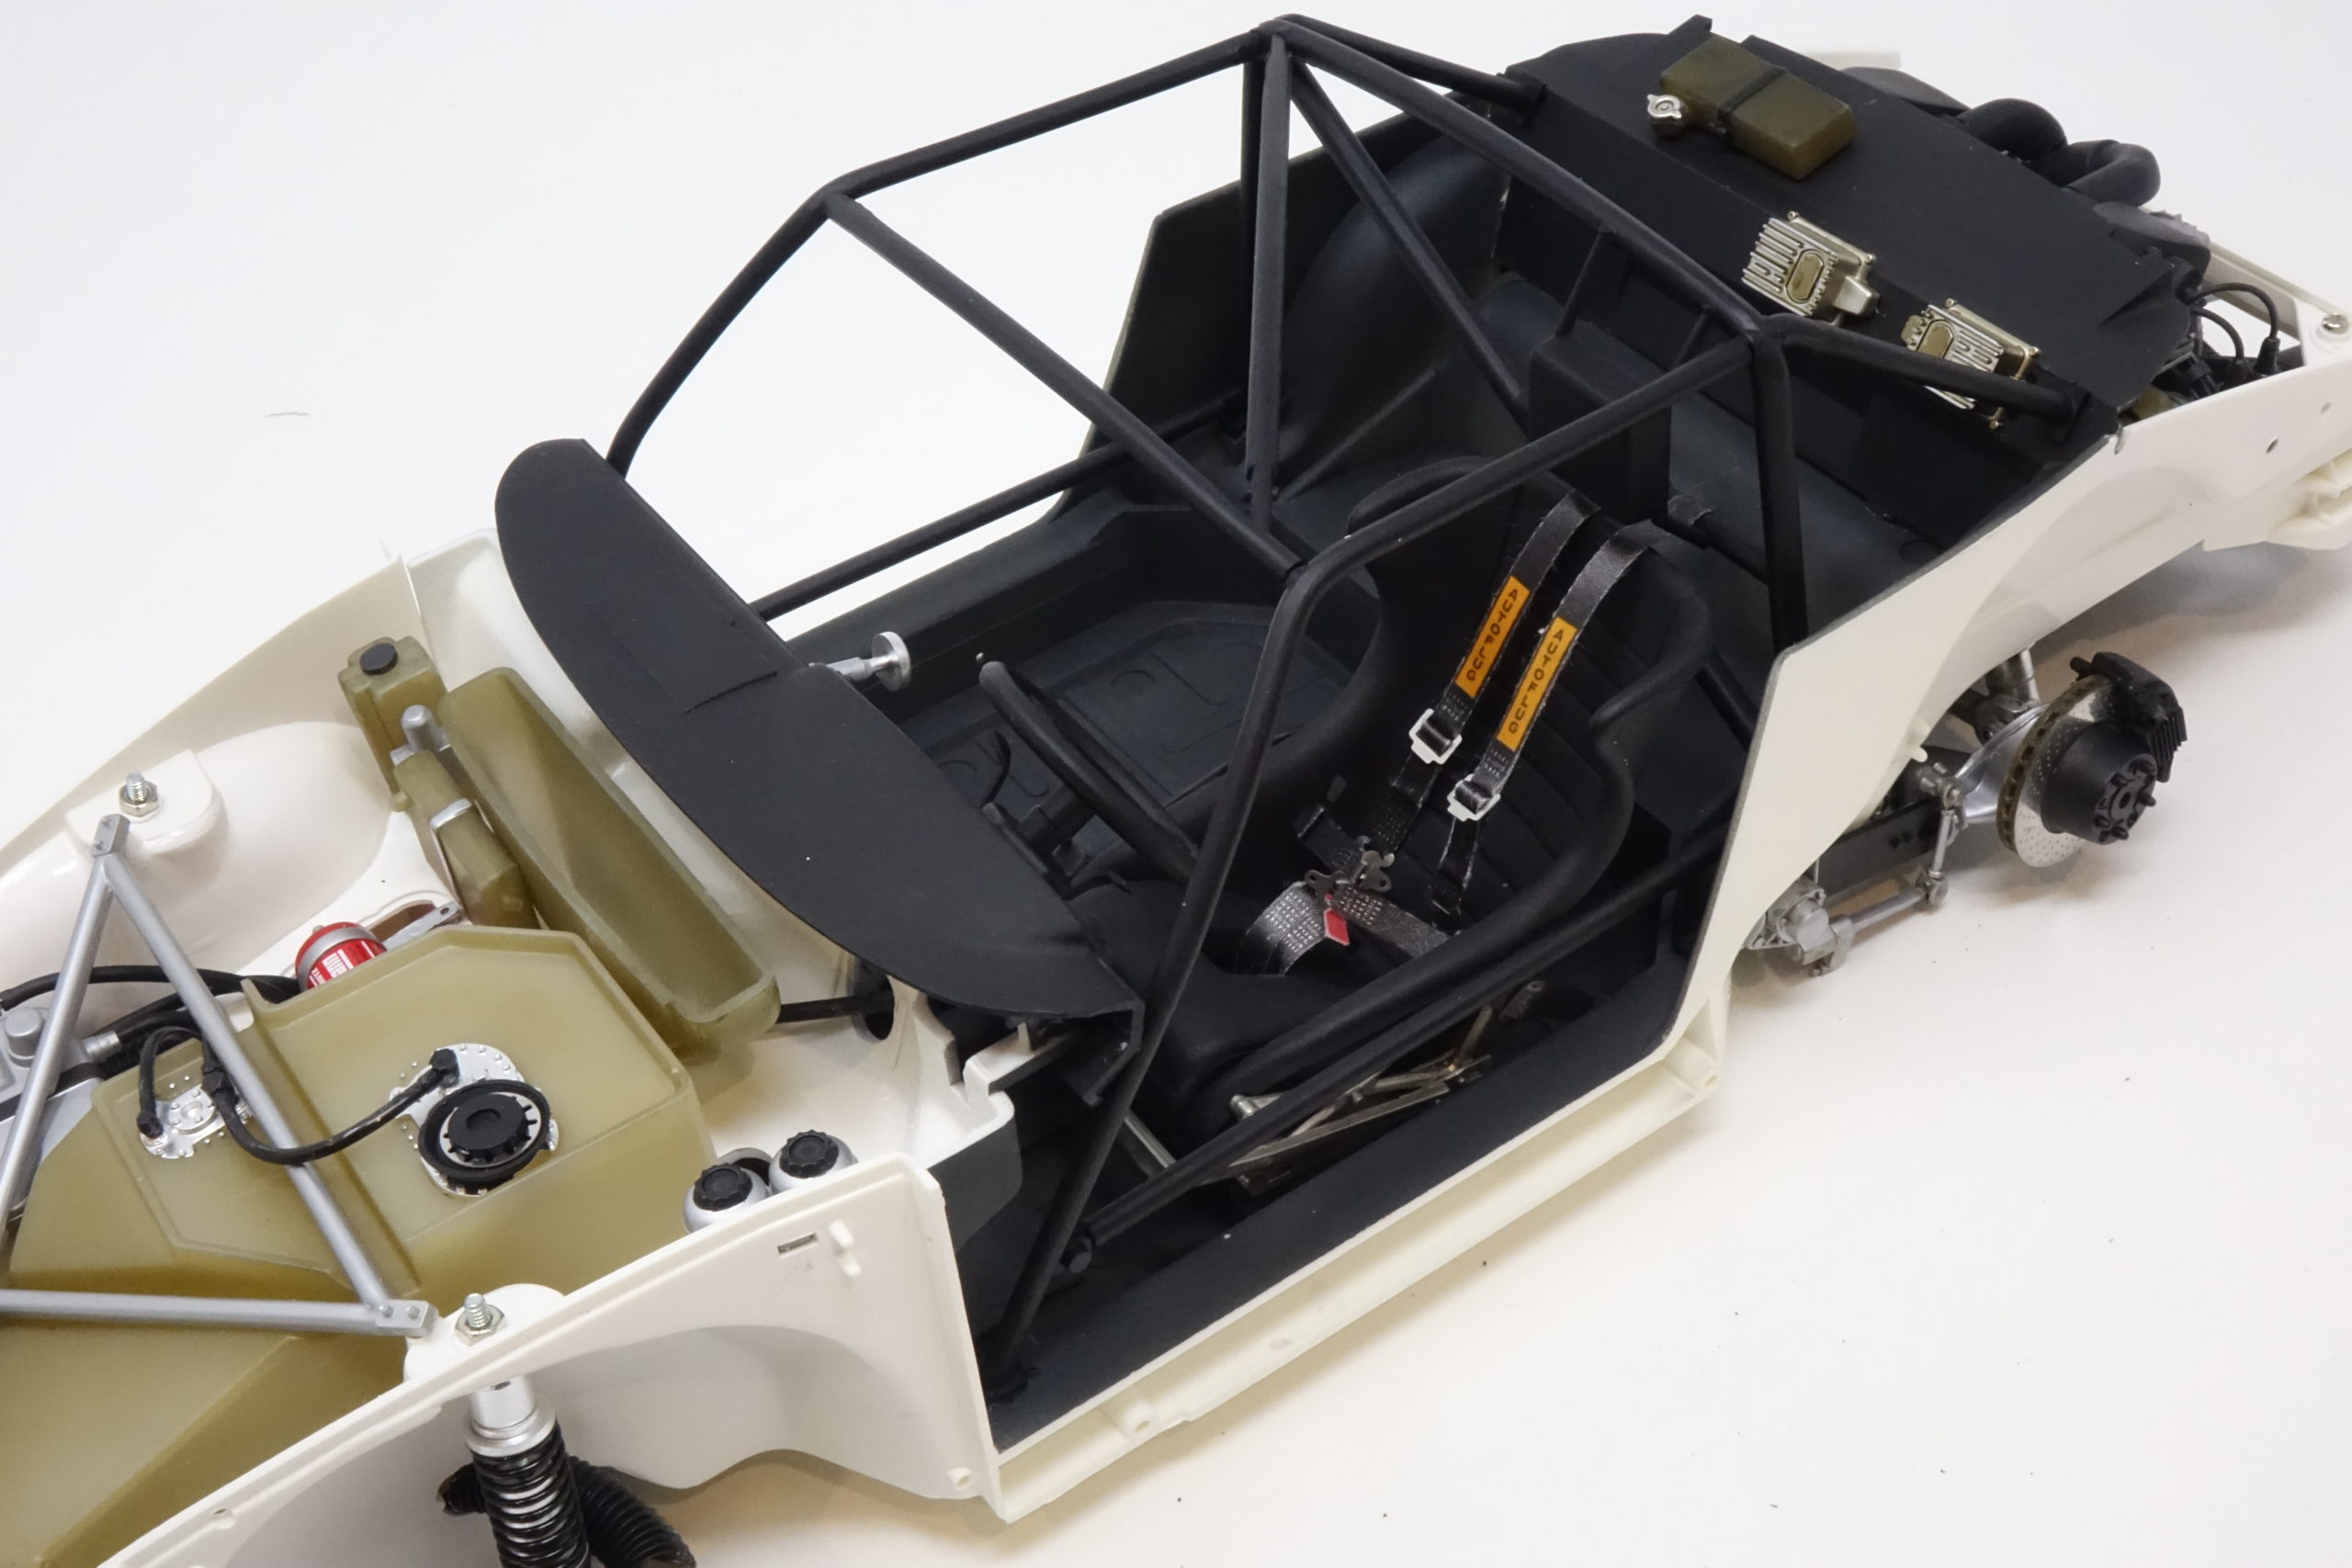
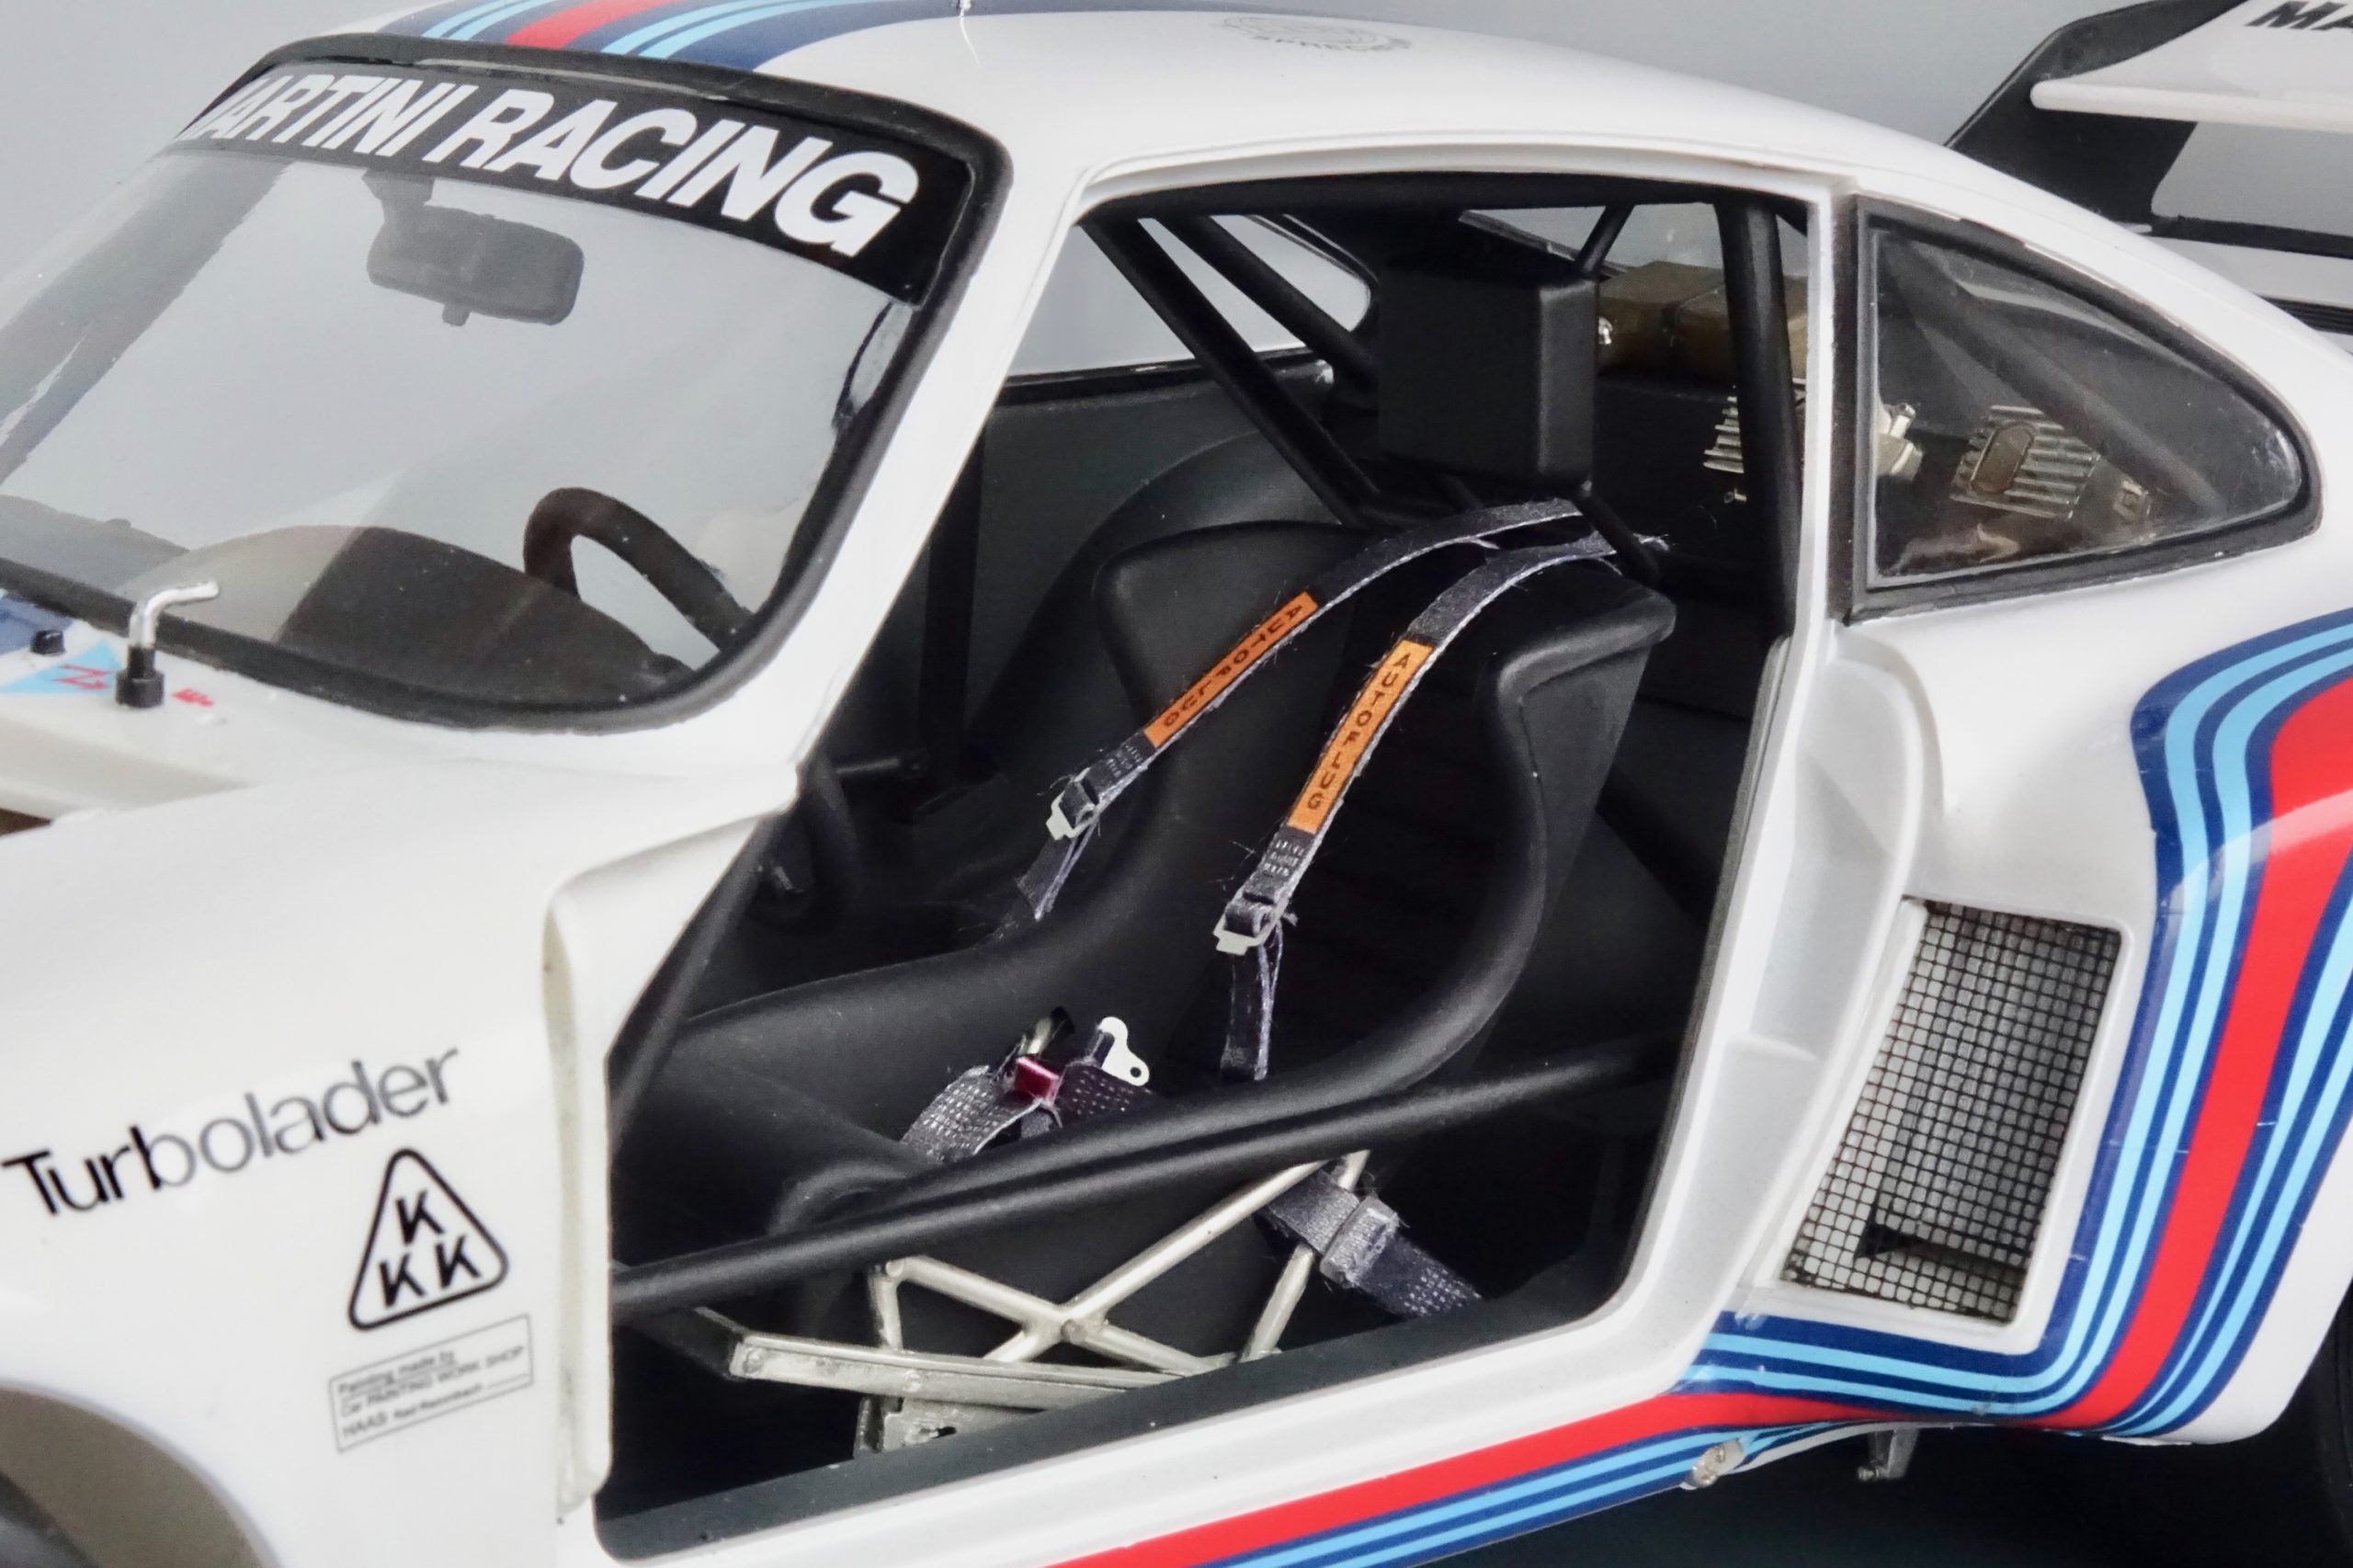
For the seat frame – I wasn’t happy with moulding marks so de-chromed, sanded and sprayed Titanium Silver. The seat then done in LP3. Then the seat and frame assembled. A bit of dark wash on the Titanium Silver used on seat frame.
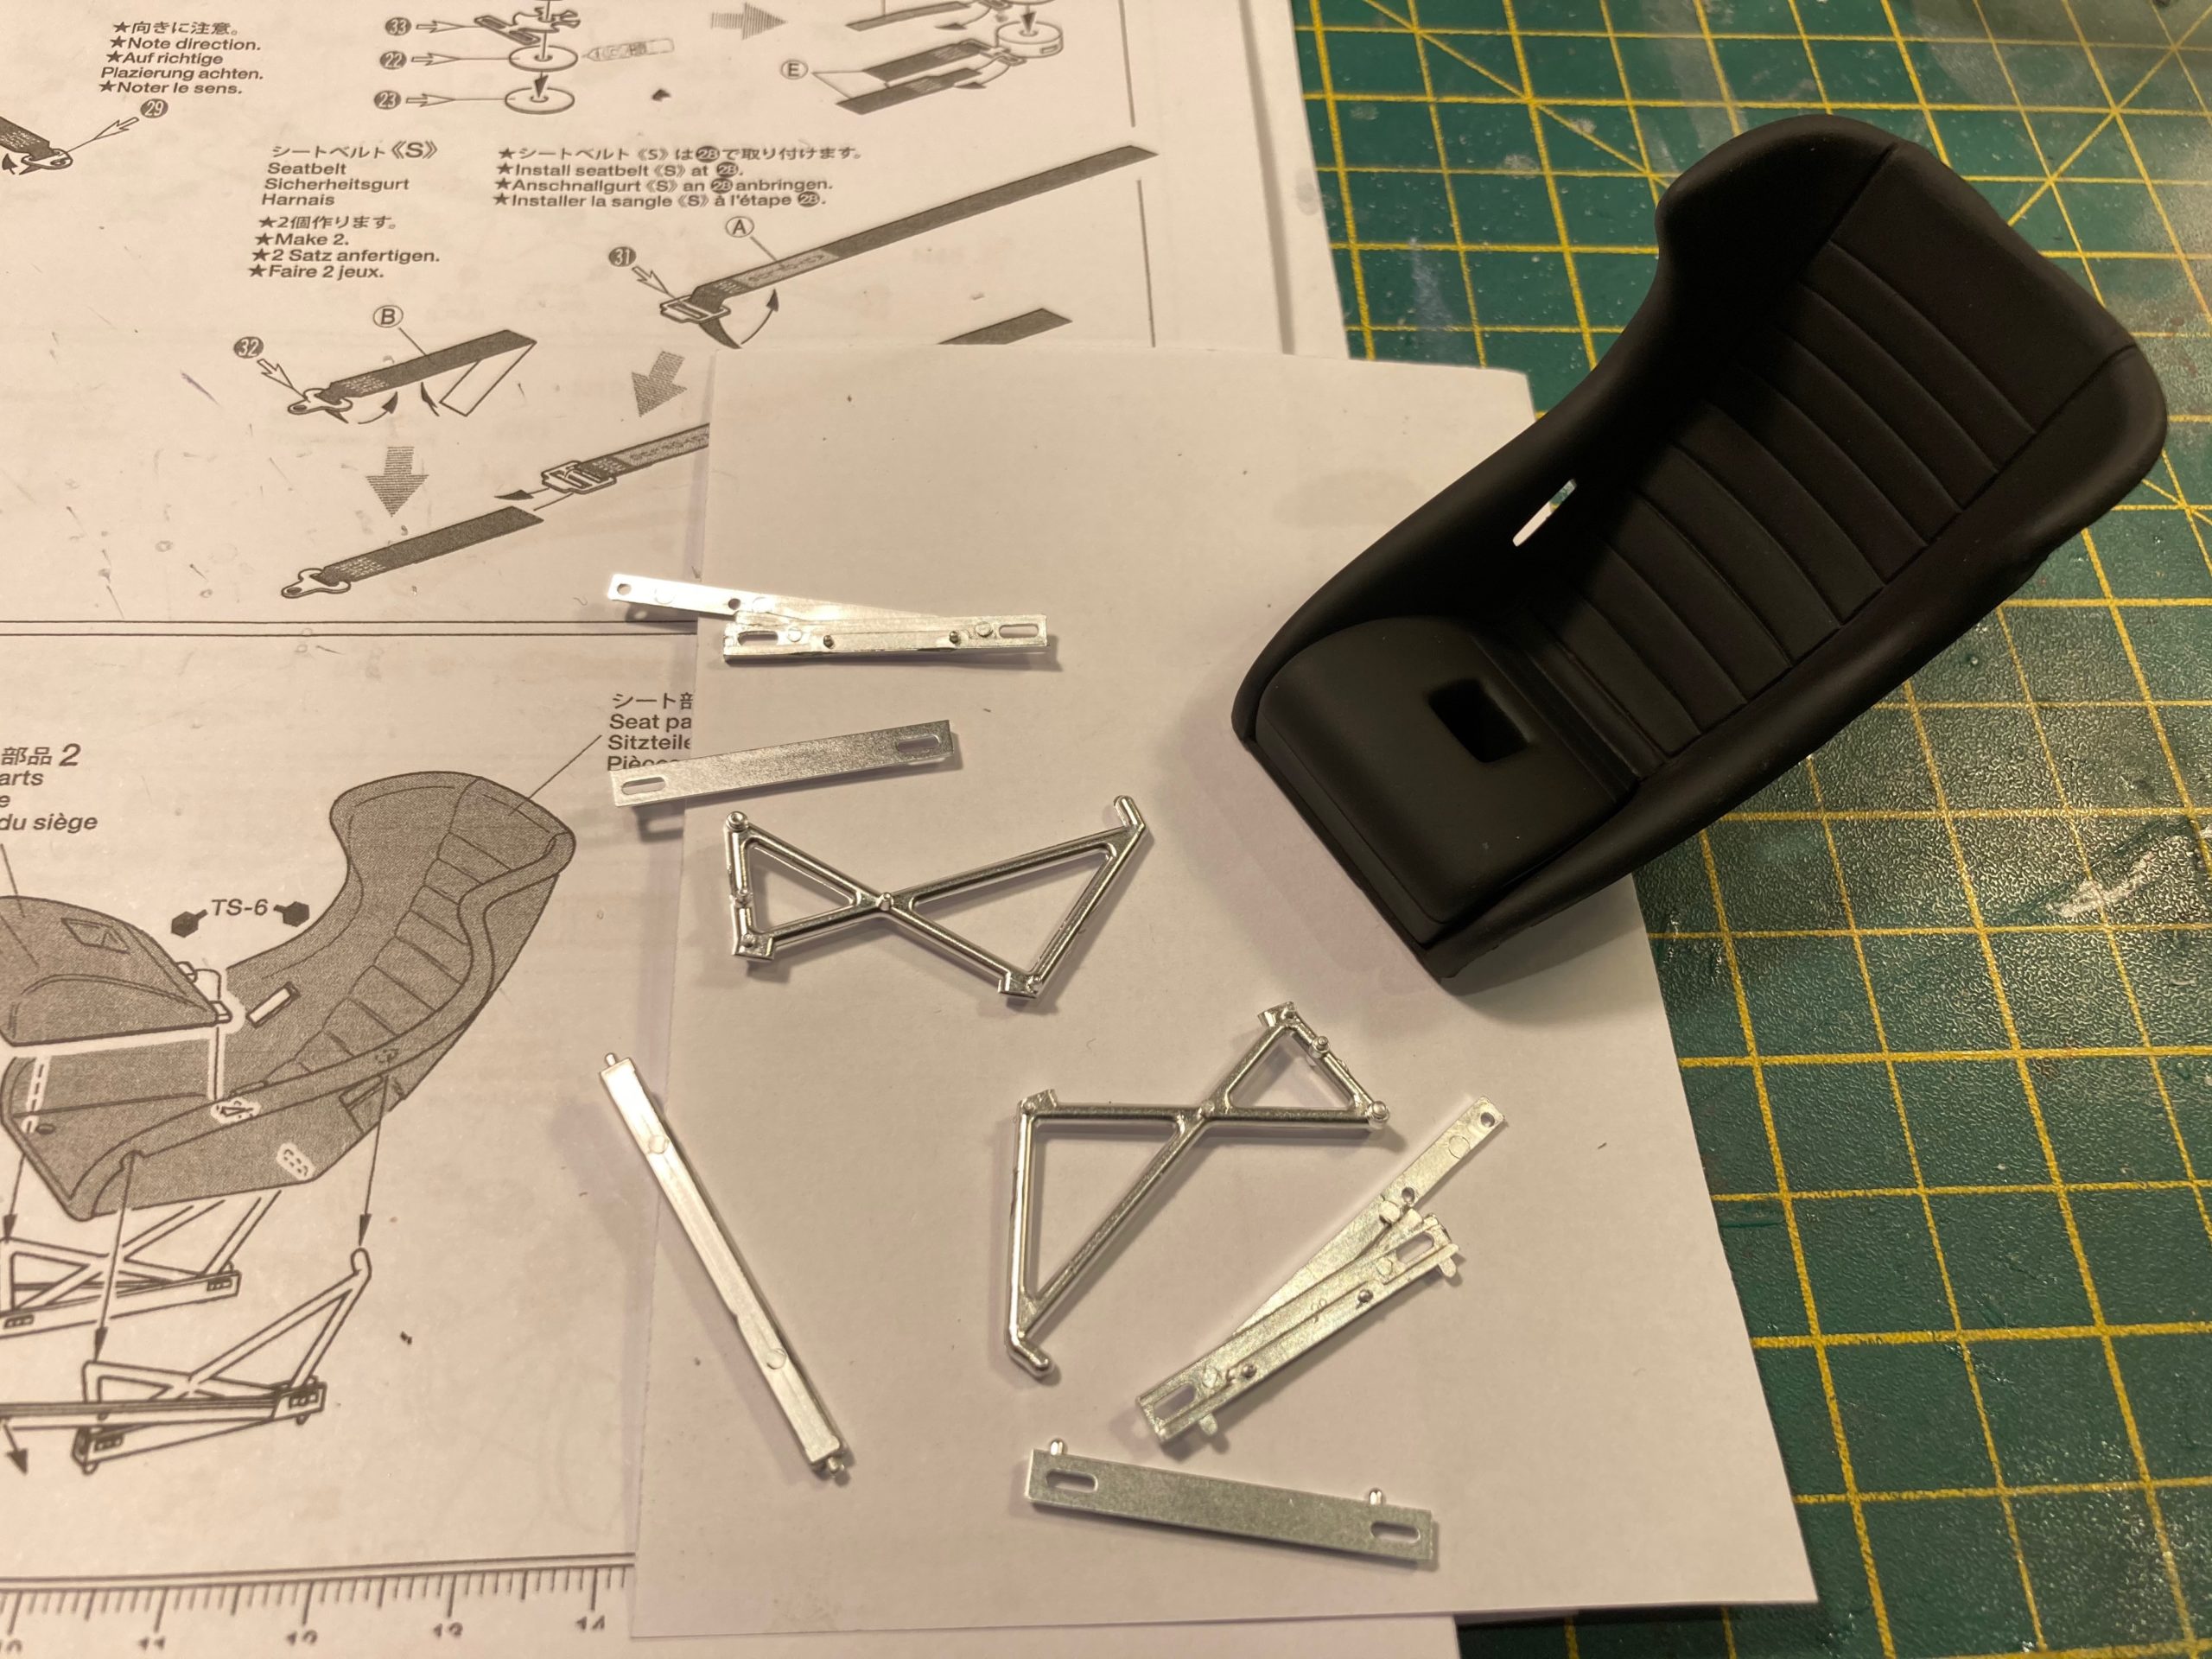
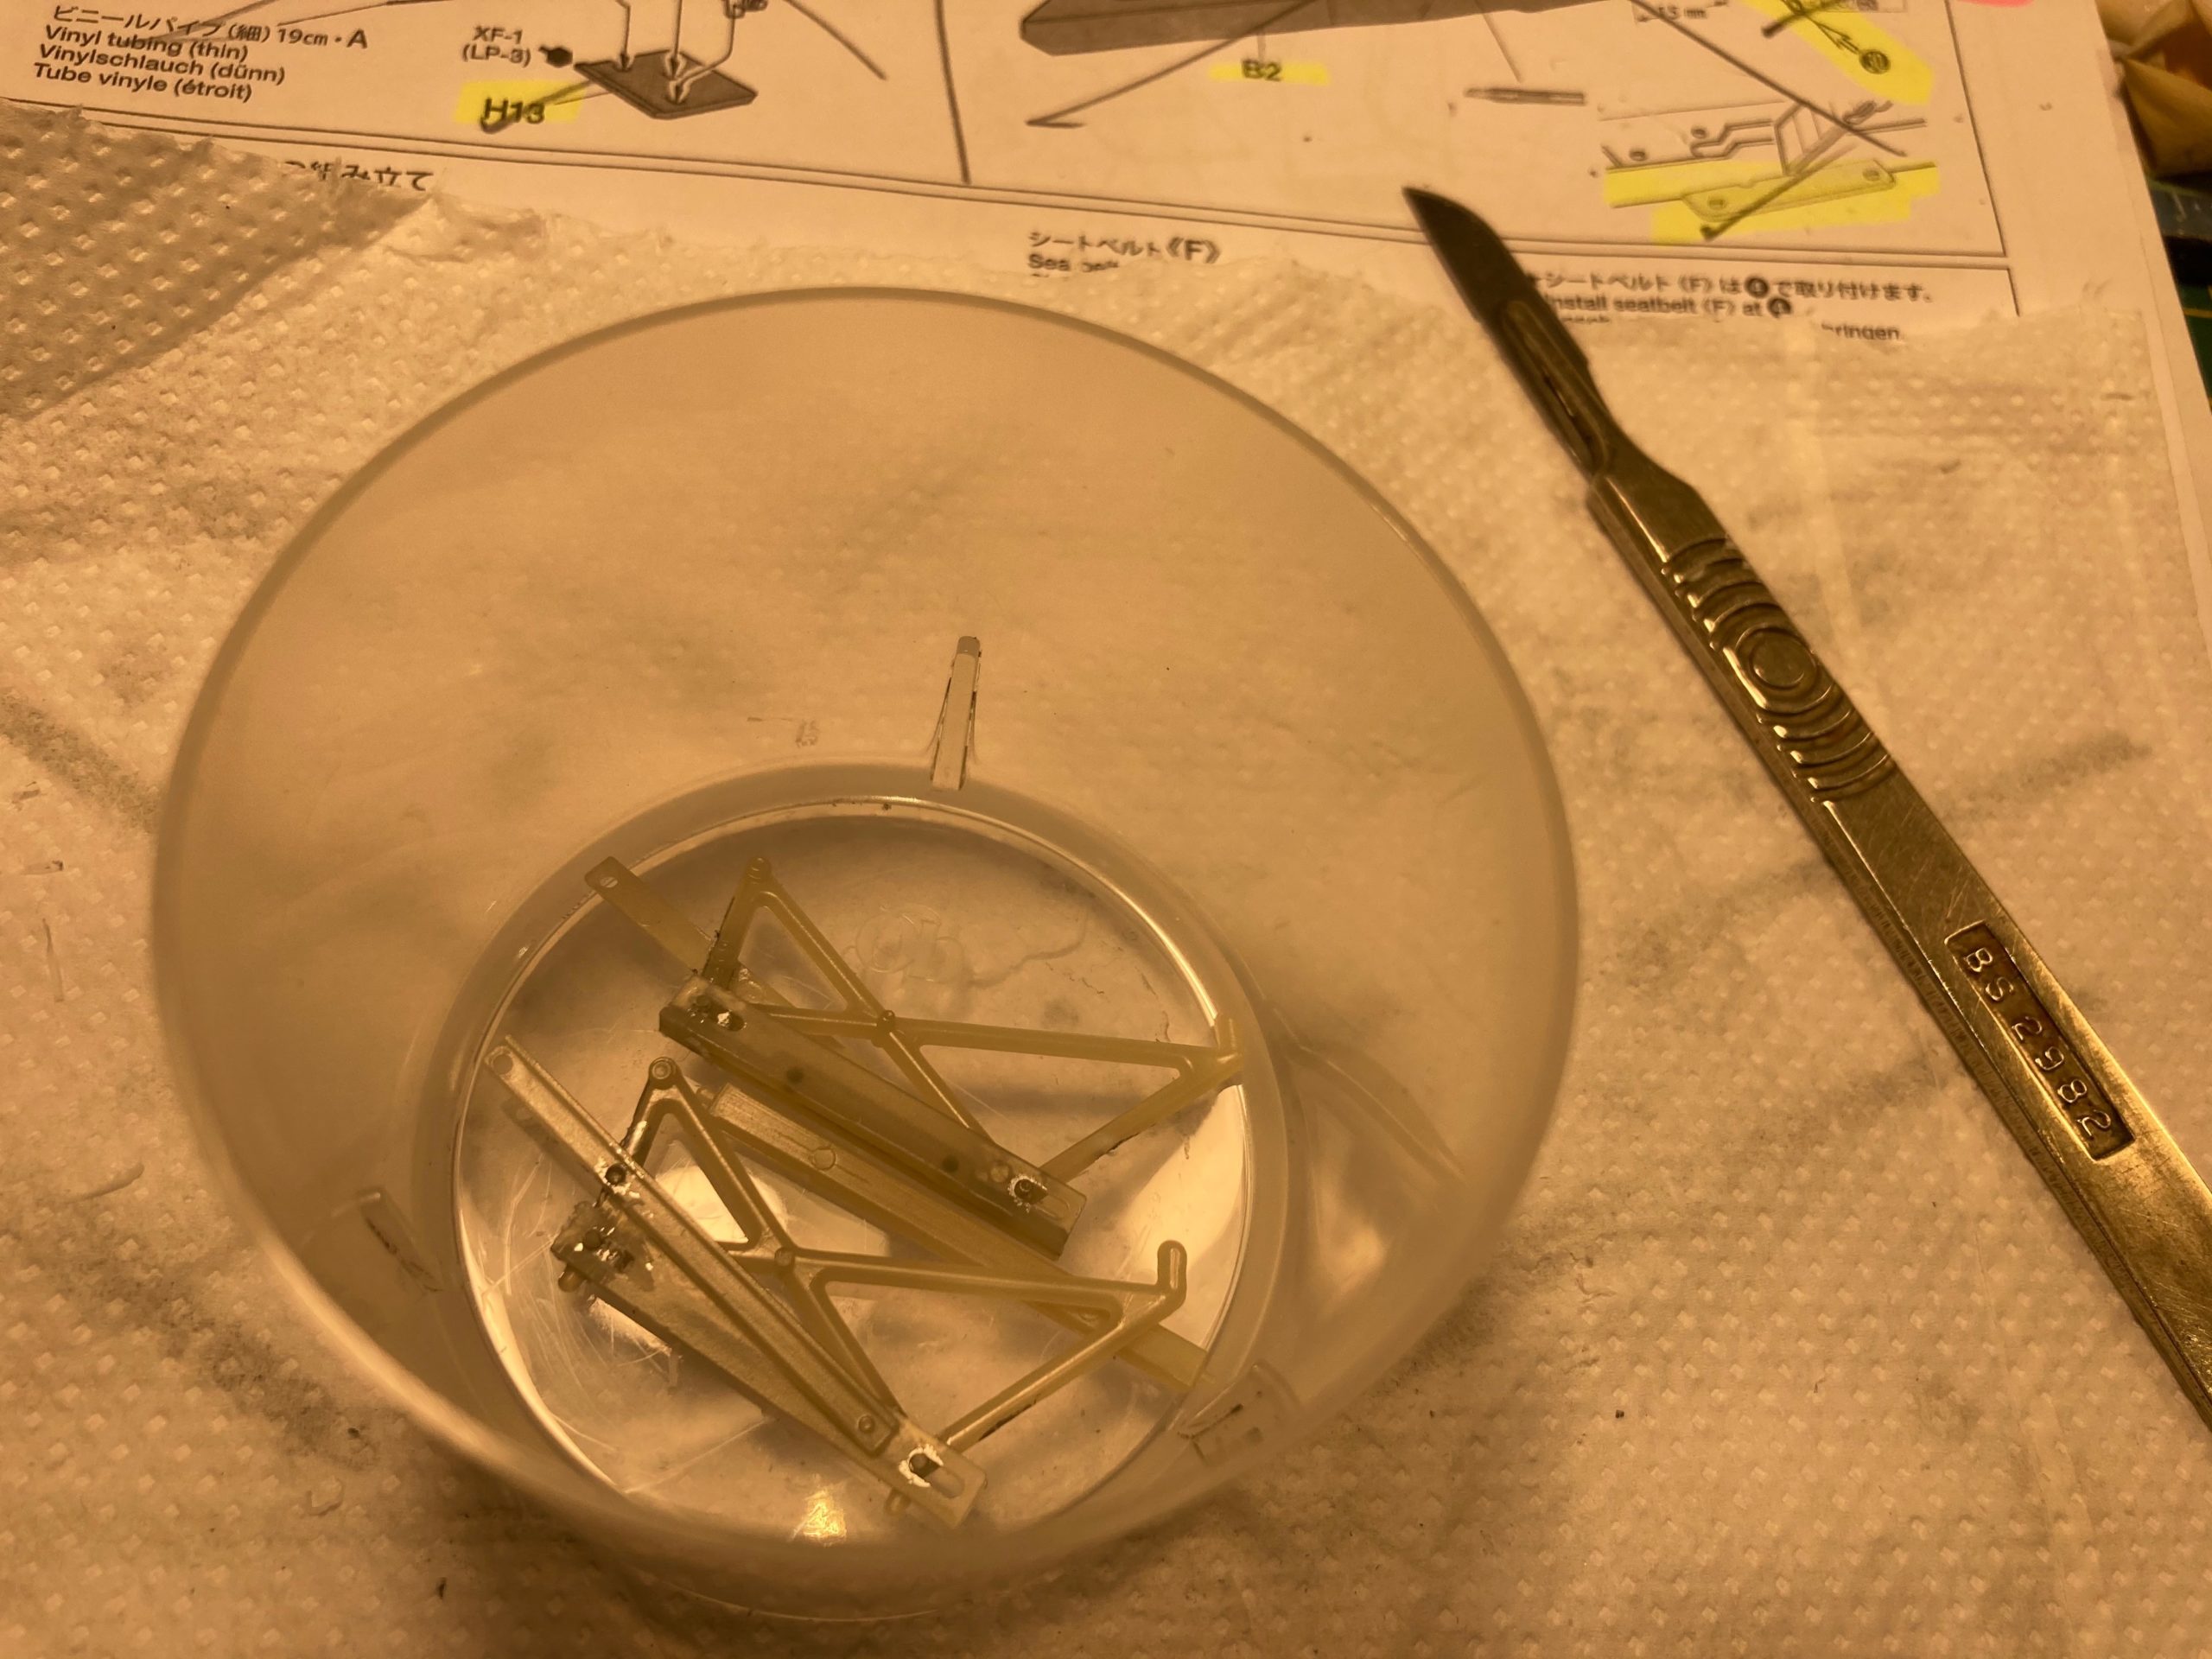
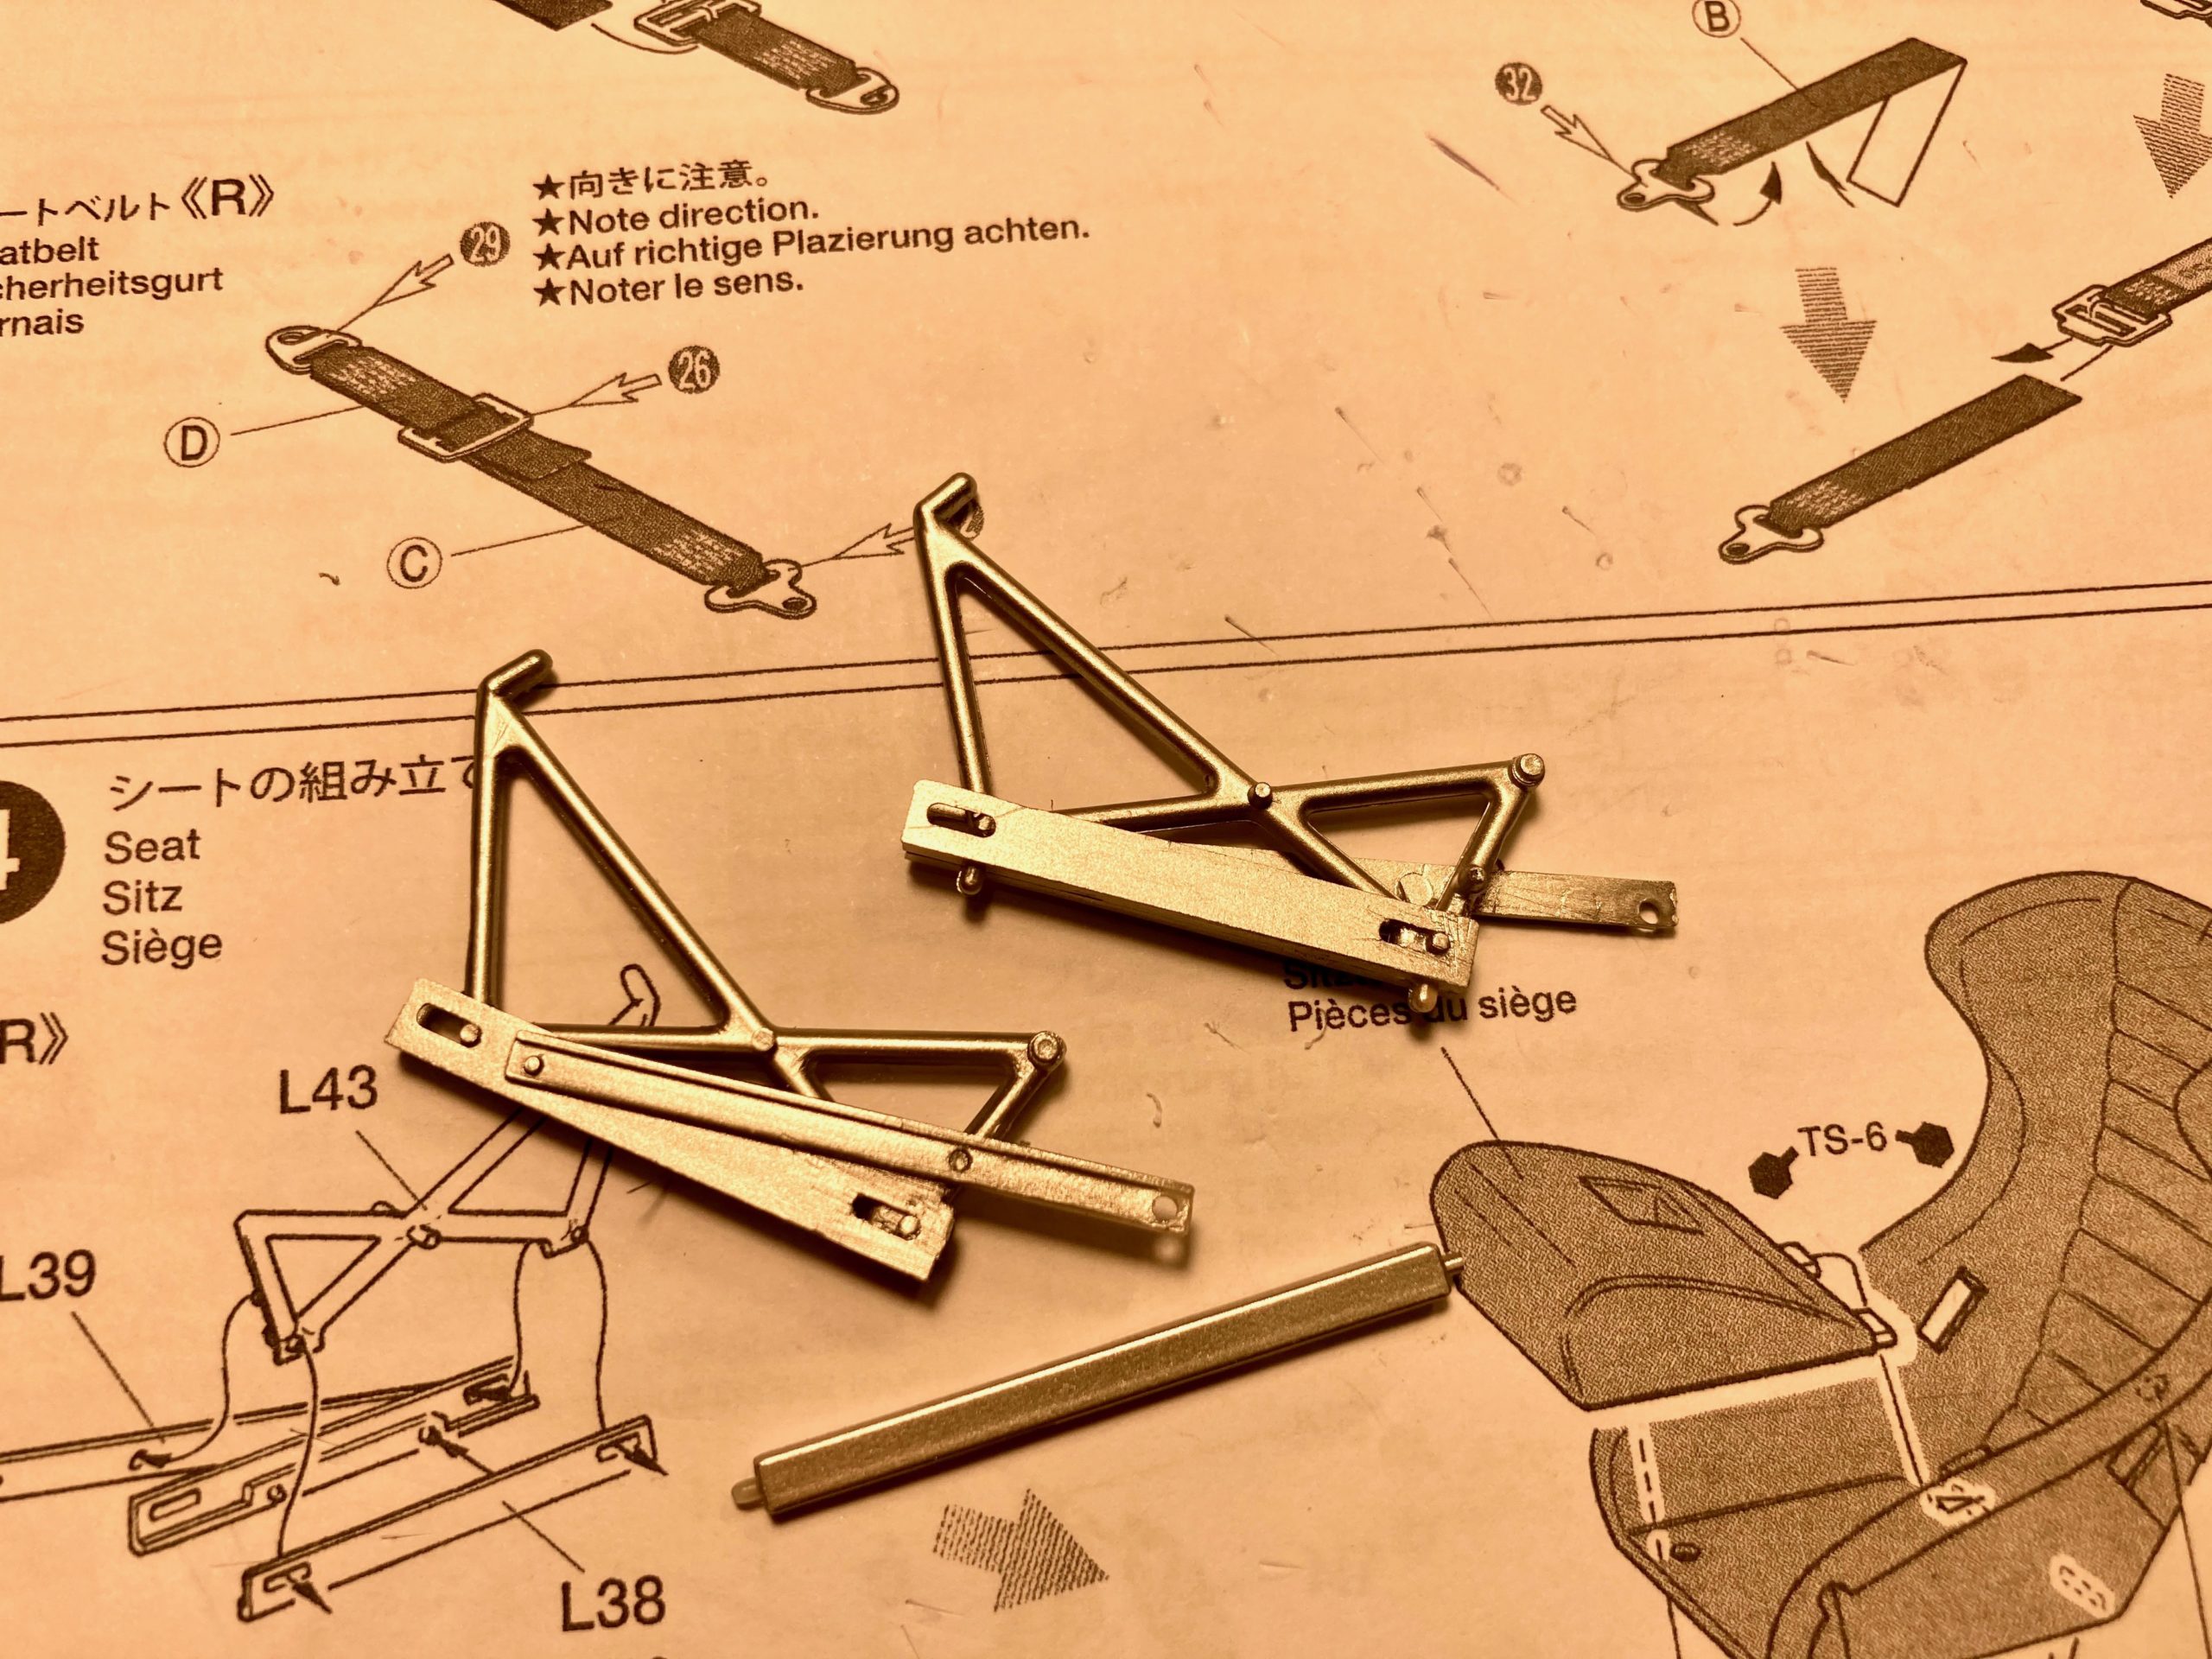
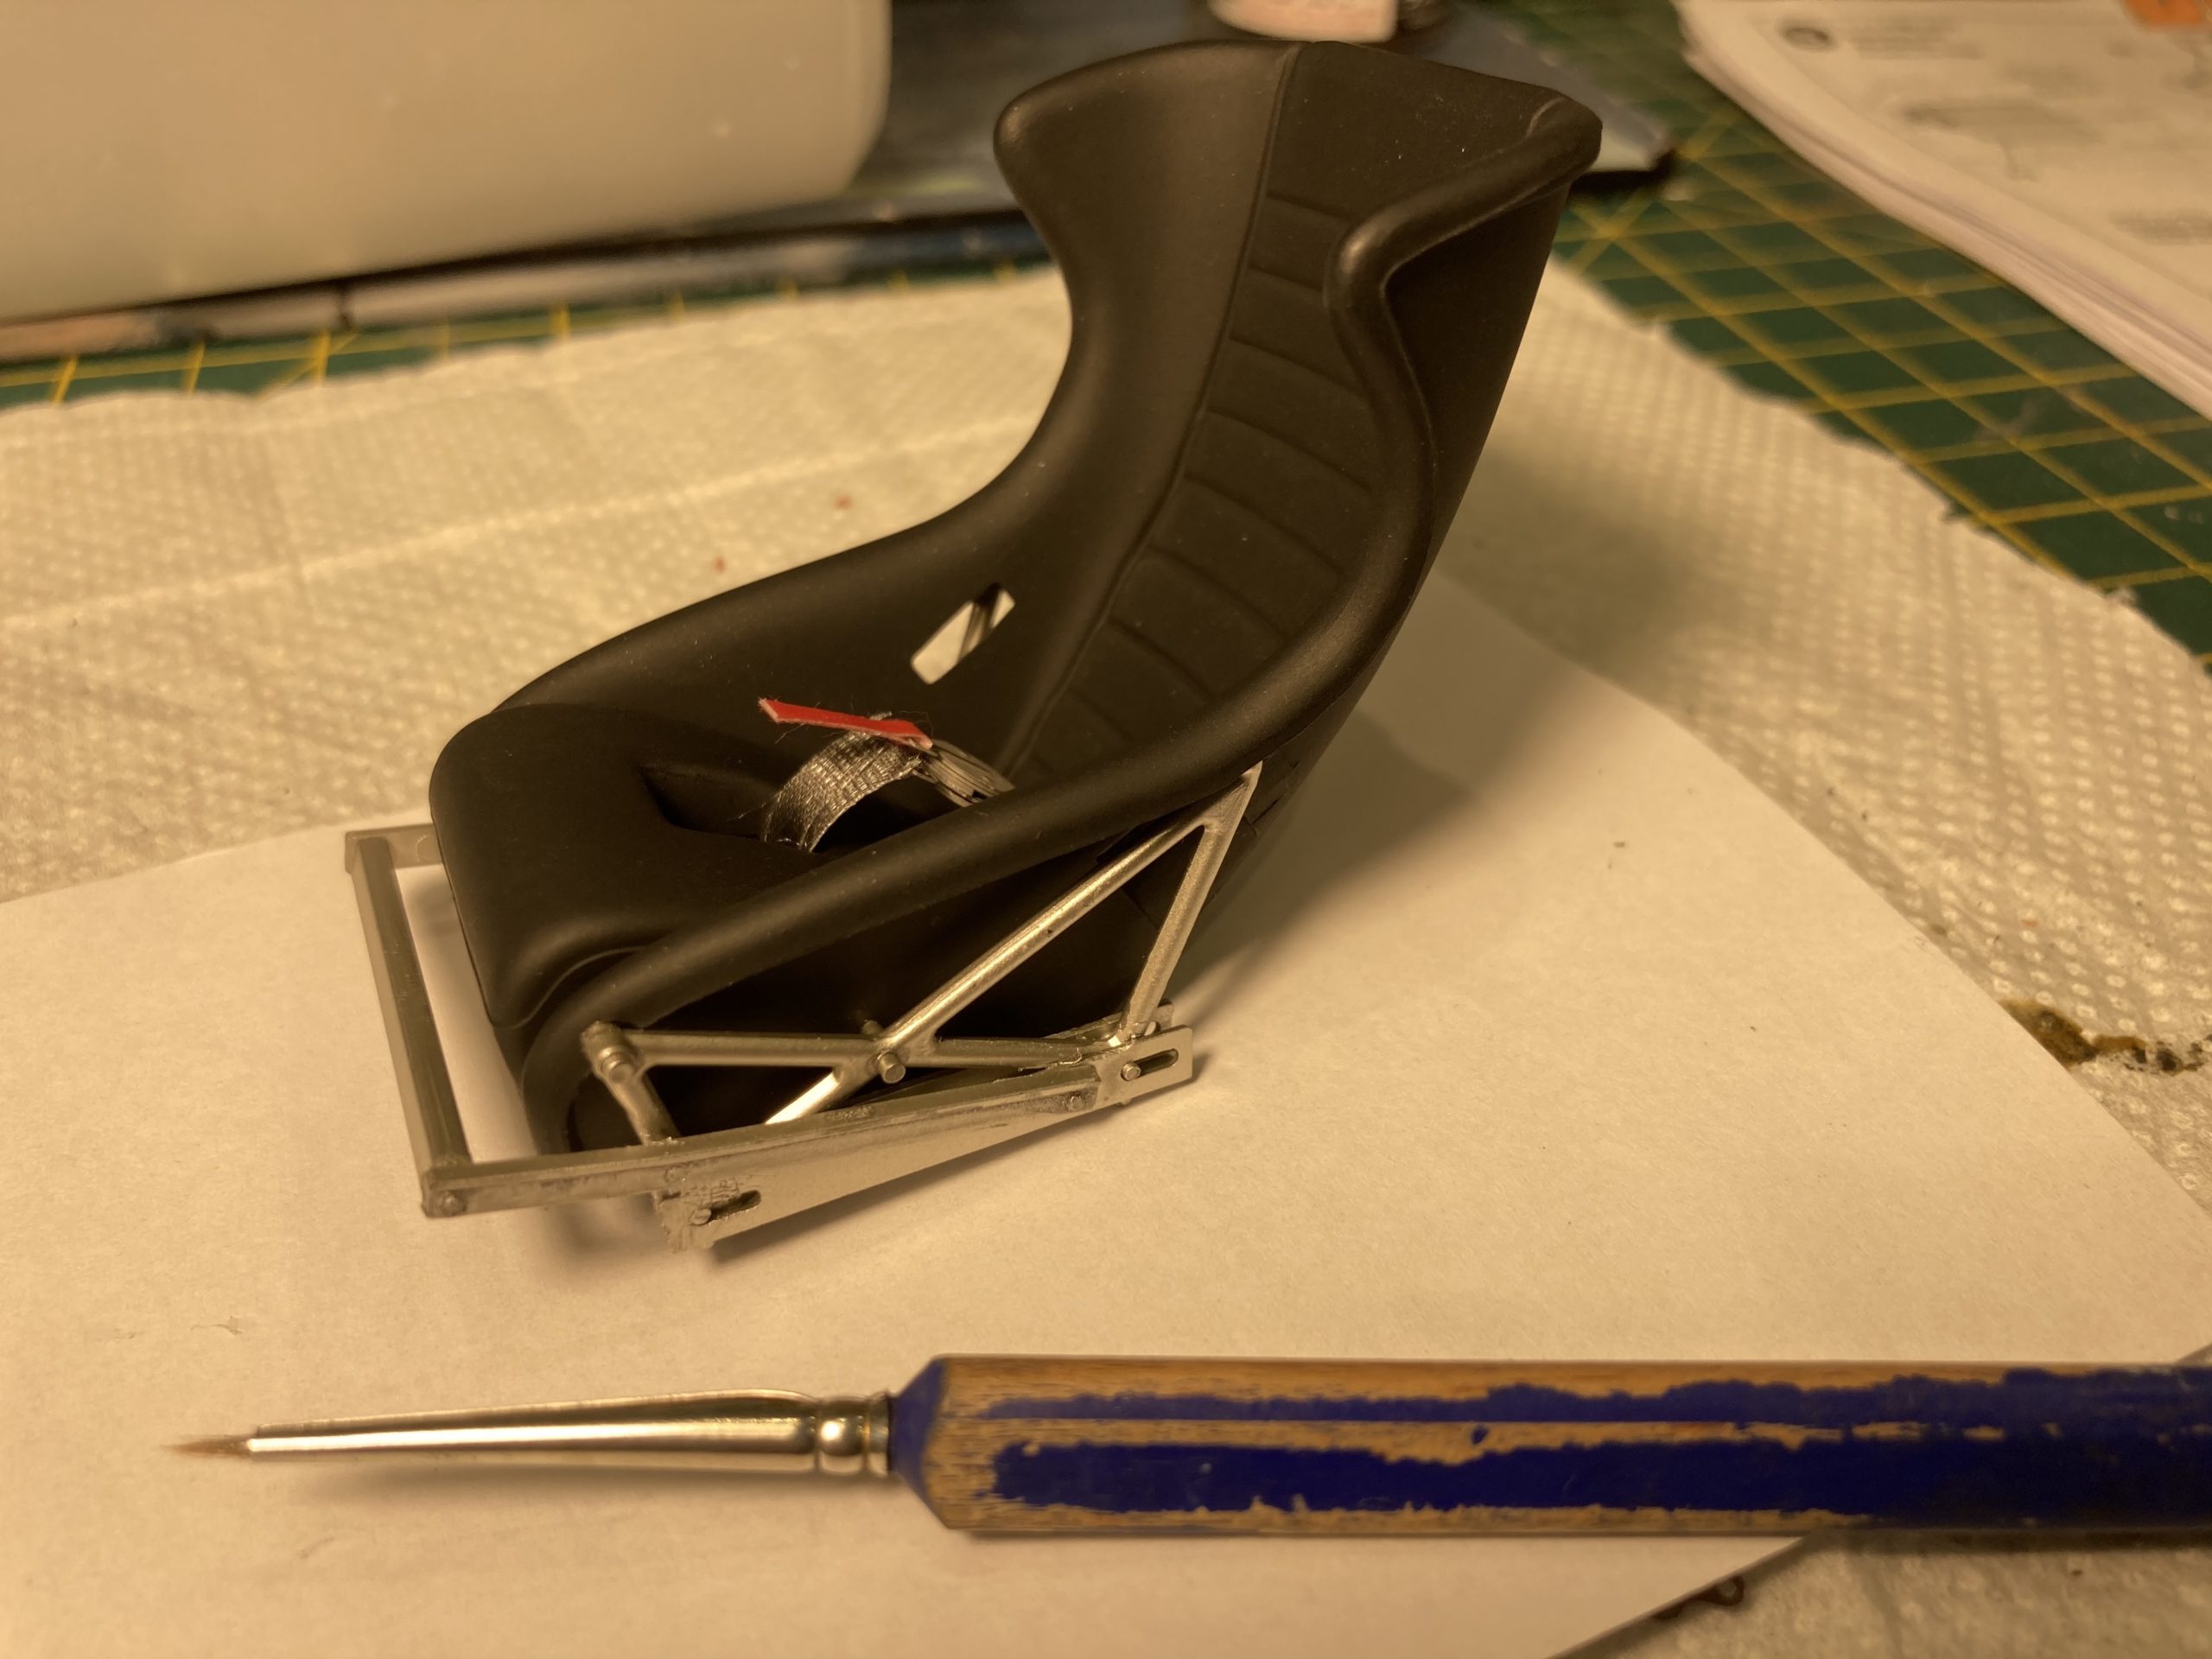
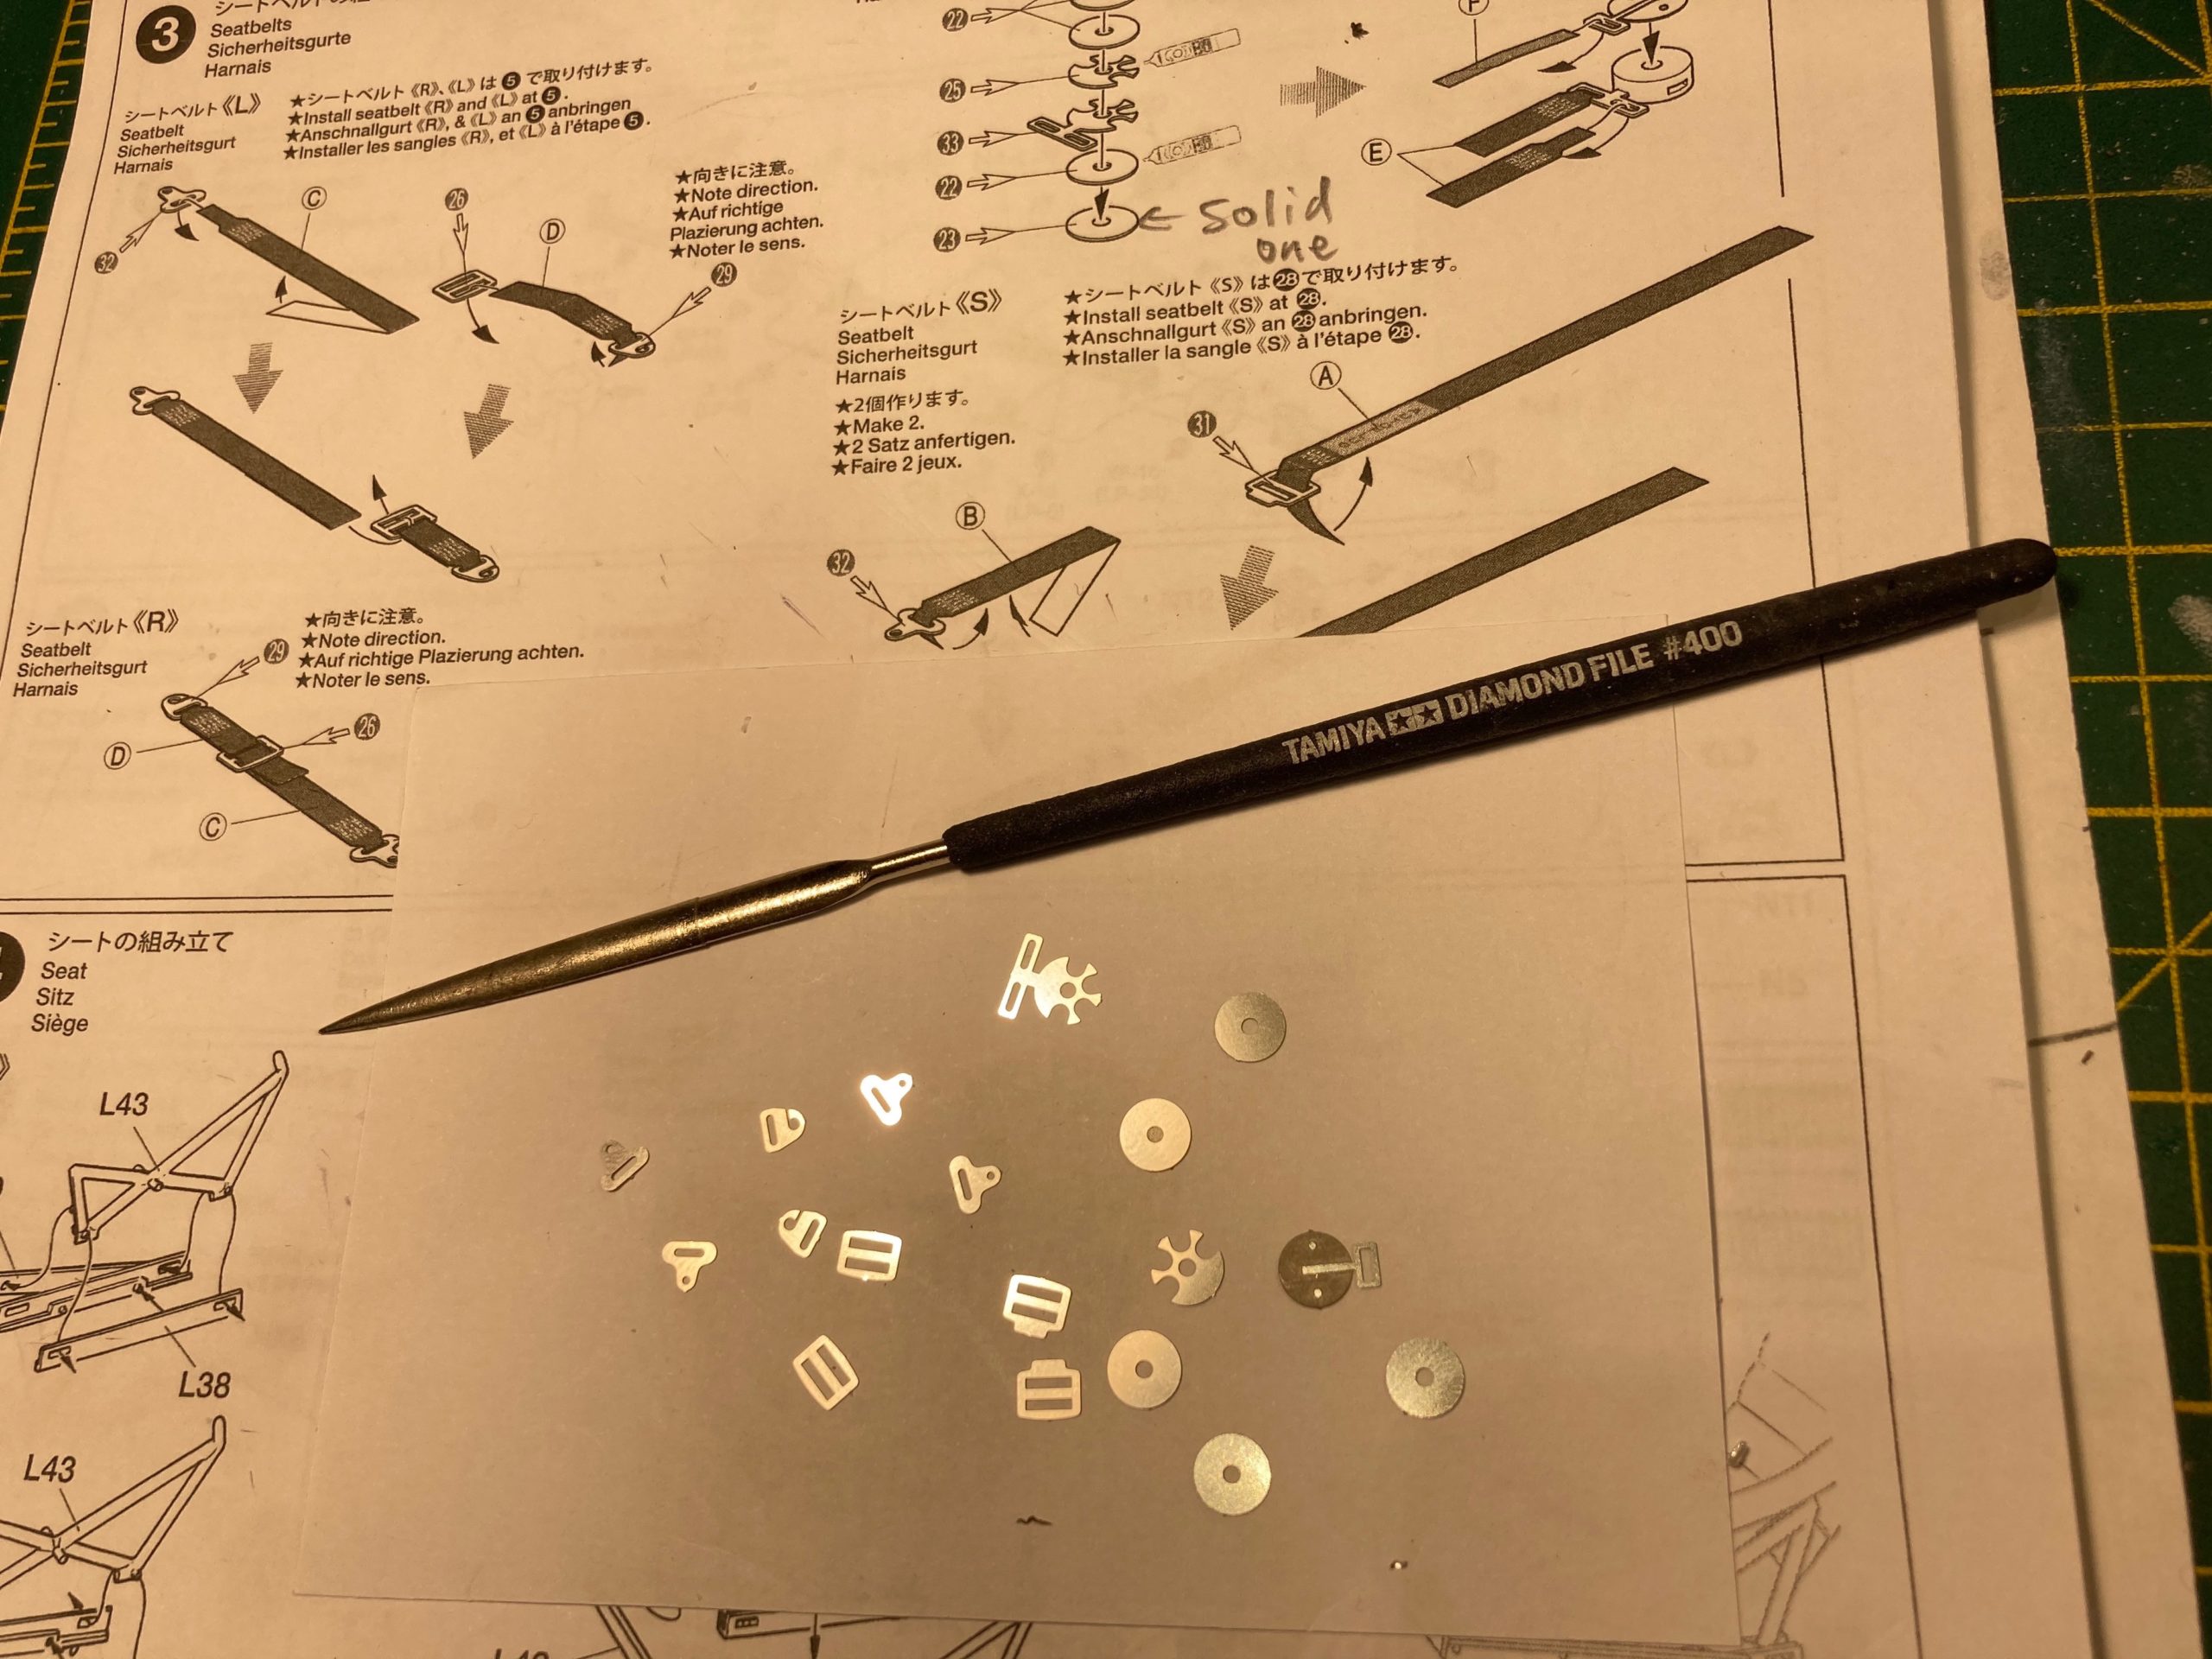
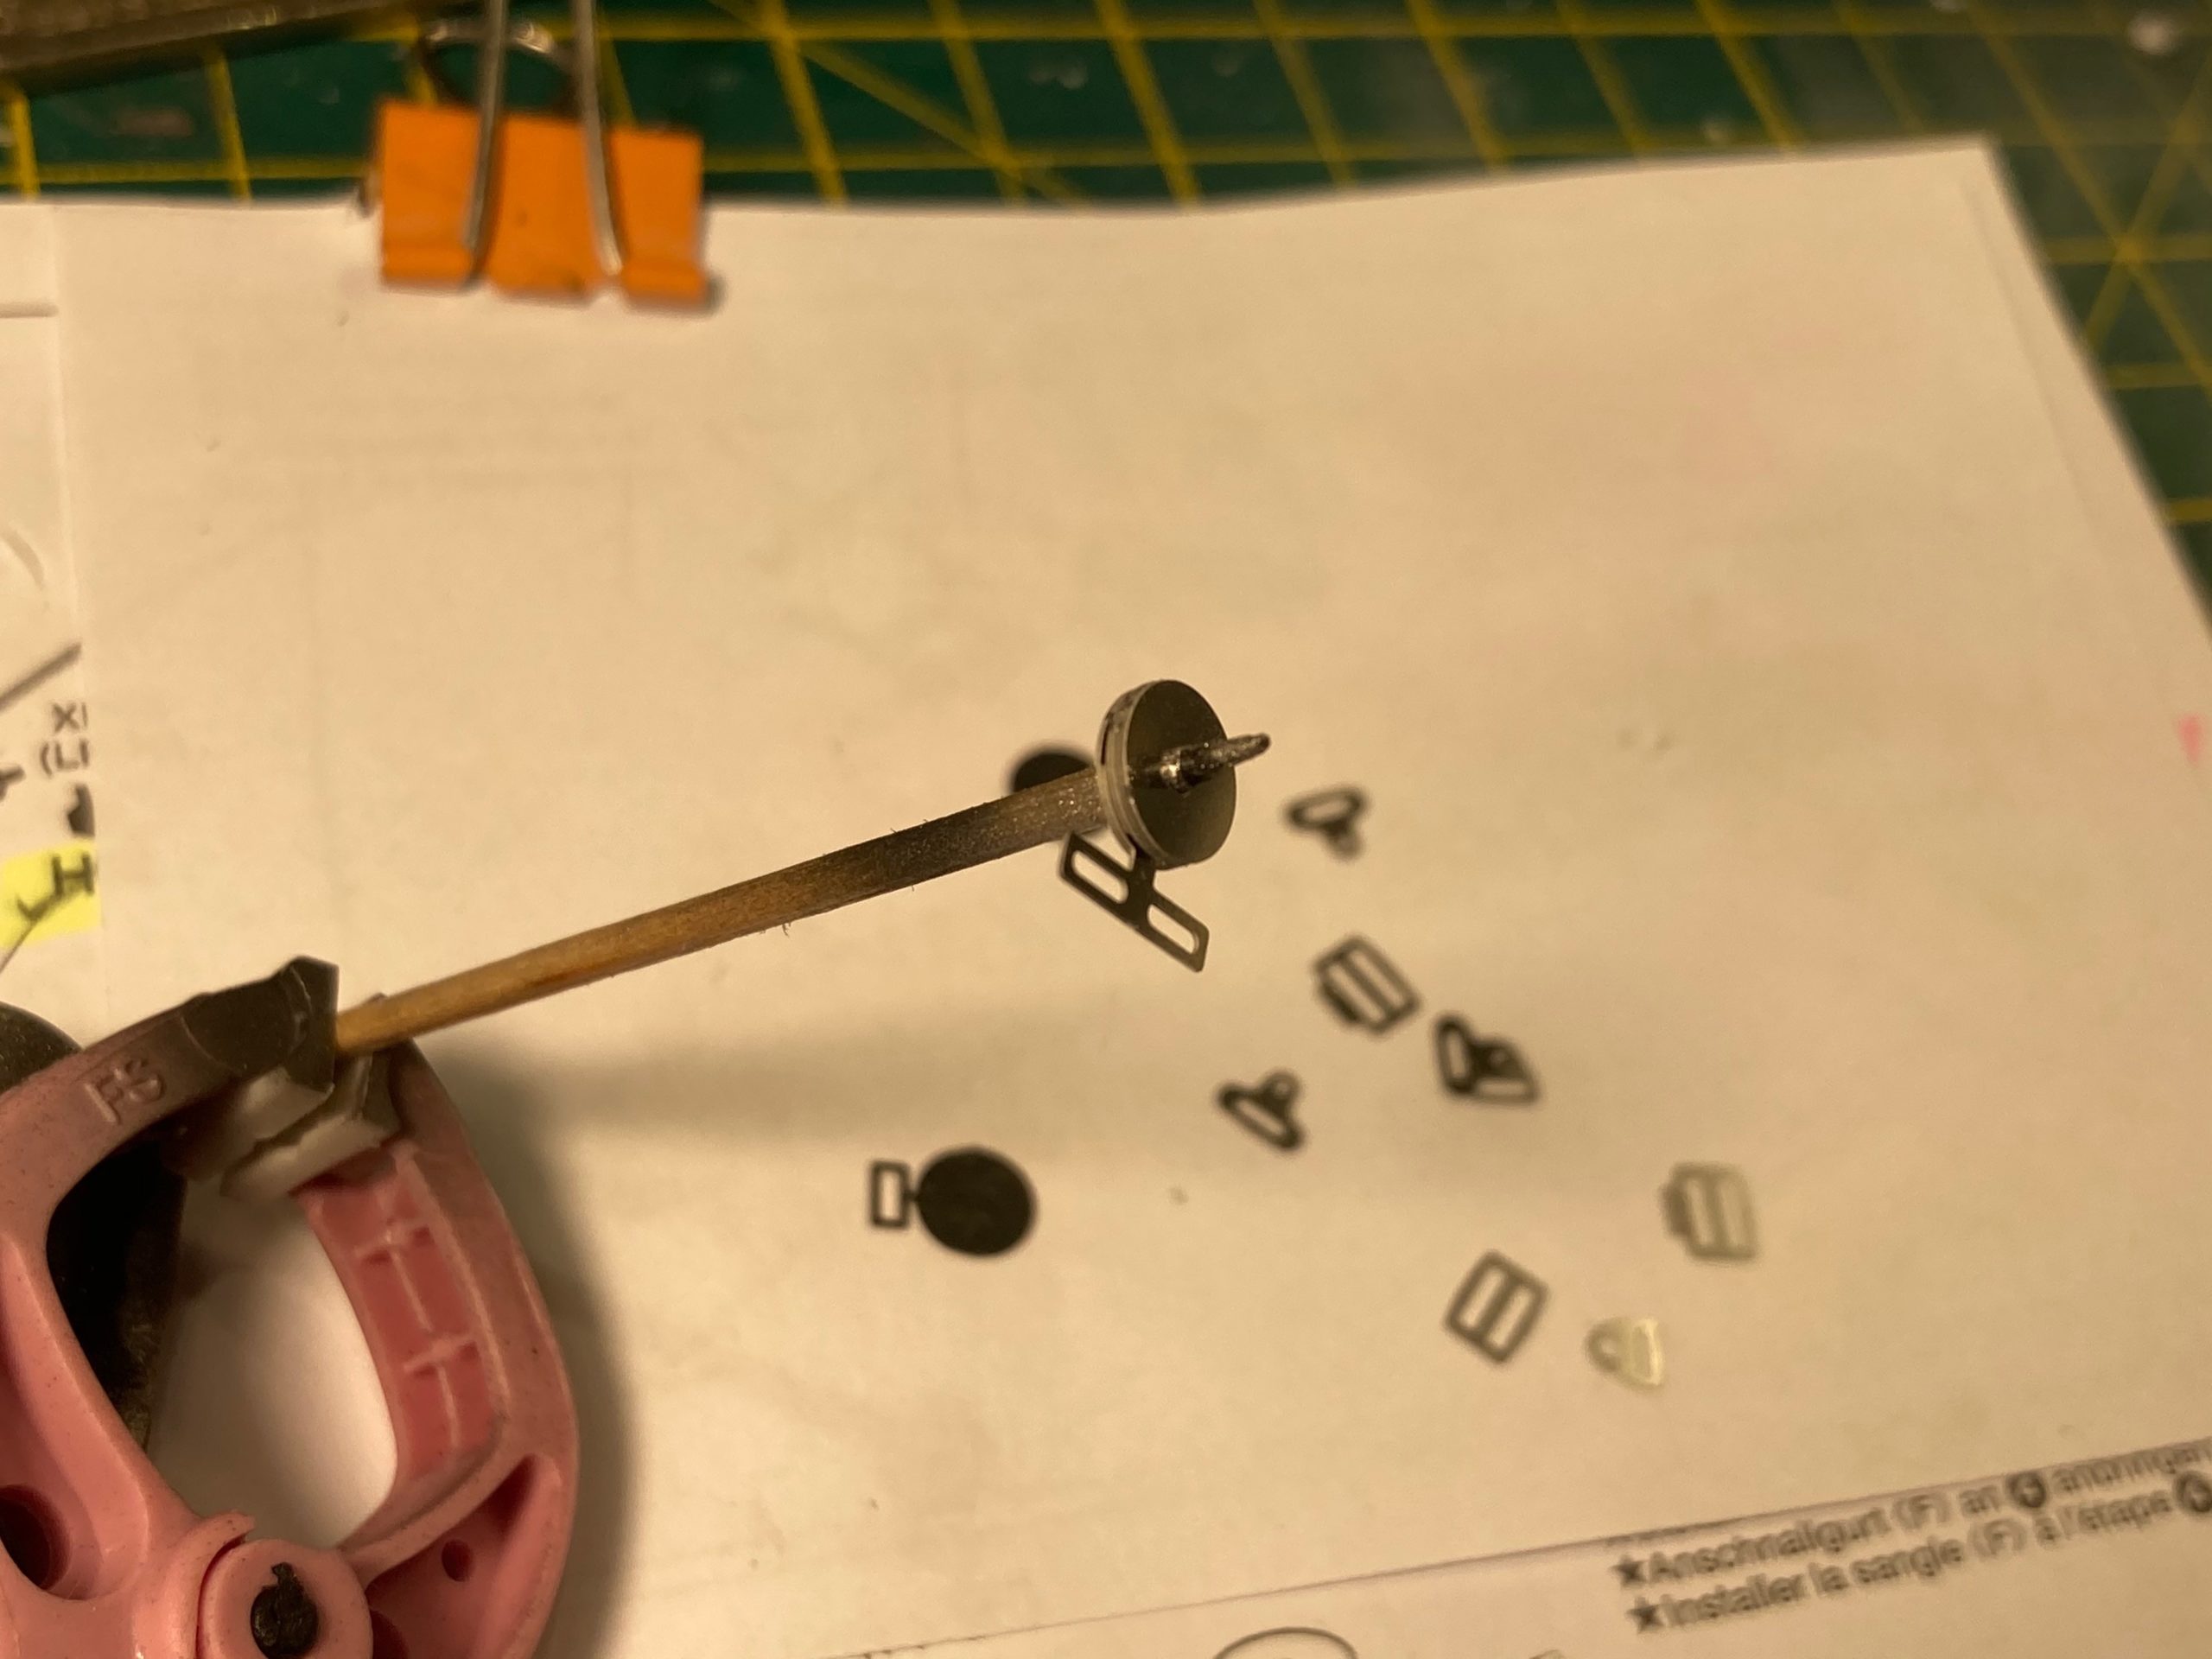
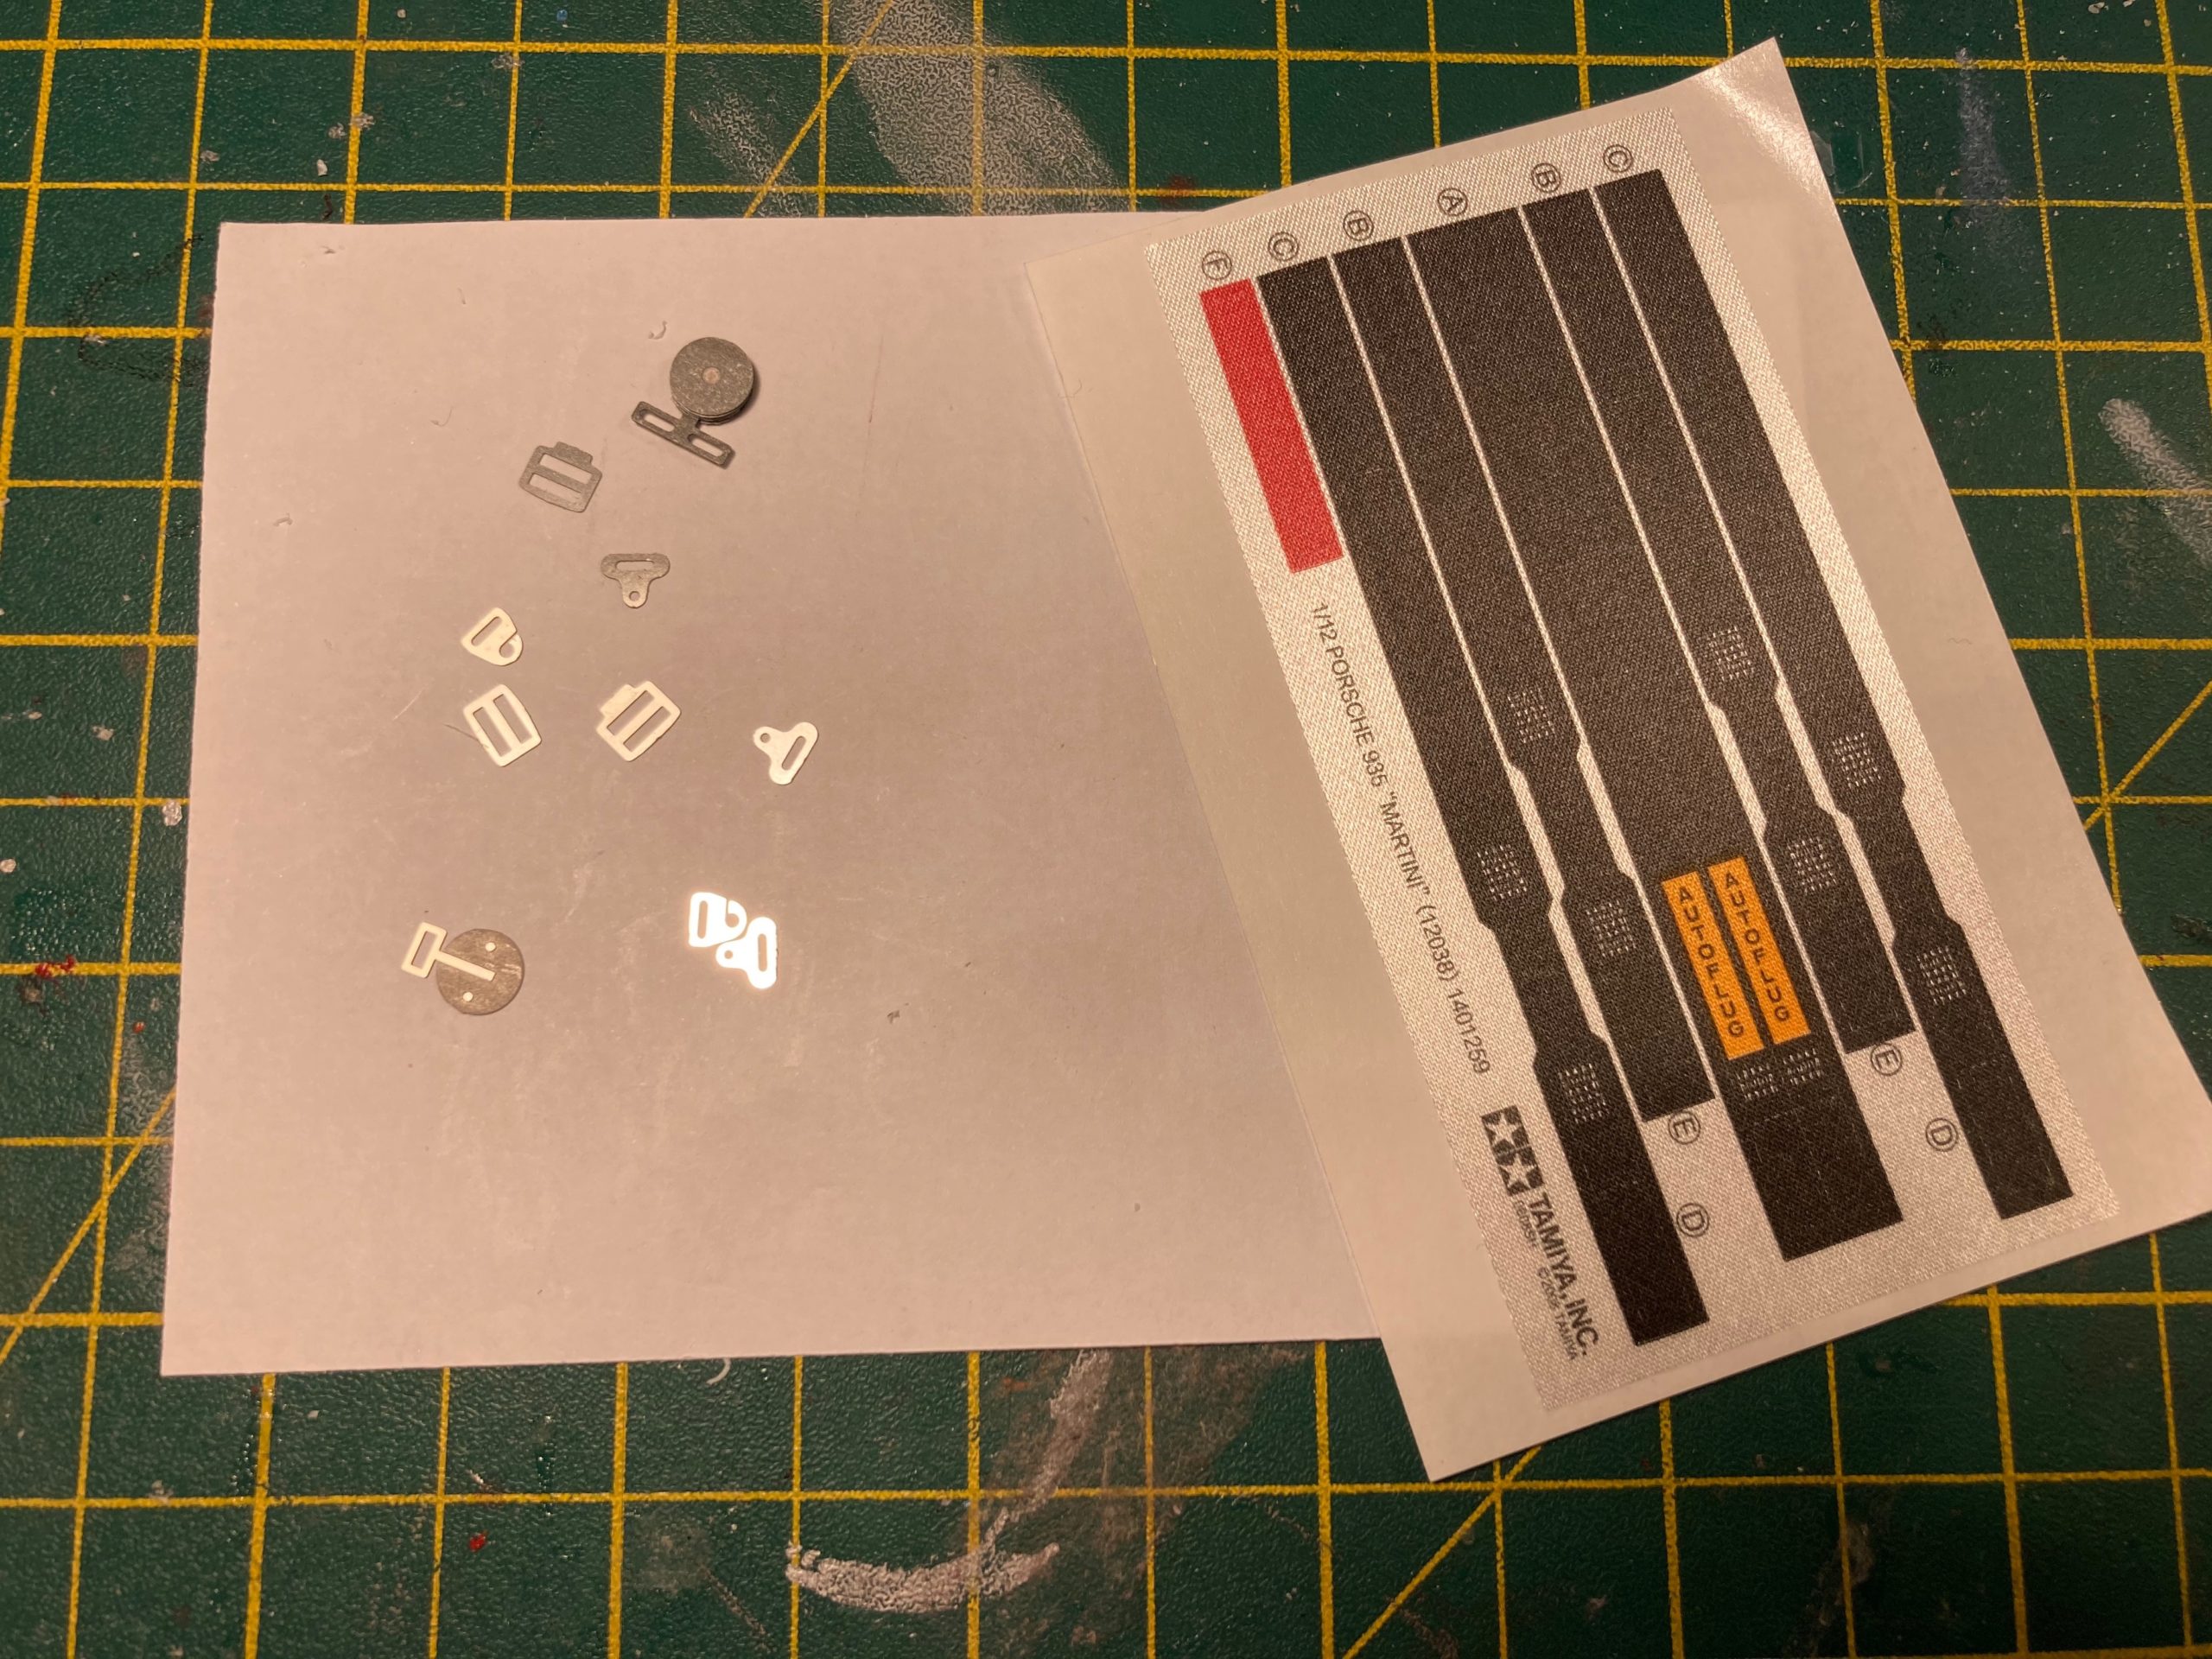
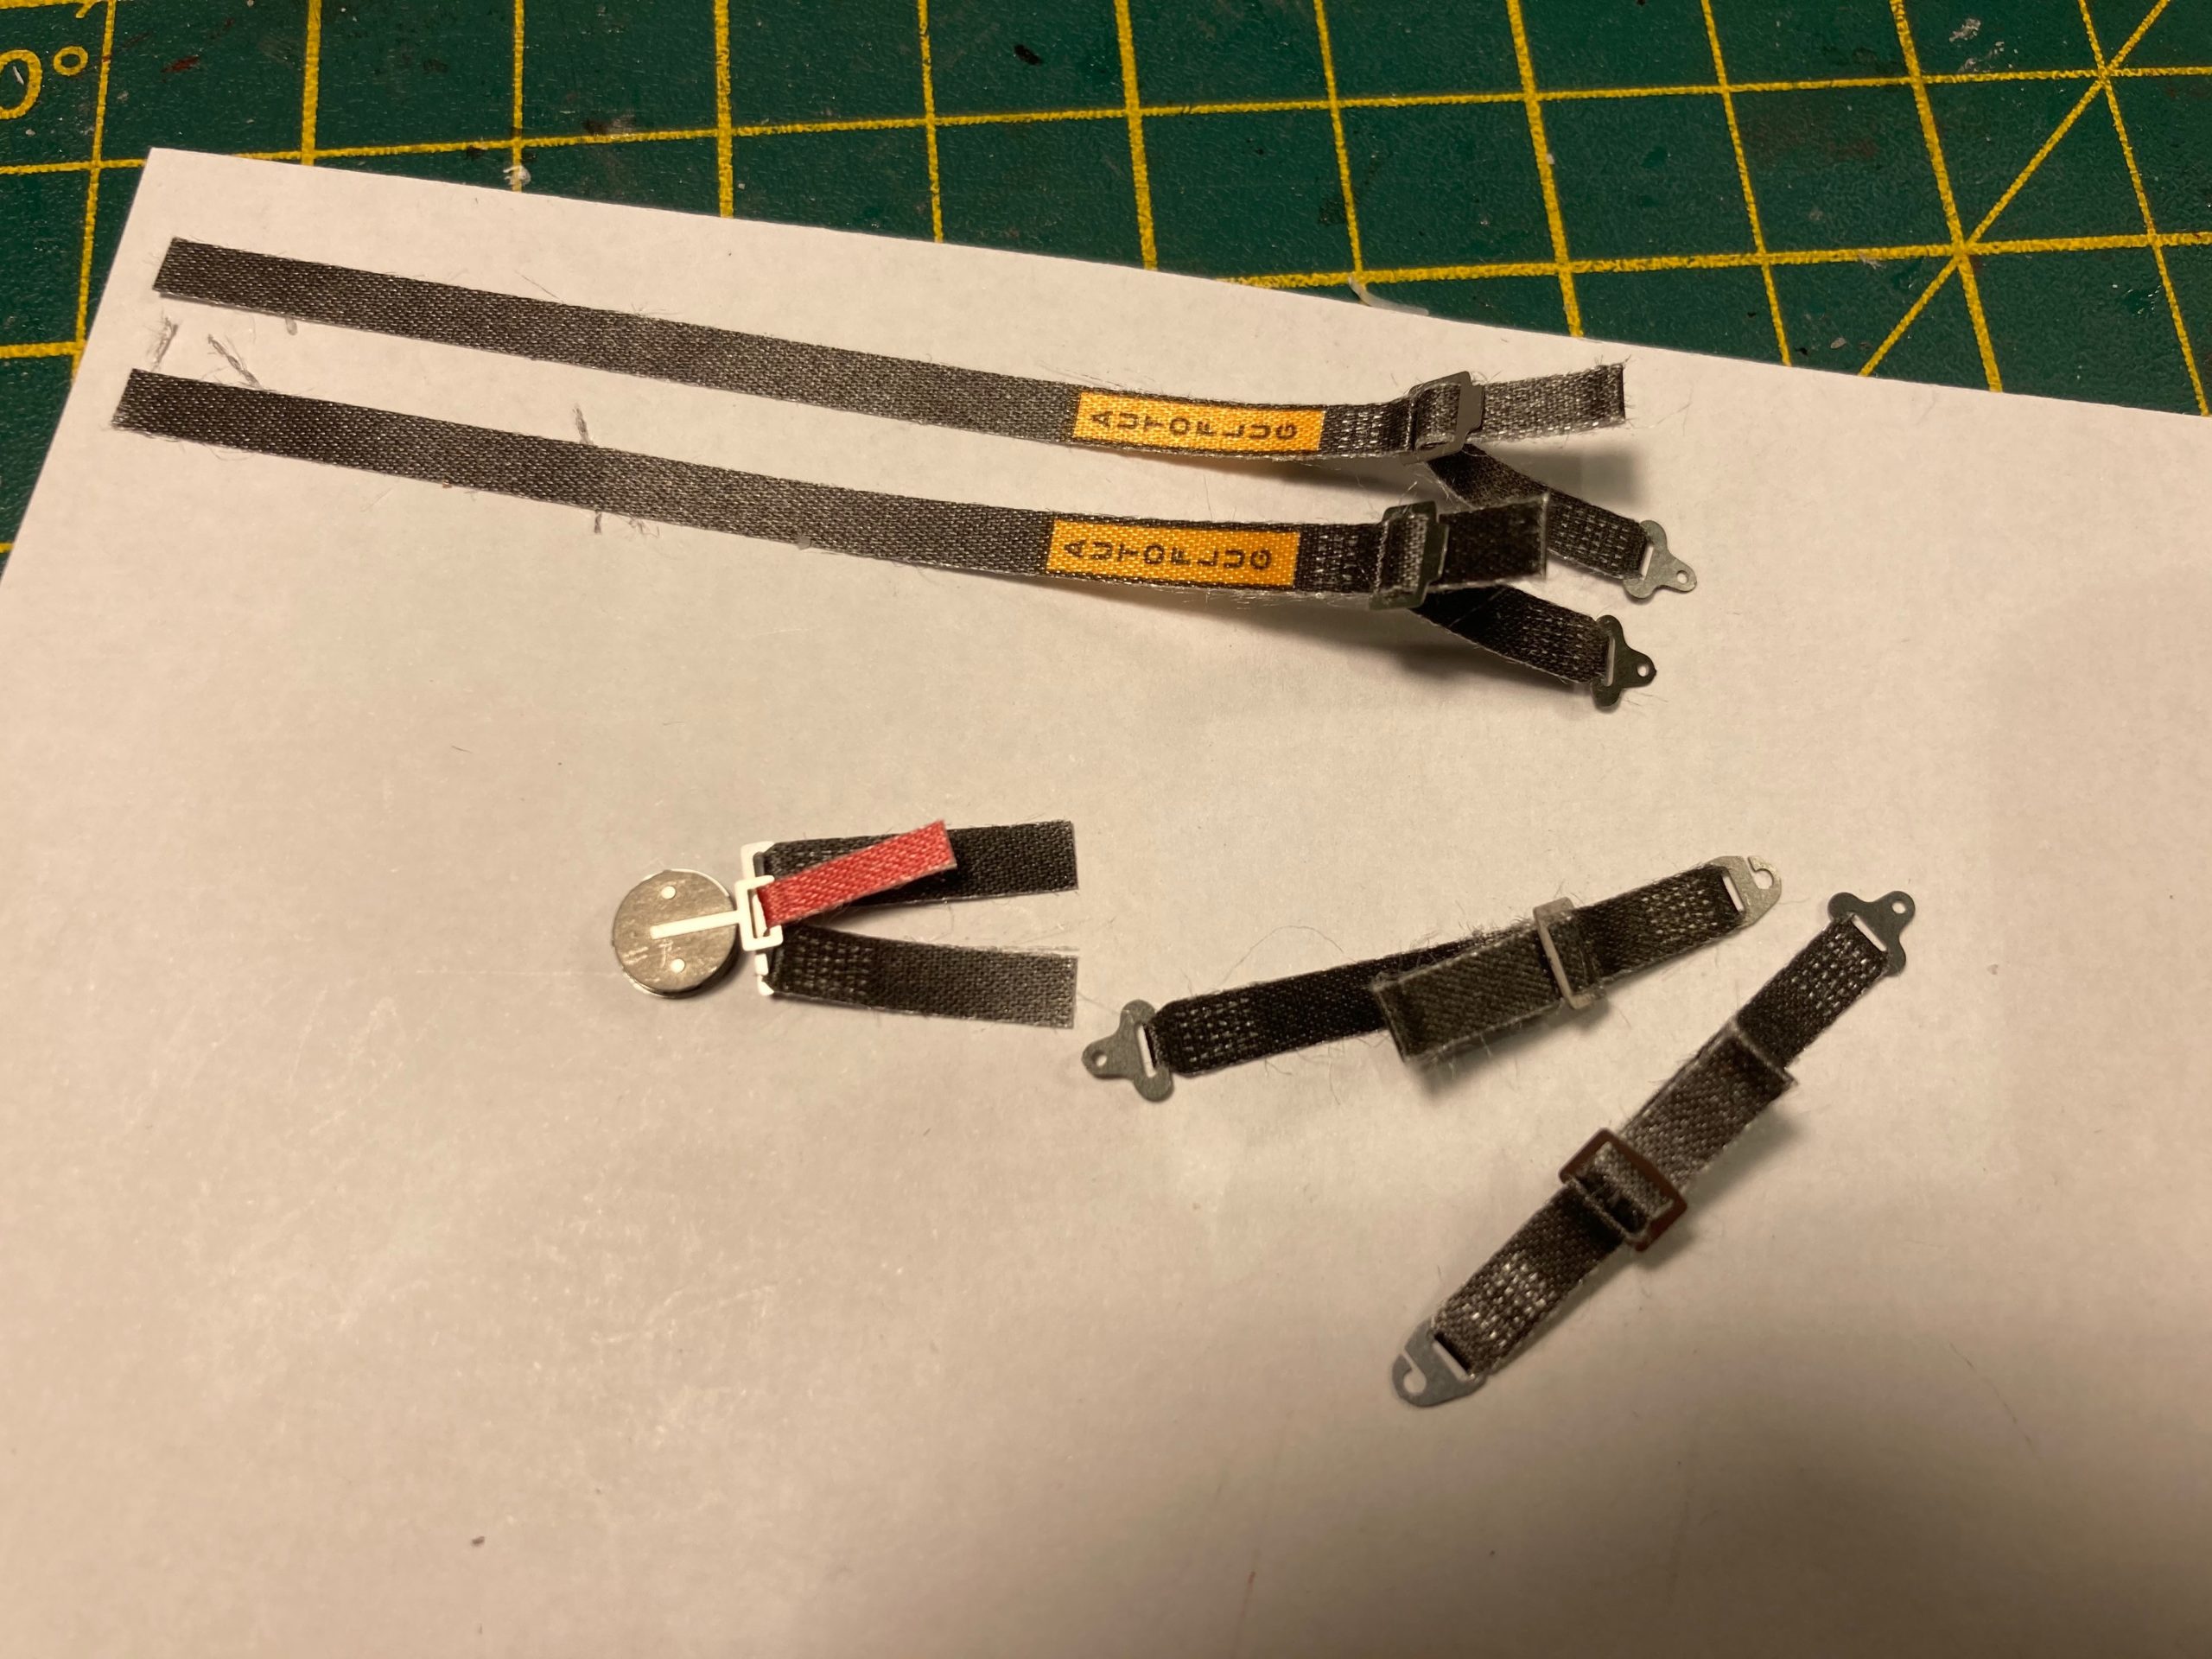
Seat belts were assembled – using PE parts and cloth belts. CA glue essential here. care needed with handling of belt material as it frays easily. The instructions are clear, but it’s easy to misinterpret them – so double check before seatbelt glueing – it’s difficult to reverse if done incorrectly. For the centre buckle unit, I assembled it on a waxed cocktail stick to get all the parts to line up.

Driver’s ‘floor plate’ is a translucent light brown plastic and, like for the other translucent light brown/yellowish sprue parts, I cleaned it up with Key and Clean to flatten the surface and lightly ( but unevenly) sprayed with the Acrylic wash.
The seat, centre console, pedal box and foot plate were then fitted to floor pan. So far, so good!


Notes on the satin ‘chromed’ parts
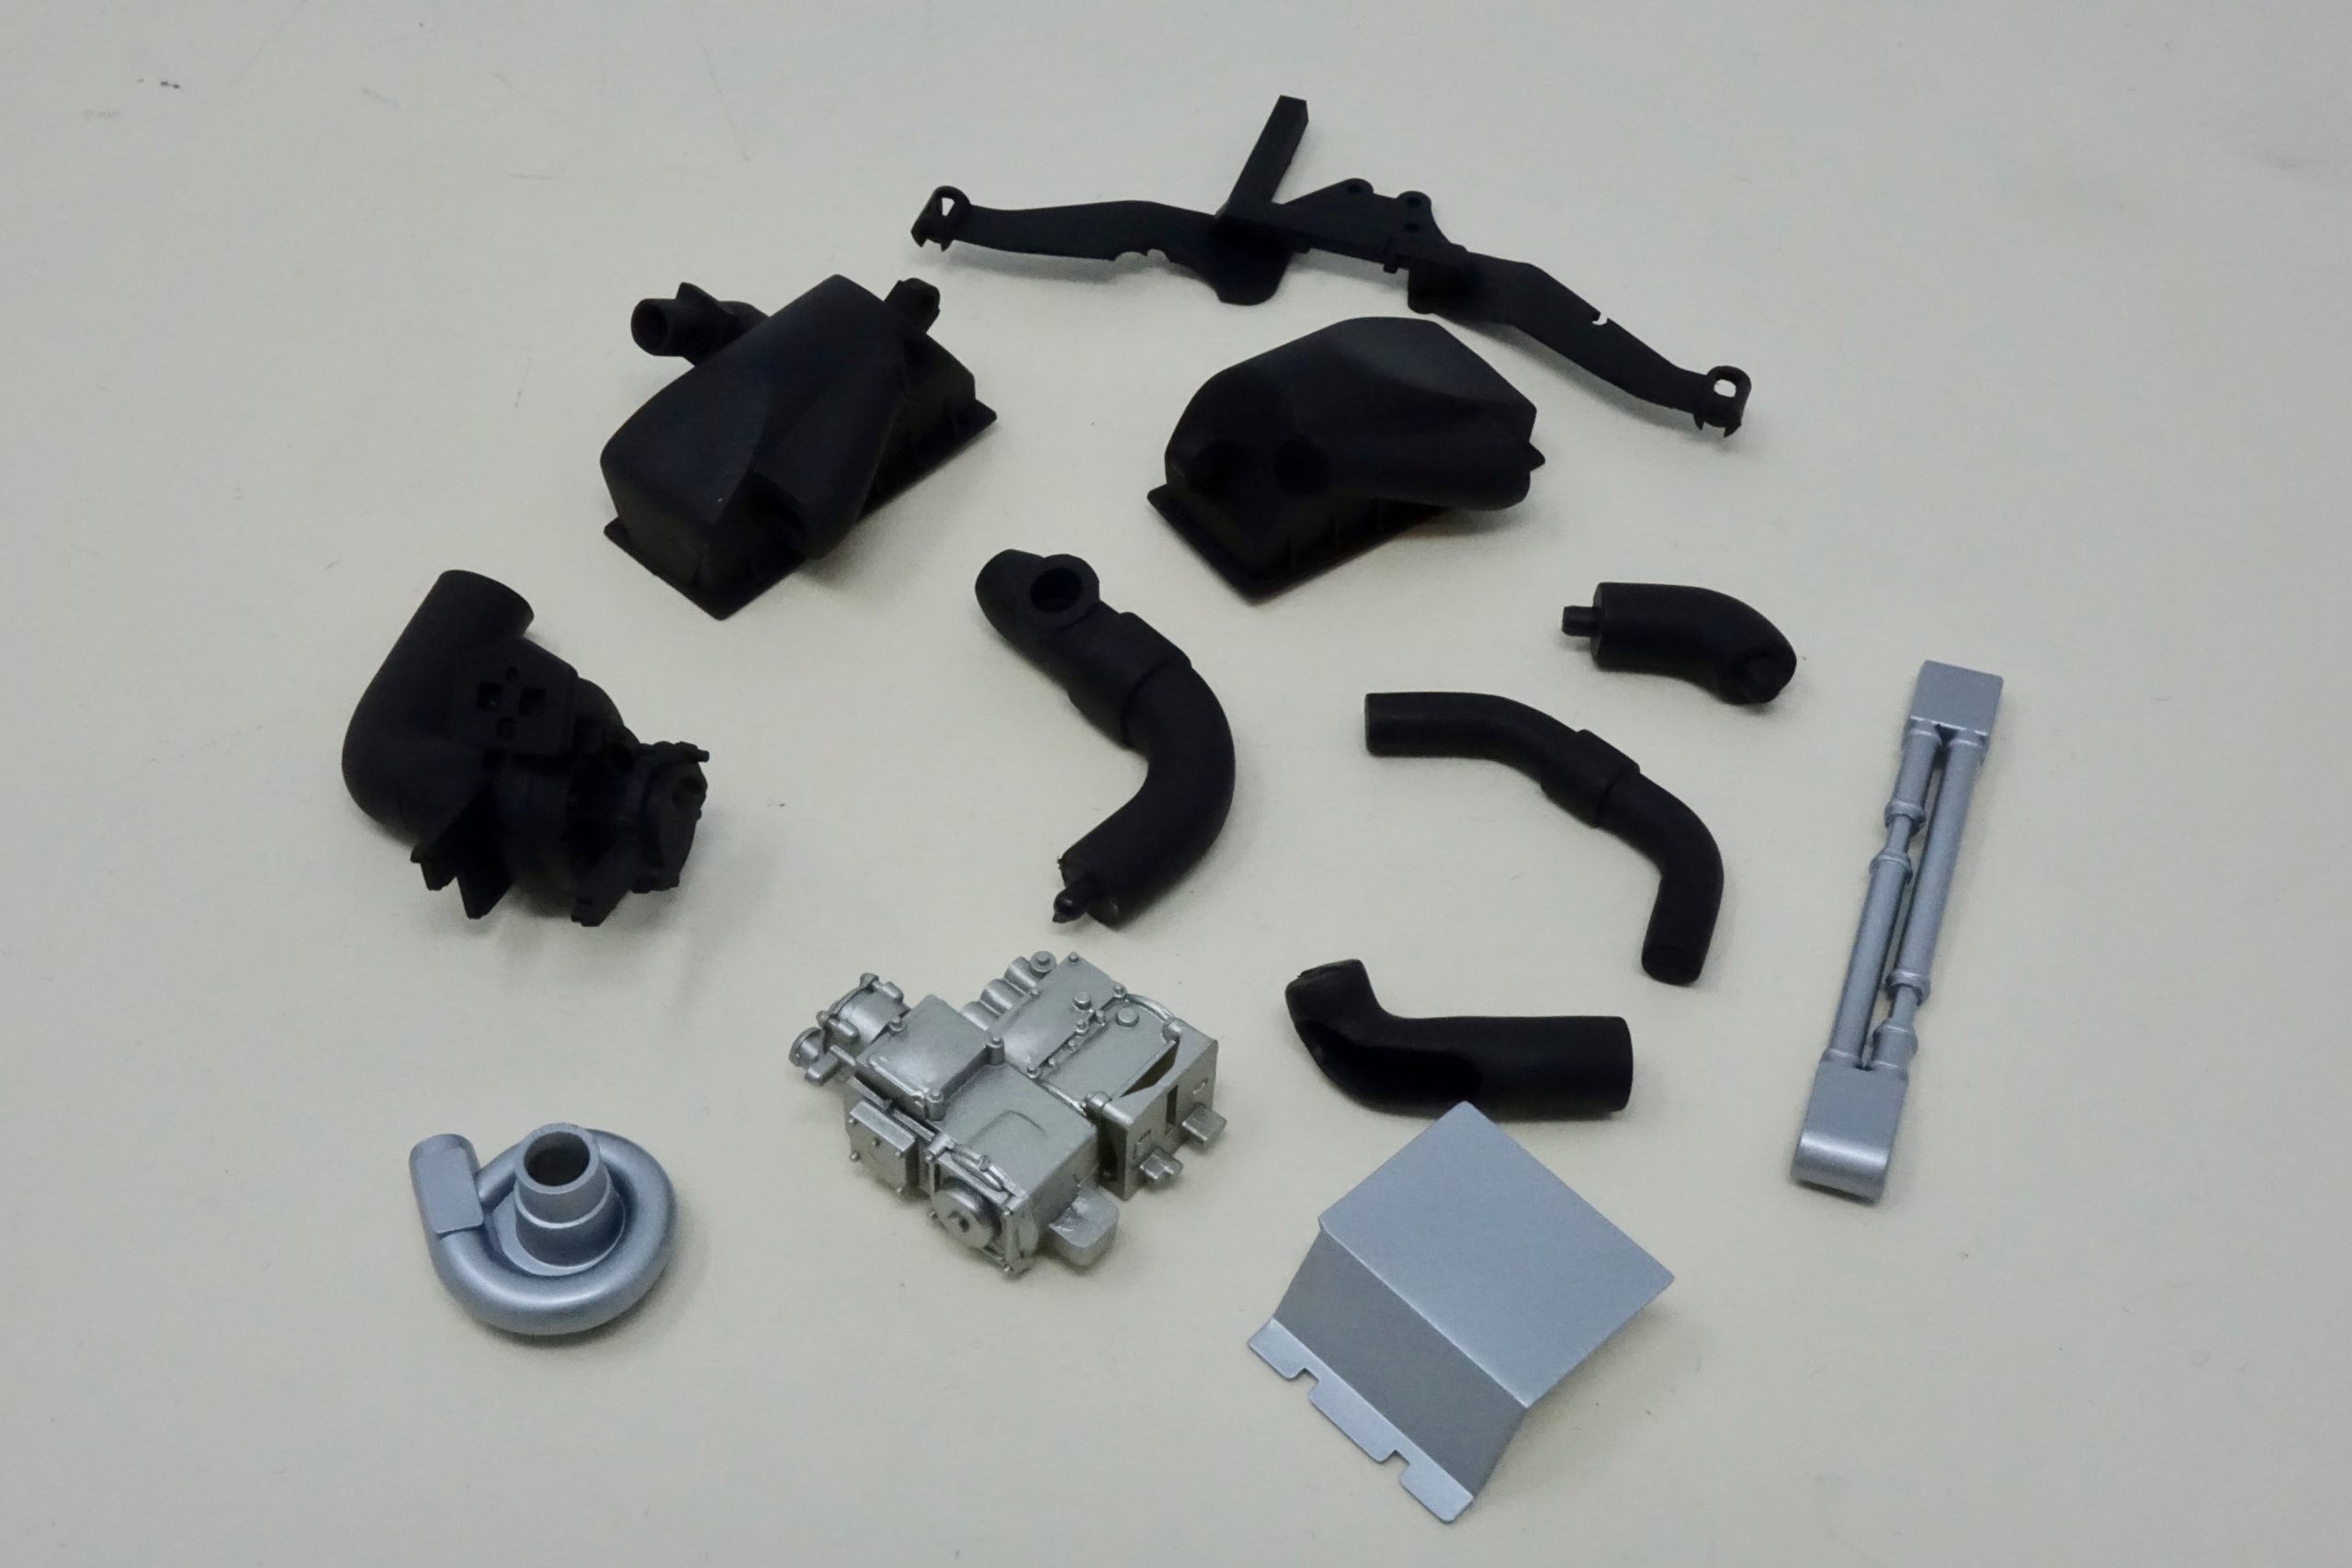
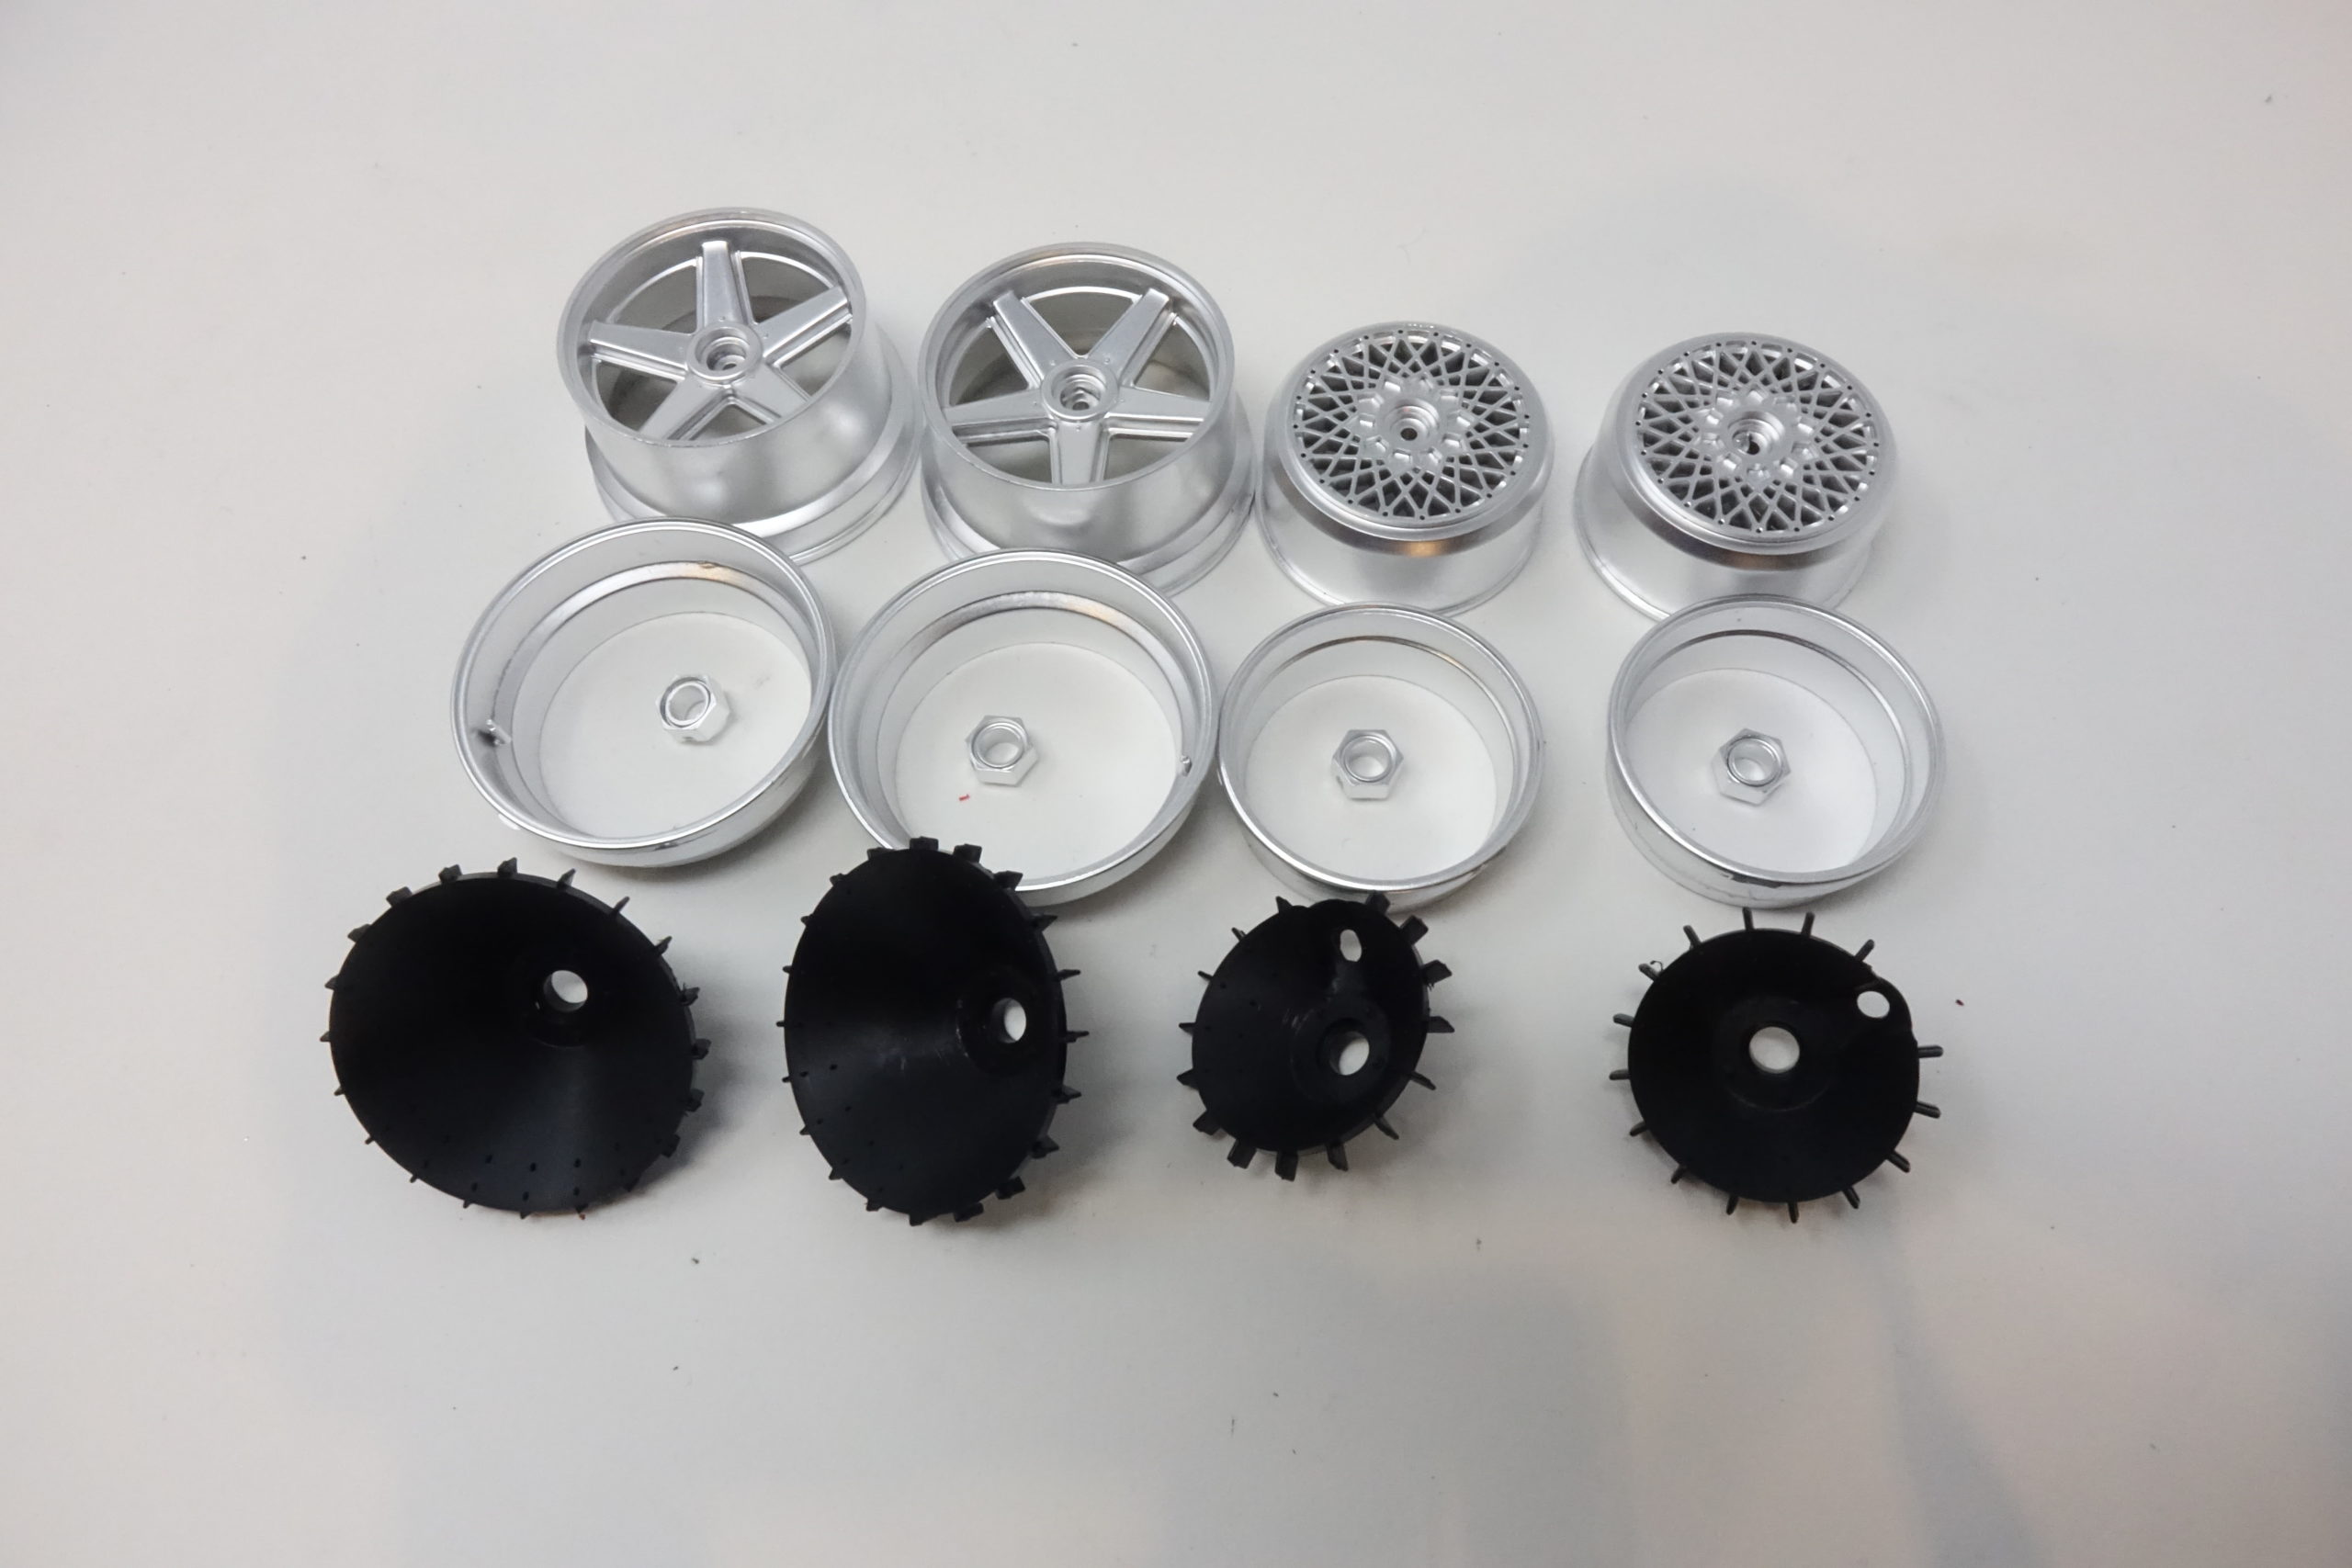
It’s worth mentioning here about the ‘satin chromed’ sprue parts – especially suspension components. The satin chrome finish is not so bad, just a bit bright, but it’s not possible to clean/sand away mould marks and sprue marks – so most were dechromed, cleaned up and sprayed in the appropriate metallic Lacquer Paint. A few parts were ok and left as they were. The main metallics I used were LP11 Silver, LP38 Flat Alu, LP70 Gloss Alu and LP63 Titanium Silver.
For all the lacquer Paints I use approx 25-30% Lacquer Thinners Retarder Type to get the best results.
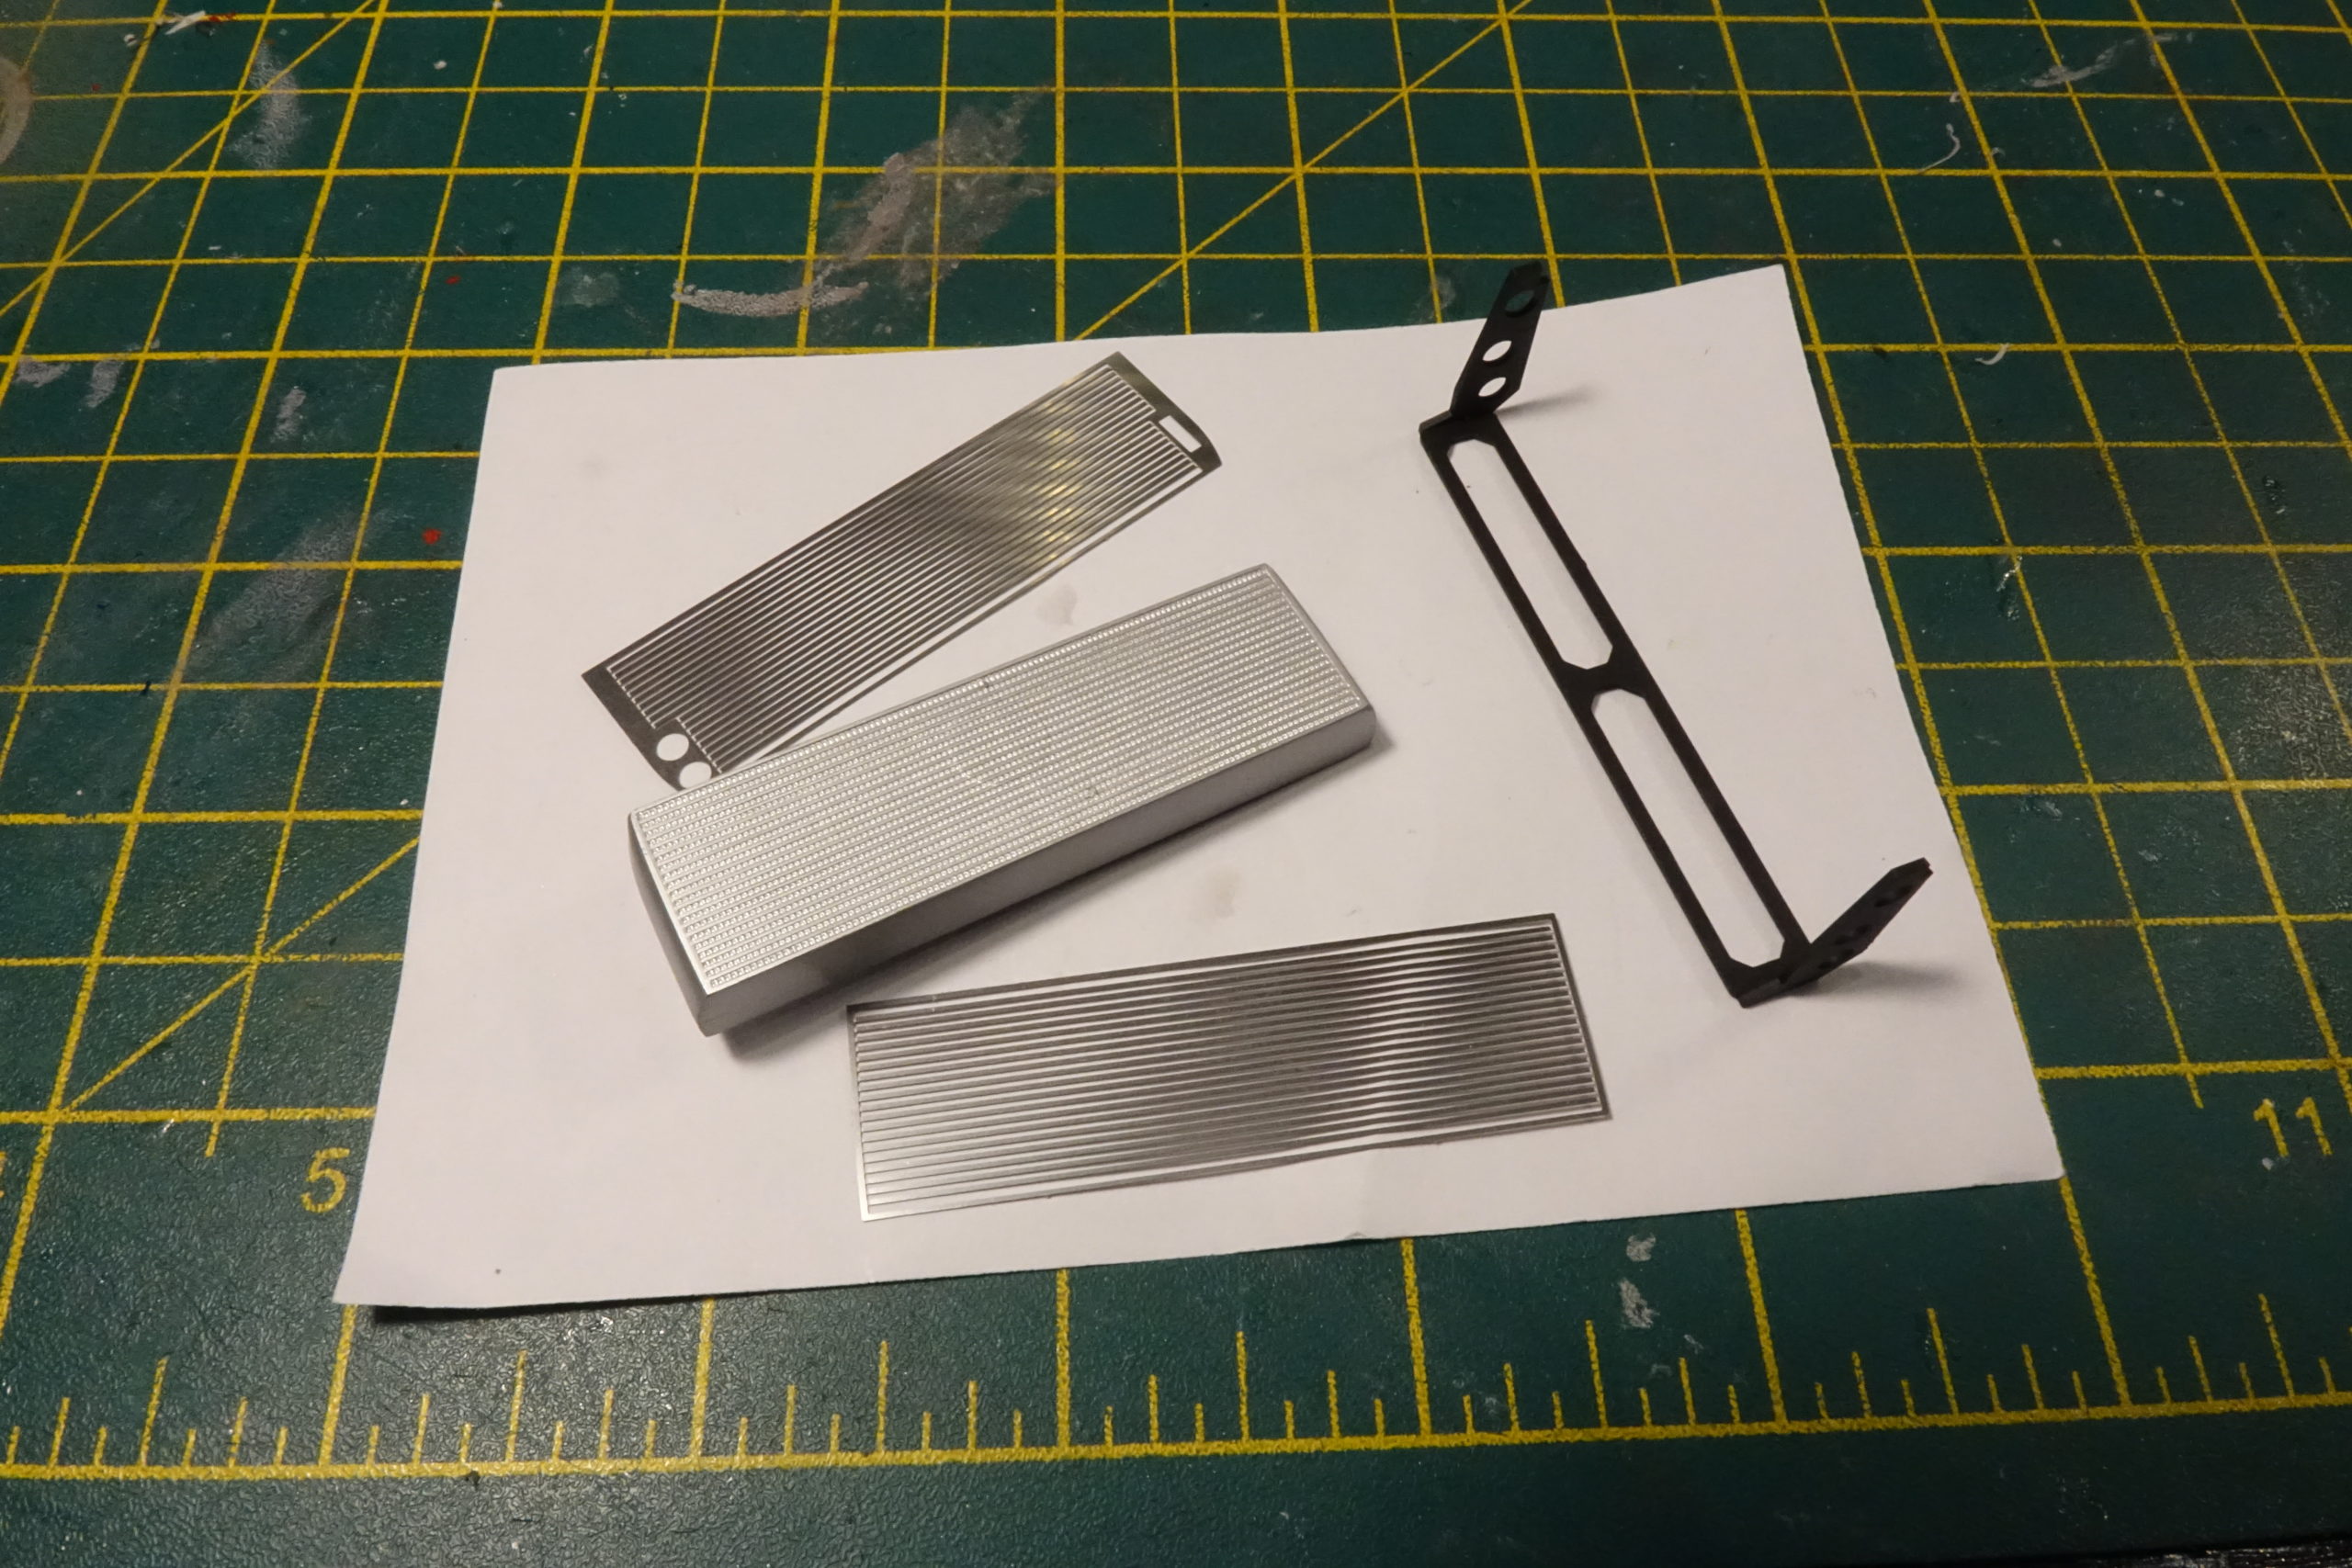
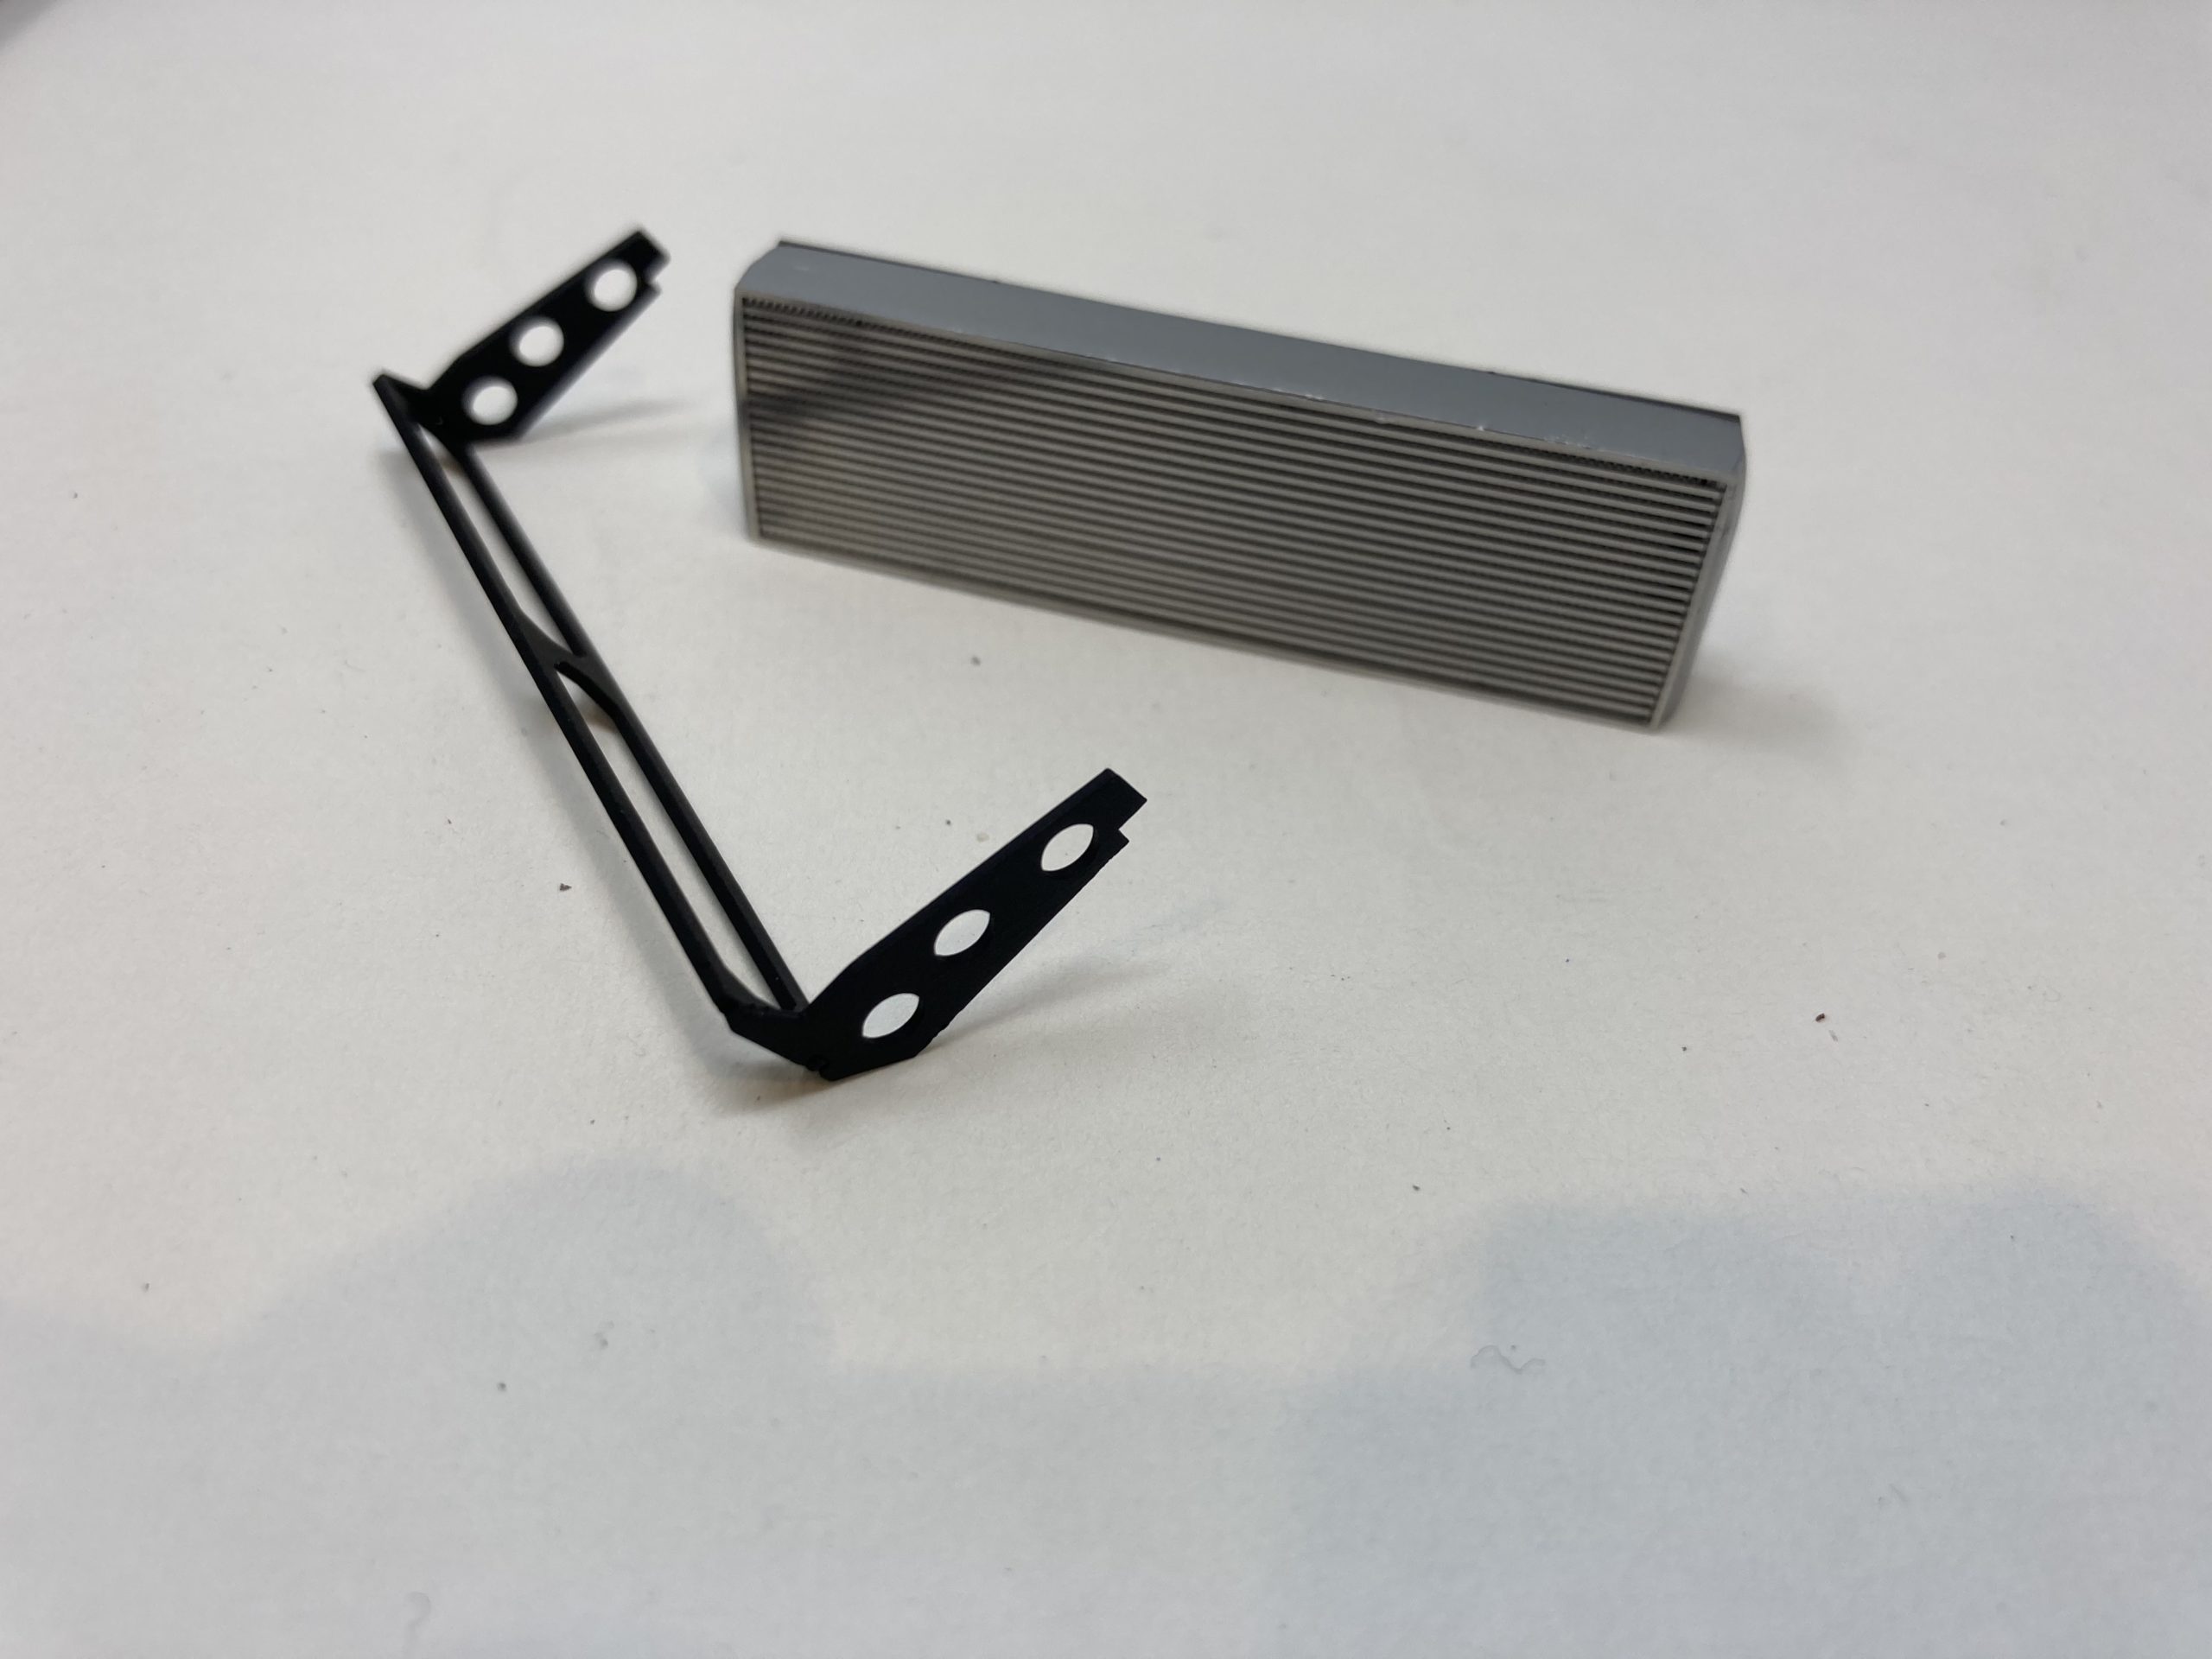
All the radiator parts were de-chromed, the seams cleaned up and sanded and then sprayed in LP11 Silver.
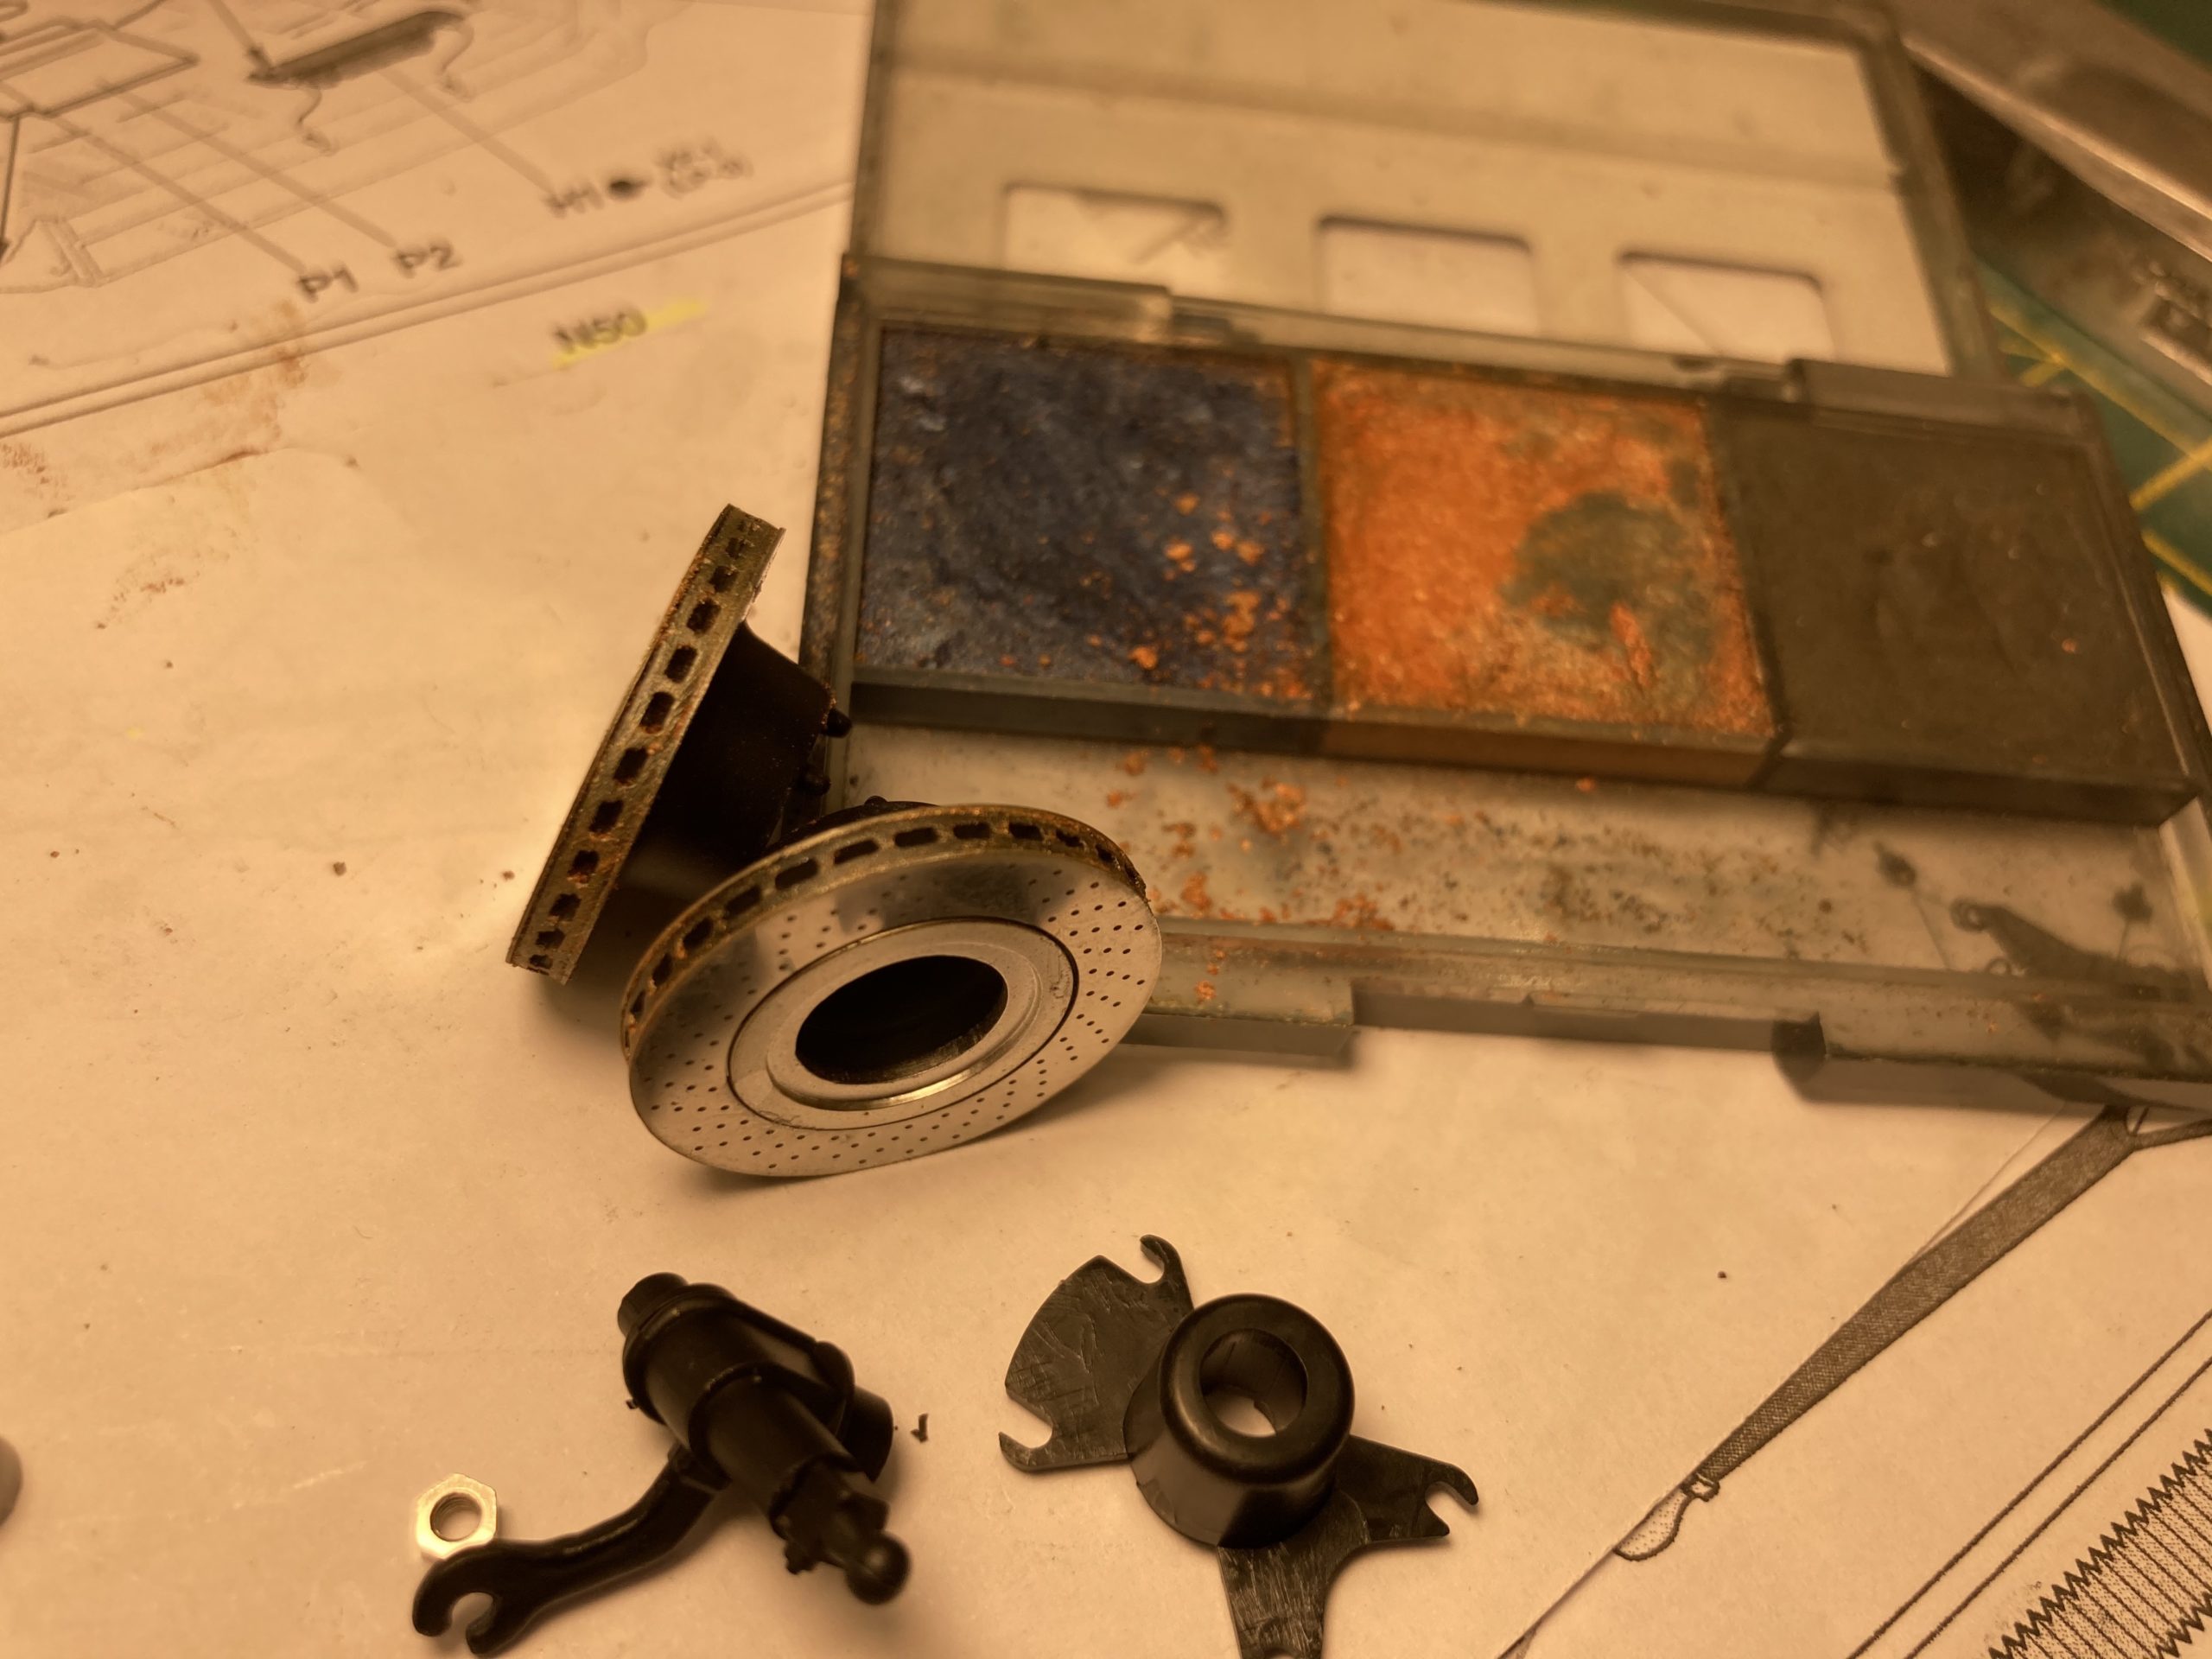
Note on drive shafts assembly and painting – lots of bits here, too many and too small to de-chrome all and repaint – so I assembled the shafts, and then sanded just the shafts (the joint seams were too obvious) and applied some LP Silver. This made them look much cleaner. They were then ‘weathered’ with oil stain wash. This step was done later in the build, but I’ll put some photos in here…
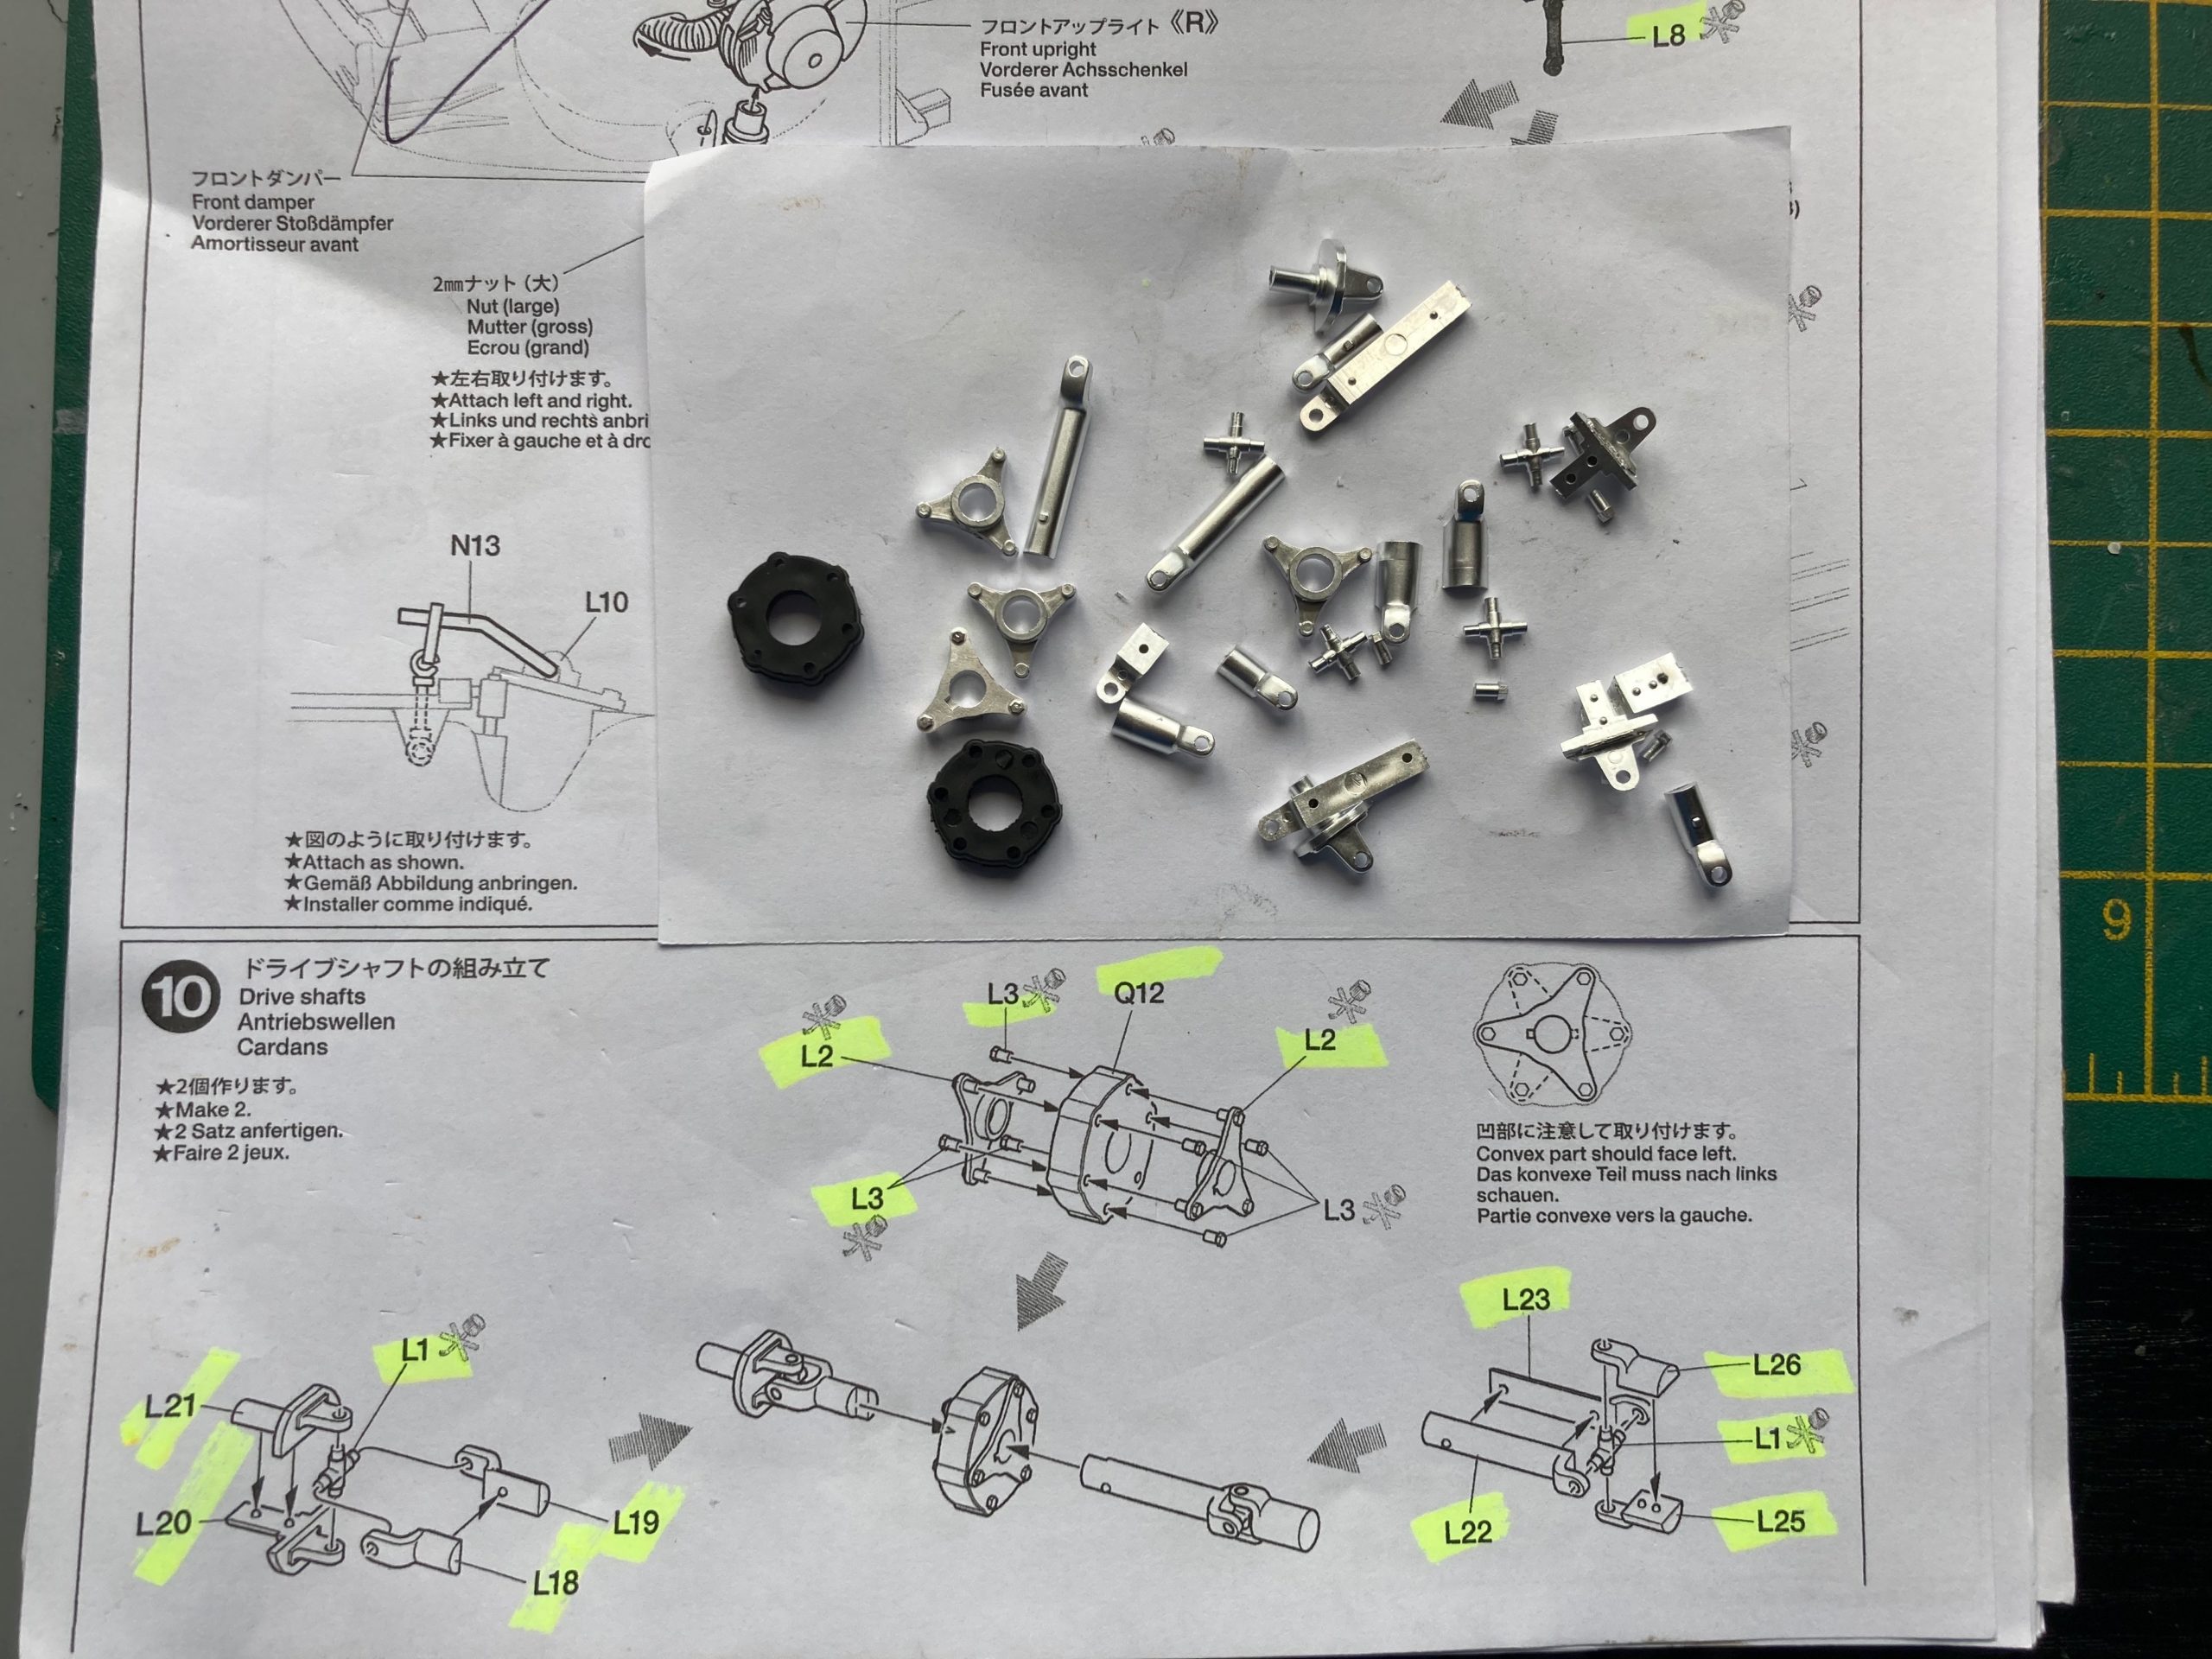


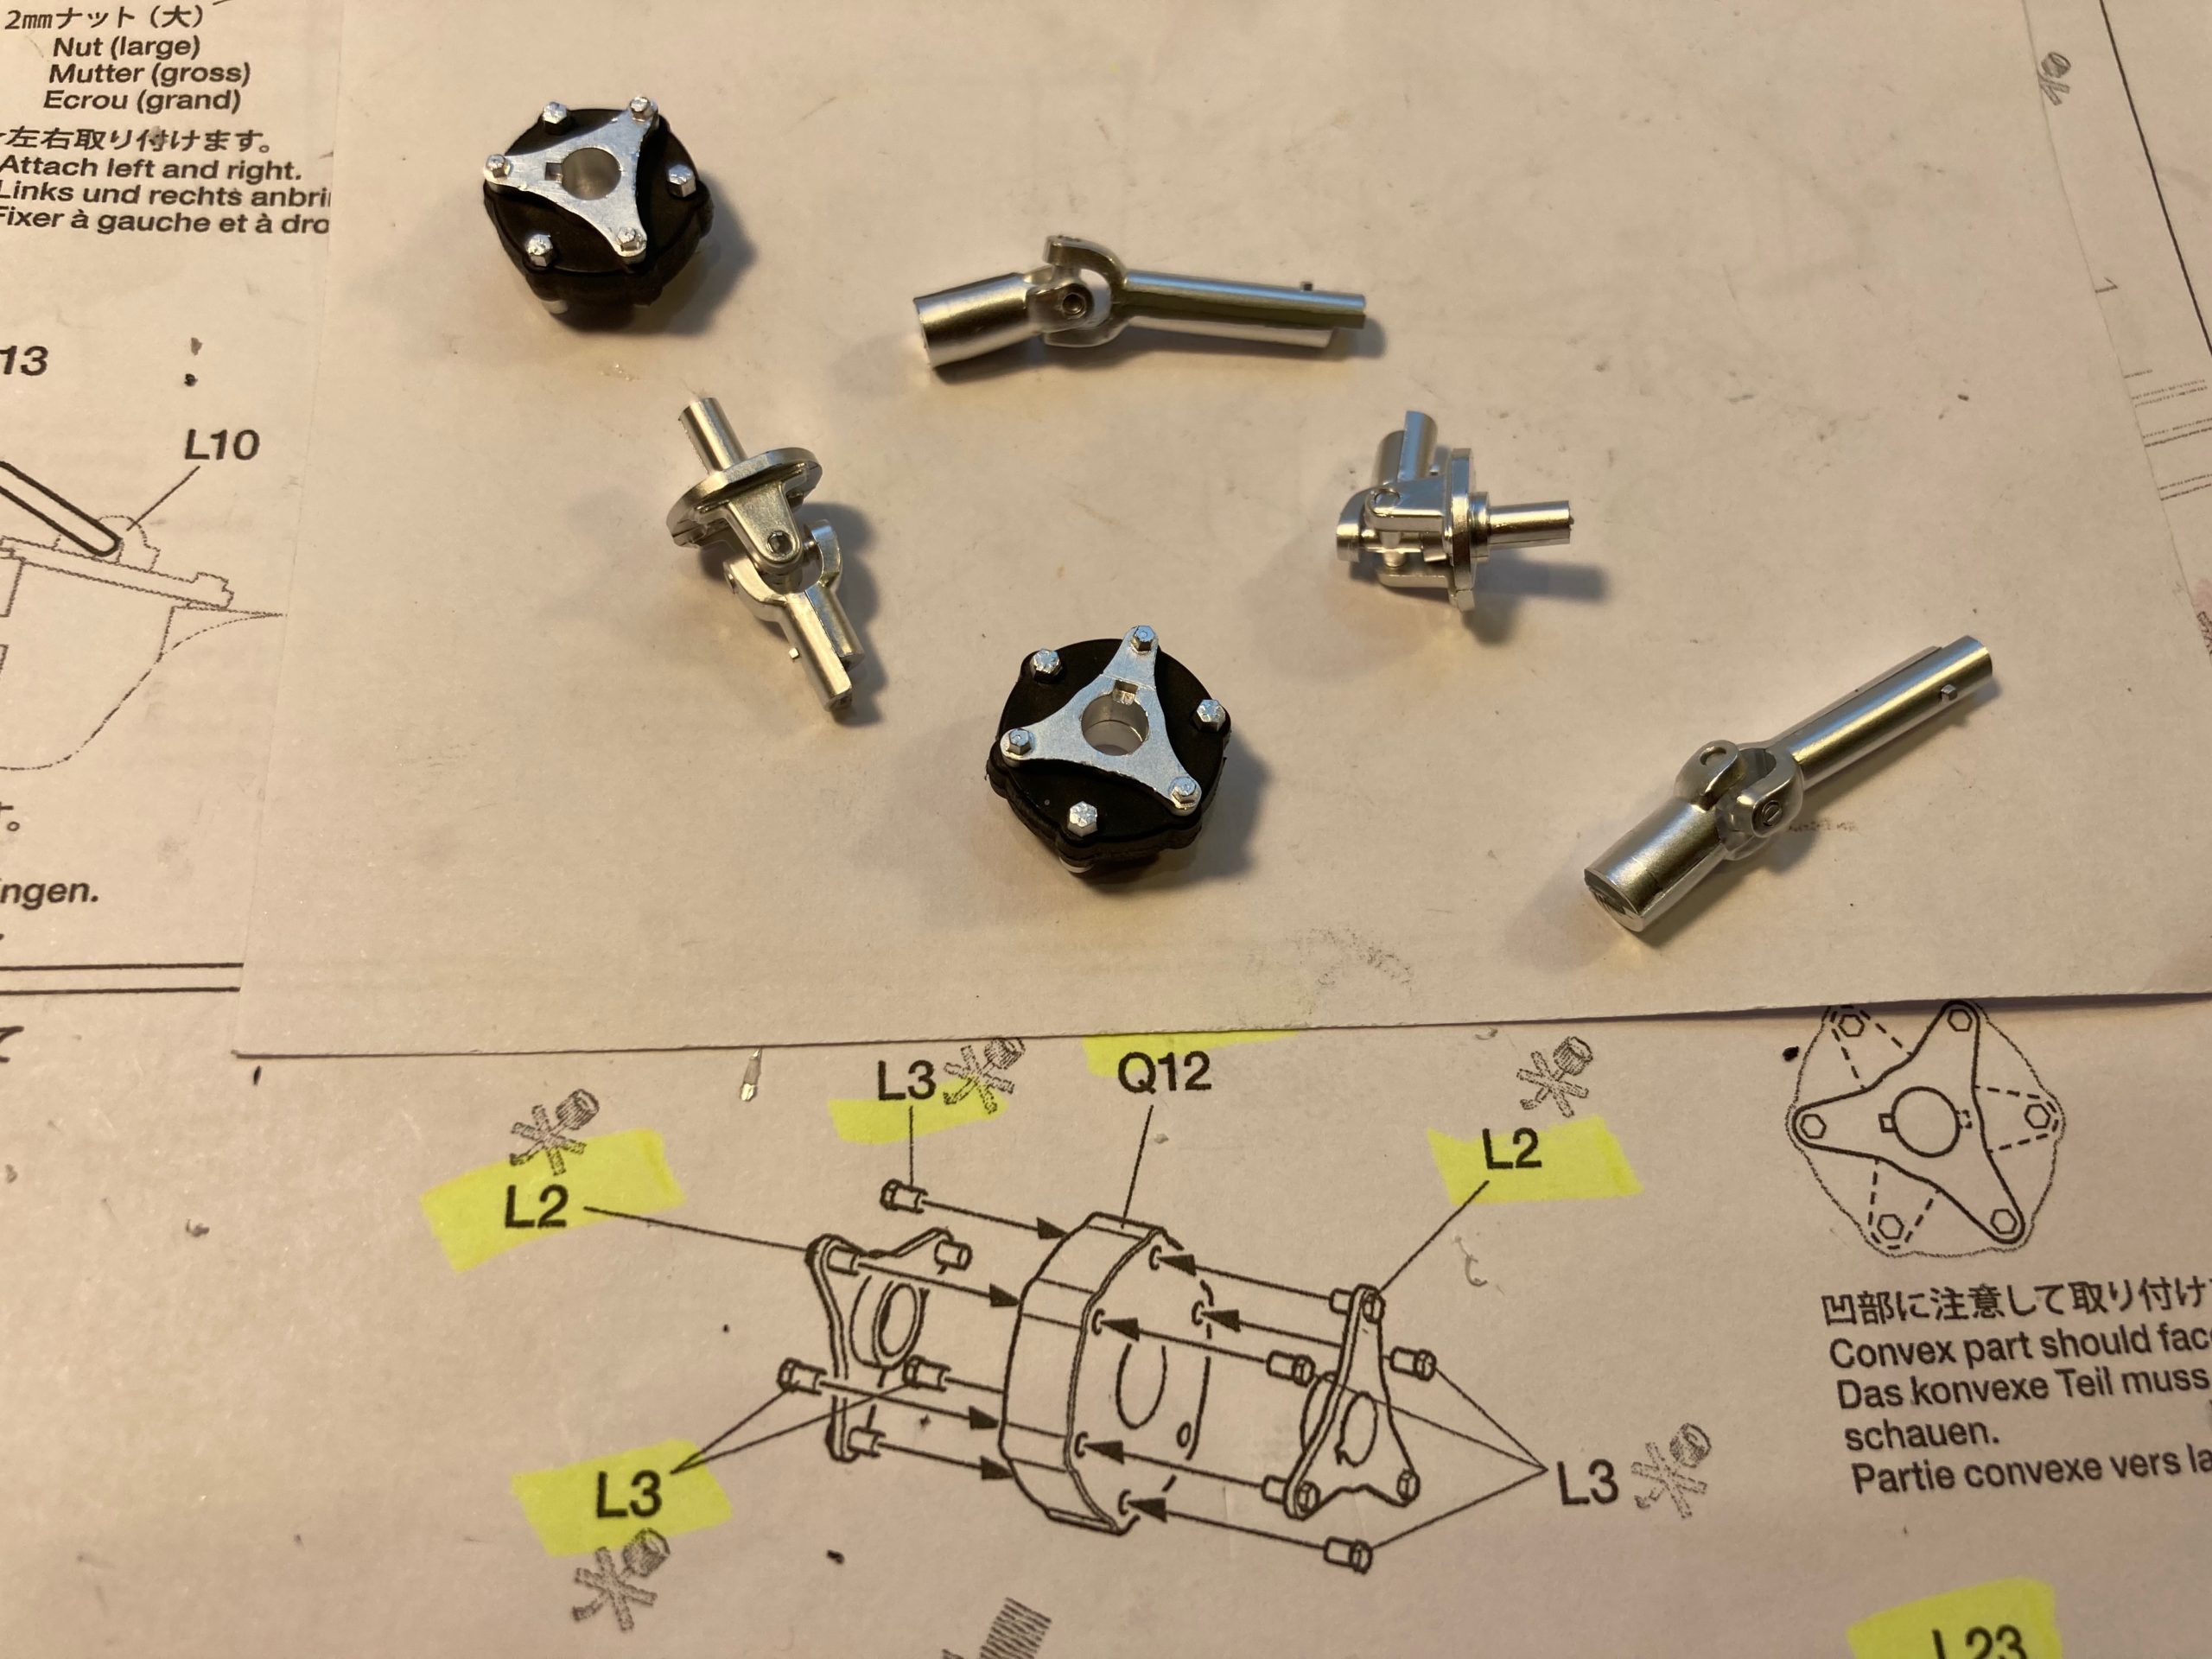
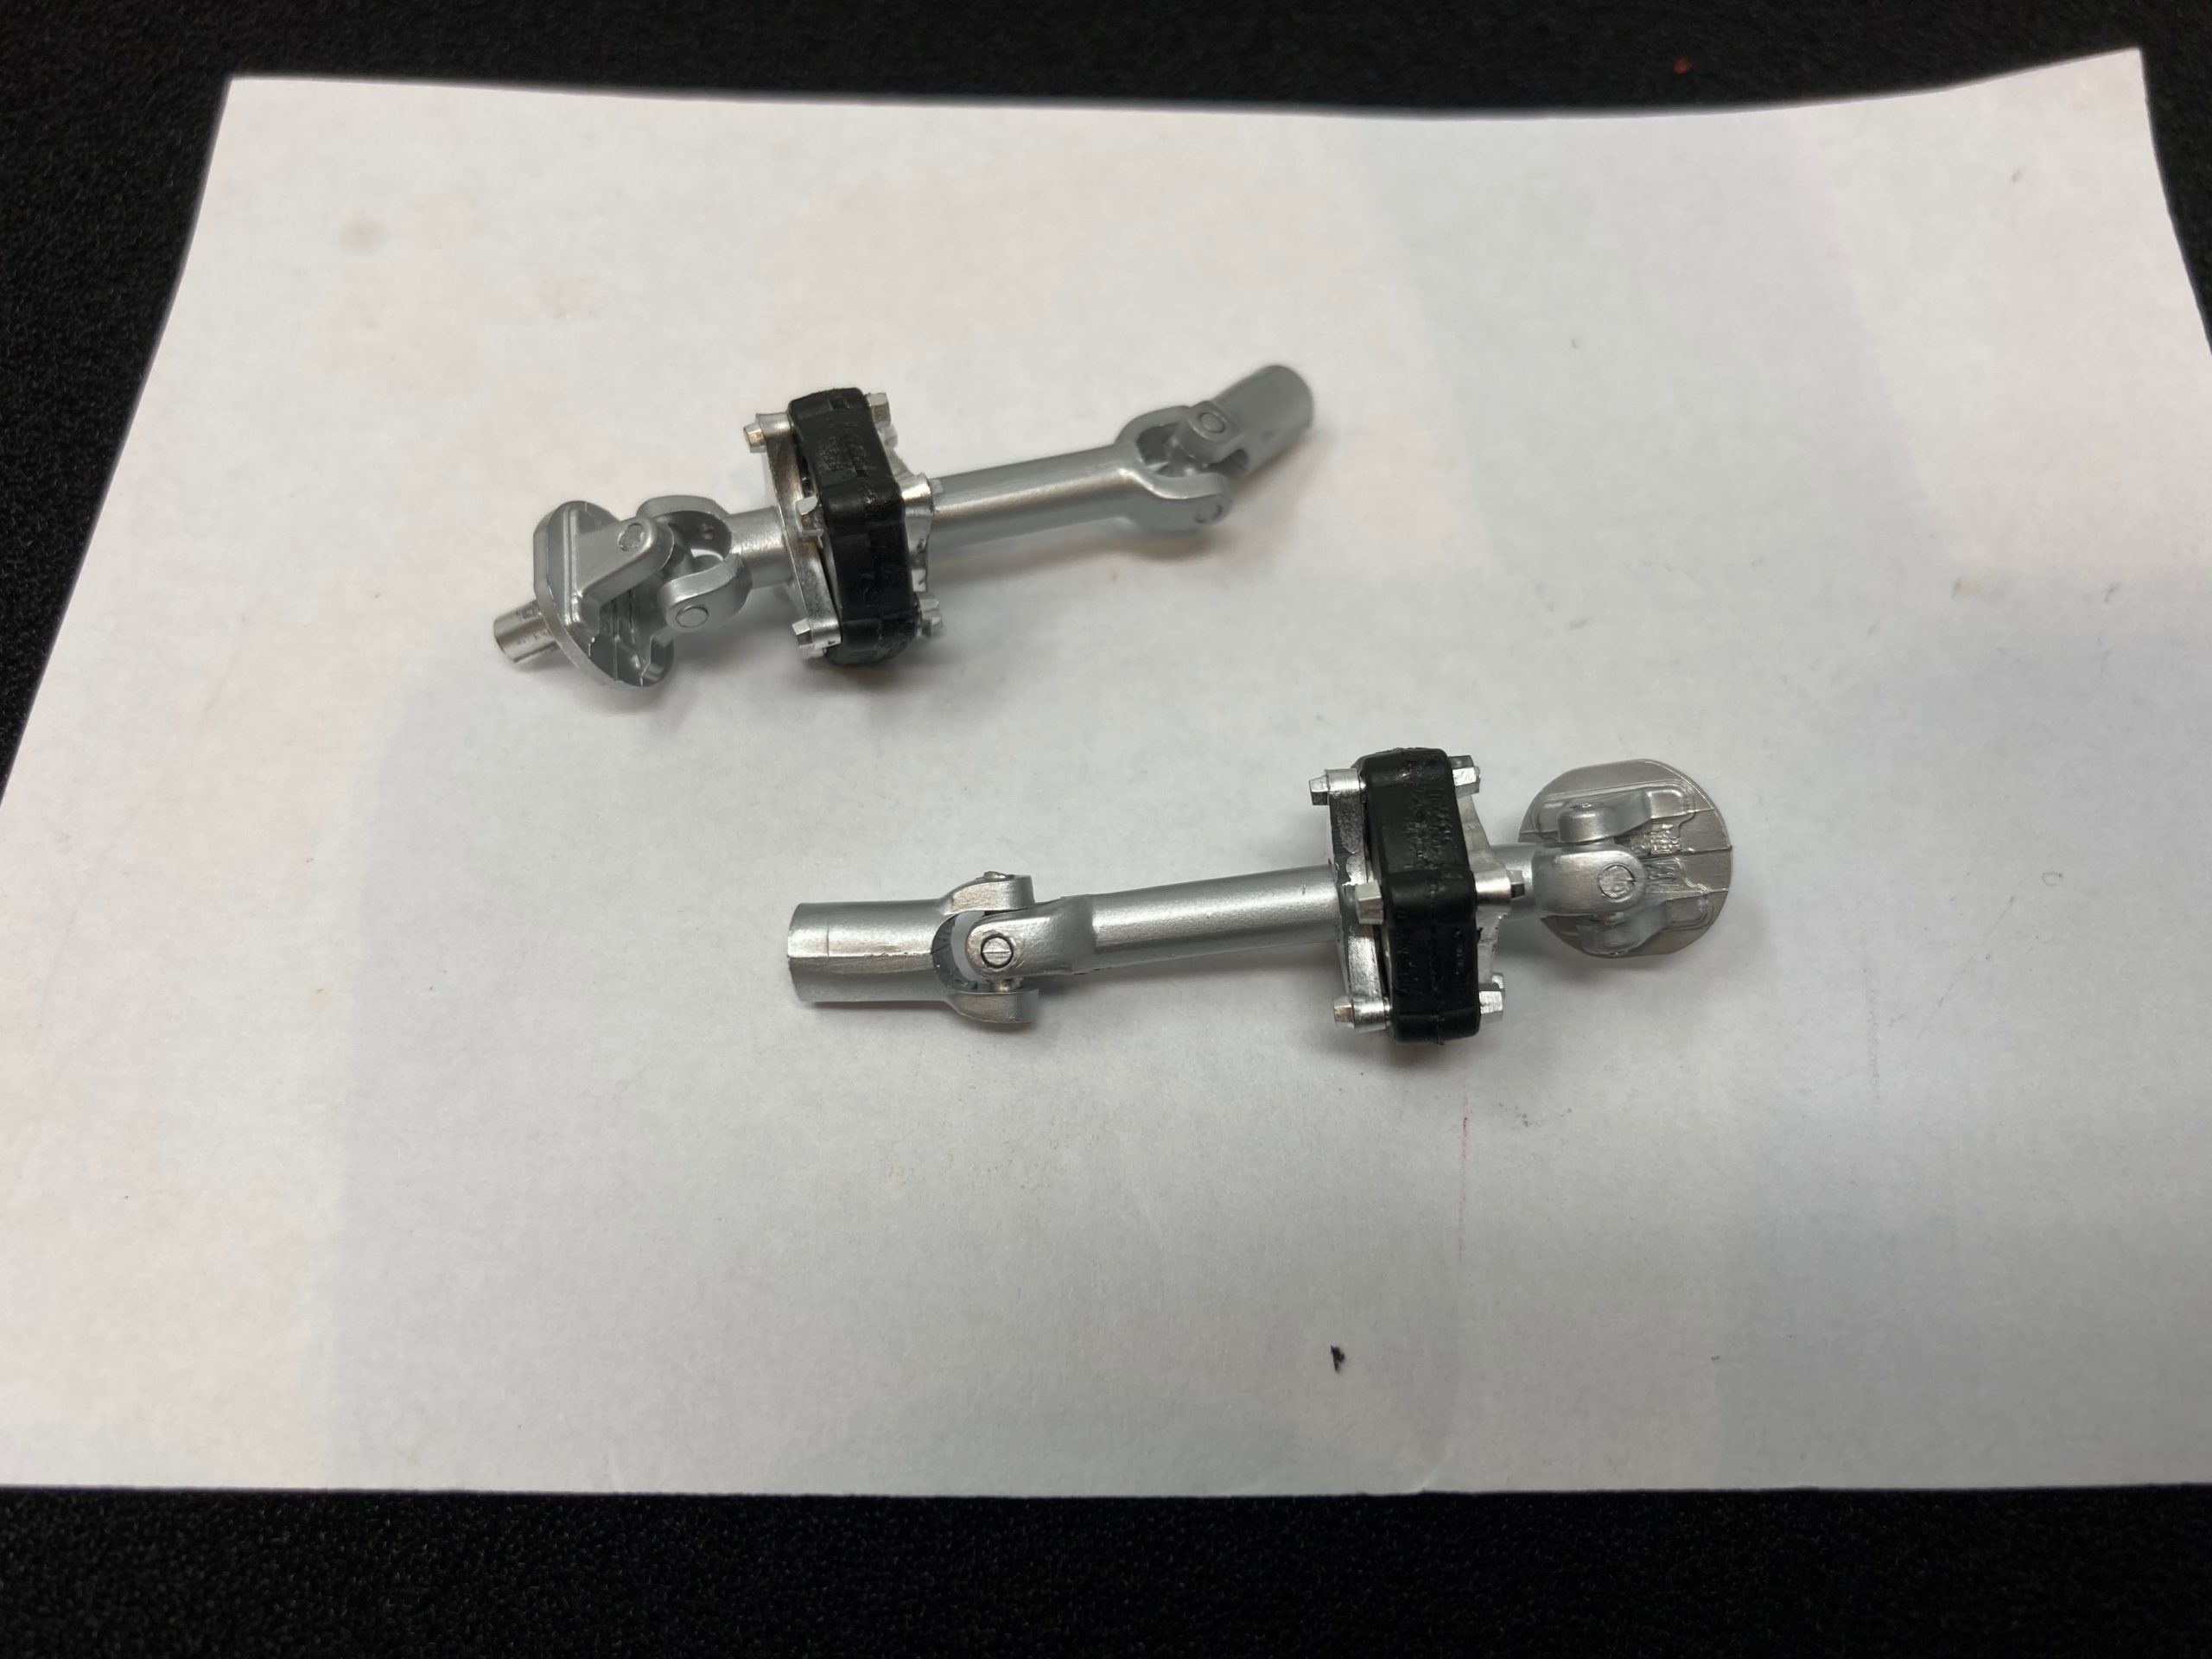
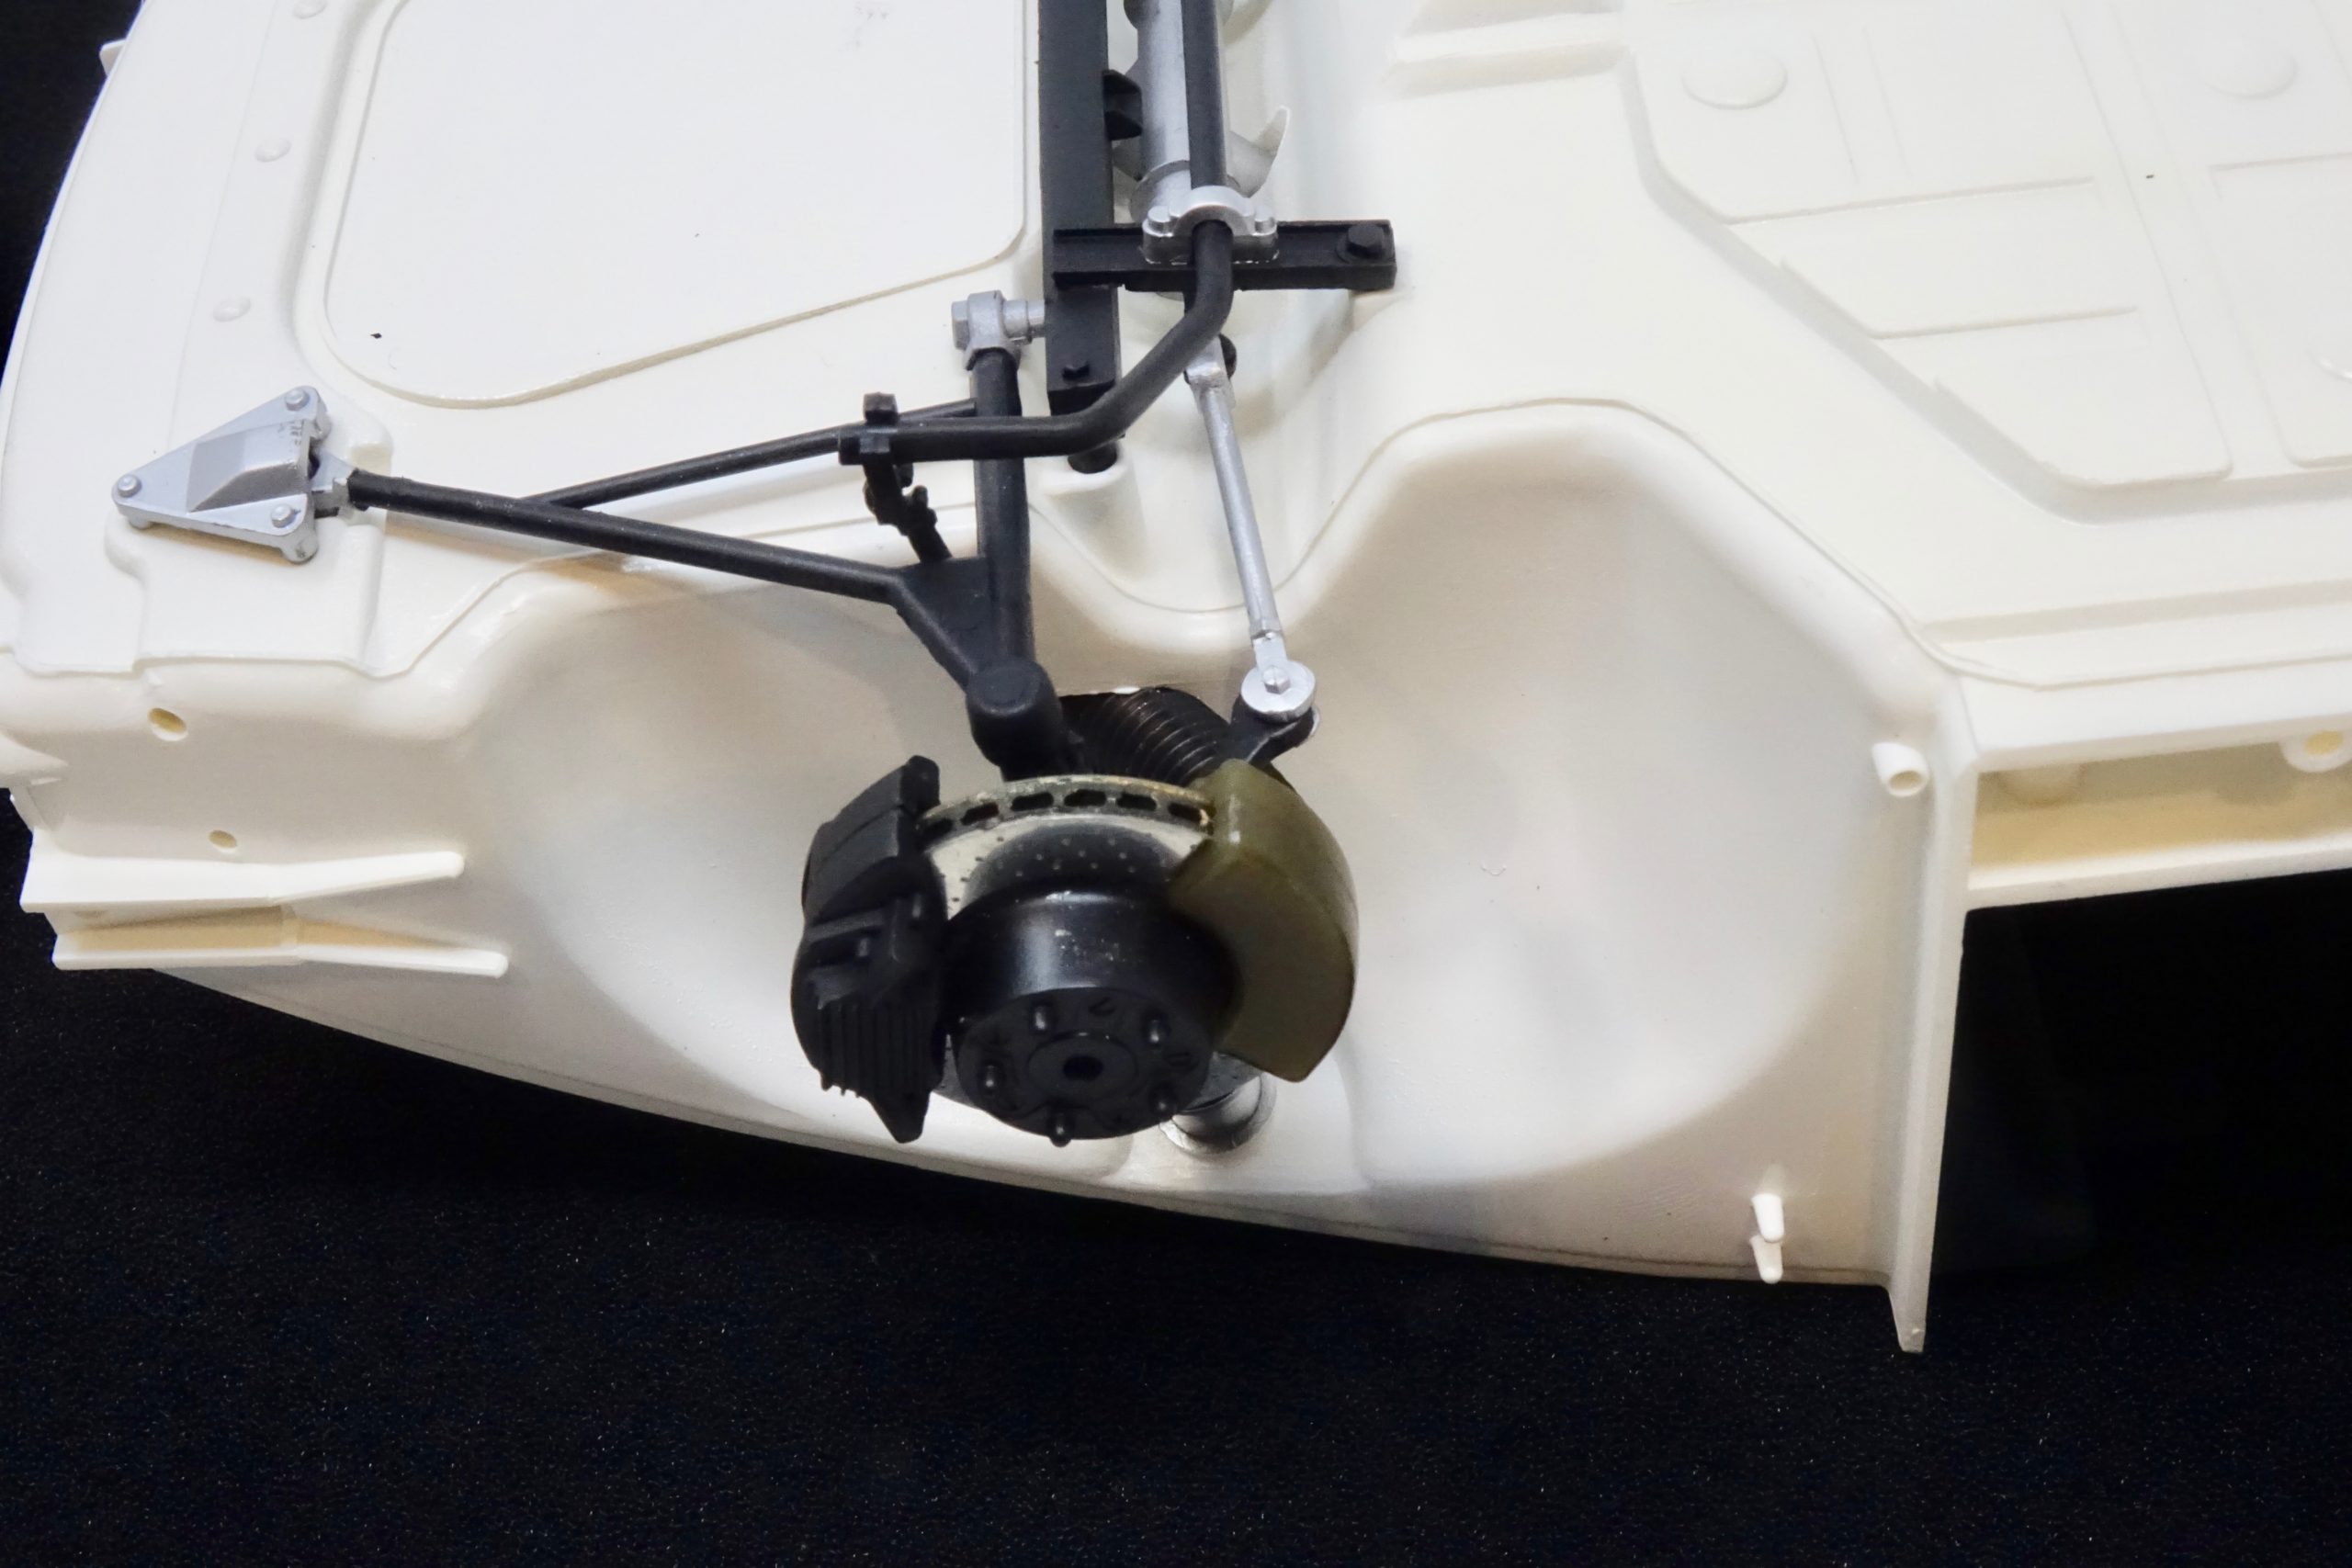
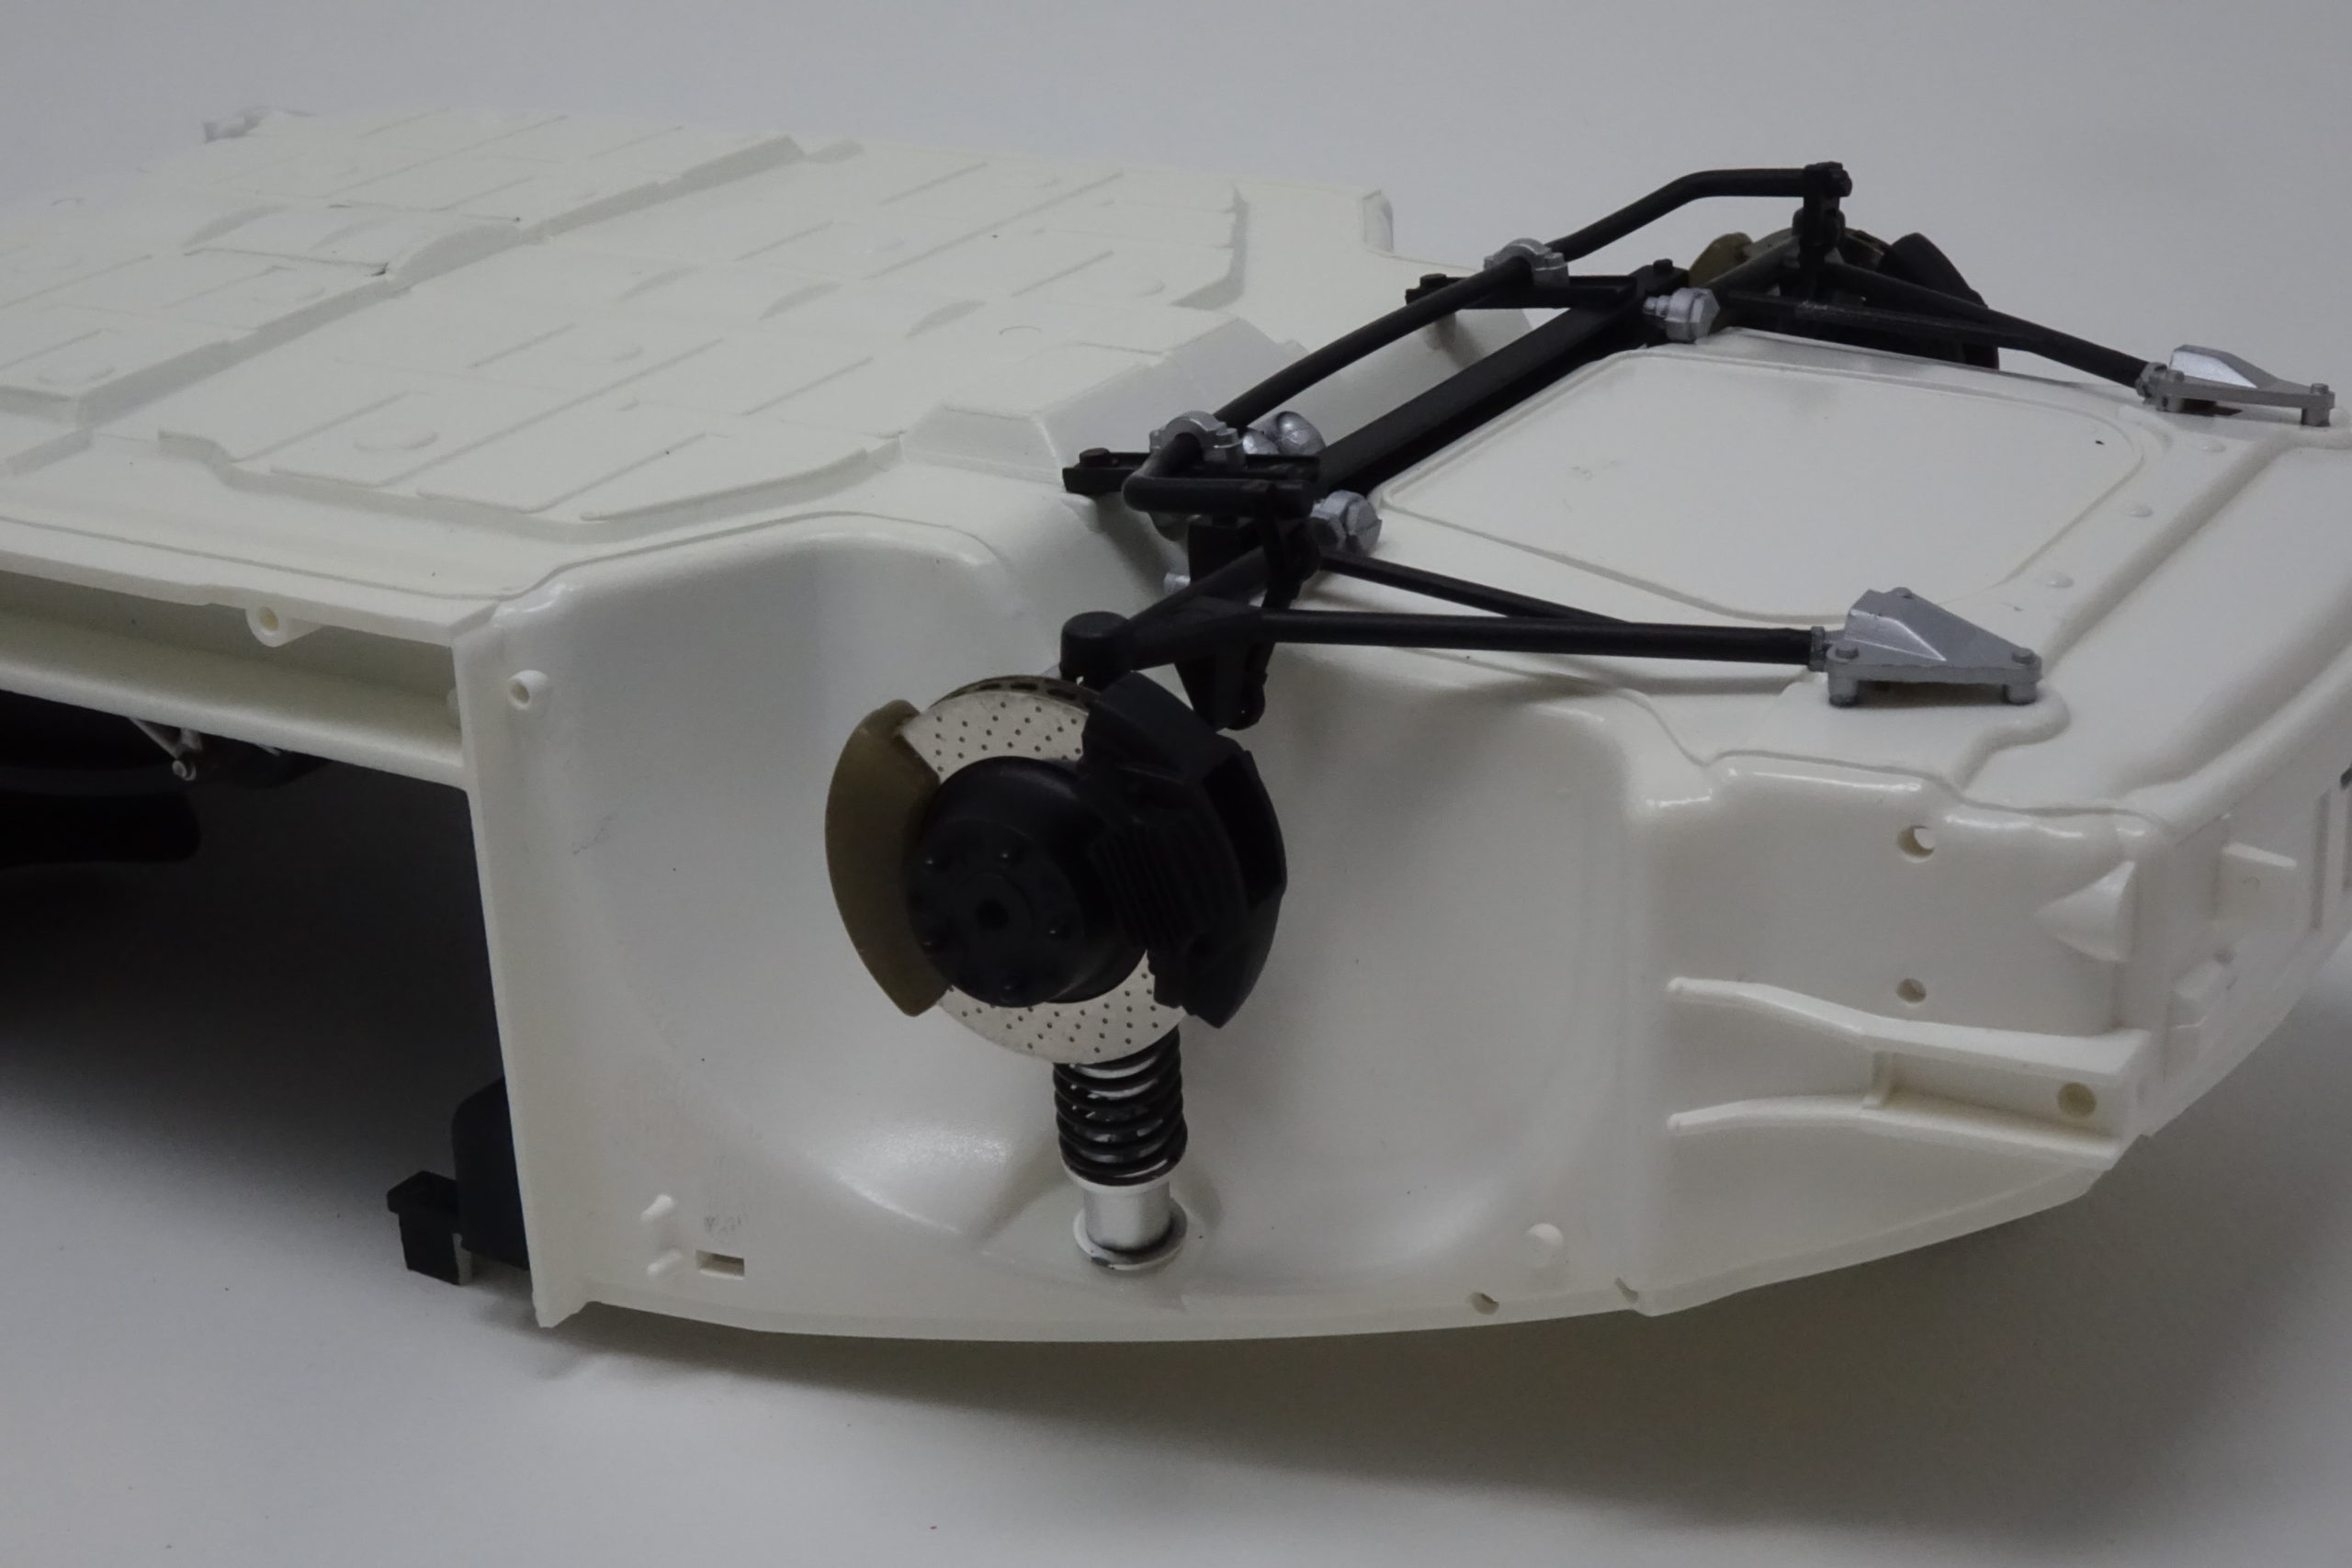
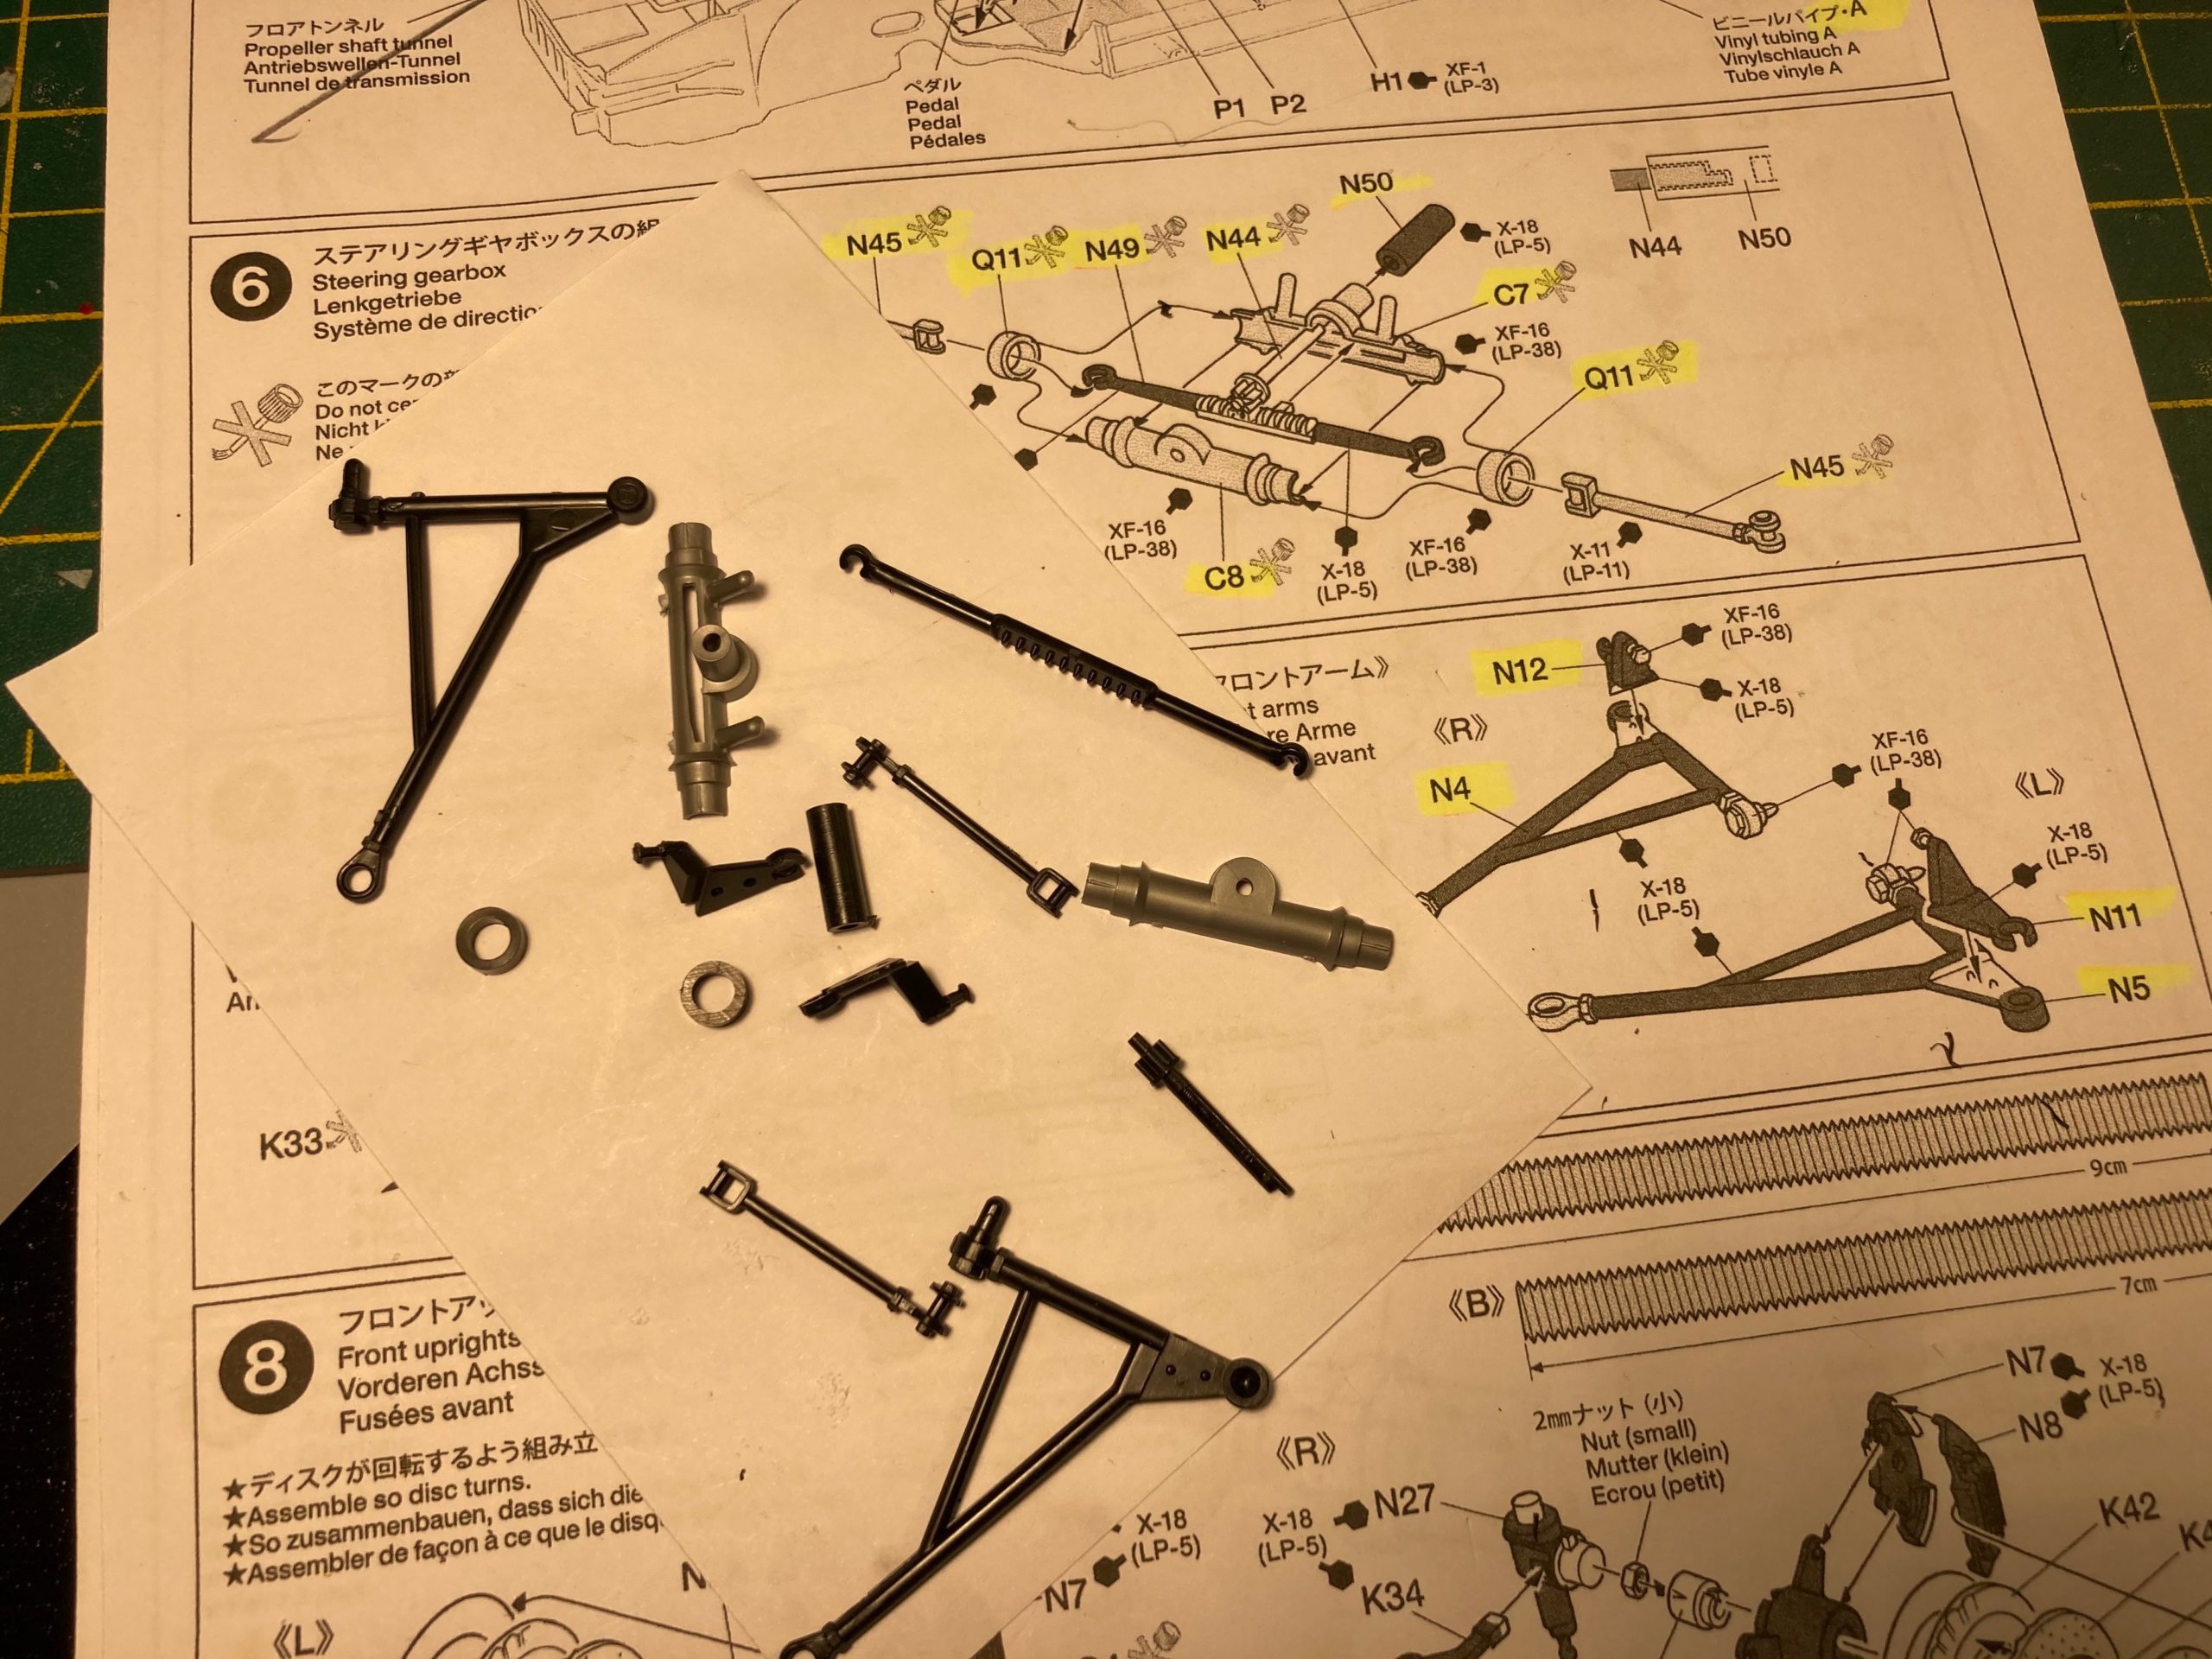
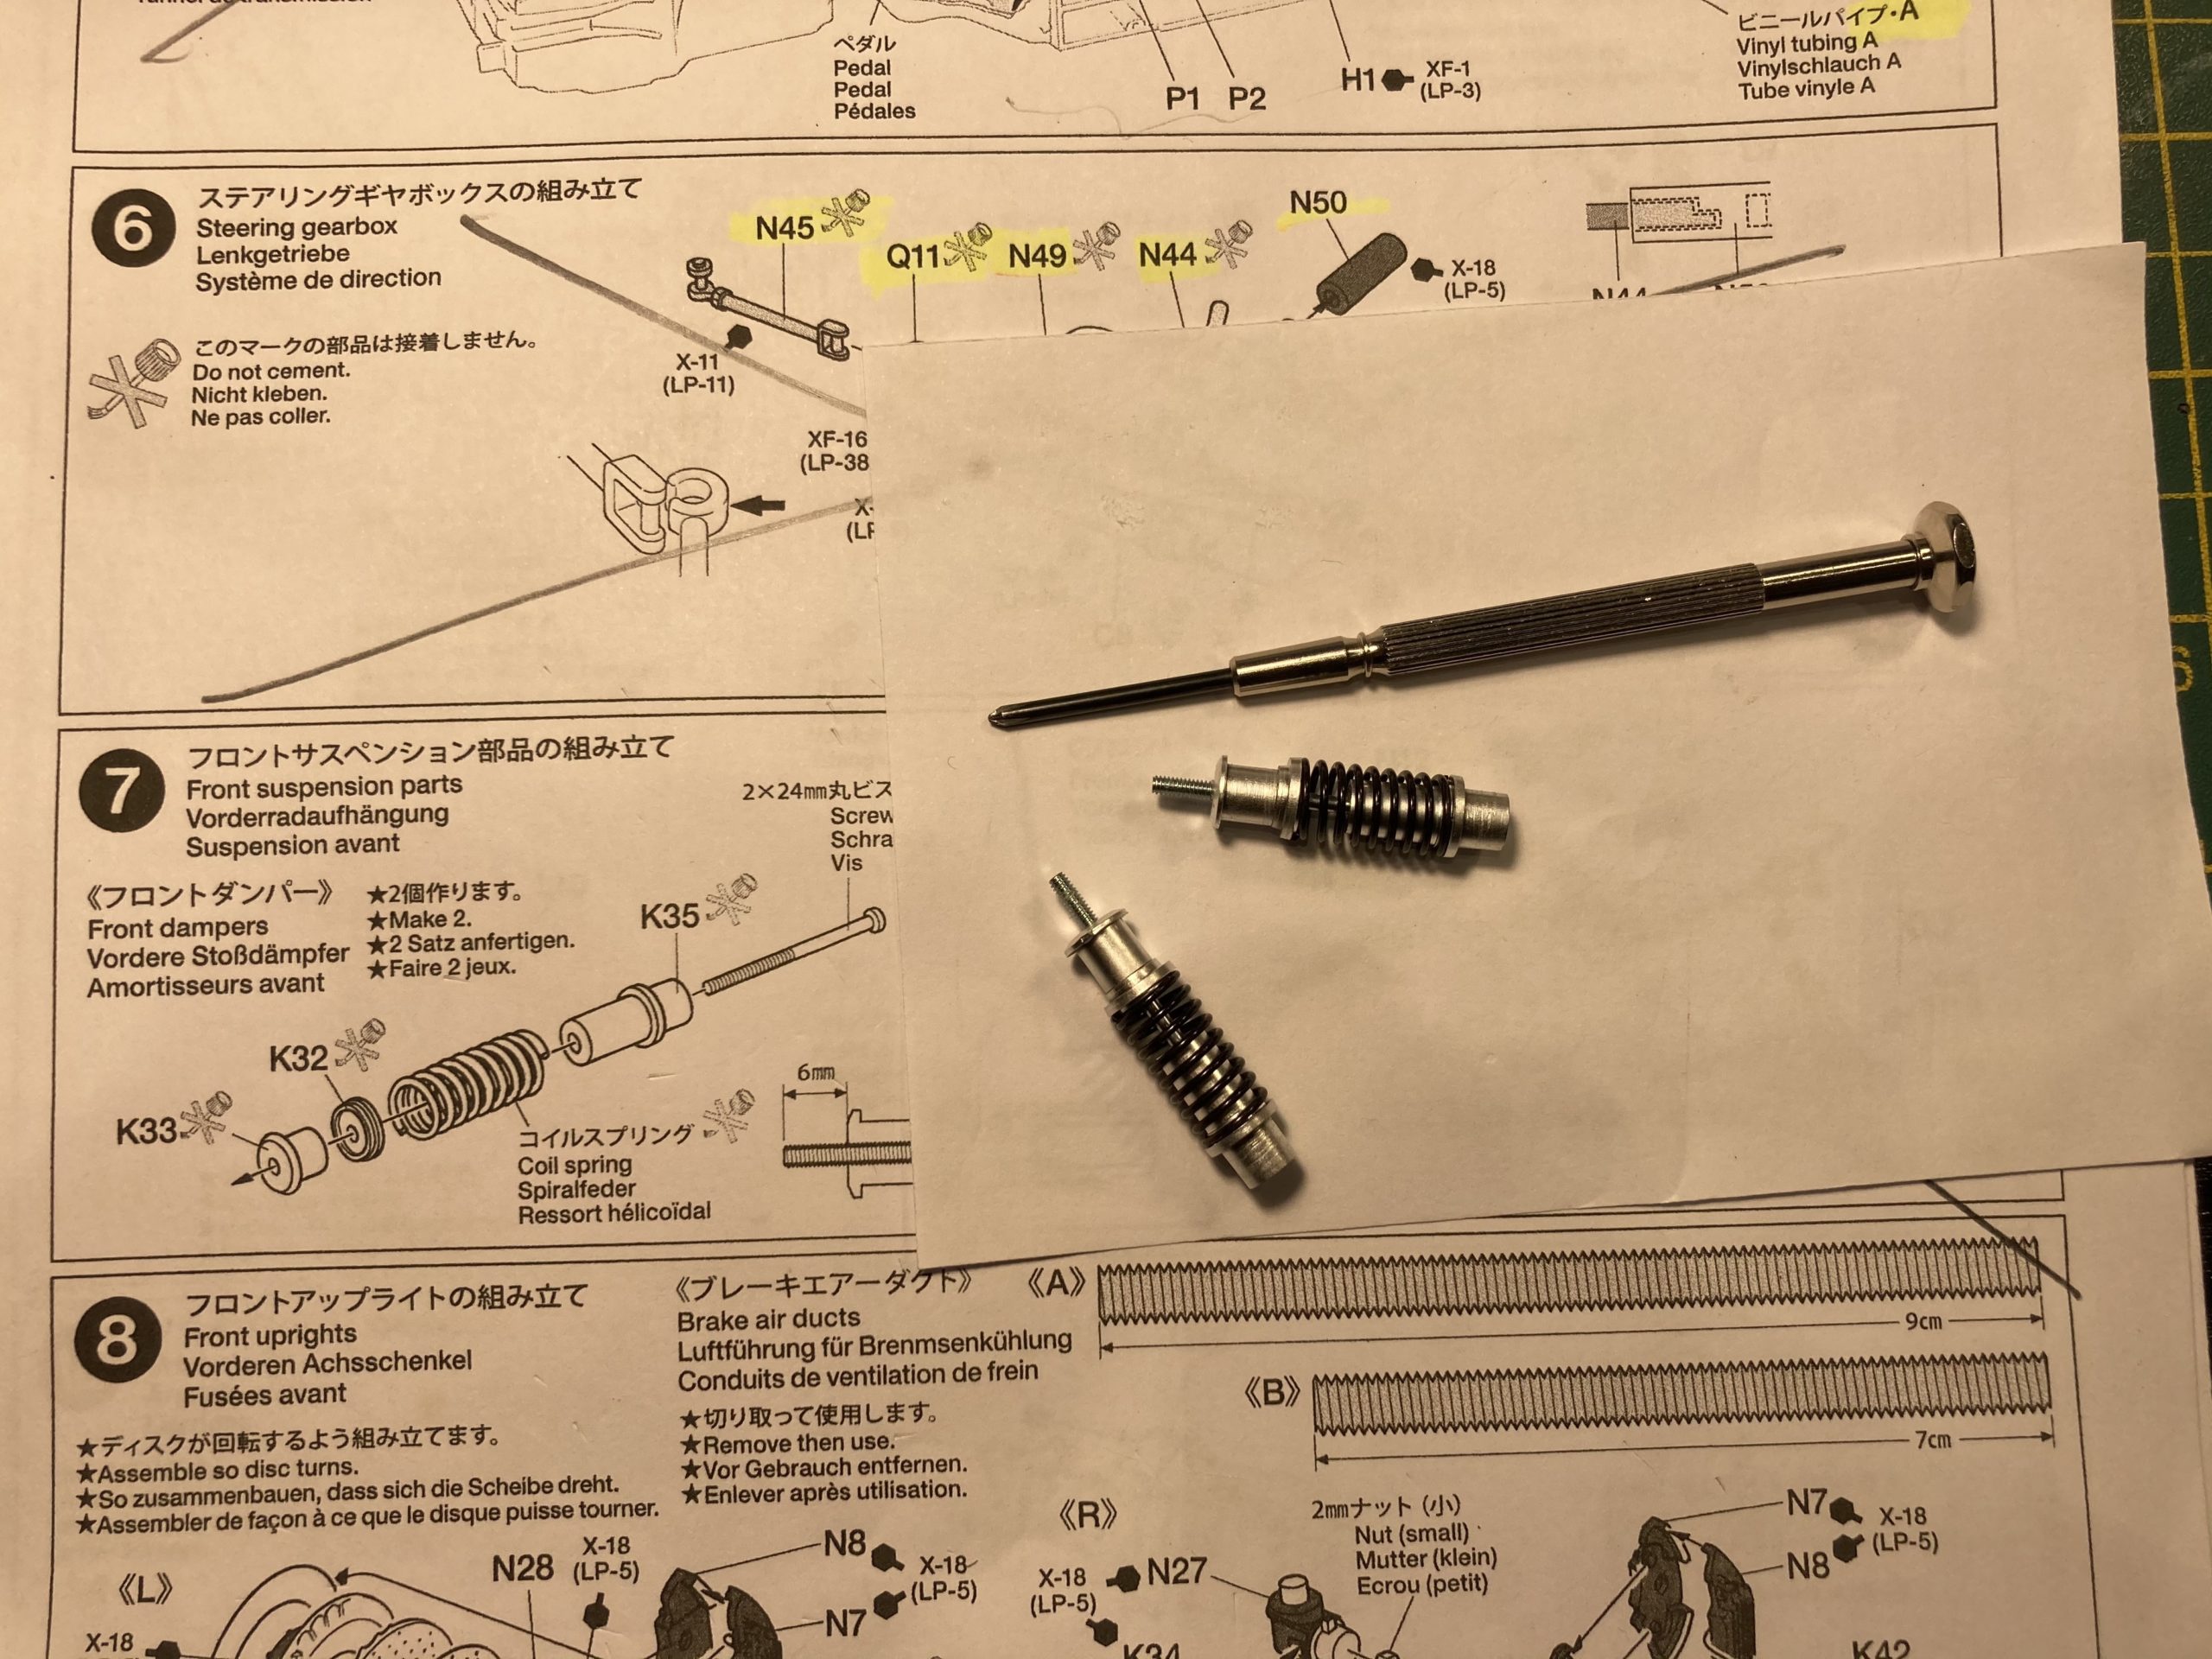
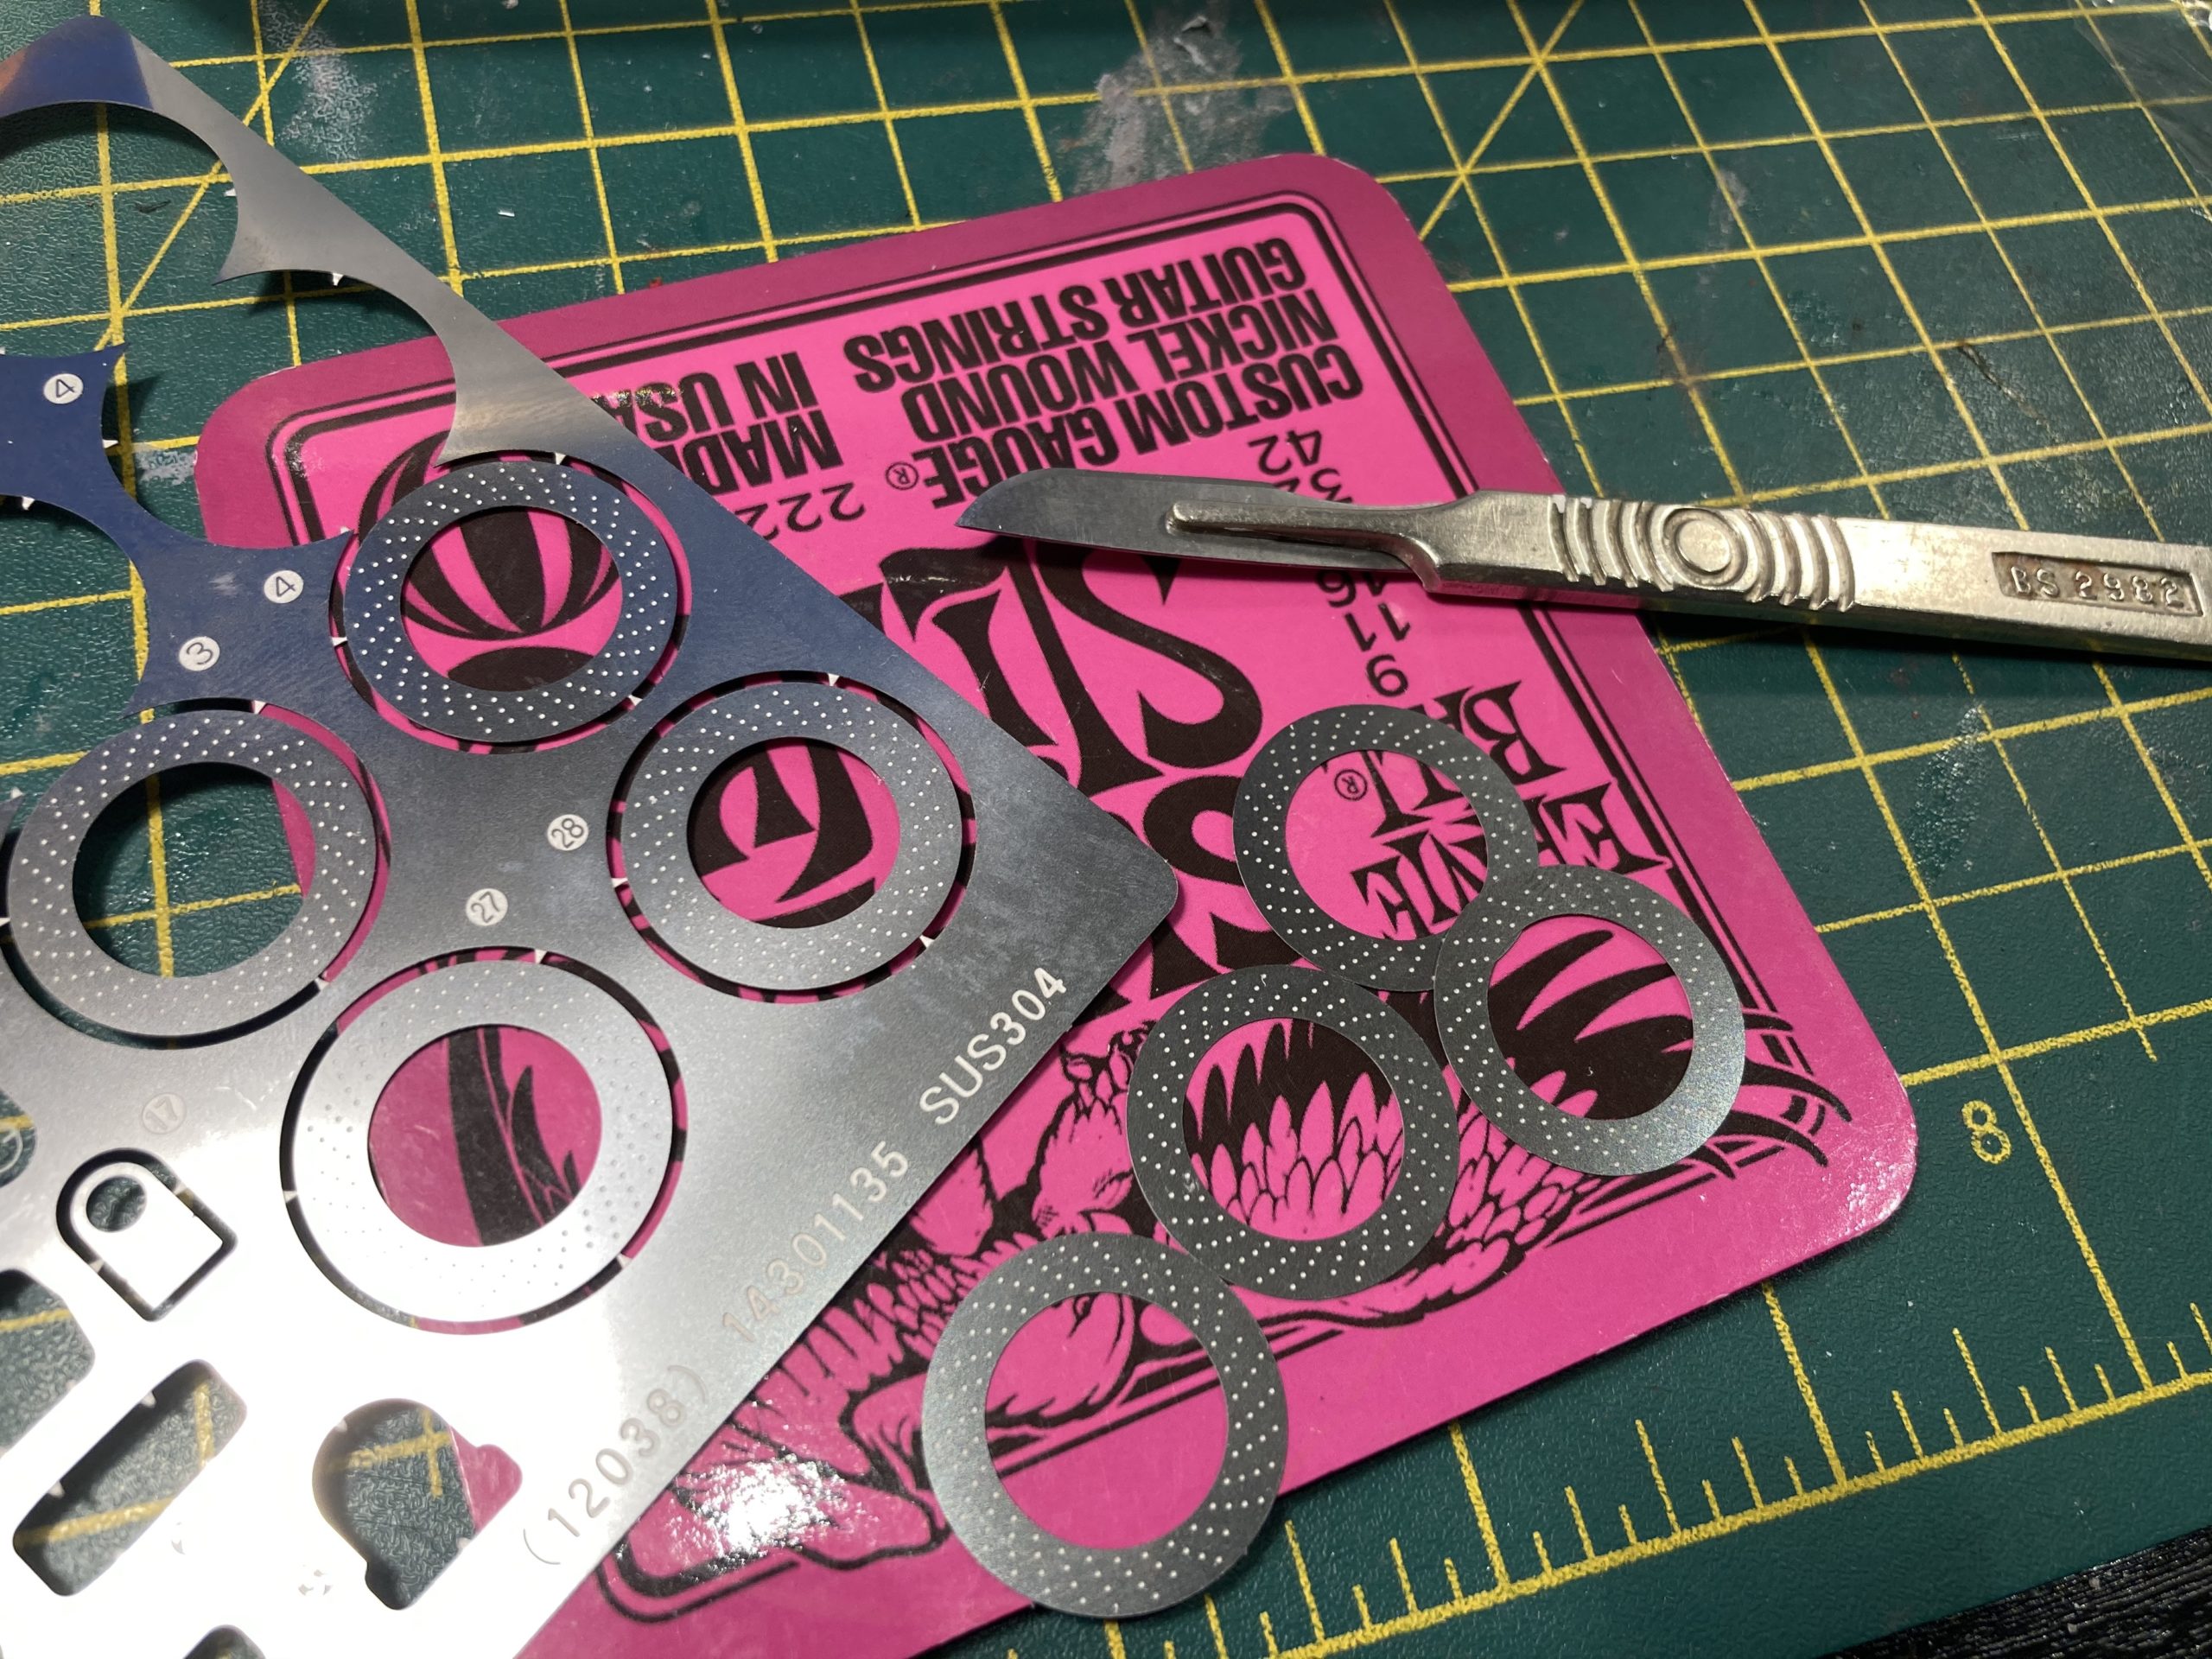
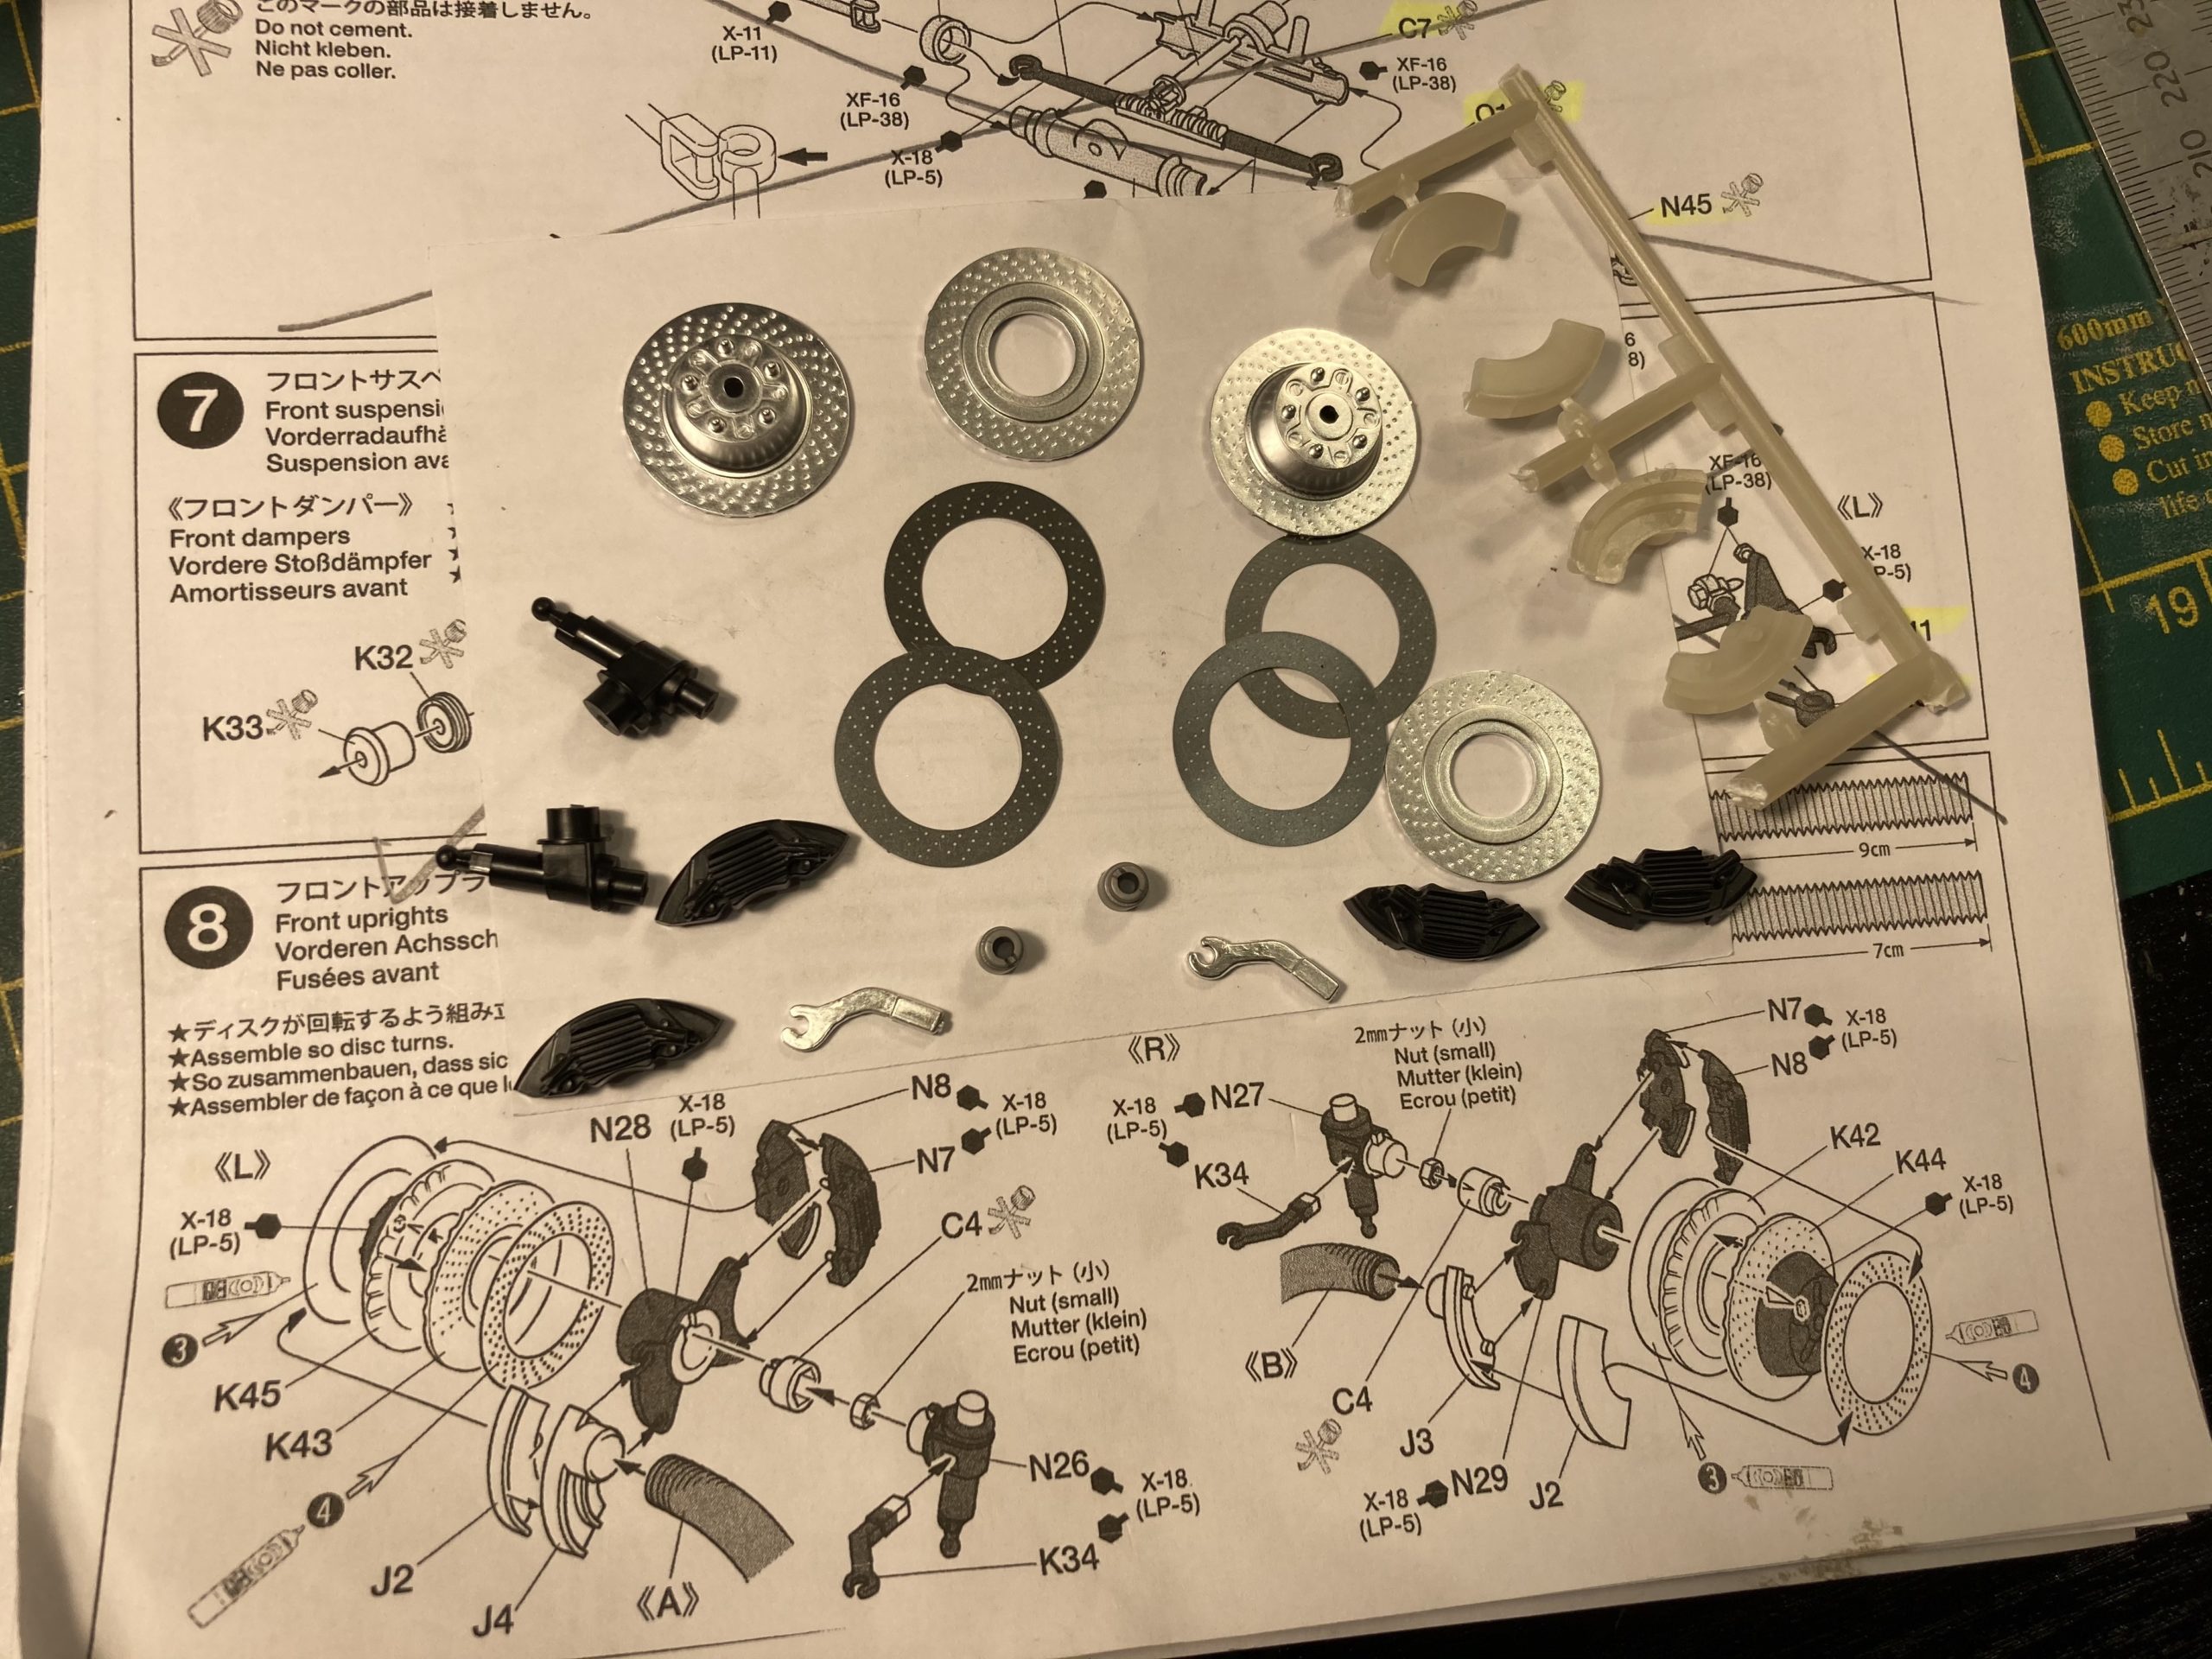
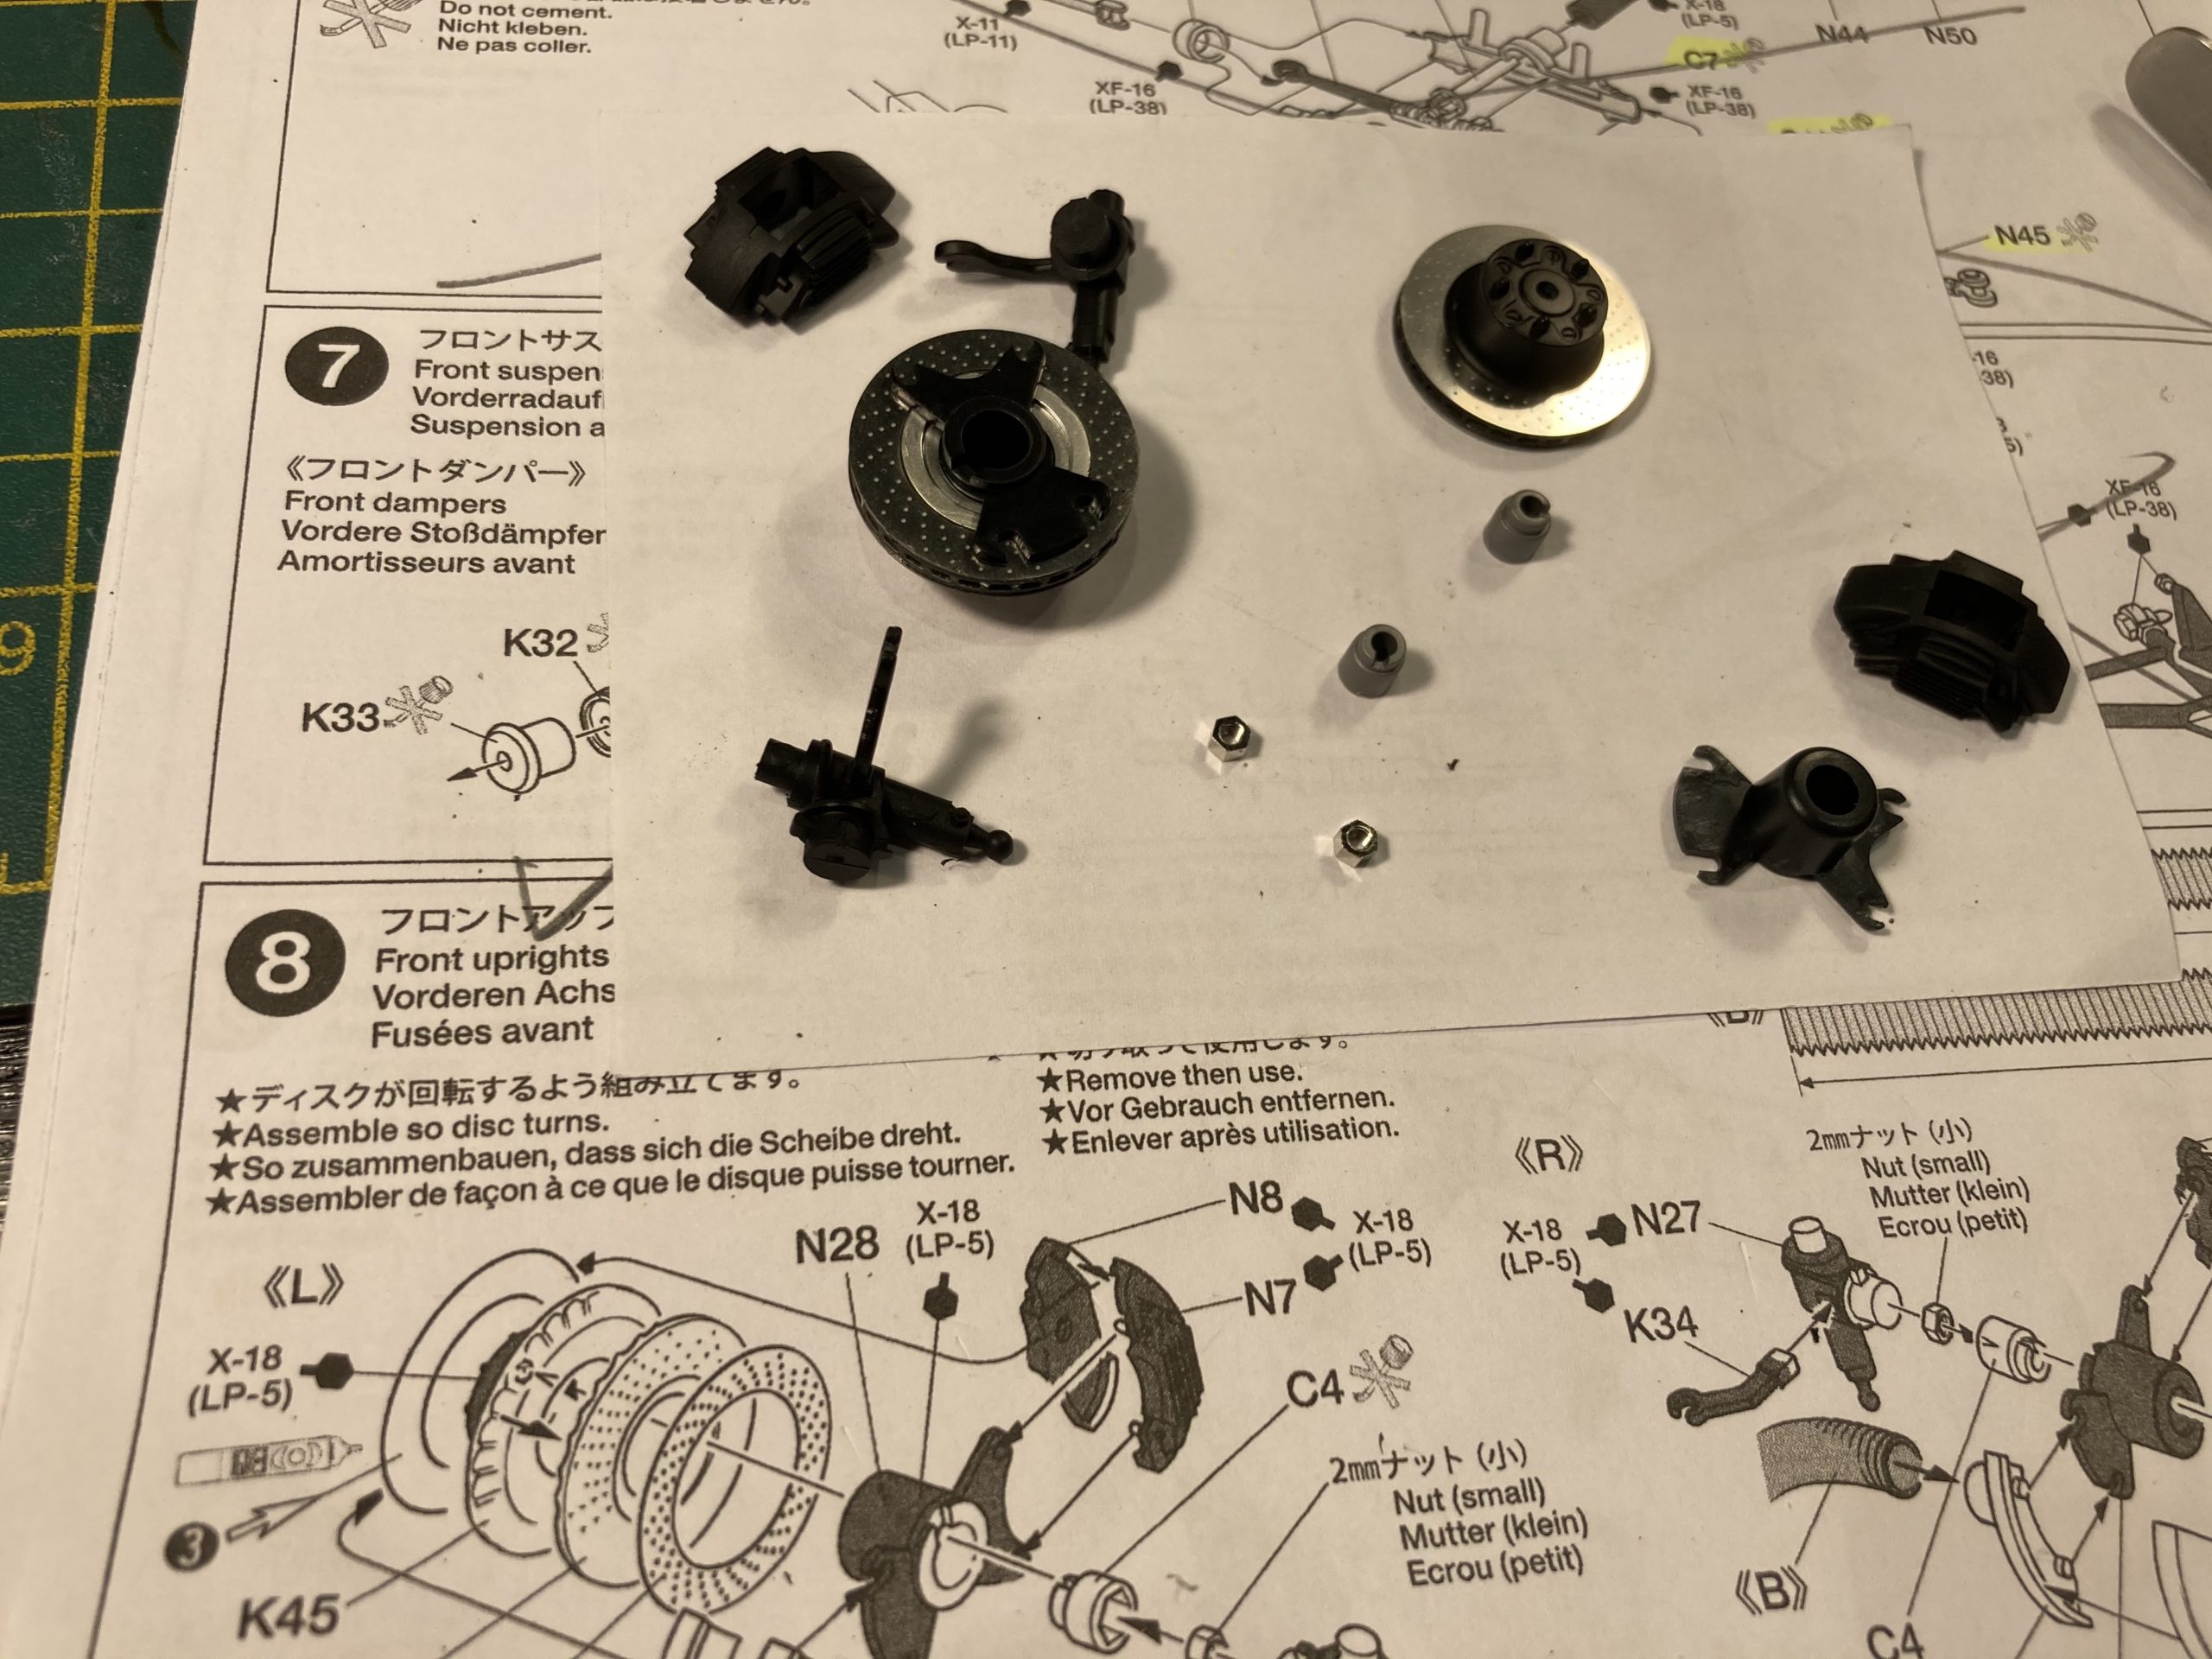
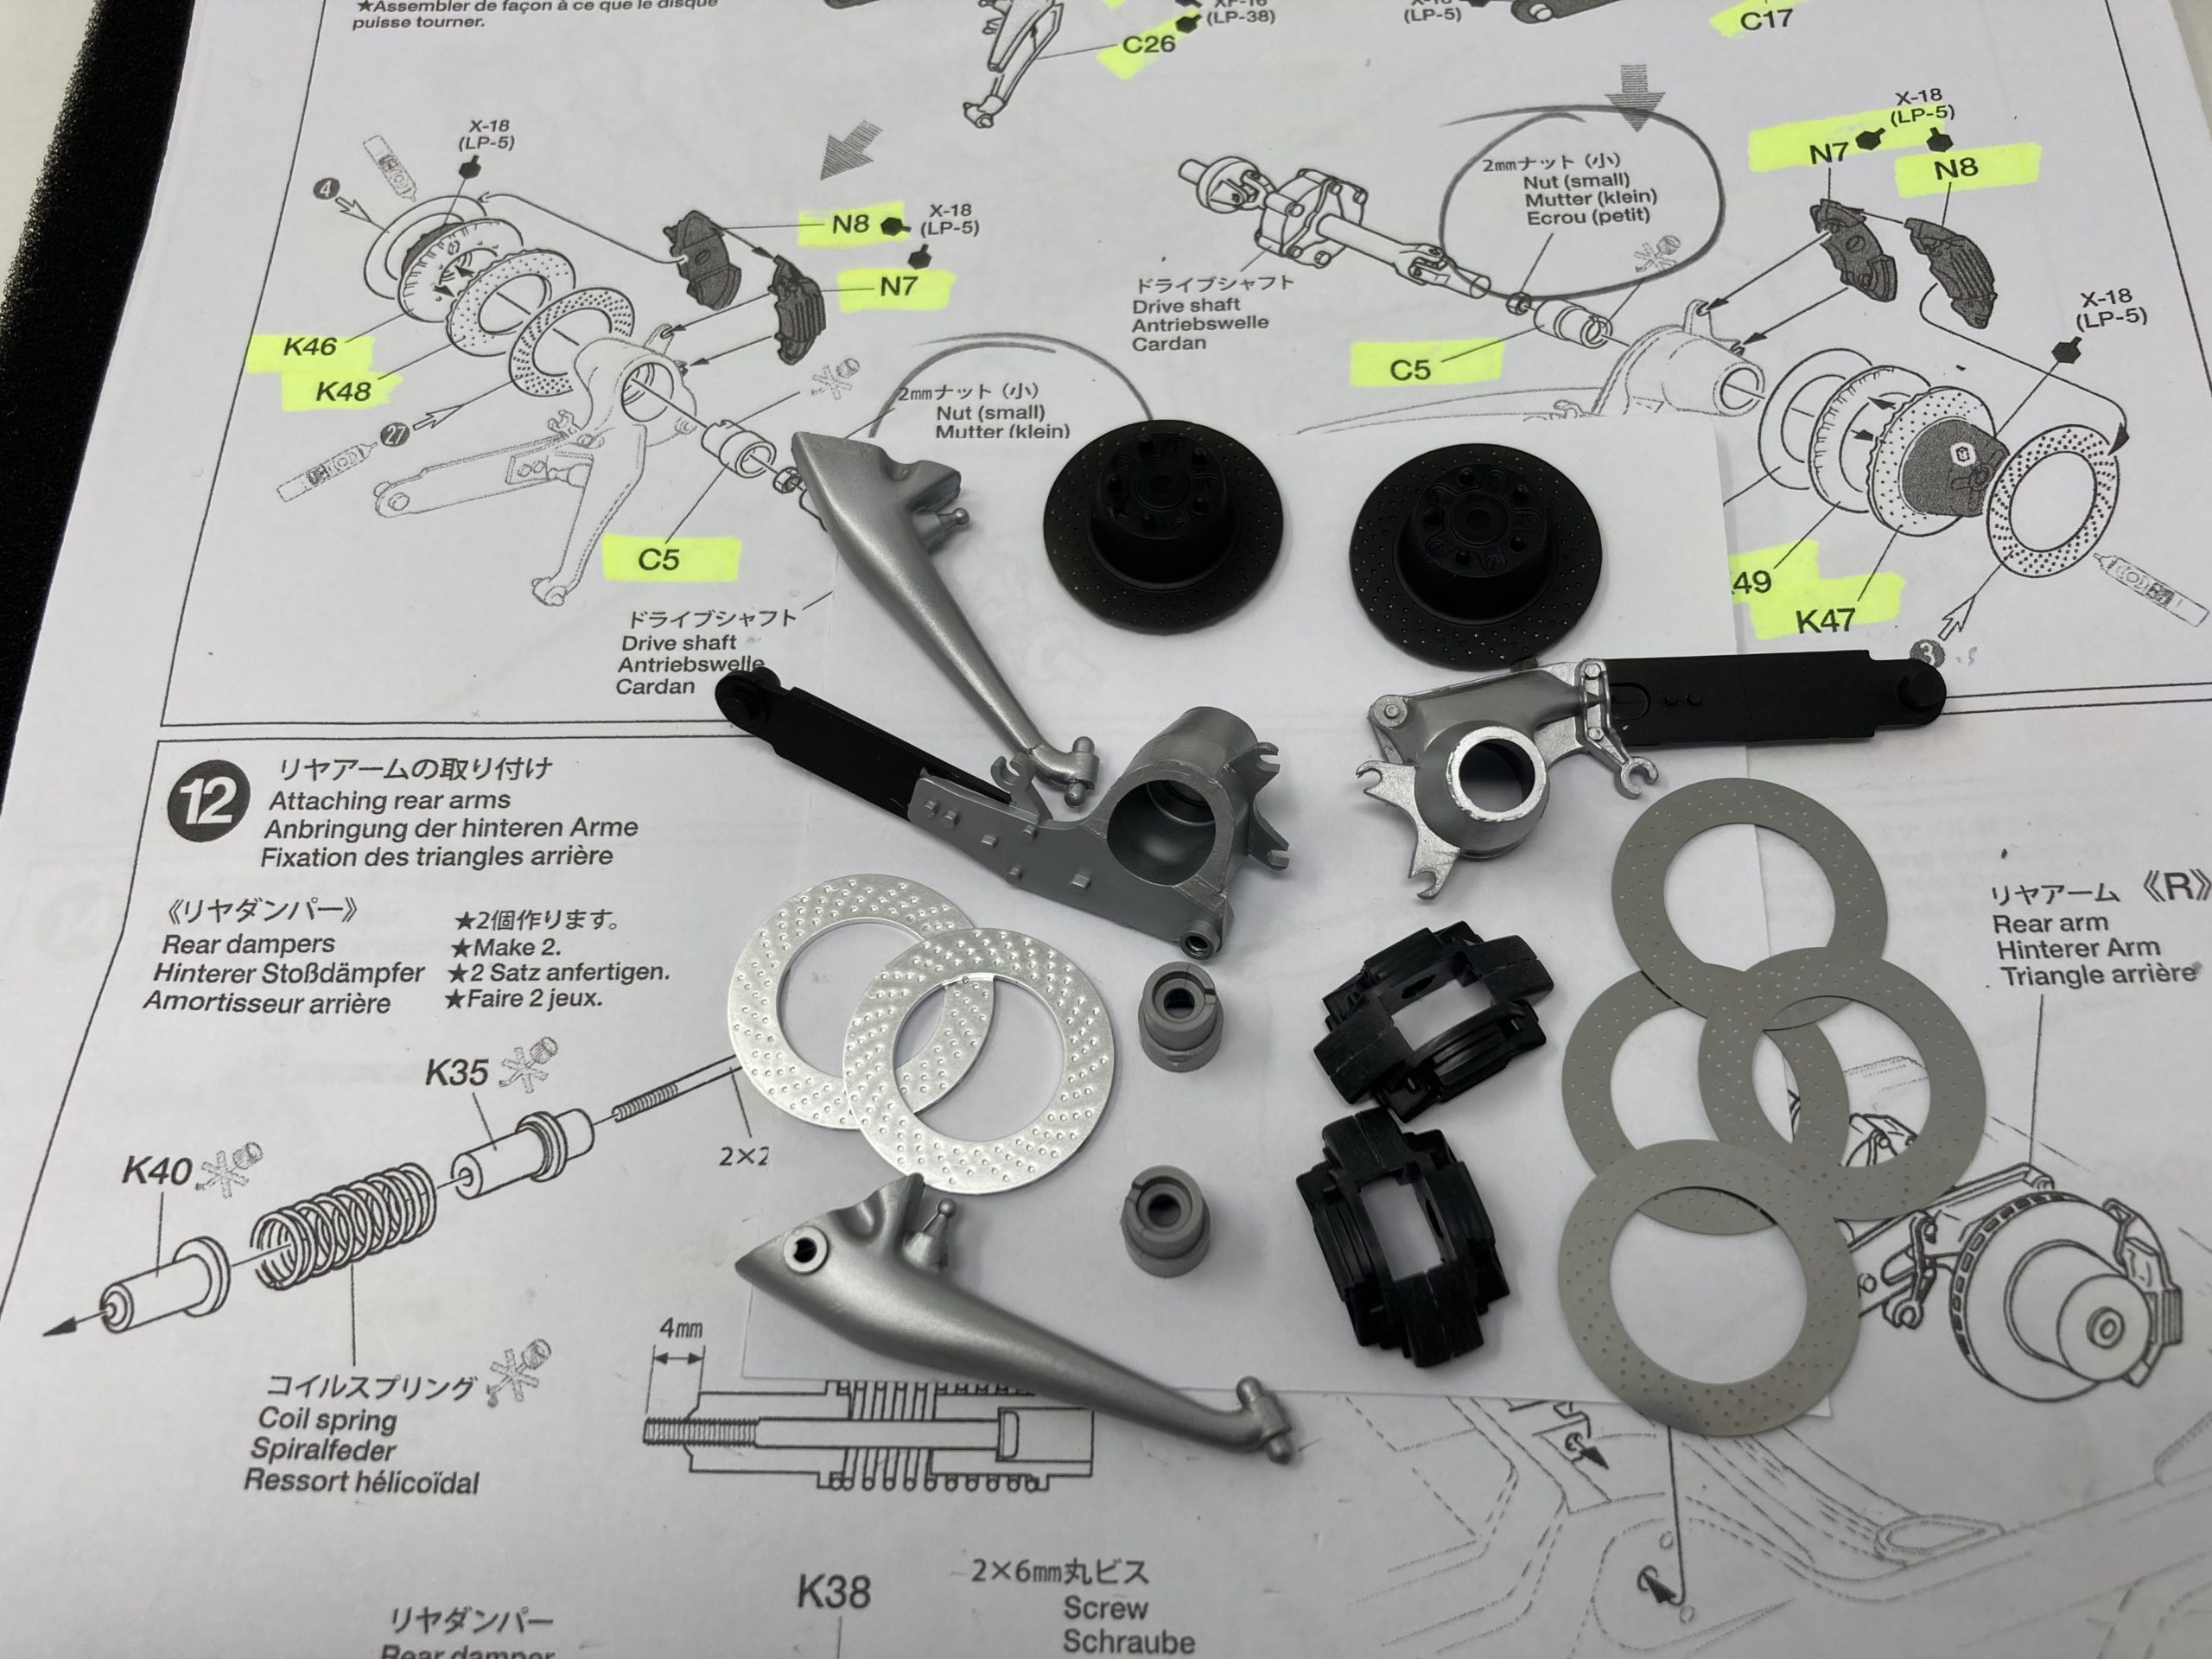
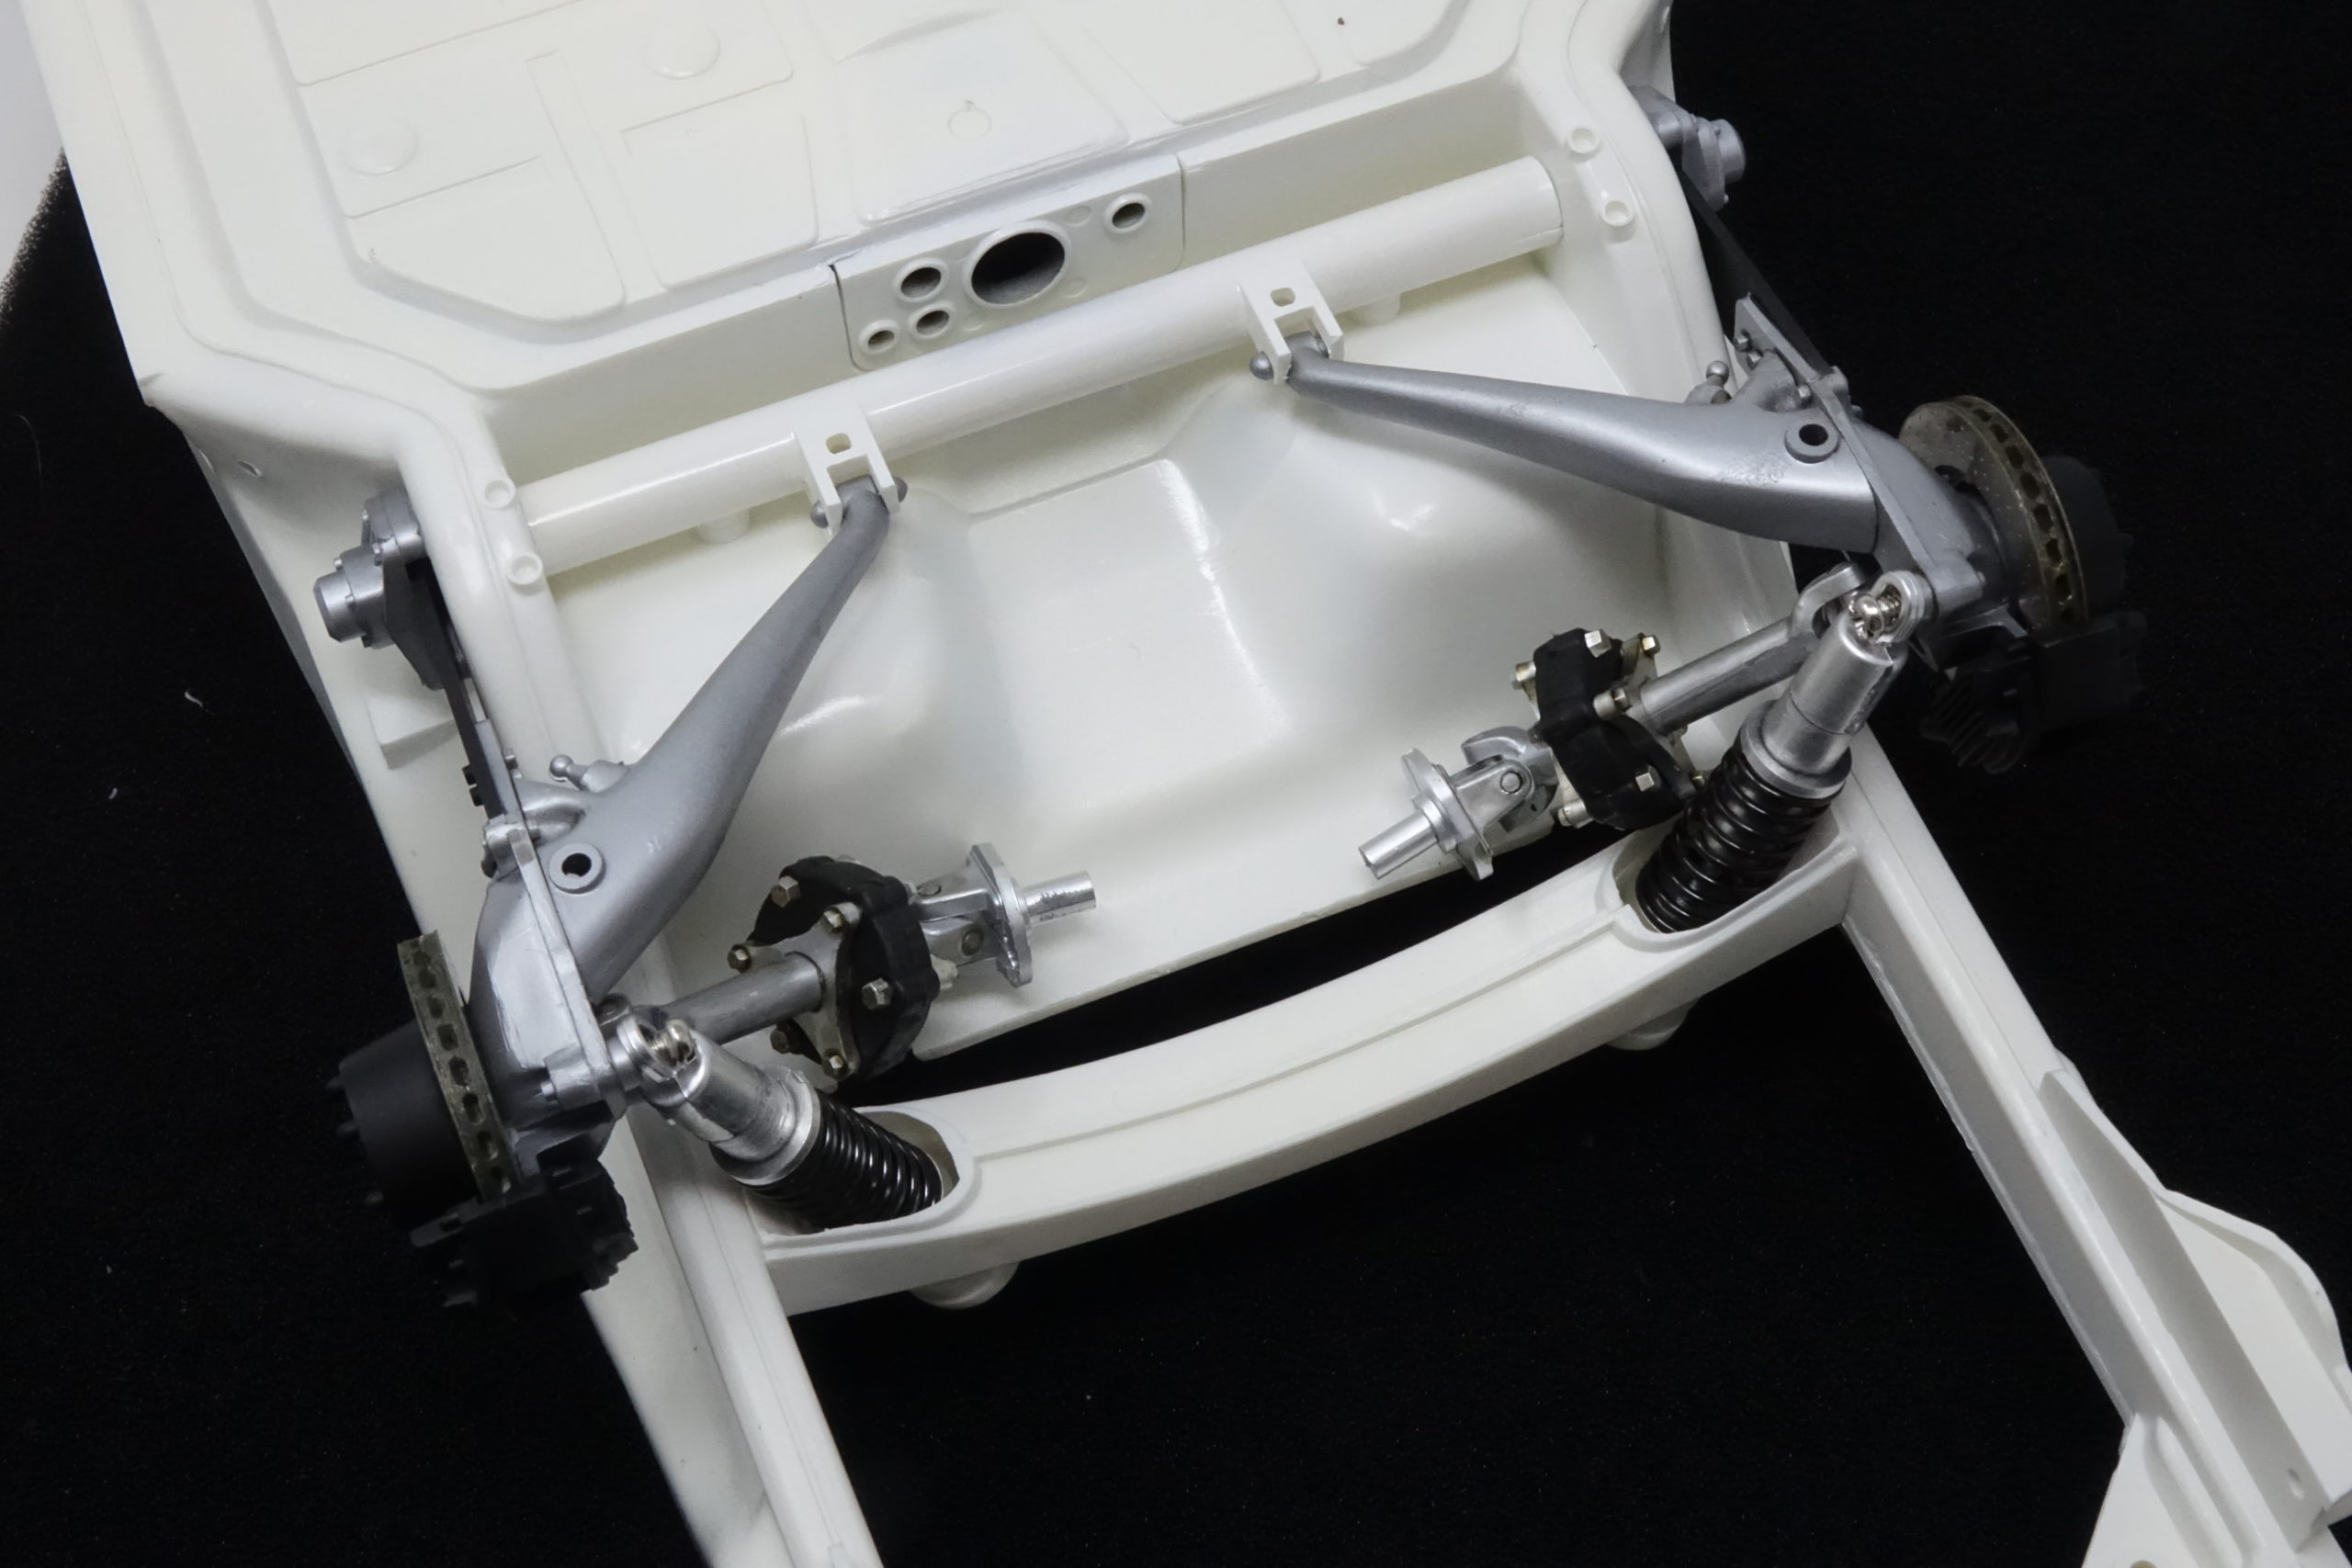
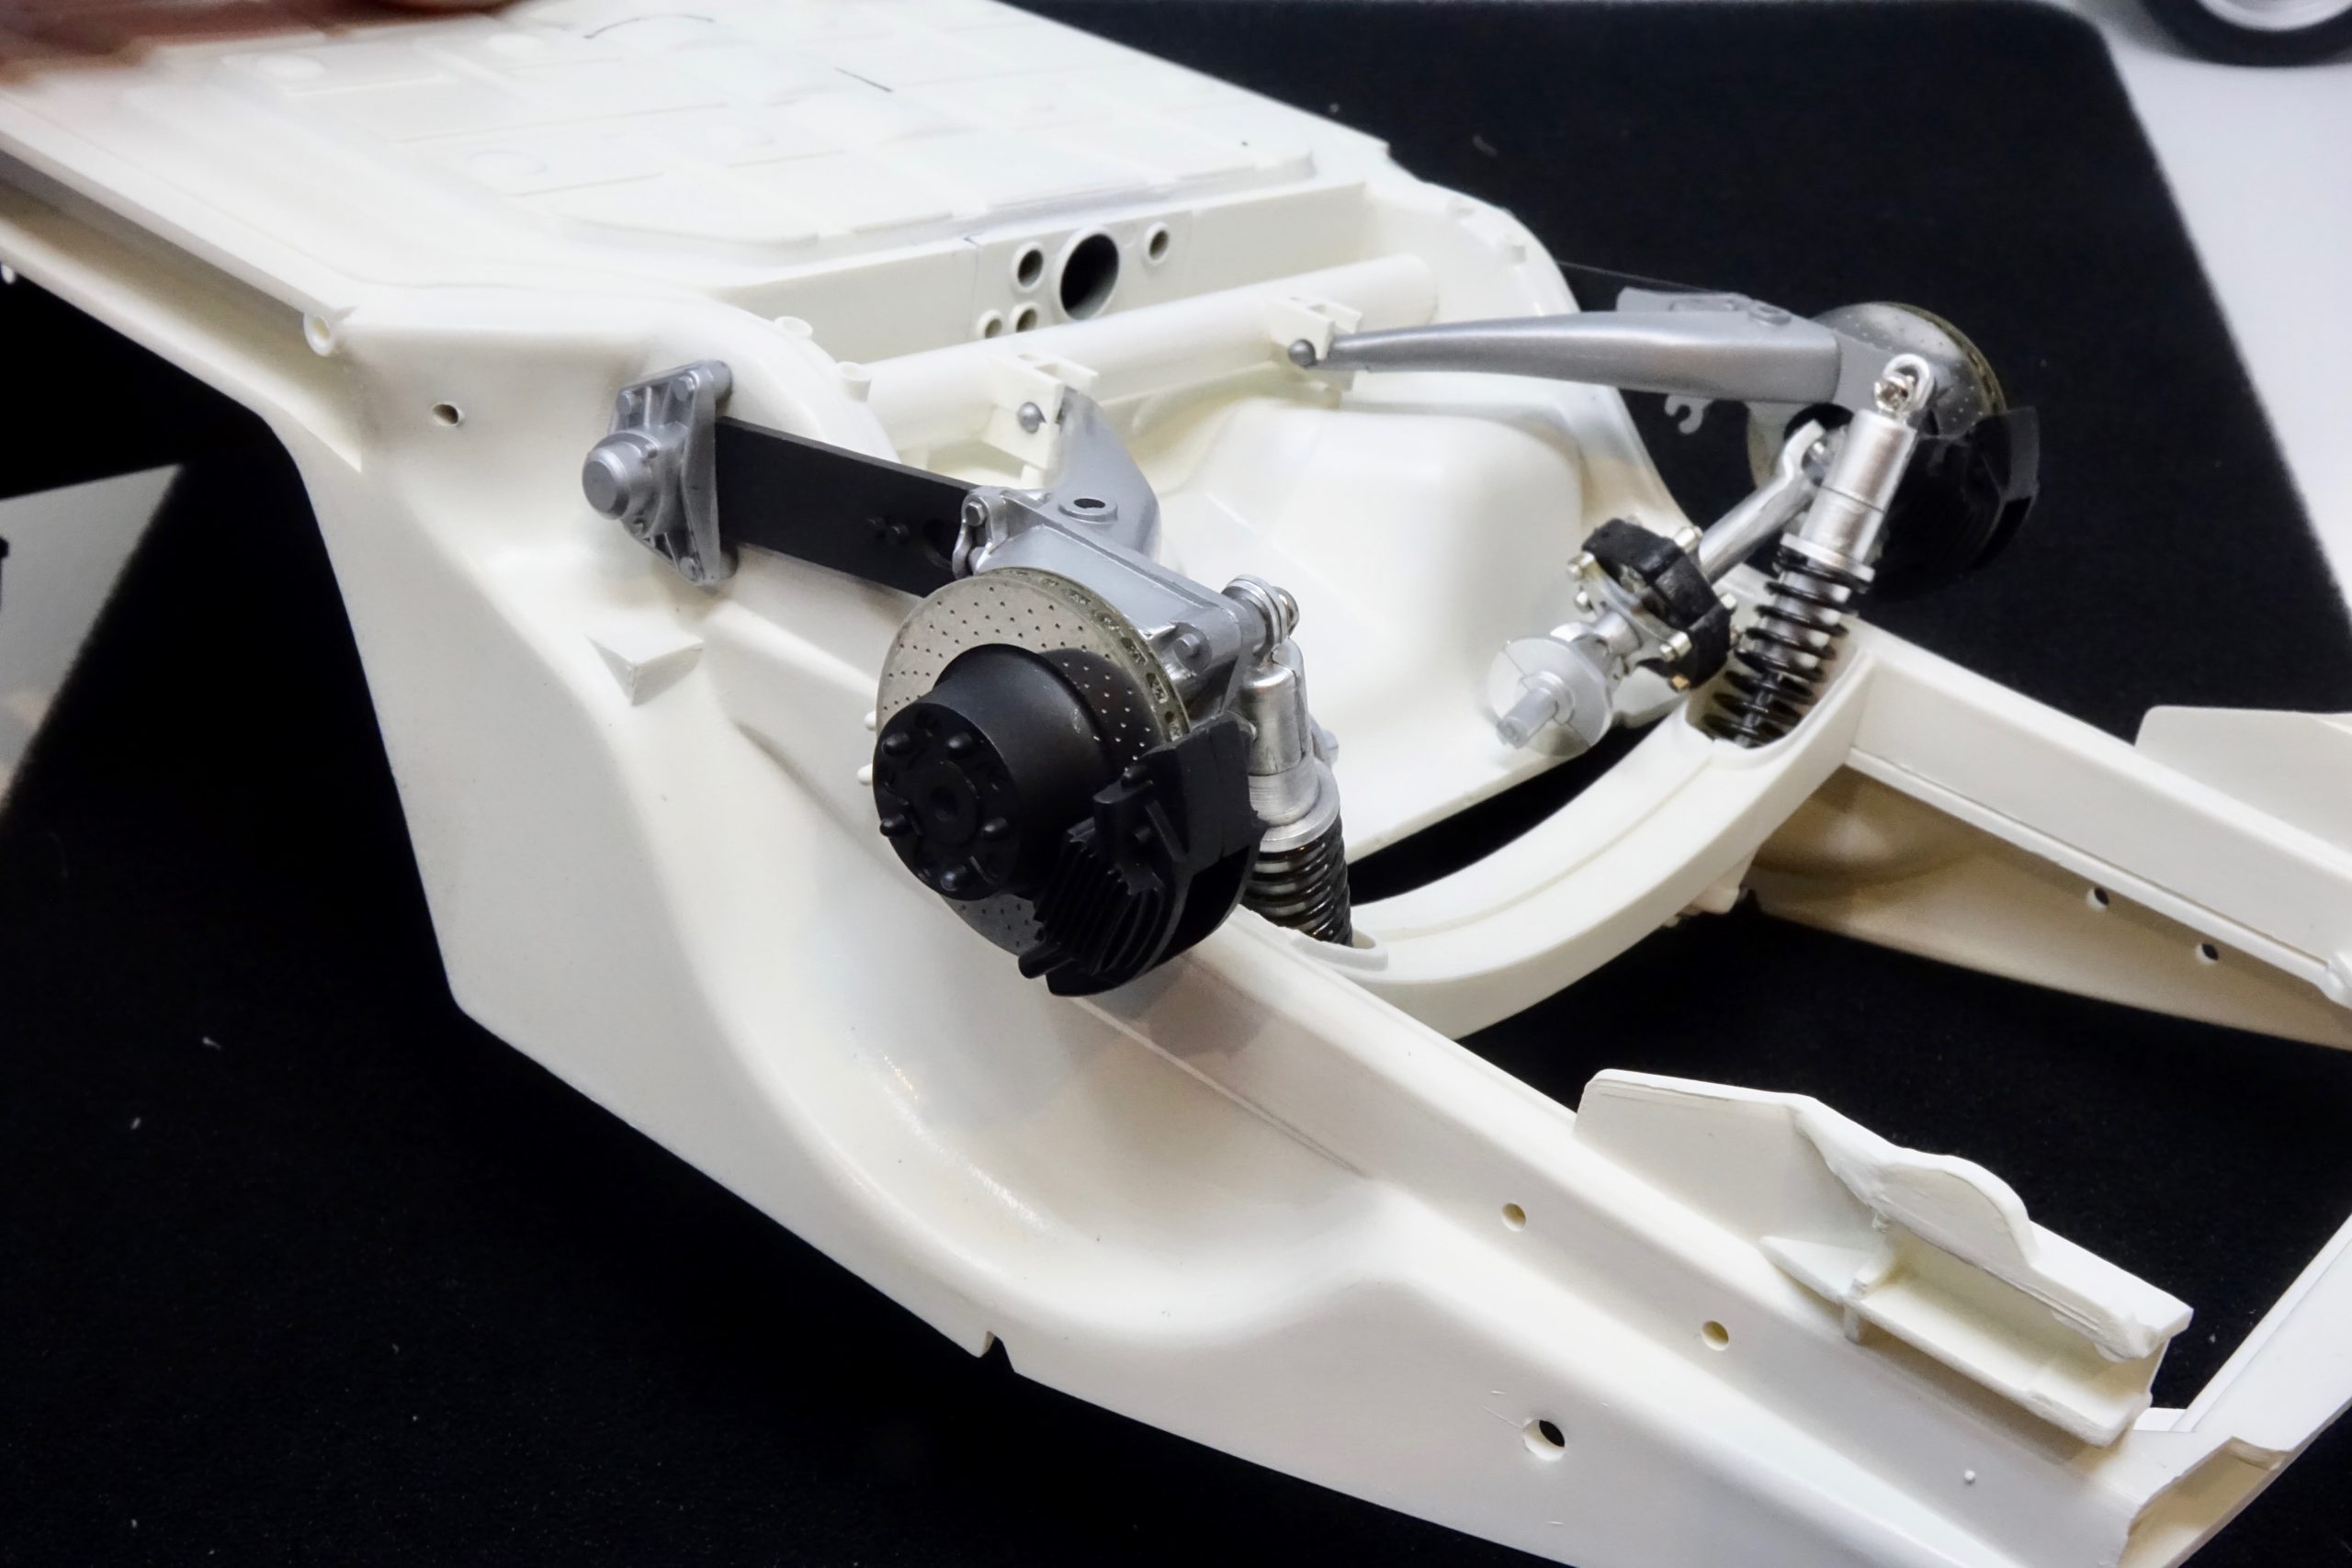
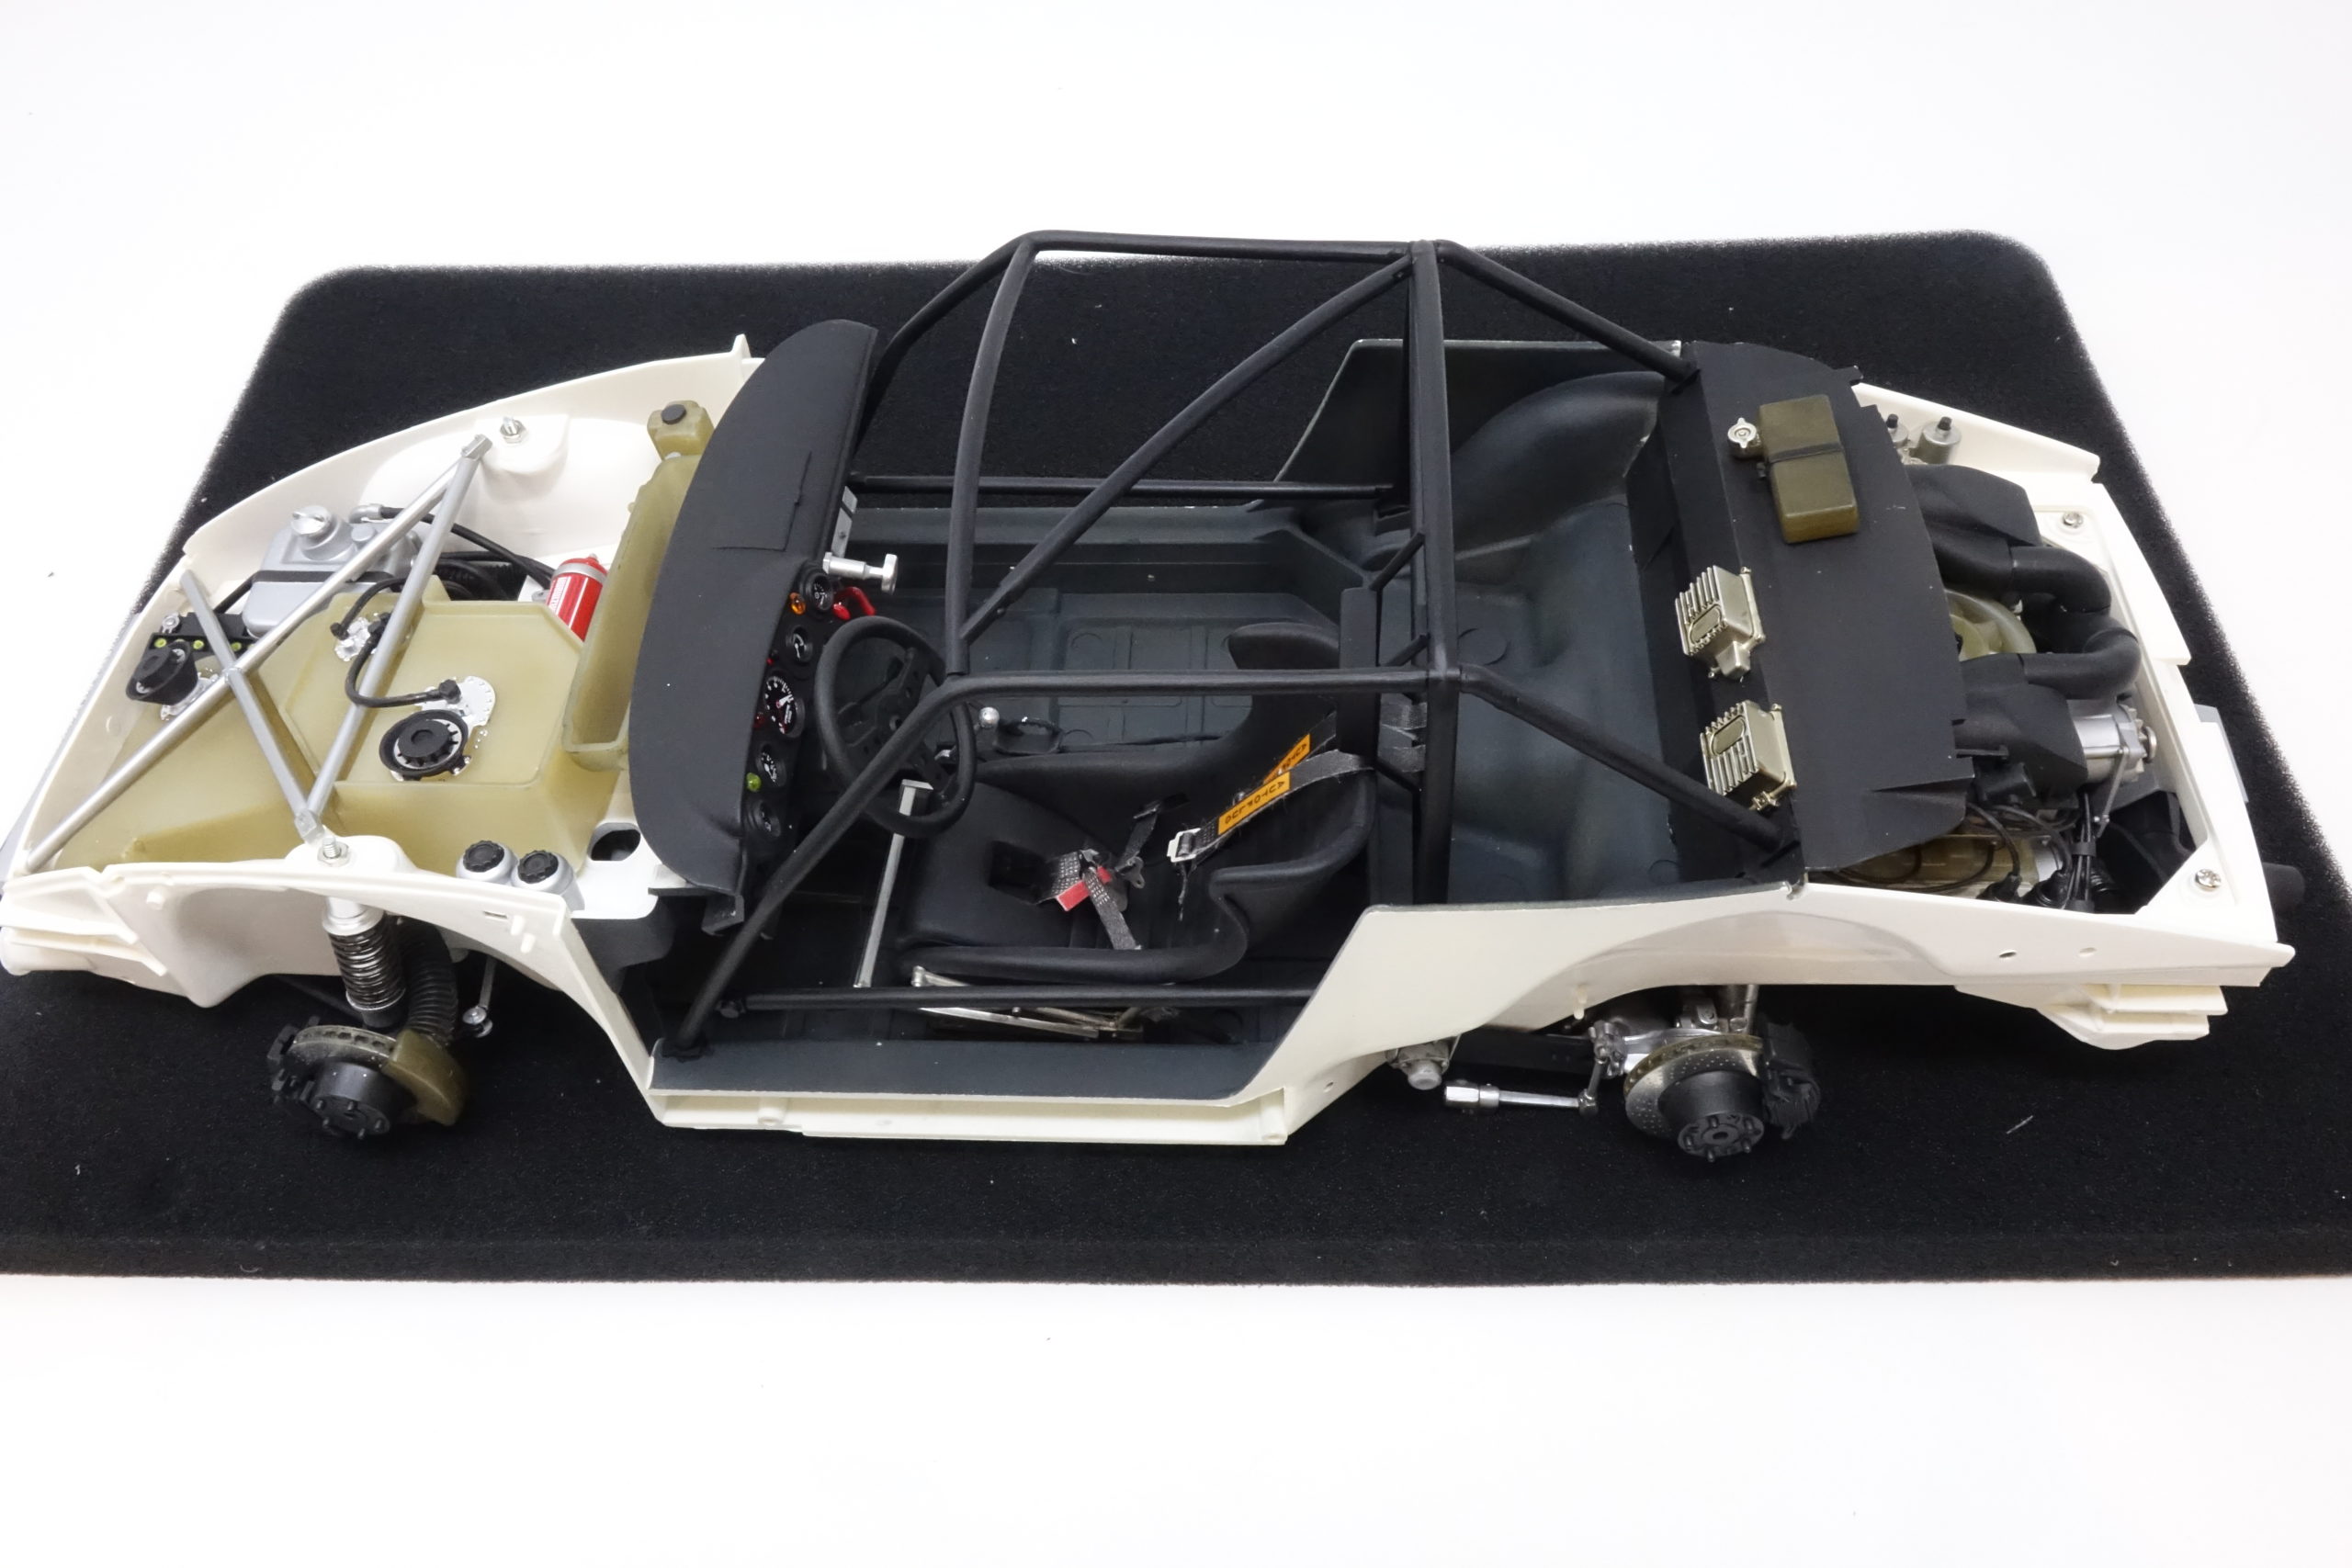
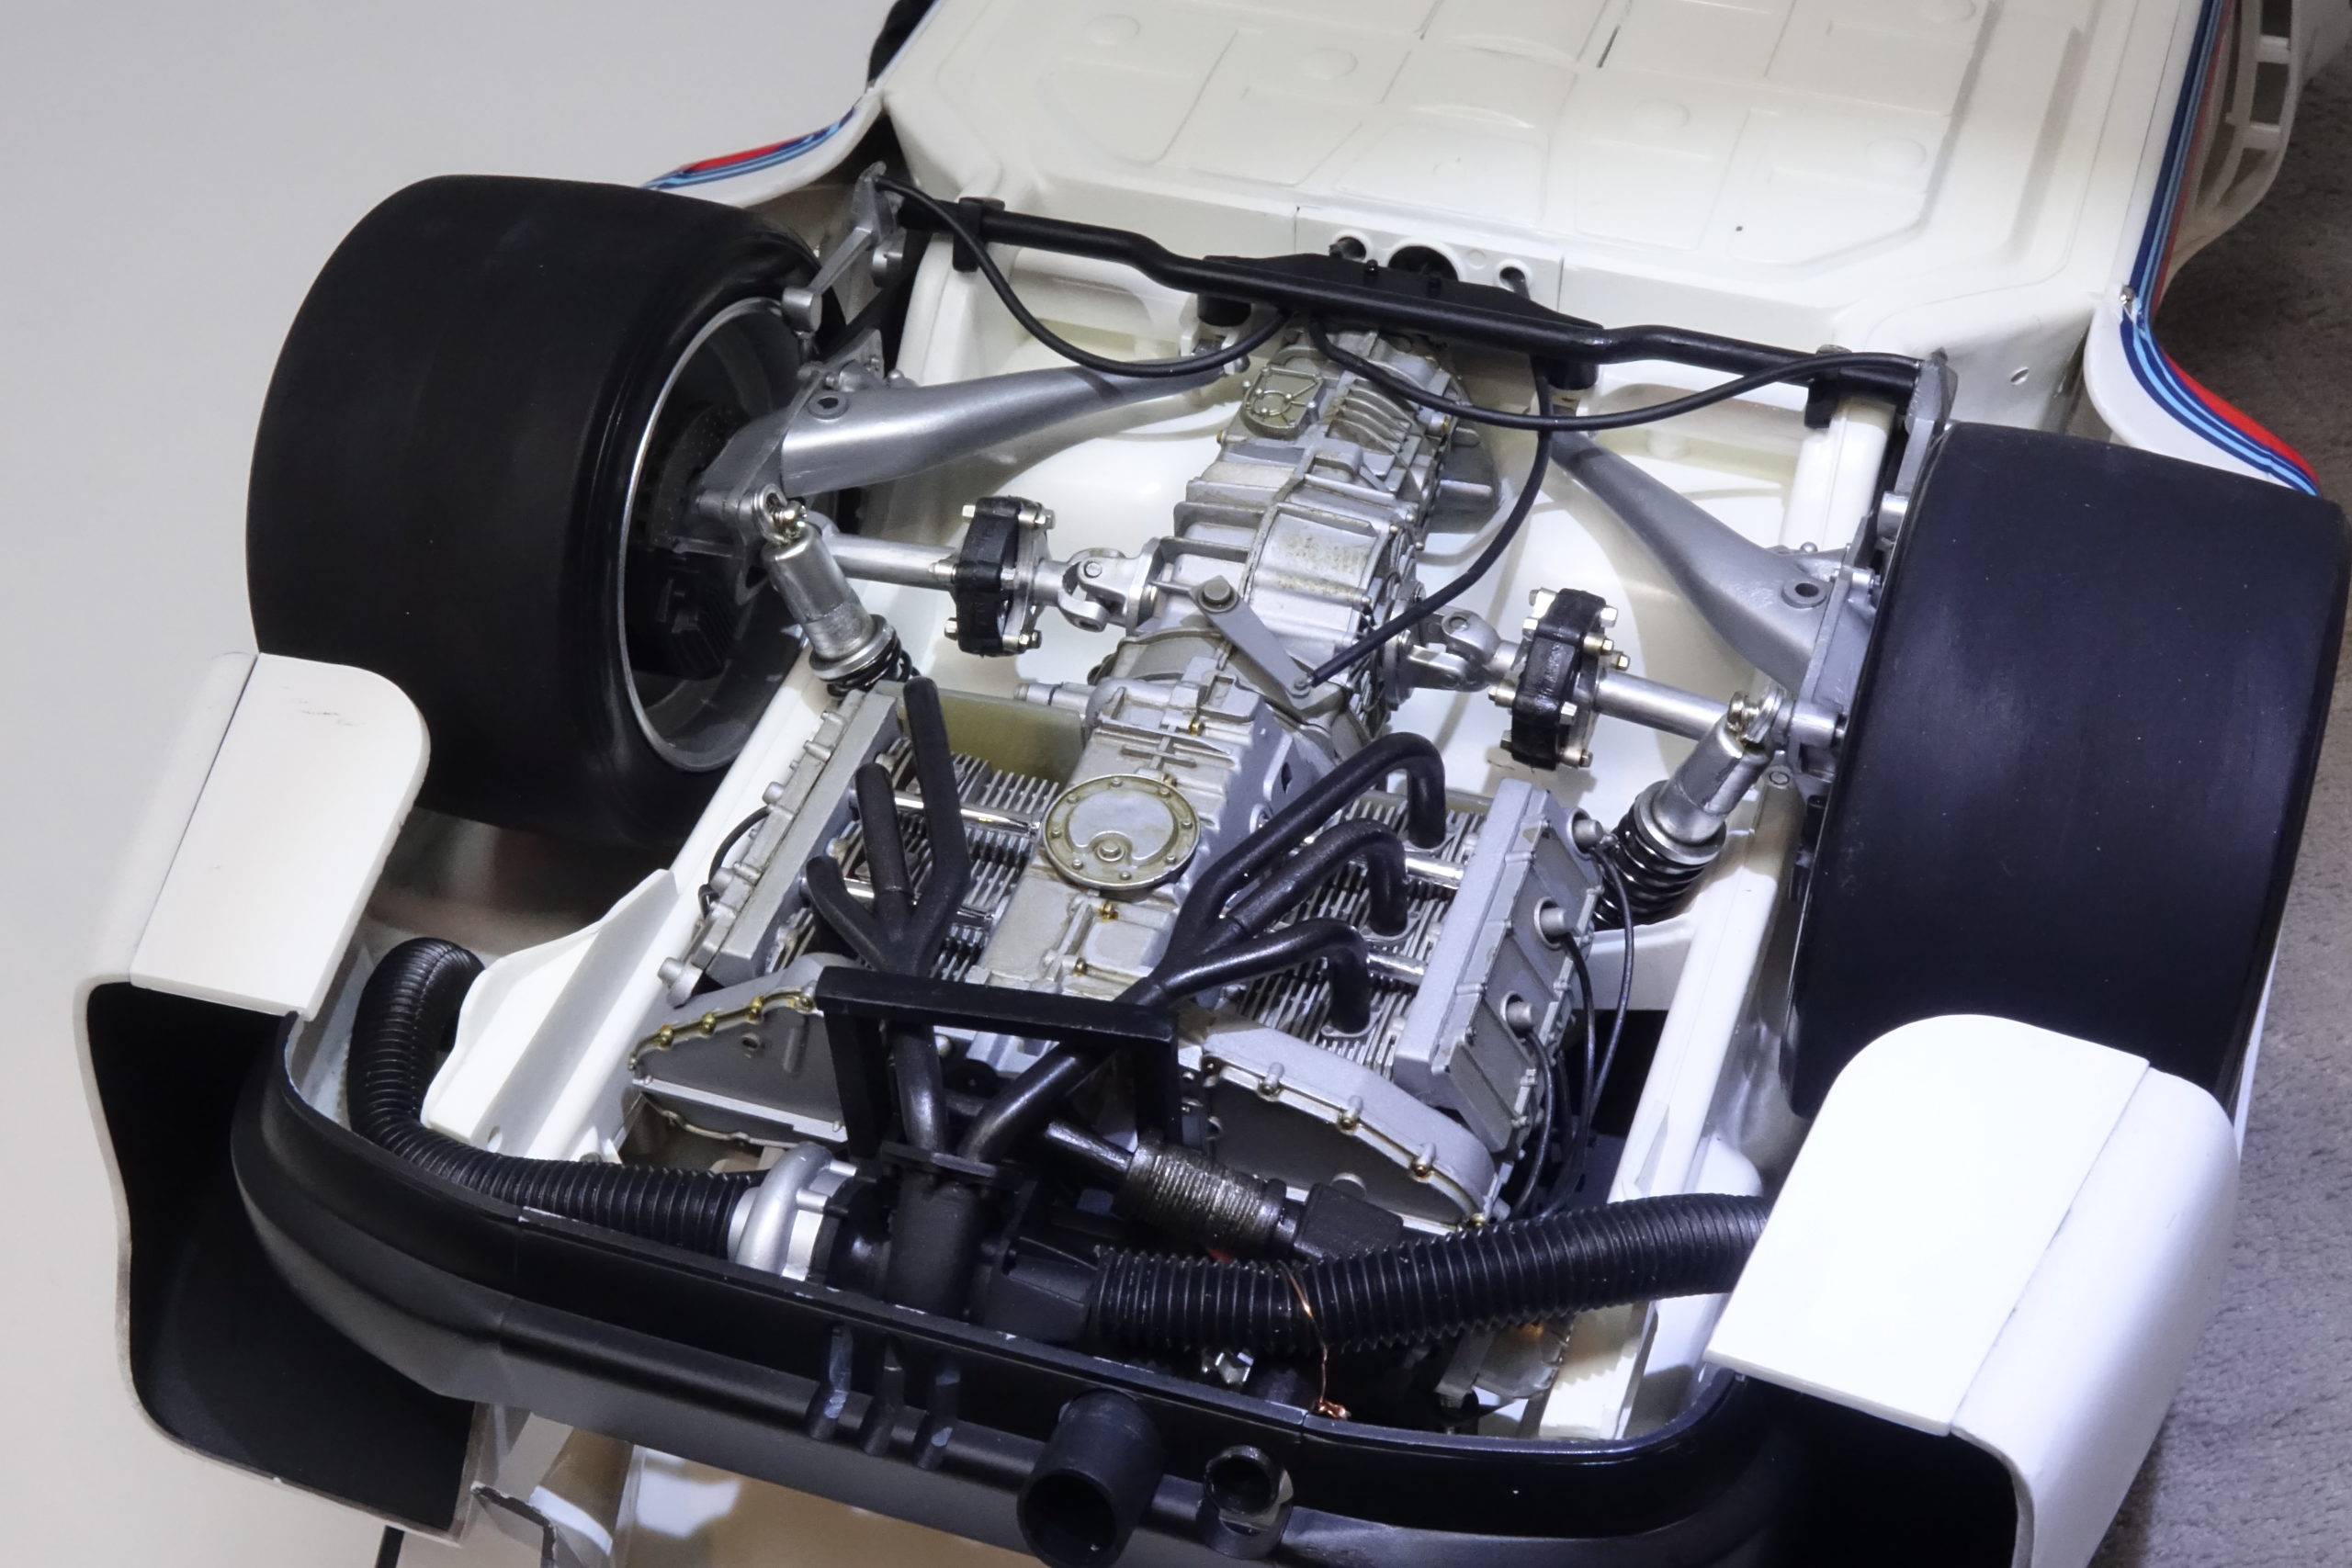
Suspension parts
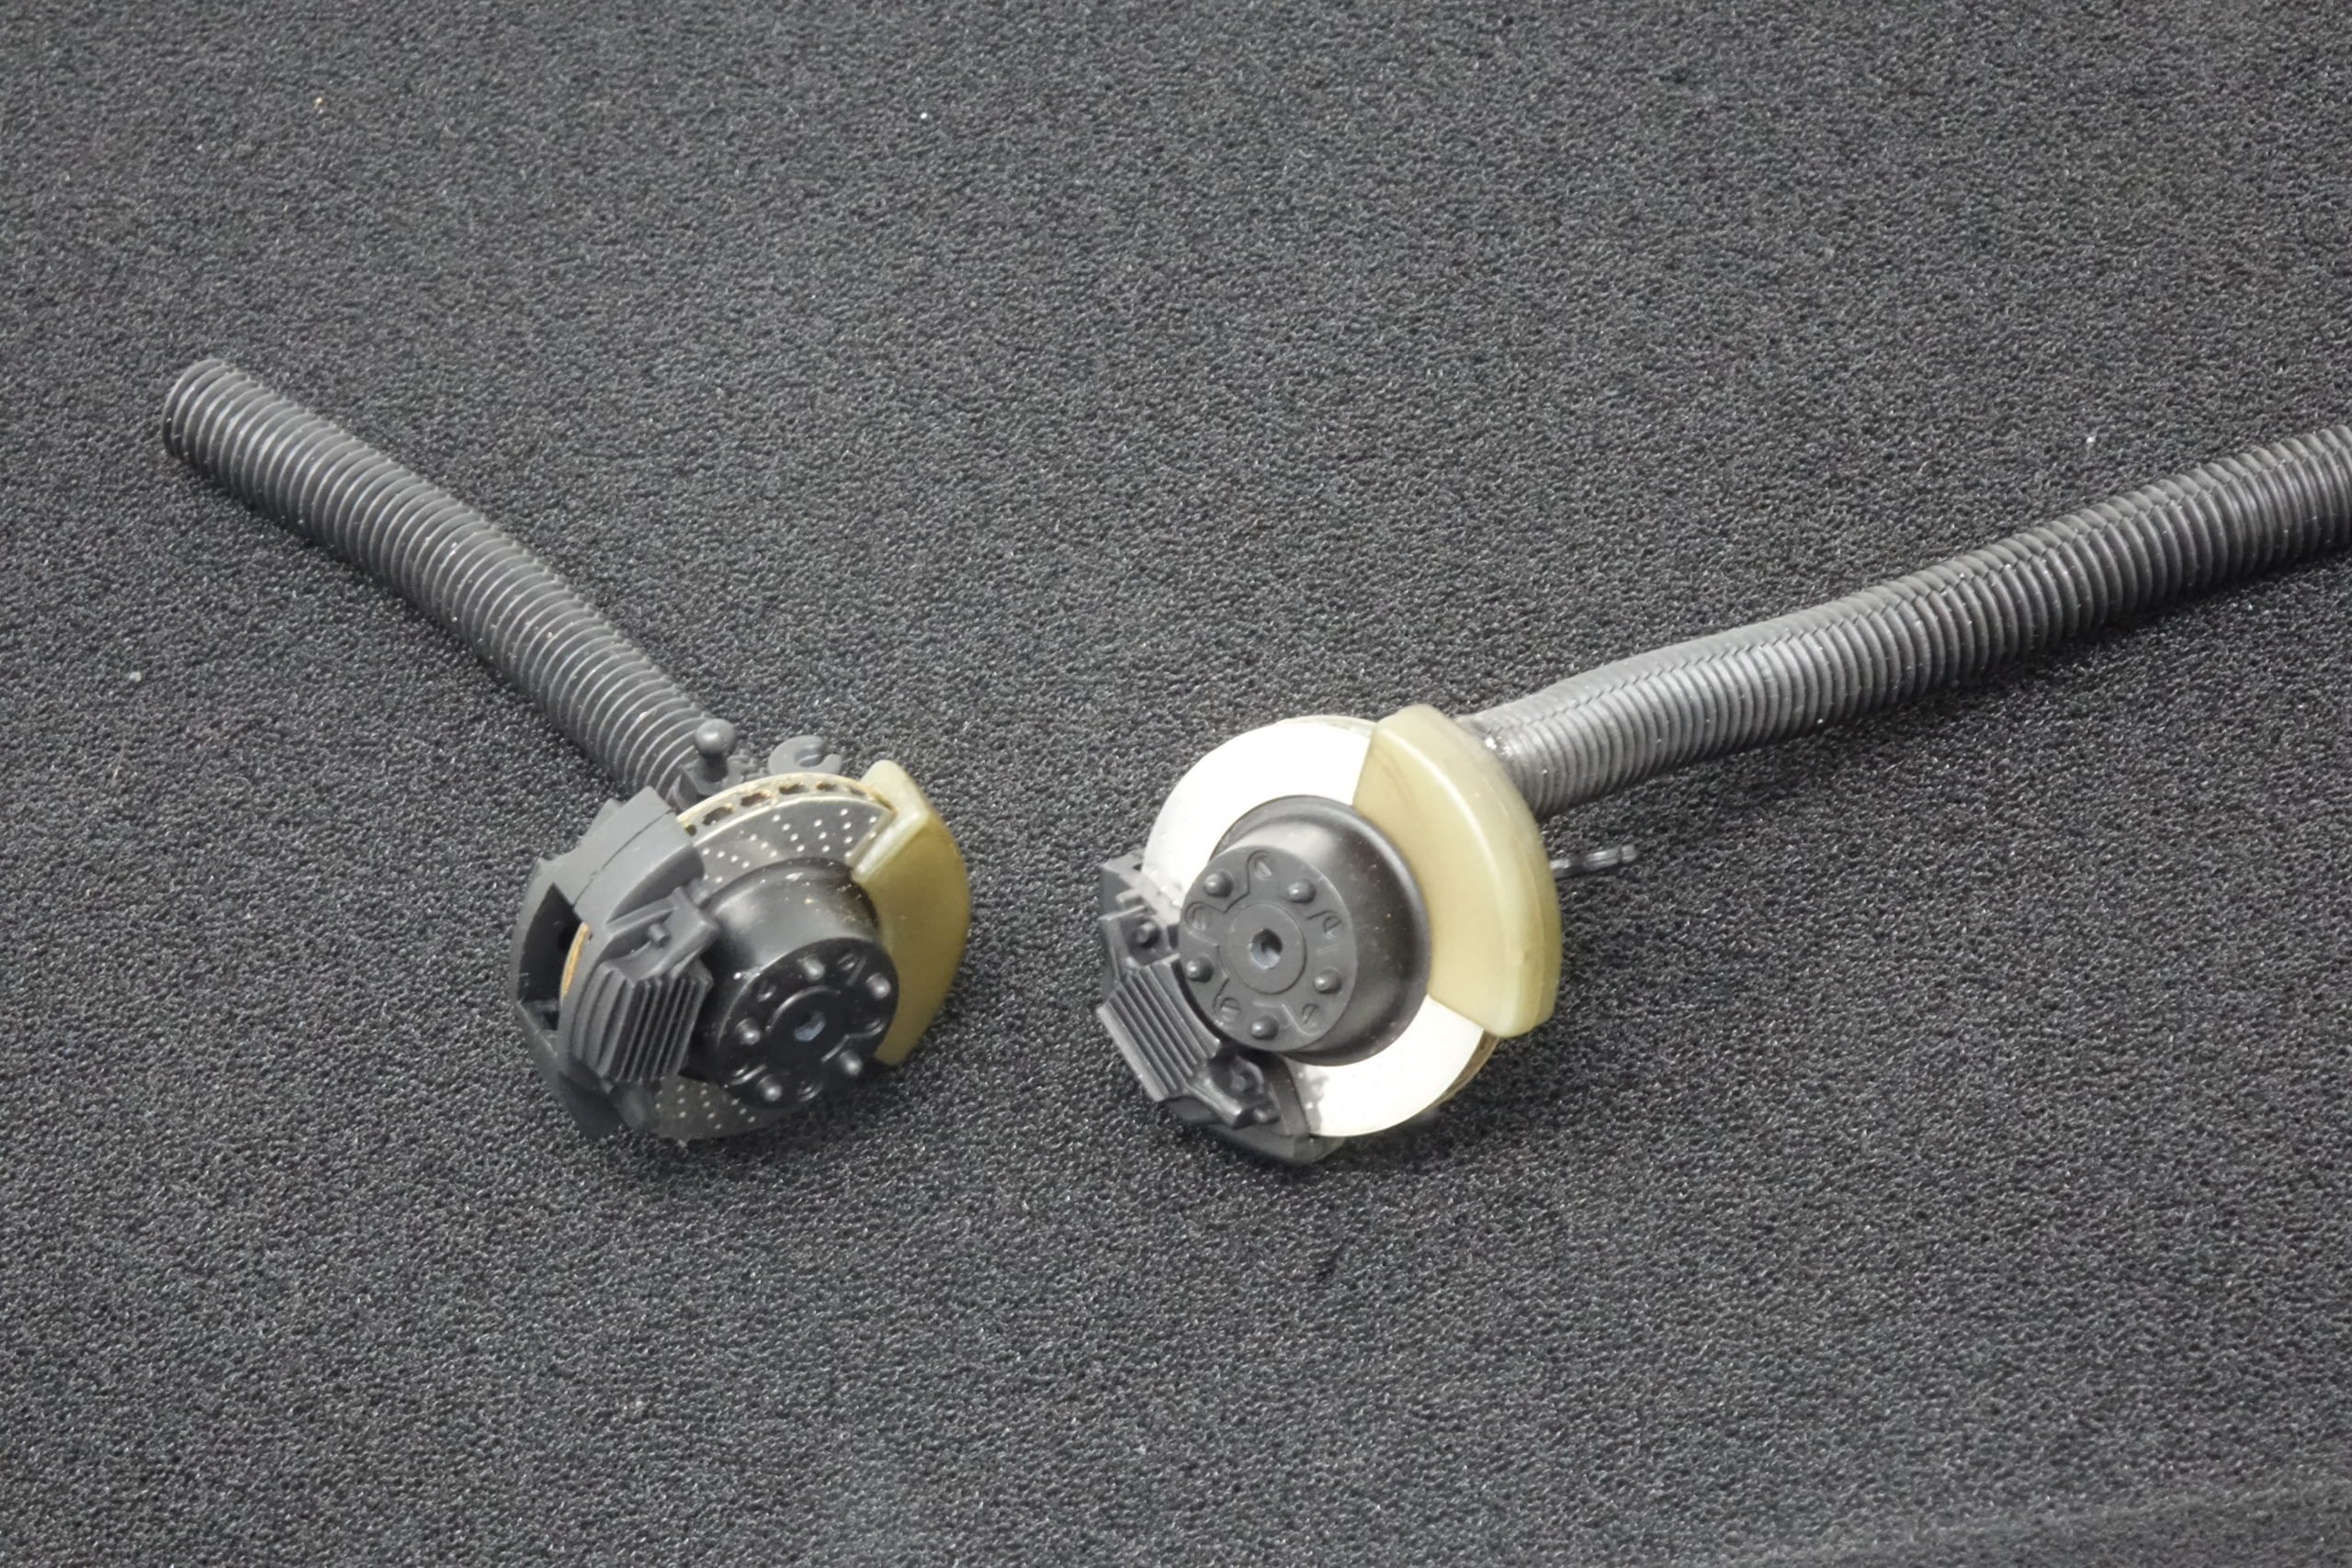
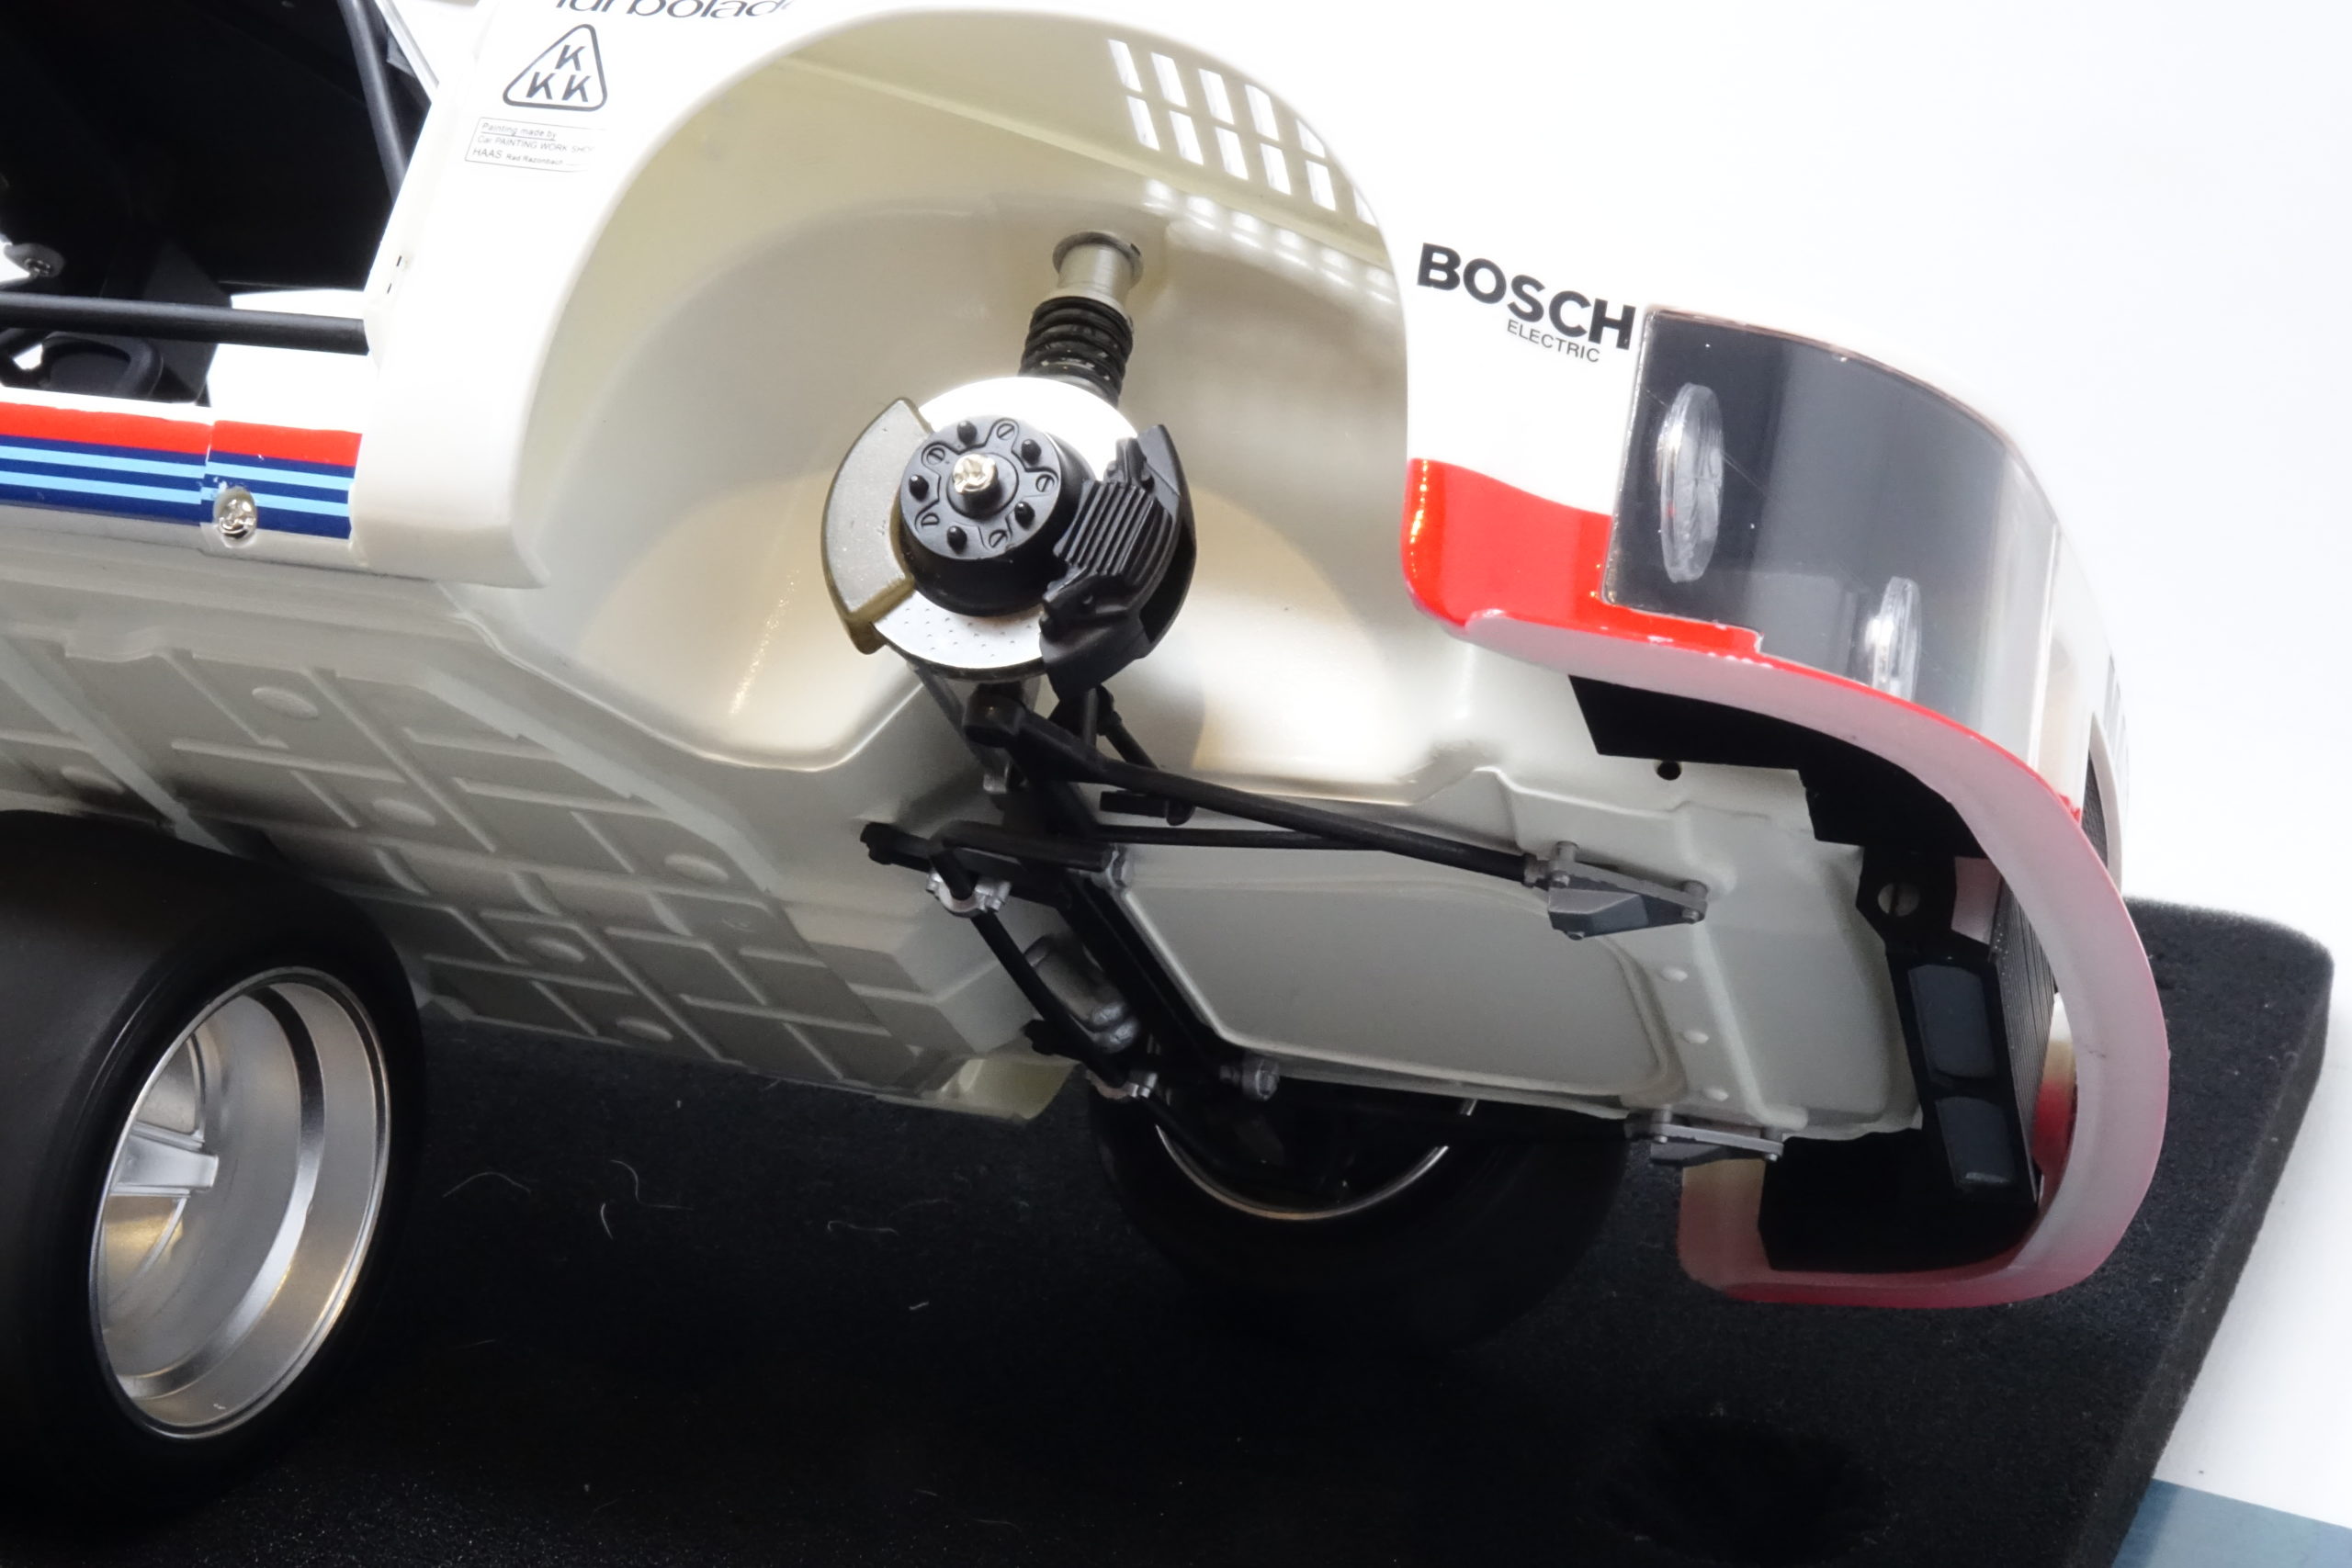
Everything here was very straightforward and as per instructions. Most ‘chromed’ parts were dechromed and painted. There are several photo etched parts in this section – primarily the disc brake surfaces. These were excellent quality, accurate parts. I filed the backs of the discs with the PE diamond file to improve adhesion with the CA glue. There were no issues anywhere with fit. I used some Tamiya ‘oil and rust’ weathering powder on the disc brake edges to add a touch of realism. Some of the steps for front and rear suspension are here….
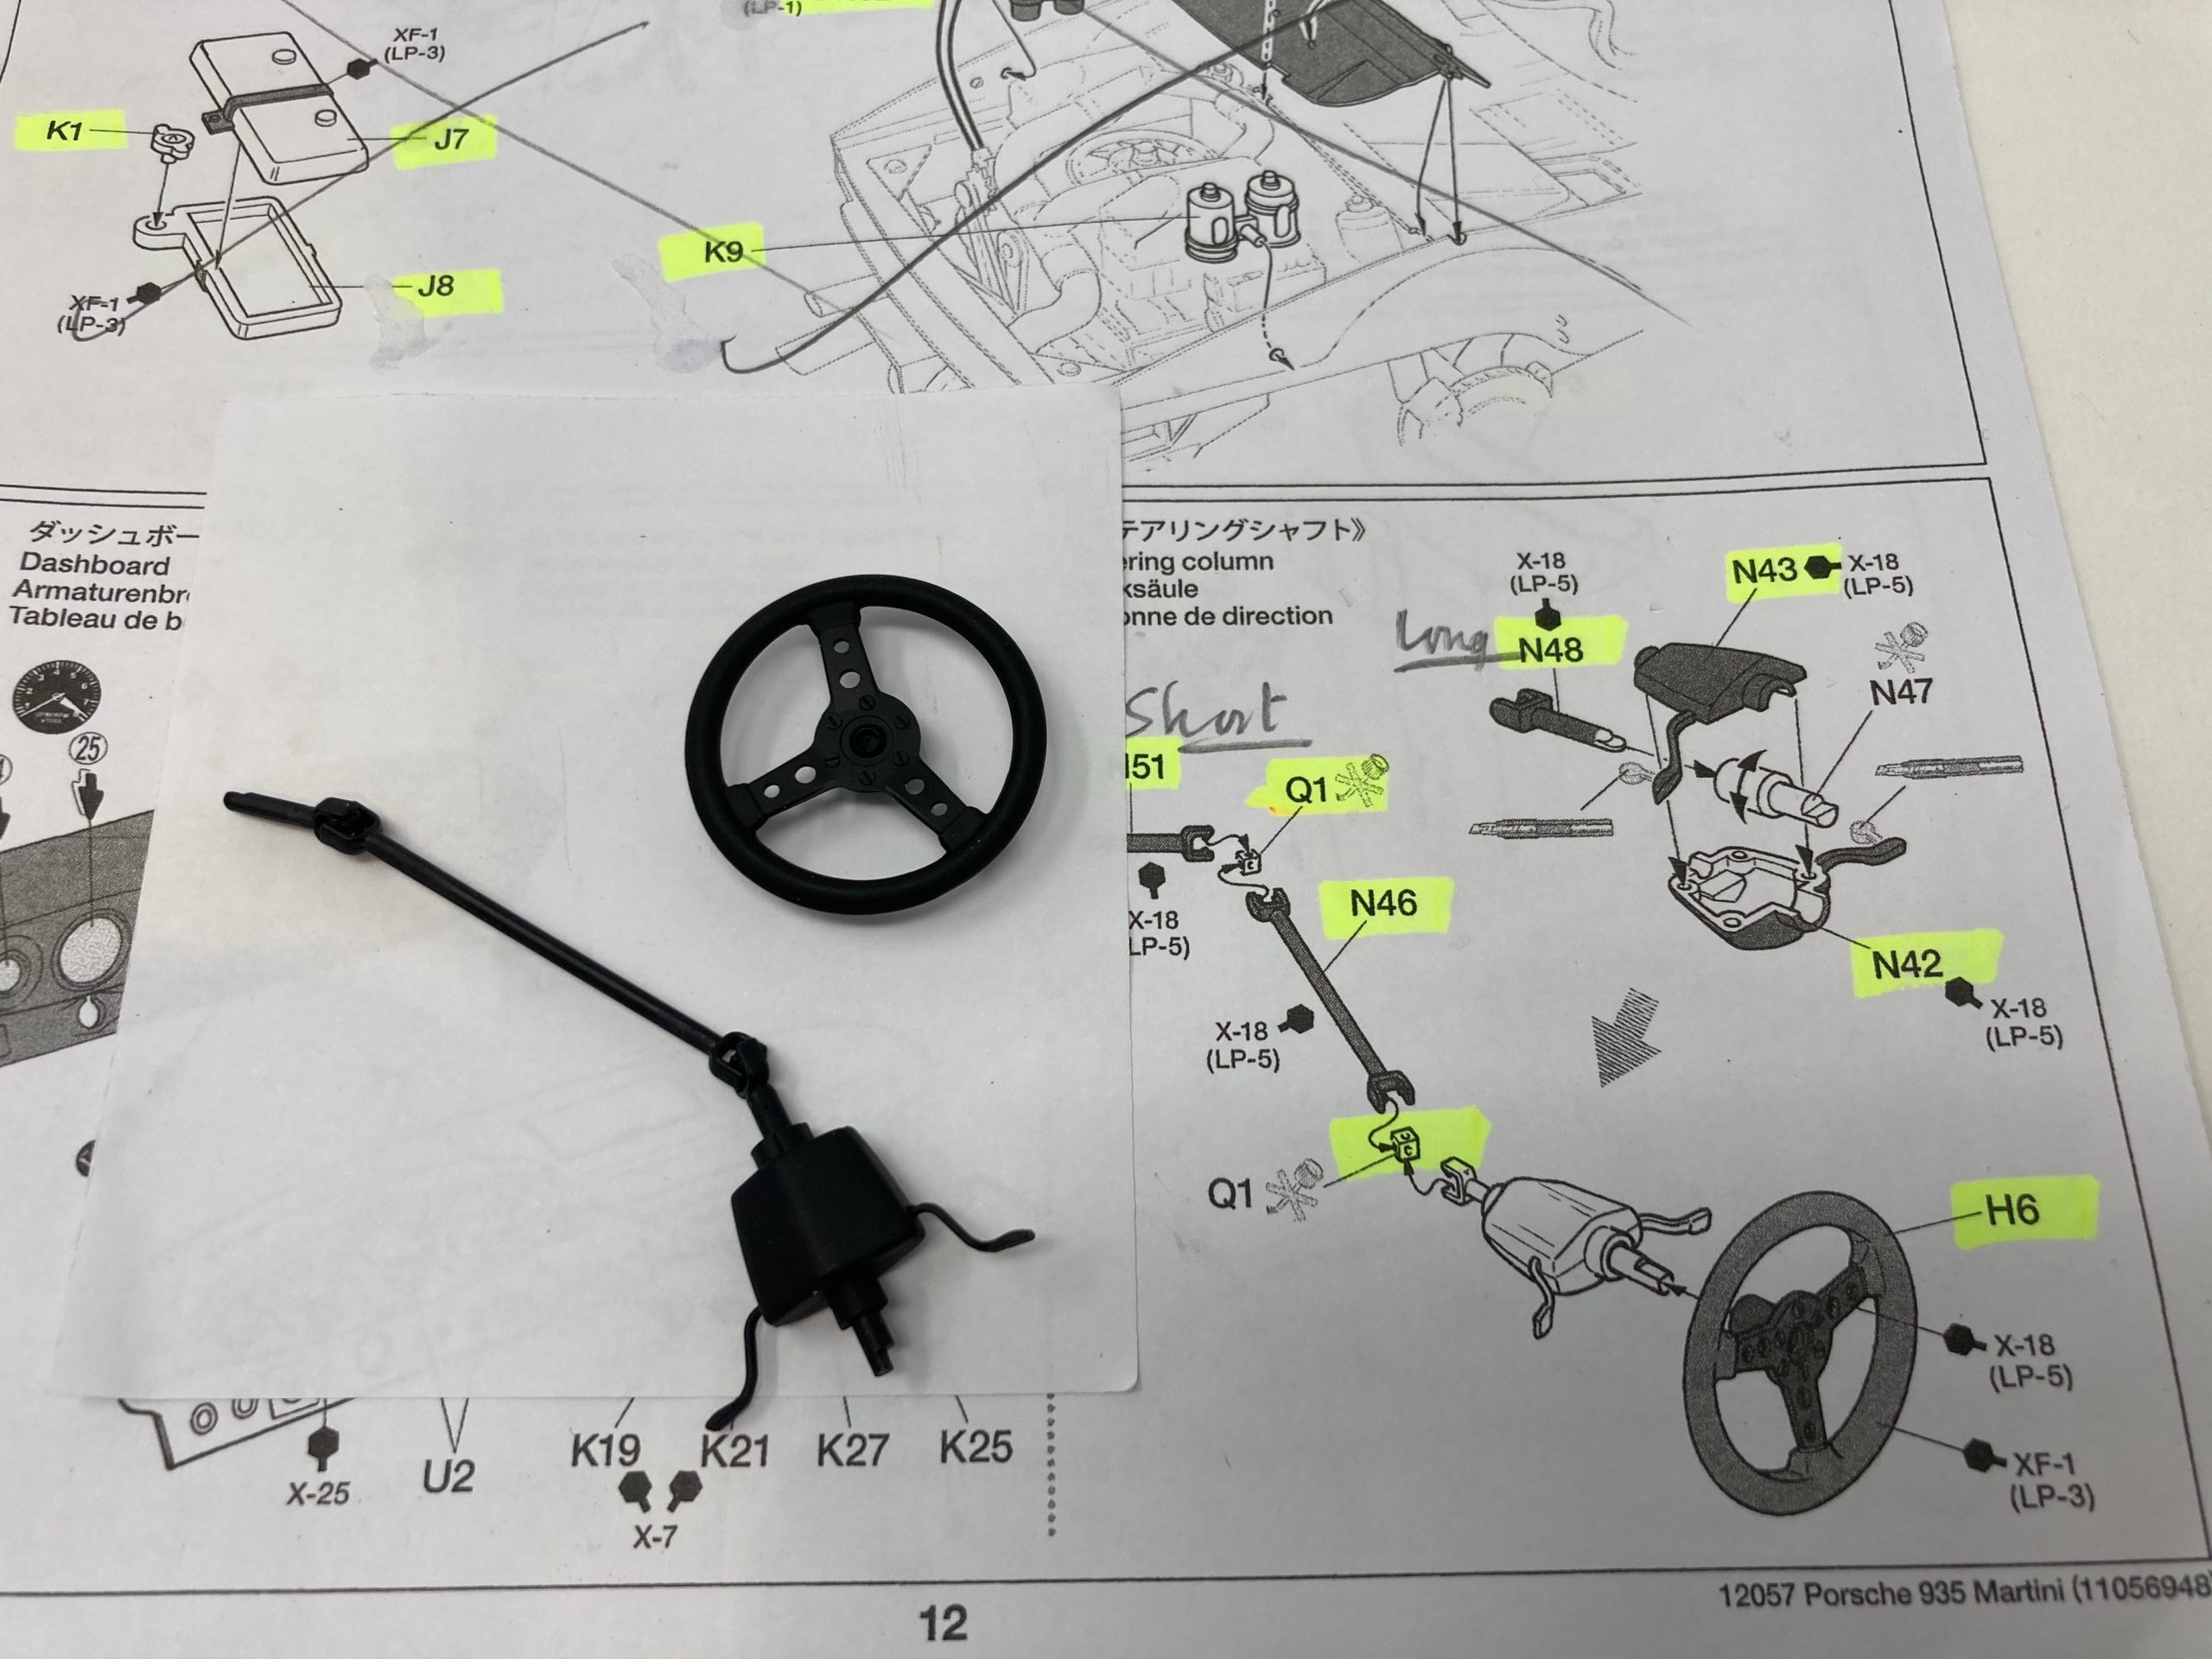
Front suspension and steering

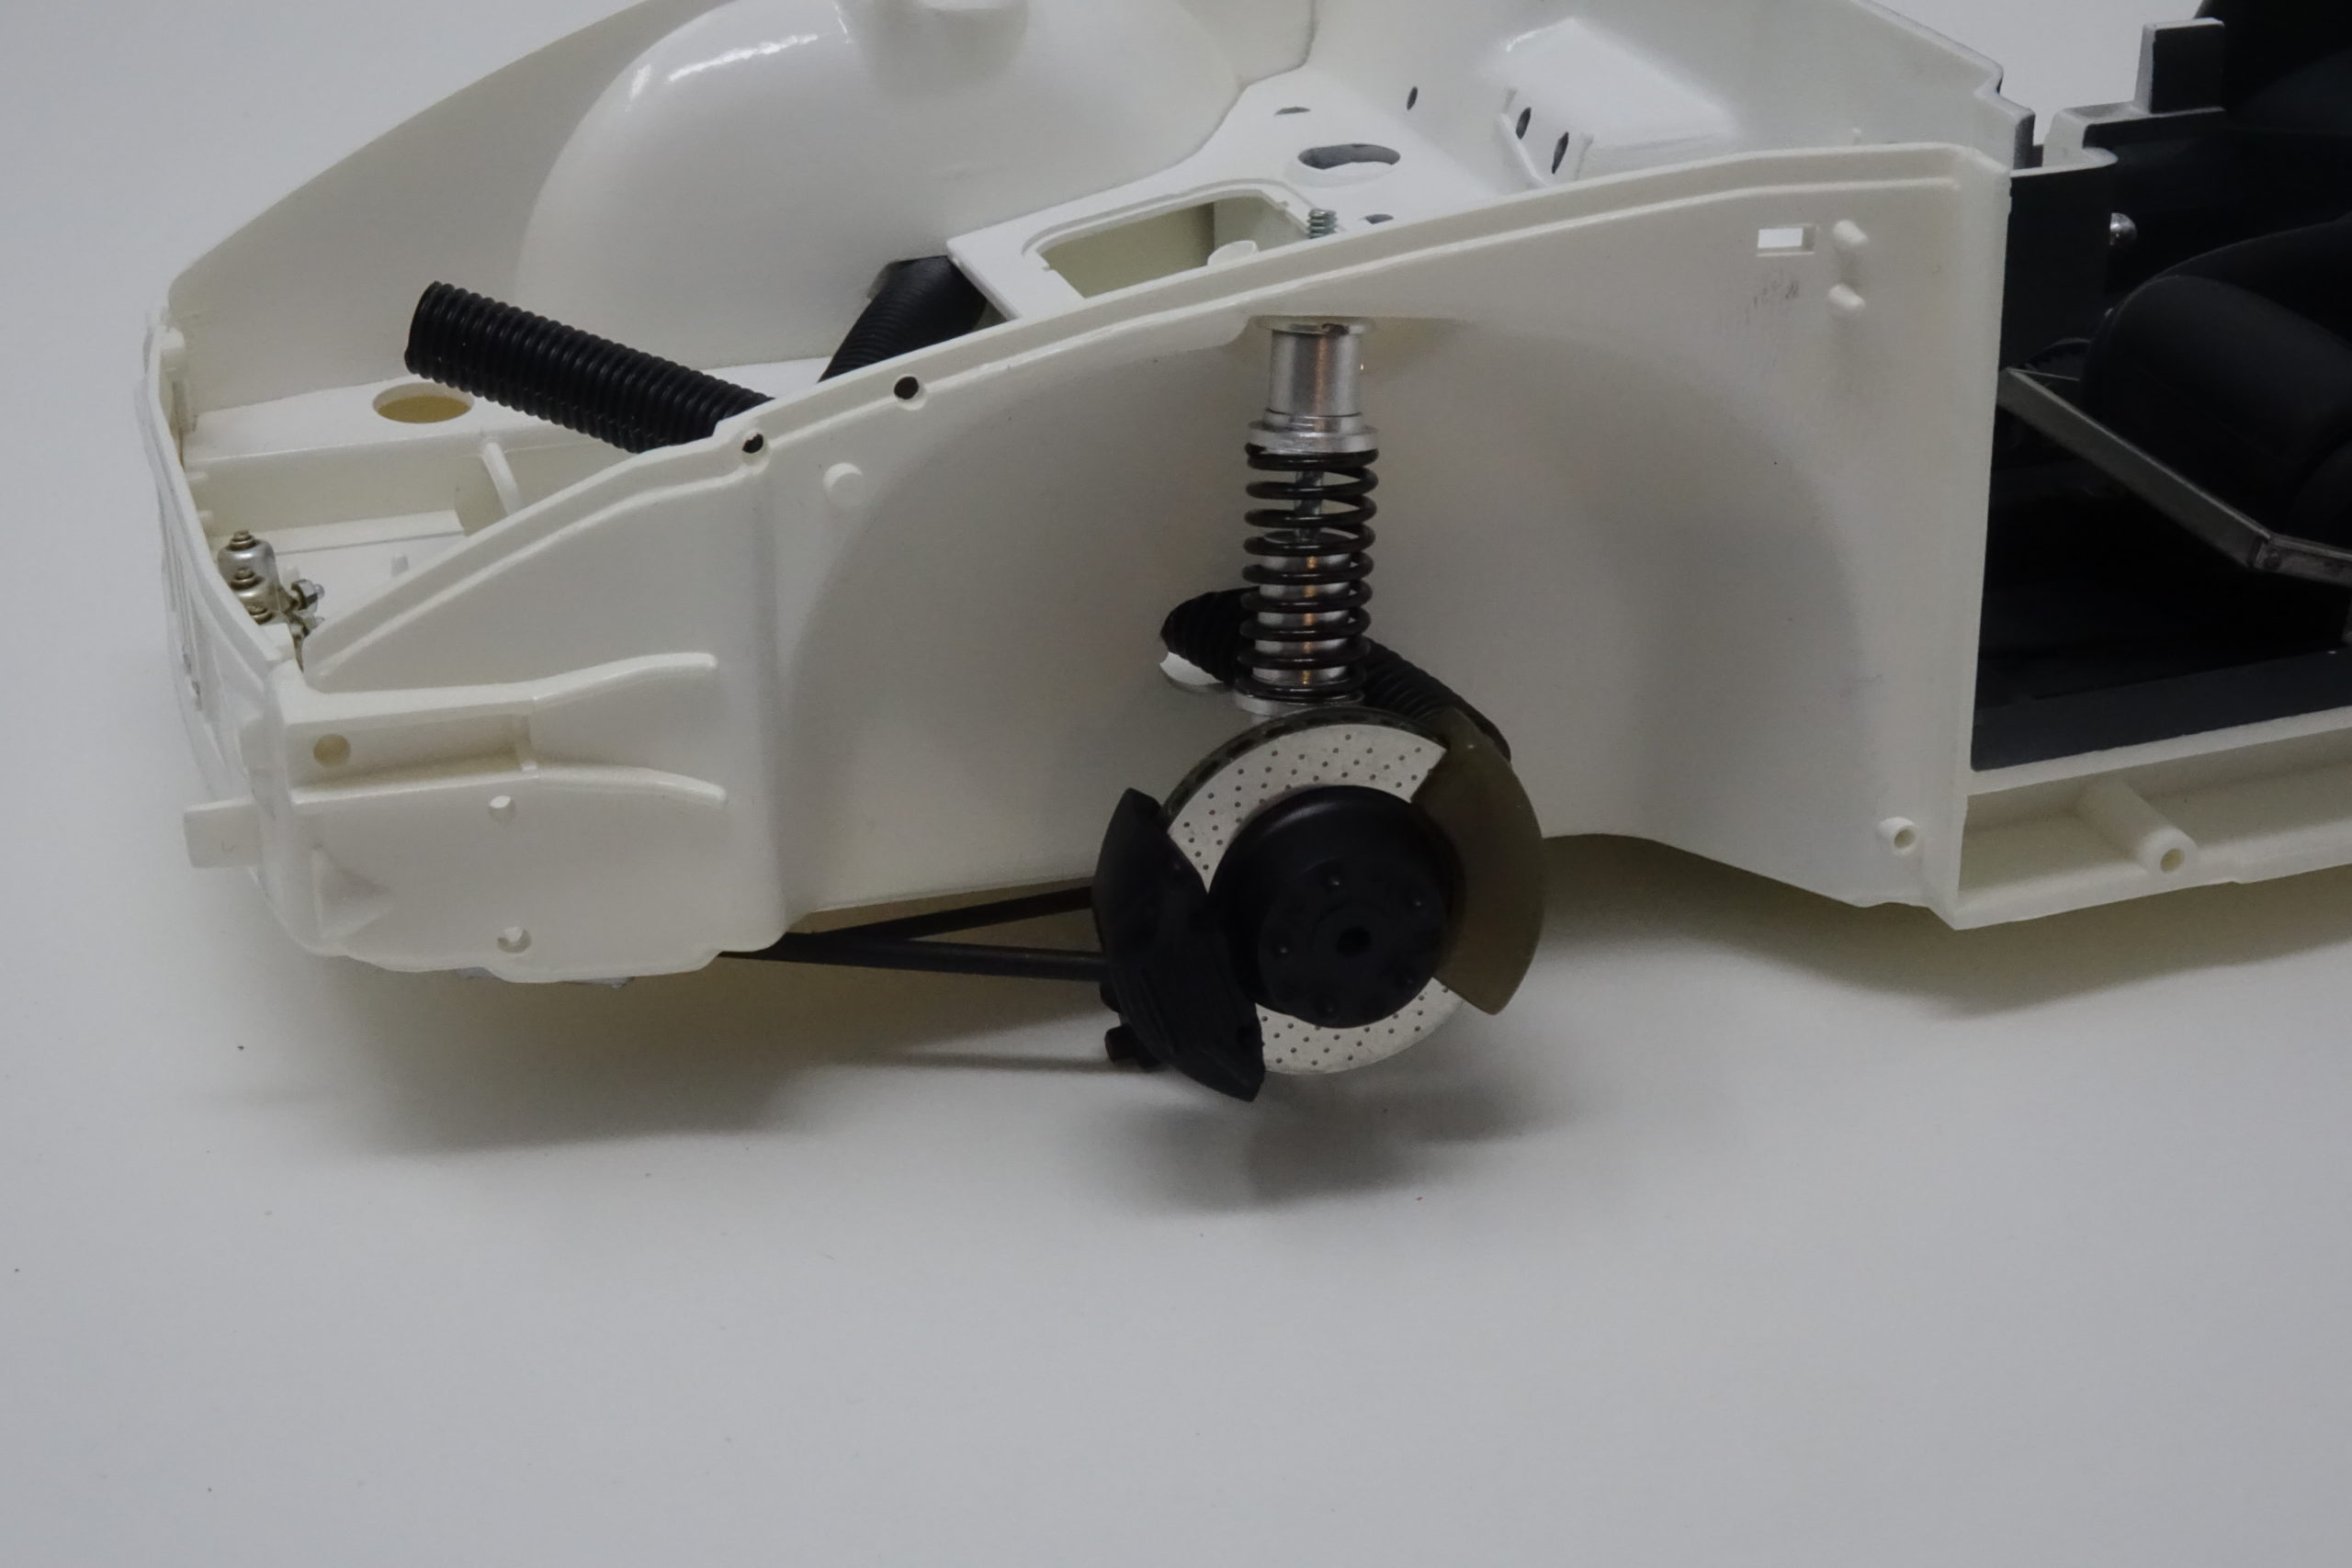


Rear suspension and drive shafts


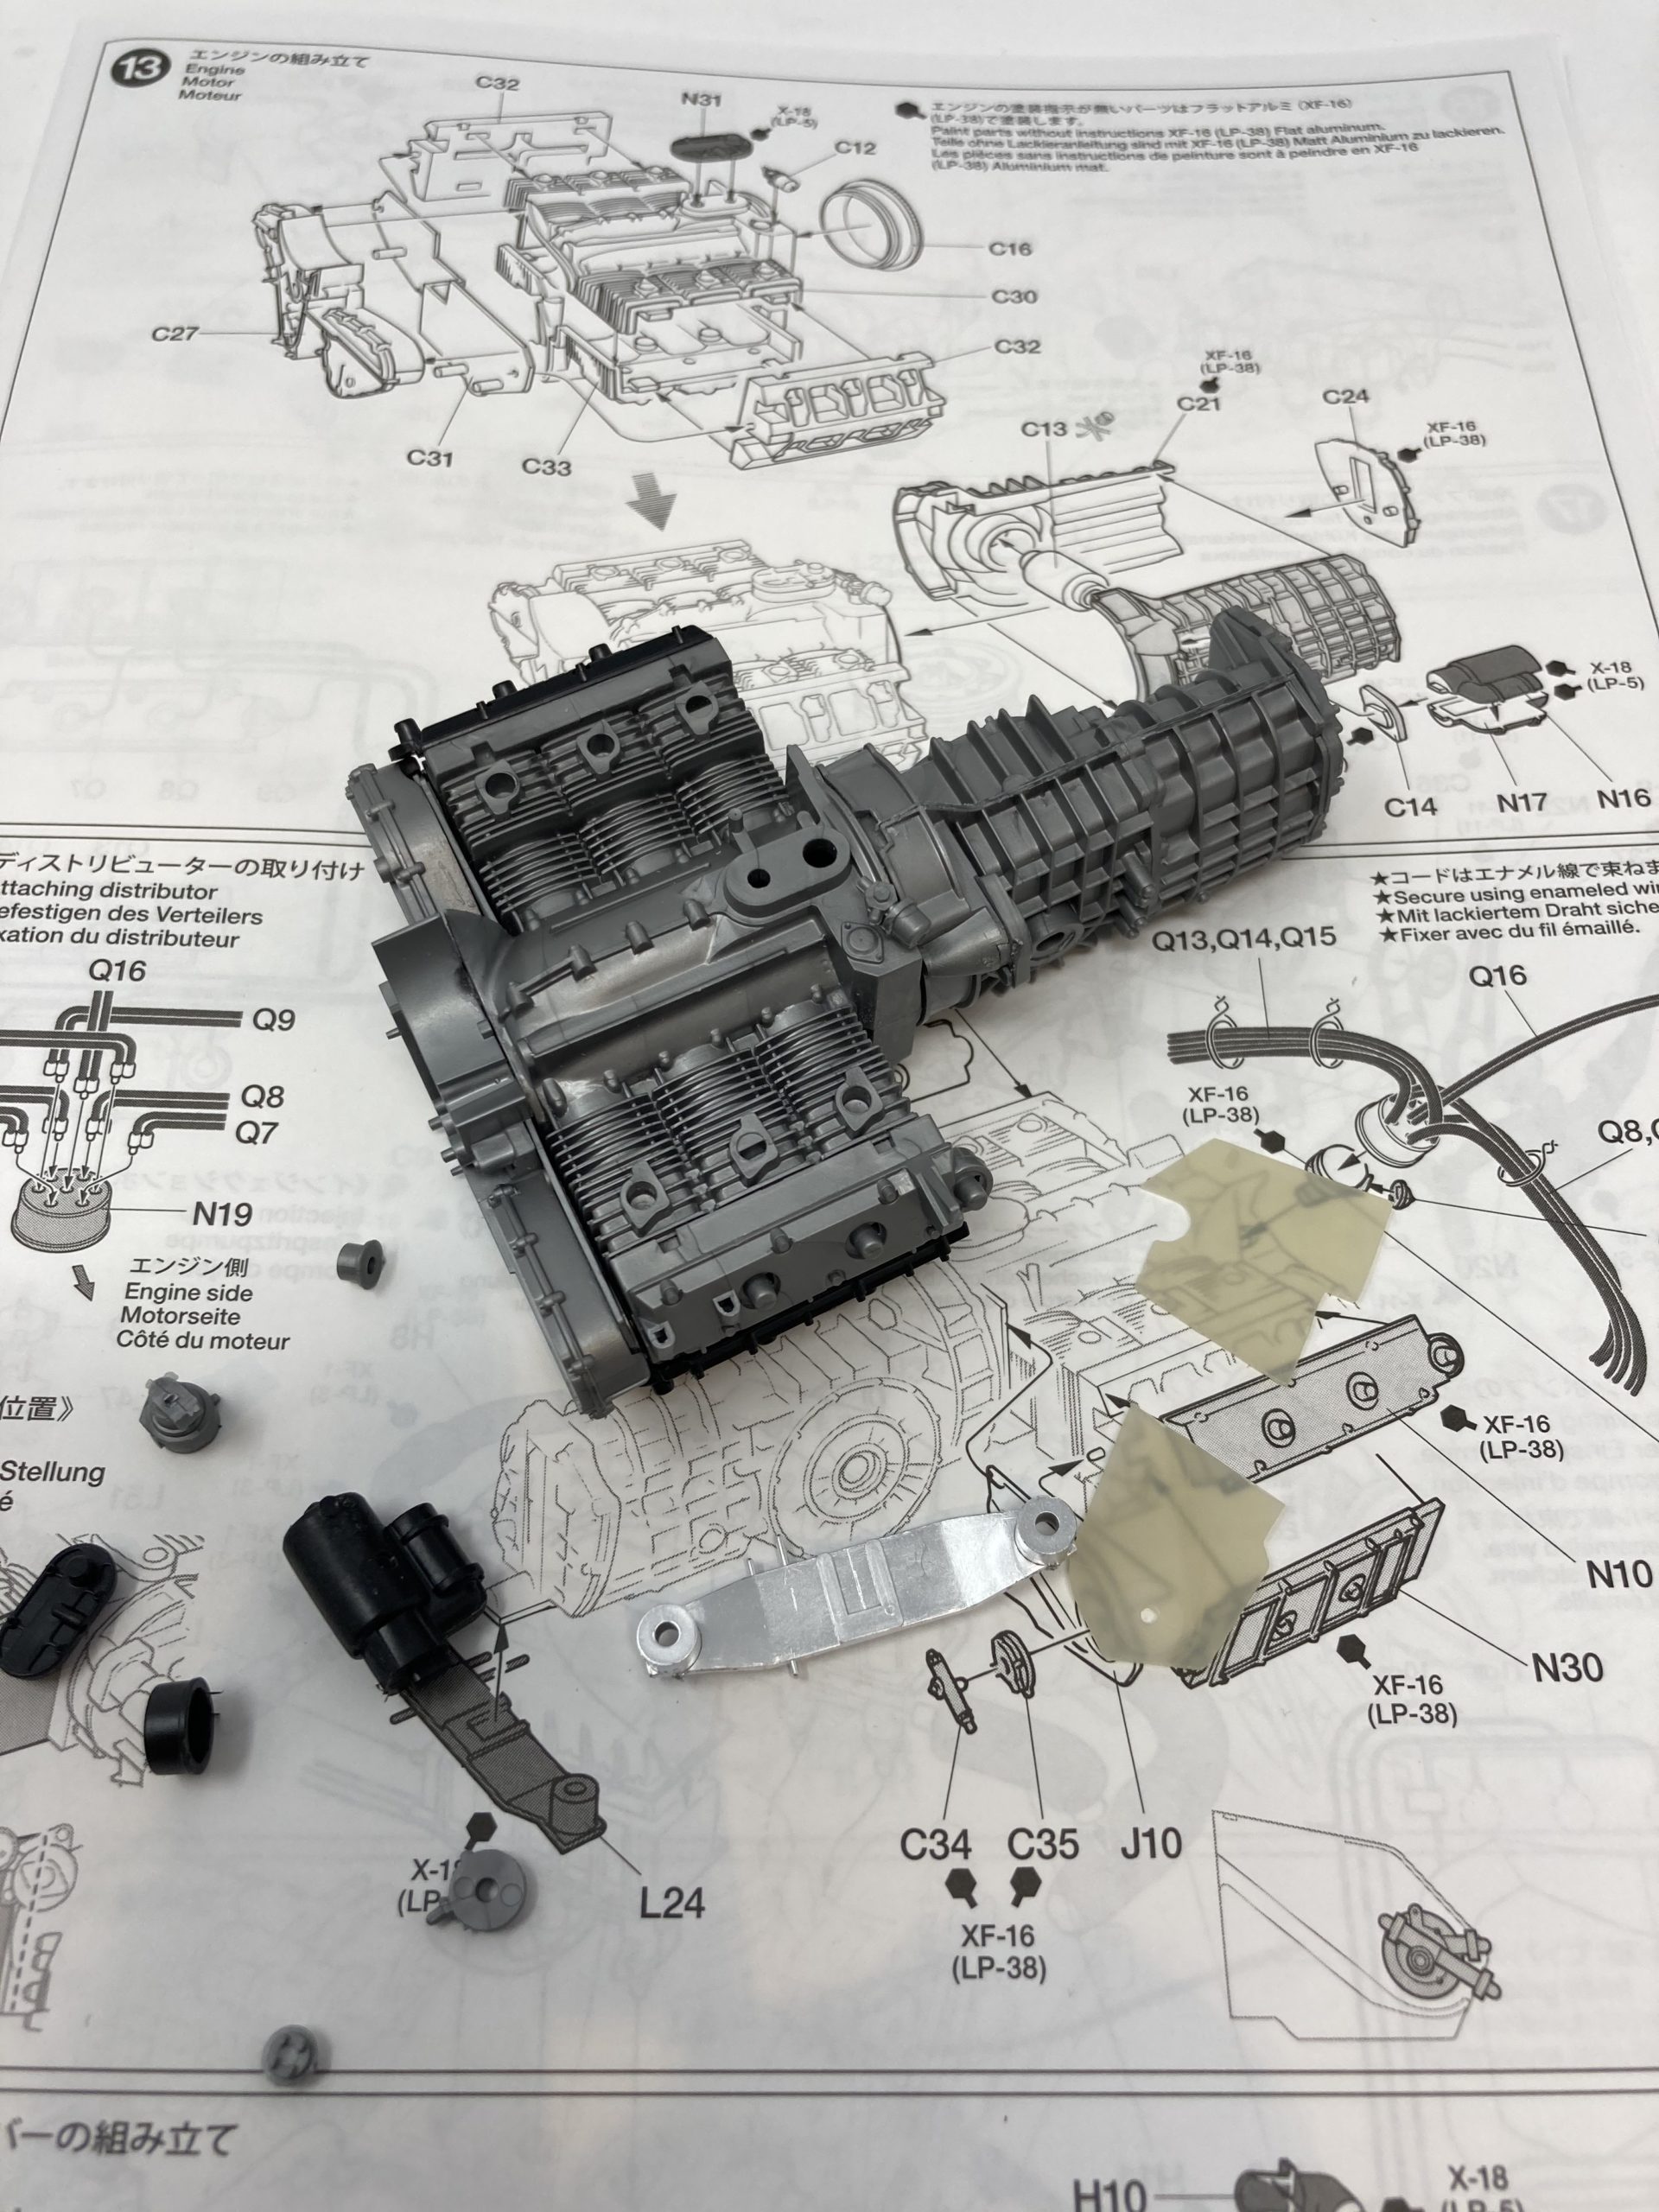
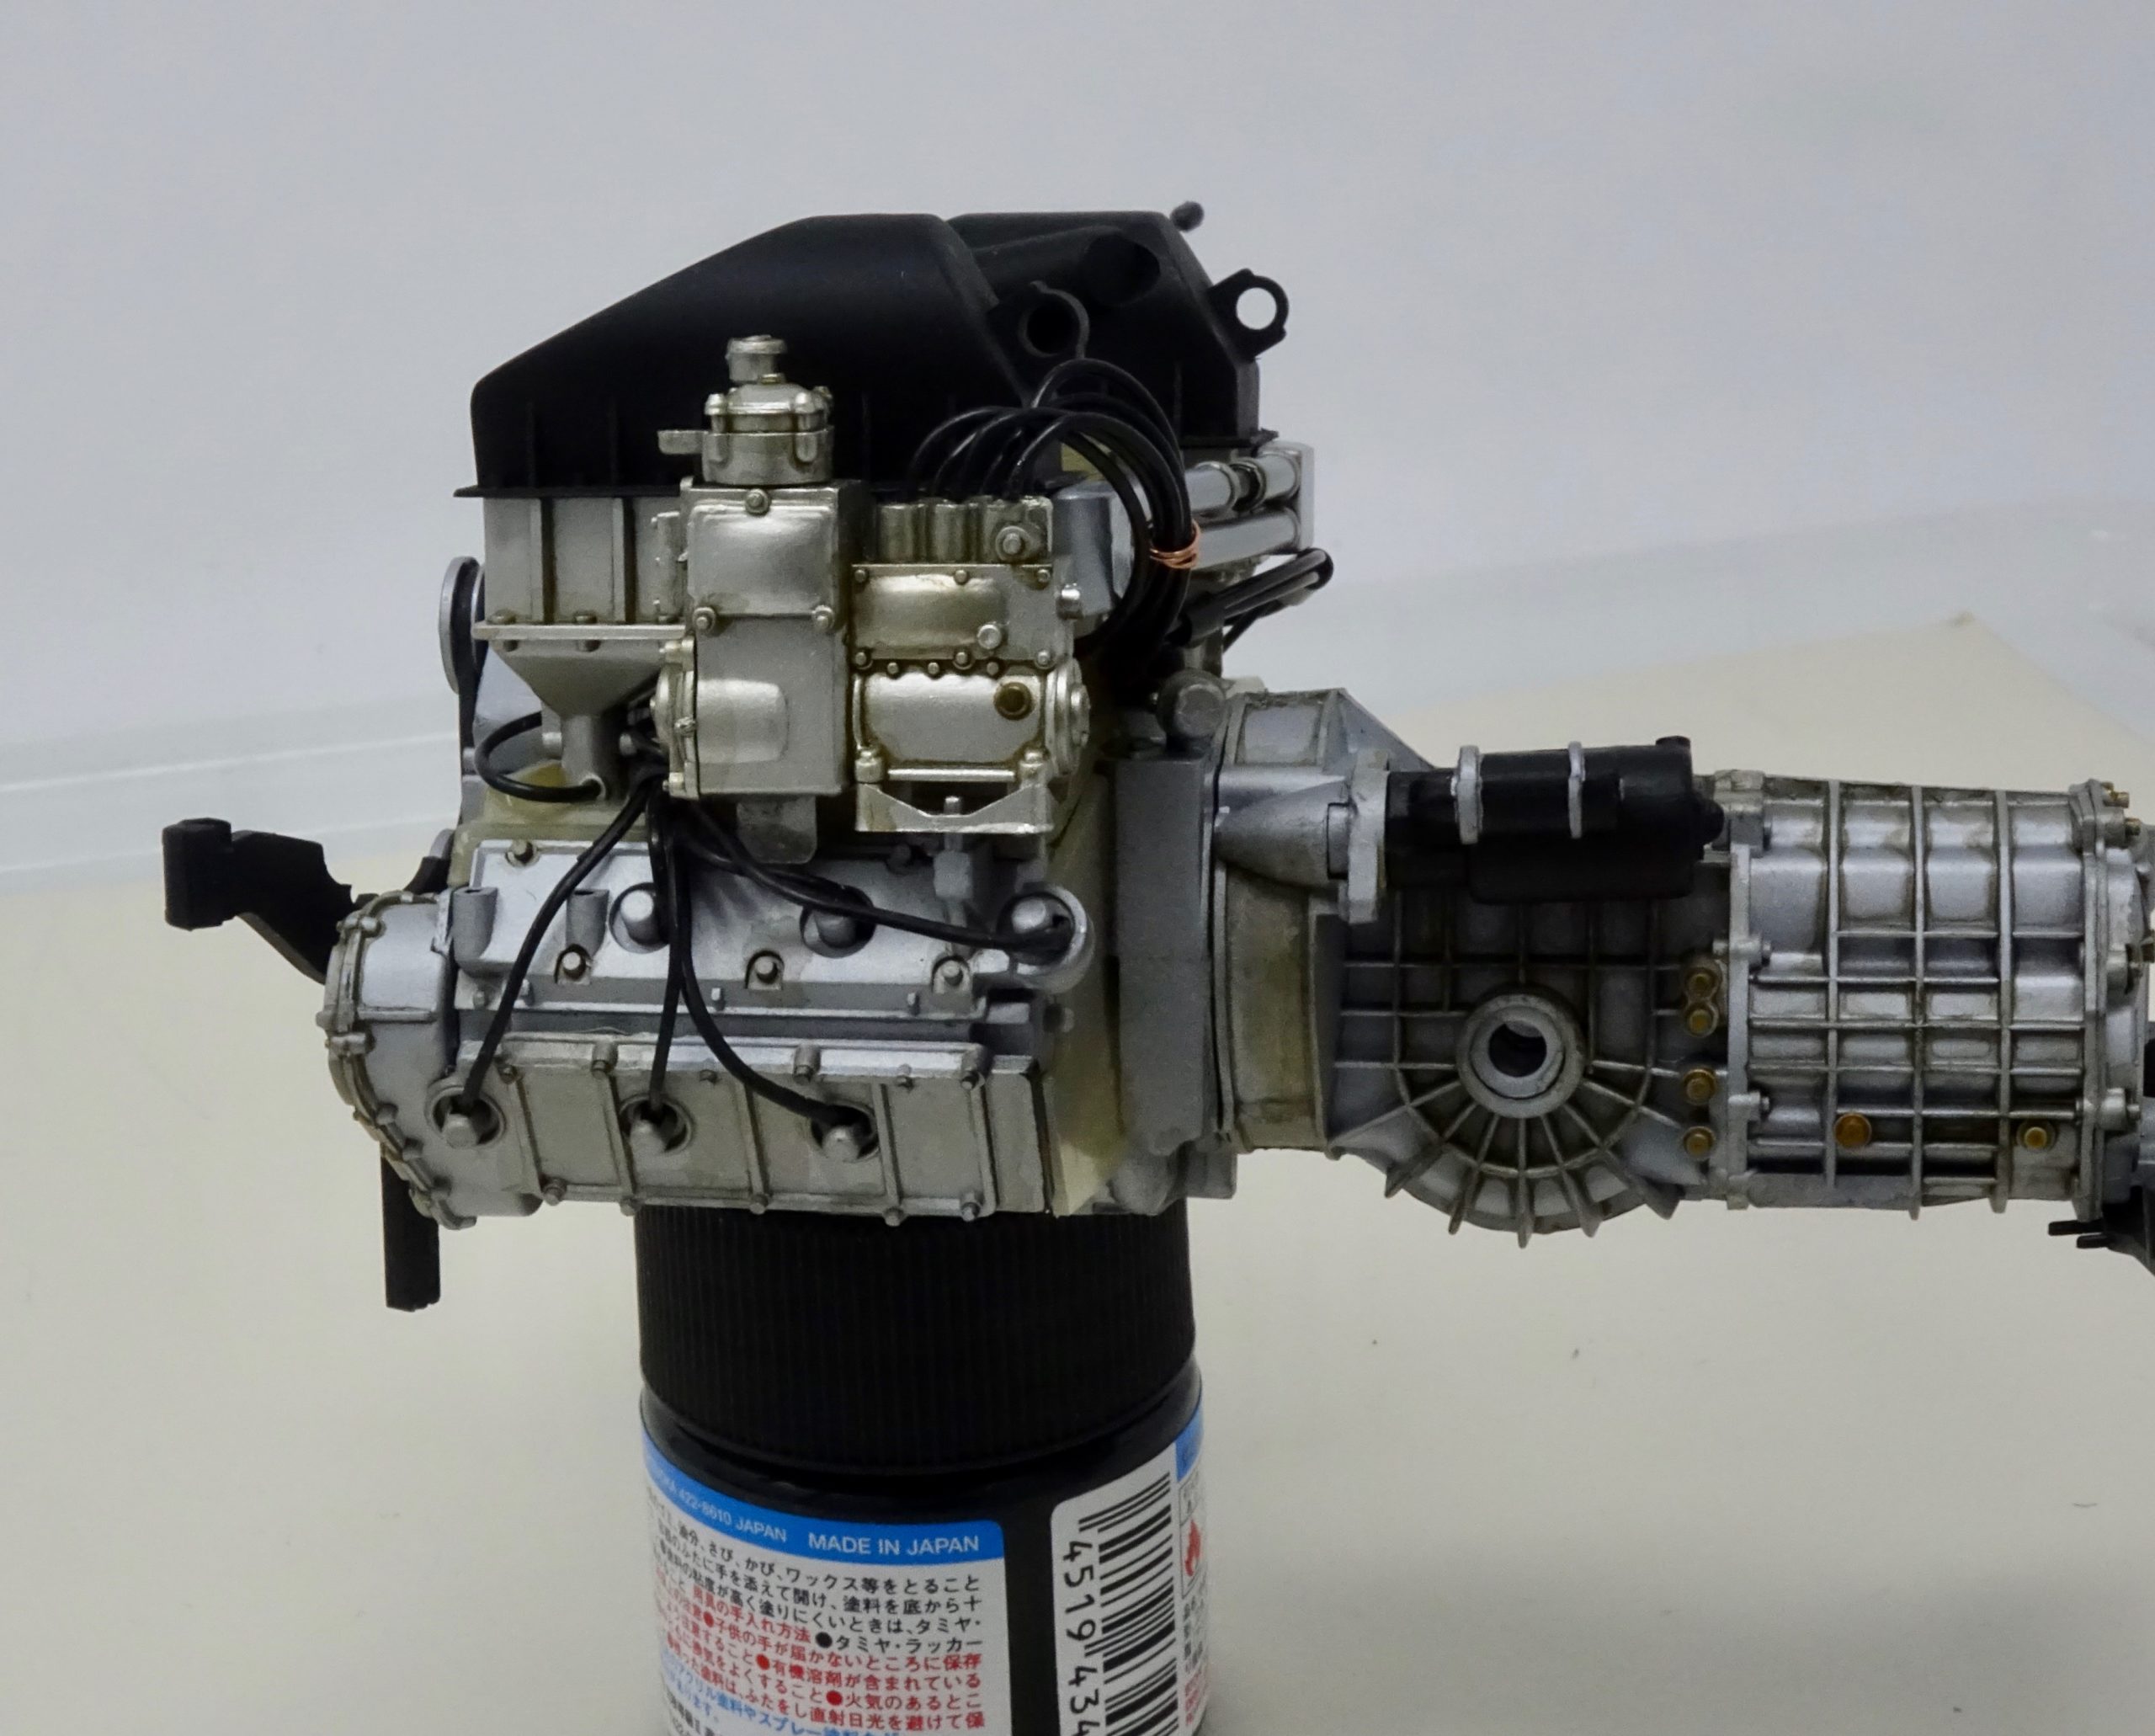
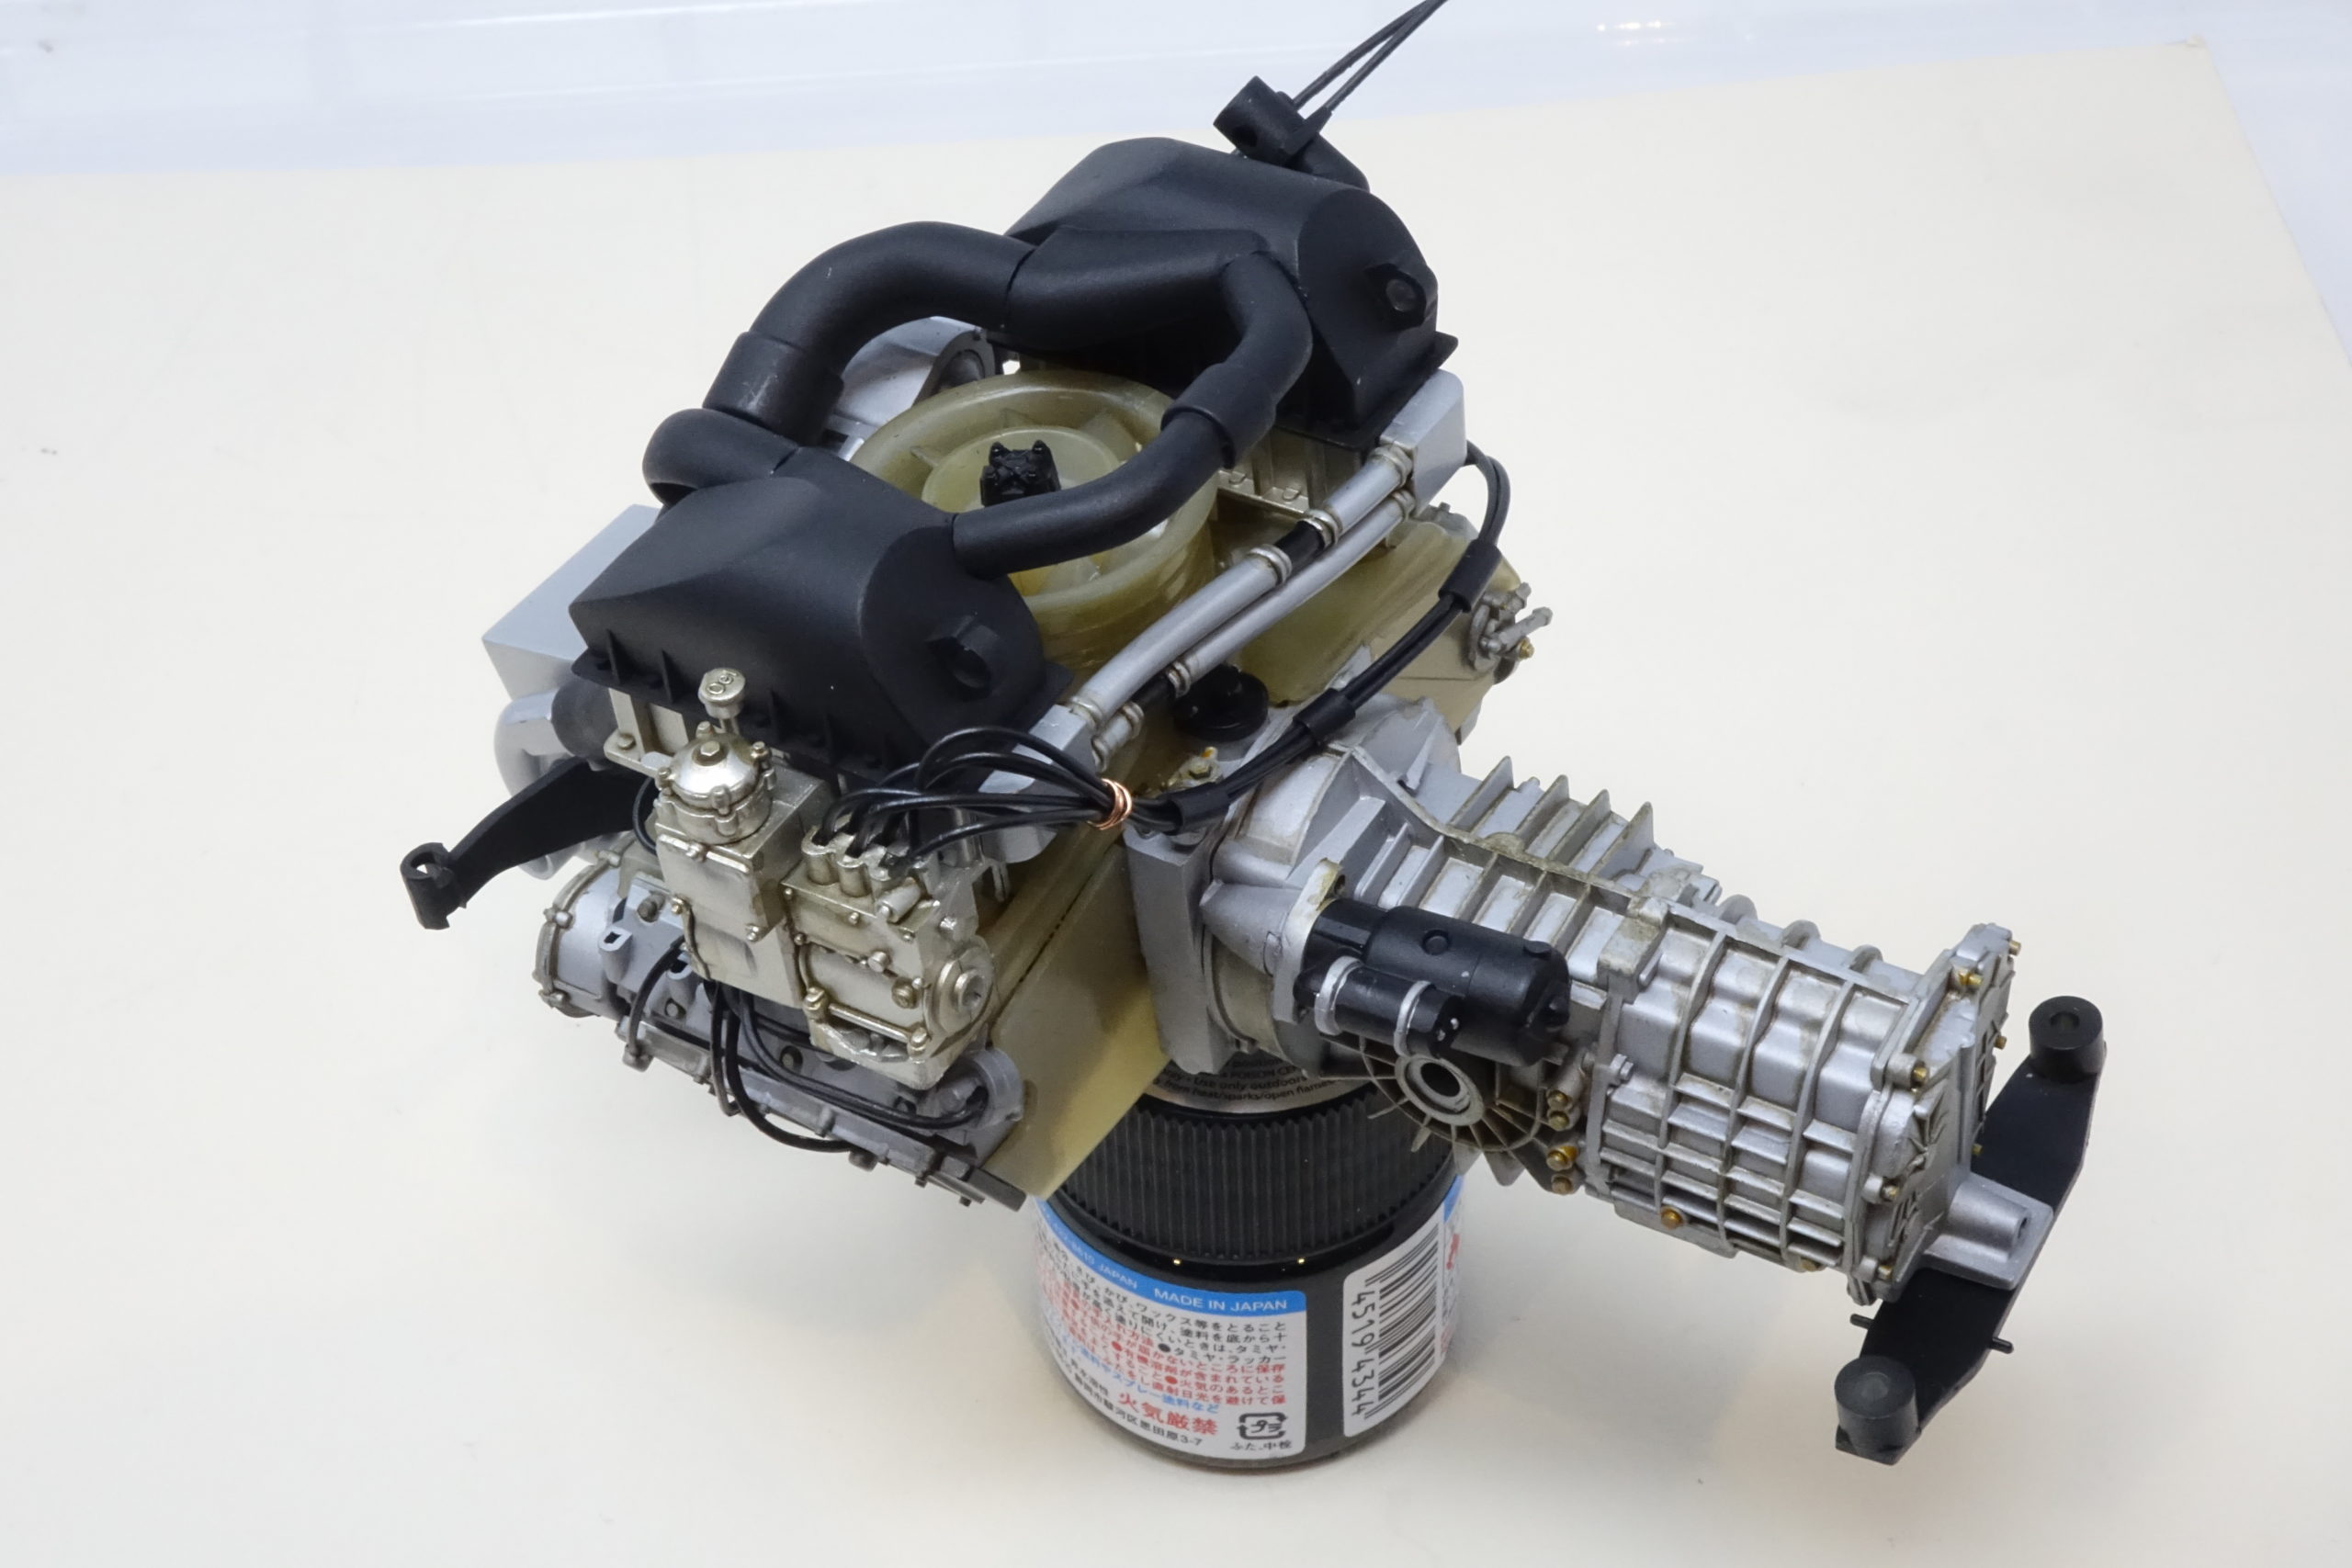
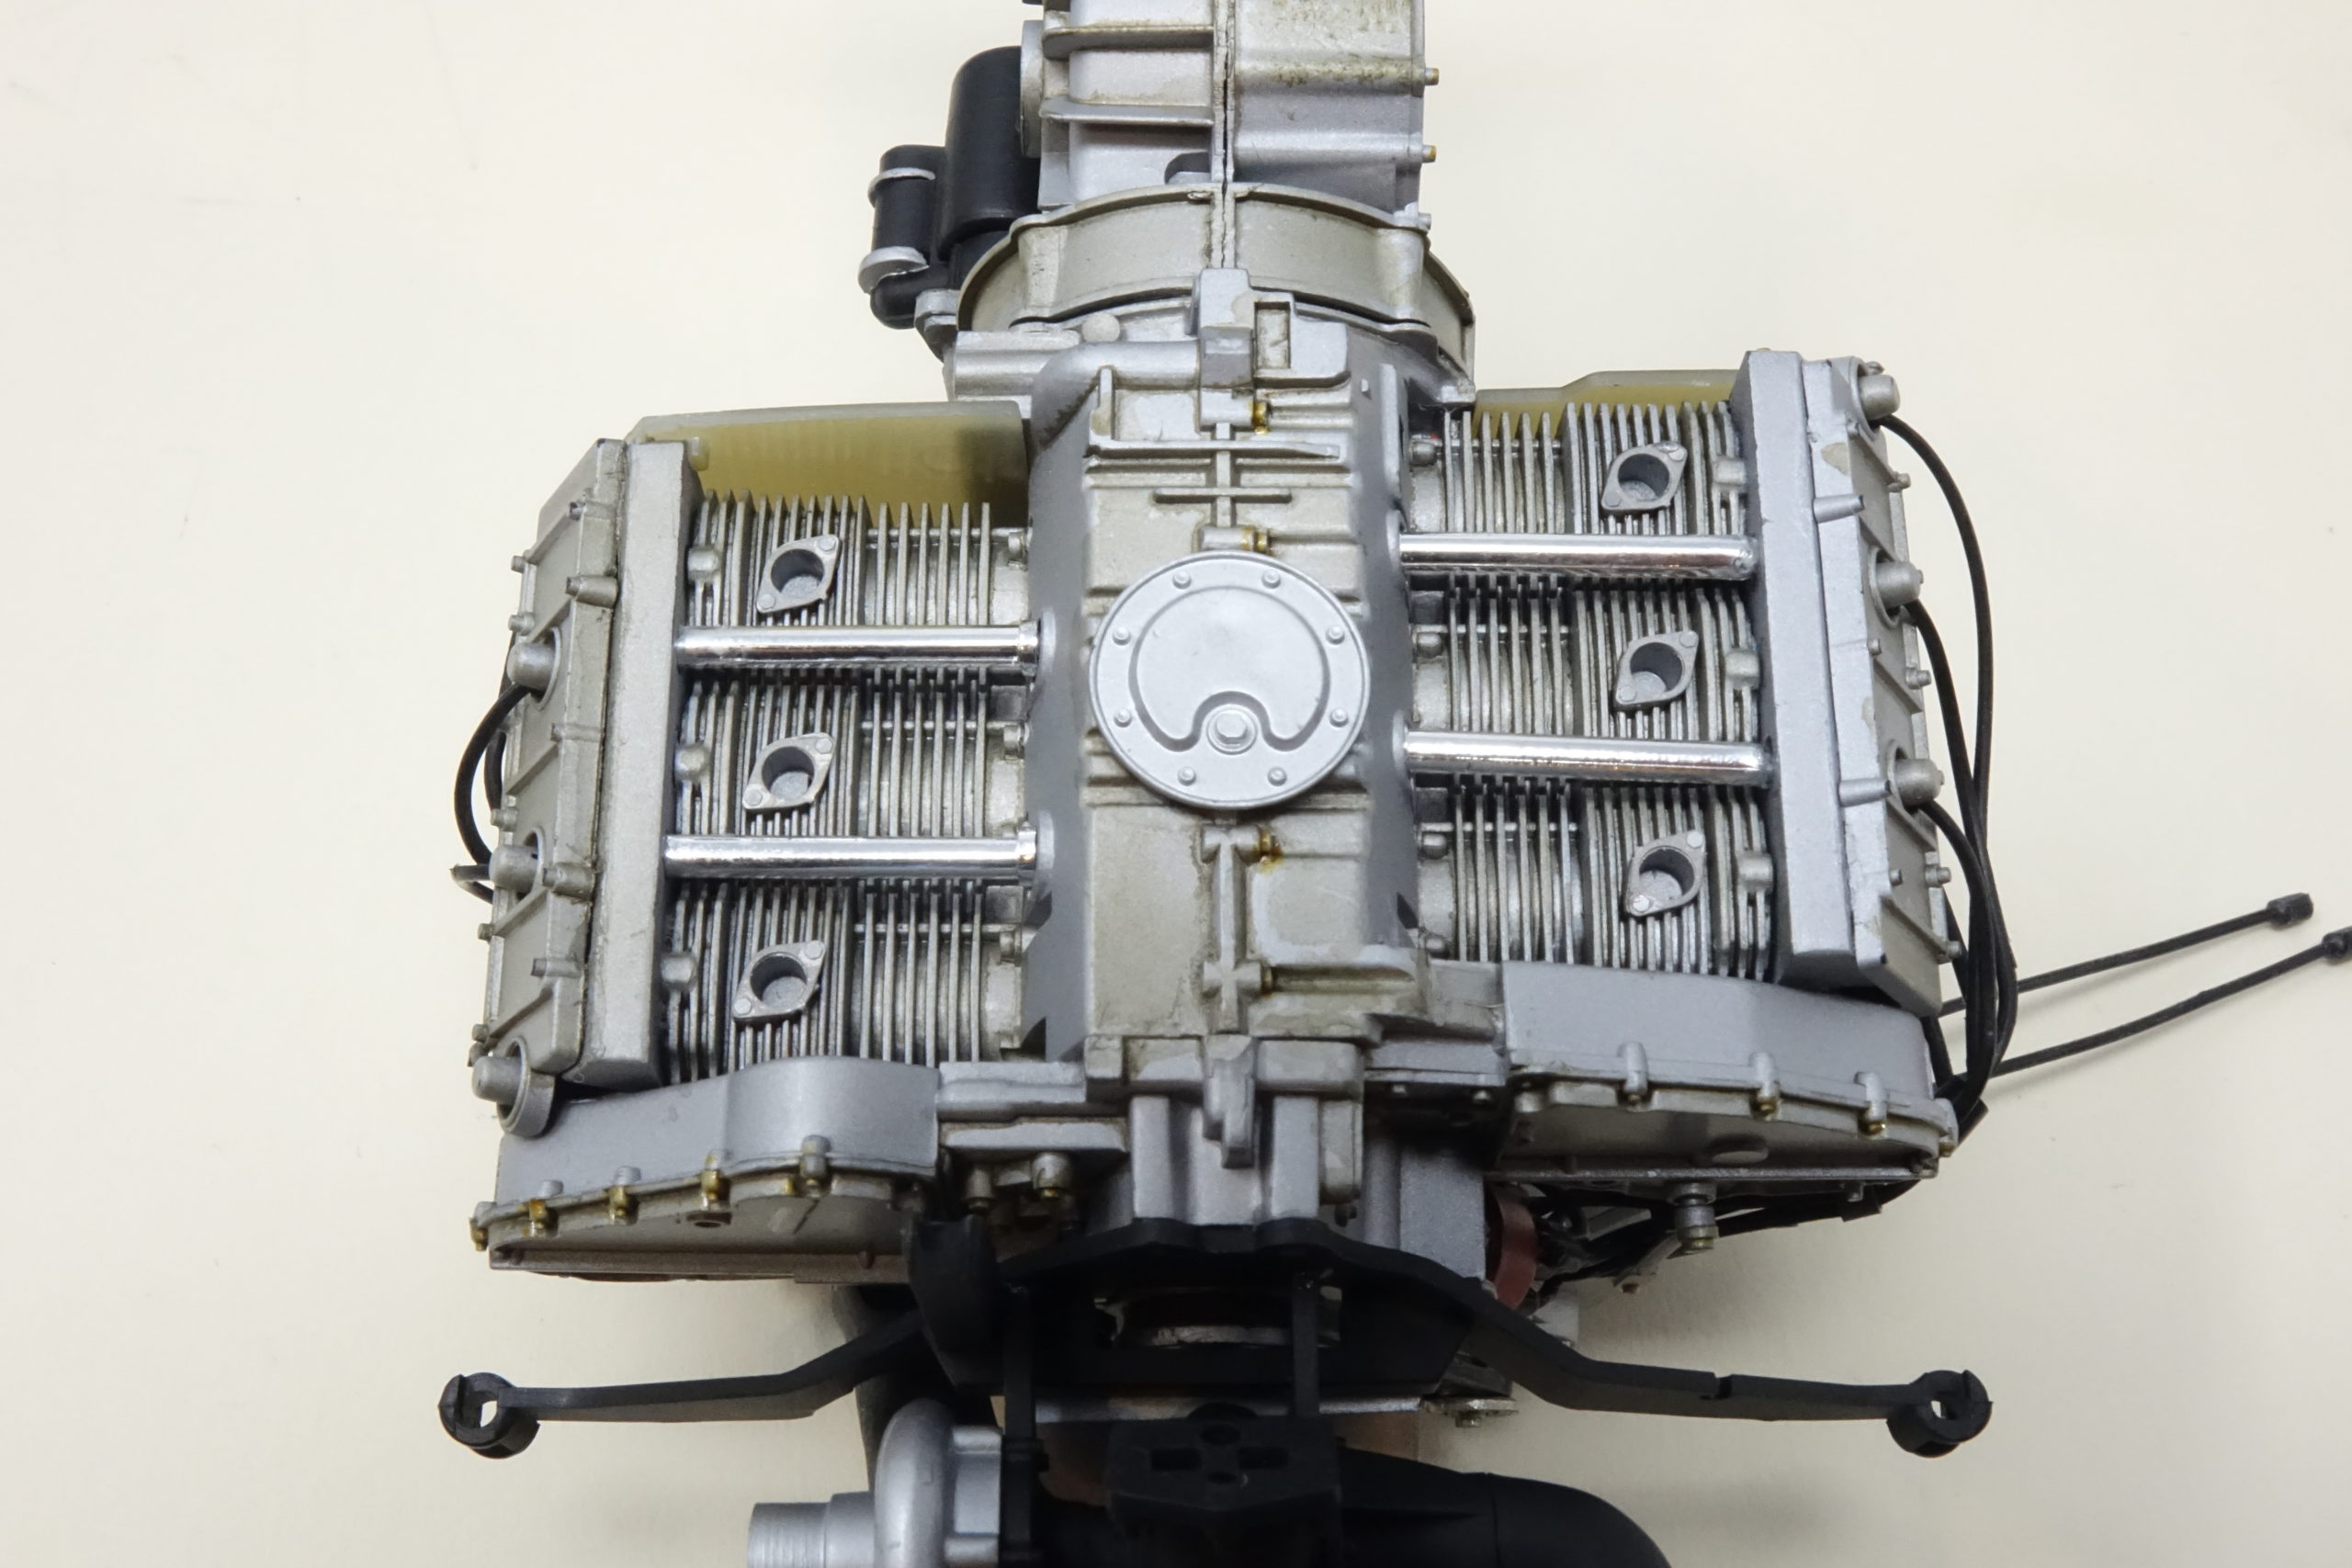
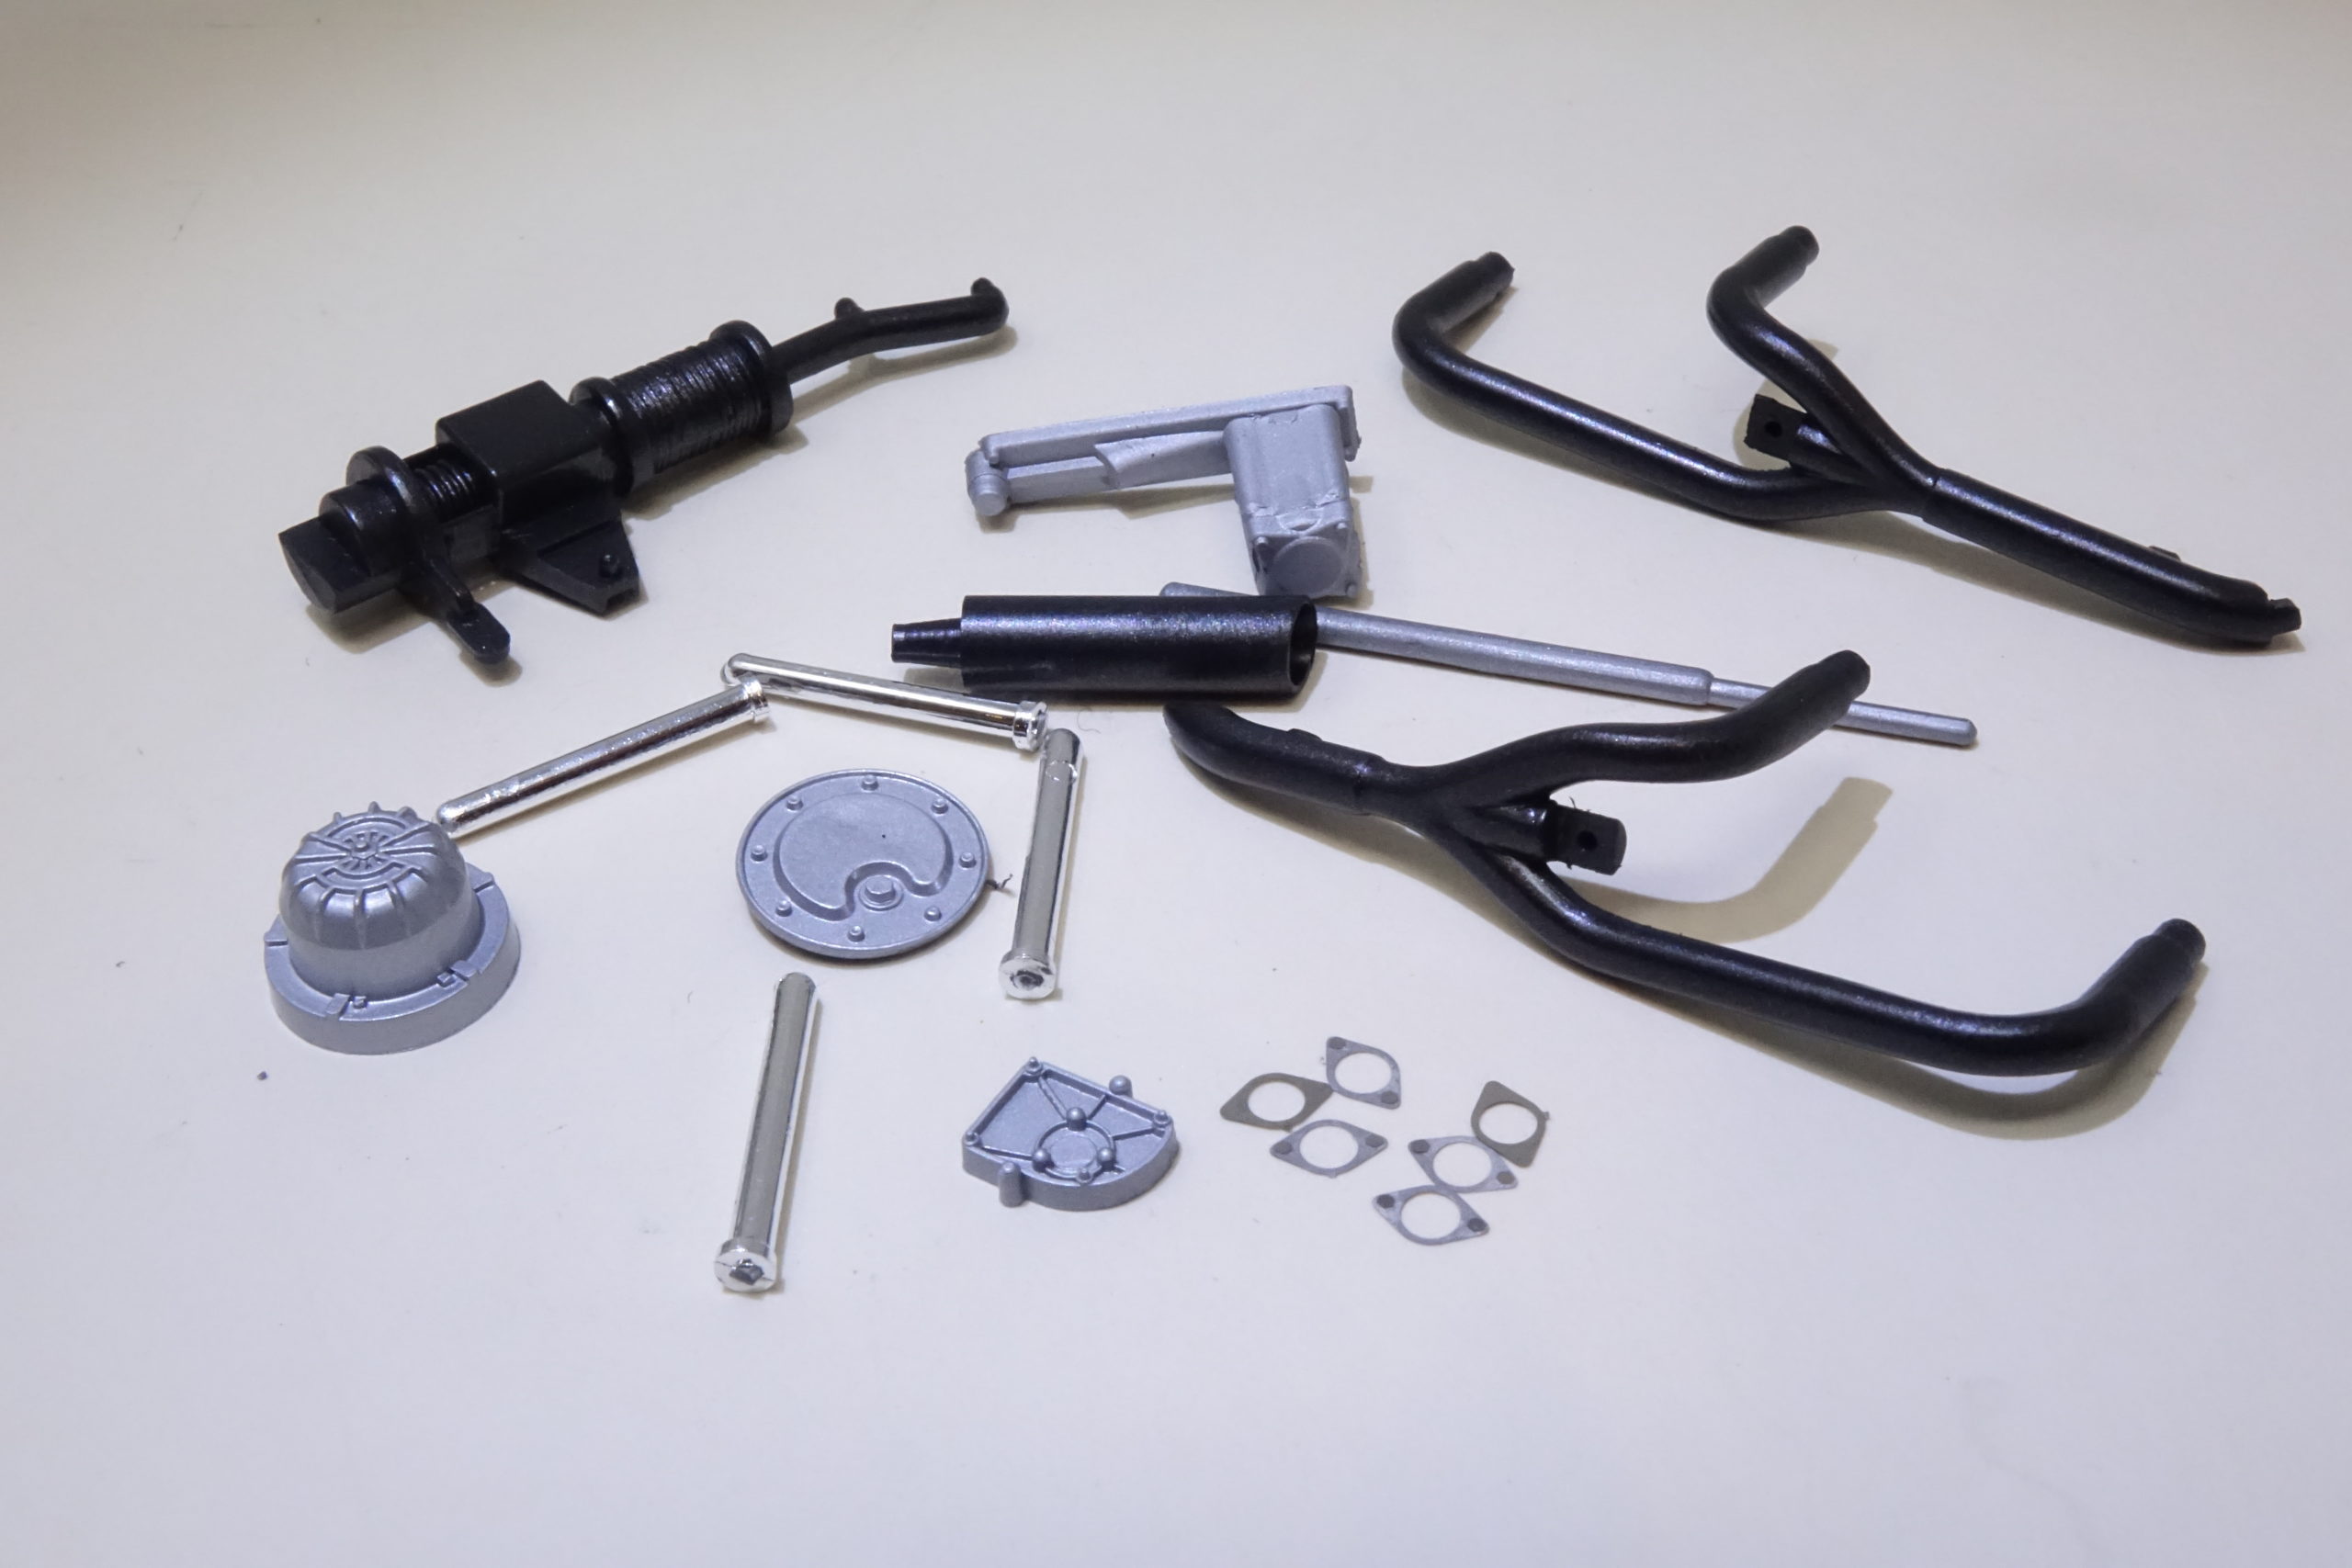
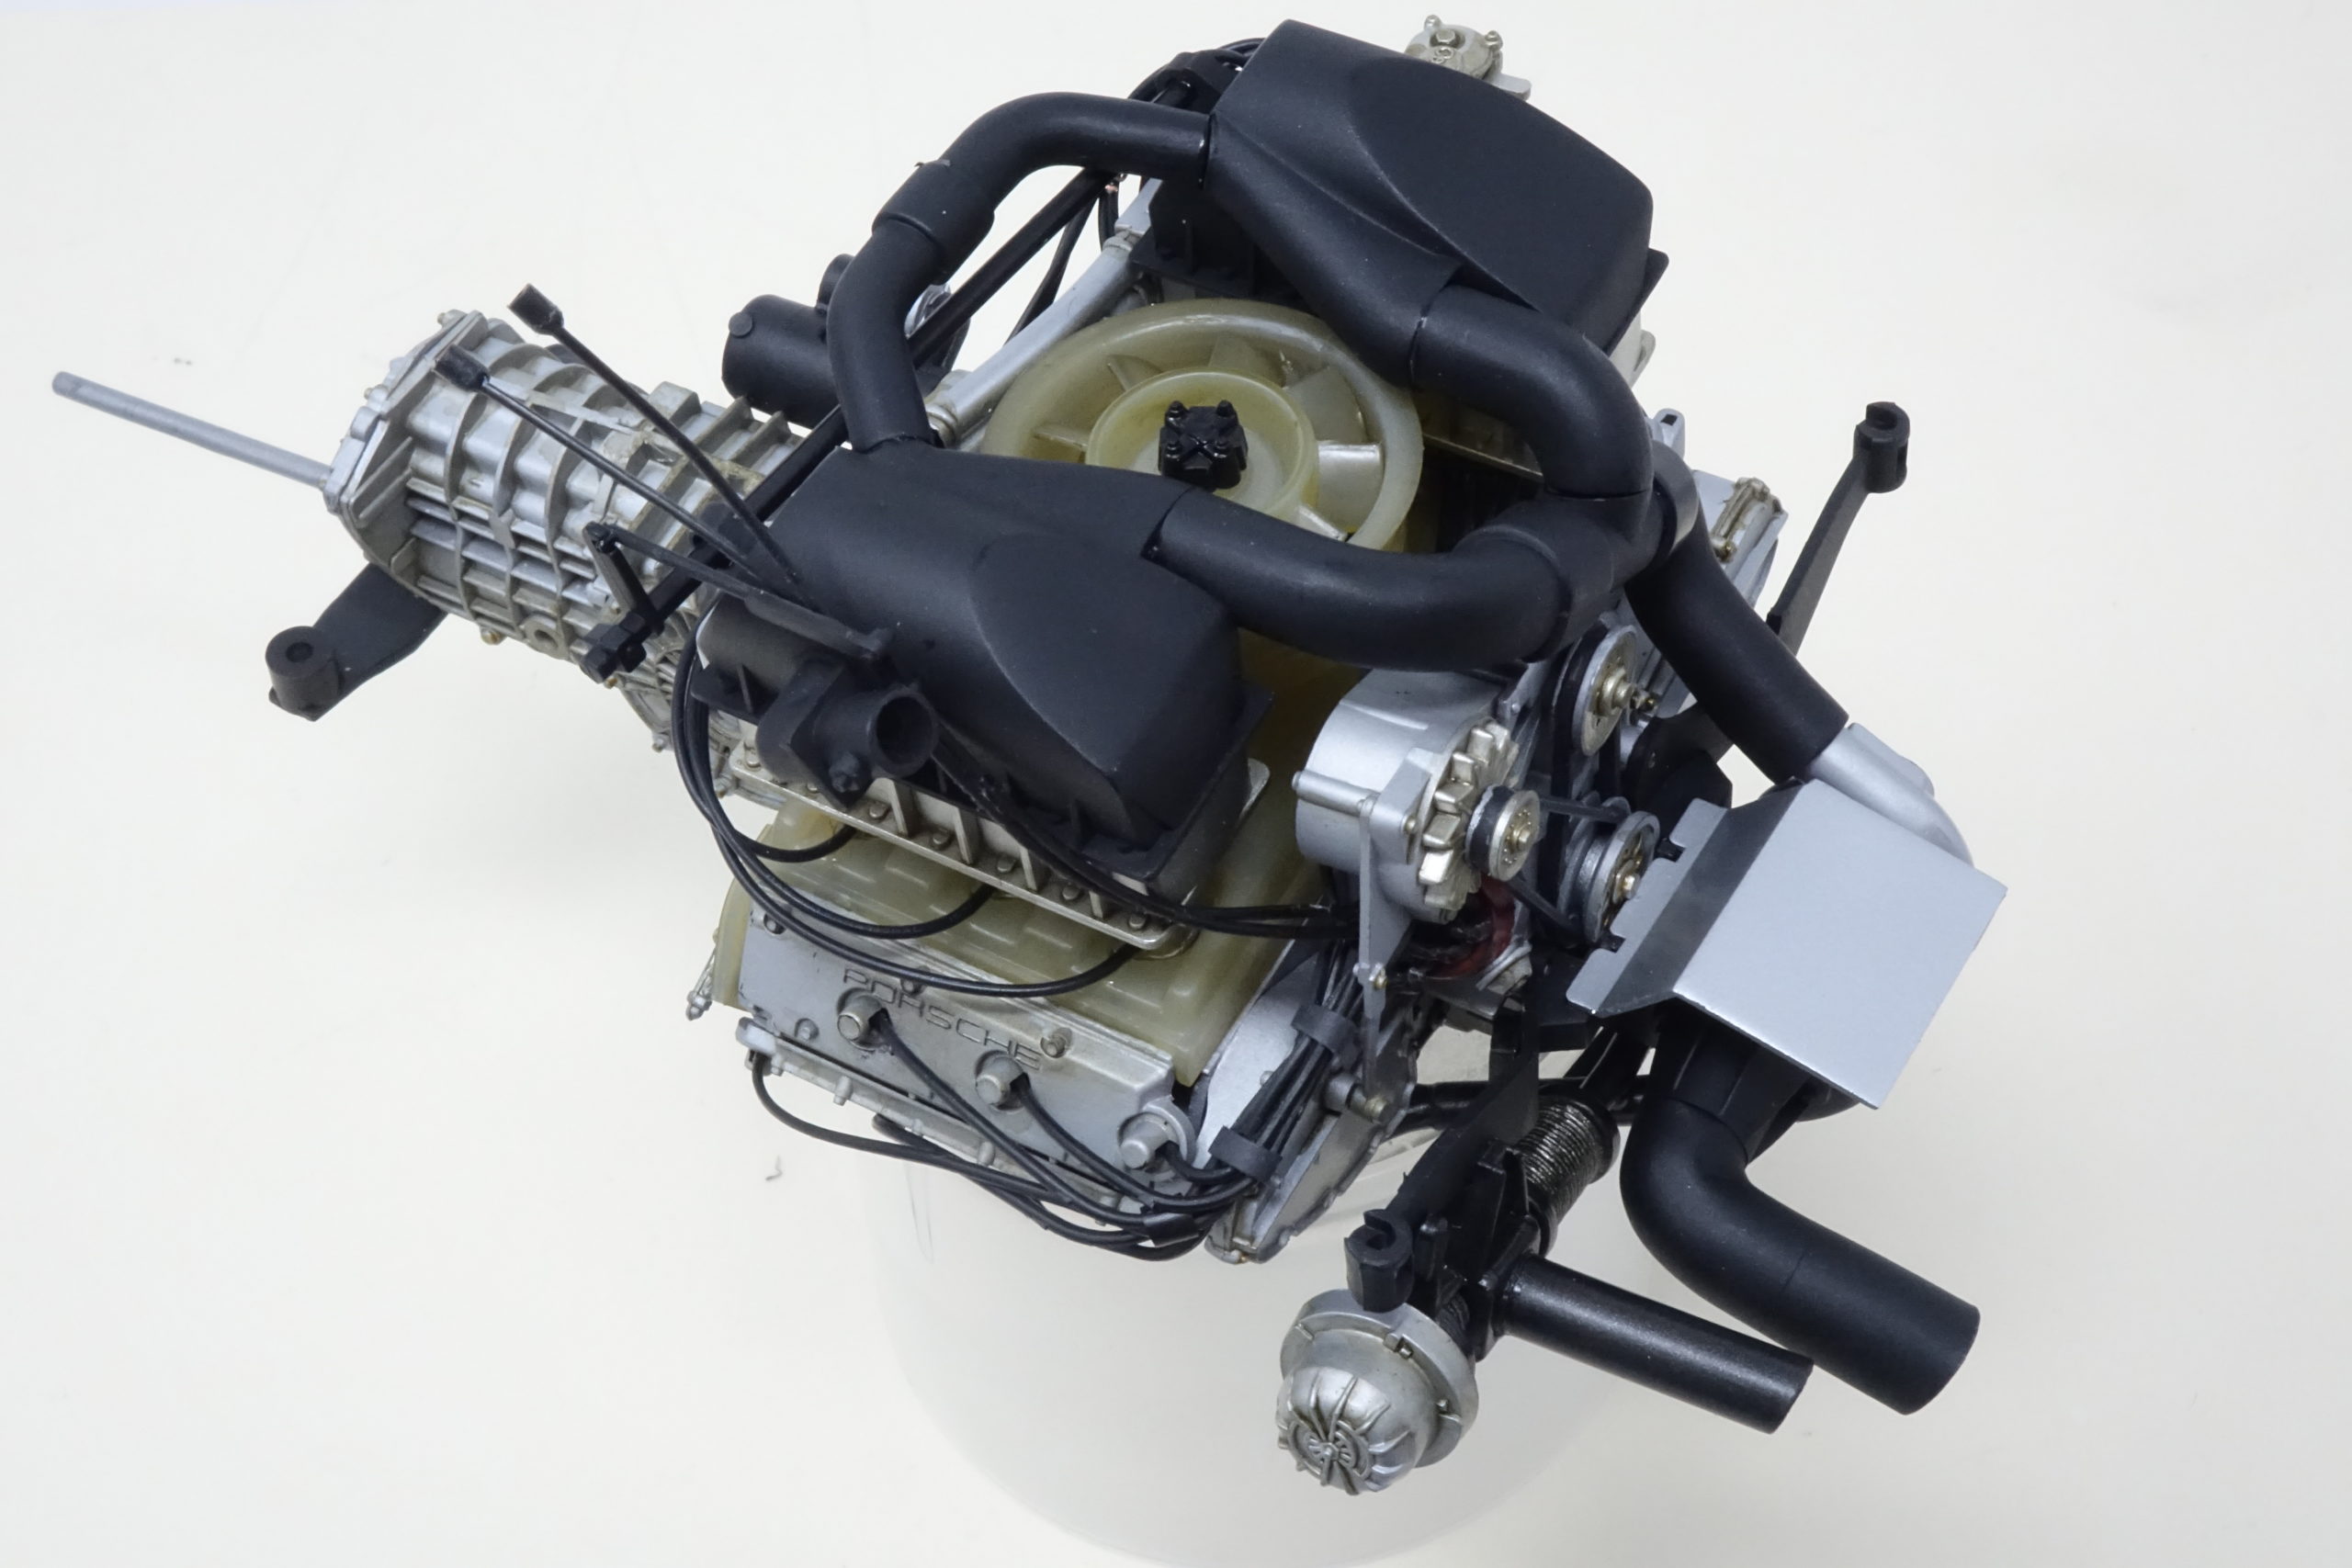
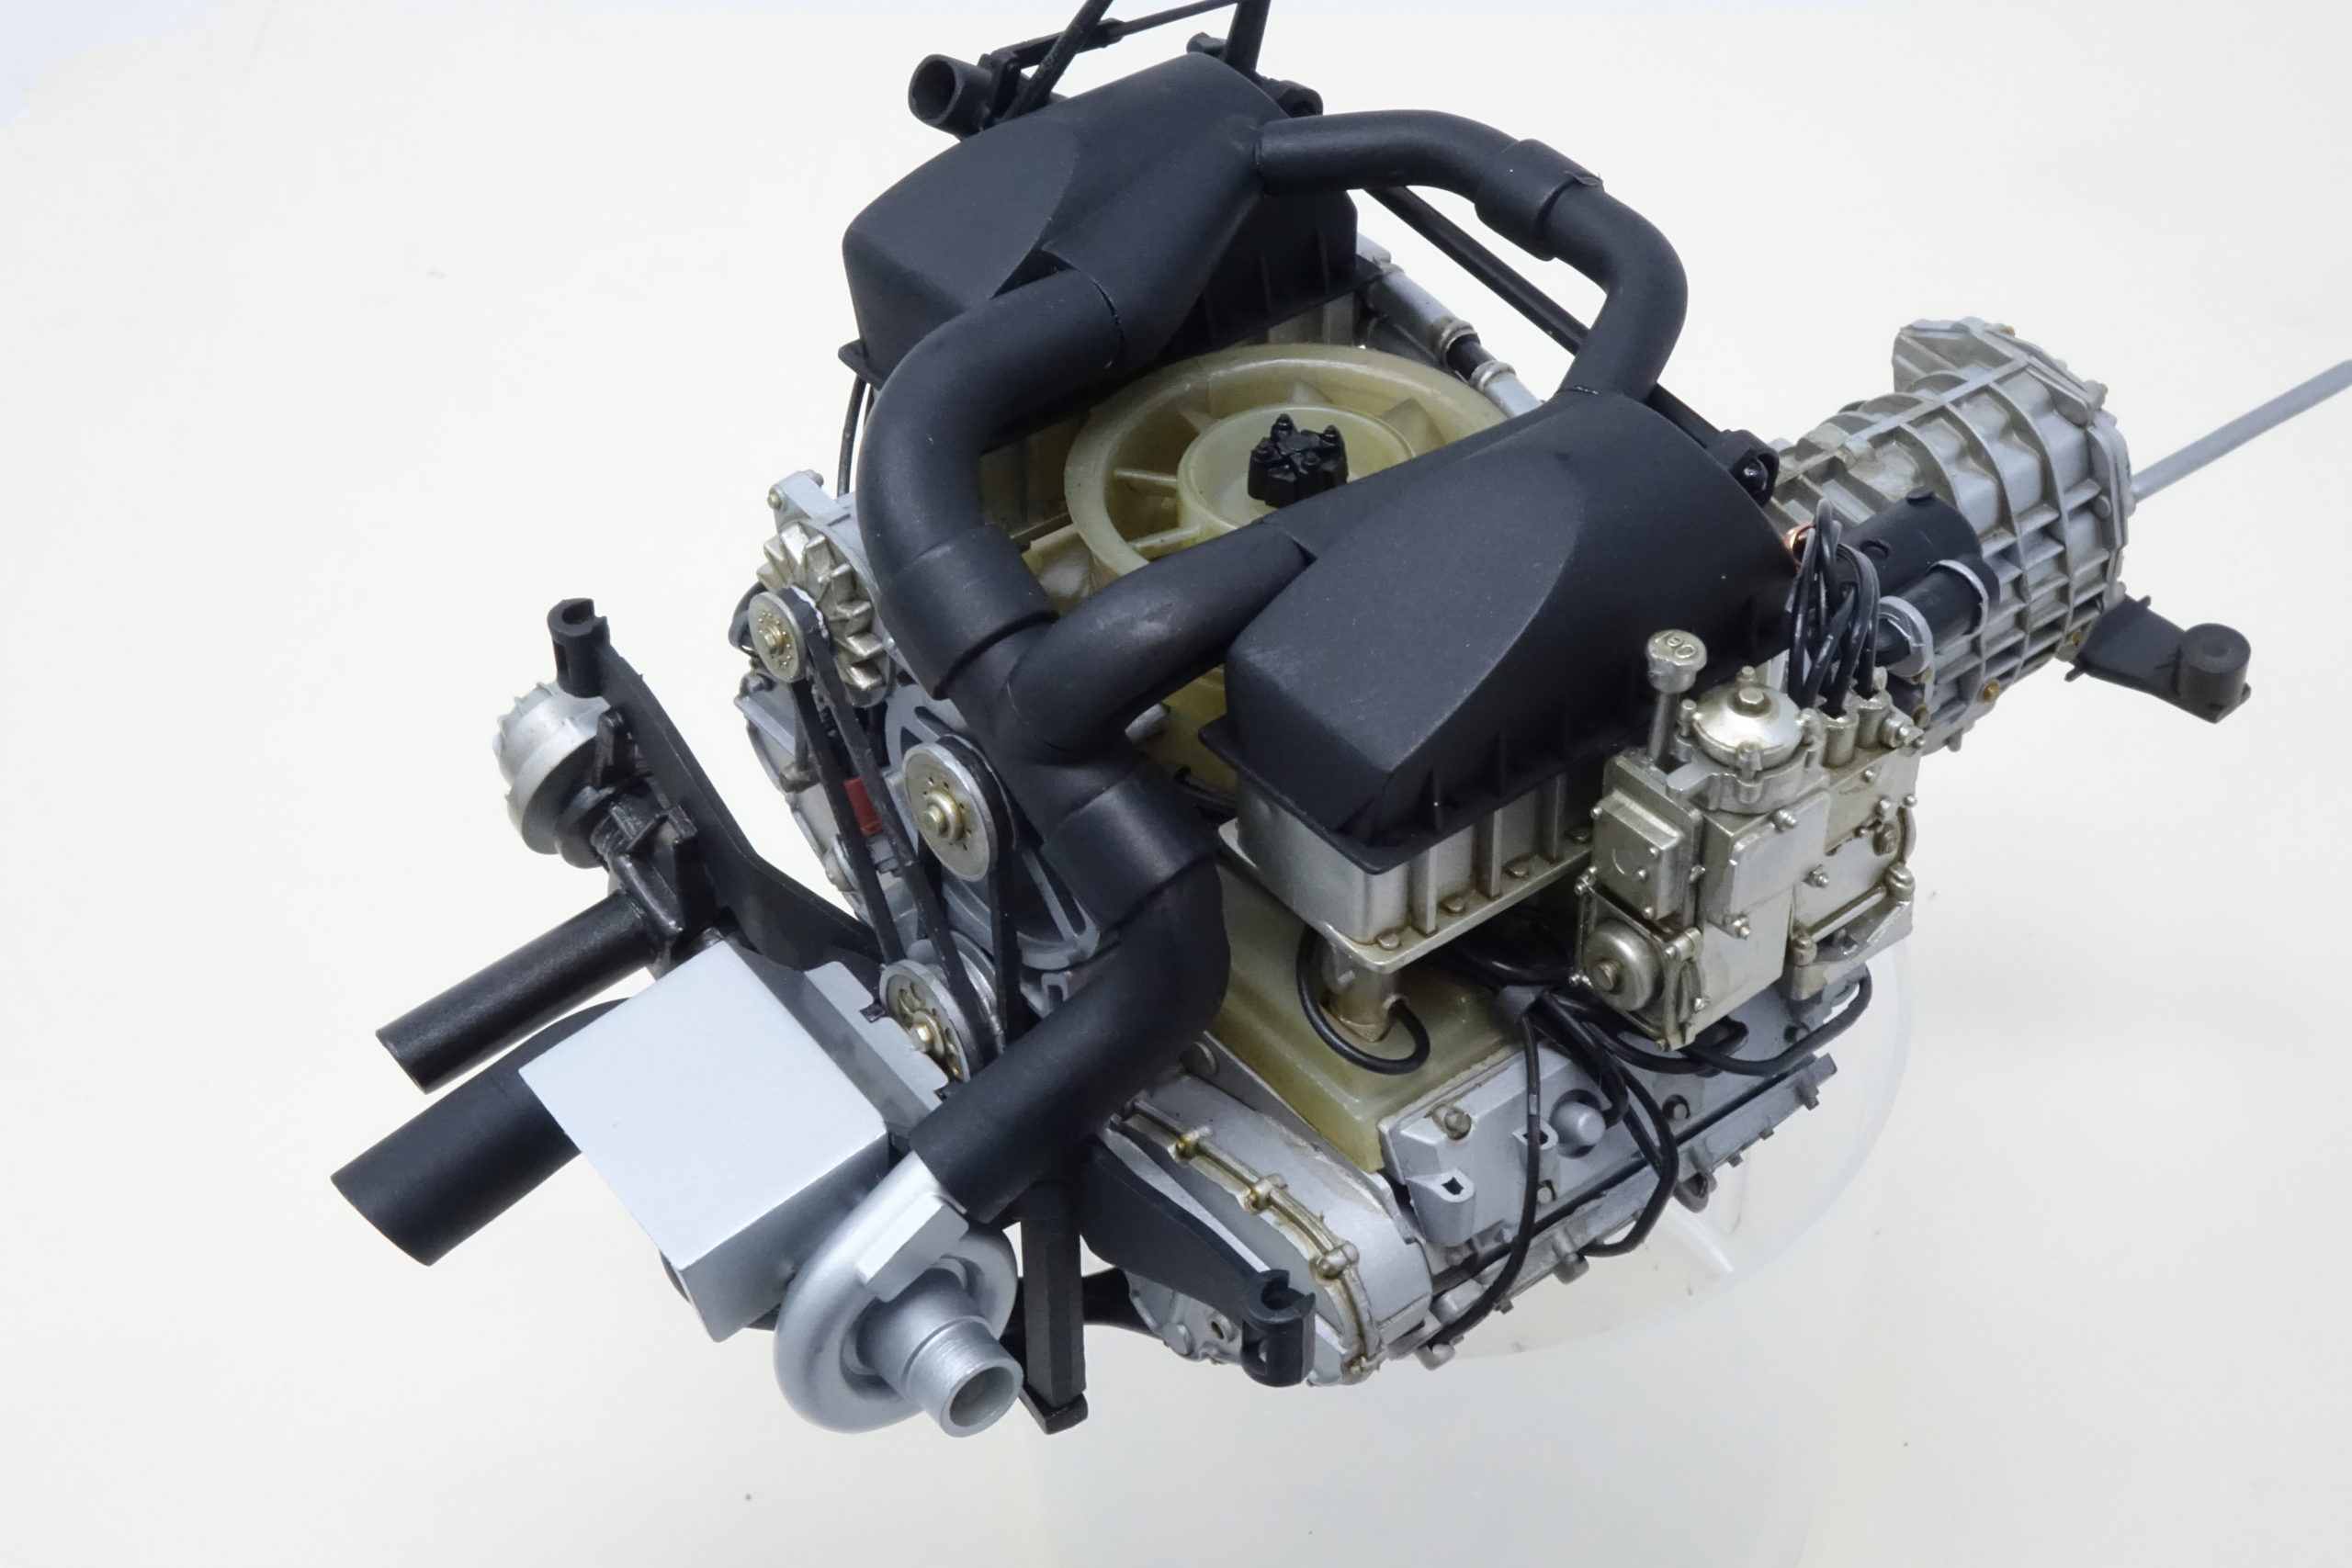
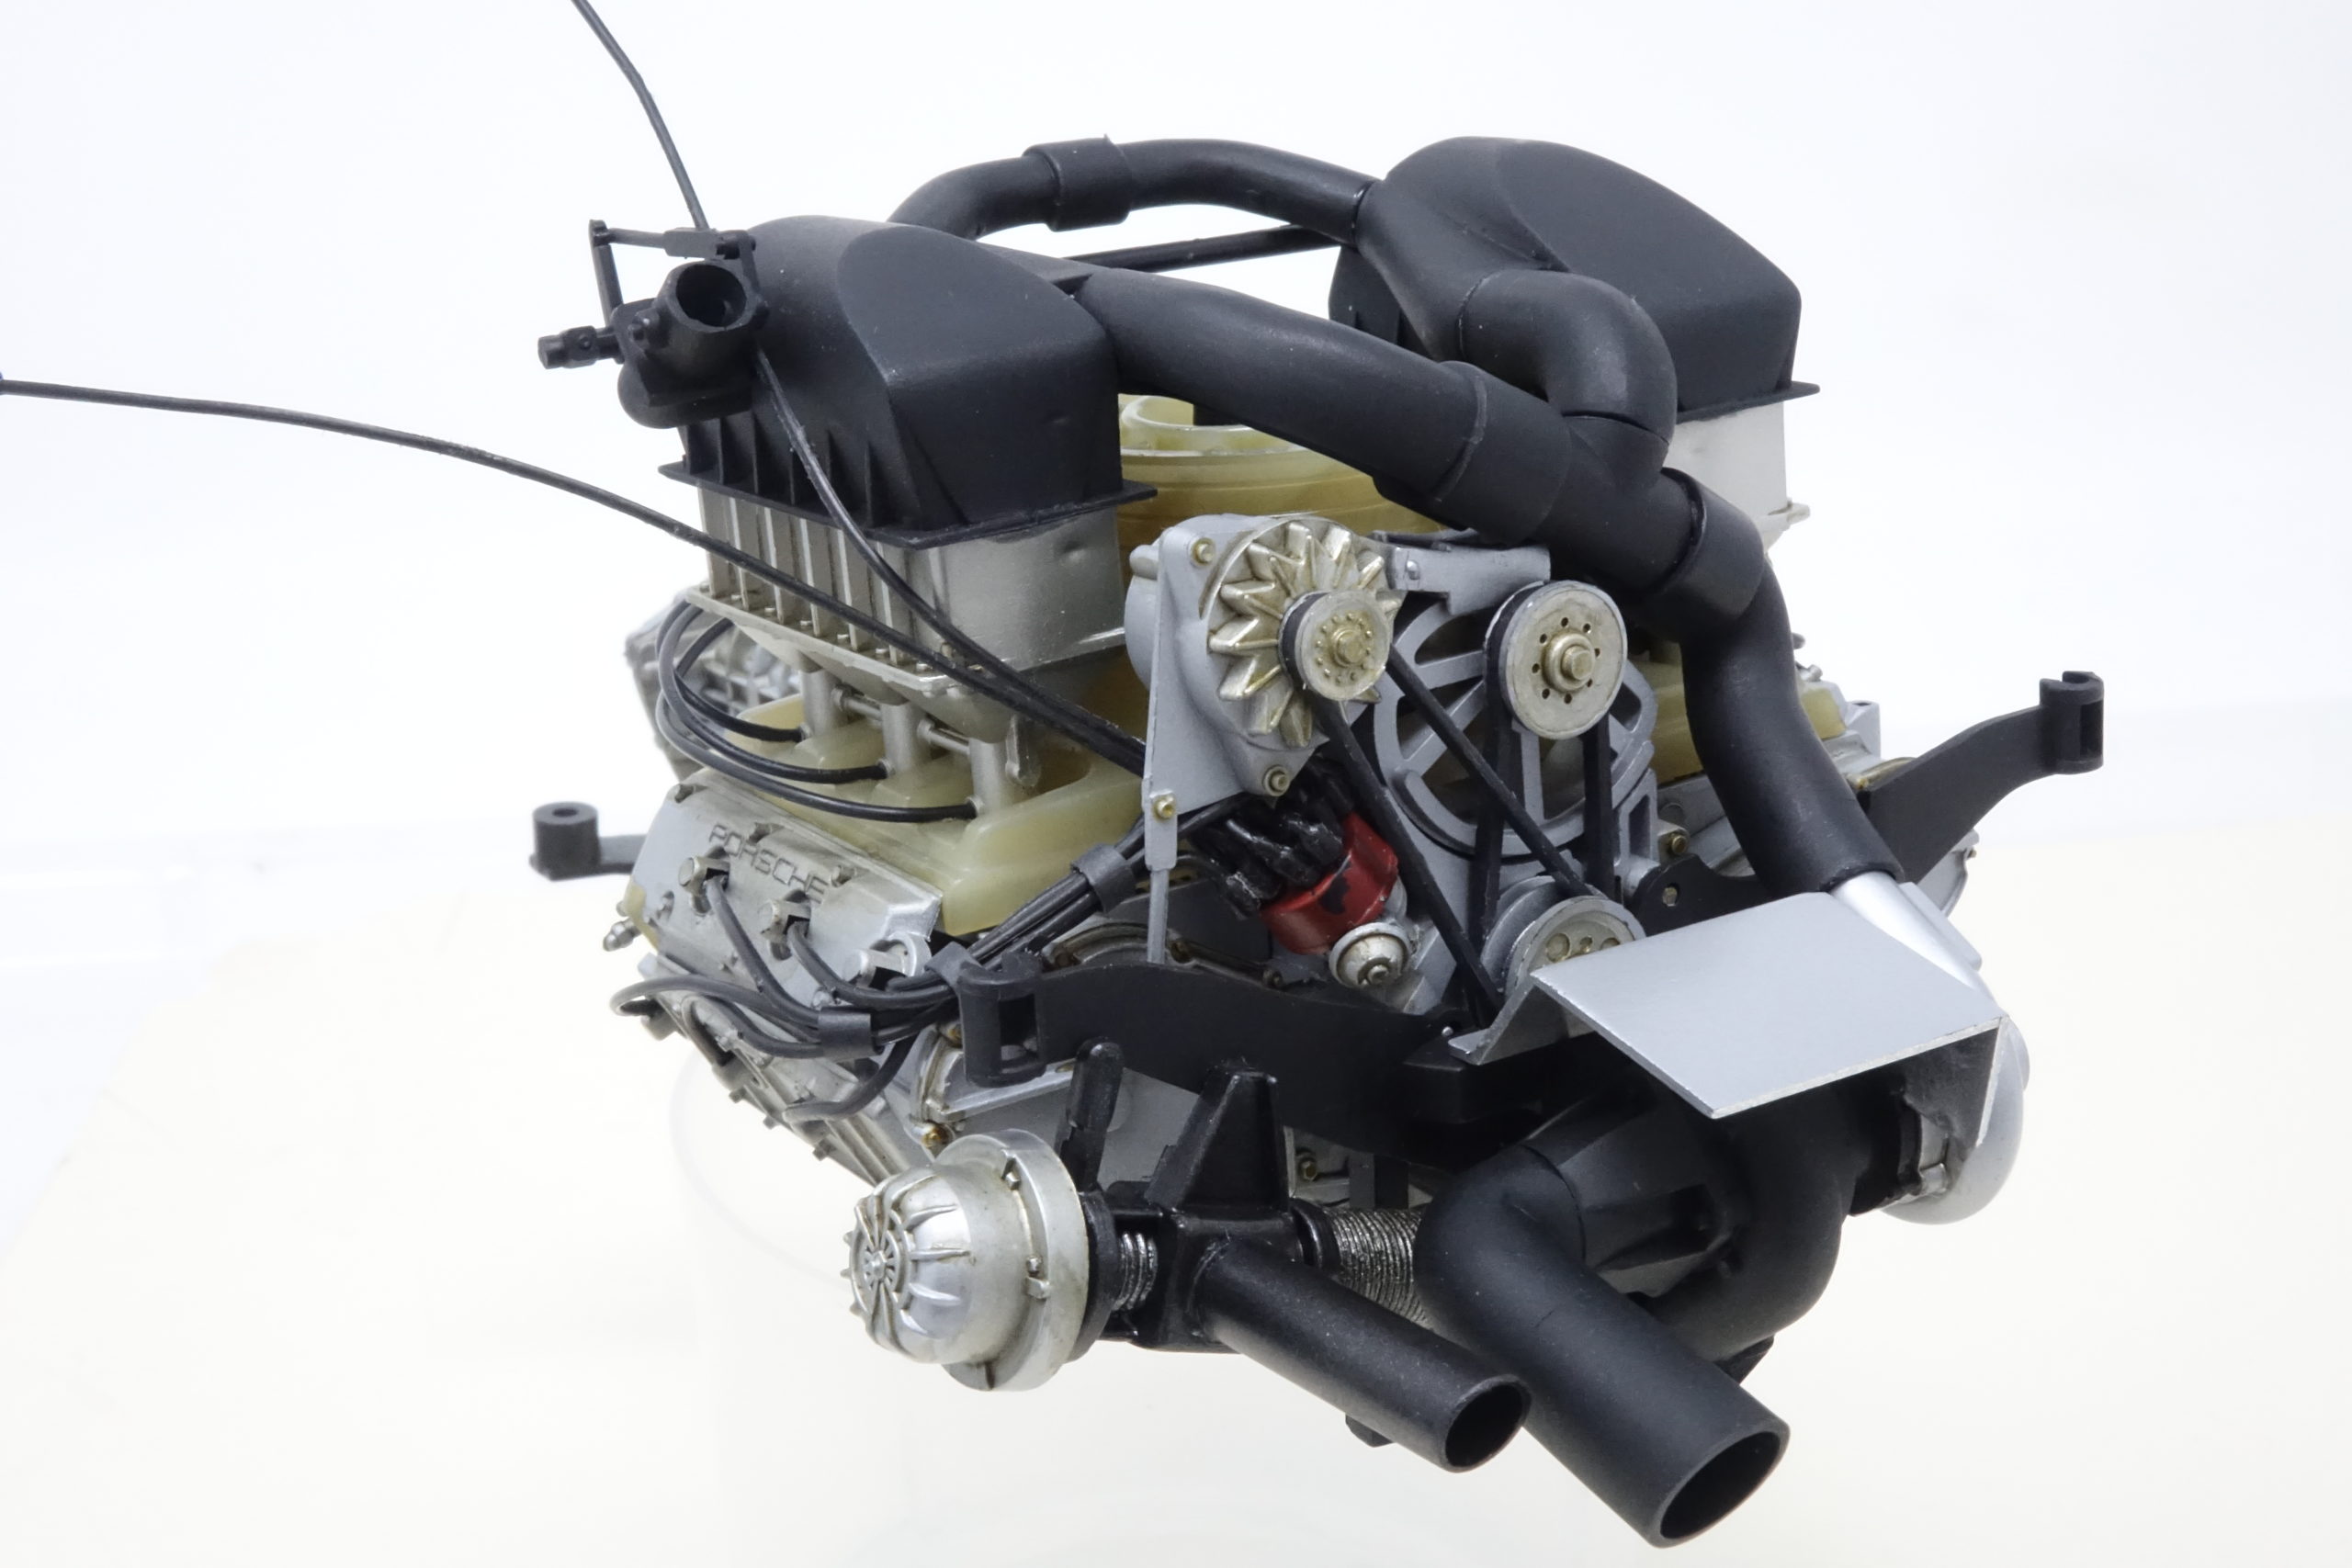
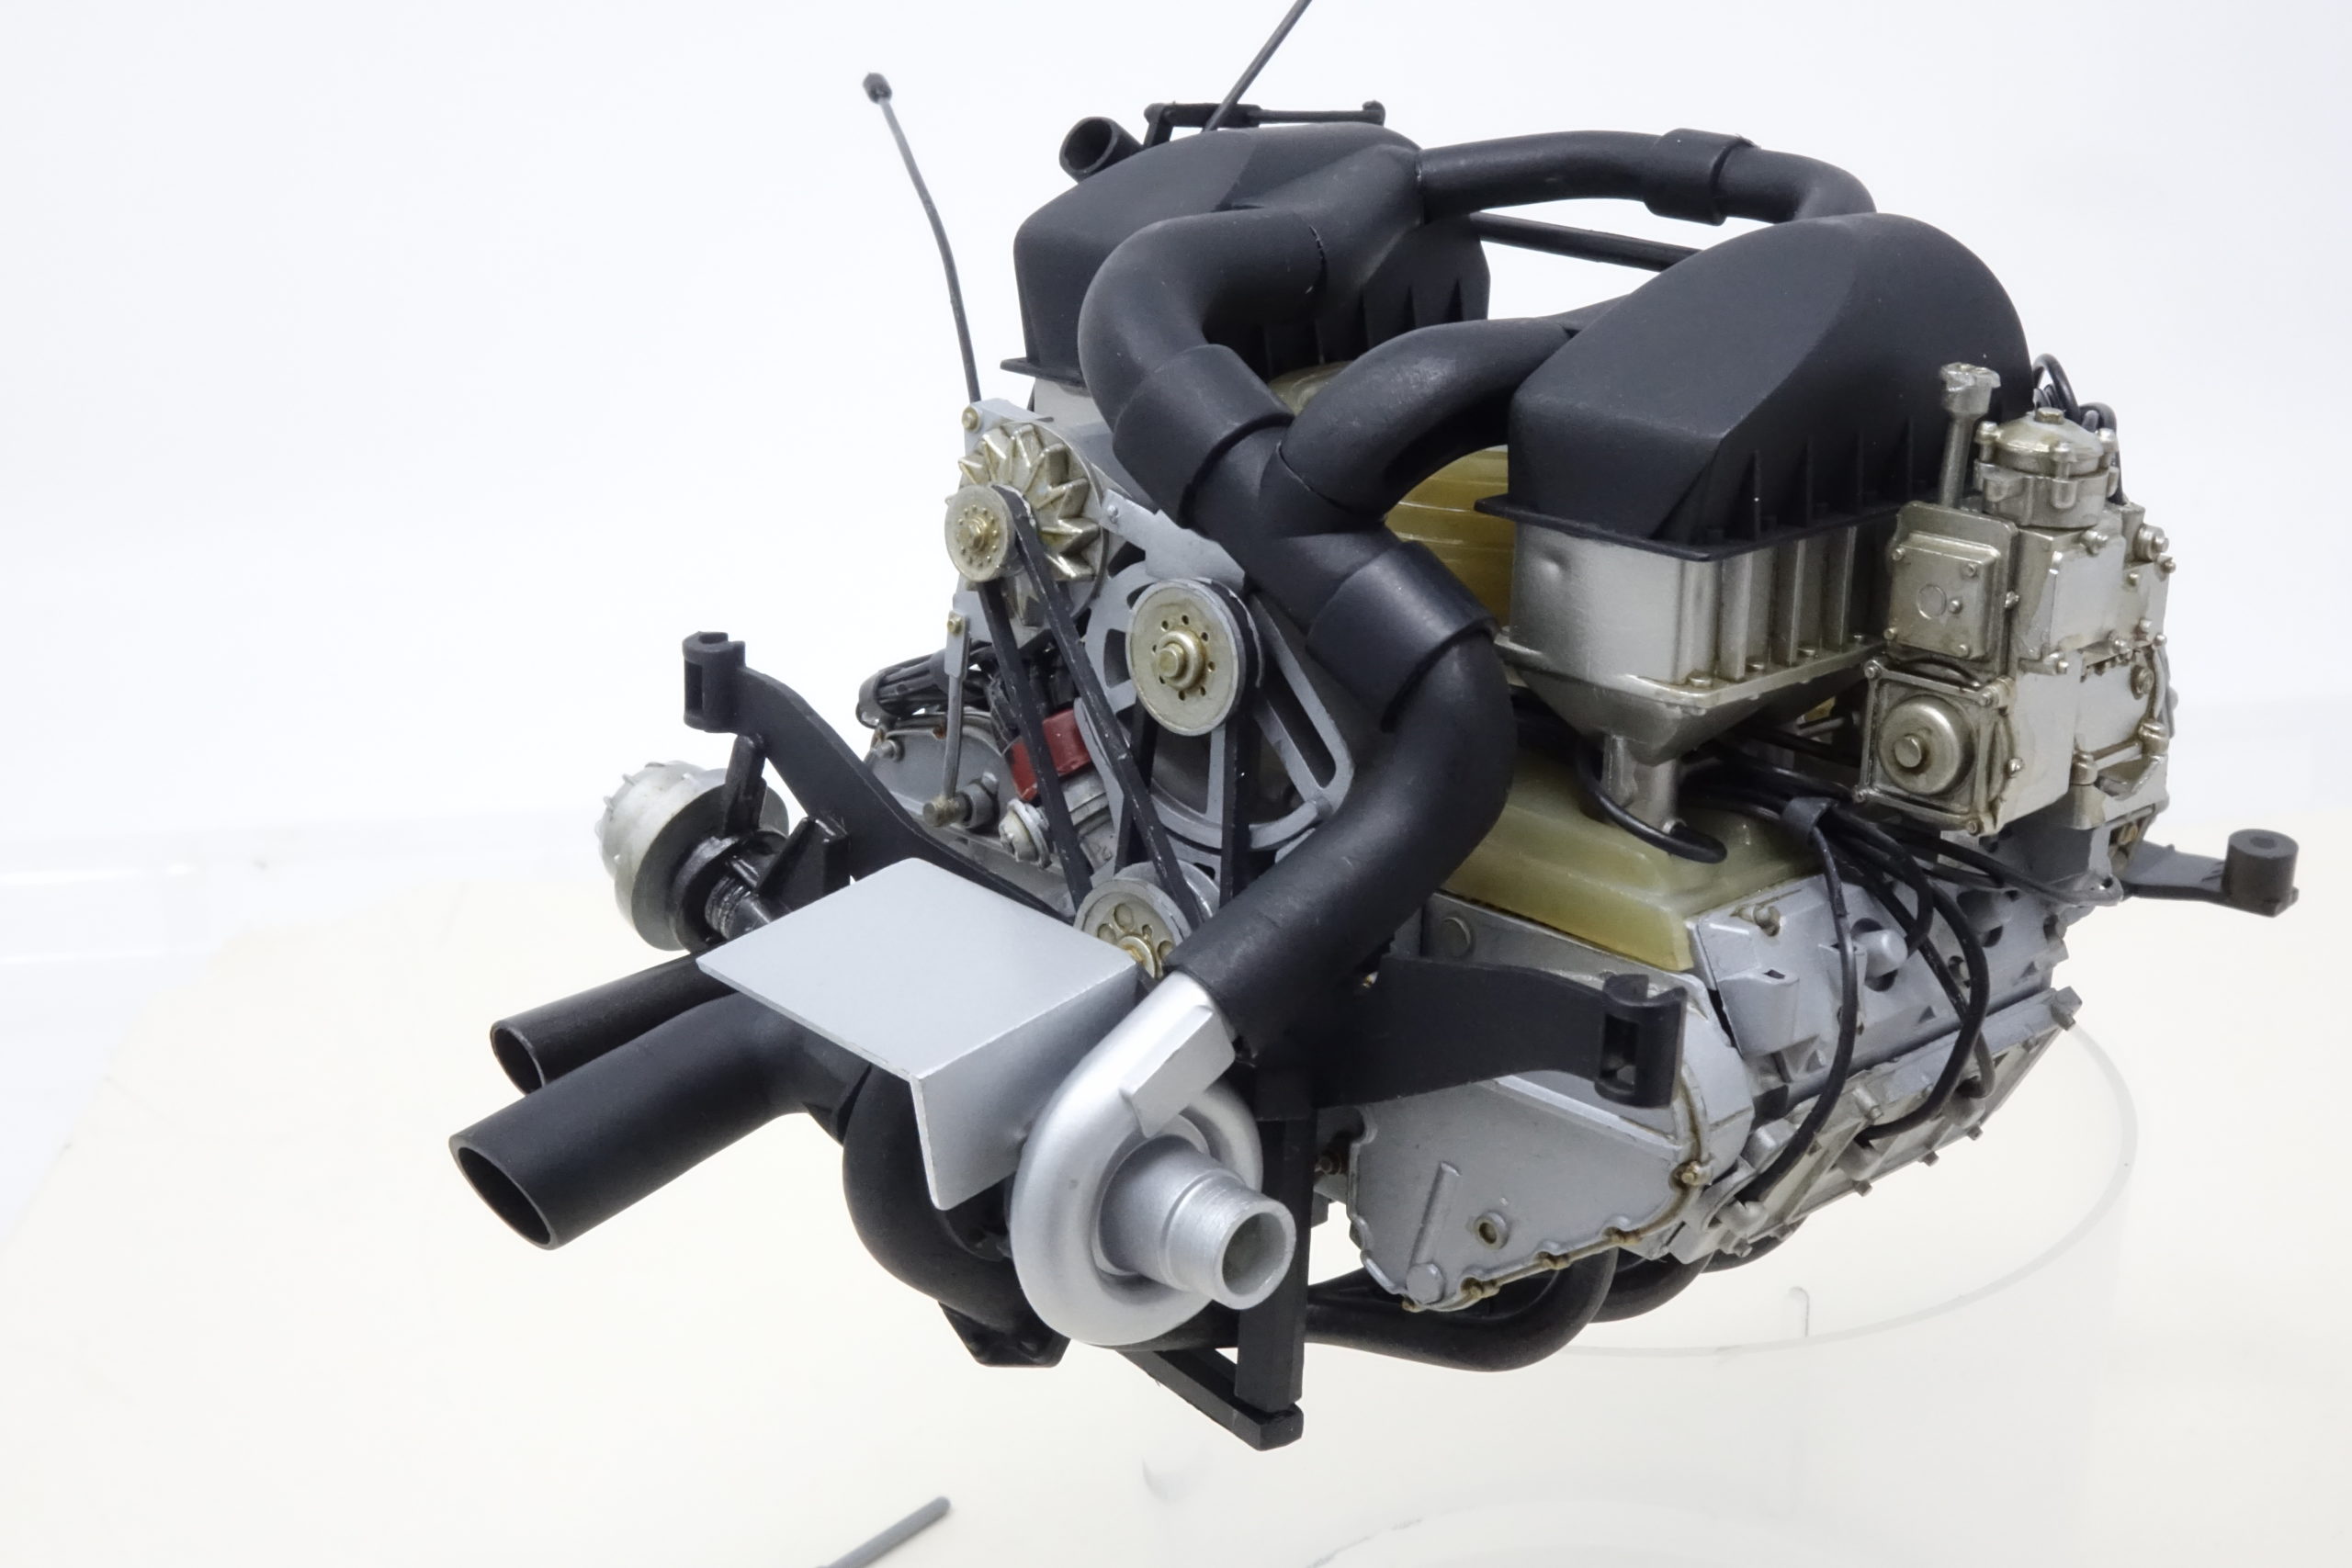
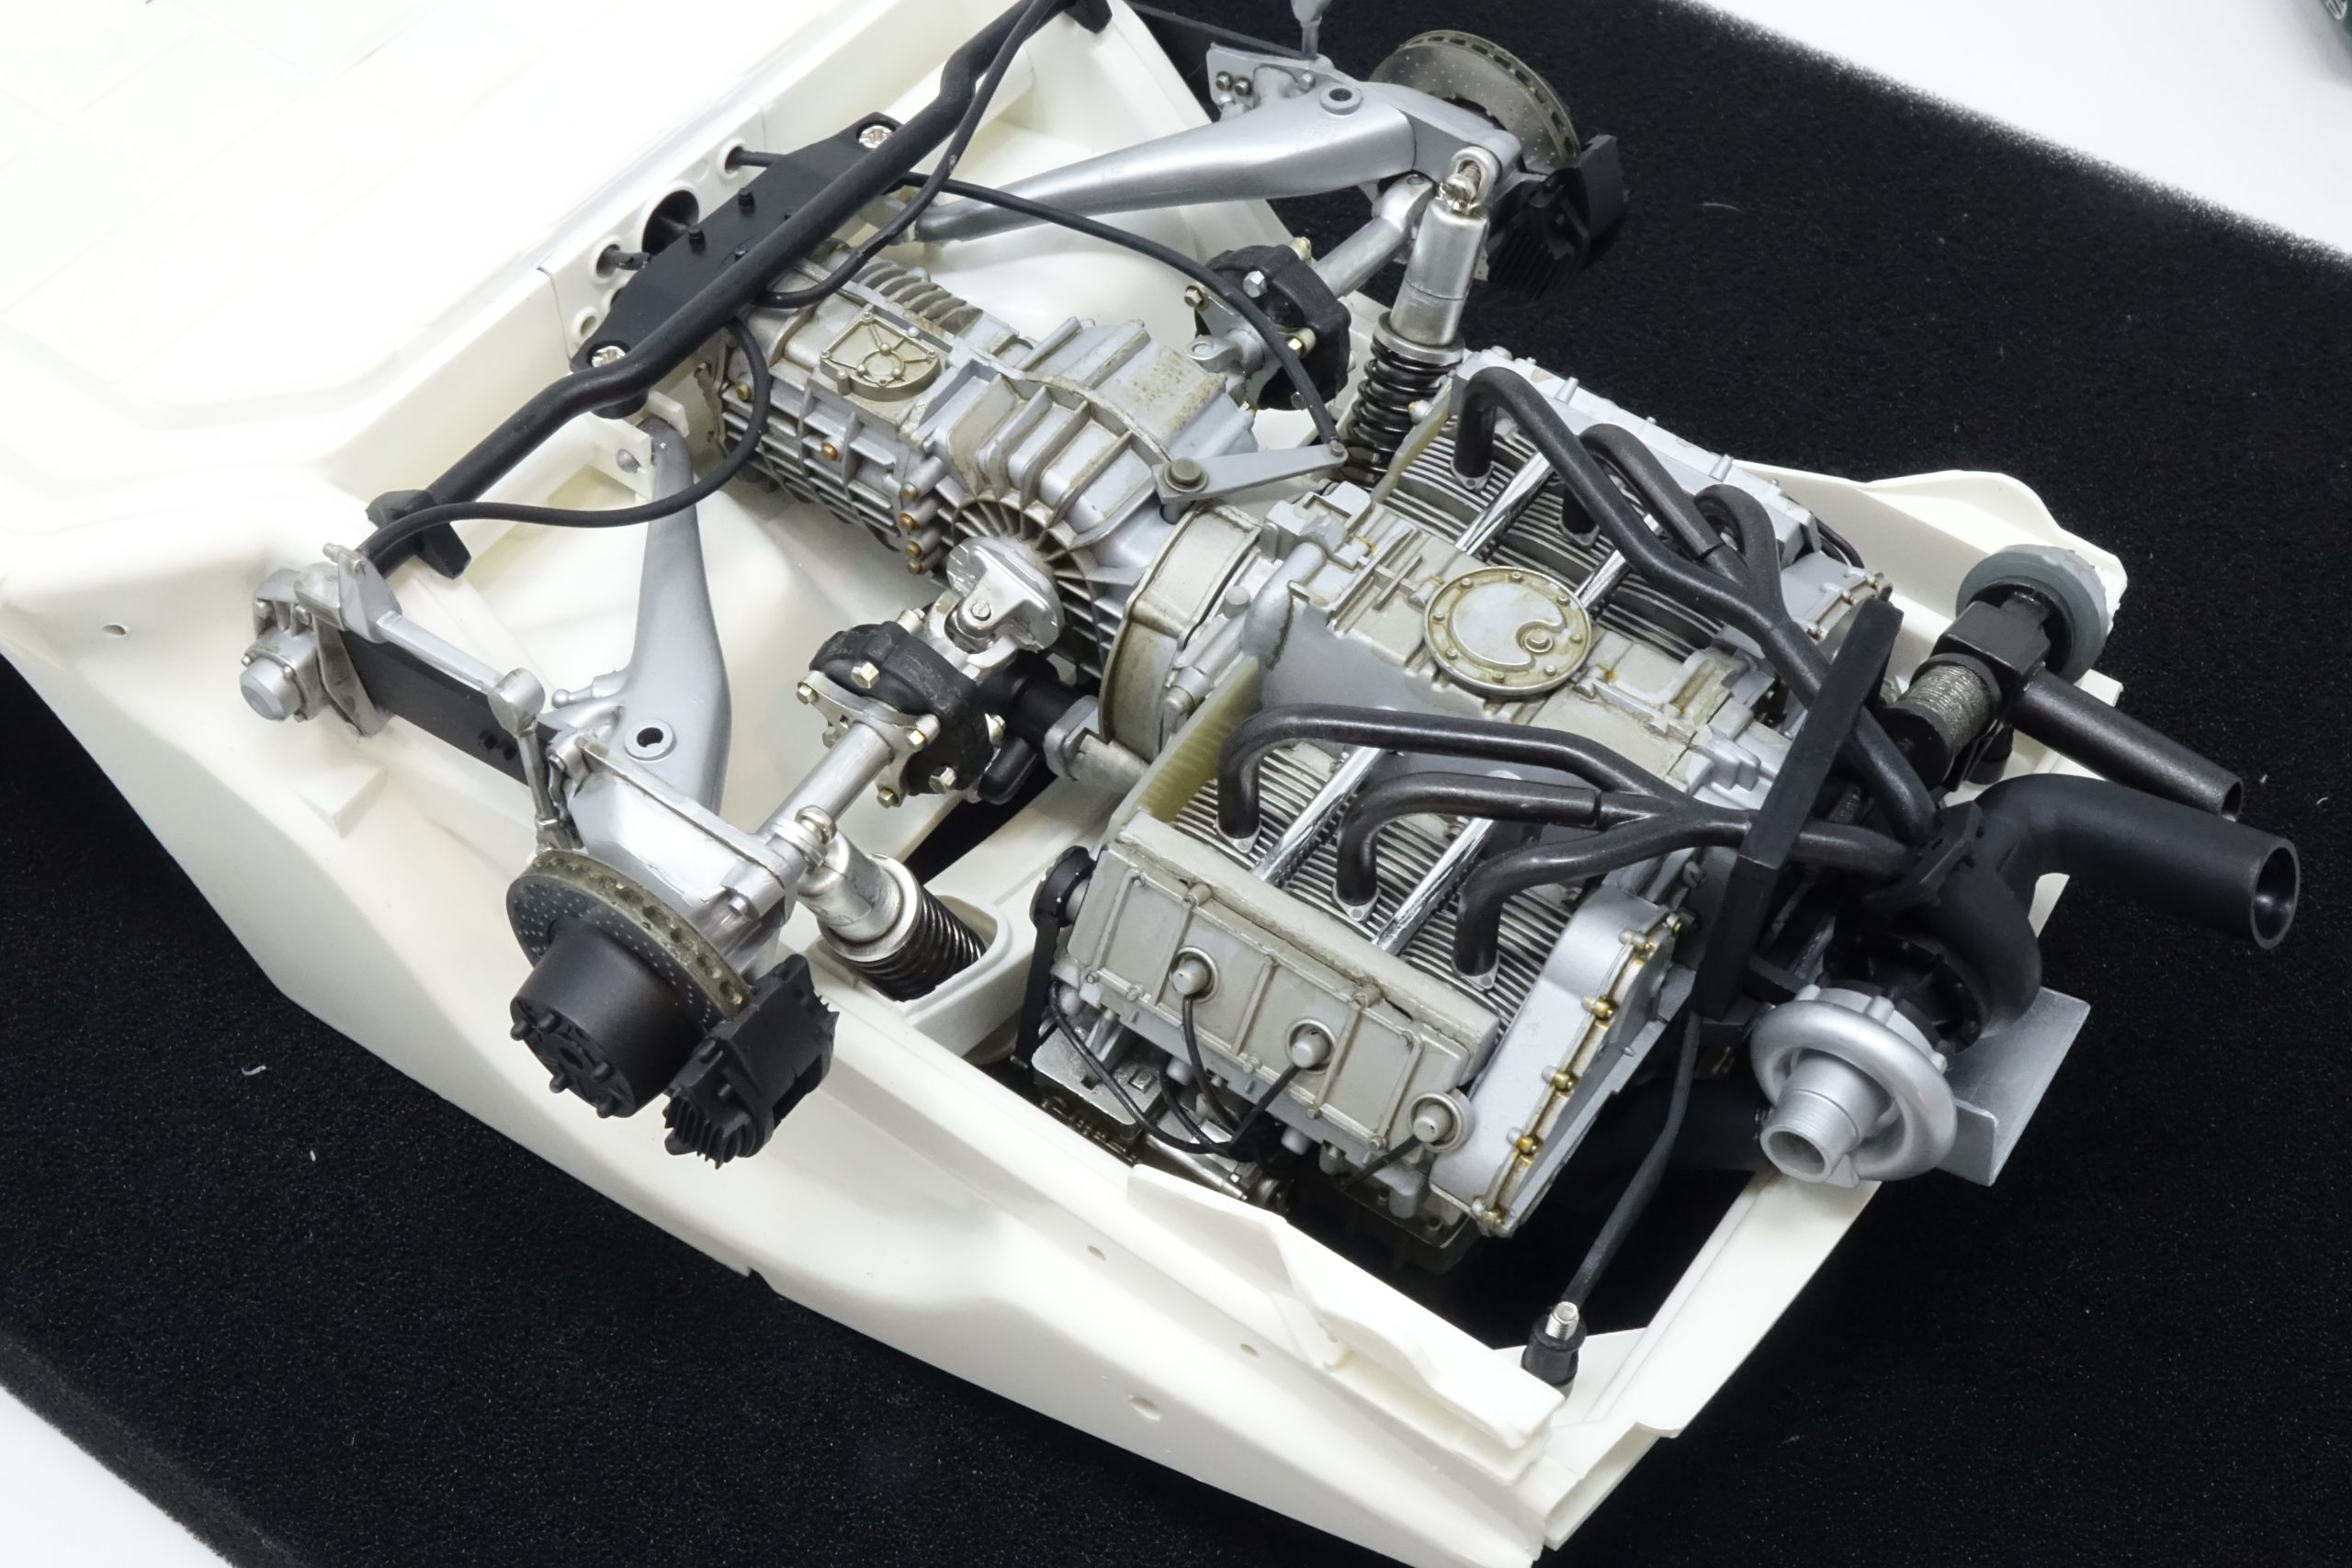
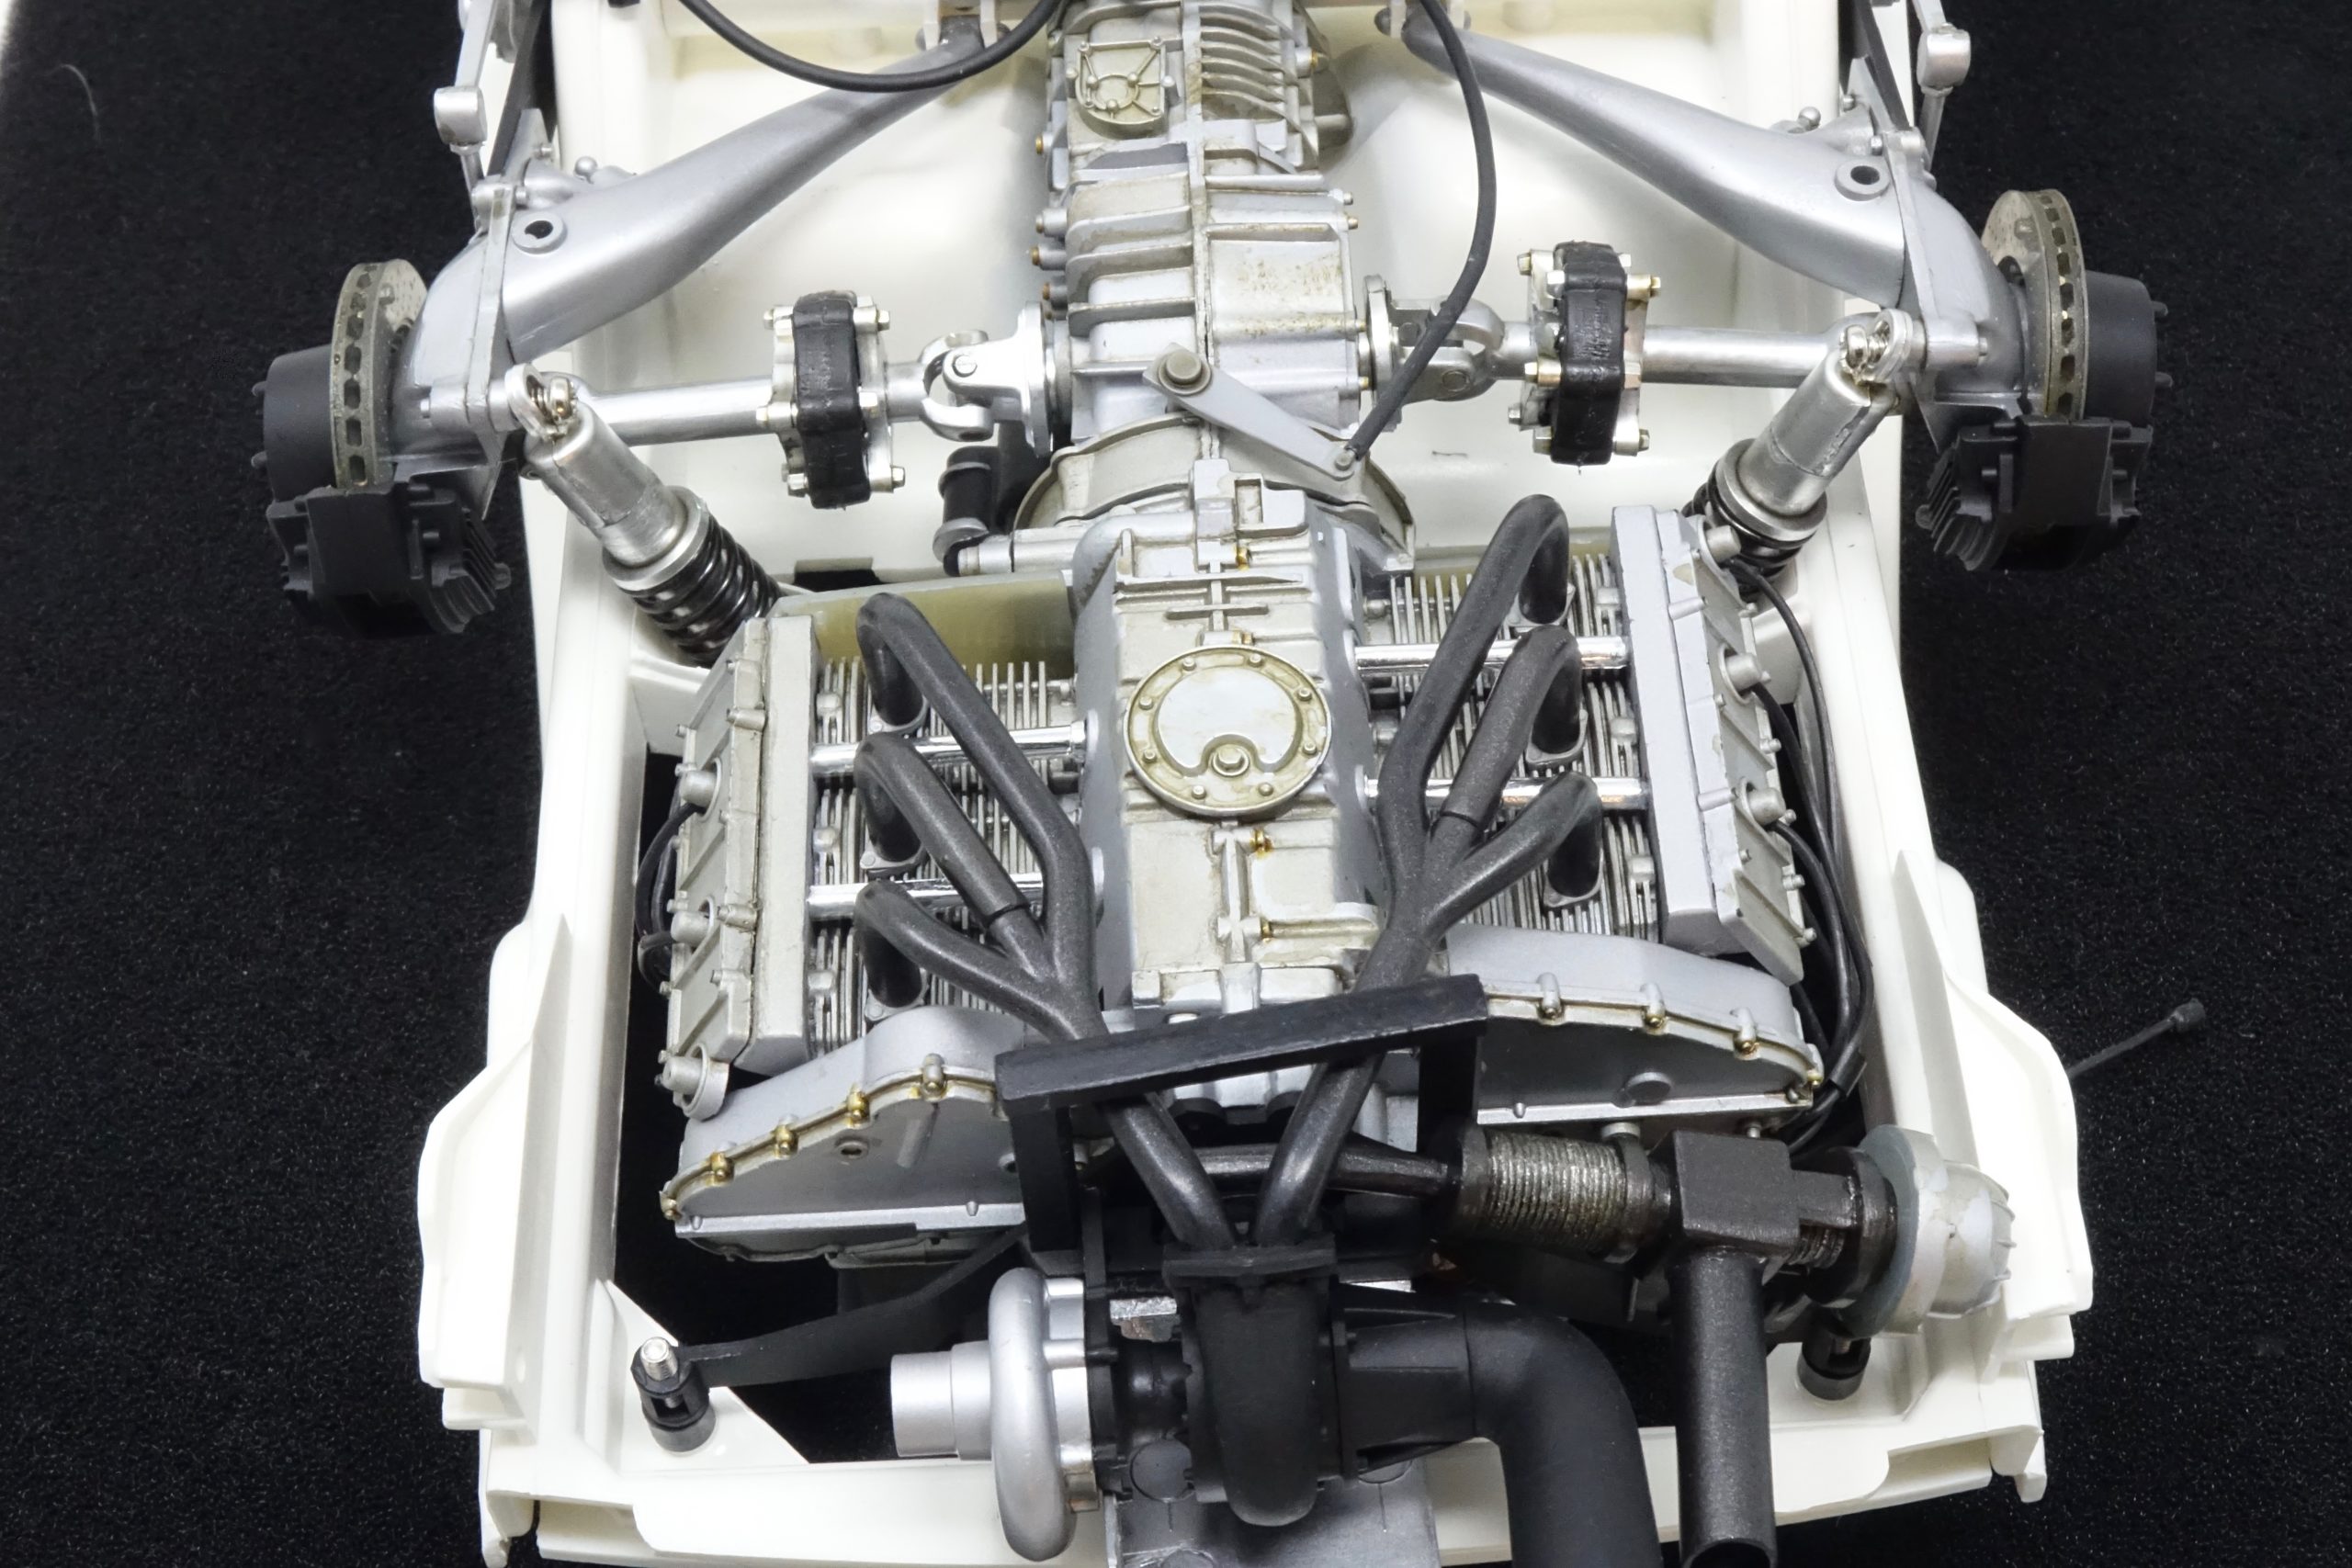
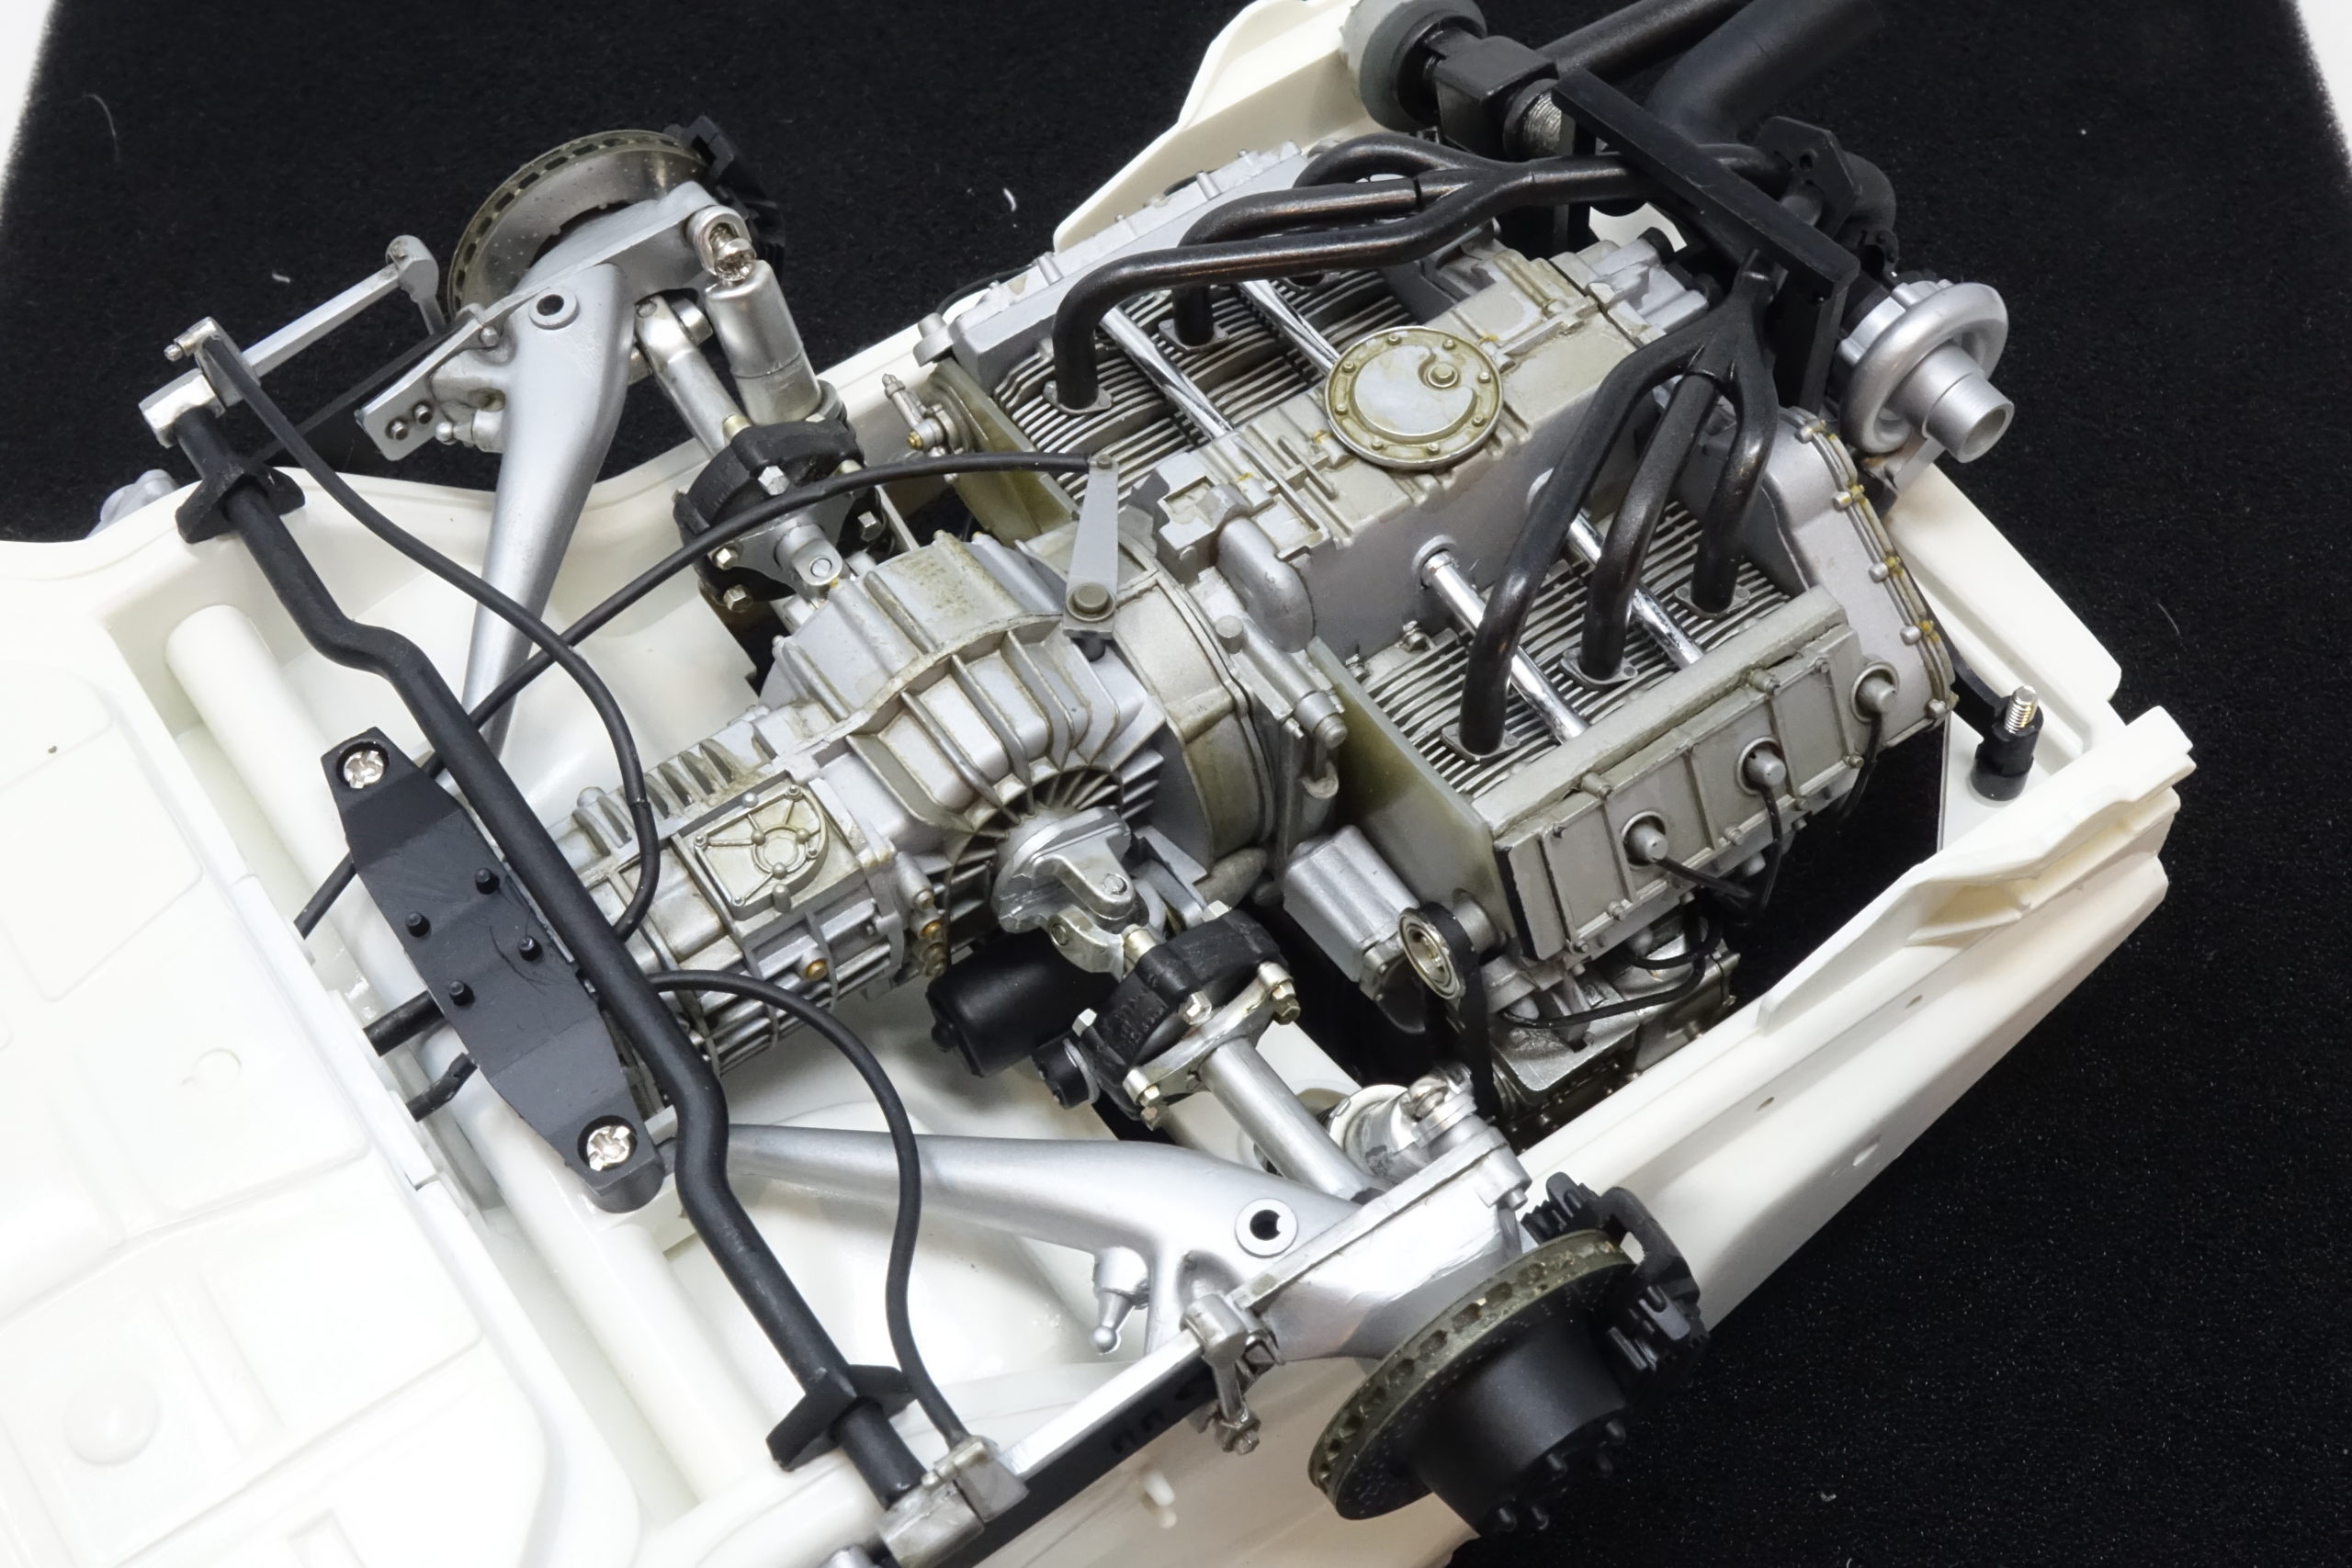
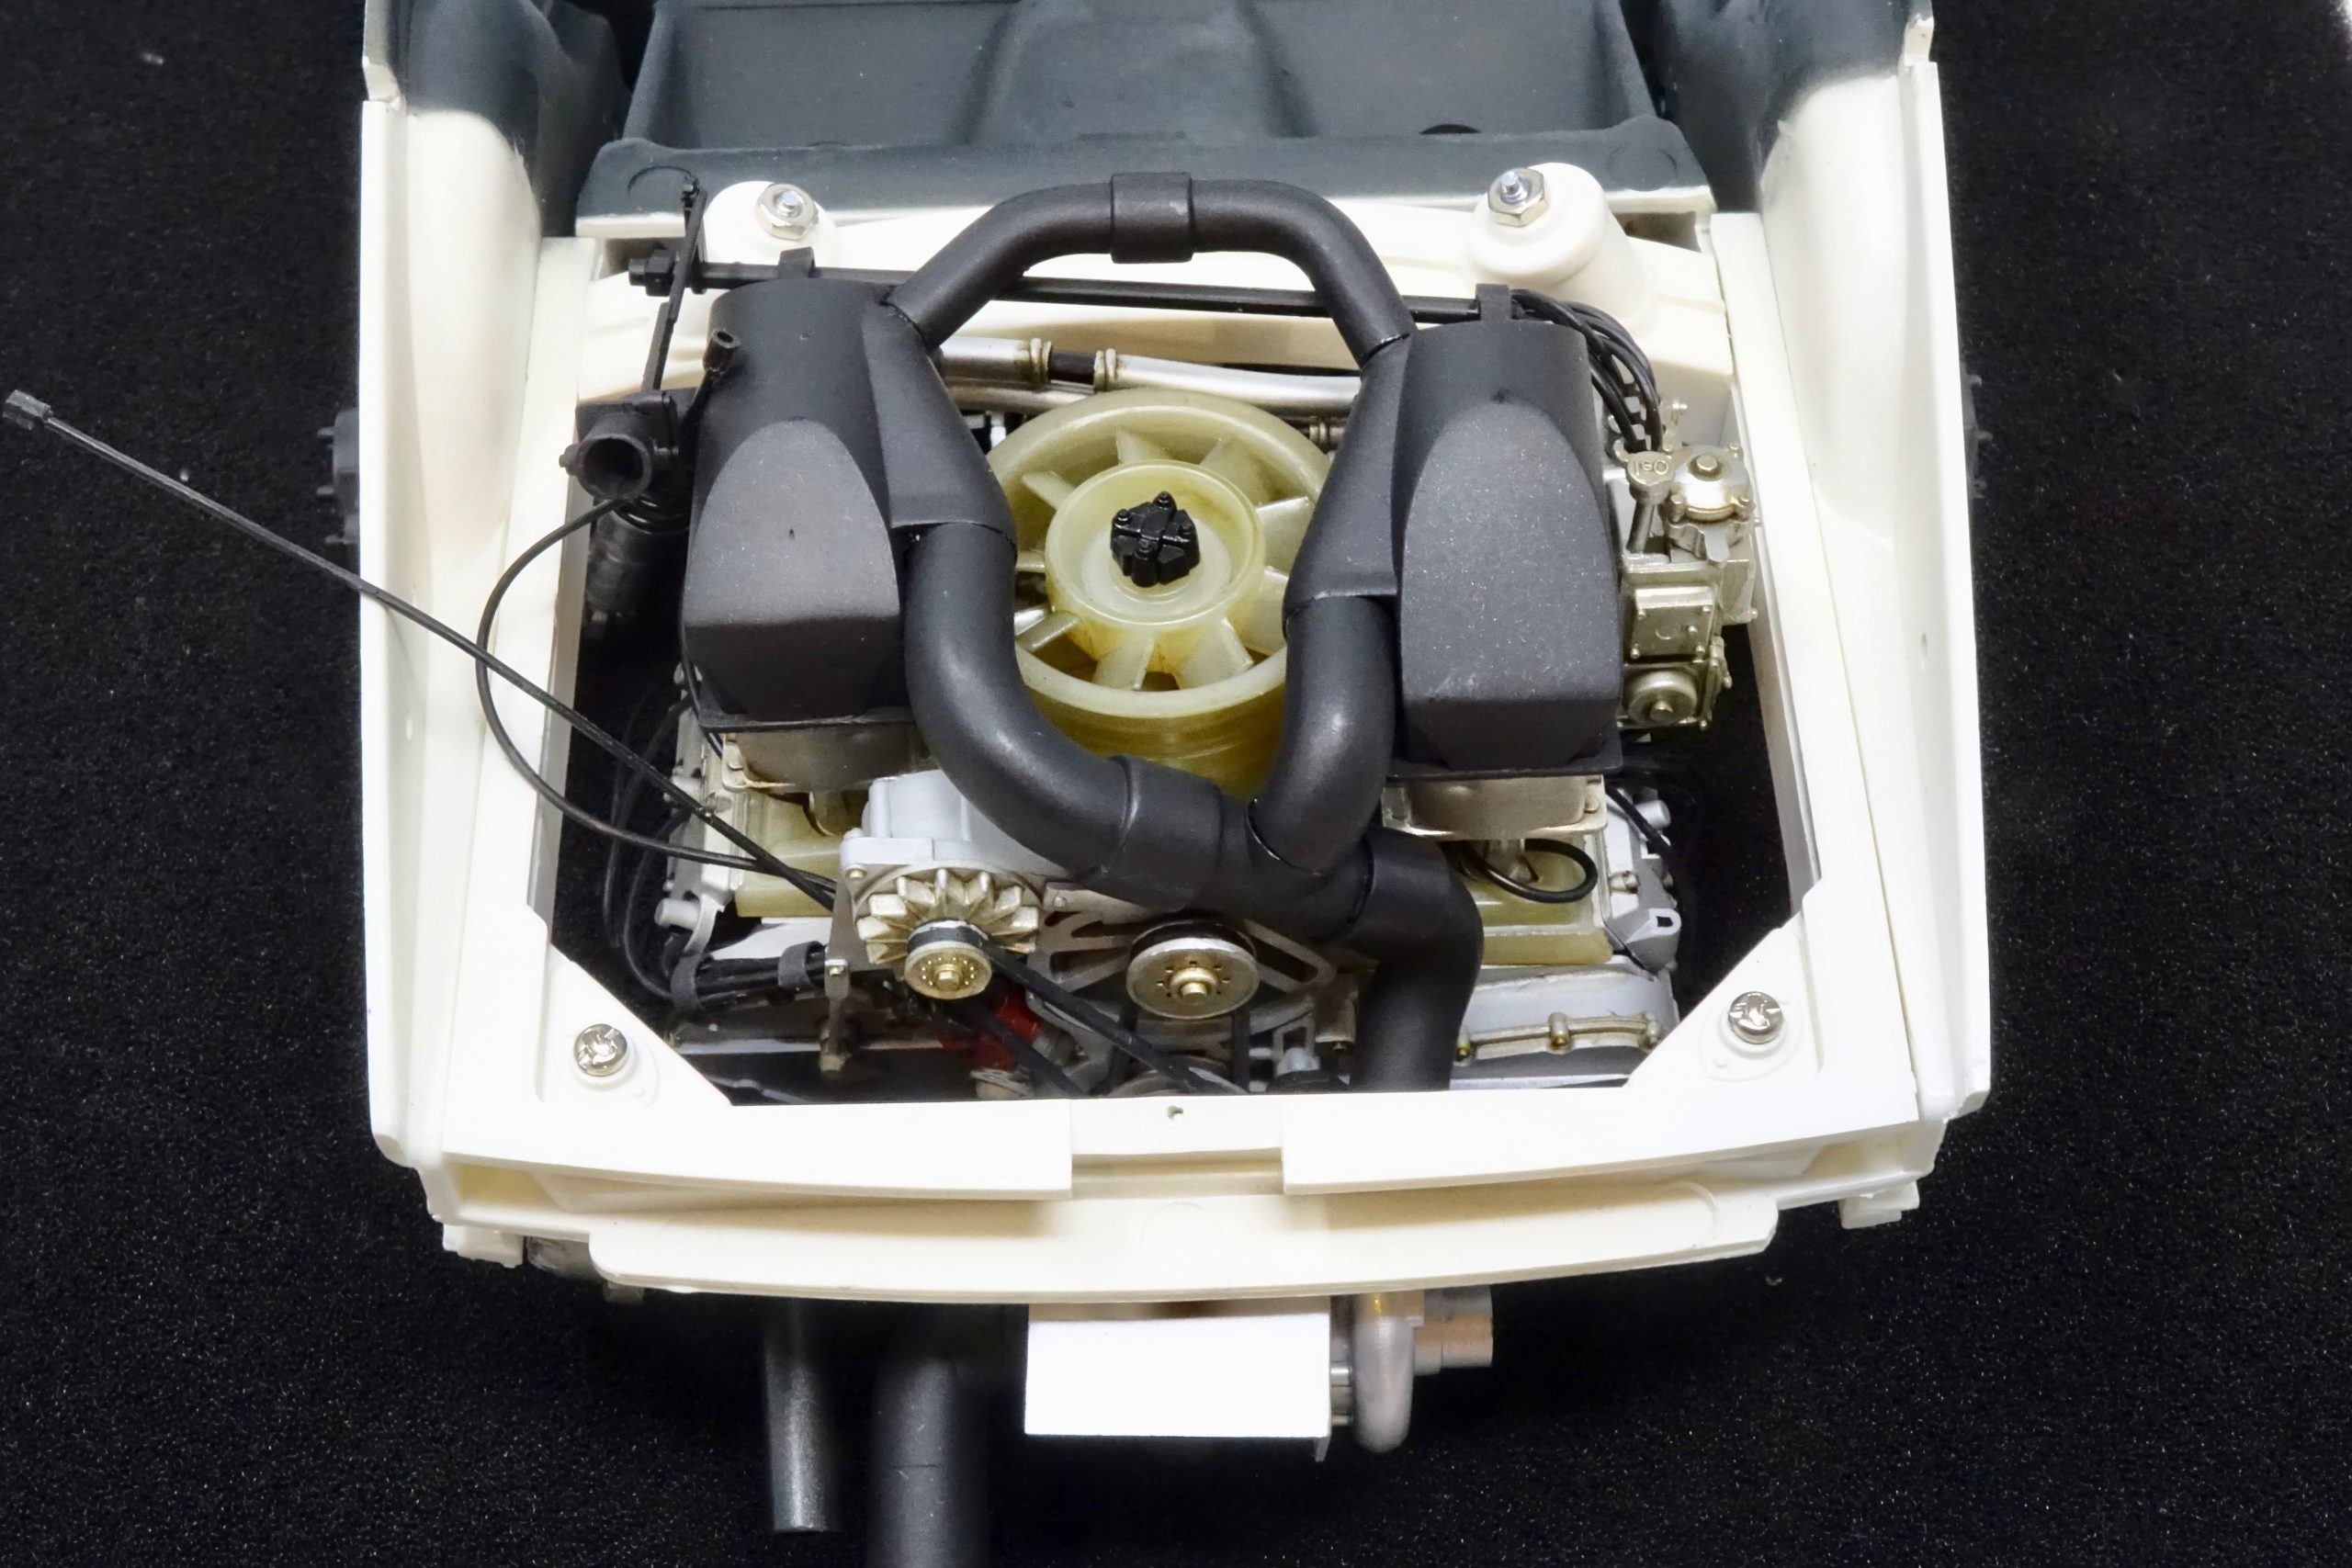
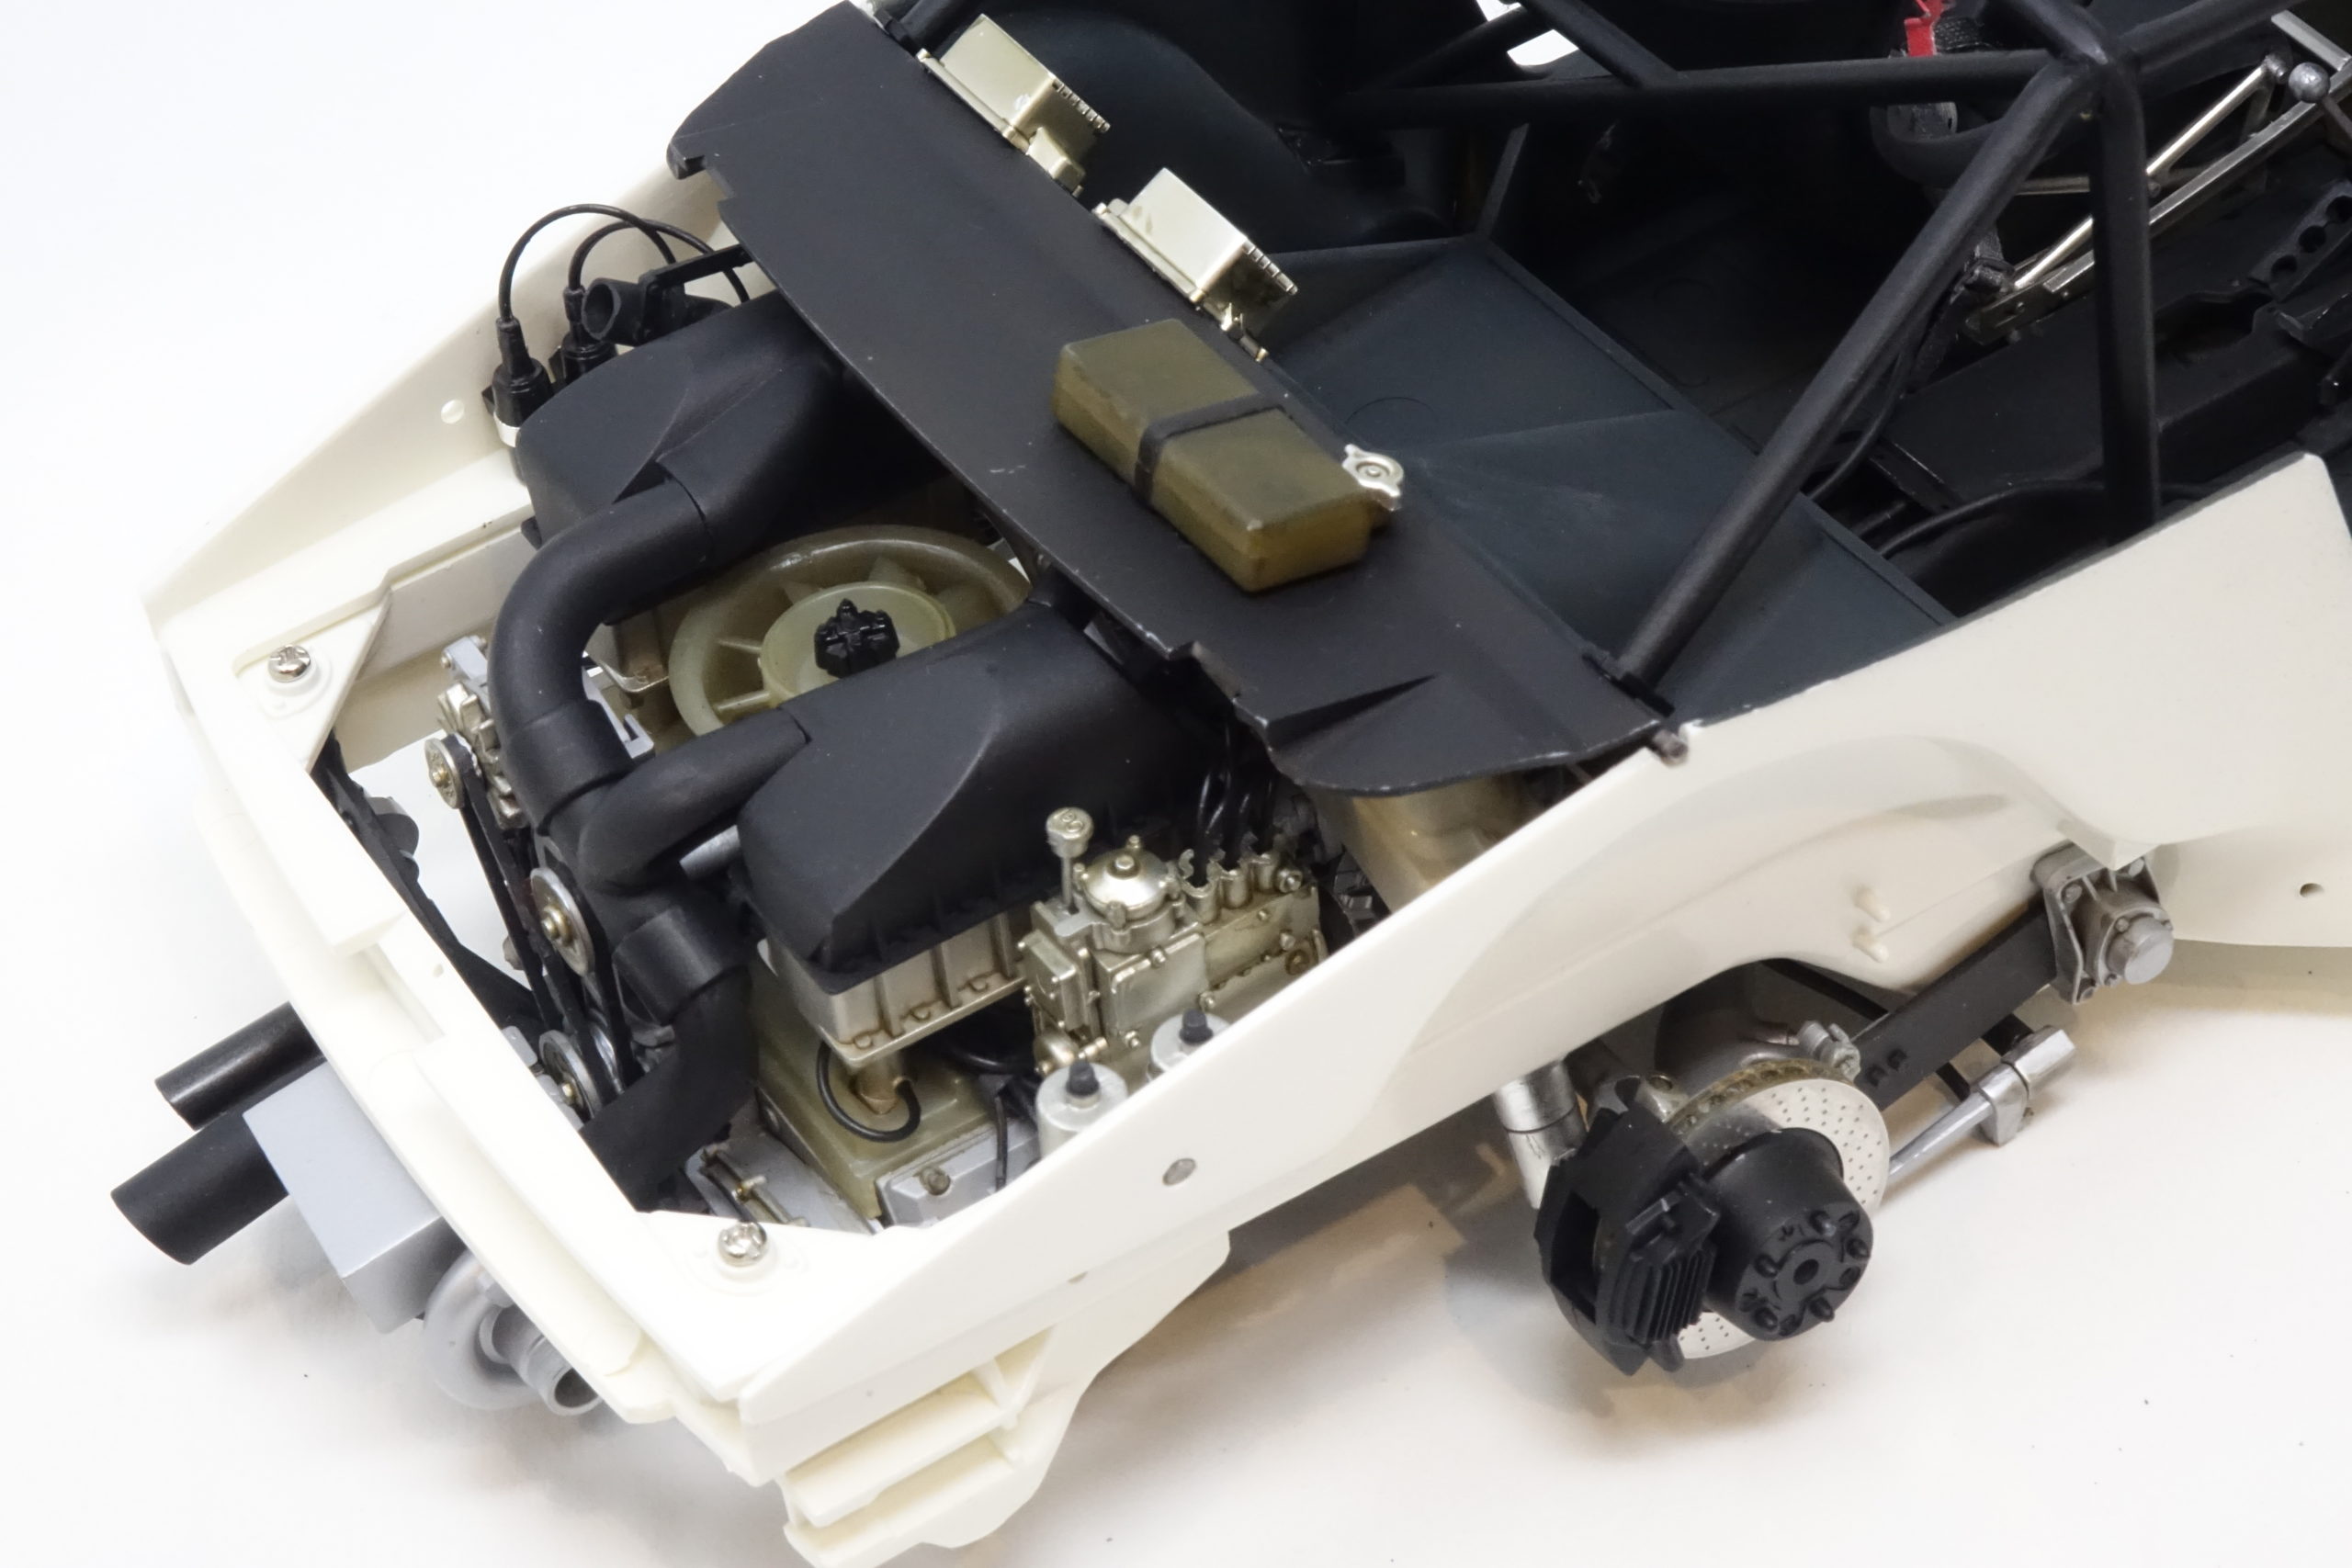
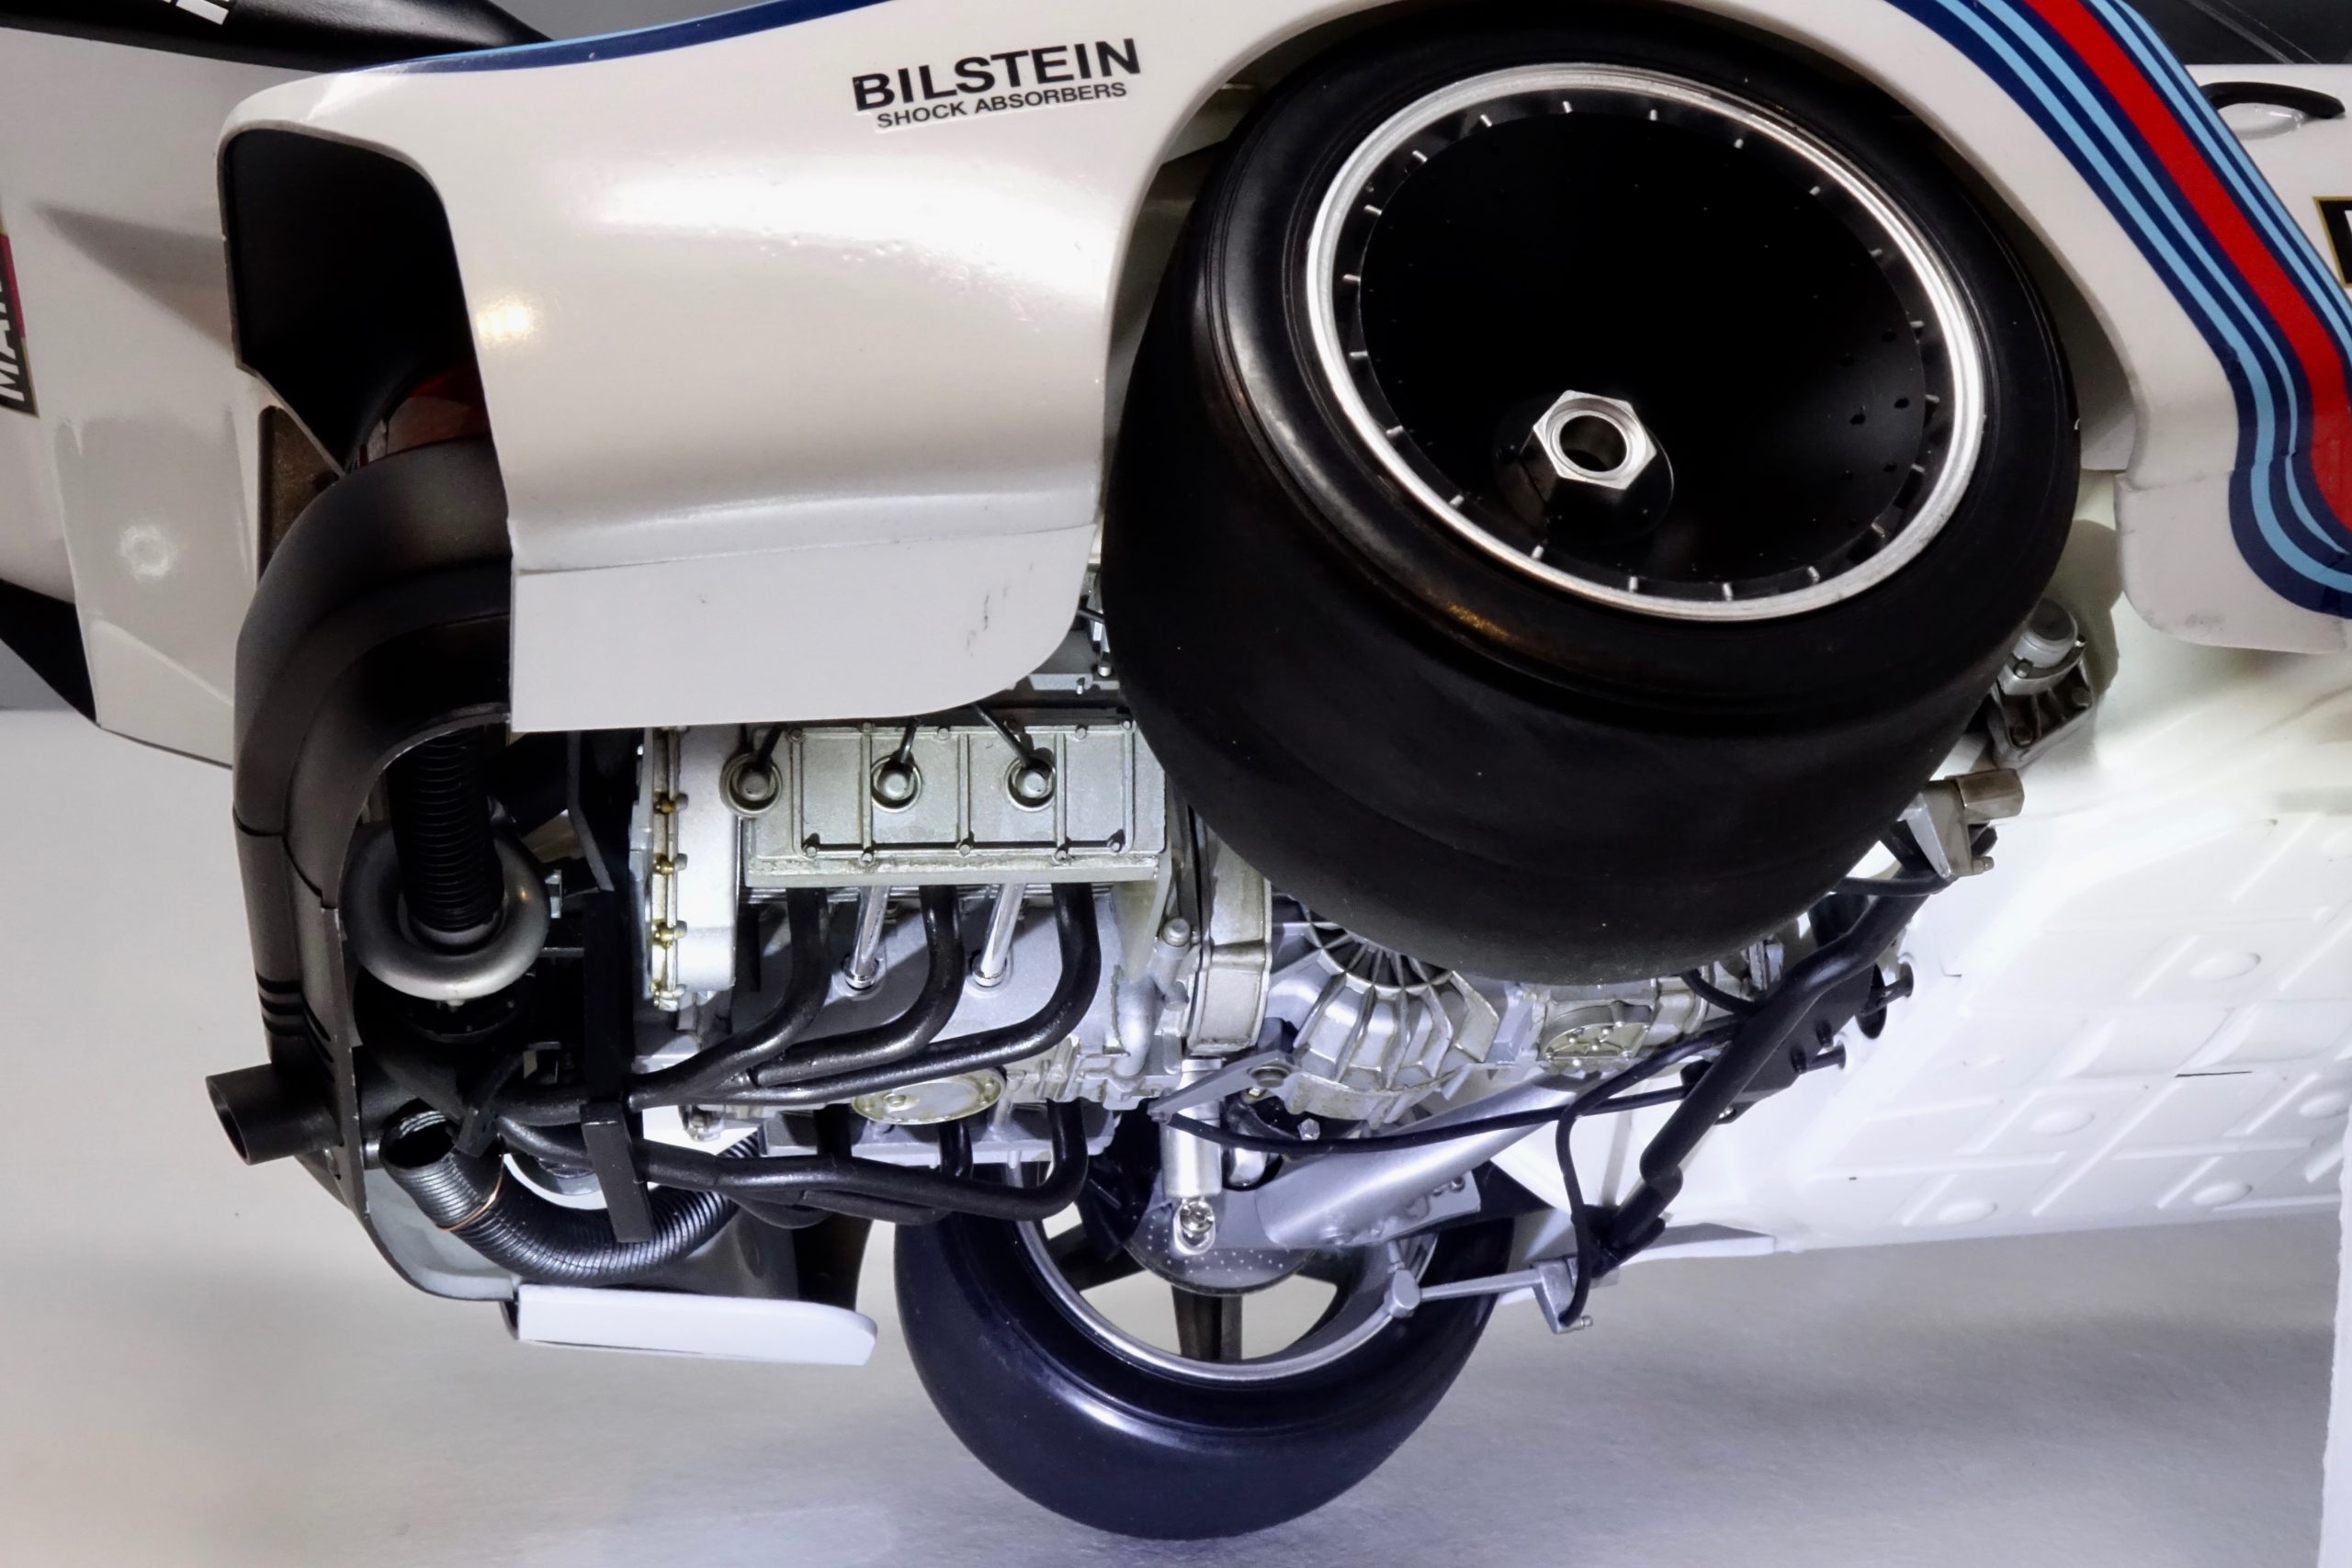
Engine Build
Couldn’t wait to start the engine build – so here we go! I’ll not spend much time describing all the steps – just a few pointers and then a photo sequence.
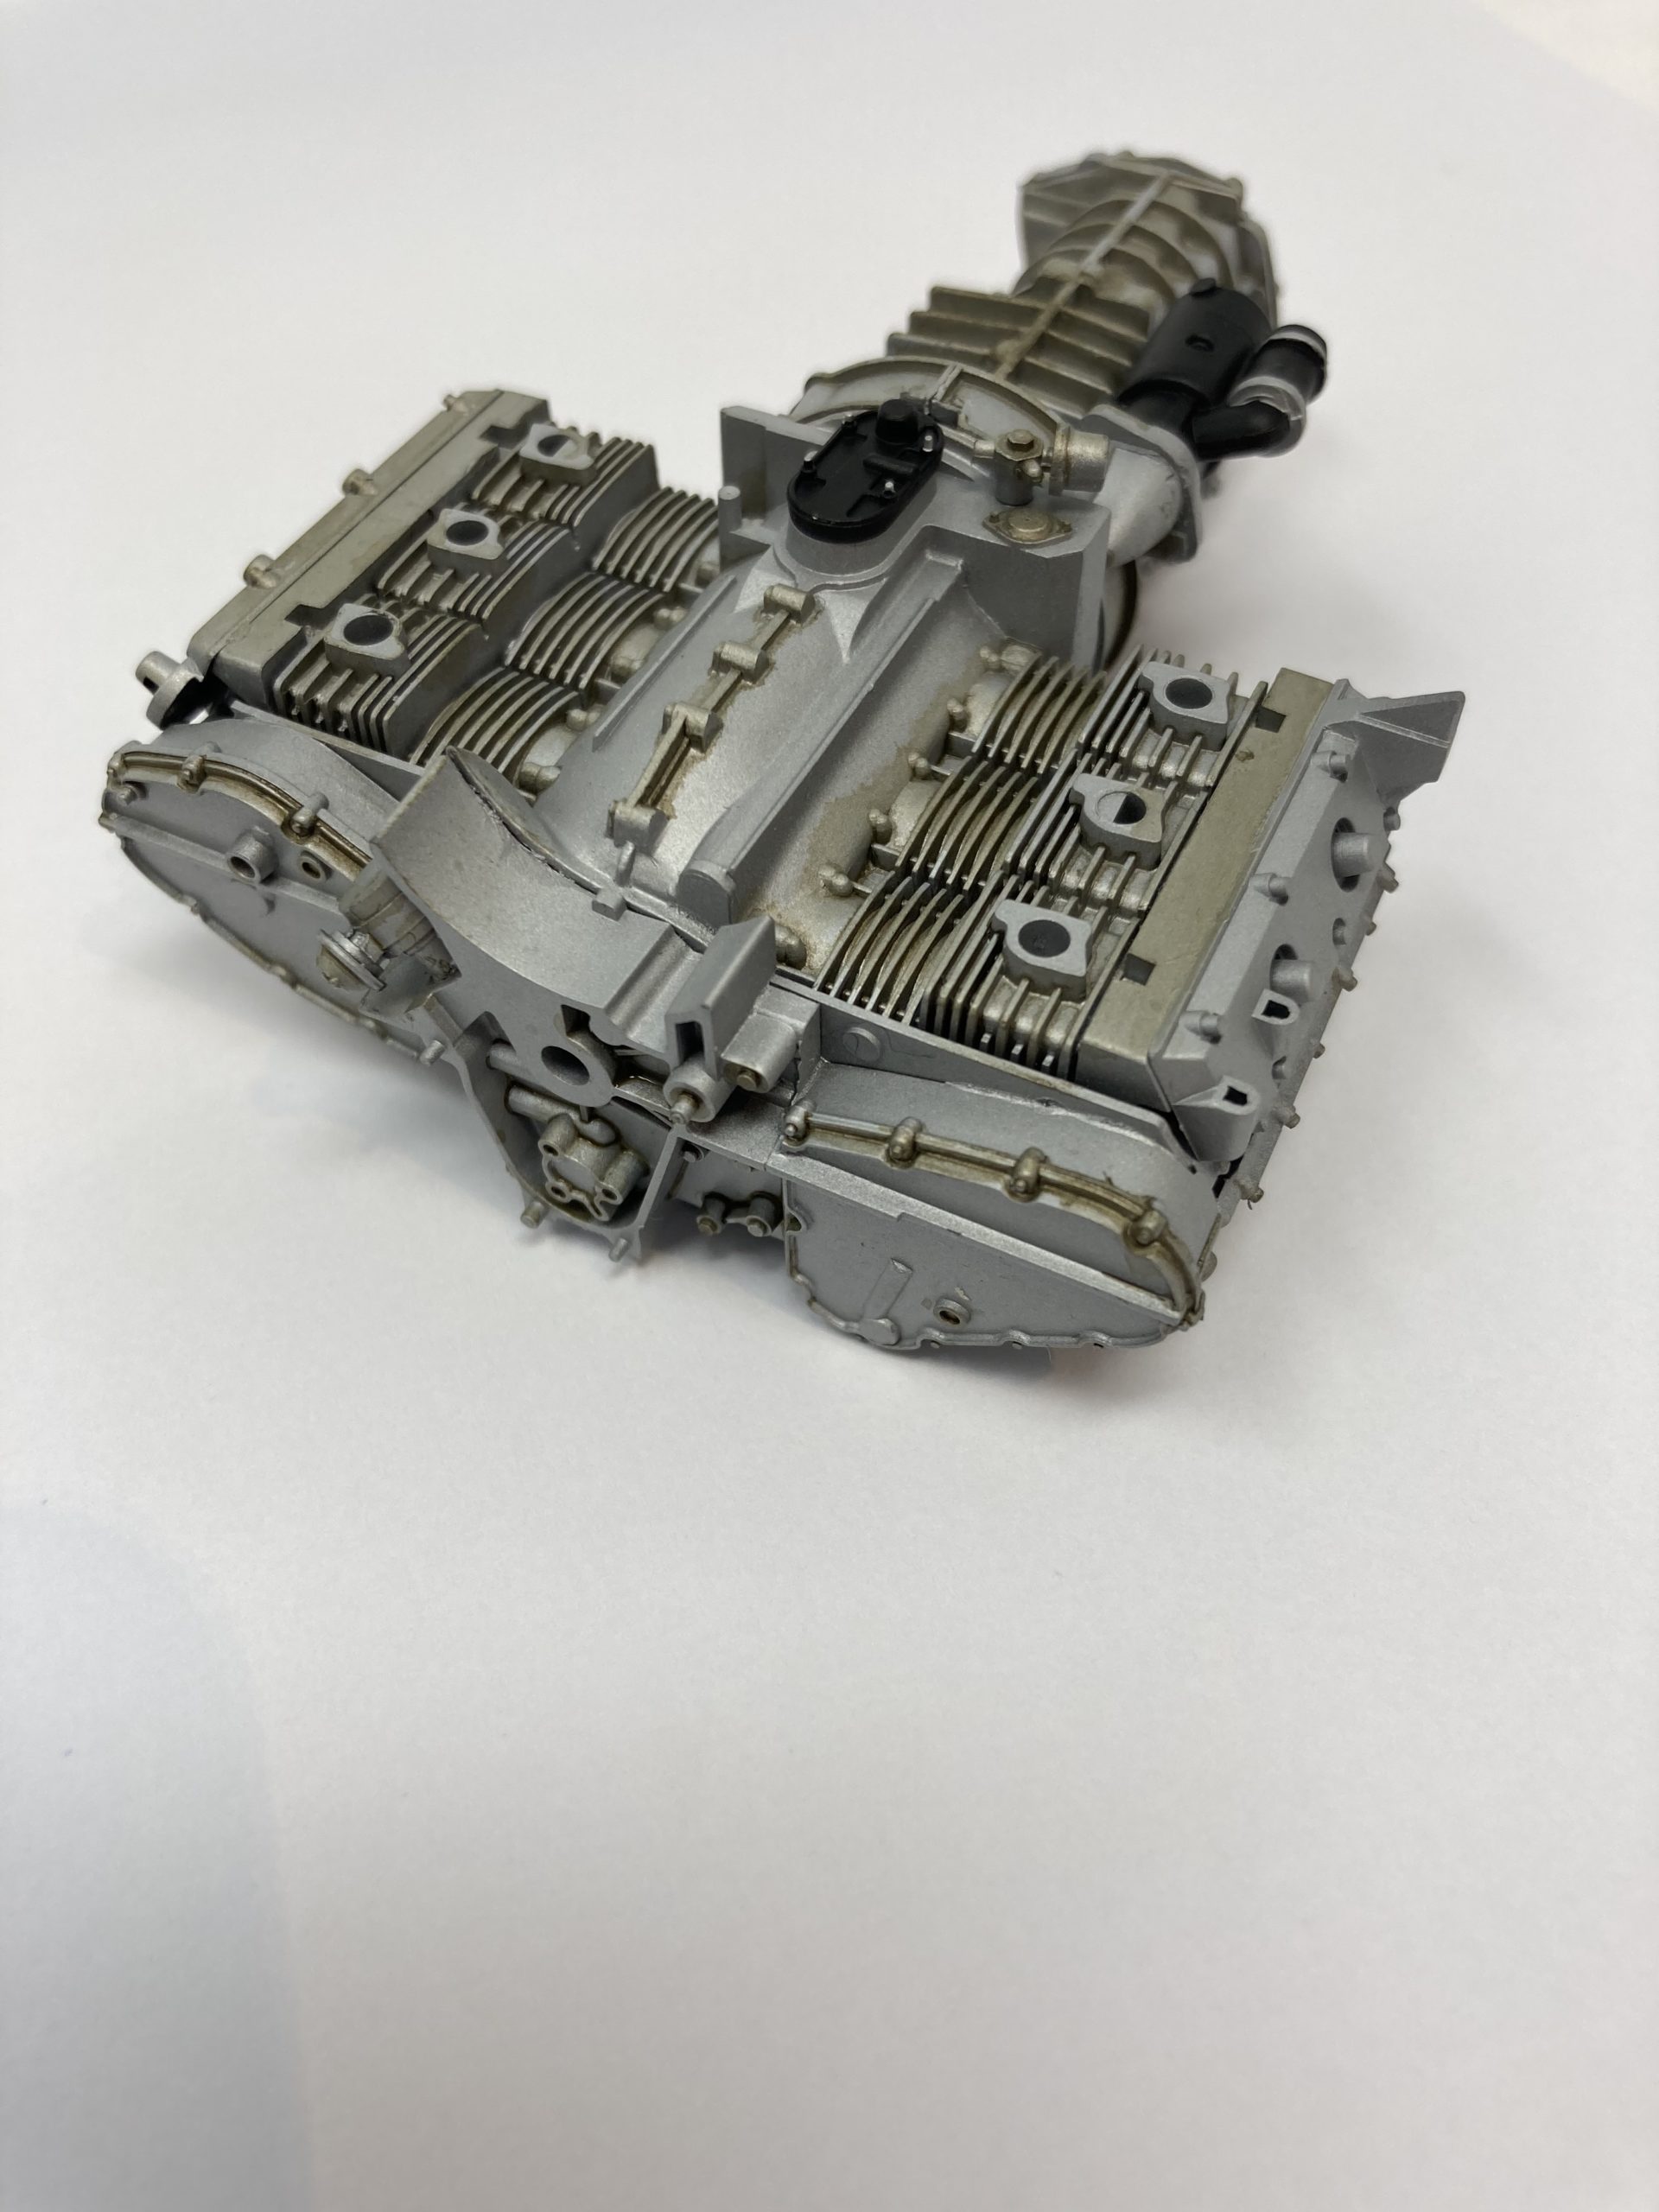
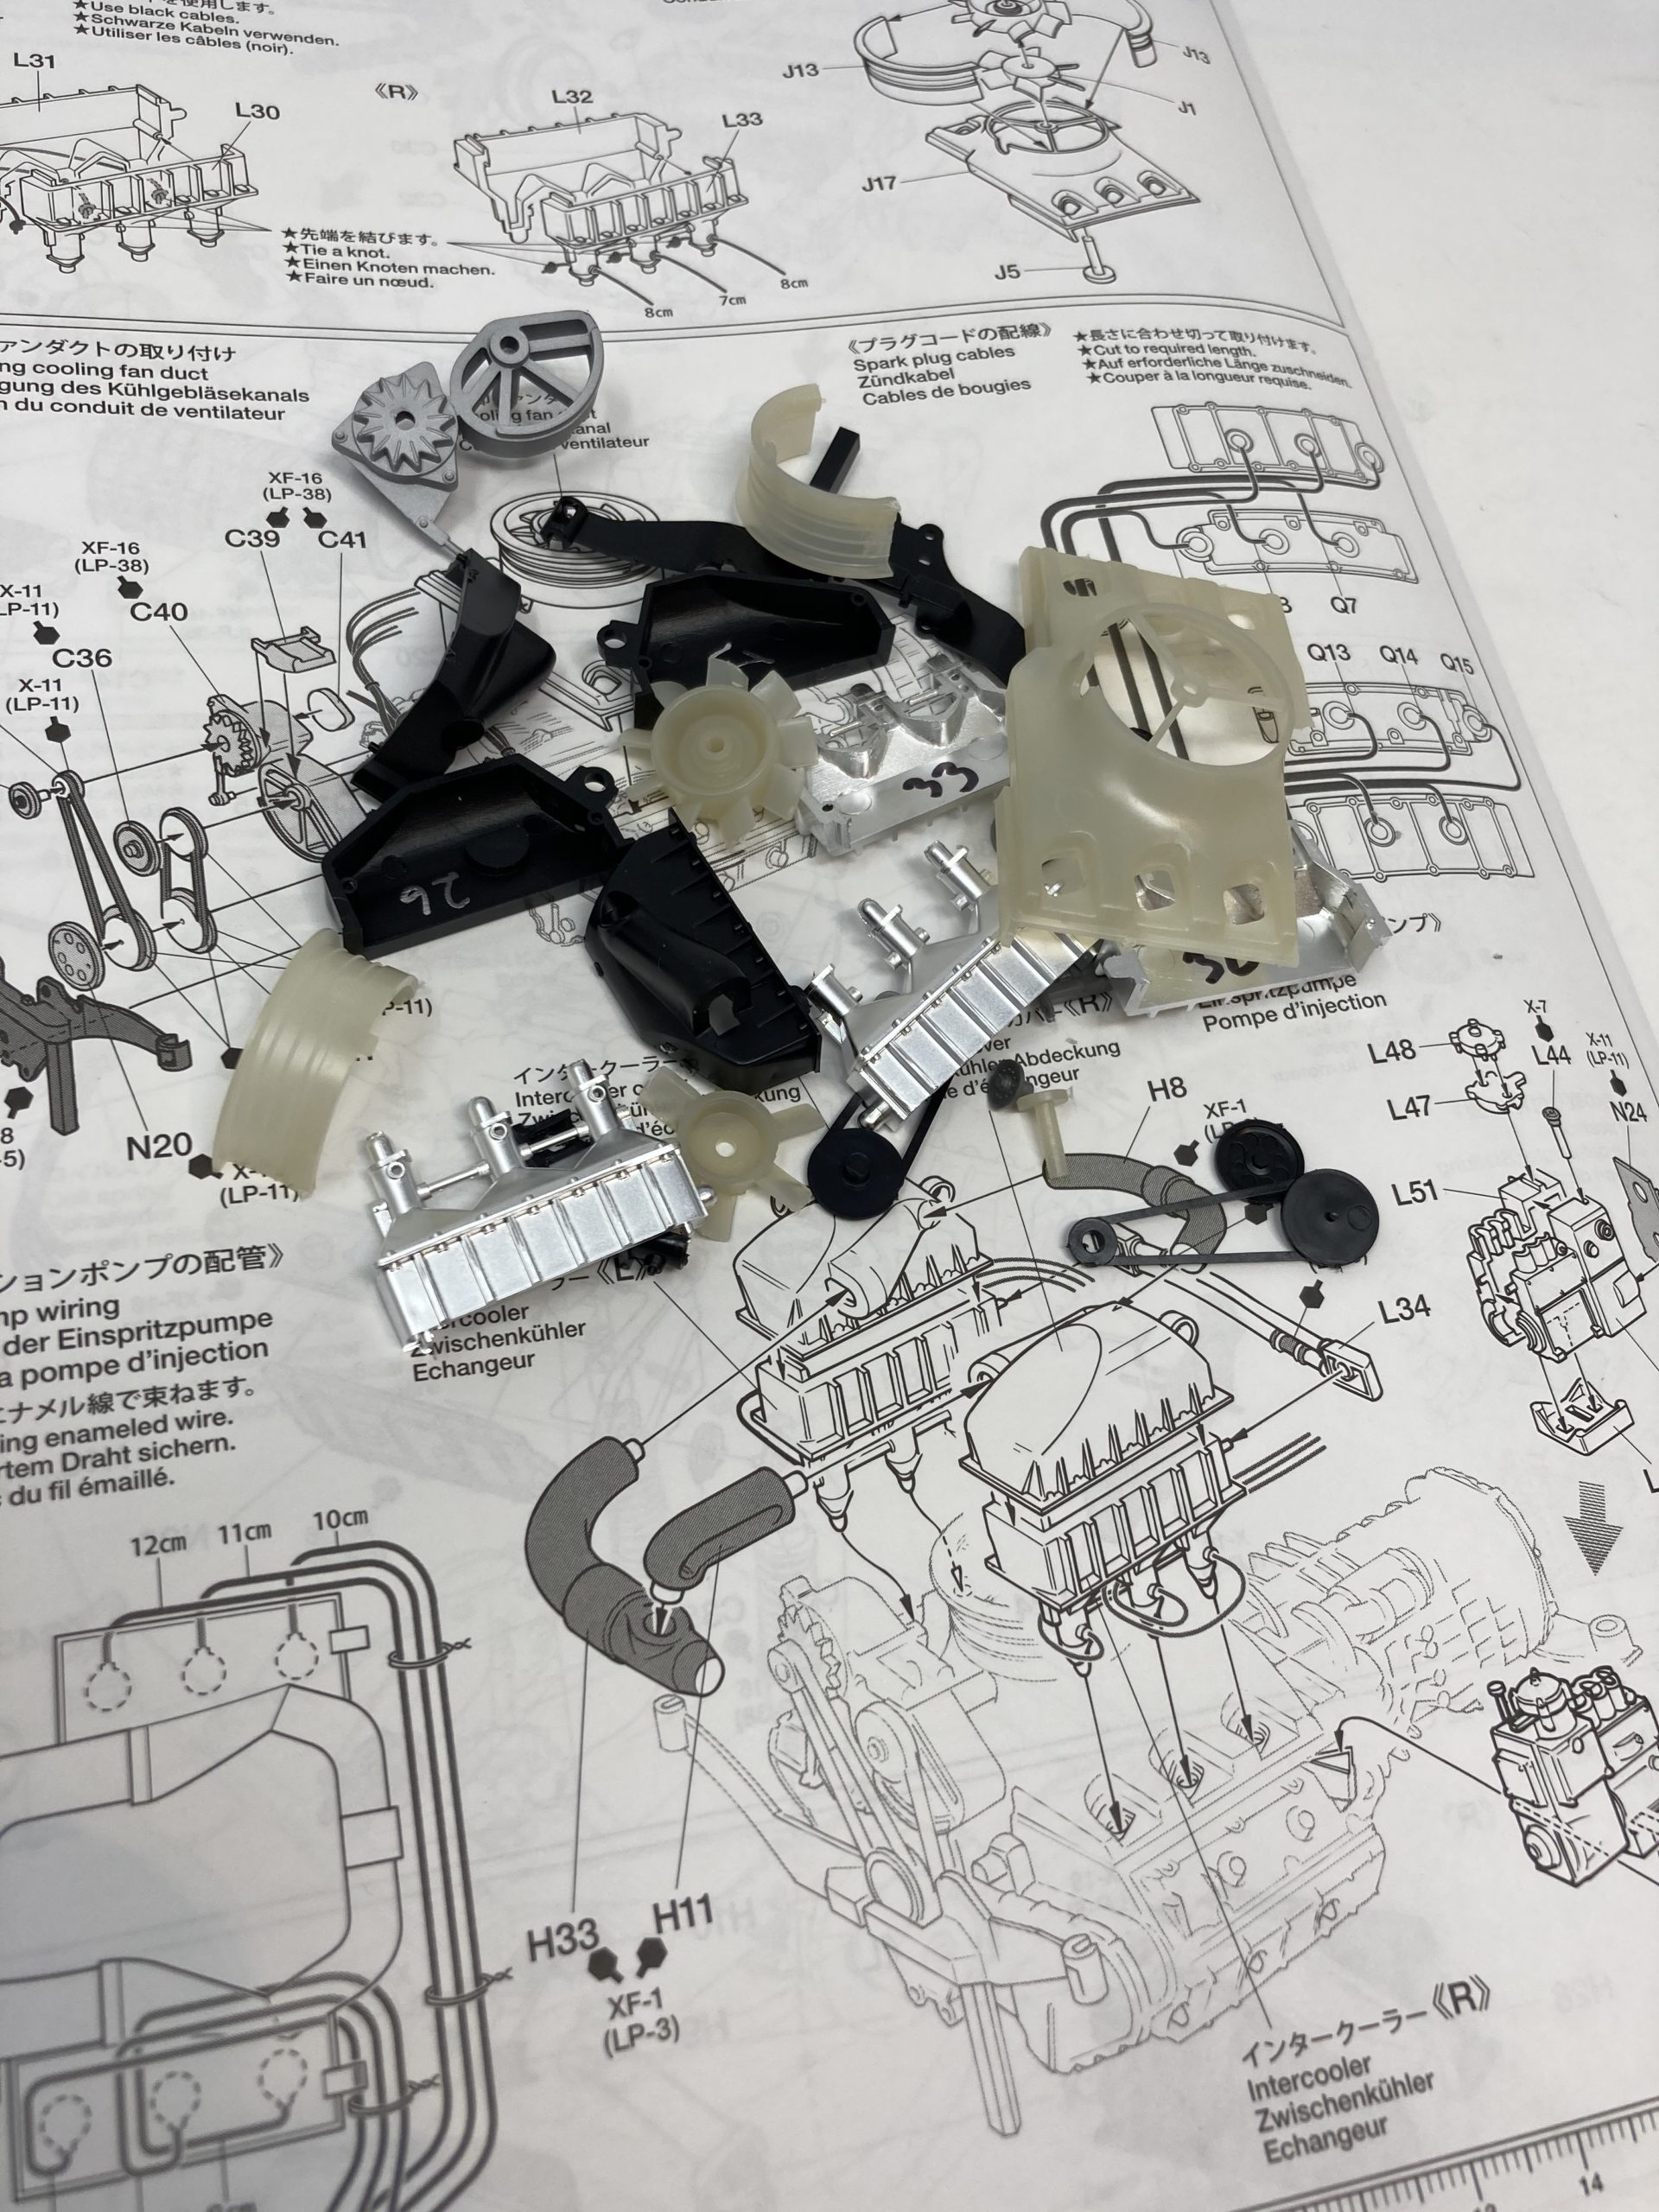
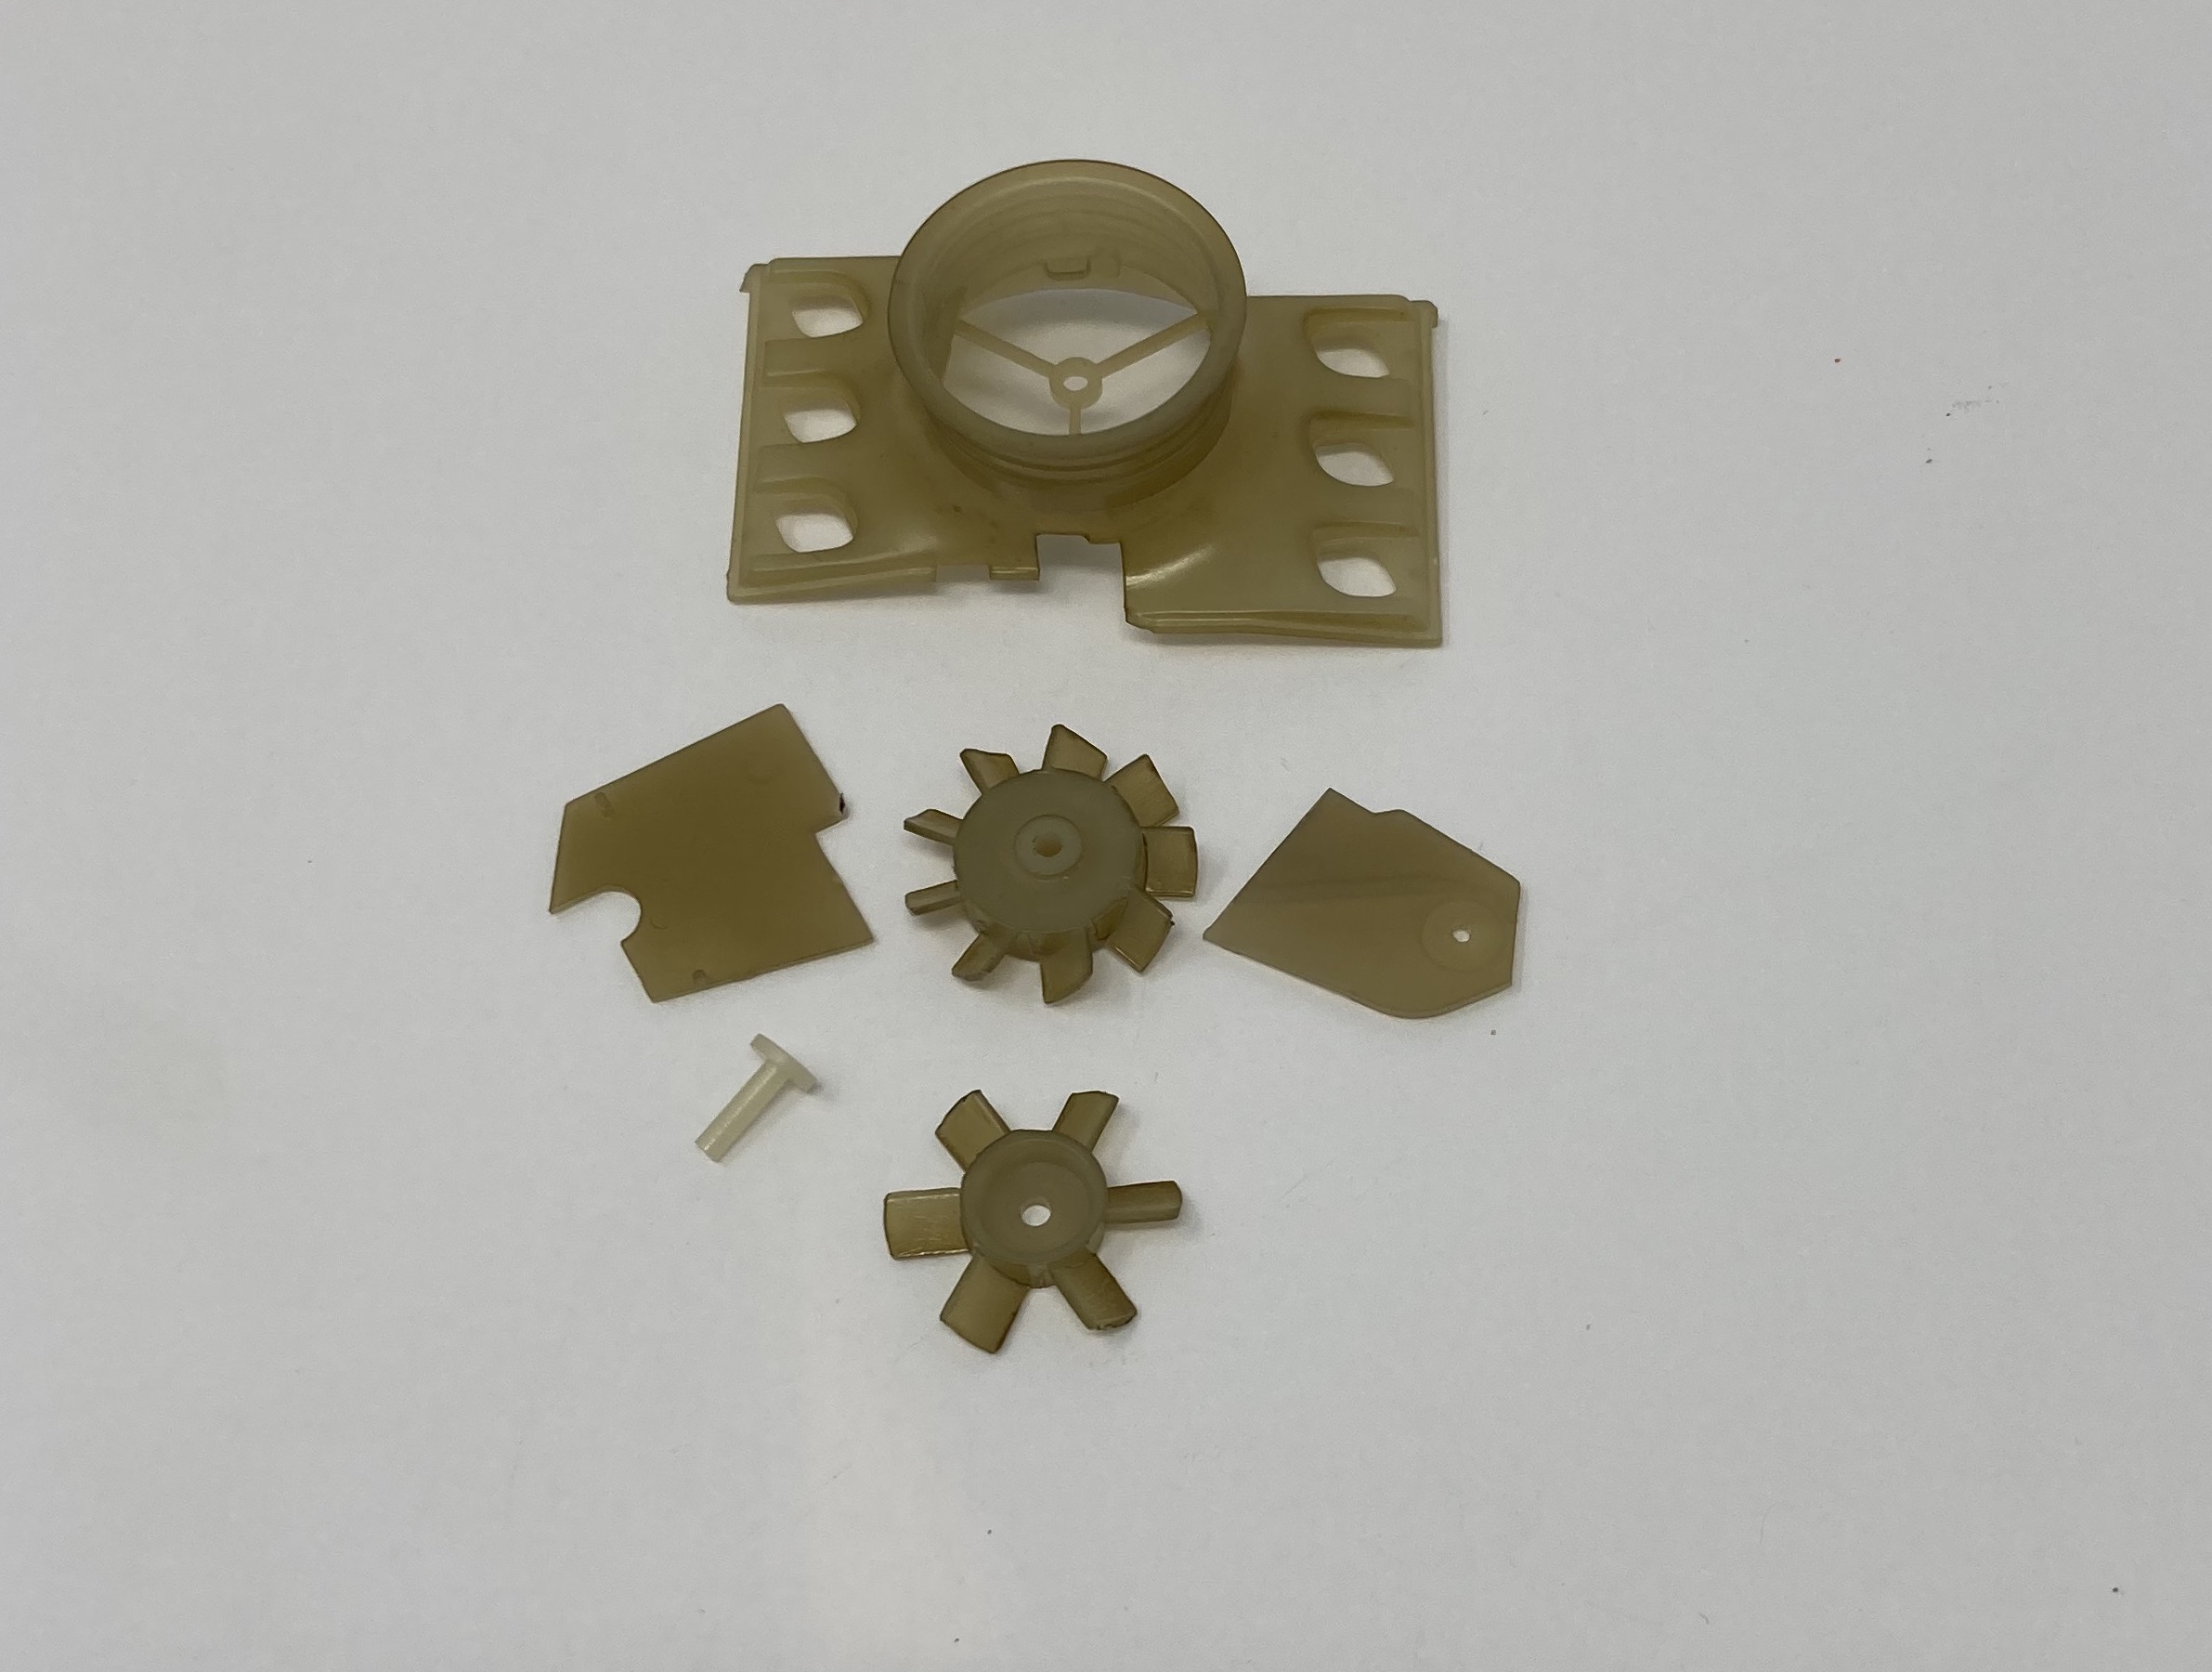
This was very straightforward, with no hitches or problems at all. The main engine/gearbox unit was assembled and then painted in Flat Alu LP38, followed by a very light flashing over with clear lacquer to allow the later oil stain wash to spread more easily Any ‘chromed parts, (except the fuel injection pump unit) were dechromed and painted in a range of metallic finishes. Oil stain wash was used to highlight the details on all the engine/gearbox external surfaces. Bolt heads were picked out in dilute Clear Orange. The exhaust manifolds were done in a mixture of Gun Metal LP19, Metallic Grey LP61 and Black – with some Tamiya blue weathering powder added later. Gloss Alu LP70 produced a super finish on the heat shield plate above the turbo. The translucent cooling fan shields were flatted down with abrasive paste and then given a few uneven, light coats of the oil stain wash mix.


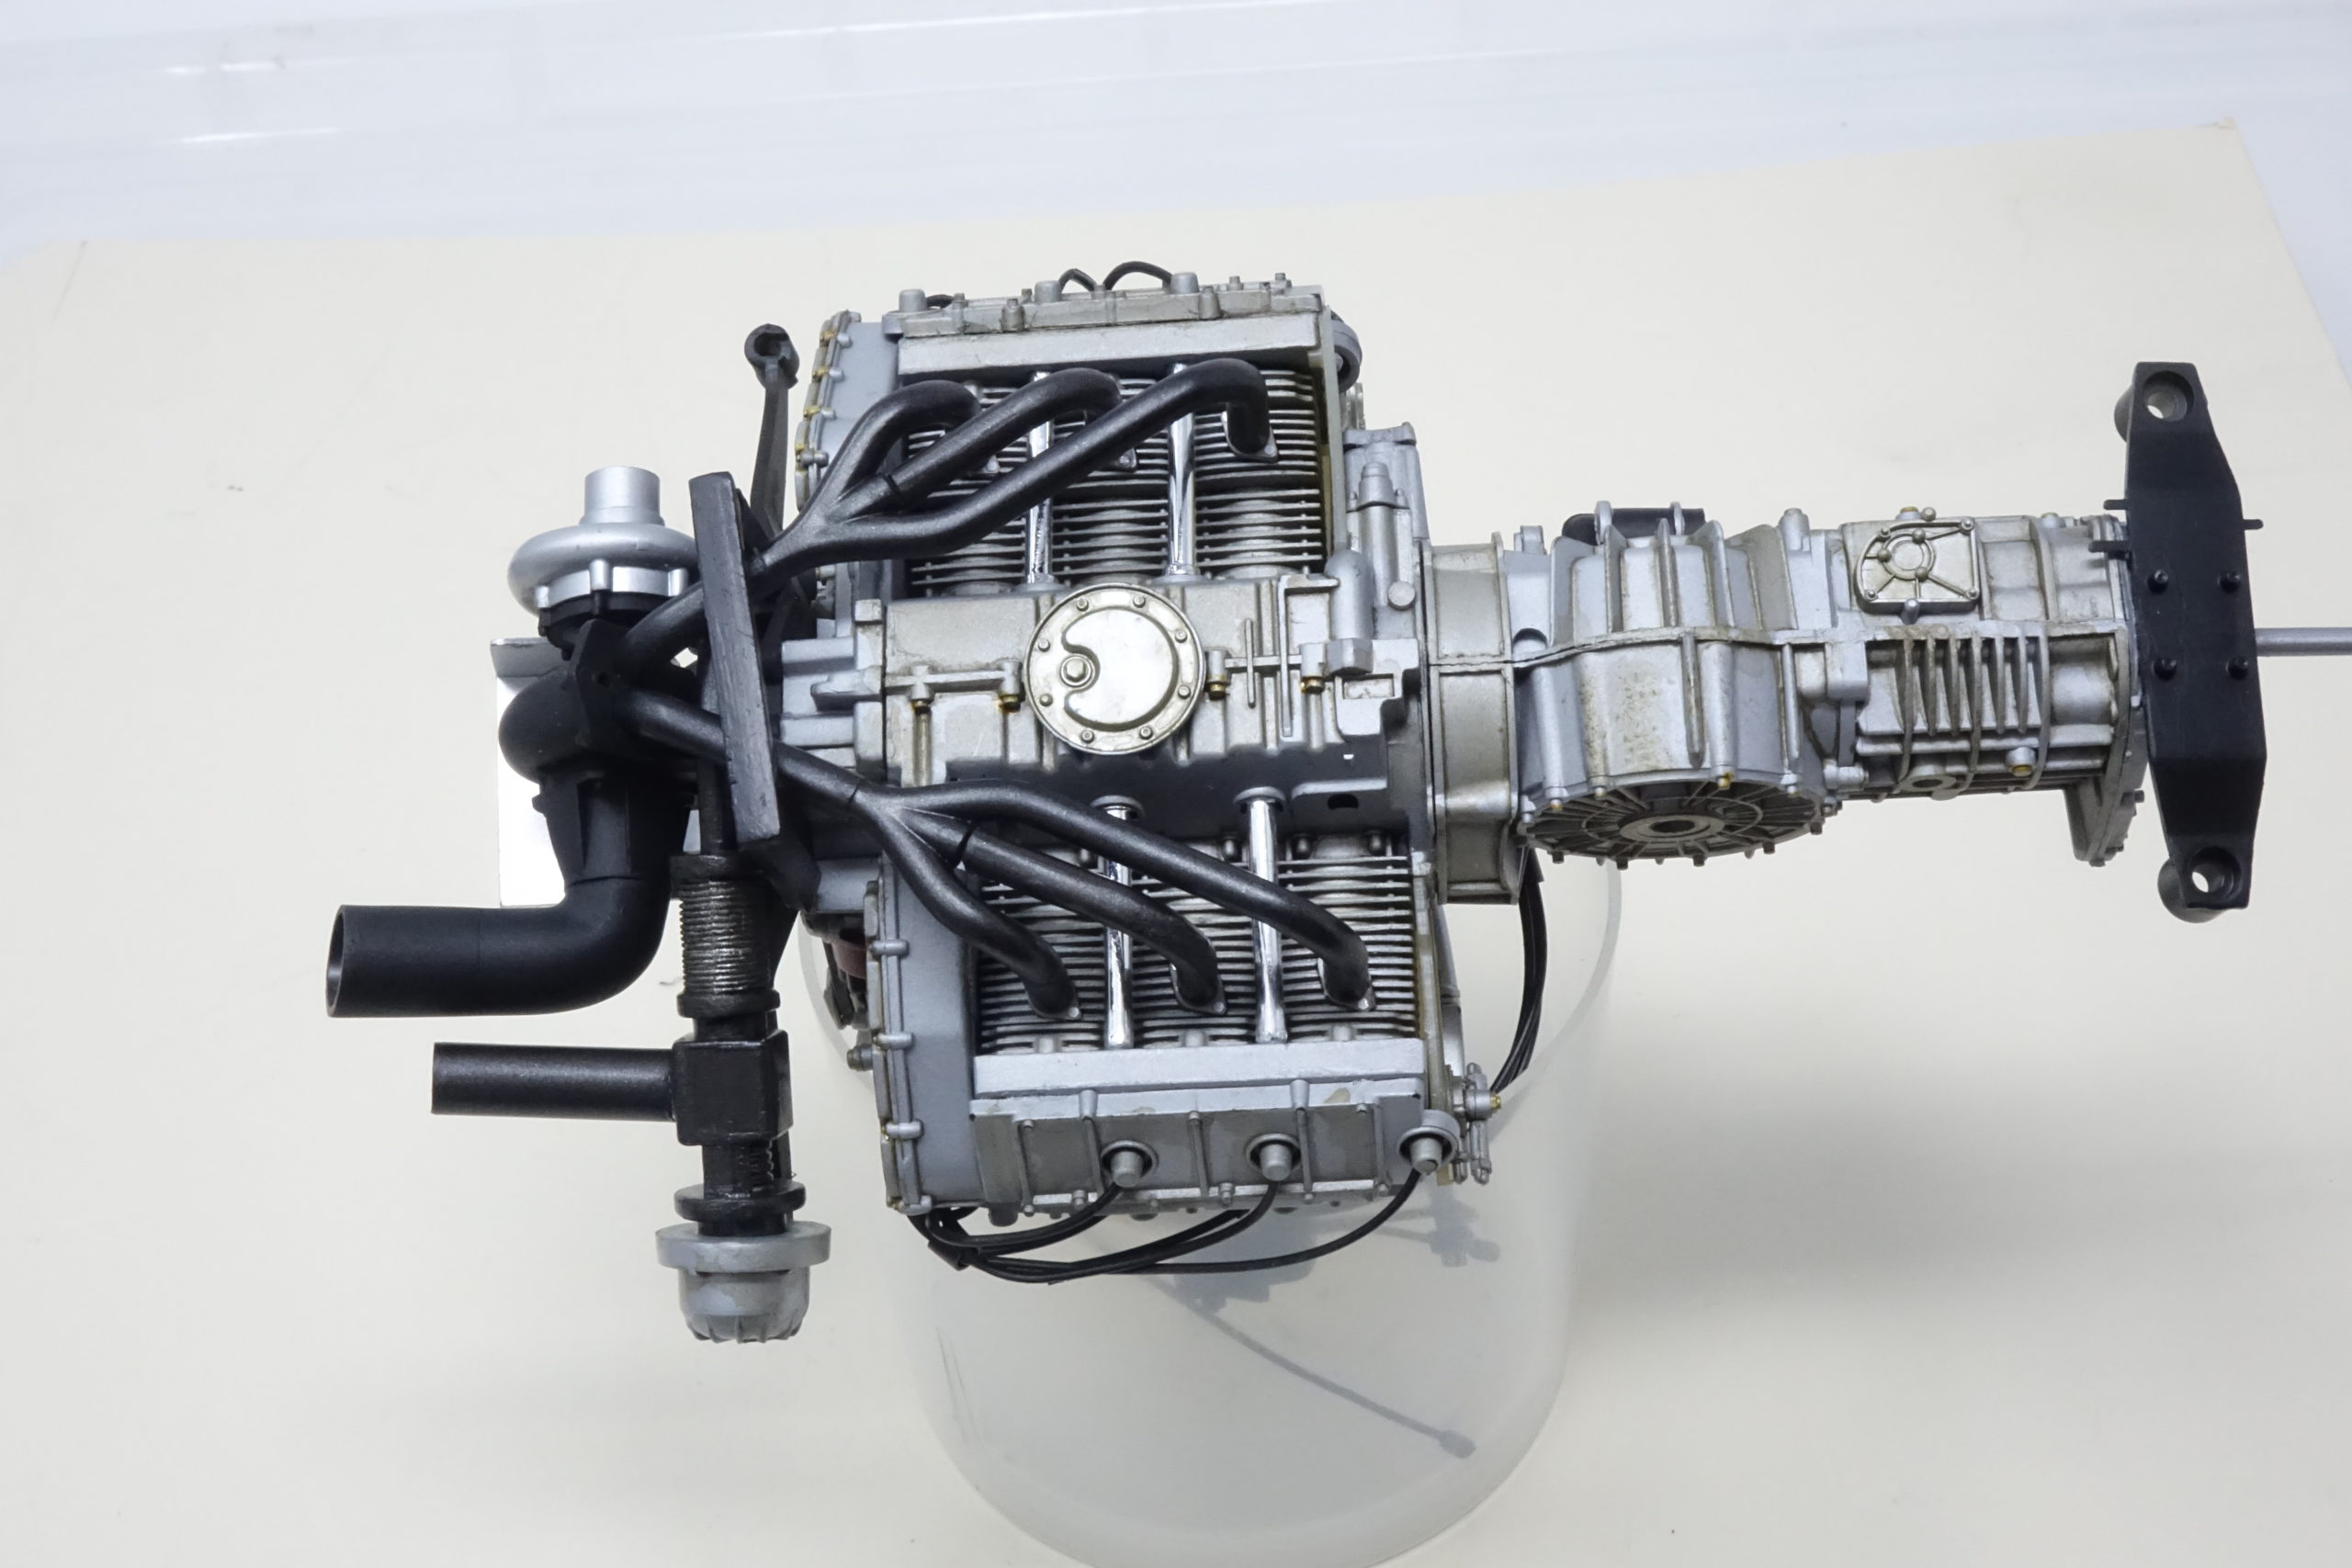
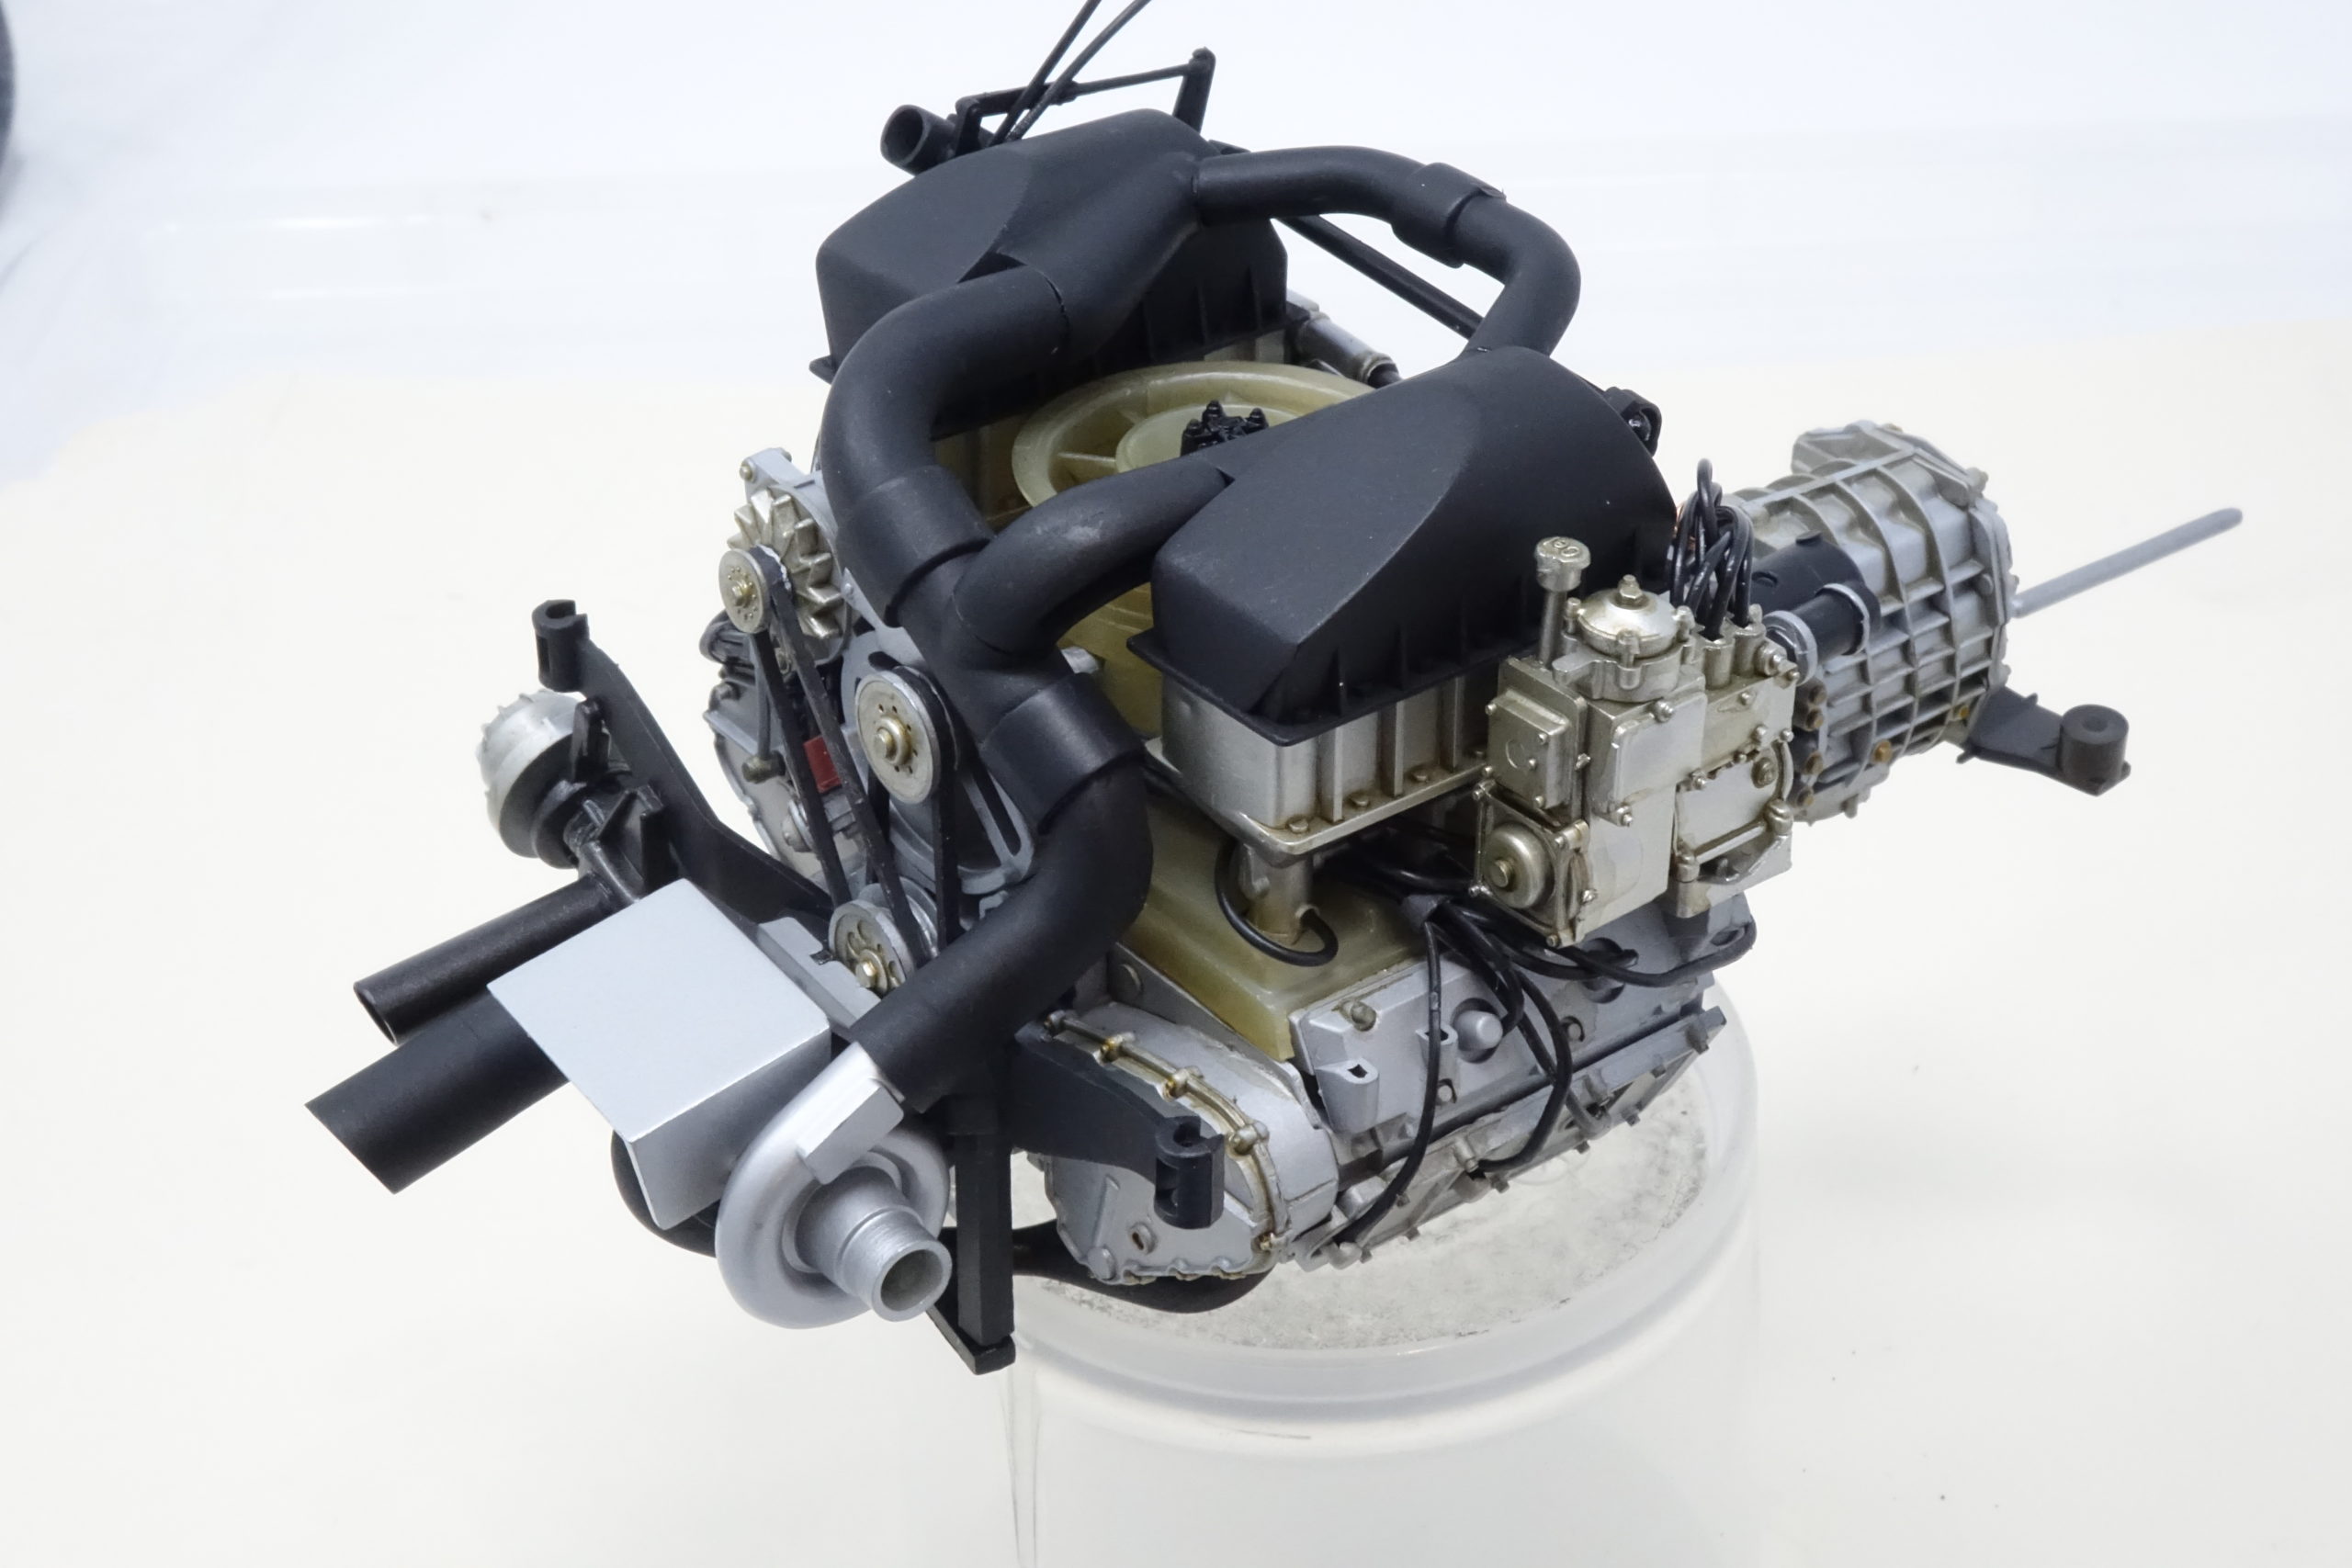
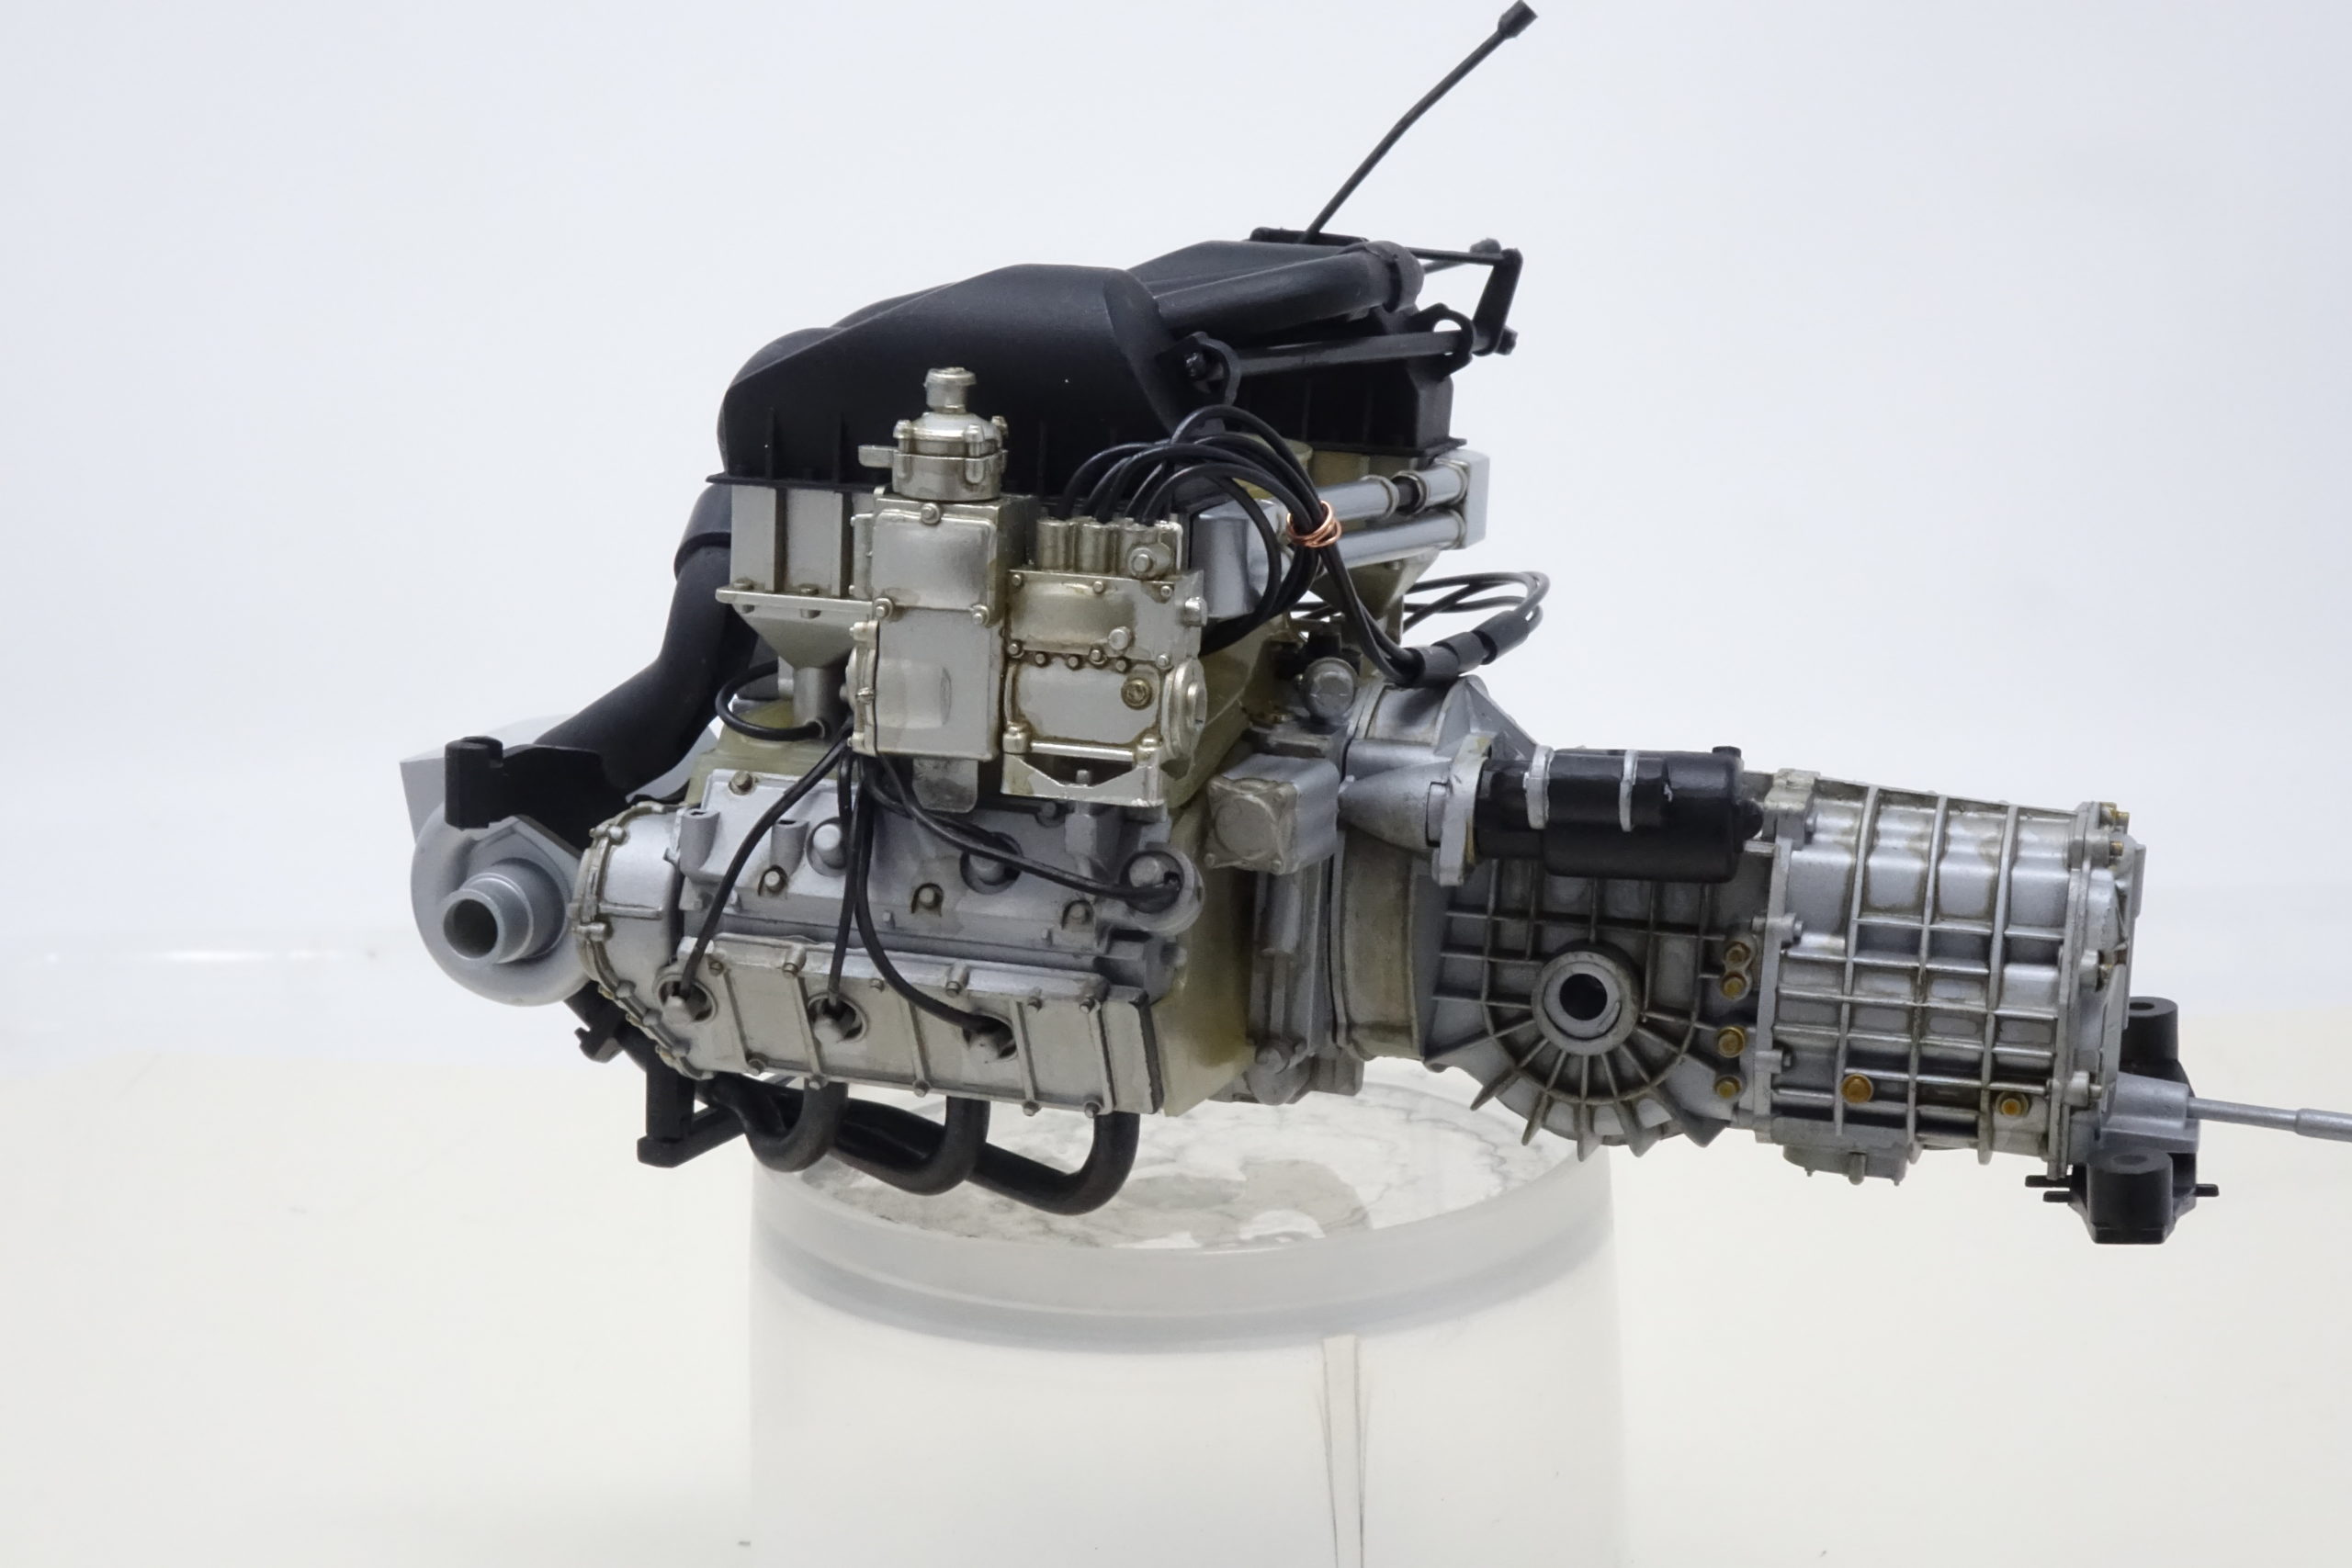
Engine fitting
All fits quite easily – but care needed with pre-positioning drive shafts so as not to dislocate the fit into to the hubs. Took several attempts. Glue not required in shafts – they are held in pace as the engine mounting points are tightened up. Also a good idea to make sure that the gear change shaft is fitted before the engine gearbox is installed – it passes through a small hole in the rear bulkhead and into the transmission tunnel. Easy to miss – I did!! But, being Tamiya, all the screw holes and other fixings all line up perfectly.
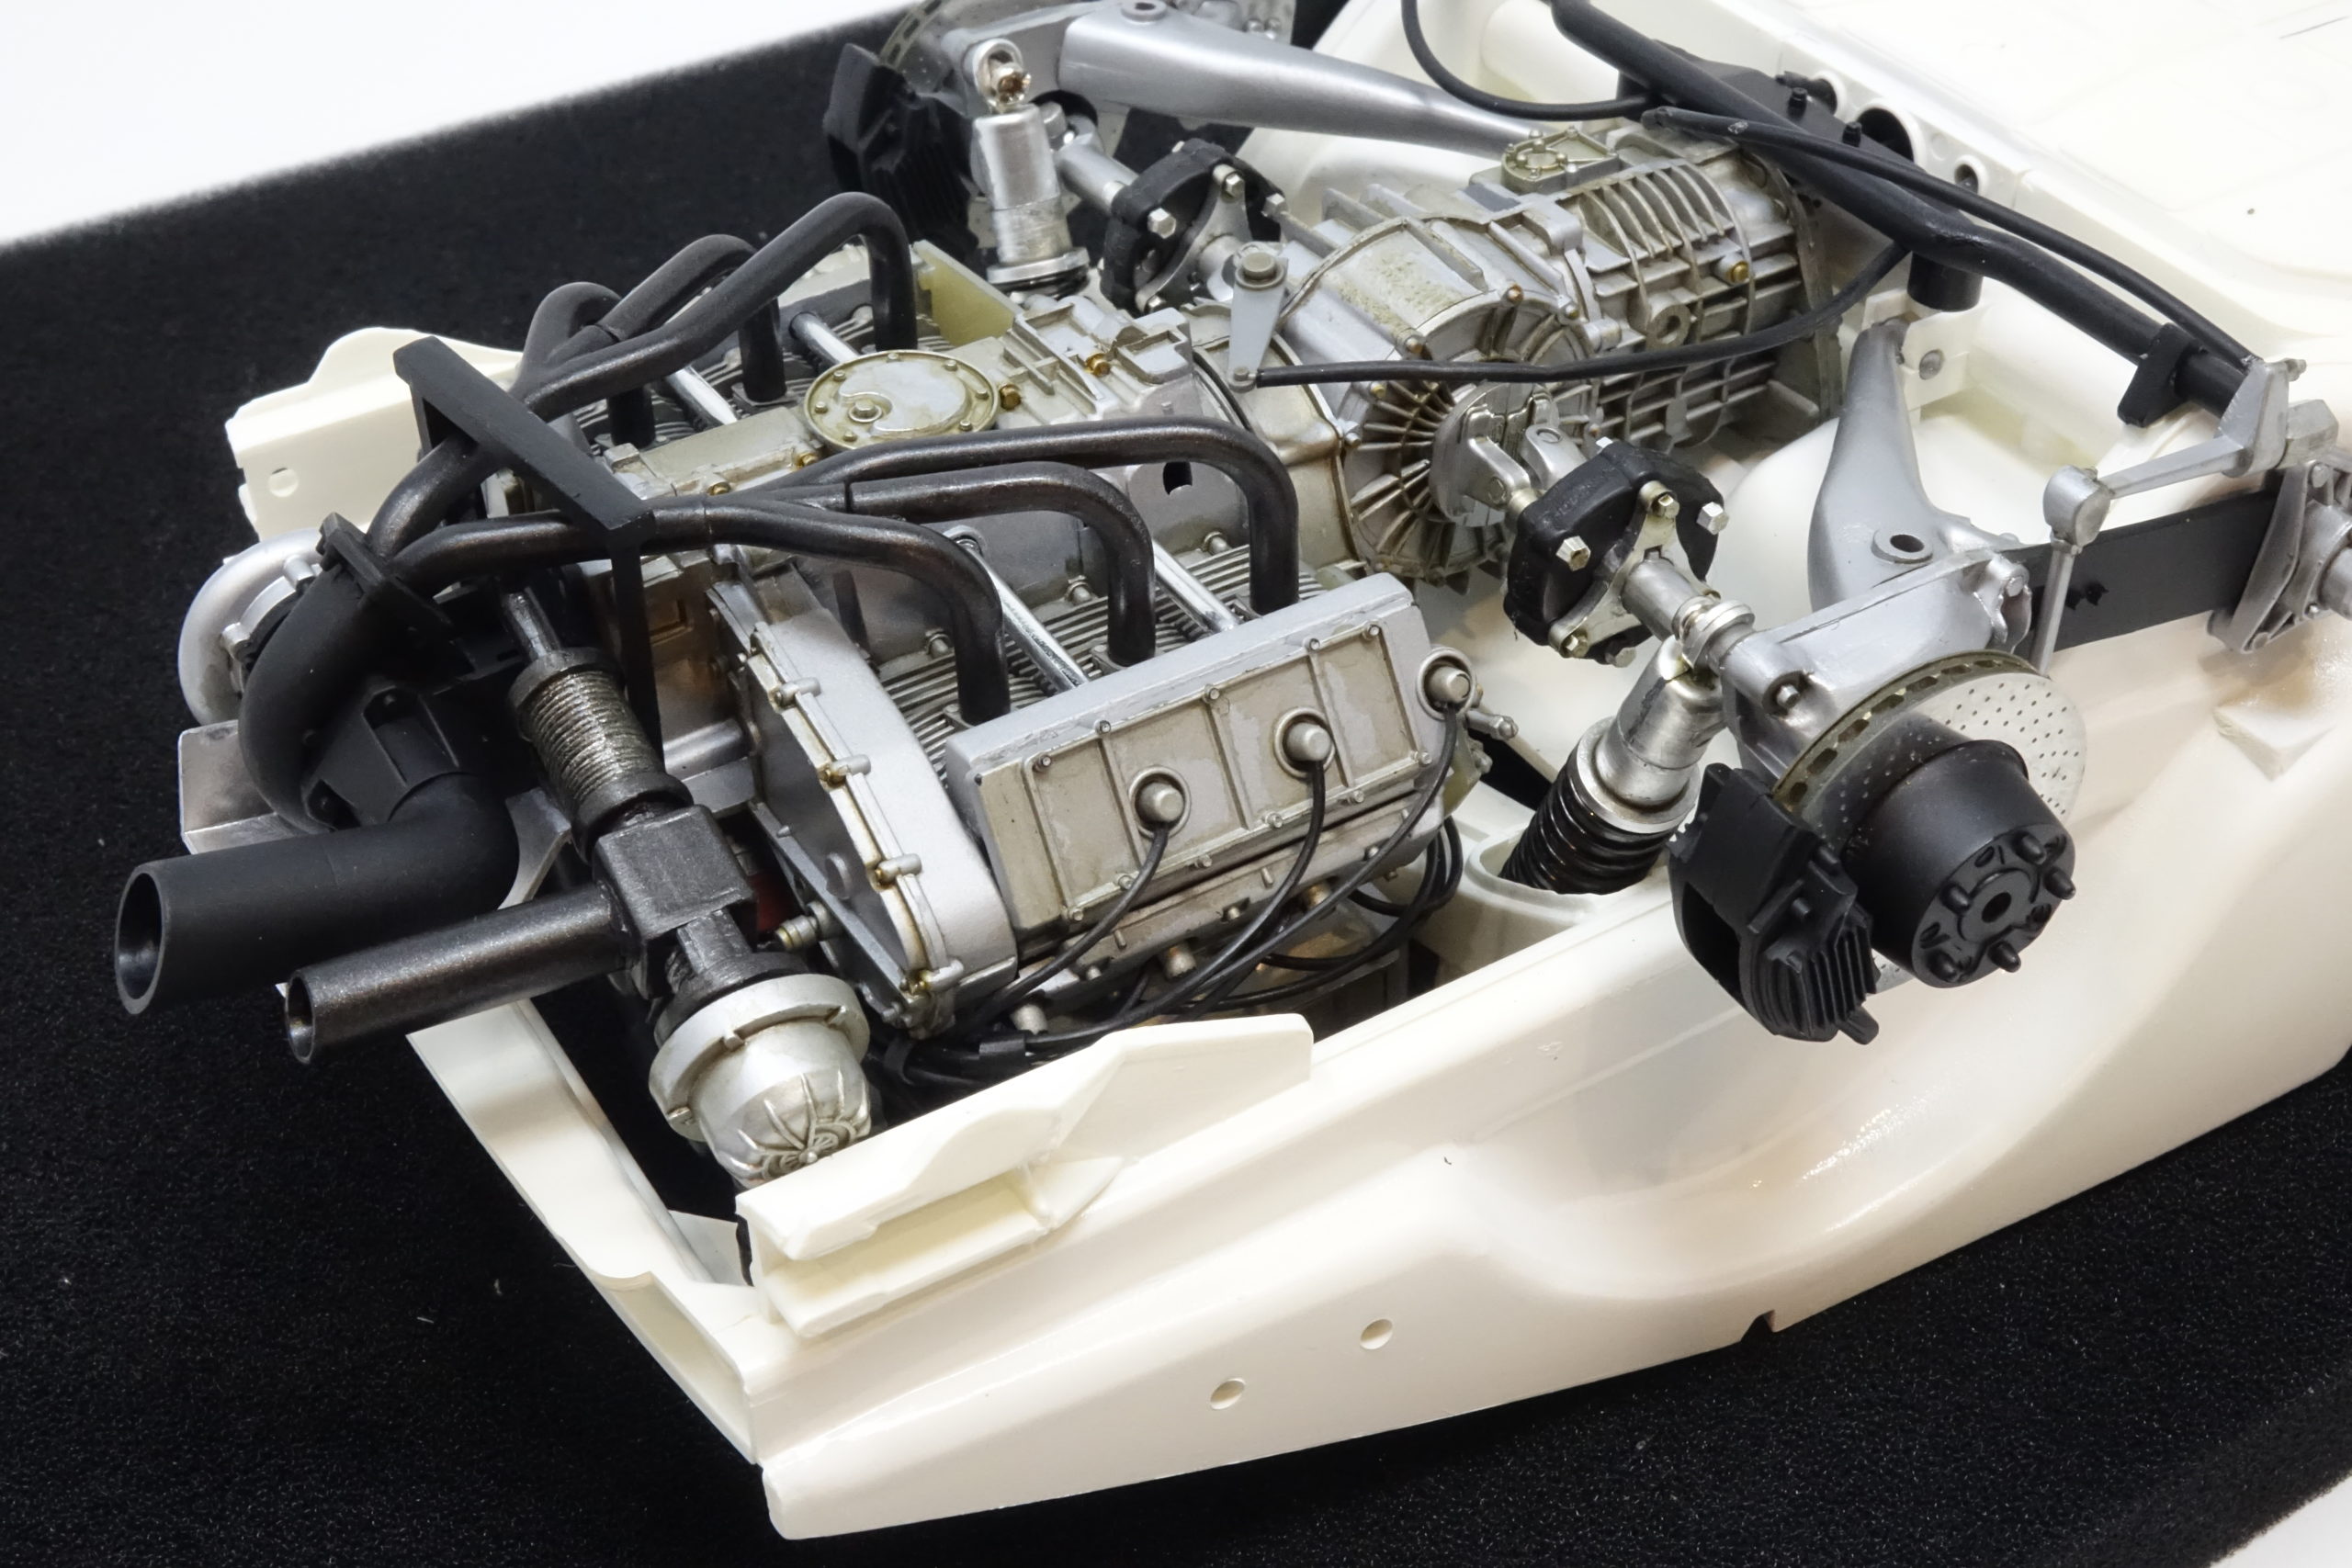
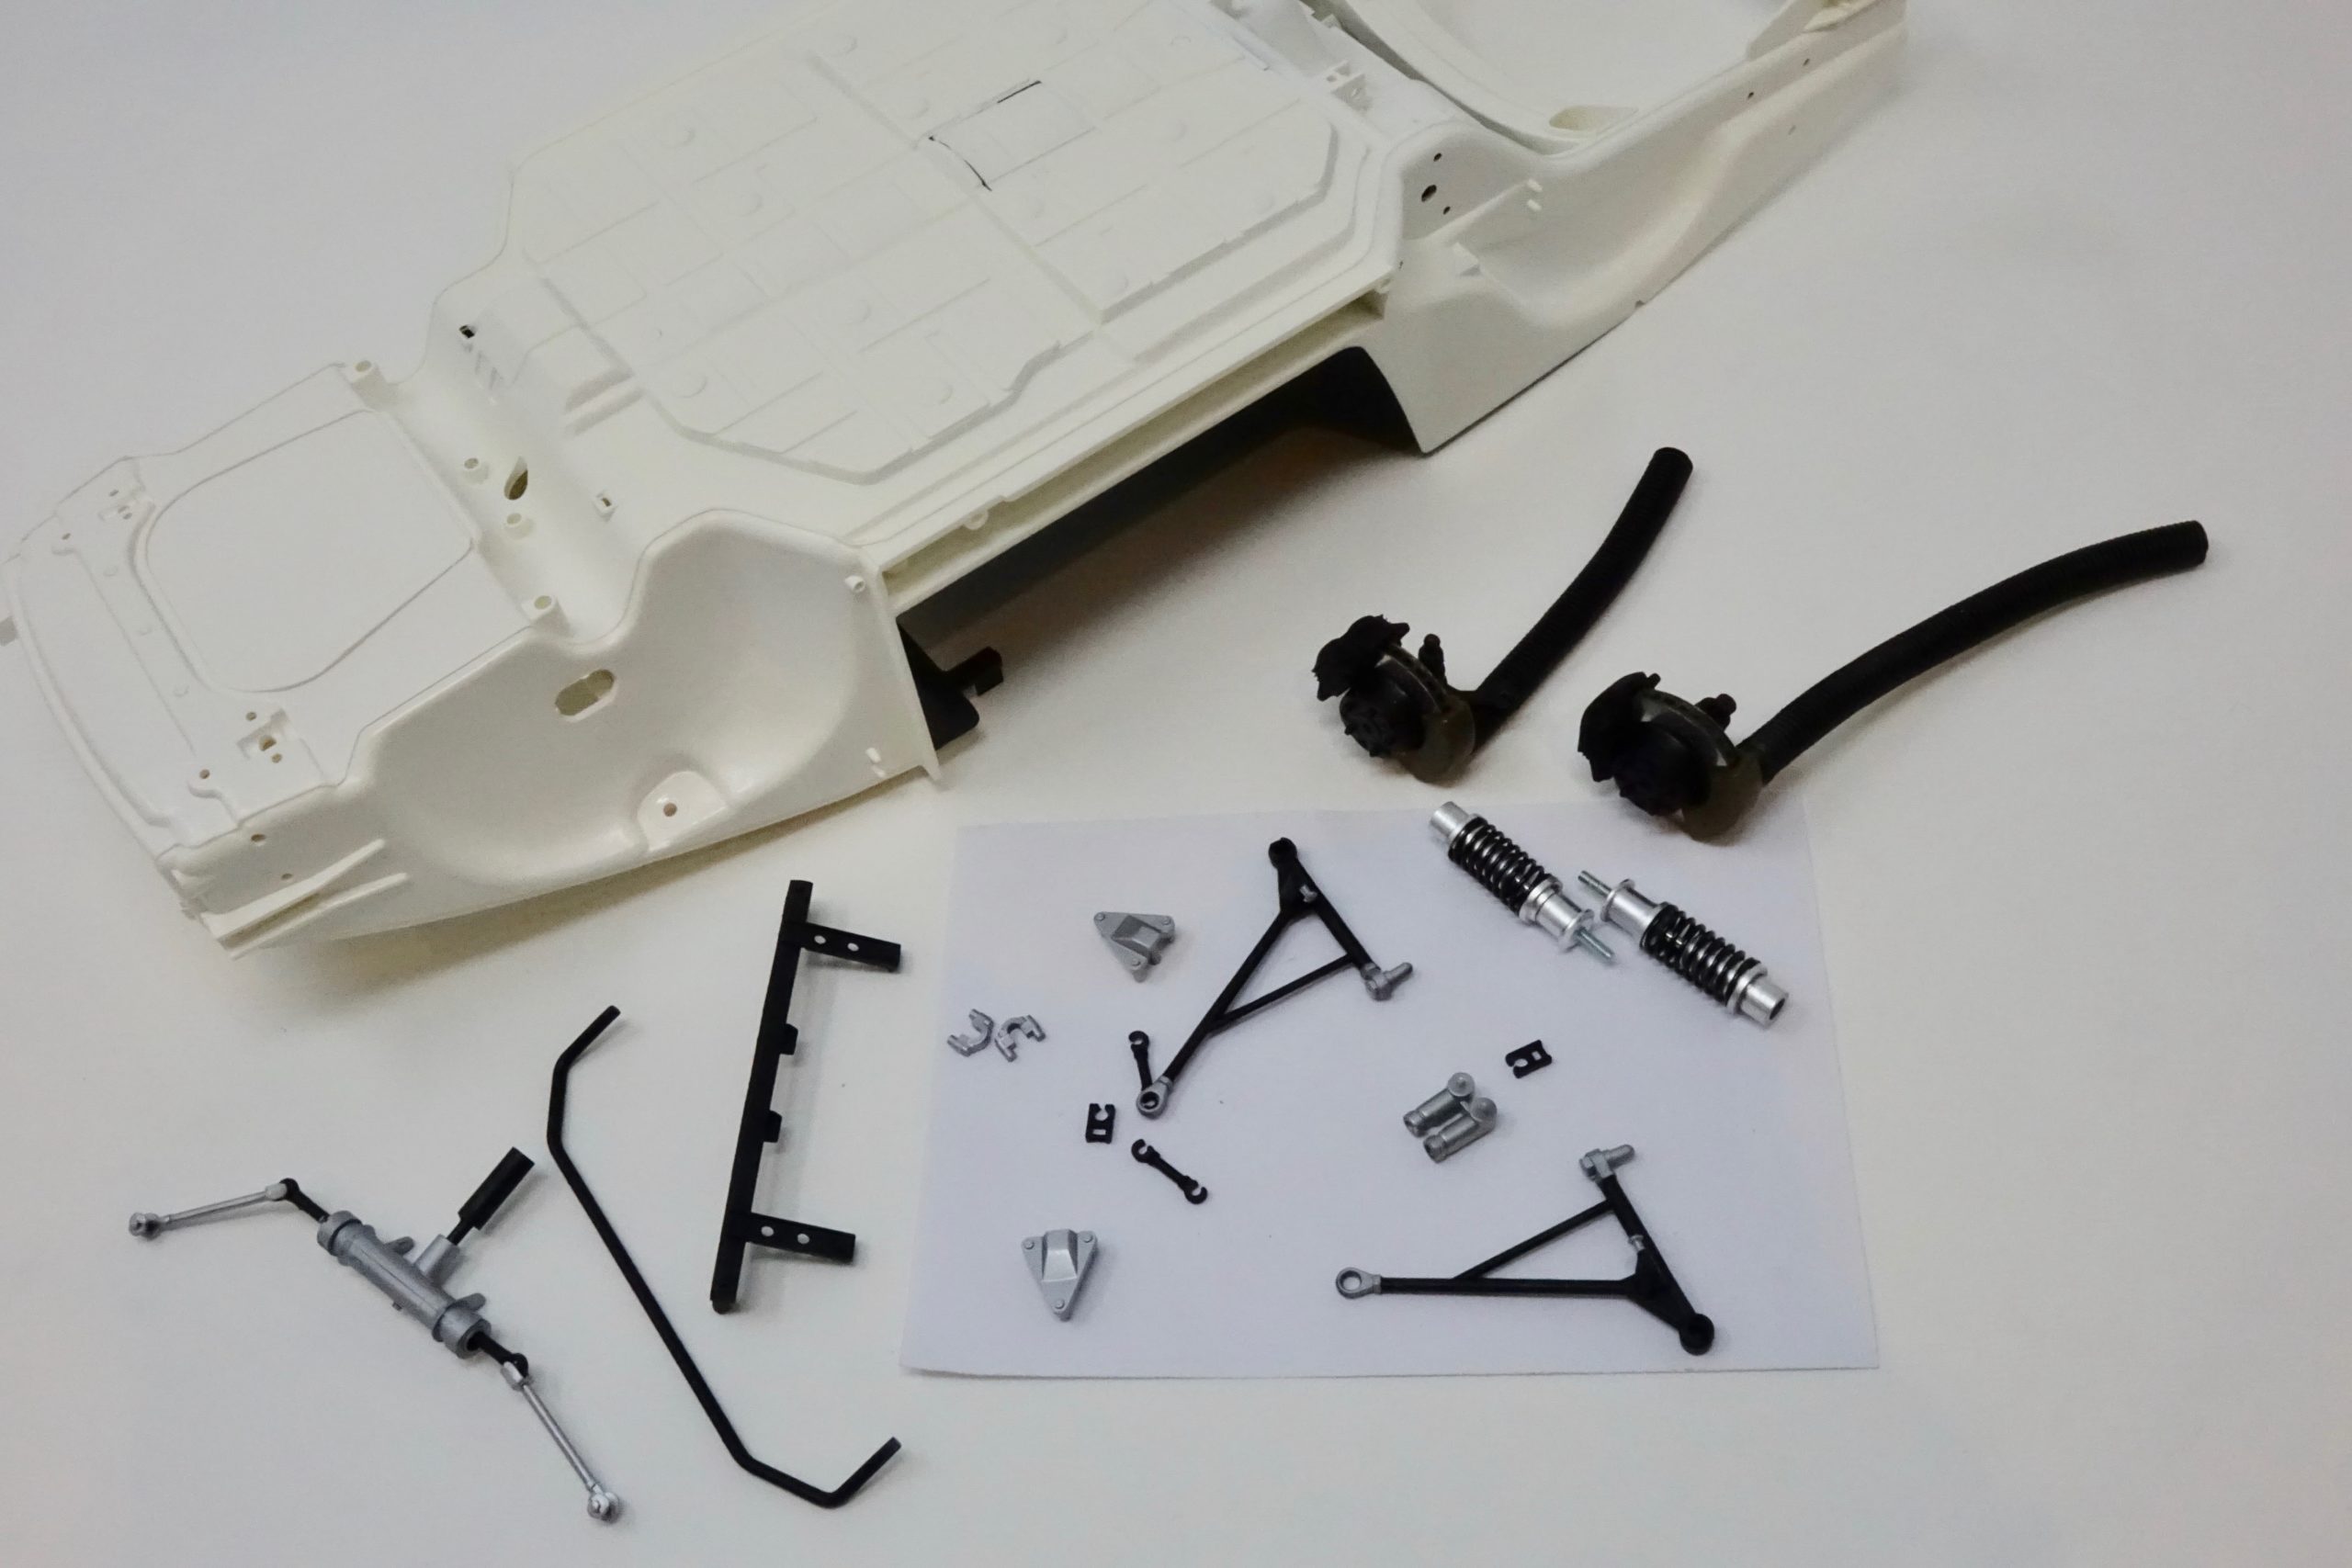
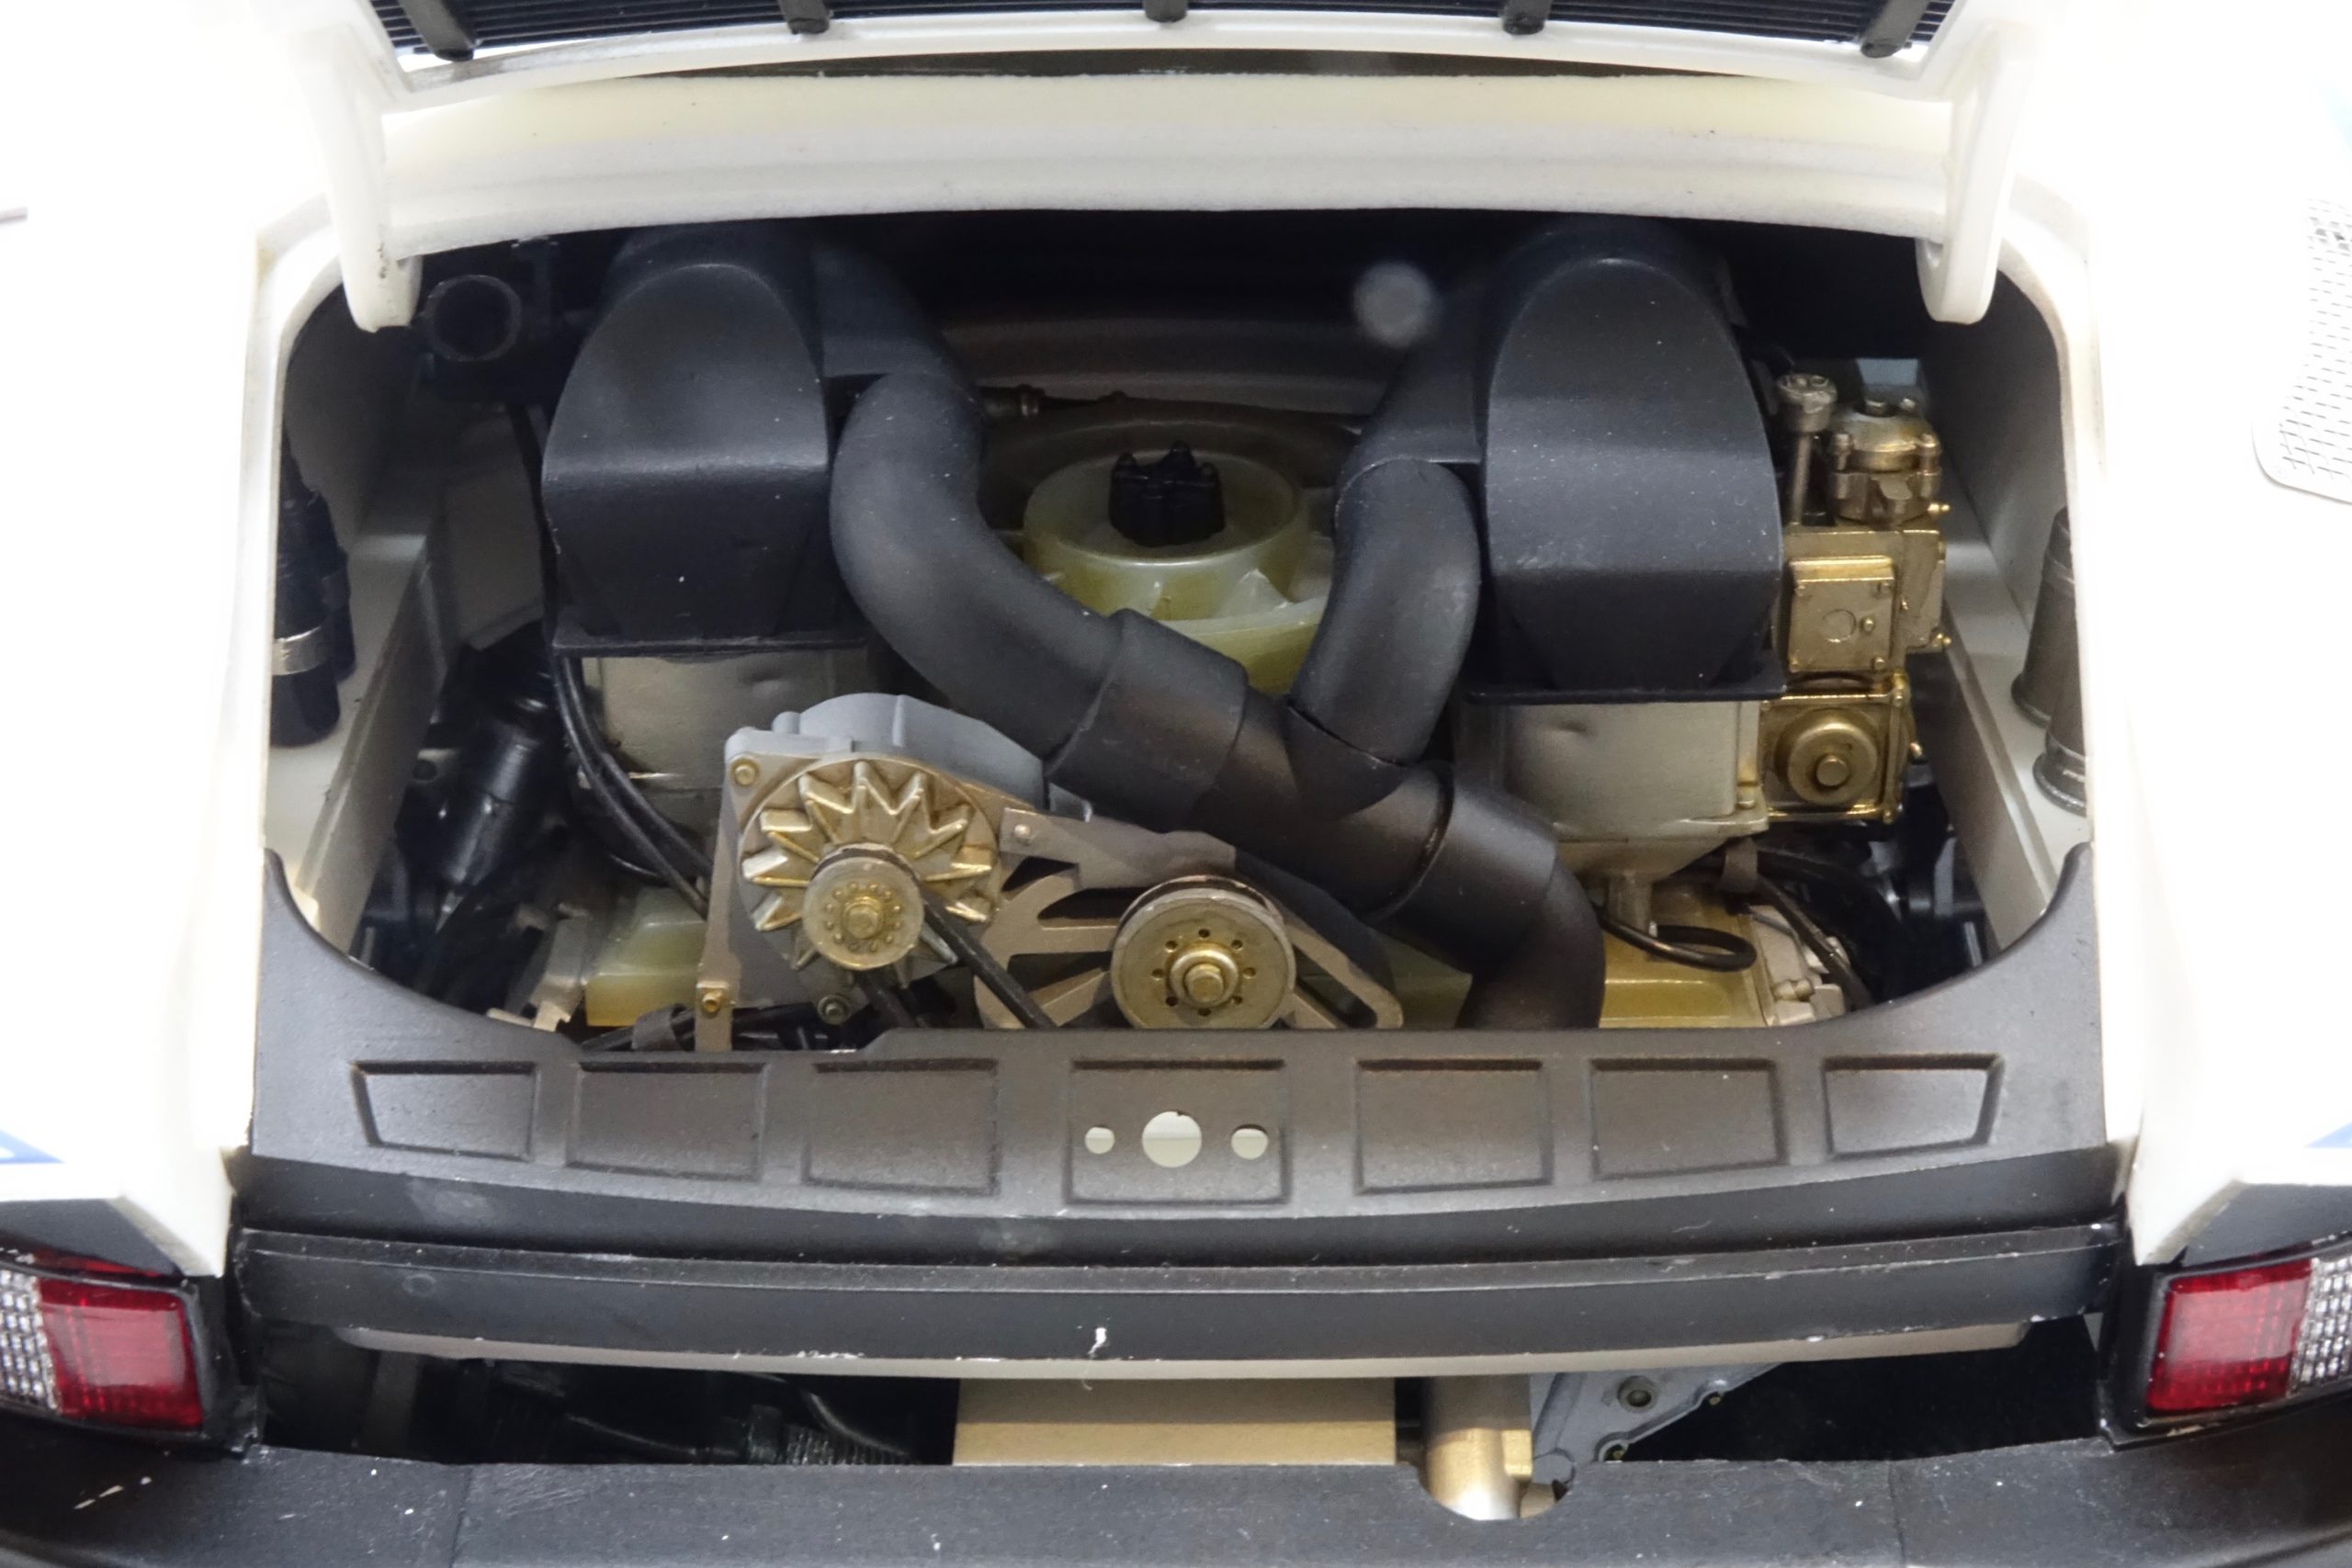
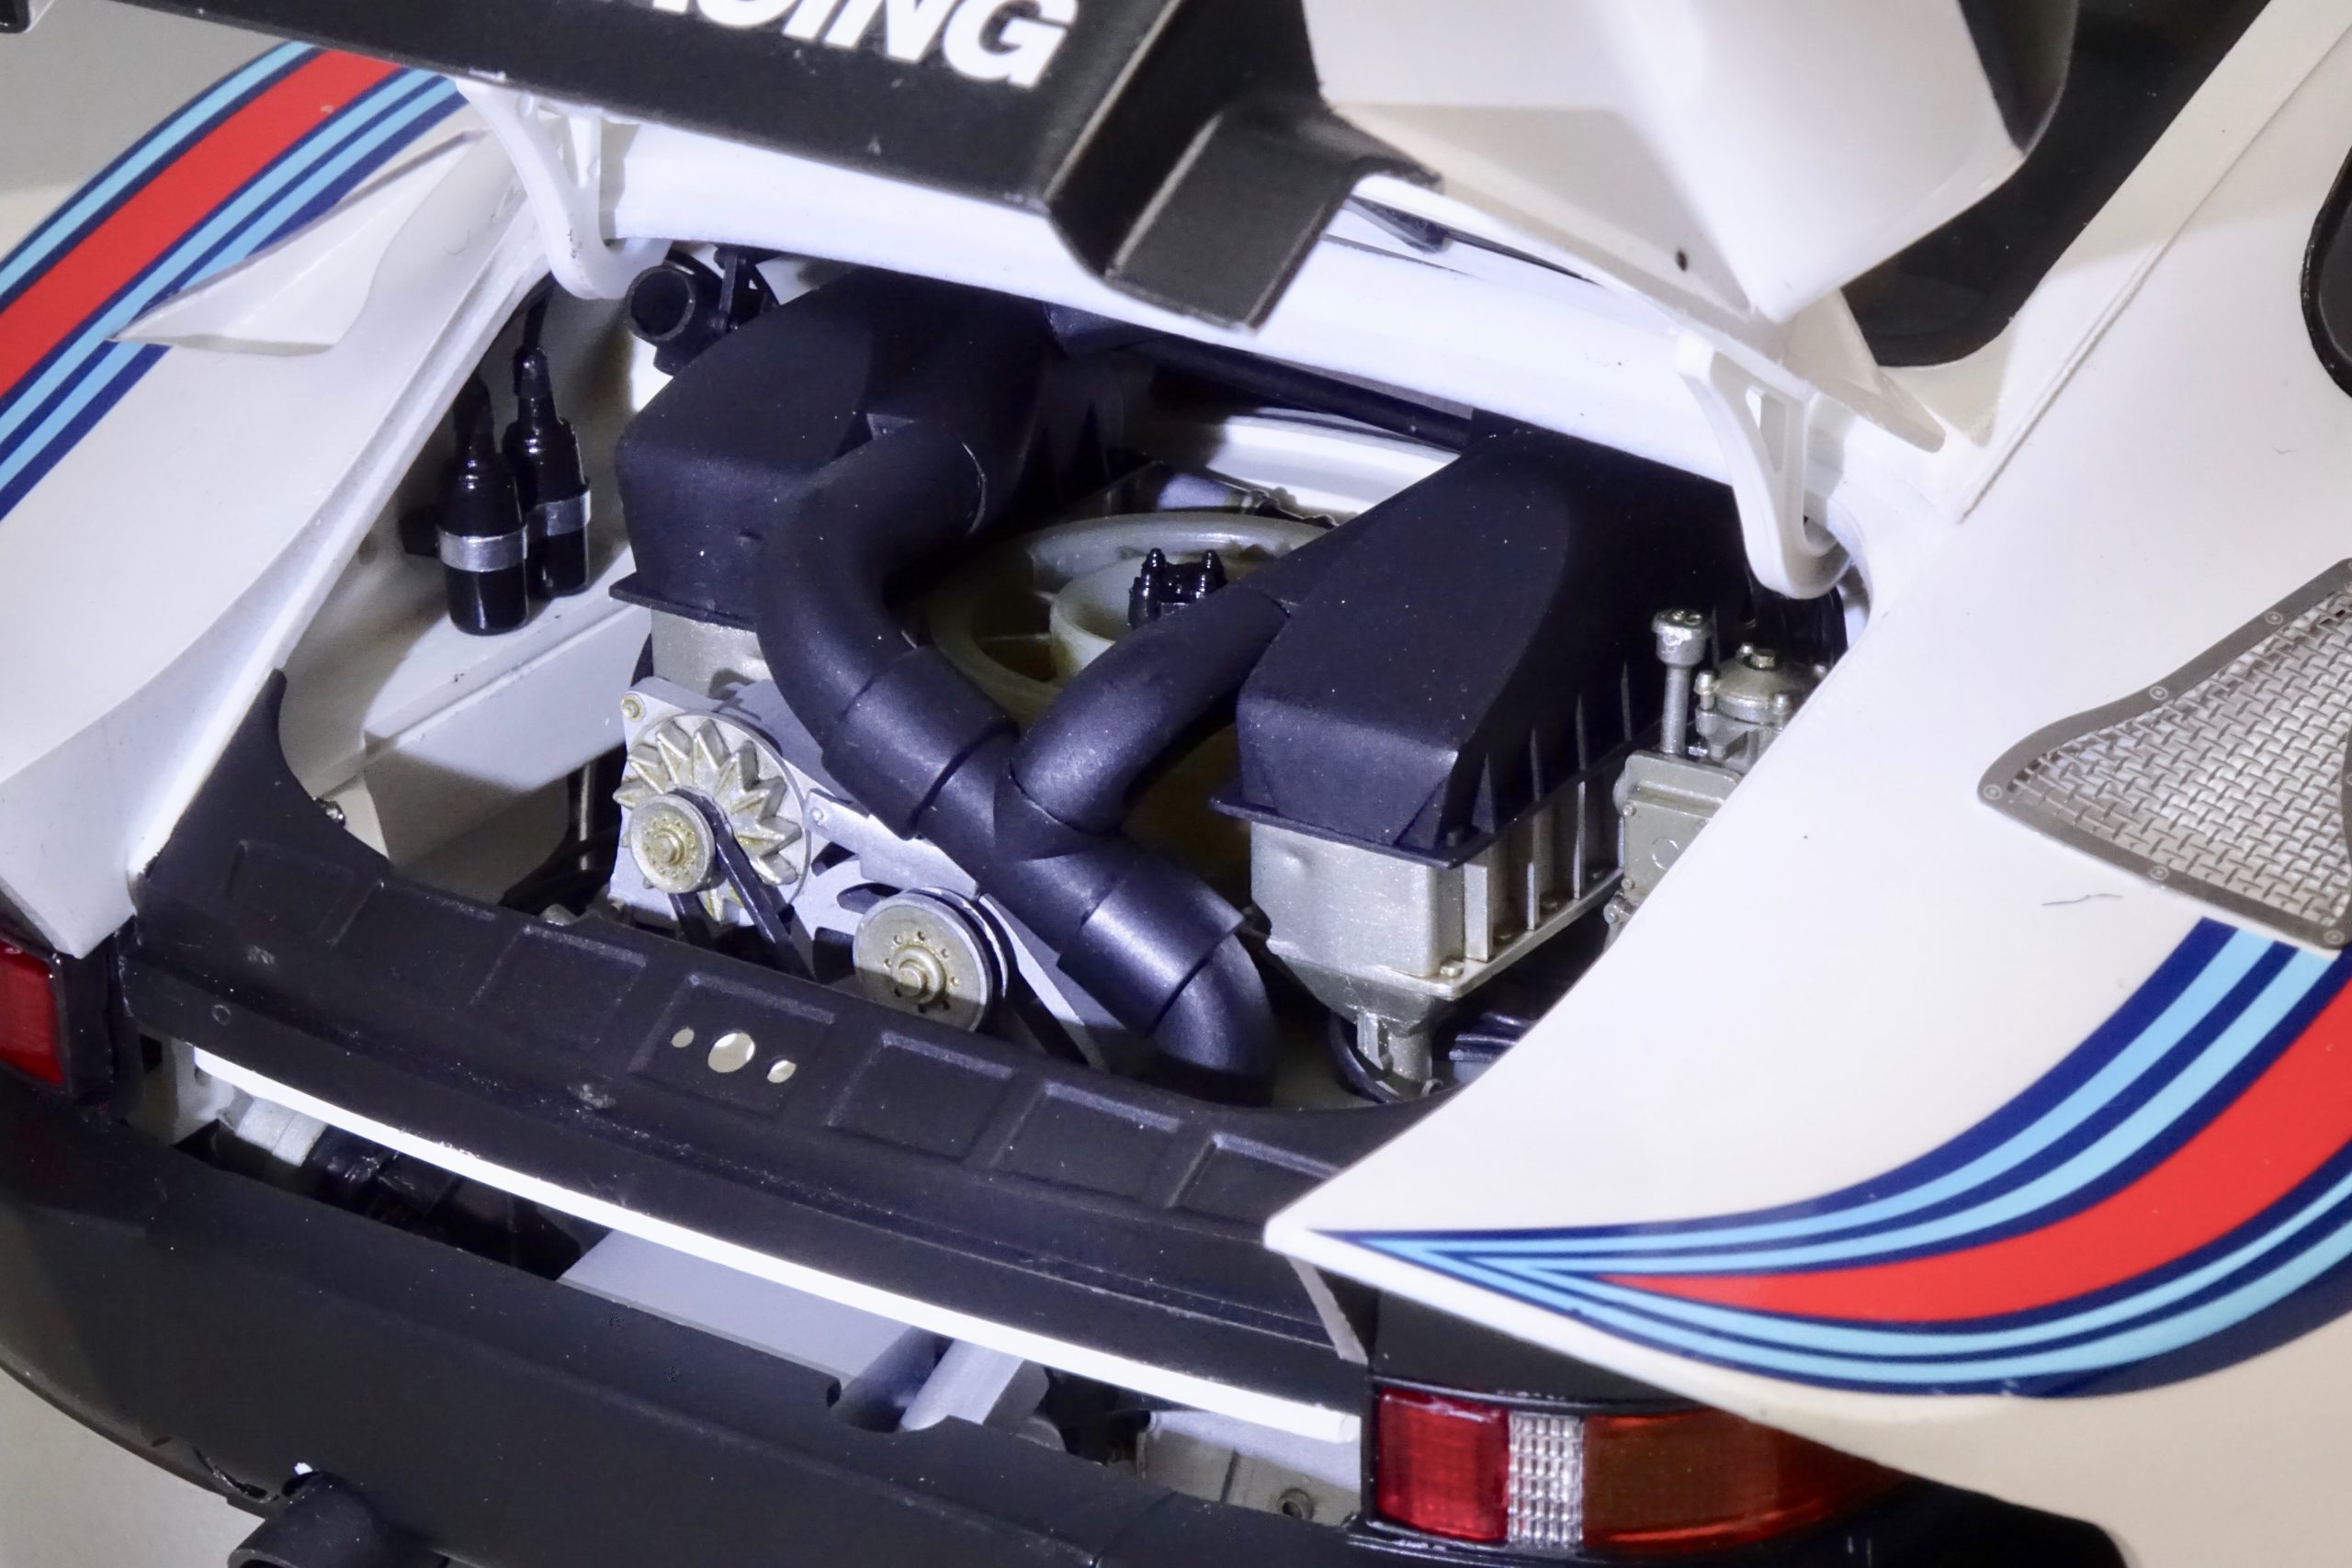
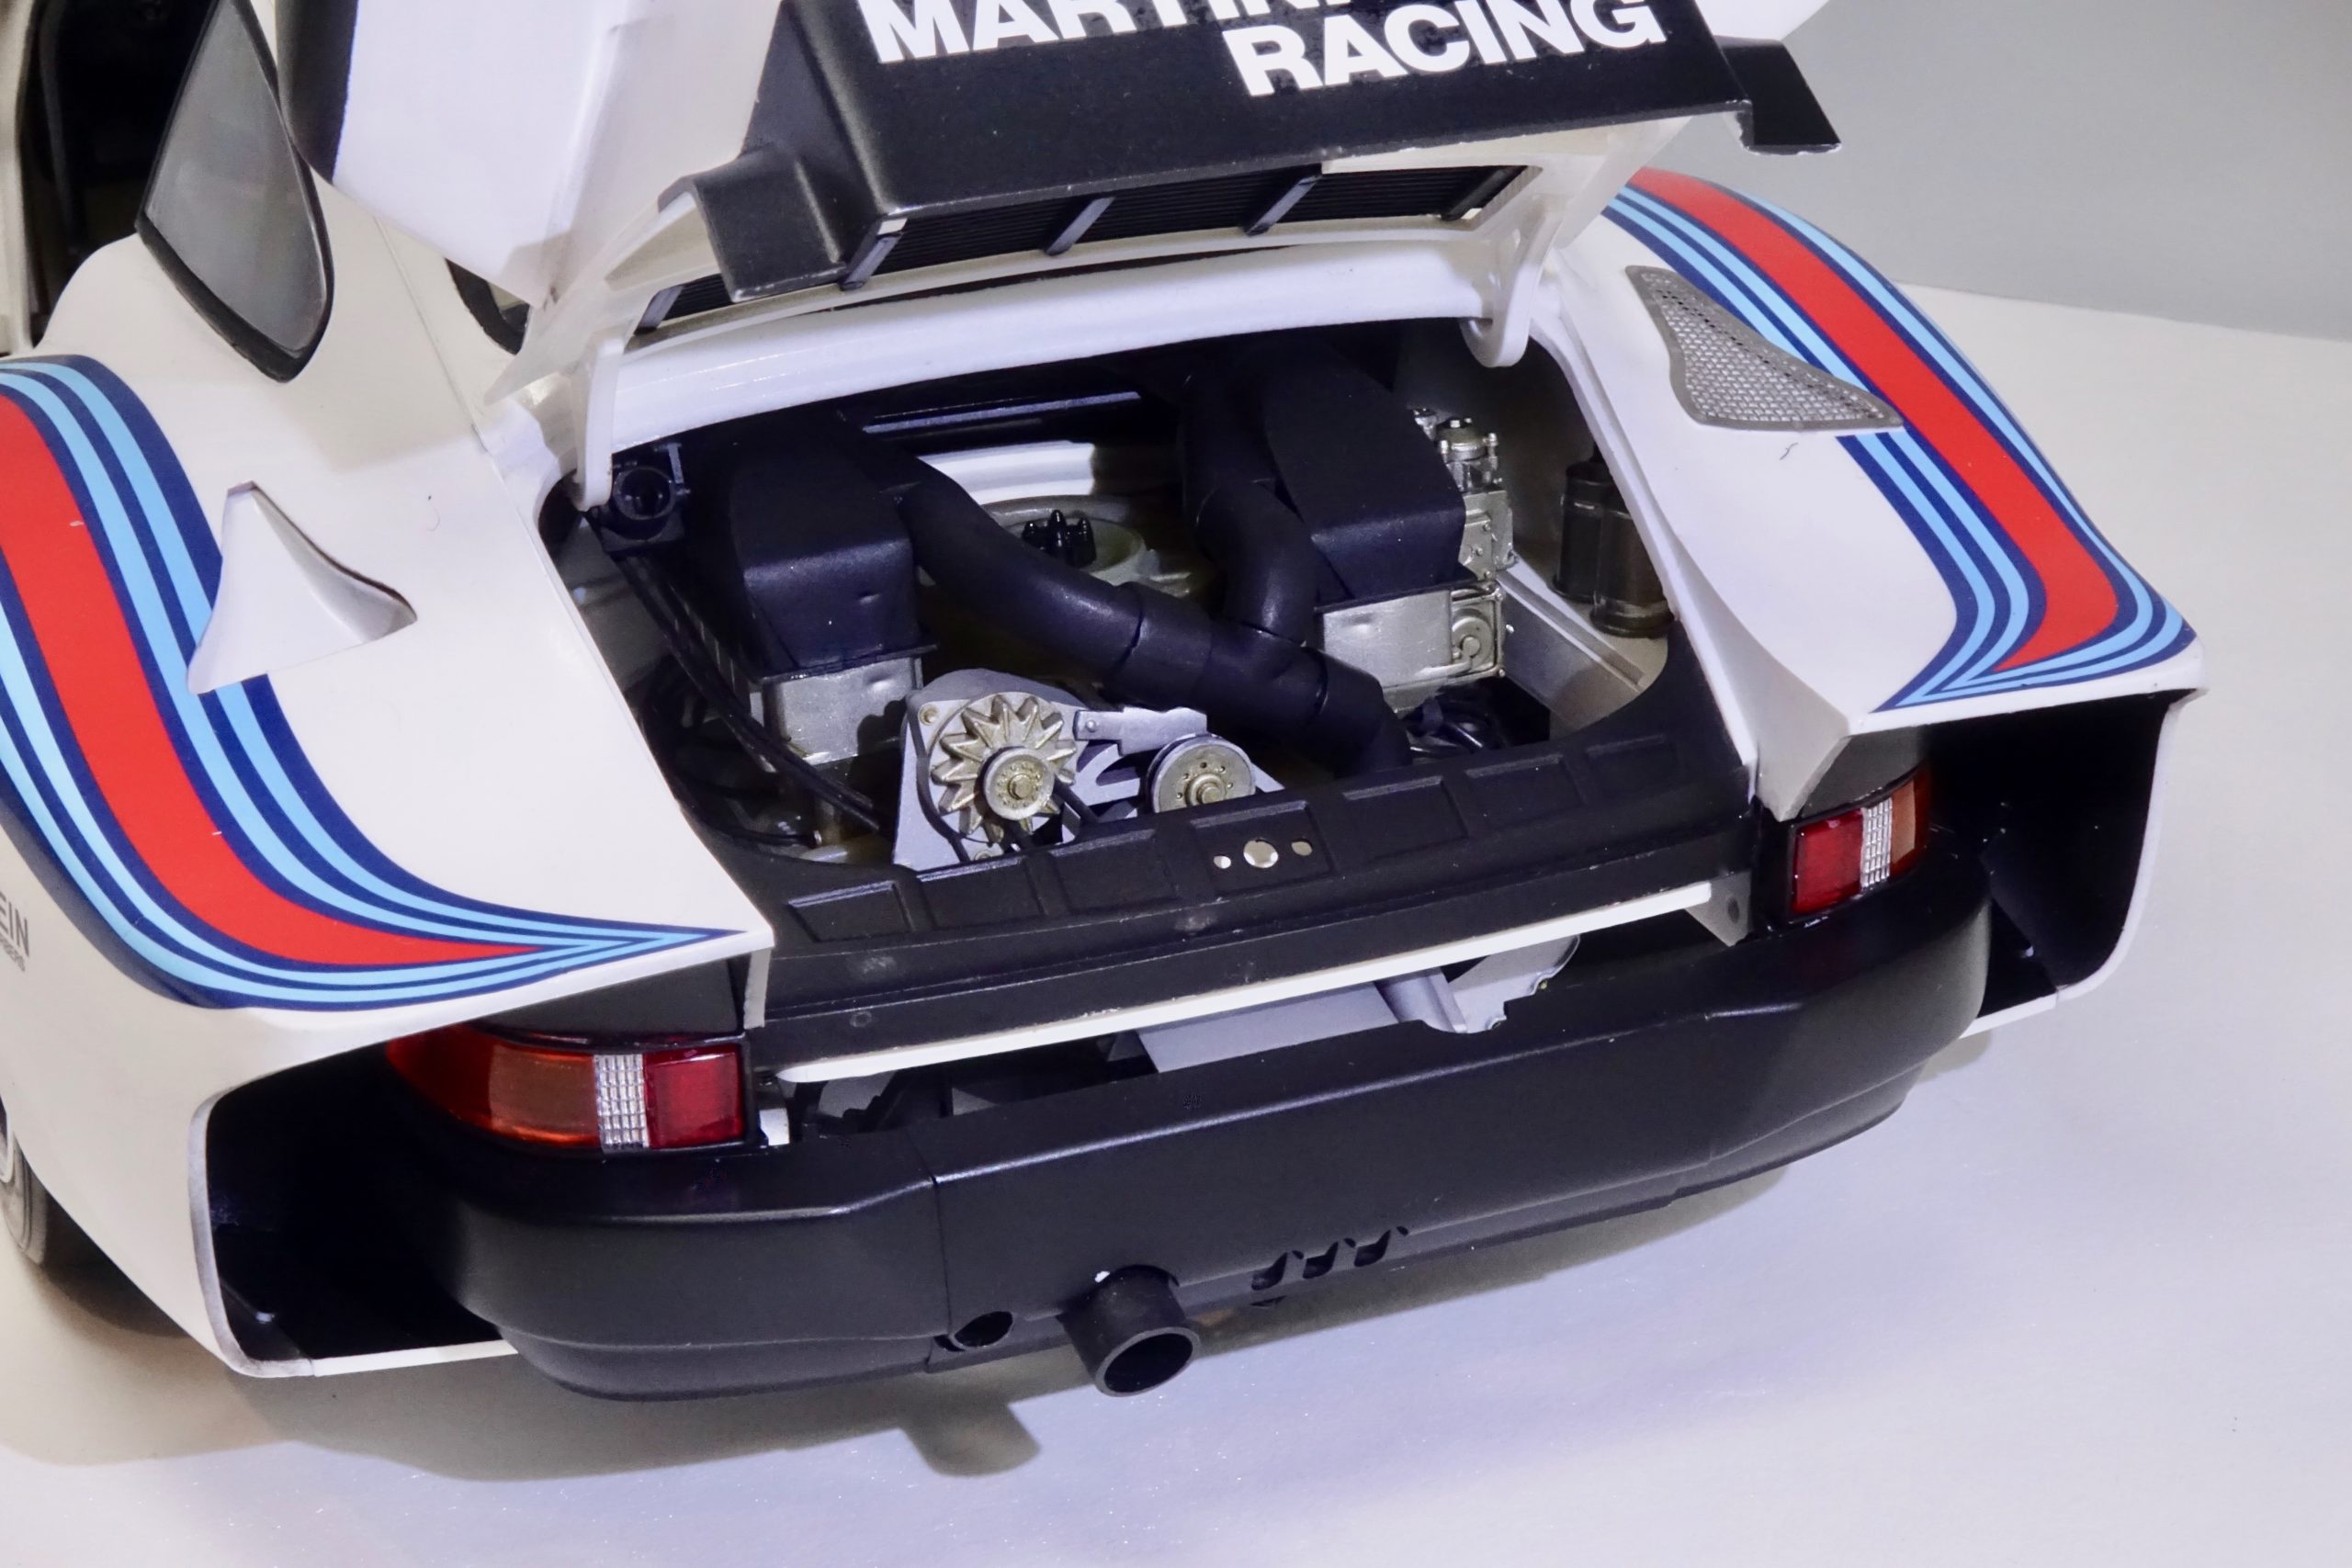
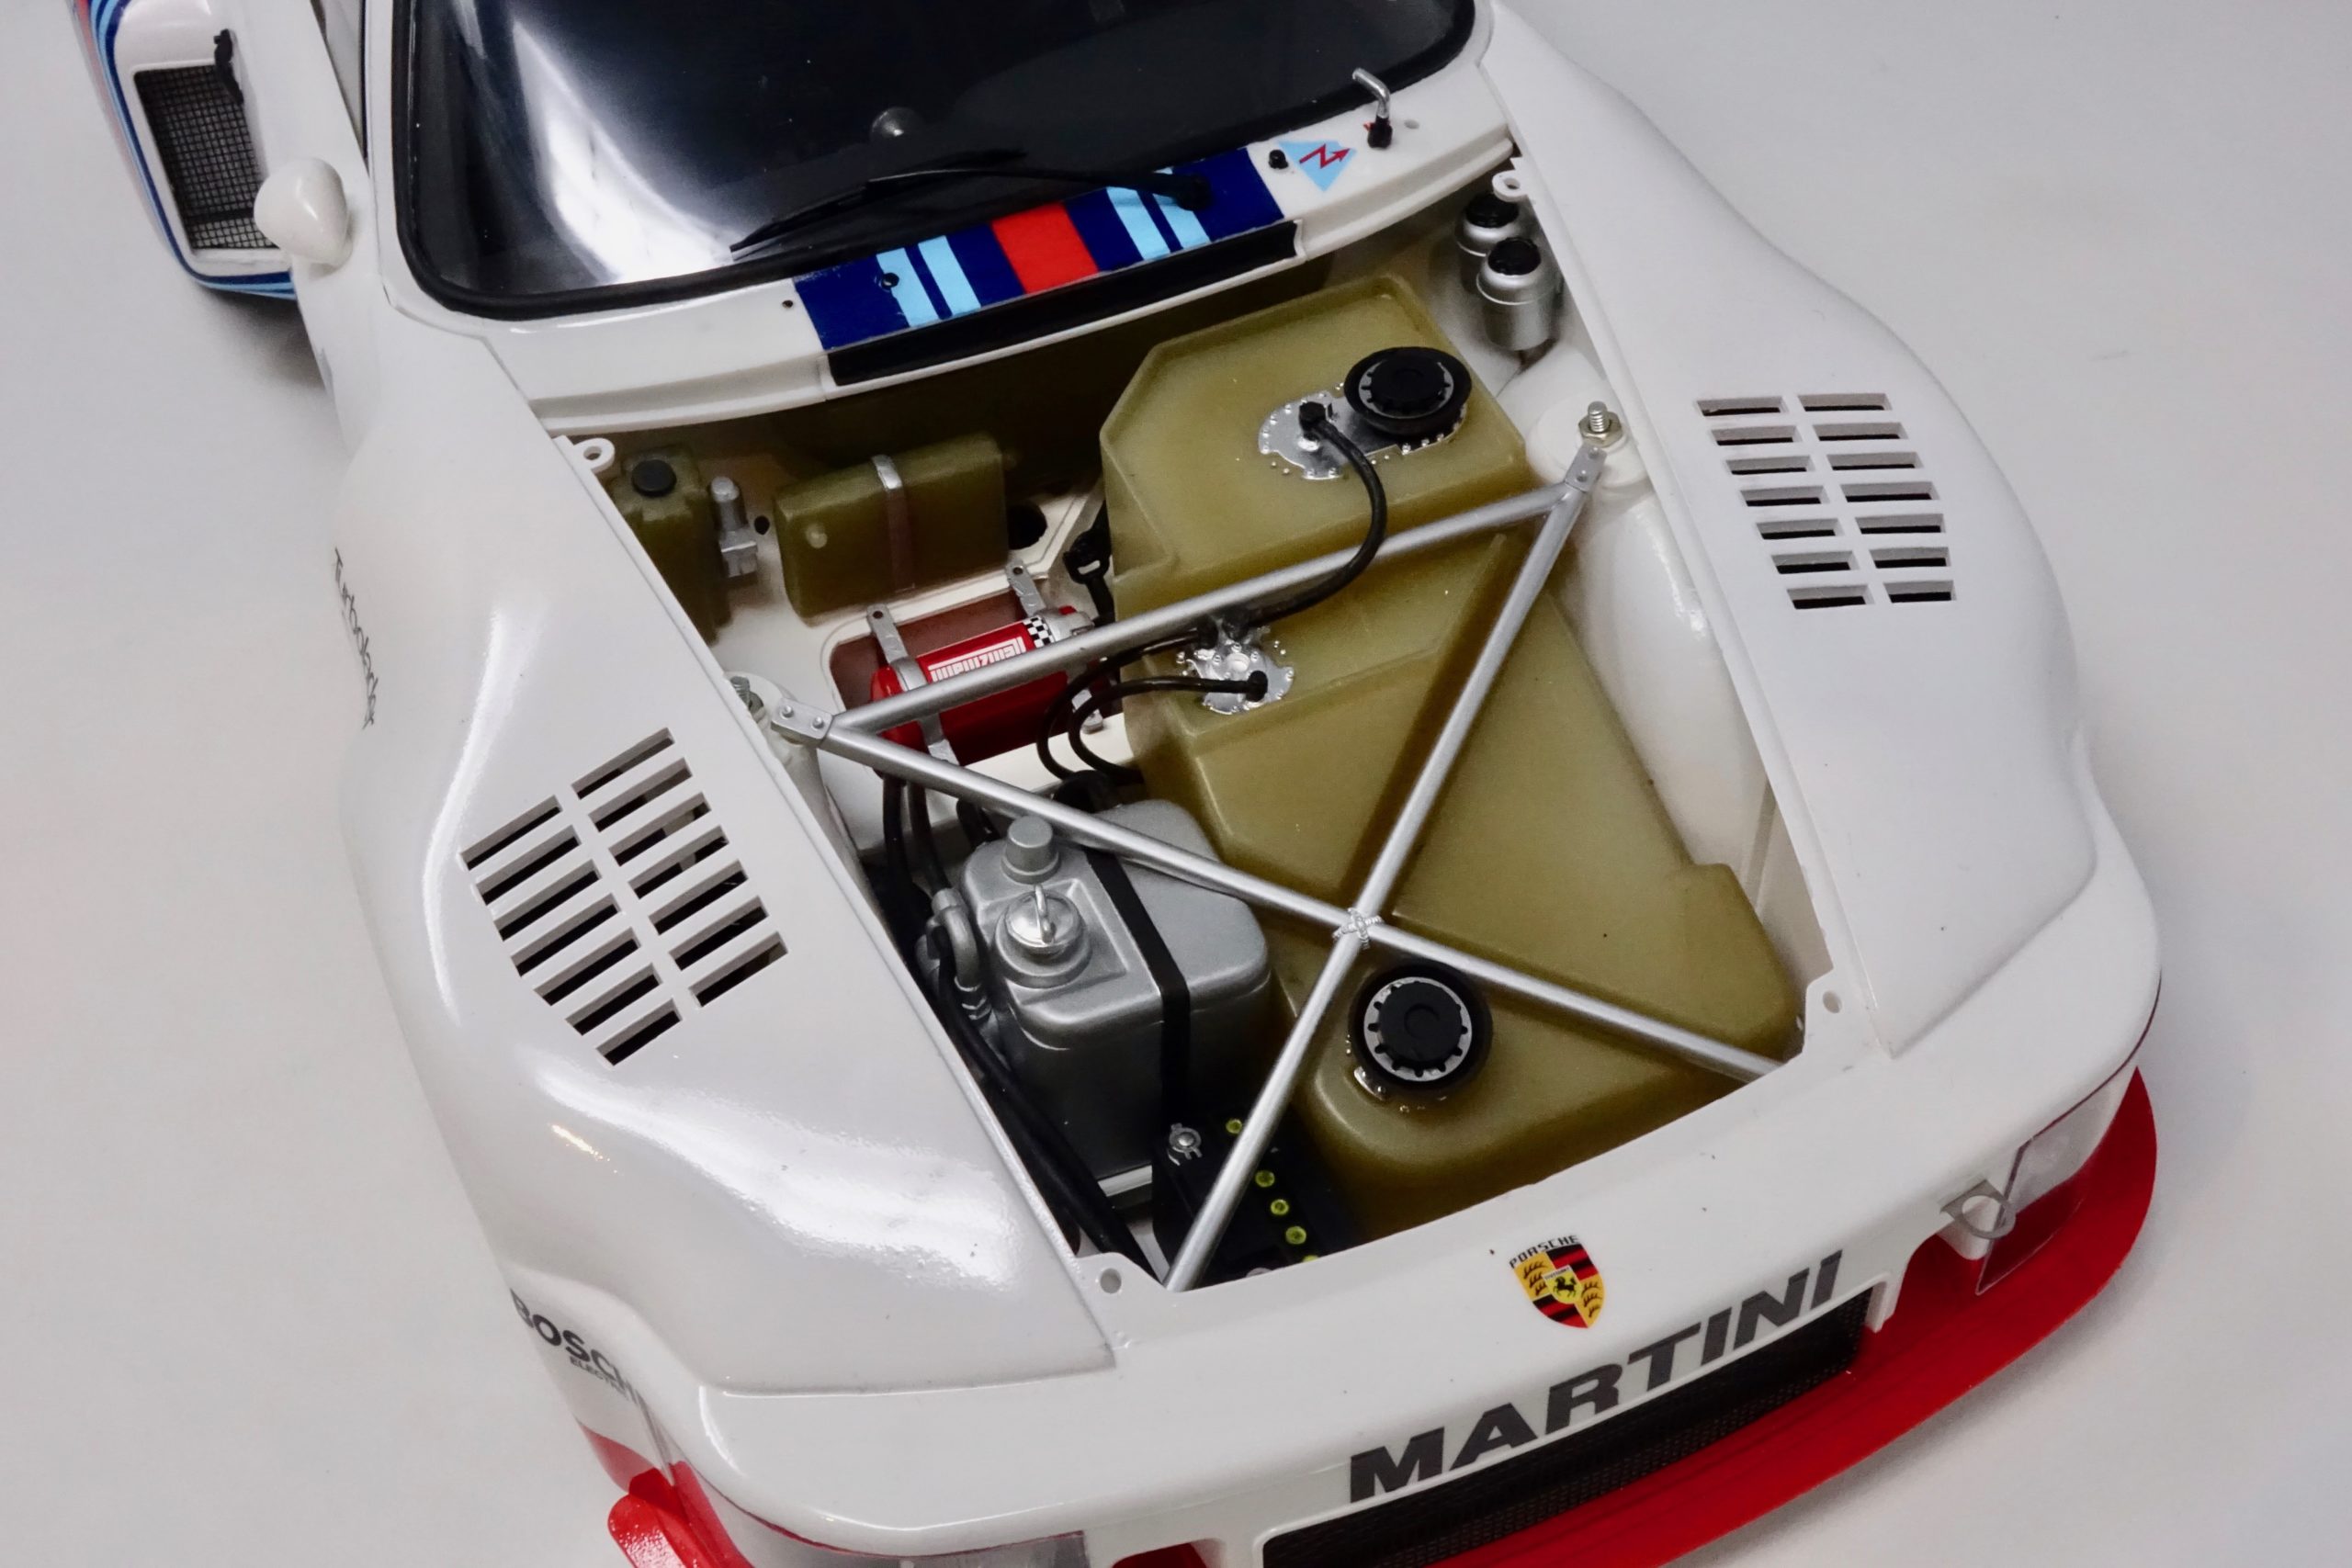
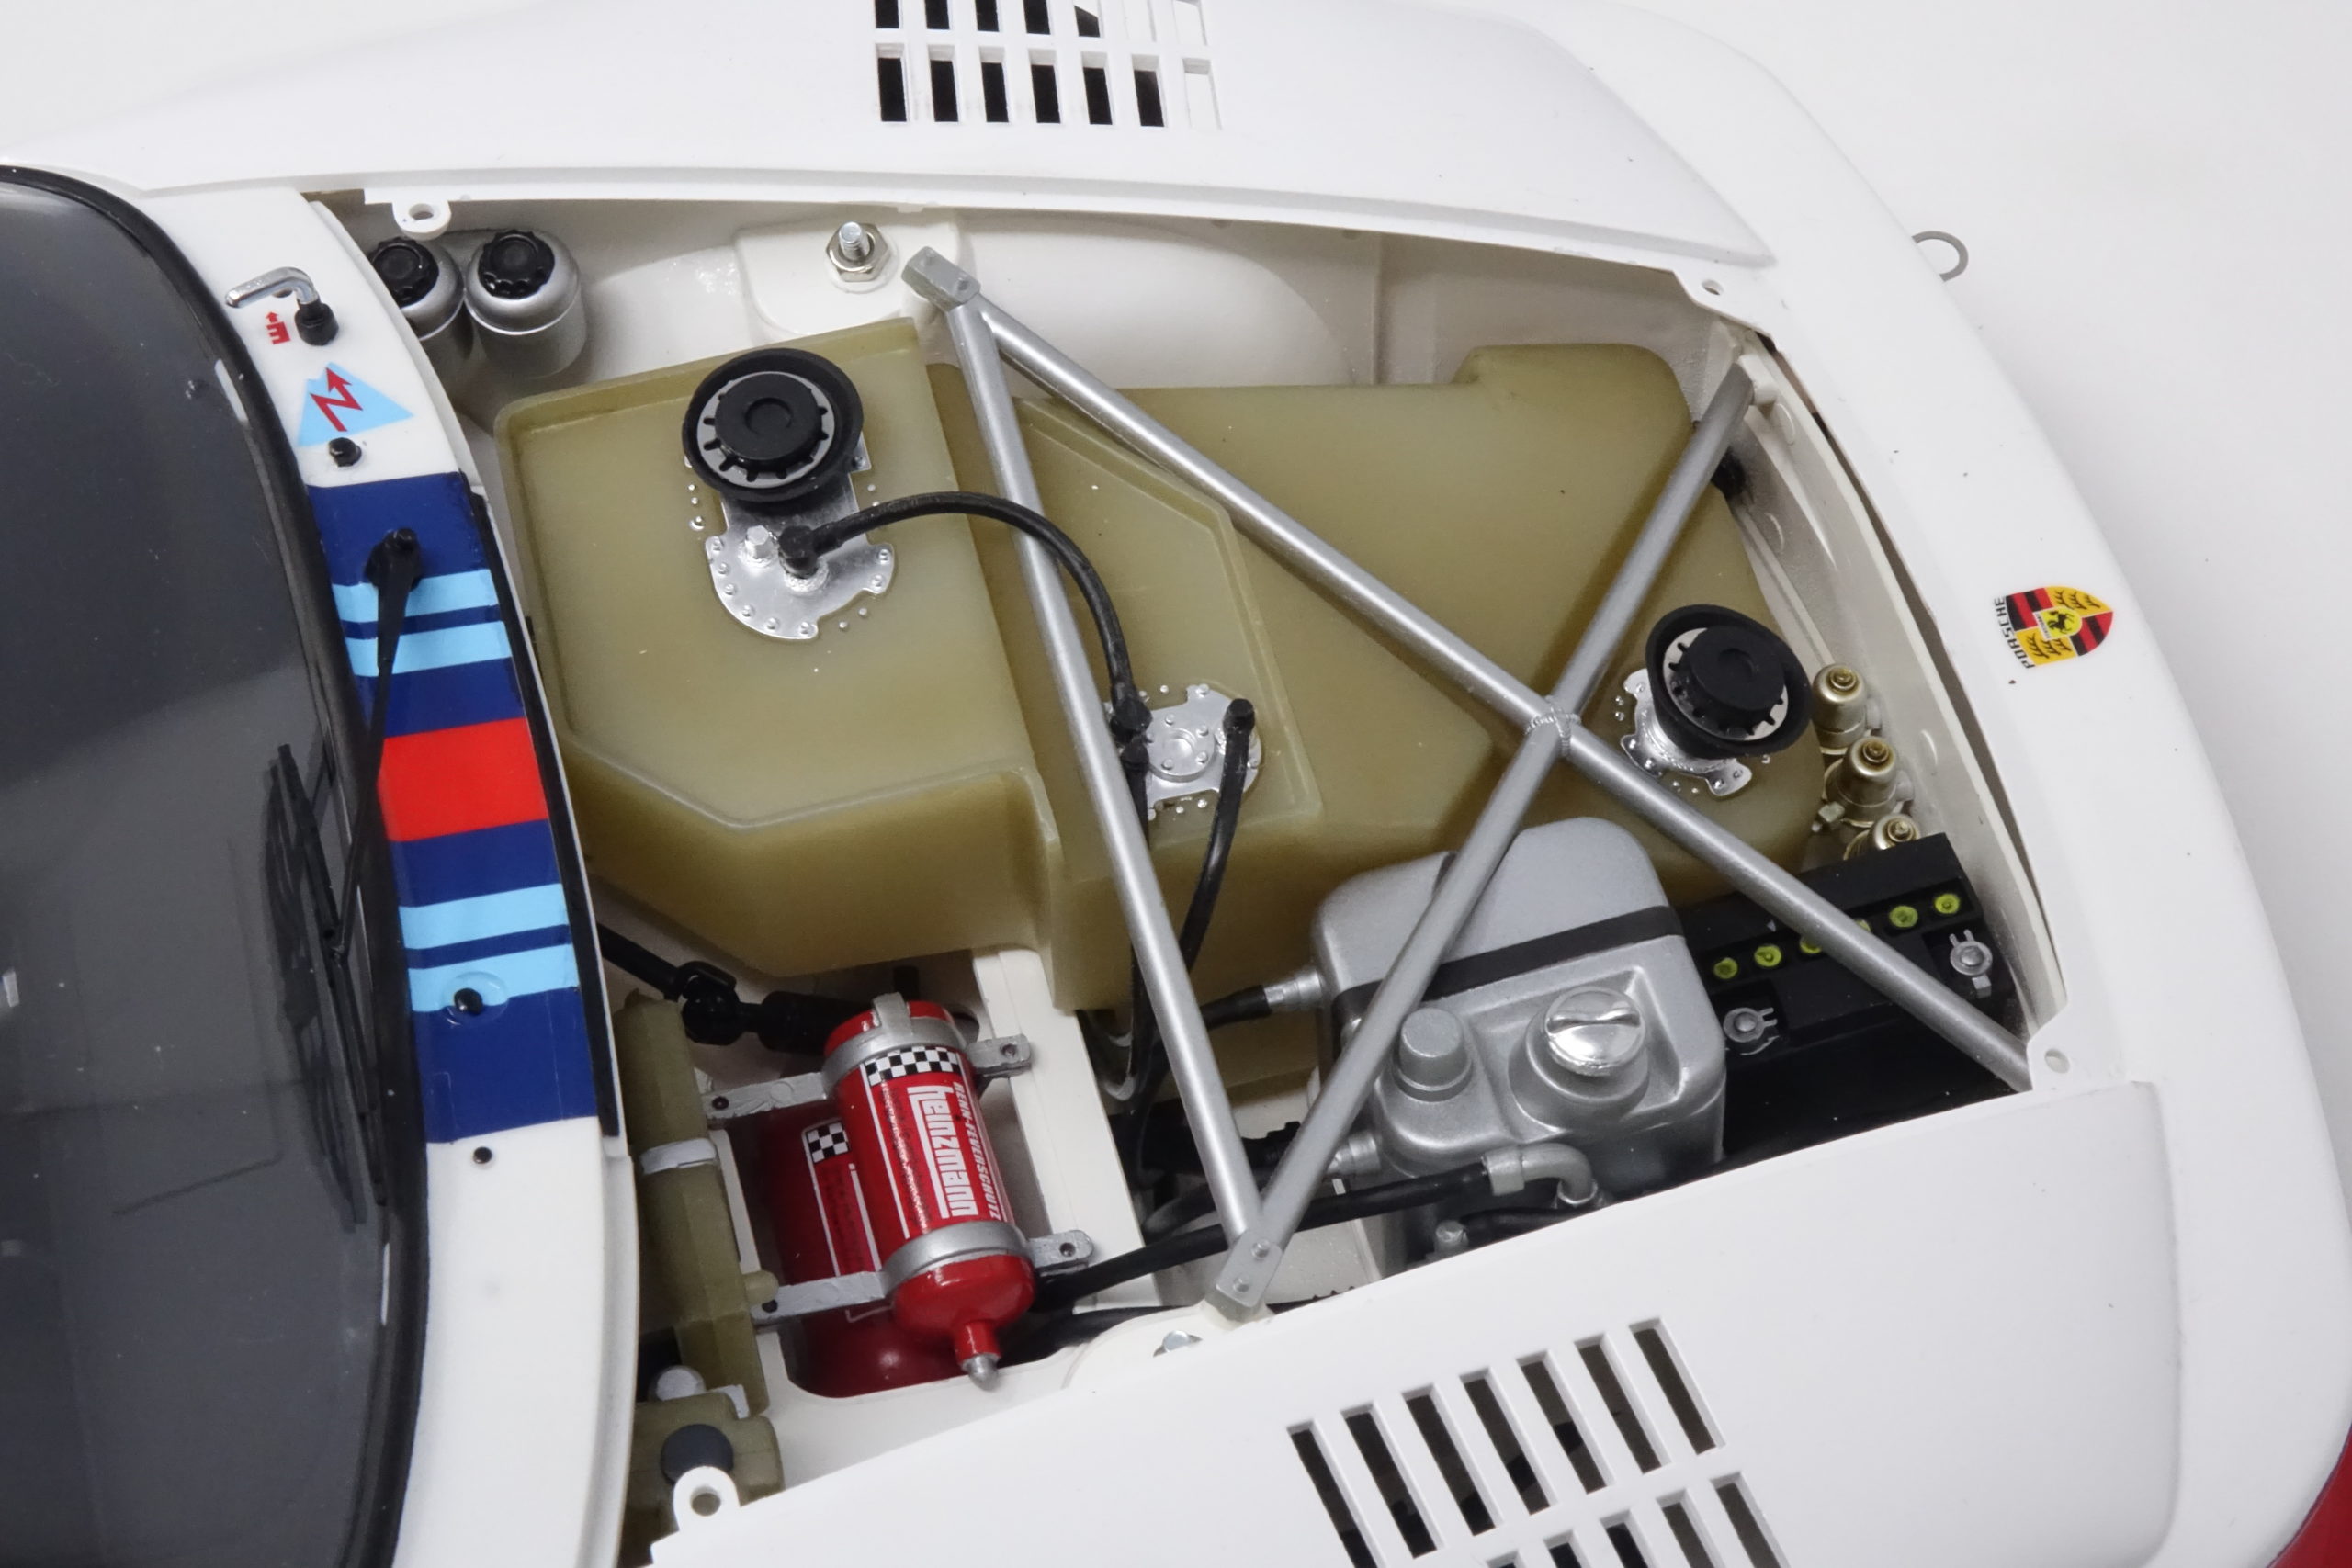
Under the front hood
As per instructions – but the oil tank parts were de-chromed, assembled and then seams sanded down and painted in LP11. Some masking was dome on extinguisher. All under bonnet components were prepared and checked for fit together, making note of any sequence needed. It’s quite tight in this area (especially working around the two large brake cooling ducts which tuck in at each side), so glueing was only done when satisfied everything would fit in properly. The strut X-brace was dechromed, sanded and painted in Gloss Alu LP70 – which I find produces an excellent, convincing finish.


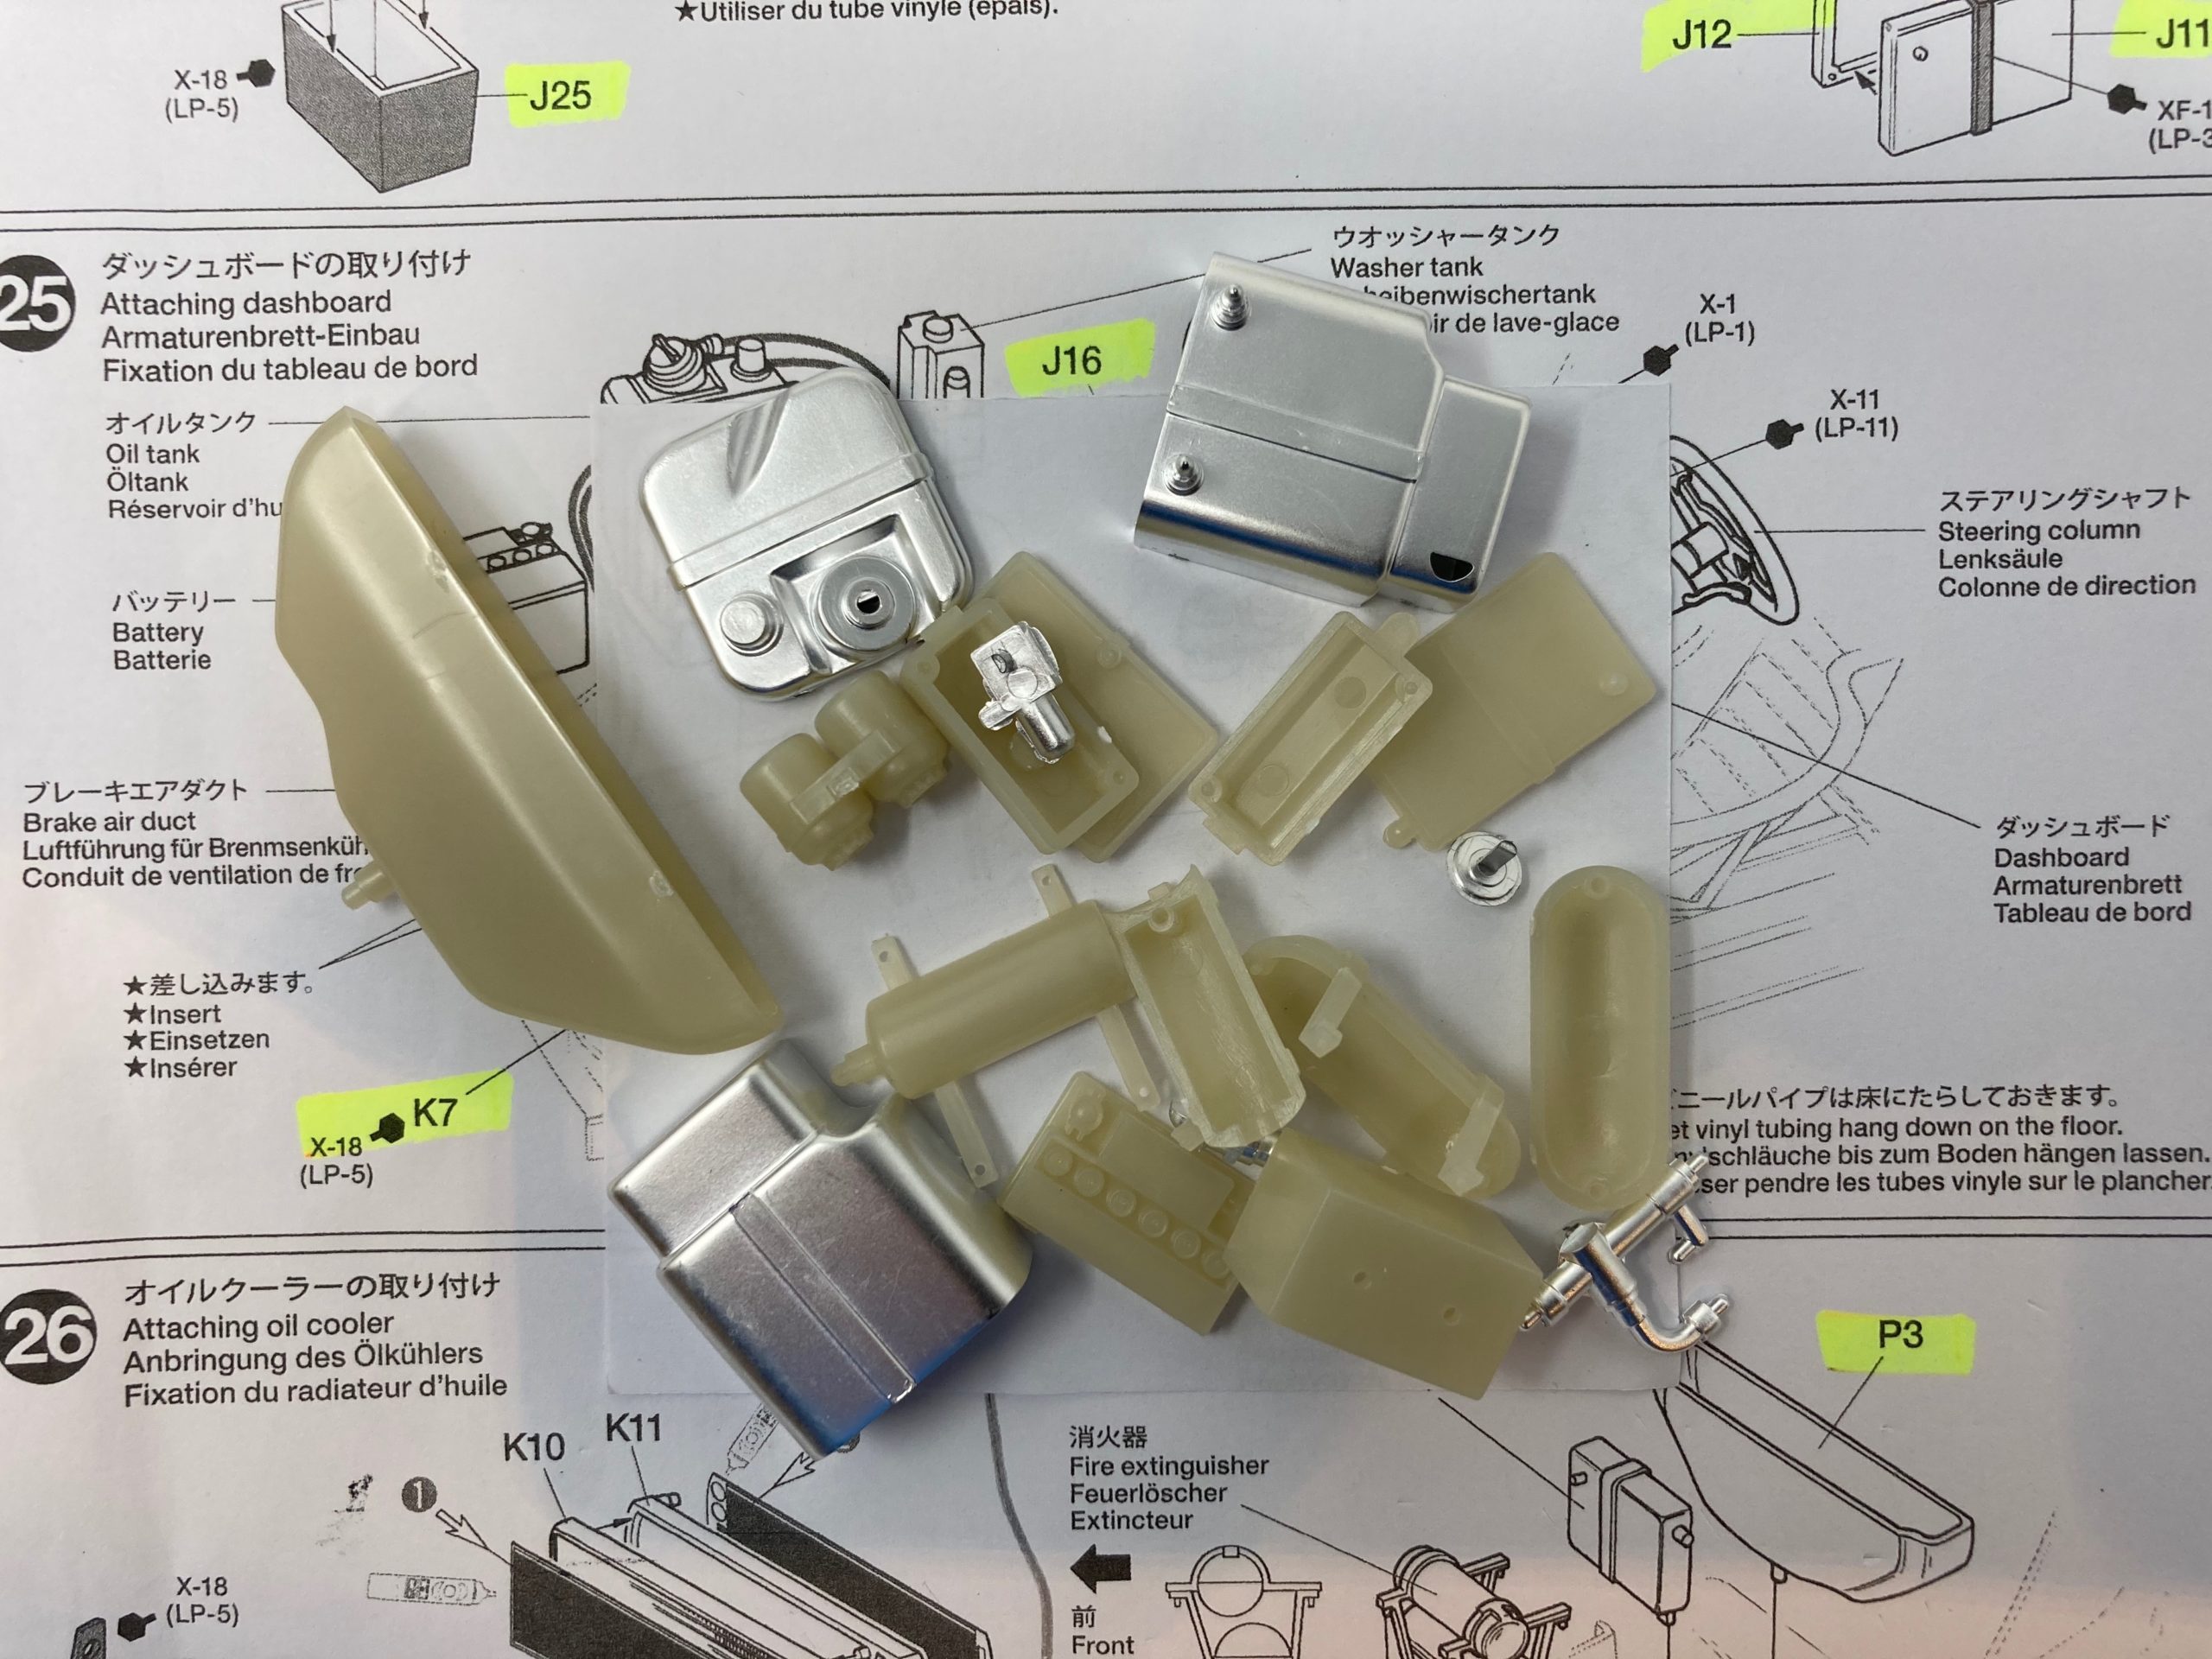


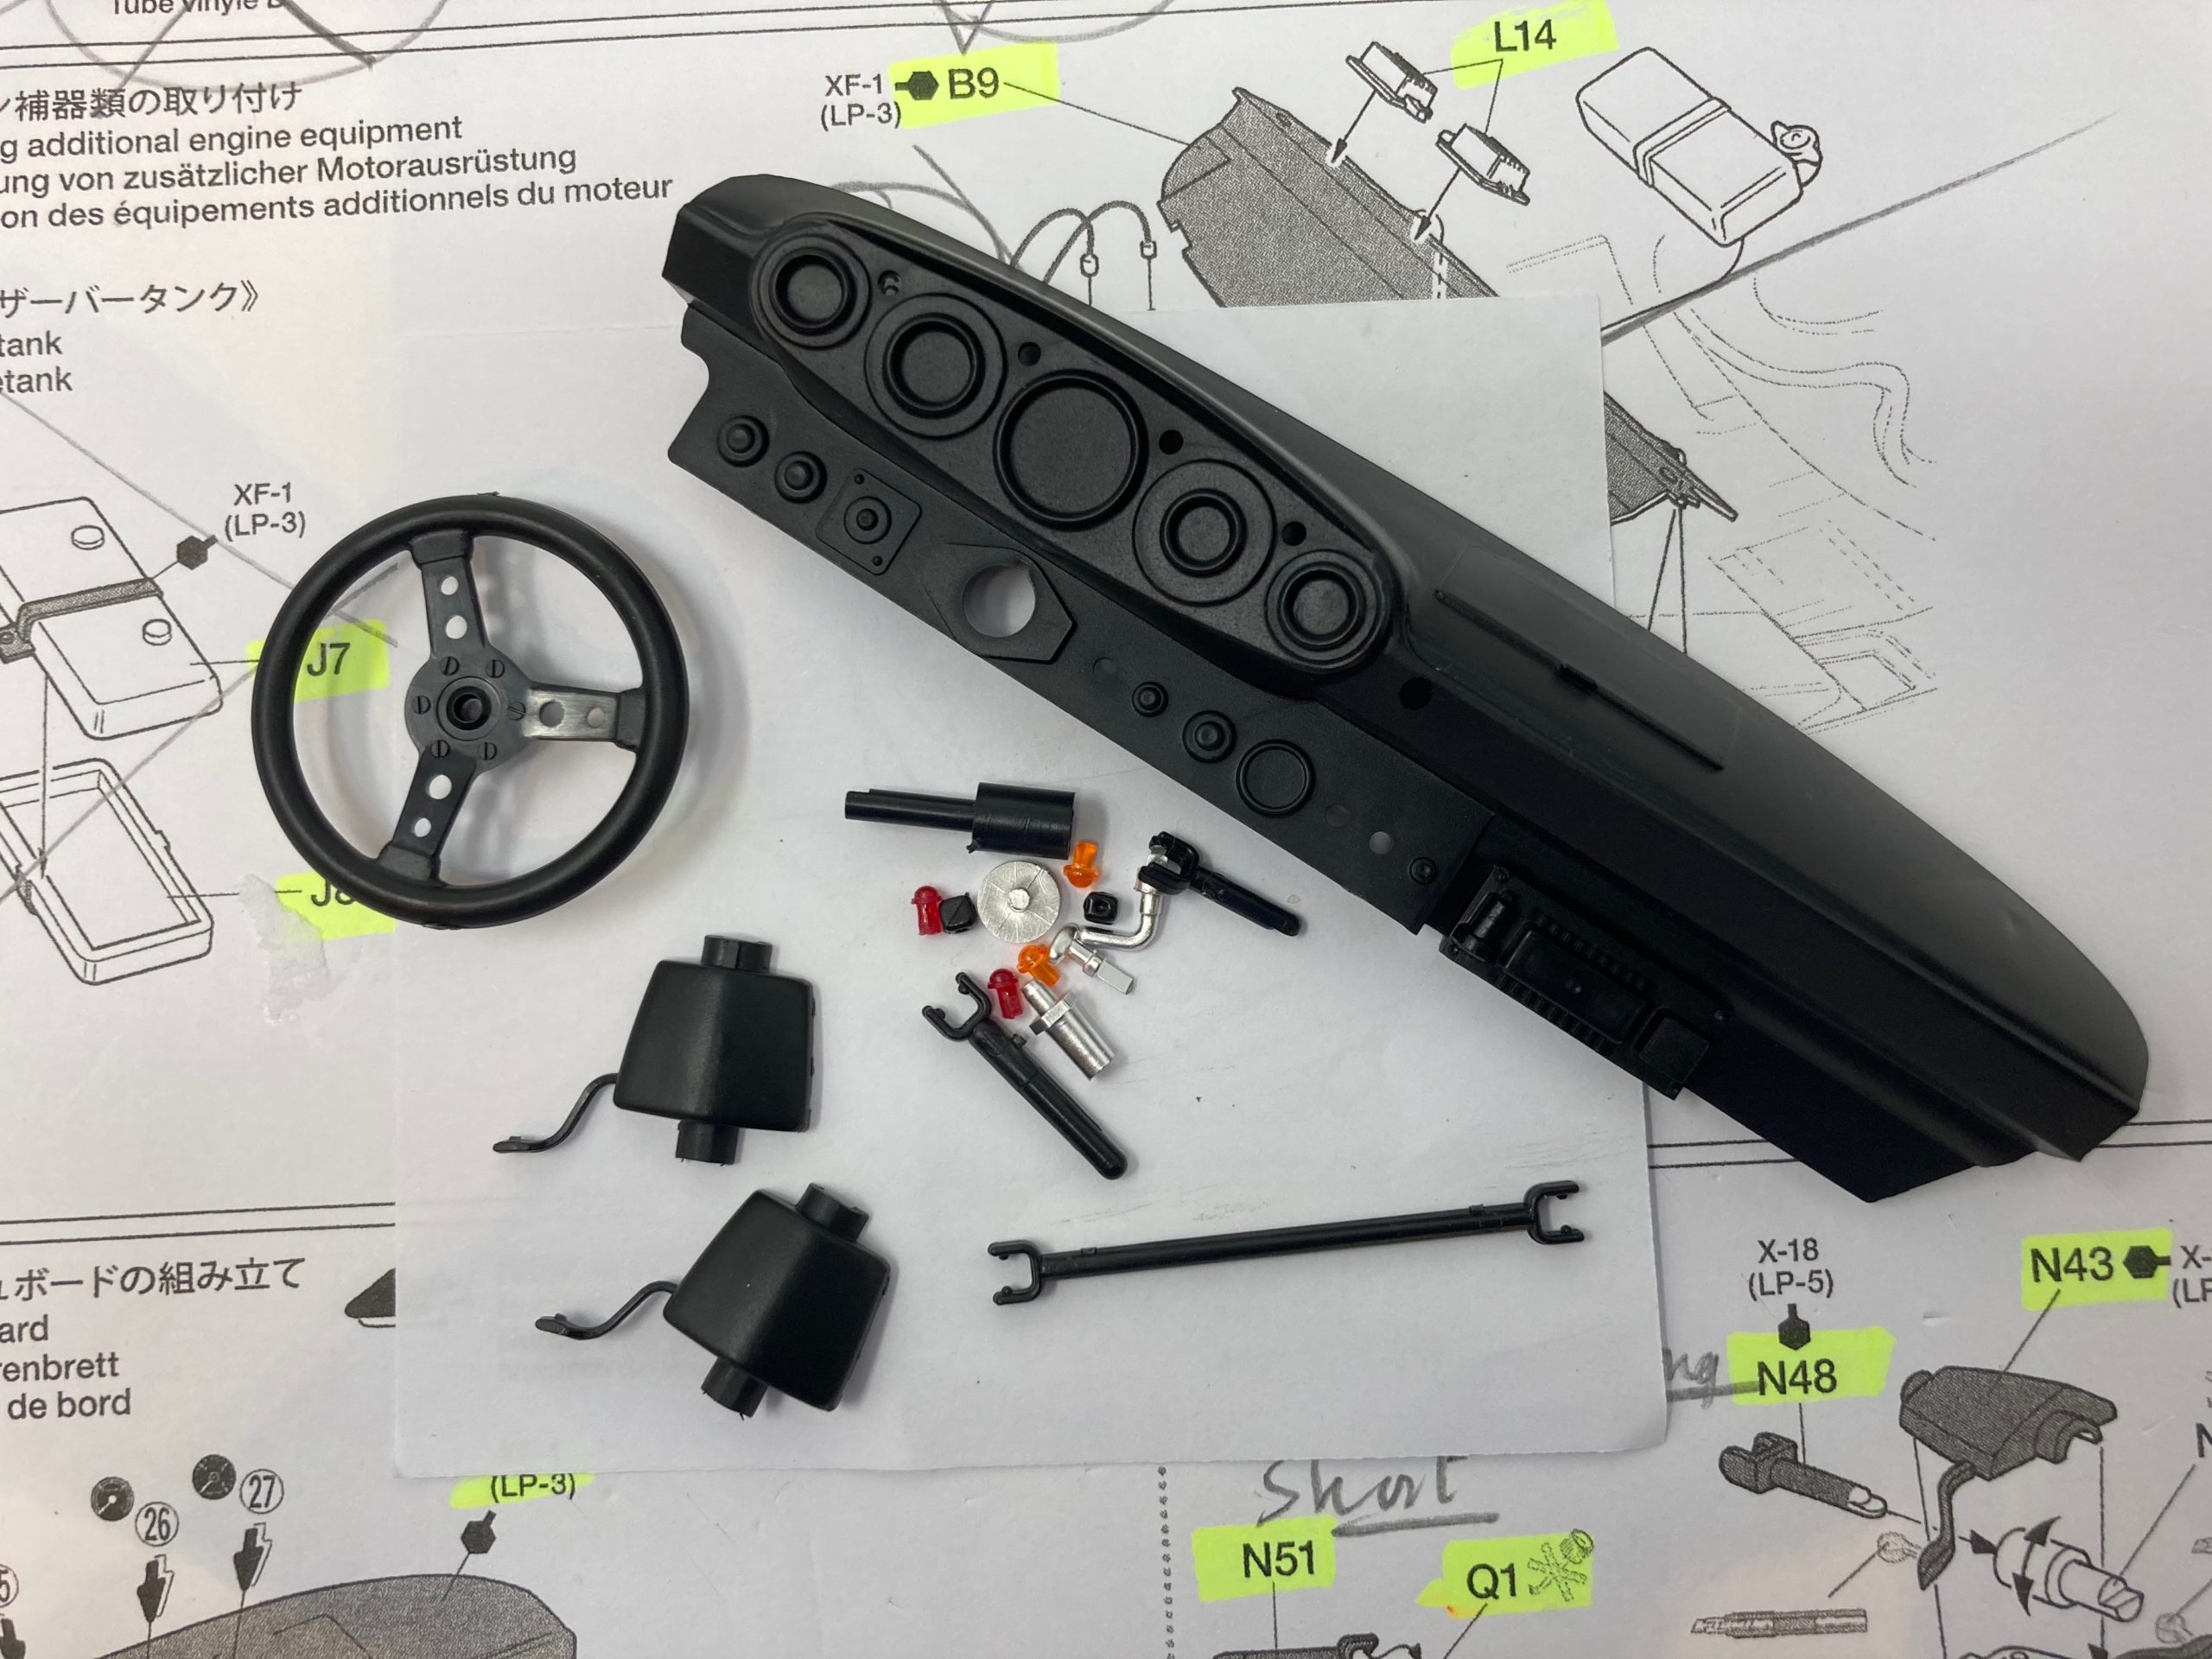
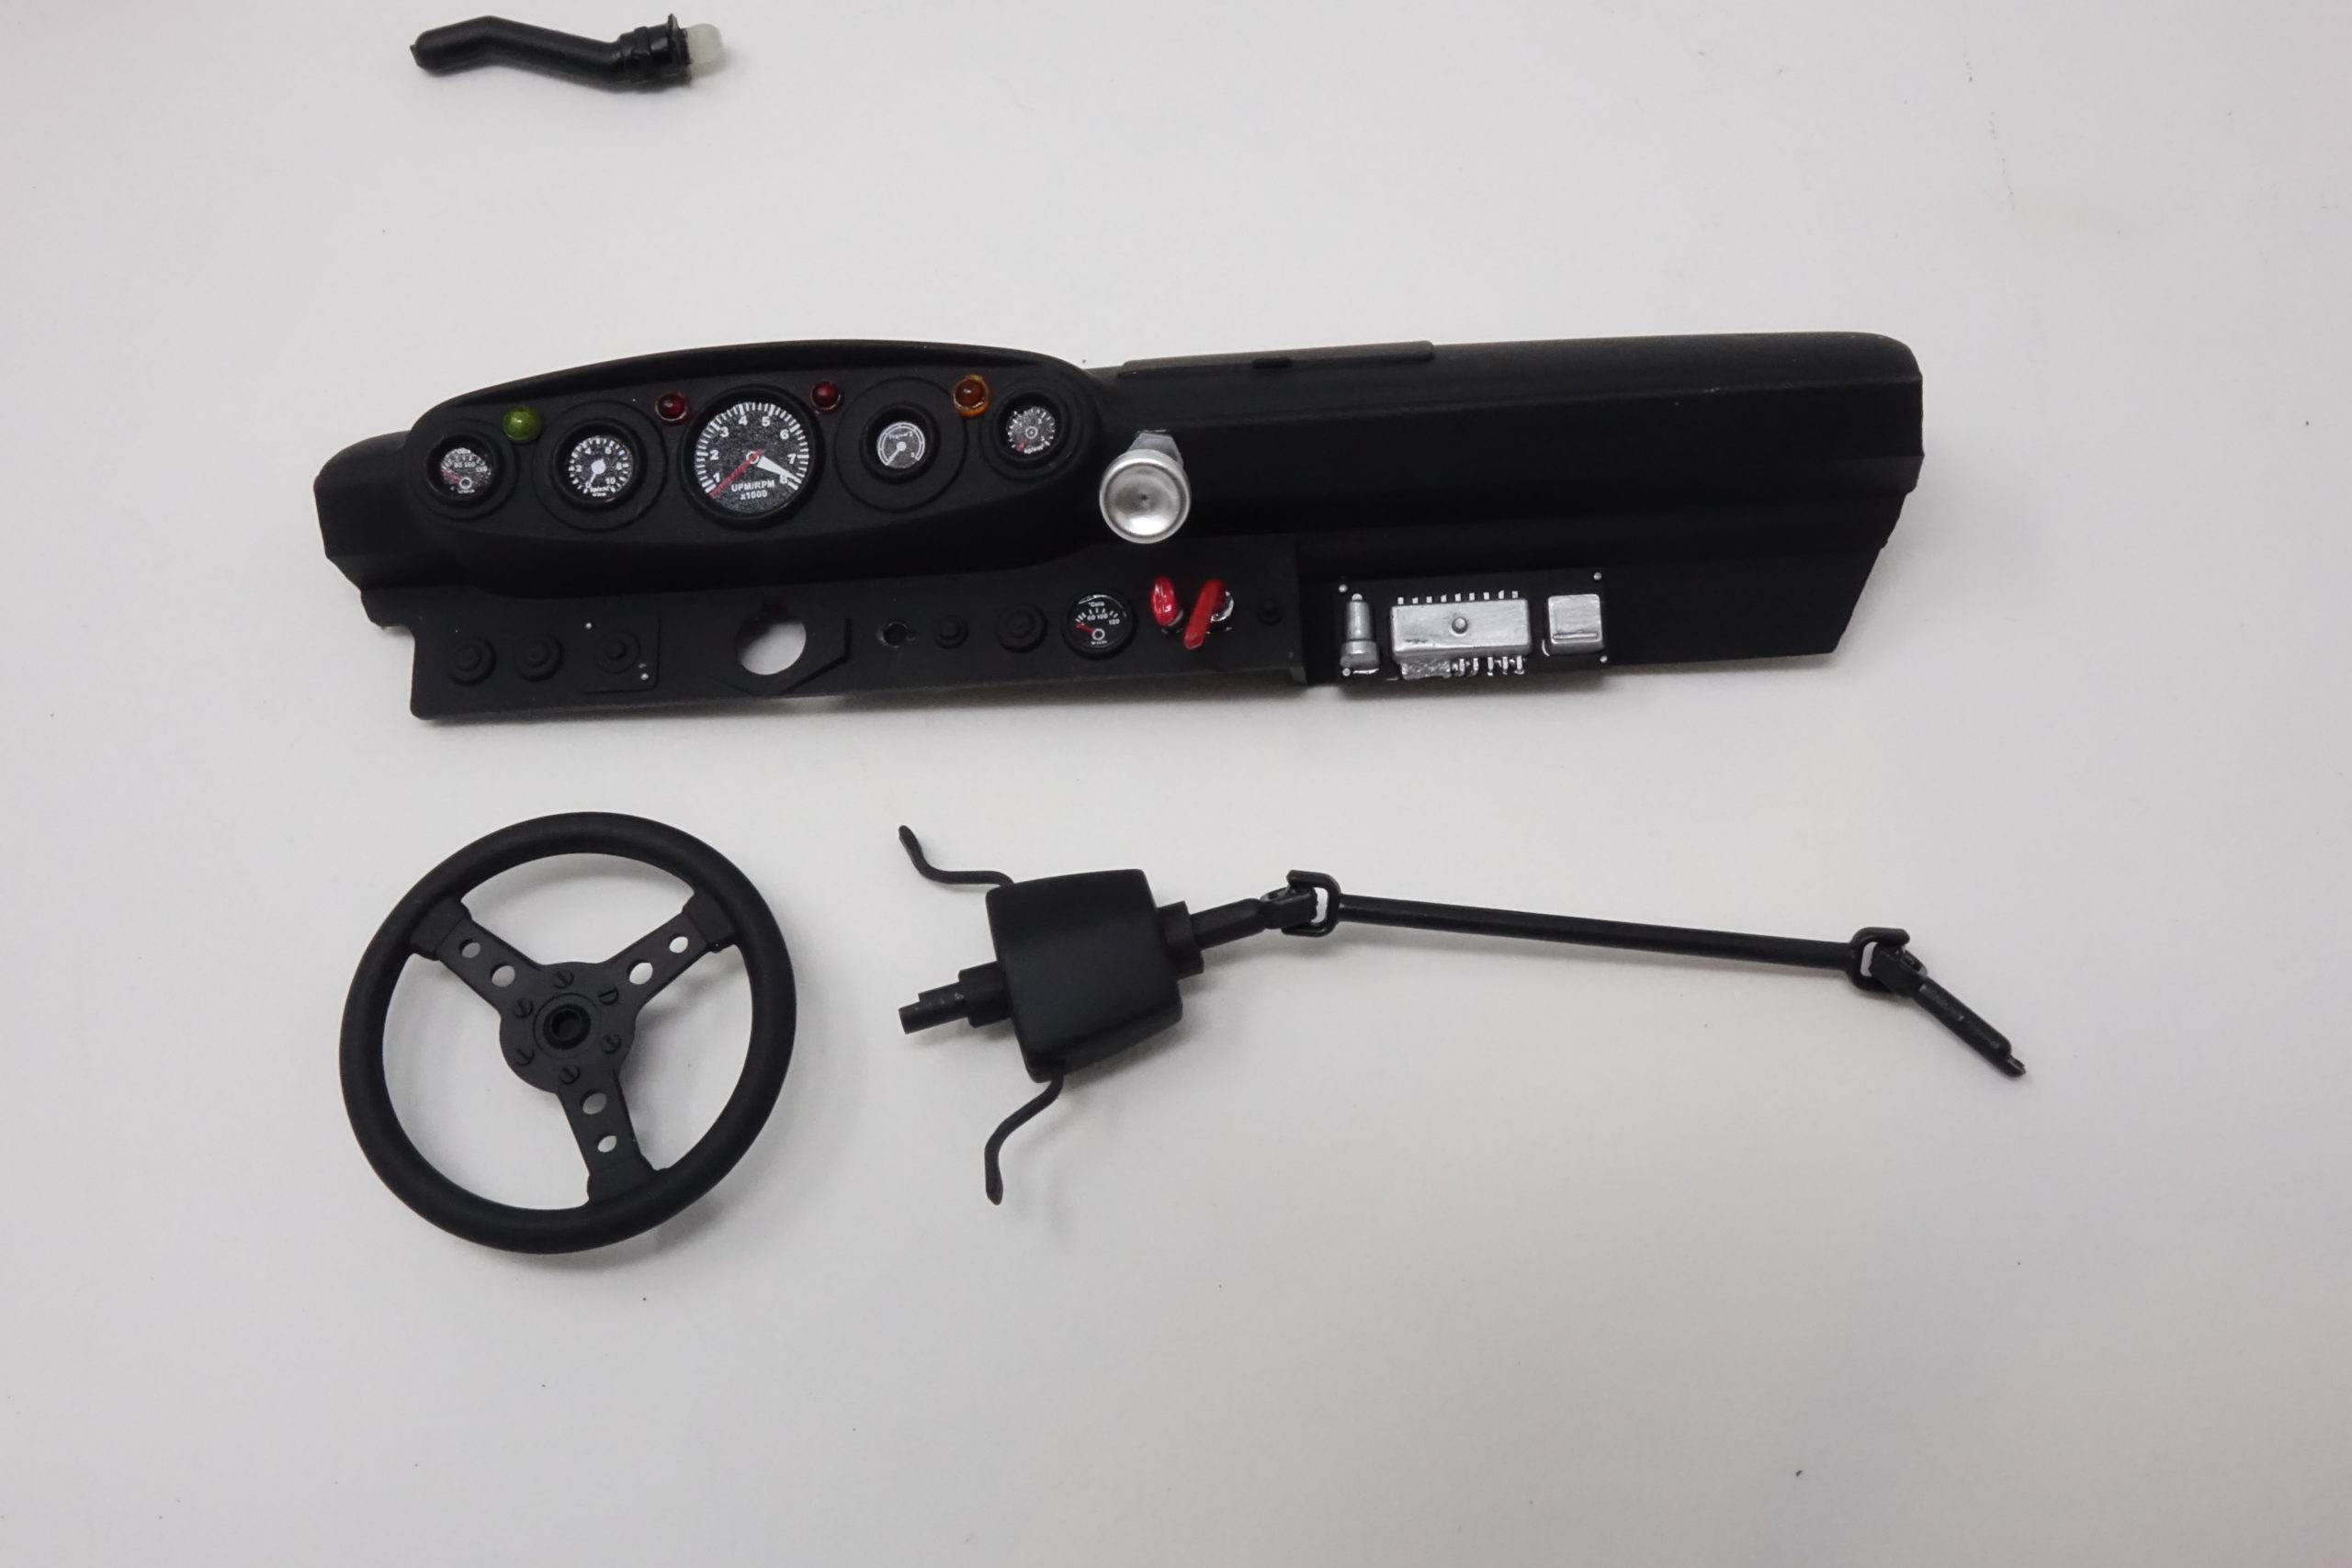
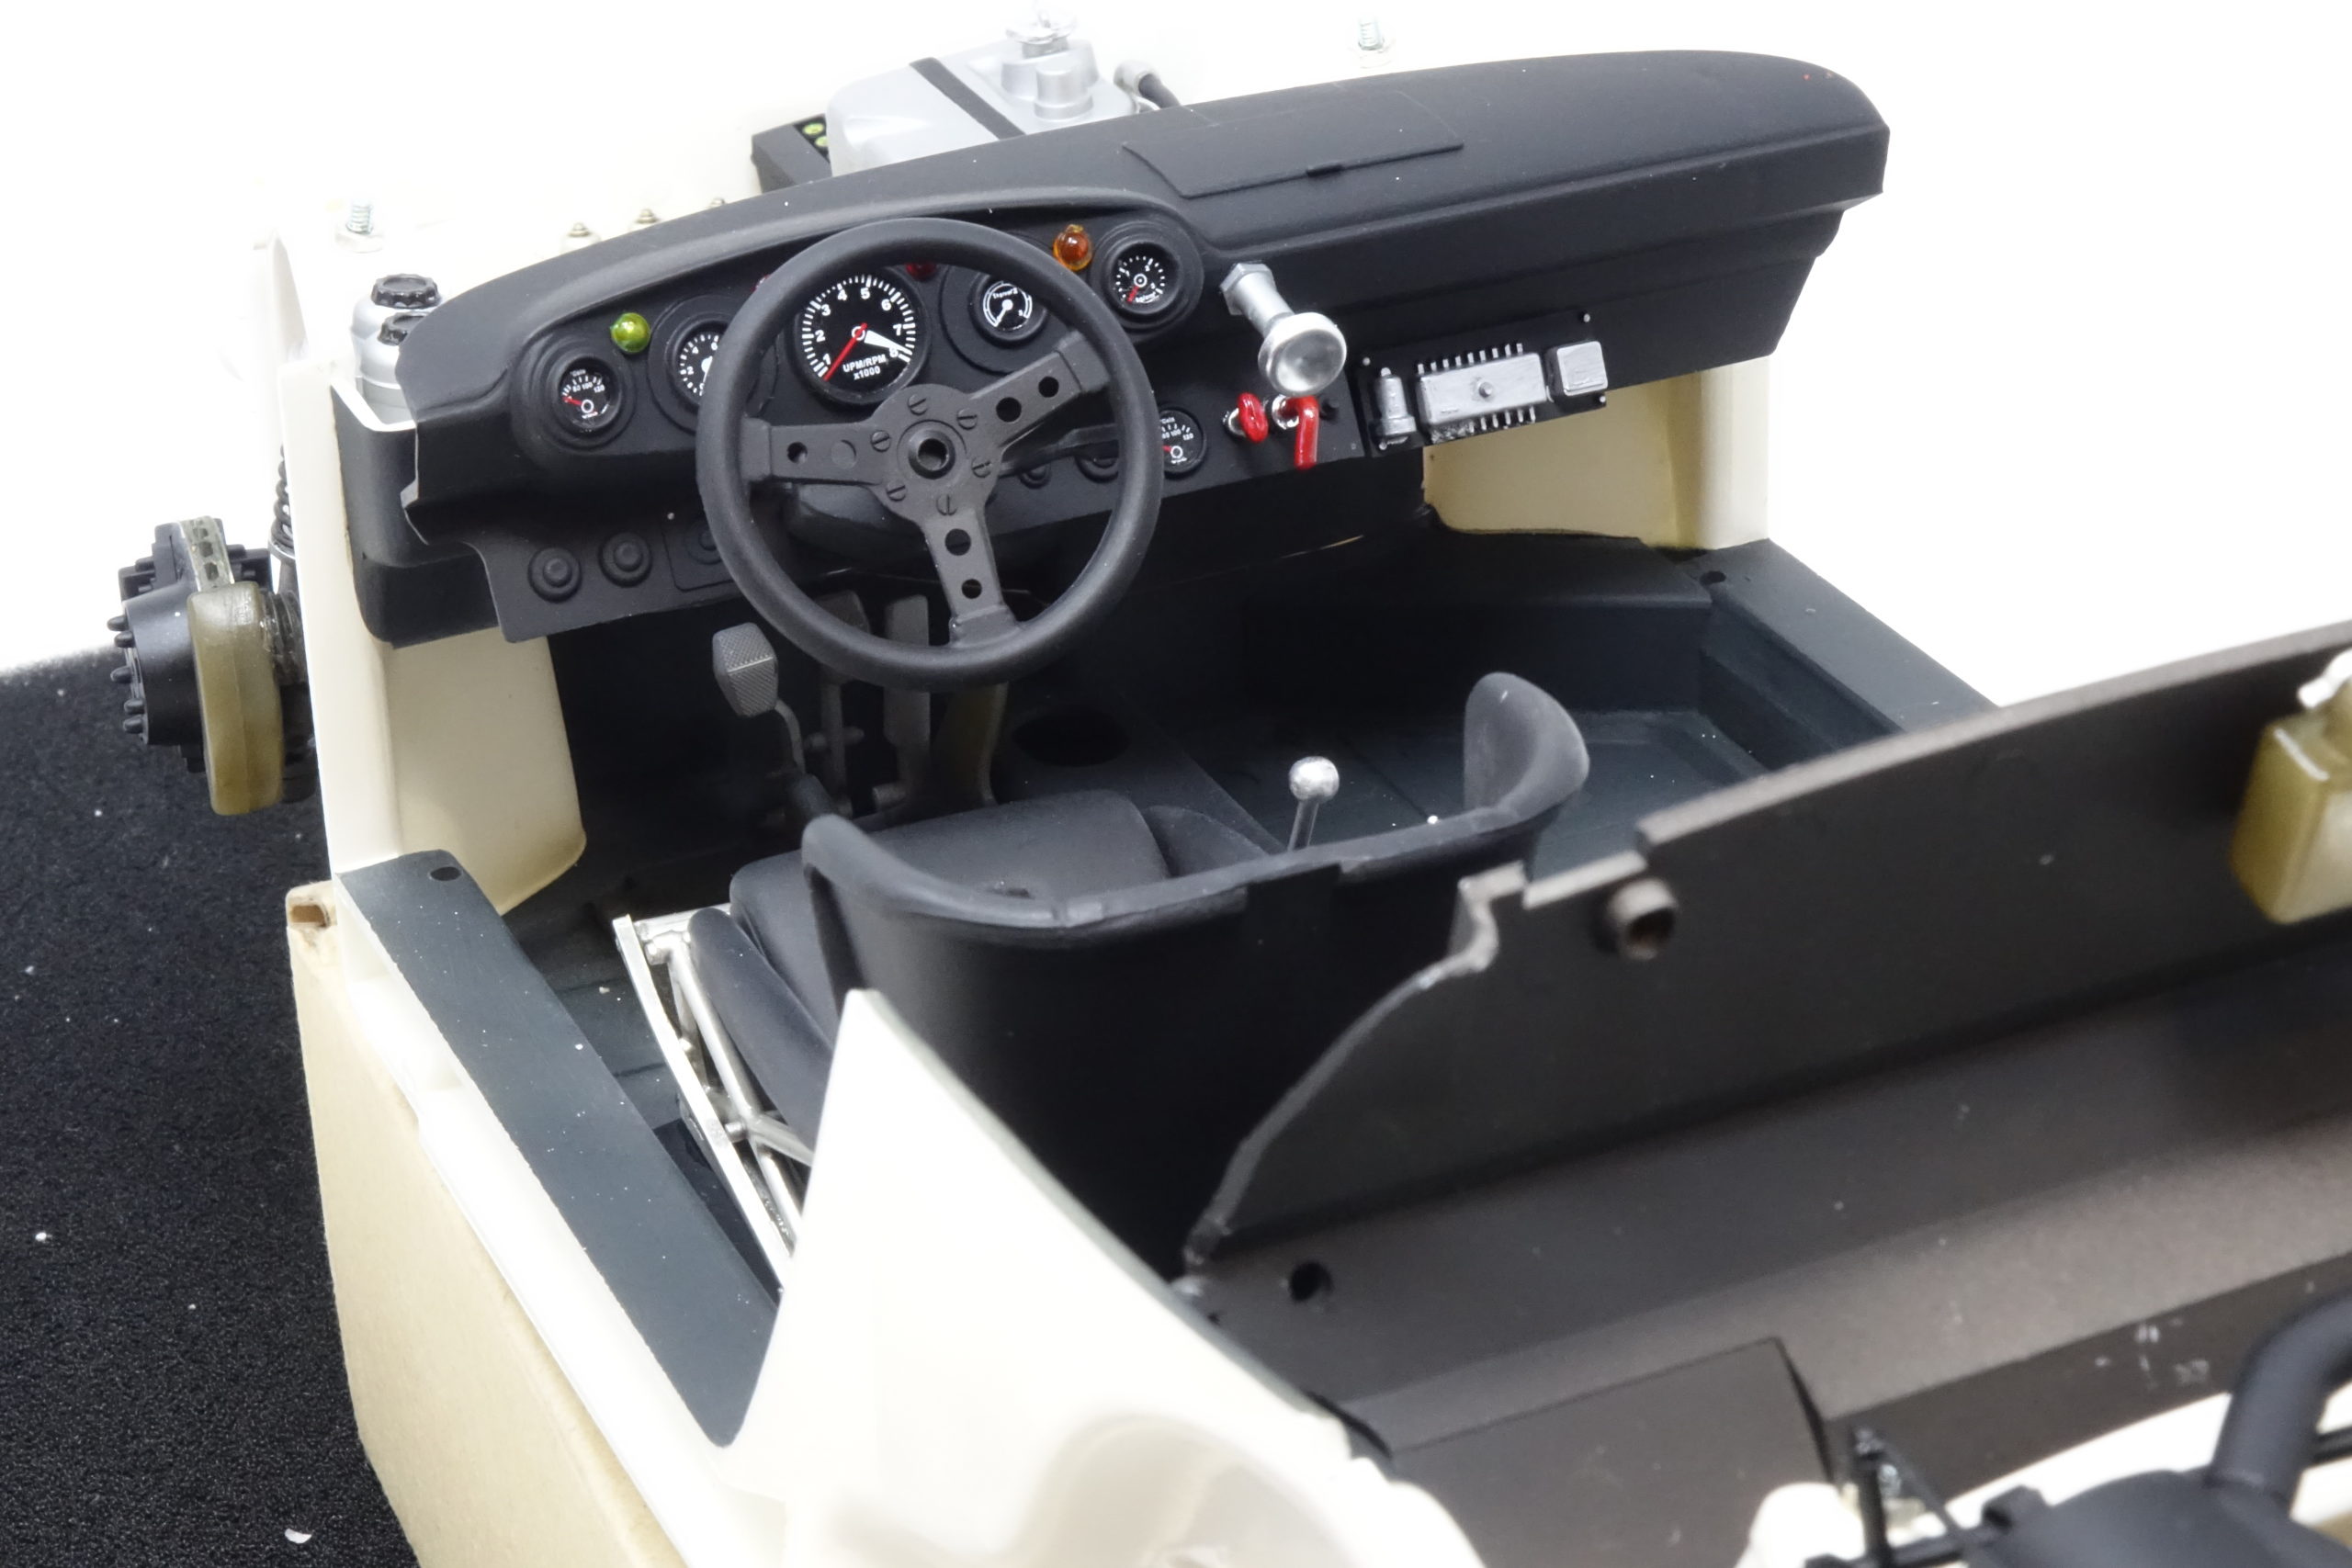
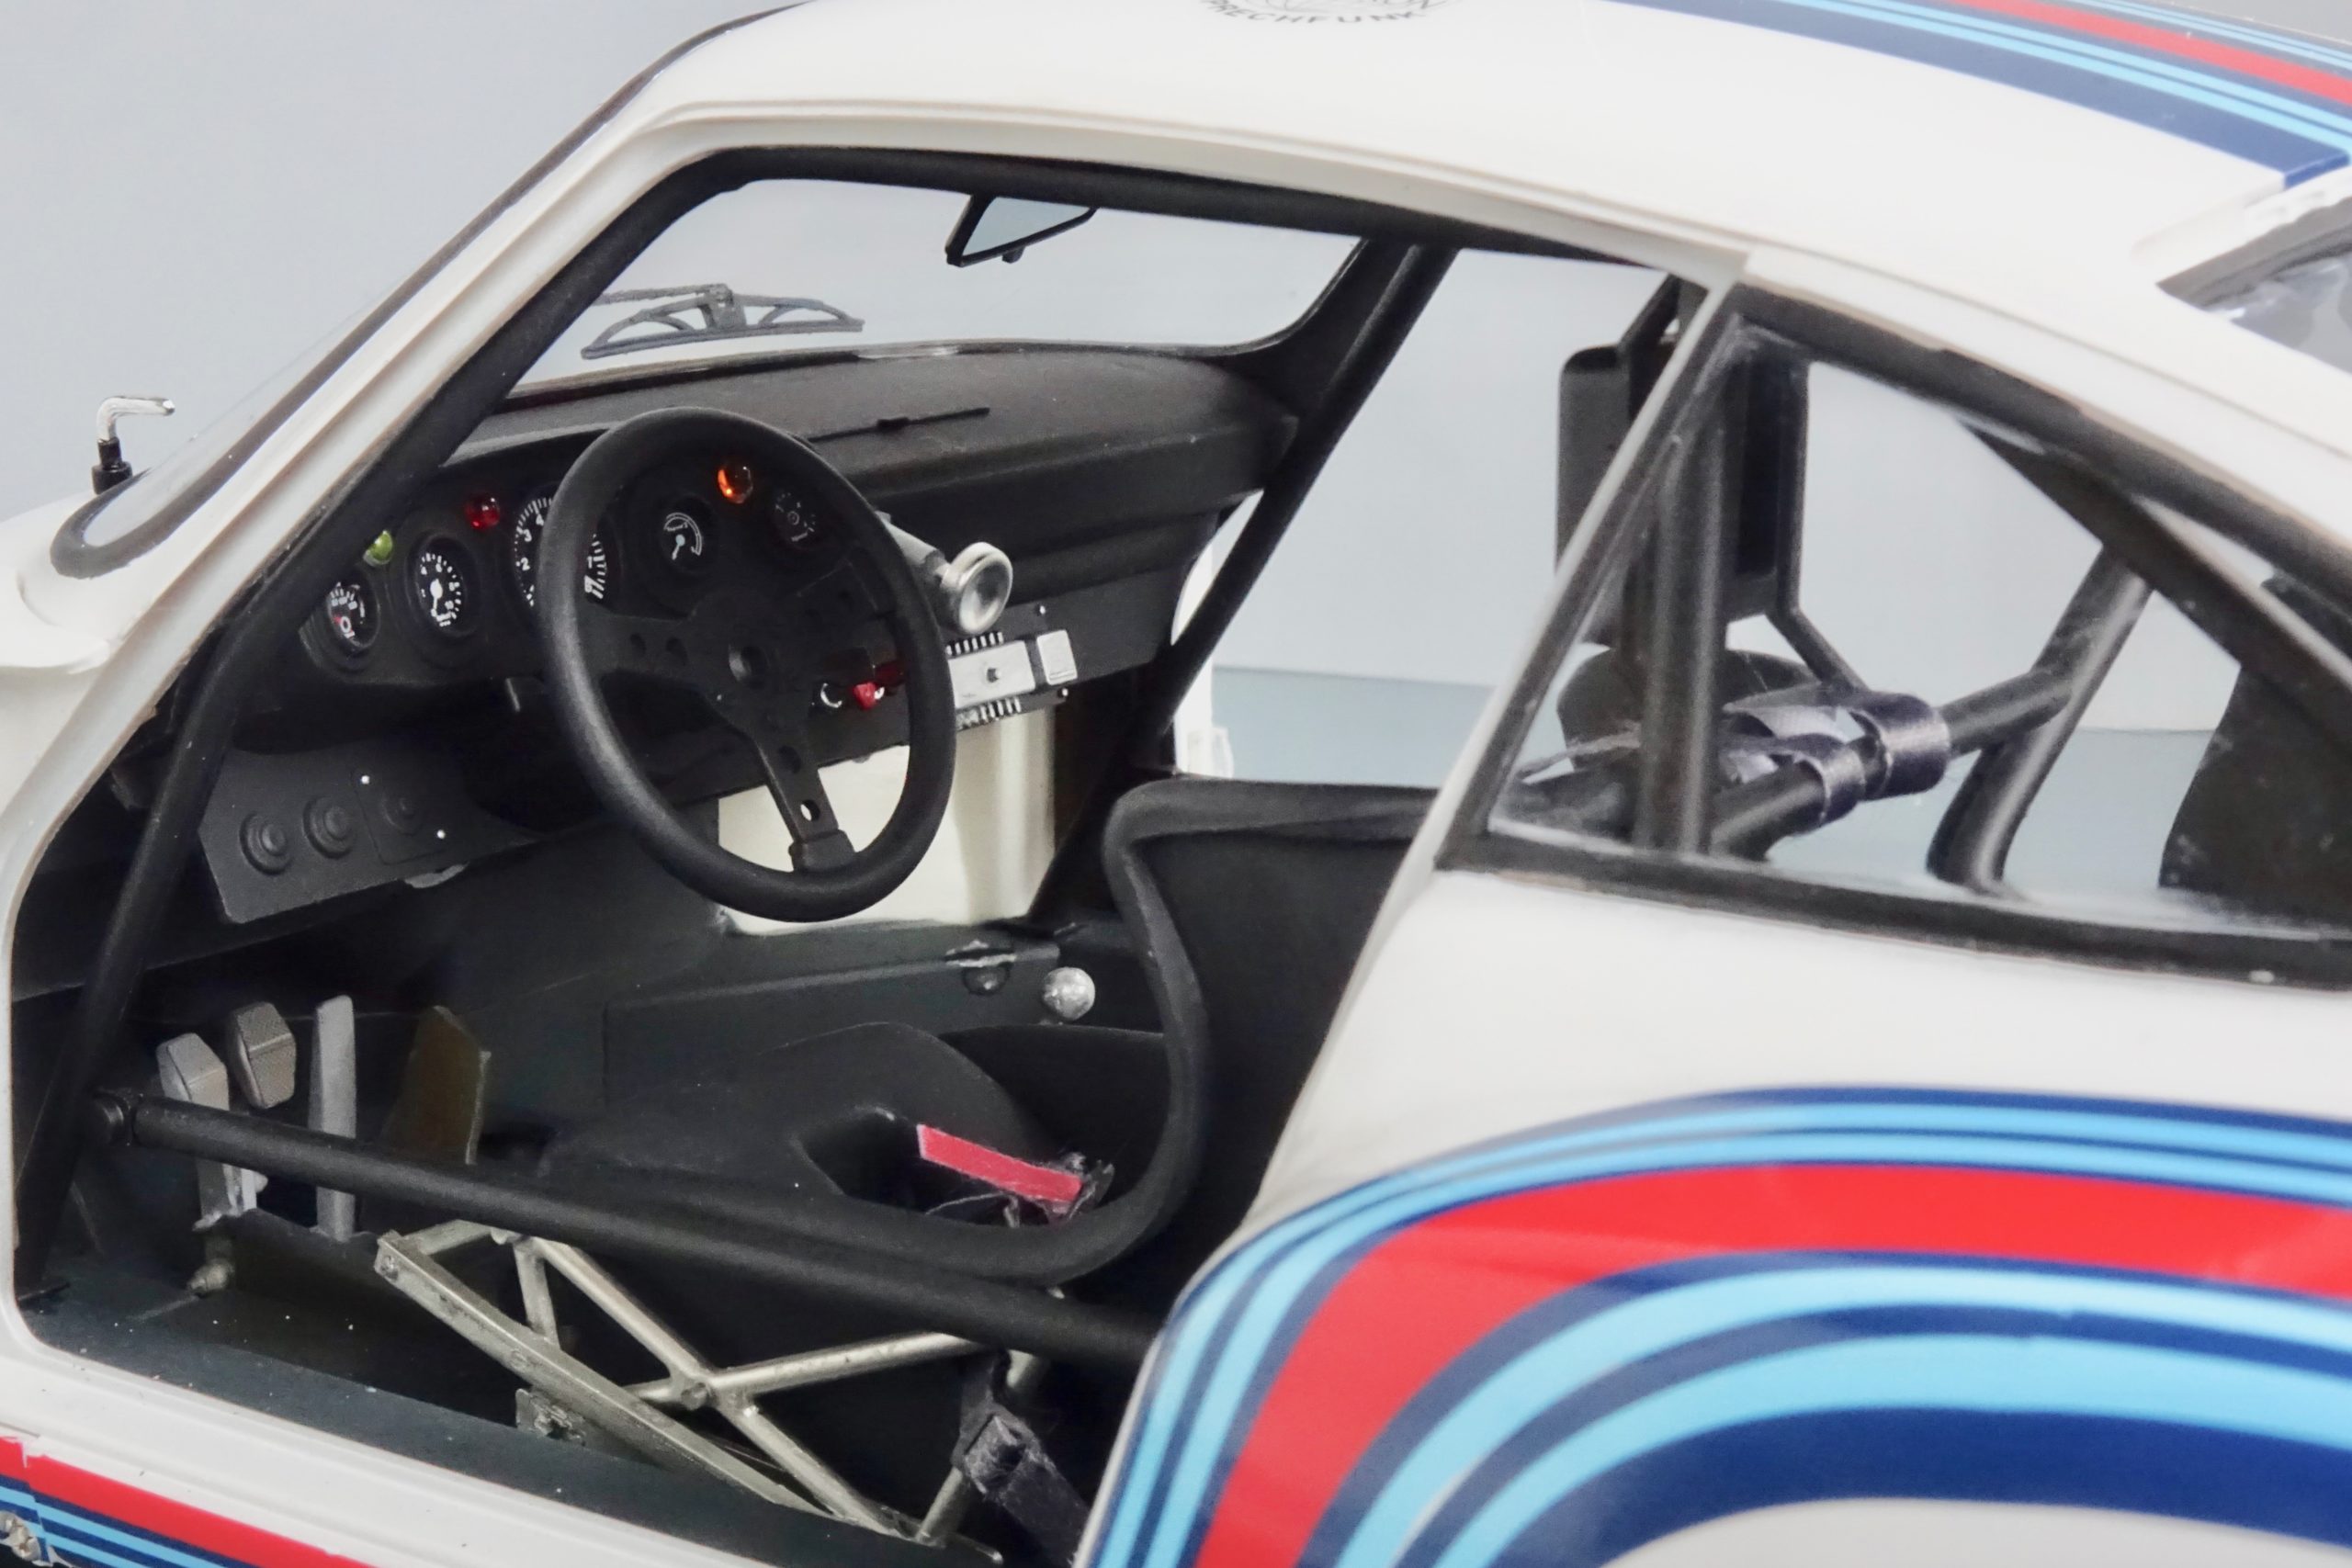
Dashboard etc
All painting was done as per instructions and decals applied. The decals here were an excellent fit Some detail on dash was brought out with a fine brush applying LP Silver. No problems here at all. Steering column fit was tested with dash in place (unglued) before later final assembly – a tricky part, so care needed here.
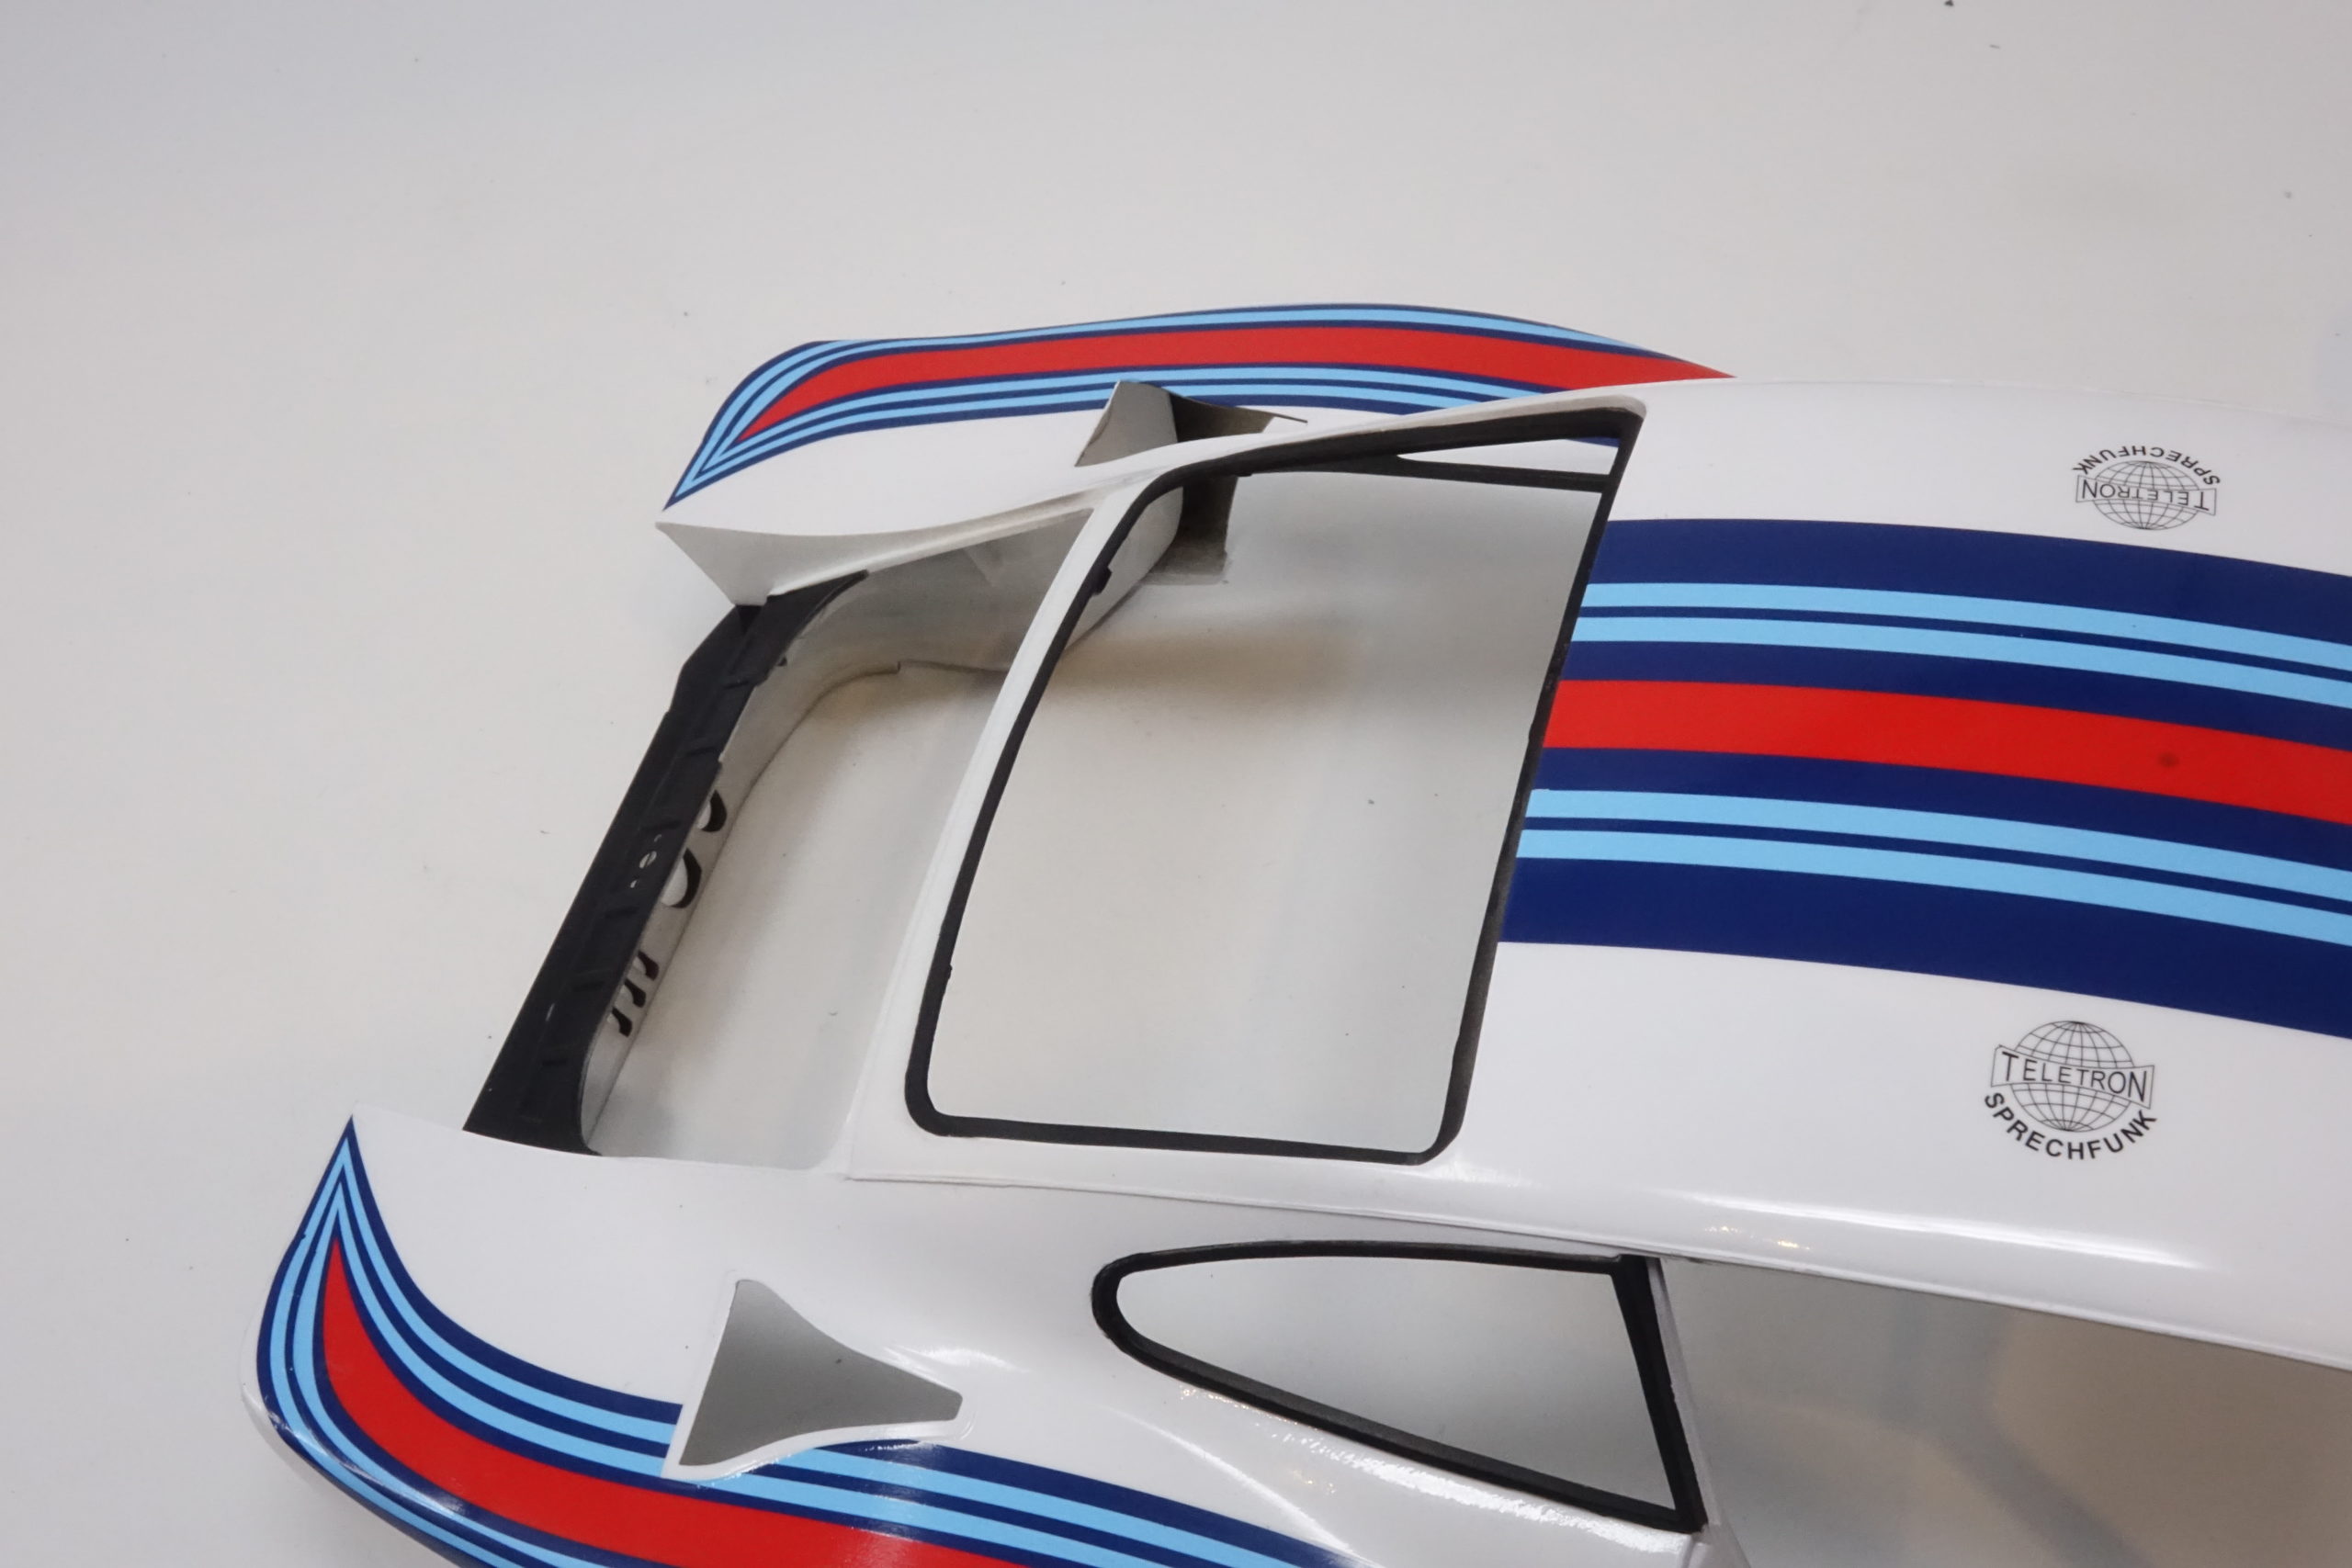
Roll cage and rear bulkhead shelf
The usual de-seaming (scraping and sanding) of mould lines was done on the roll cage pieces – and then cage assembled dry in place in the cabin – then glued up while in place and then removed for spraying with LP5 SG Black. The main cage could then be glued in place in one piece. When fitted, the 2 remaining seat belts were attached as shown and then the 2 rear roll cage struts.

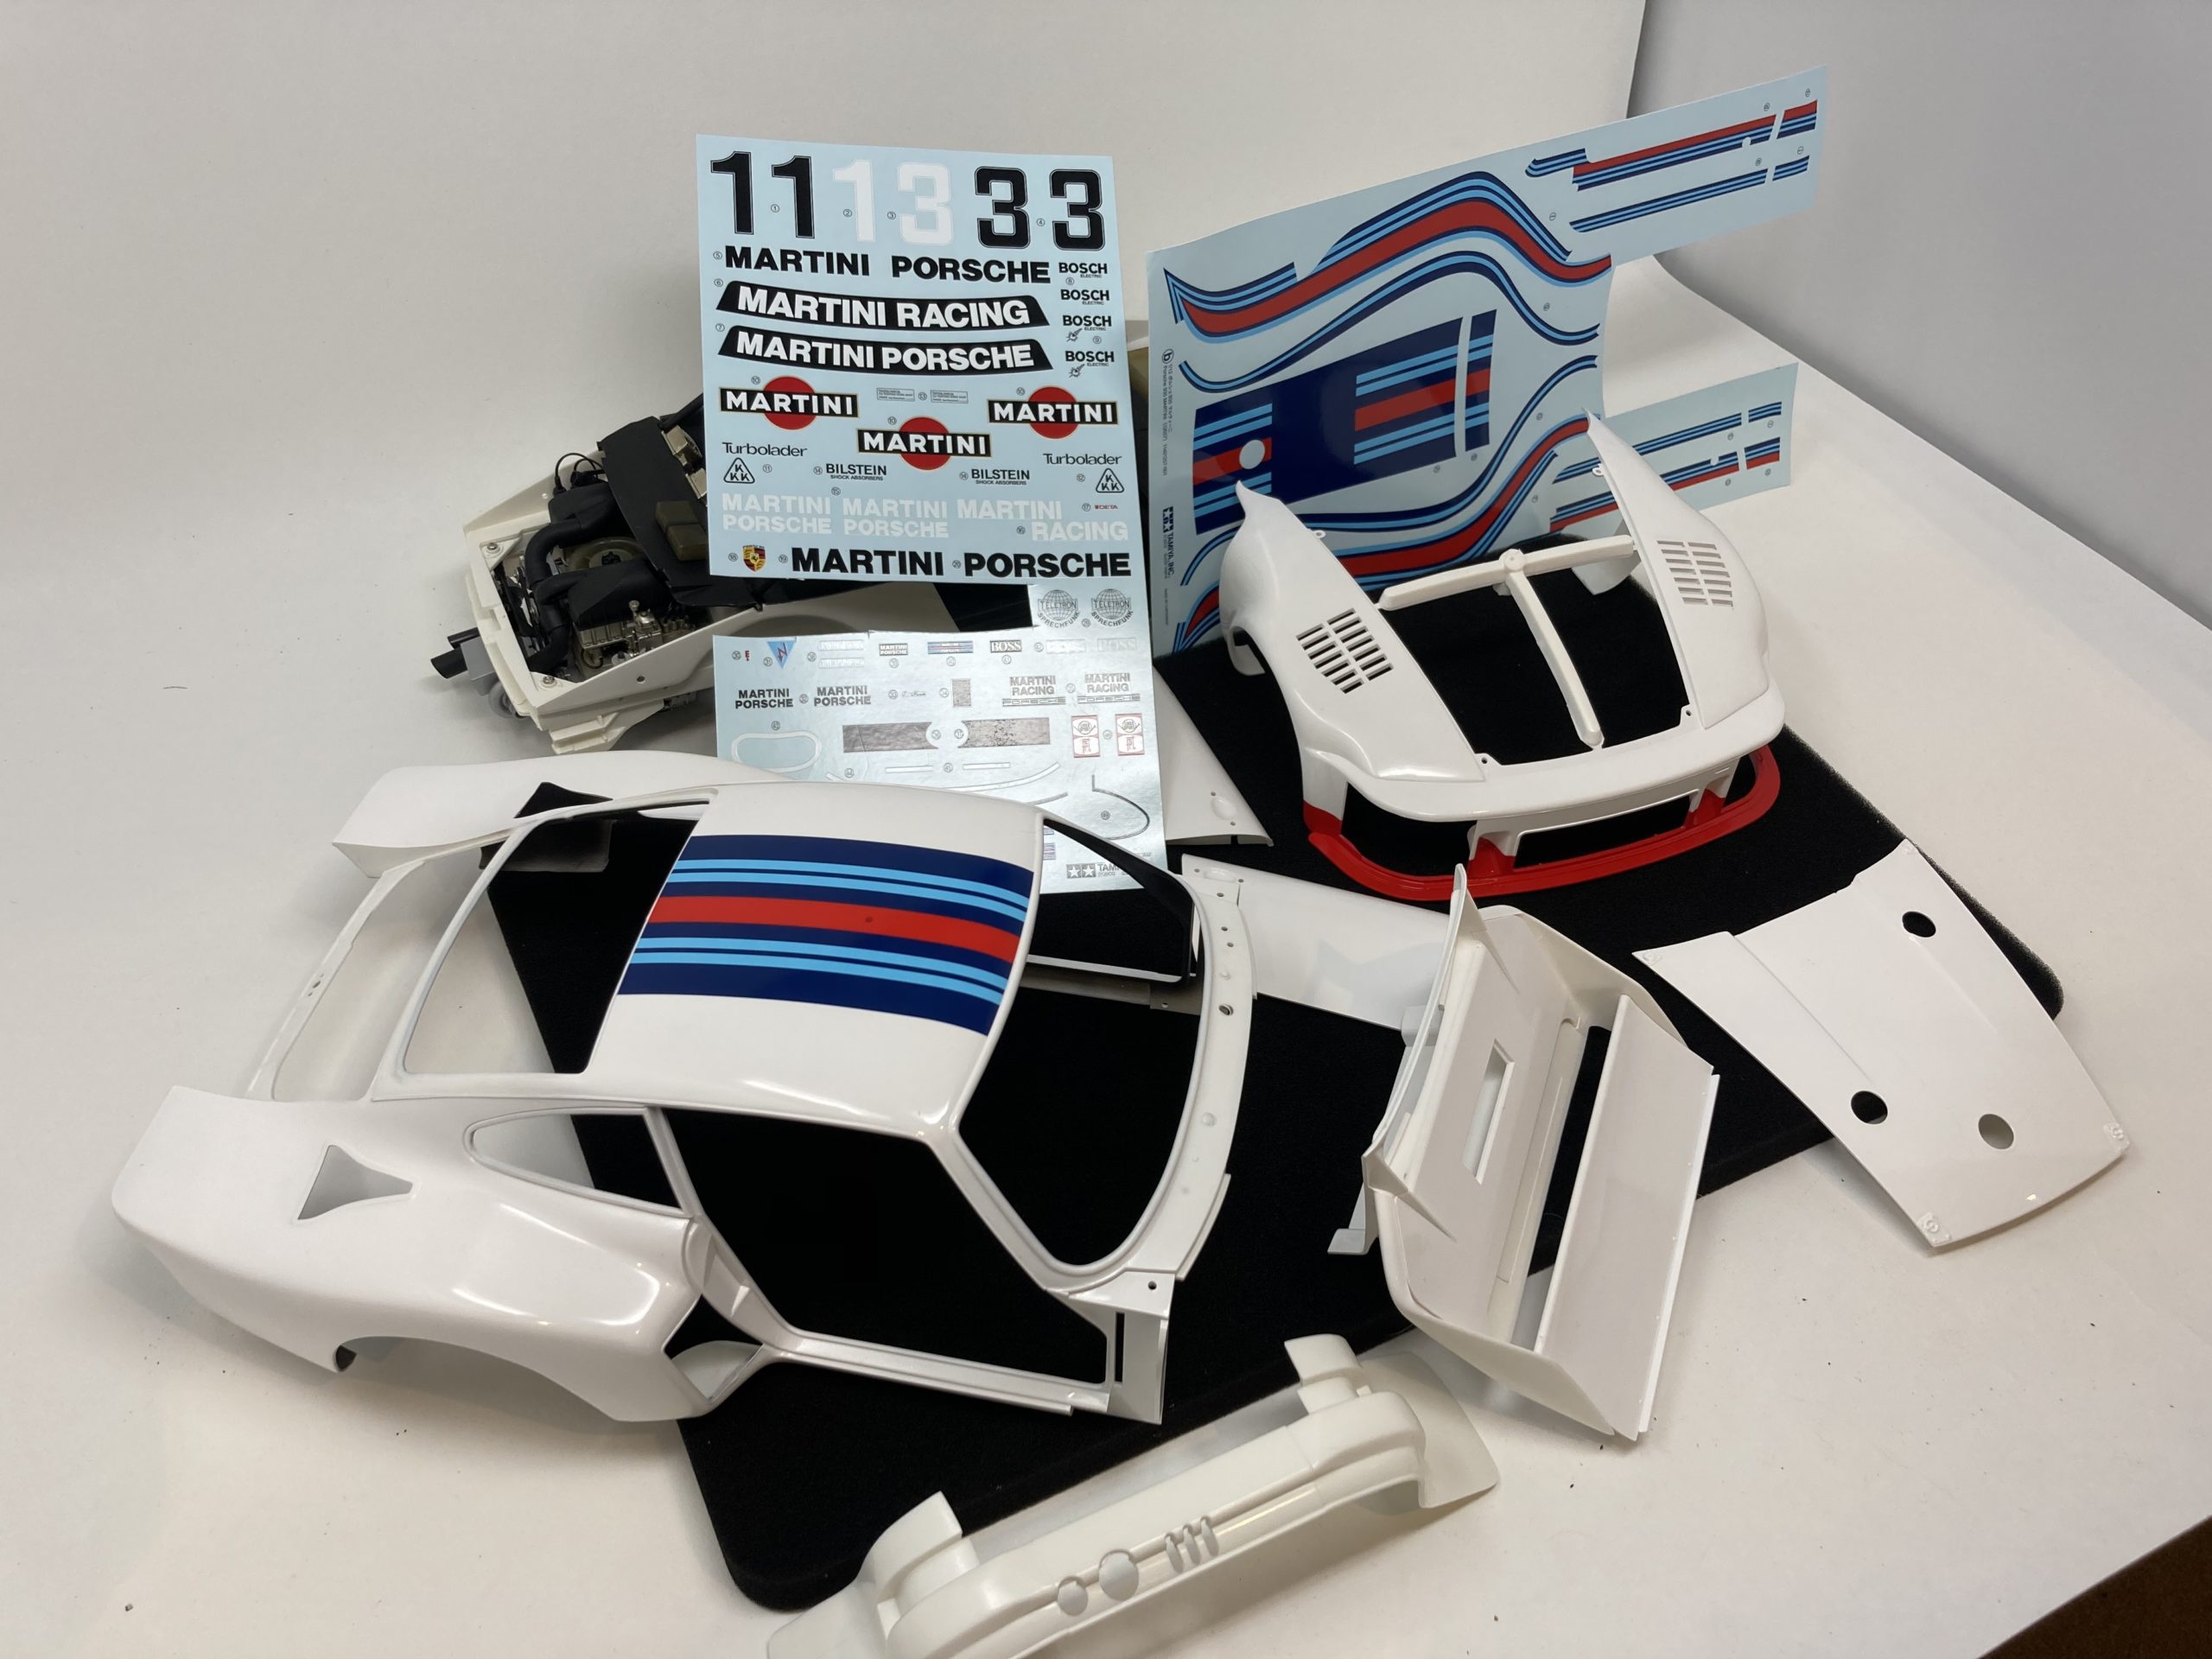
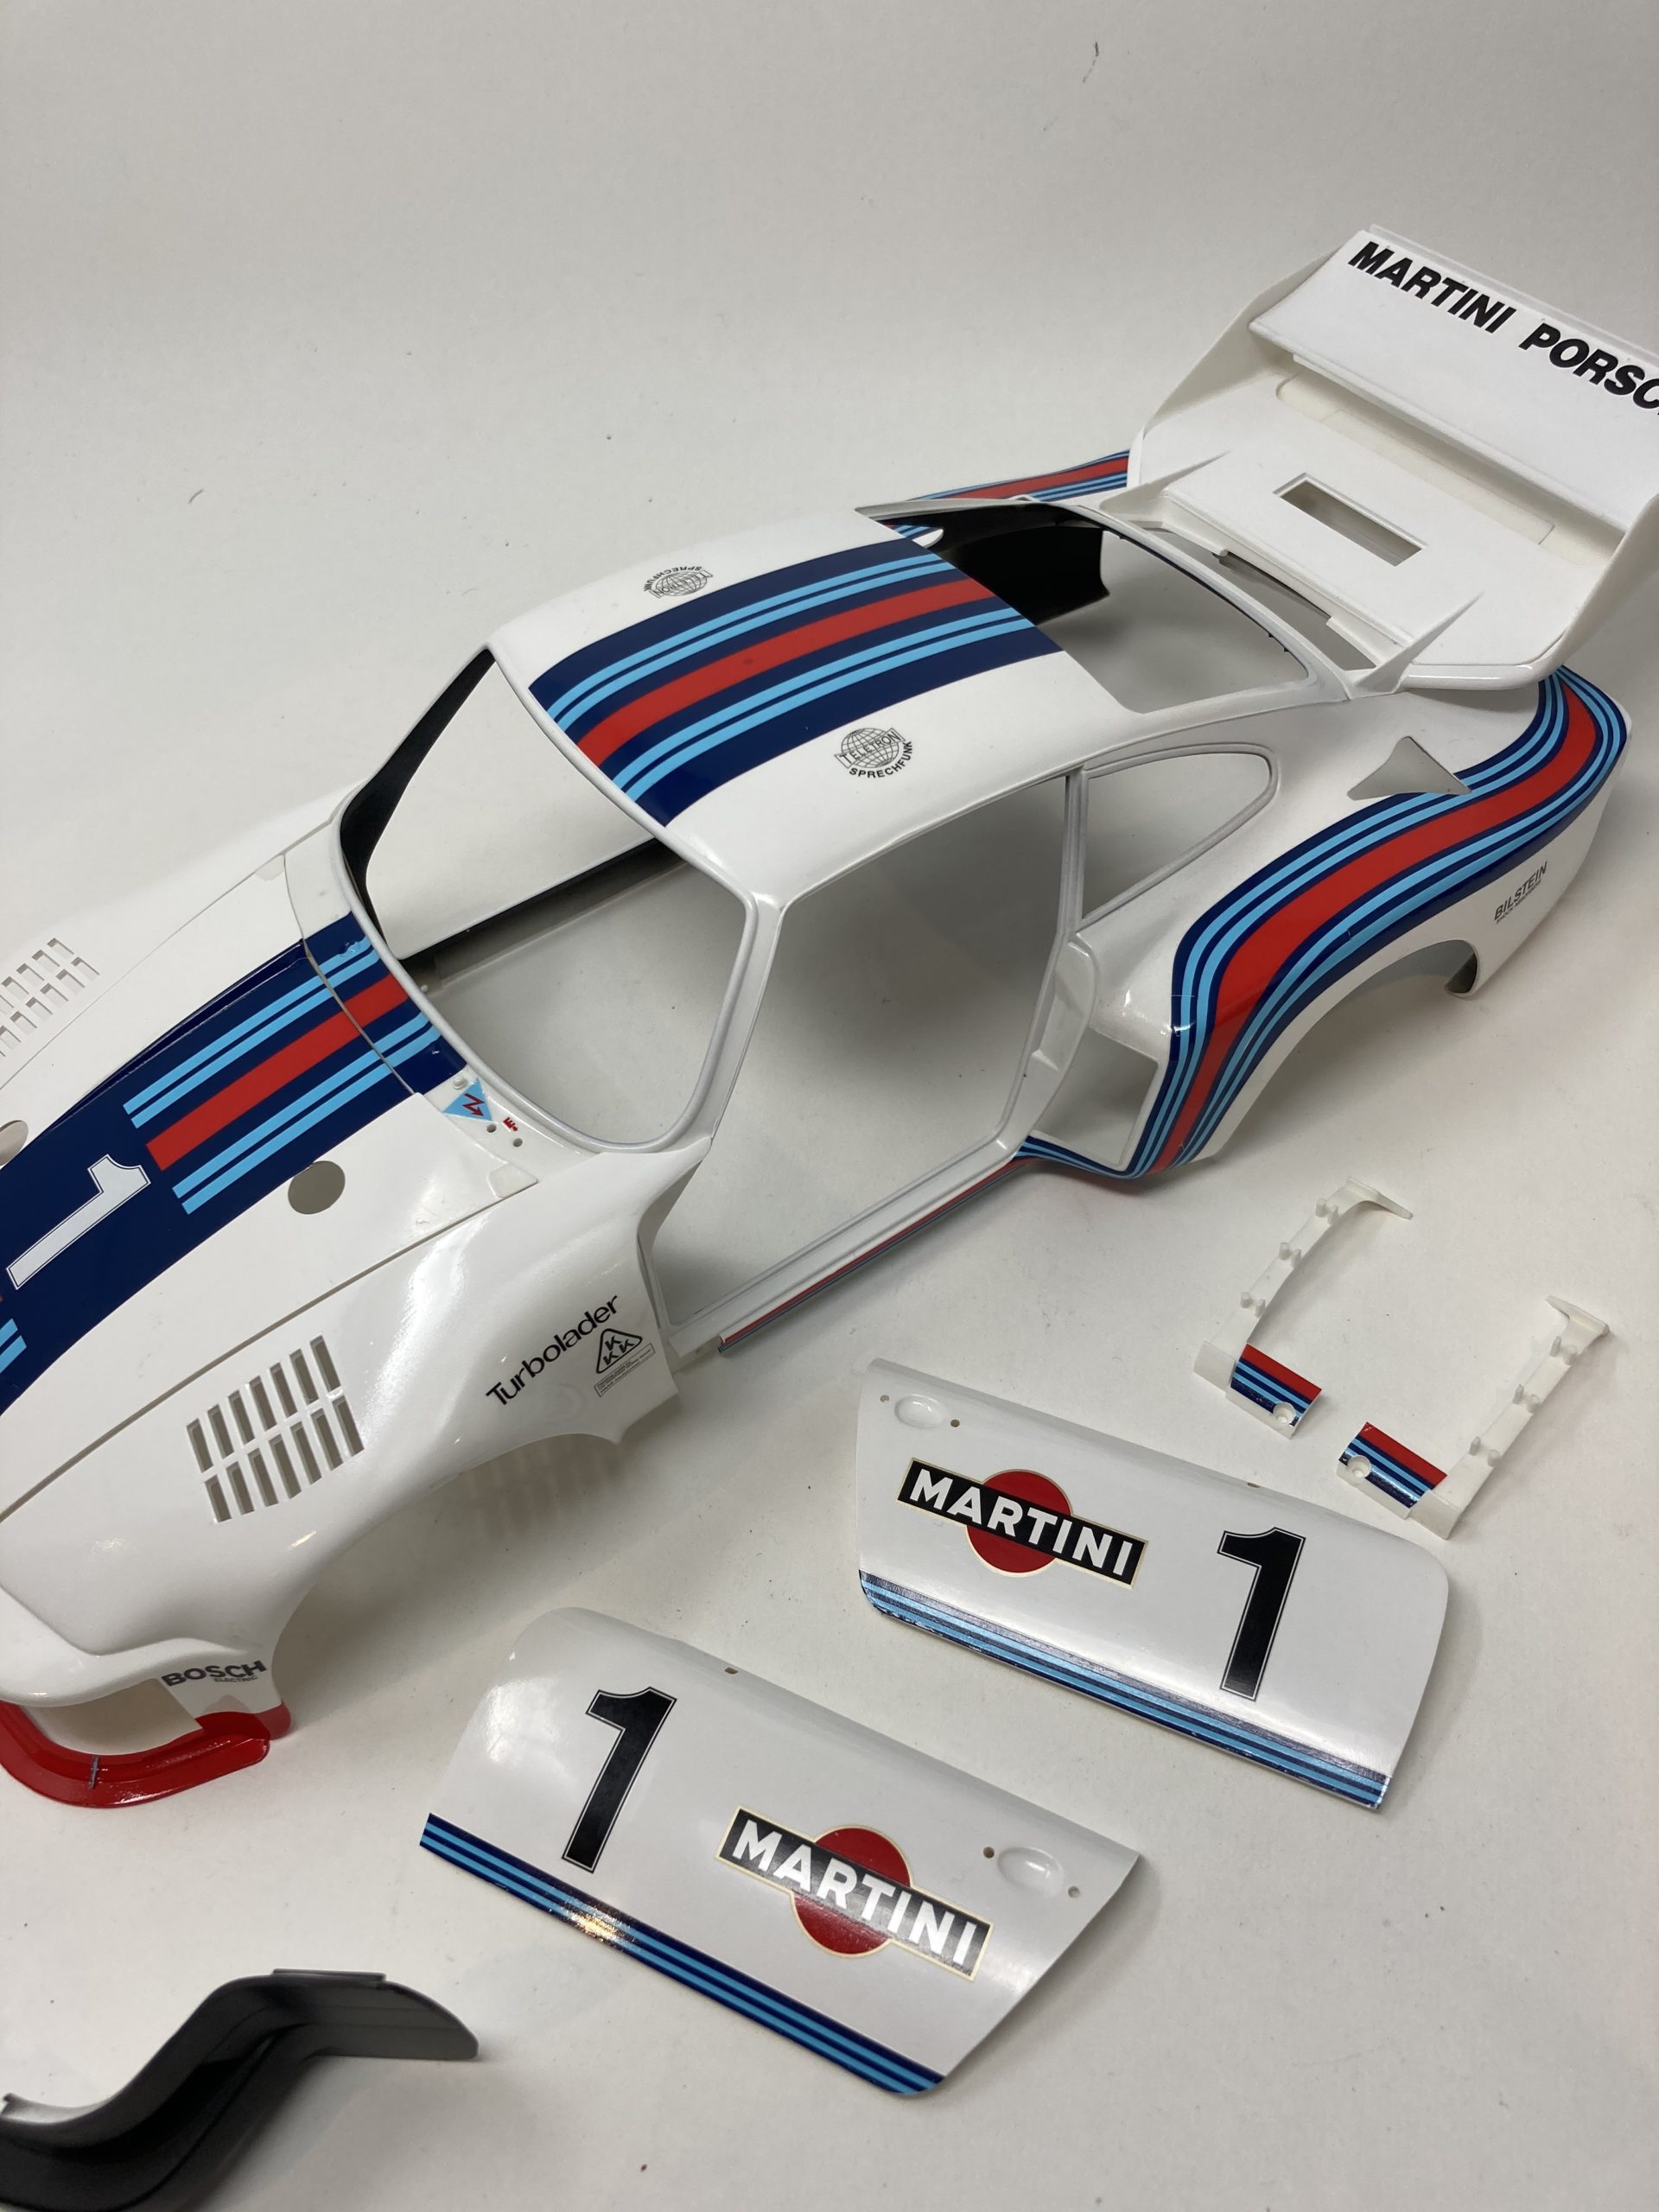
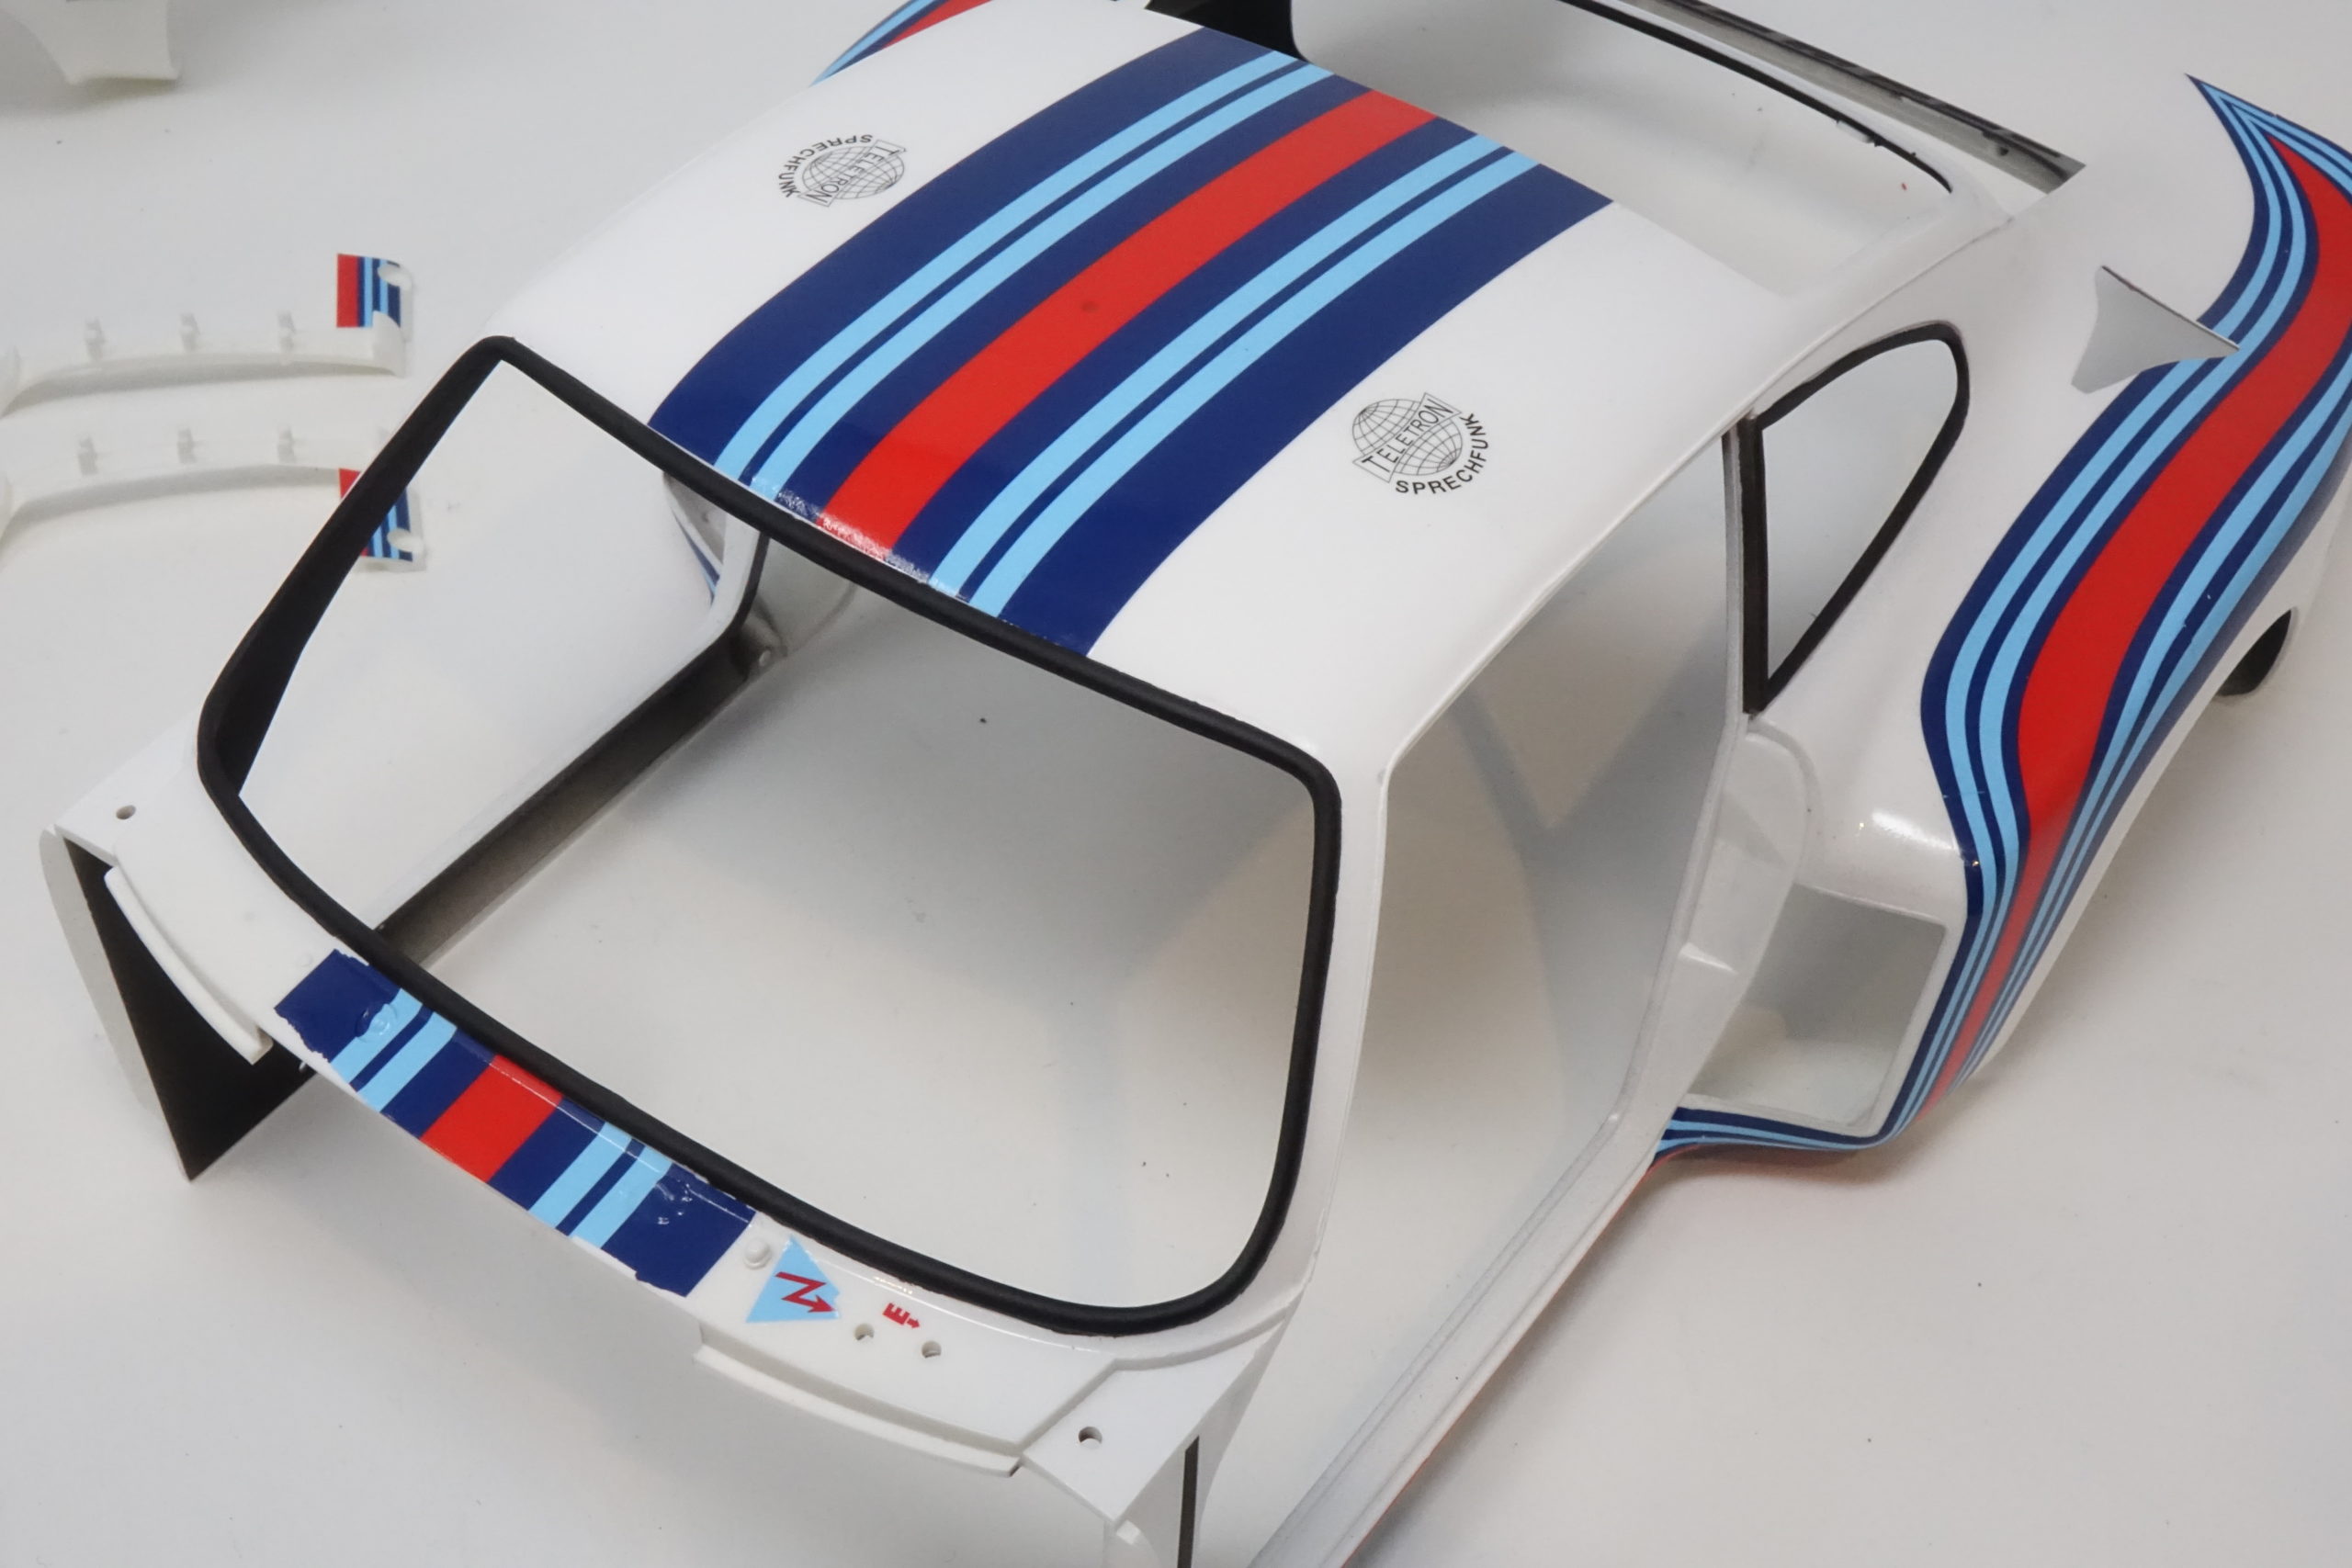
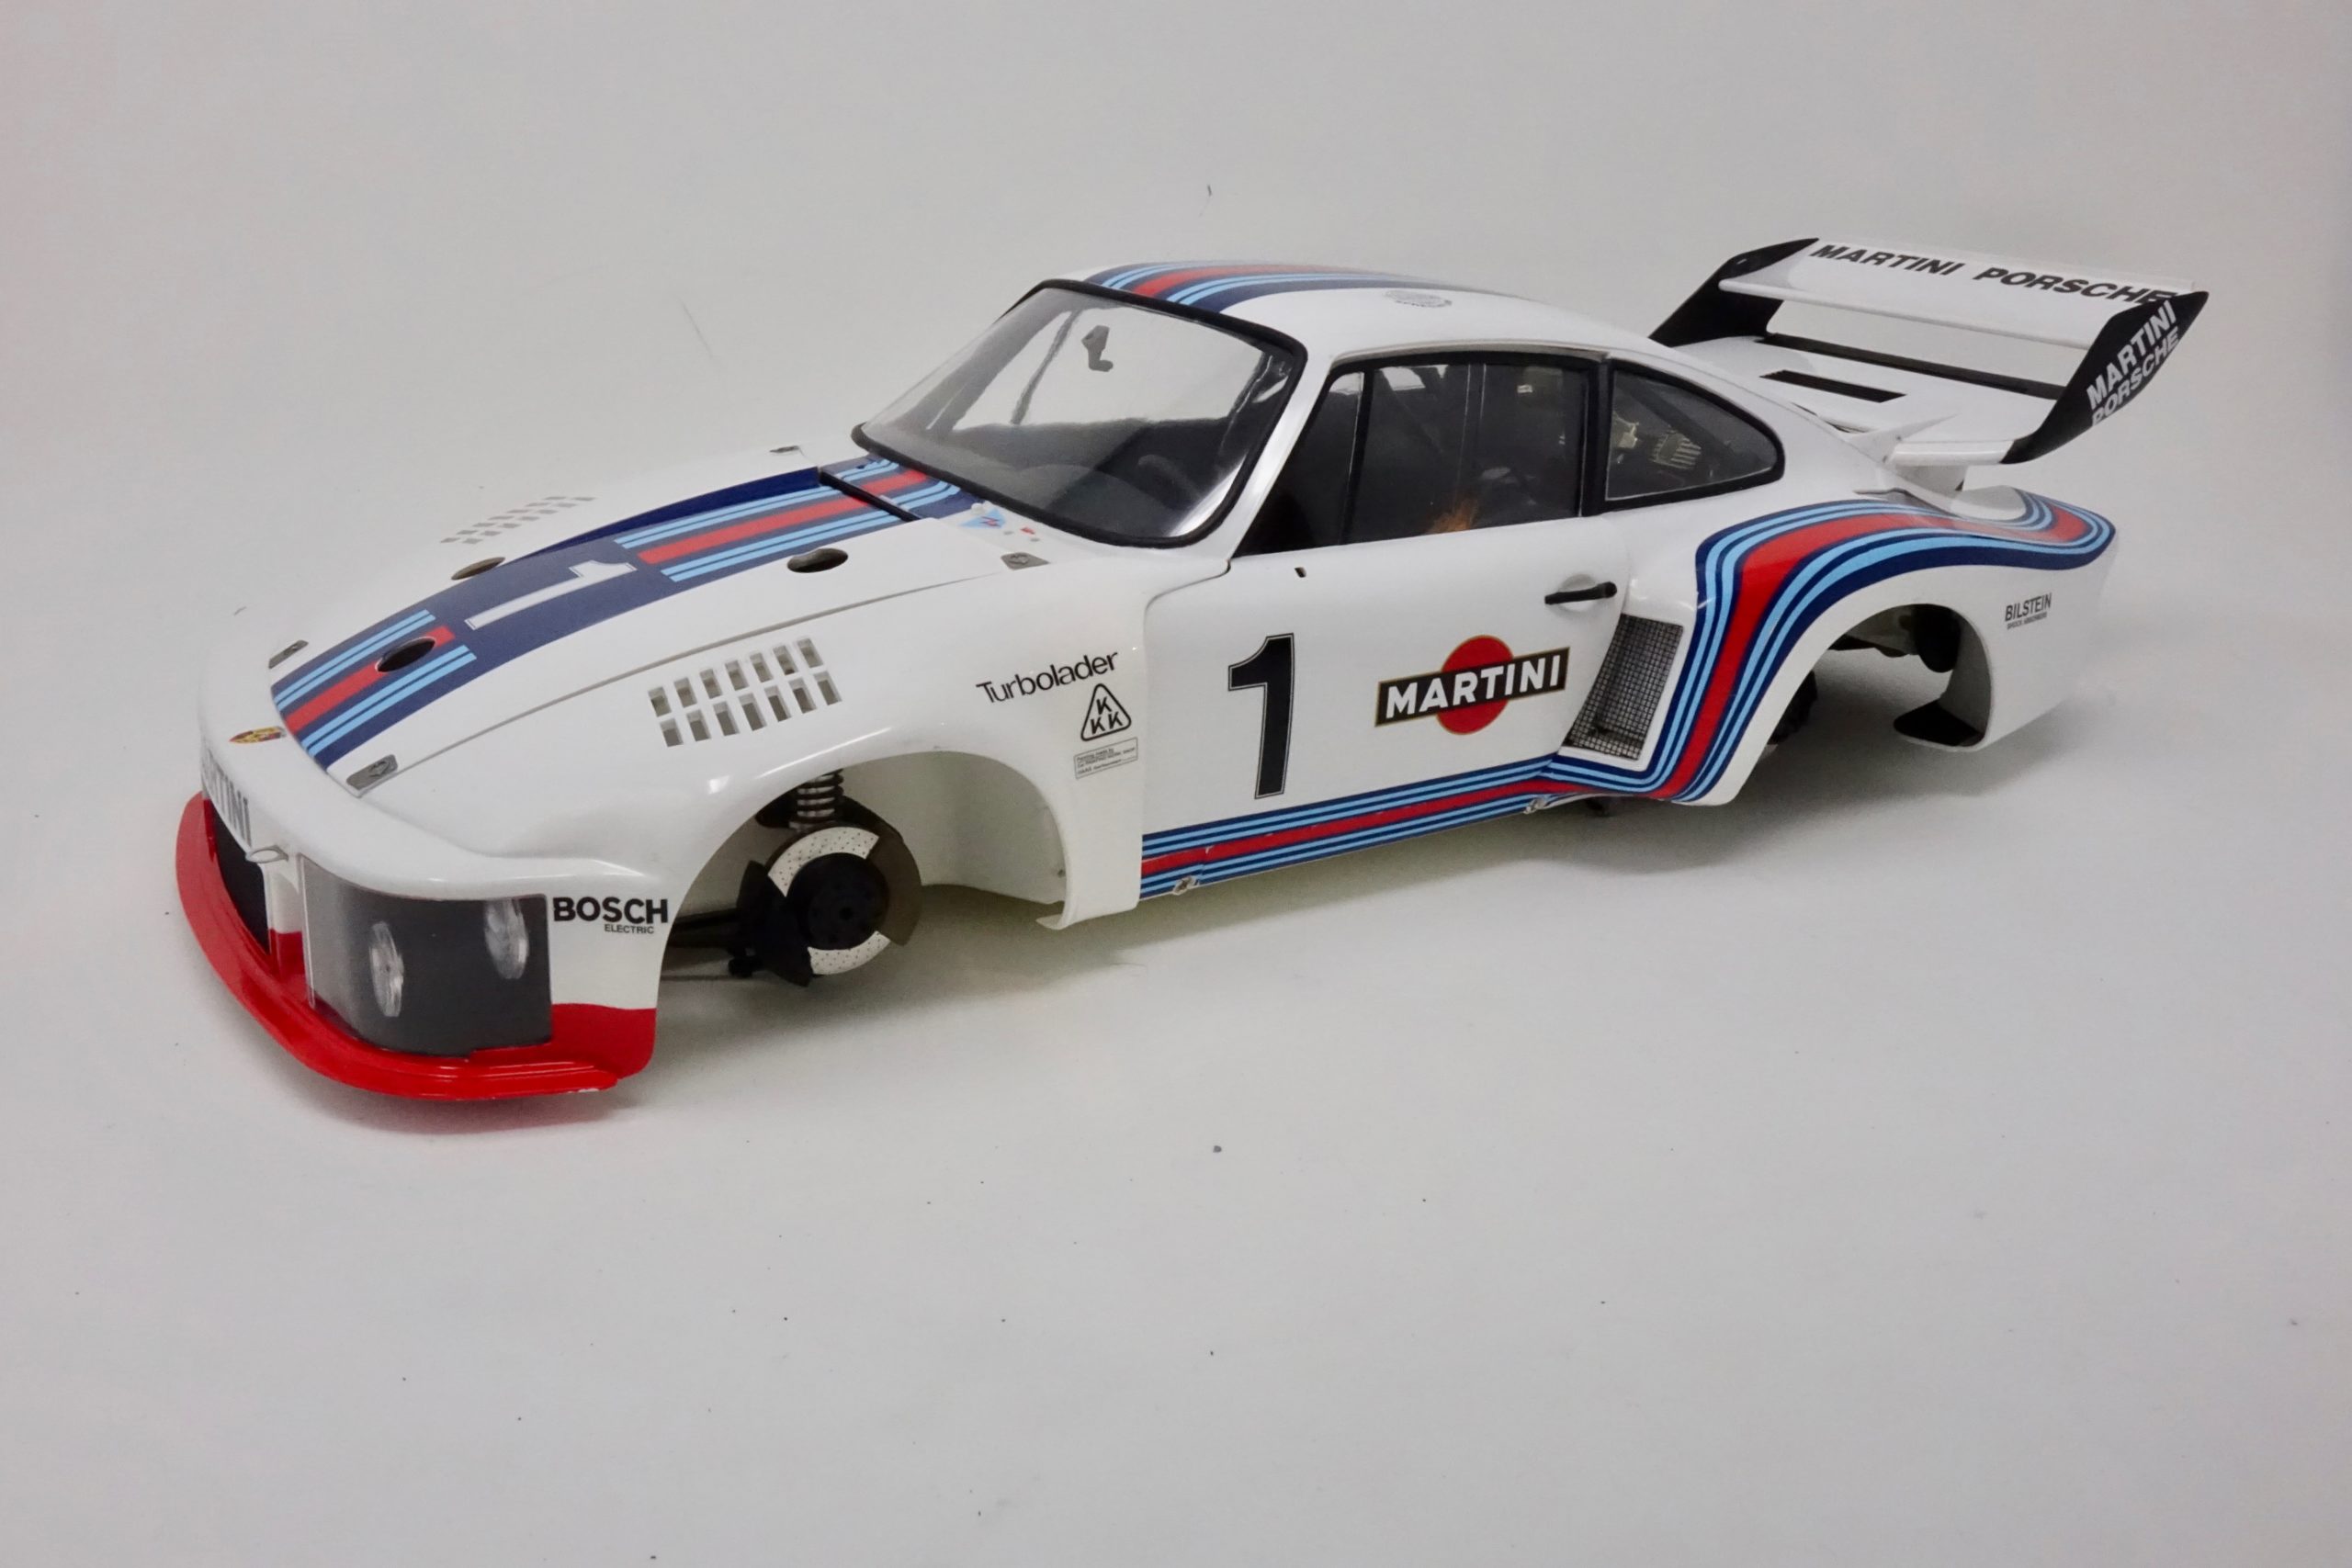
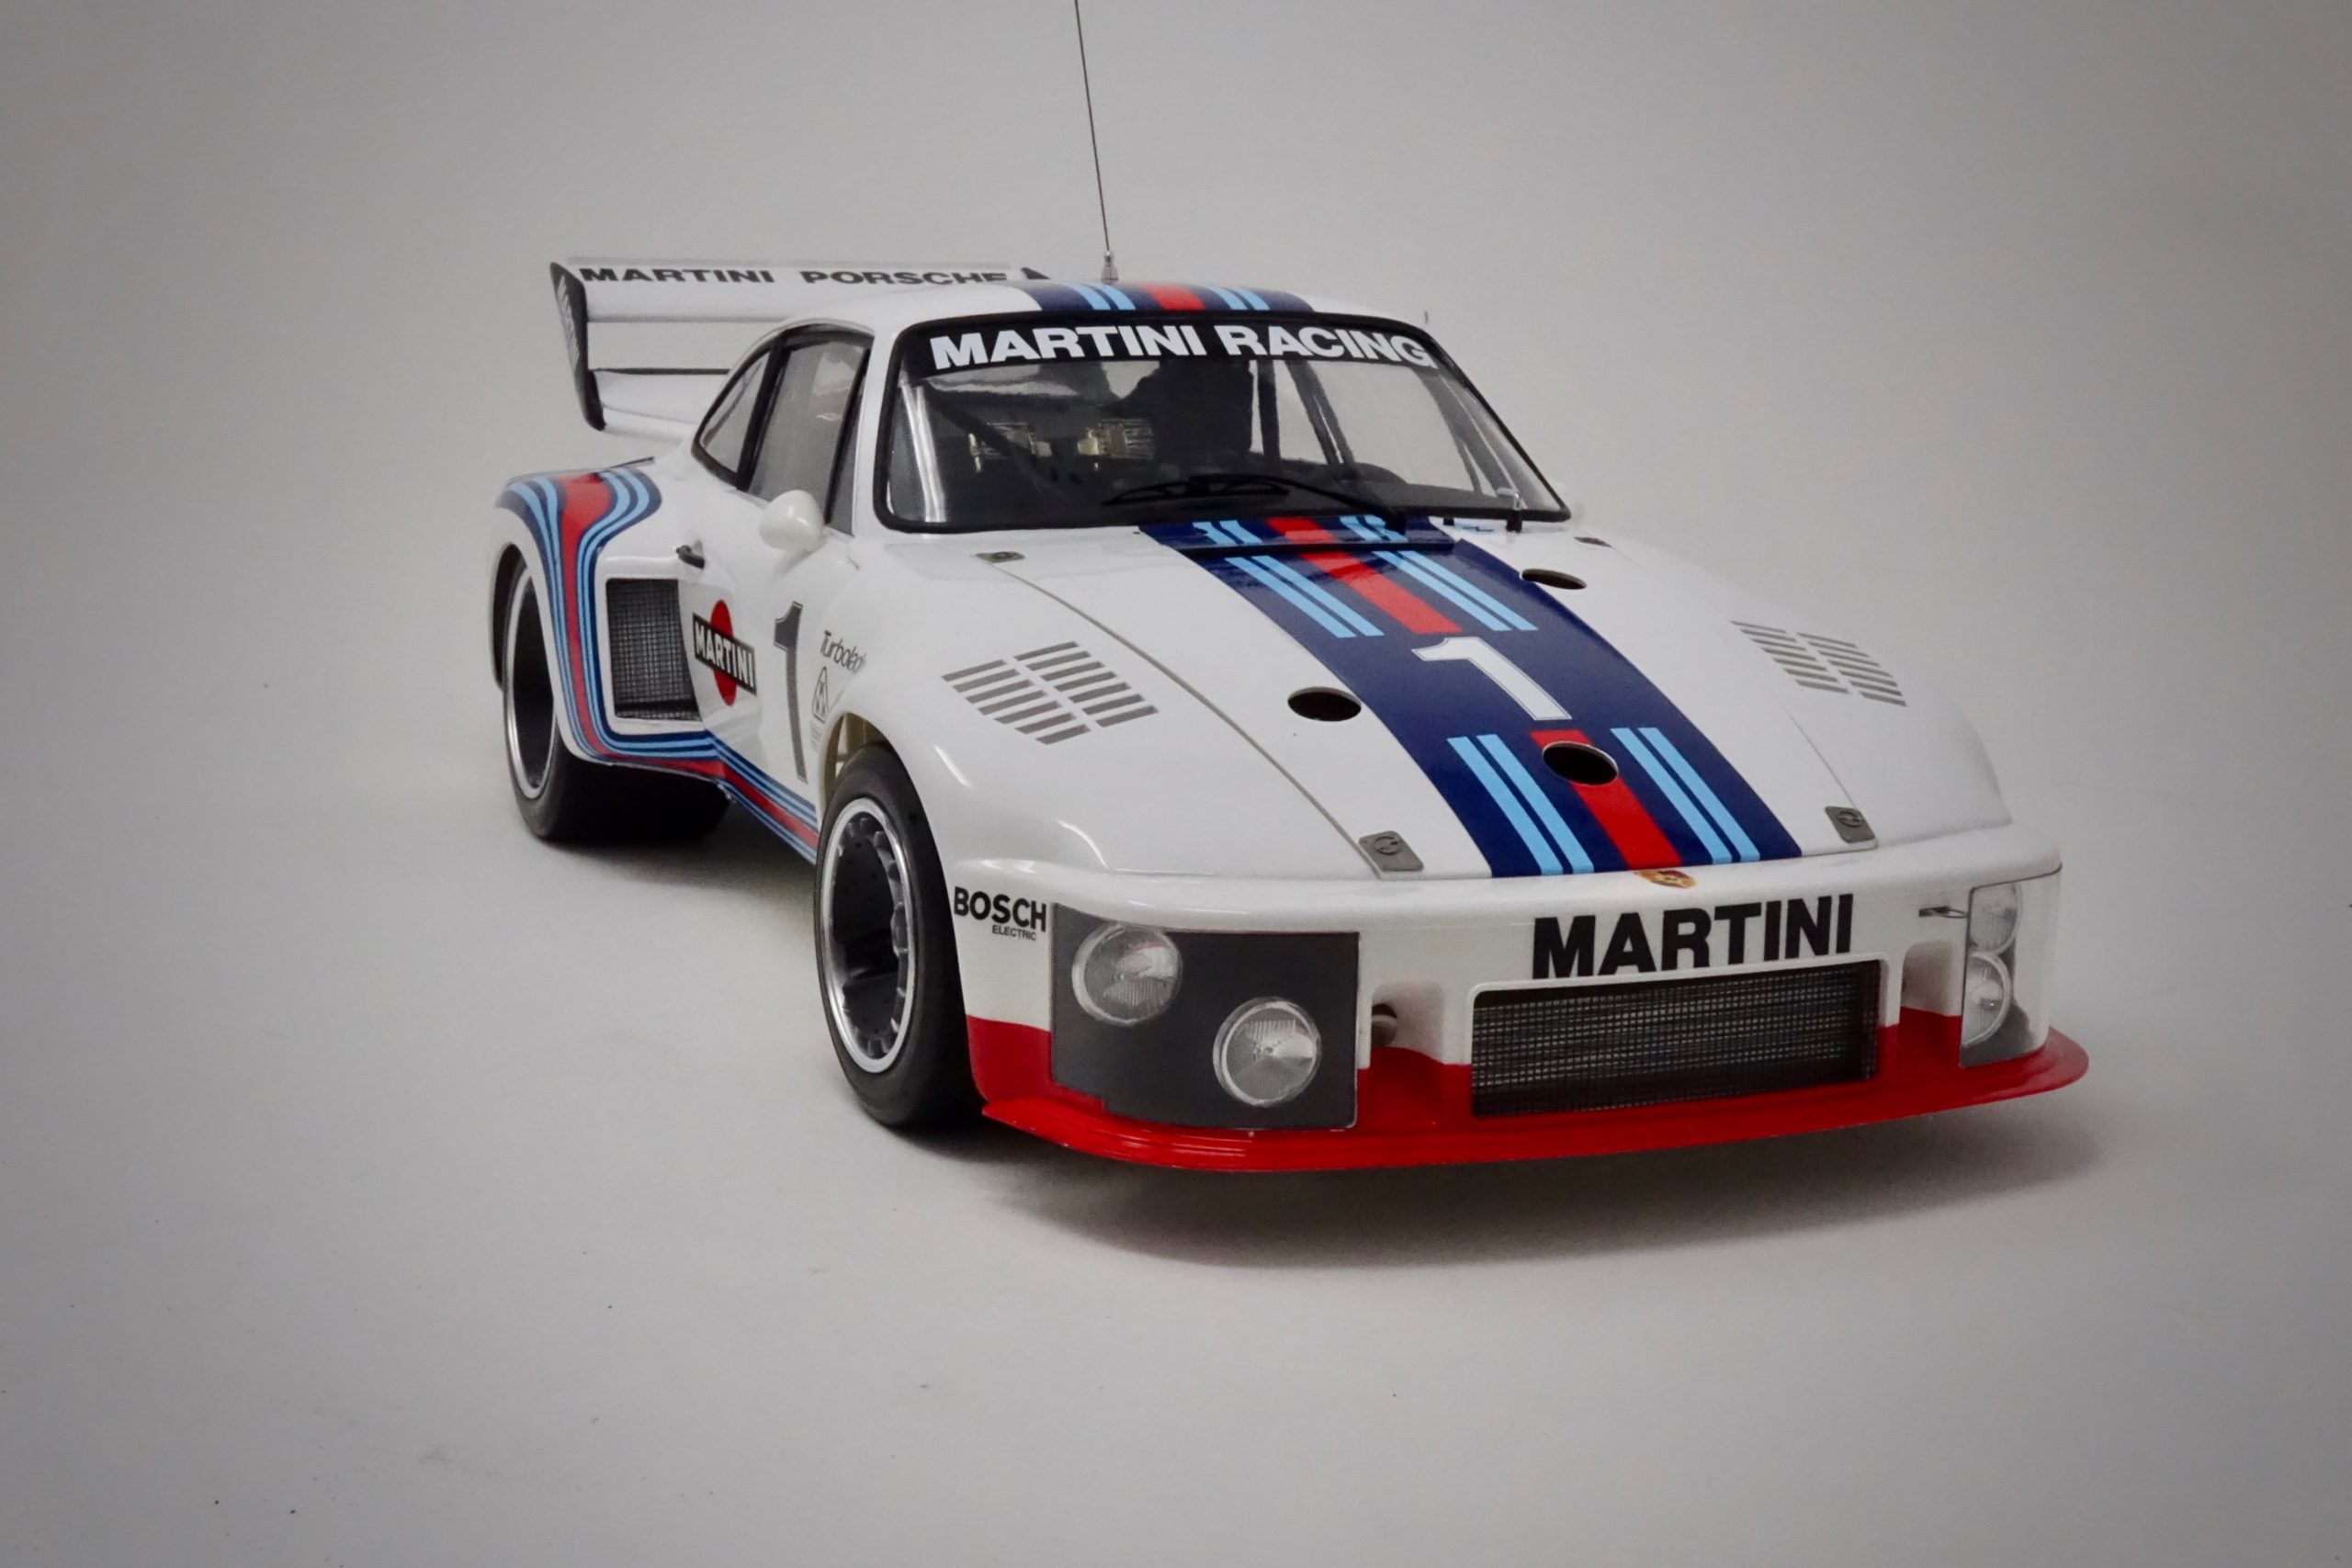
Painting the body shell and associated parts
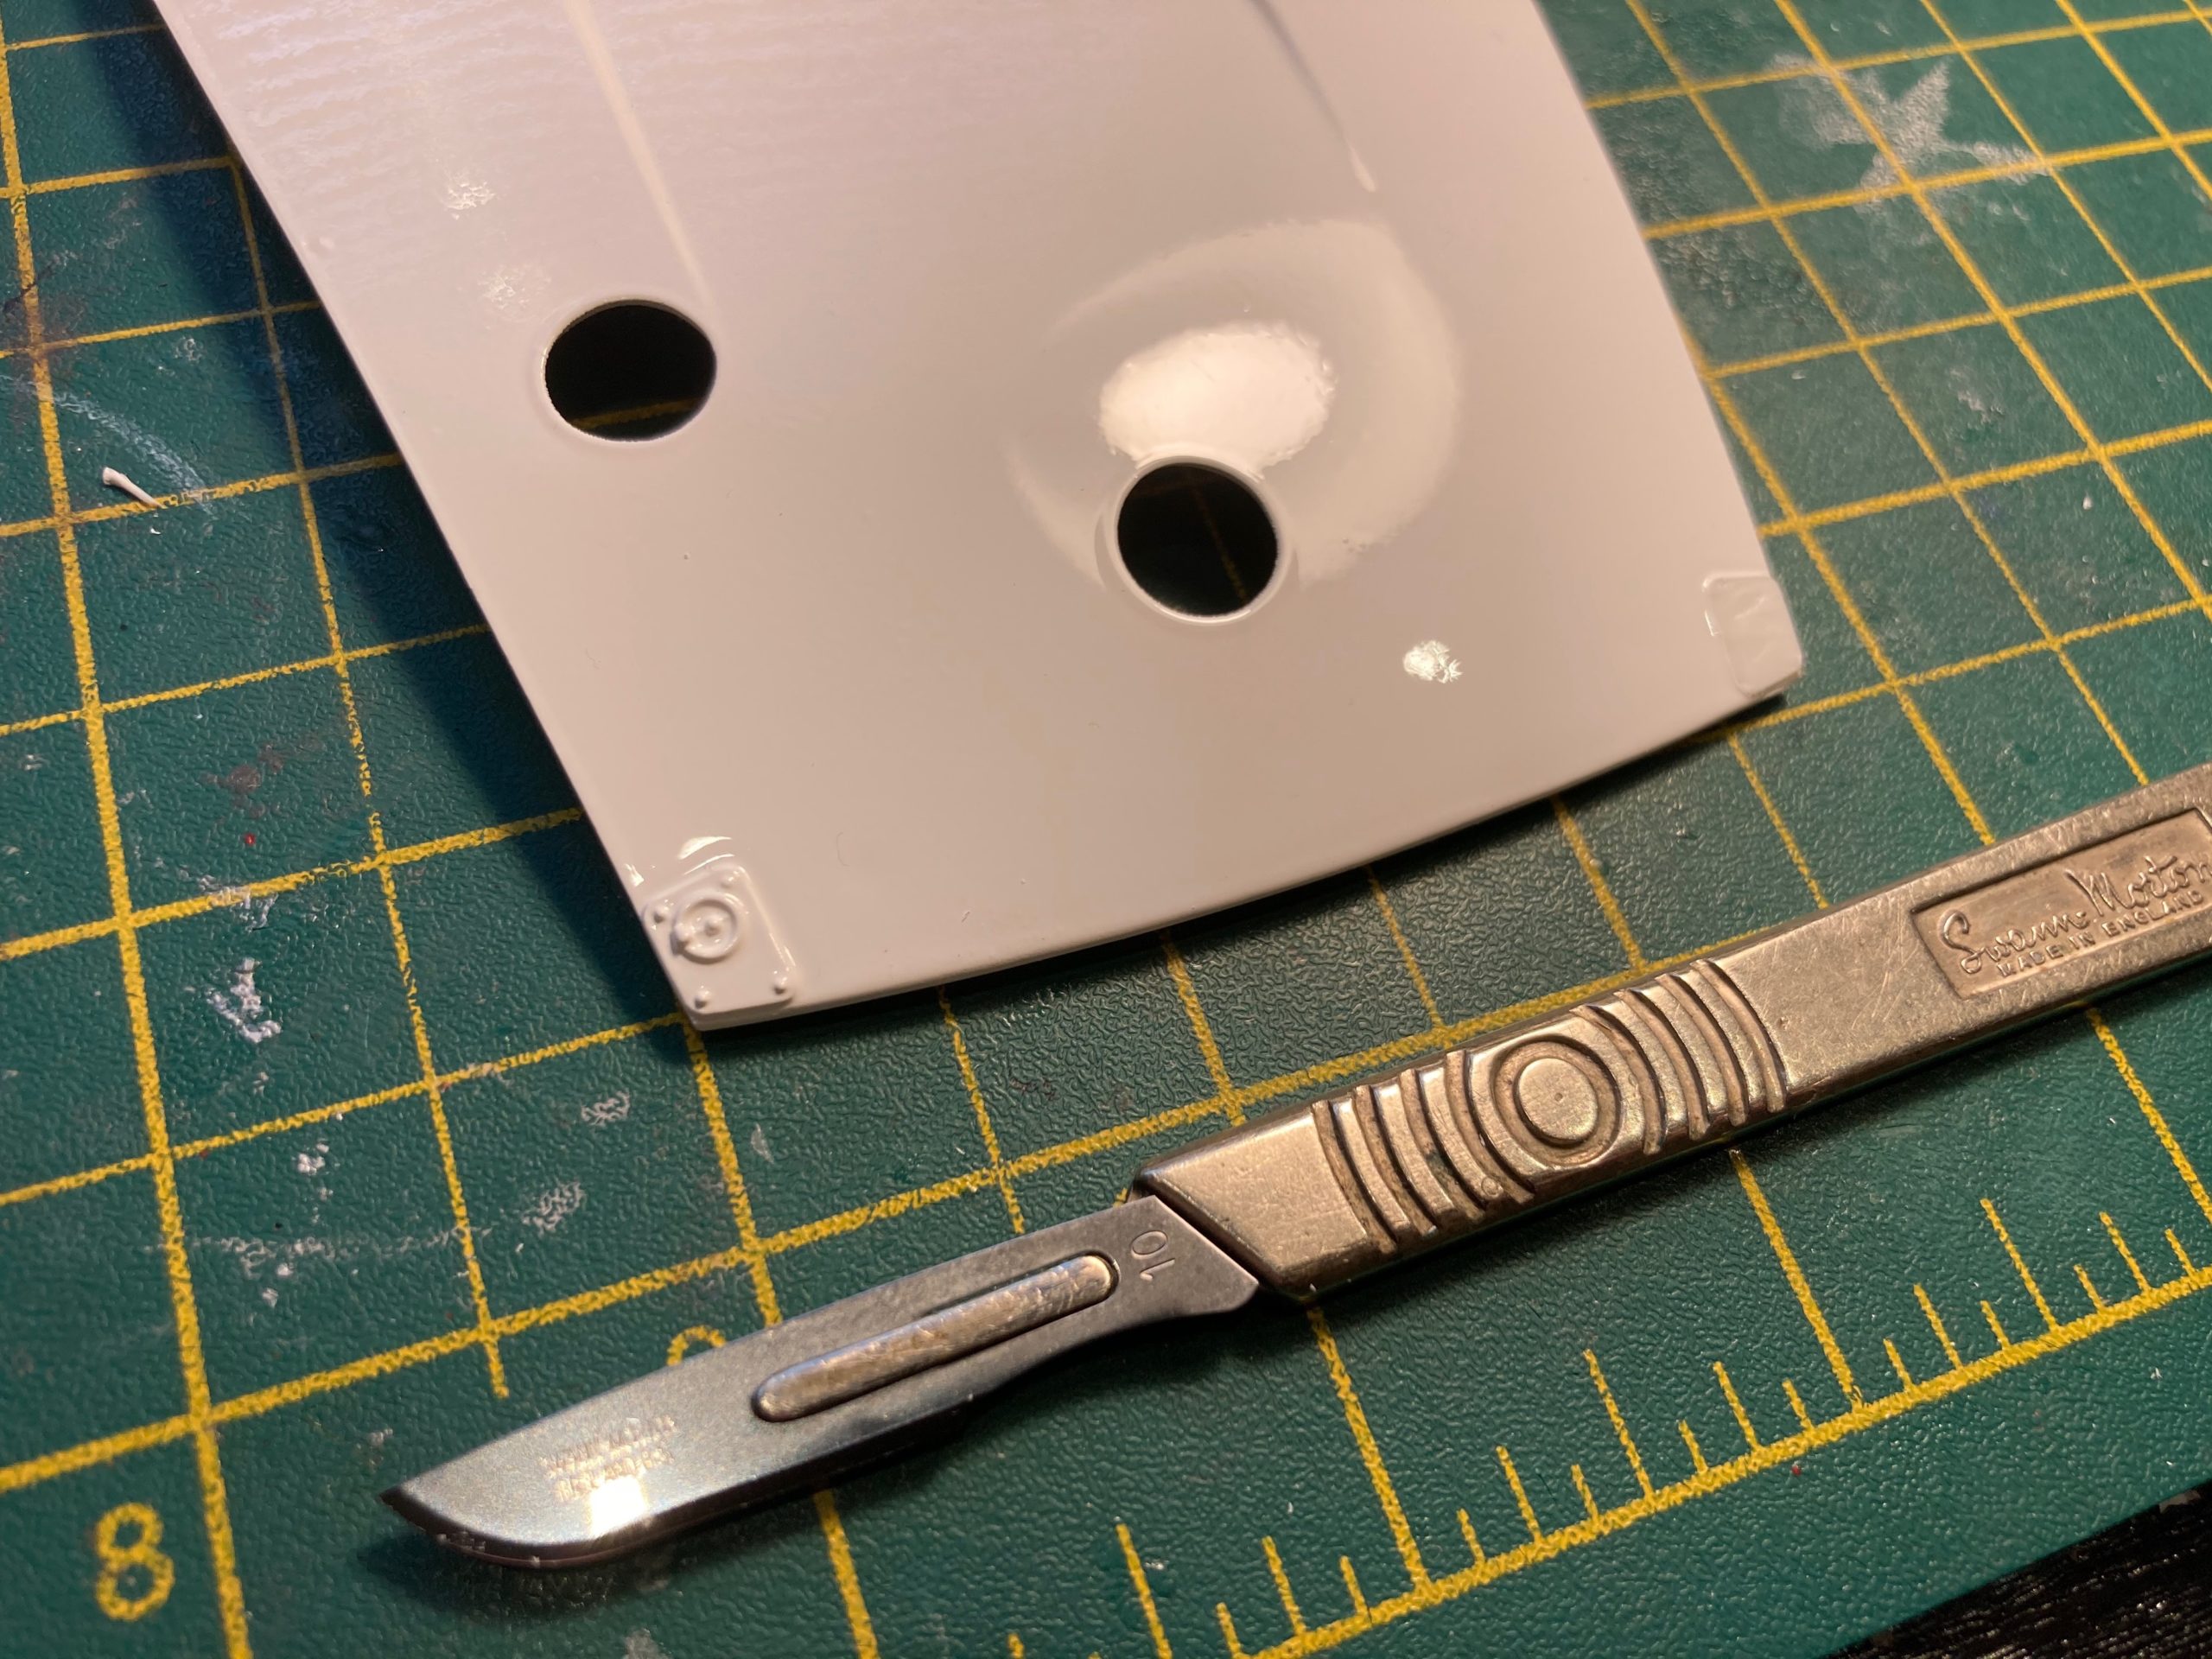
** note – on the bonnet – that the bonnet pin mouldings need to be removed and sanded down BEFORE bonnet is painted!! But only the design moulding – not the underlying relief ‘plate’. I managed to do it ok after painting, but would have been better before painting.


Potential problems with white paint
White paint on a white body shell should not be a problem – but…! The body shell plastic is quite thin (which is good) and a little translucent. And white paint does not have a solid pigment. So, when some parts of the inside of the body have to be painted black this affects the way the white exterior paint can cover. It became clear part way through the painting that the white shade was being affected. The only thing I could do at this stage was to re-coat the white exterior areas that I was unhappy with and feather in an extra coat to make good the white coverage. It worked, but it was time consuming. If I was to start again, I would consider giving the whole of the inside of the body and other main sections a coat of silver/aluminium to act as a block on the black paint. With a darker/denser exterior colour this wouldn’t be a problem.
Plan for painting
I found it was really important to have a plan – I made a ‘flow chart’ list of steps for the sequence of paint/decals/lacquer etc which was basically as follows:
Interior parts of body shell which needed to be flat black
LP2 white on all body parts which needed it. Paint and prepare all parts which have to be fitted in a sequence when finals assembly takes place (air scoops, radiator housings, headlamp casings etc)
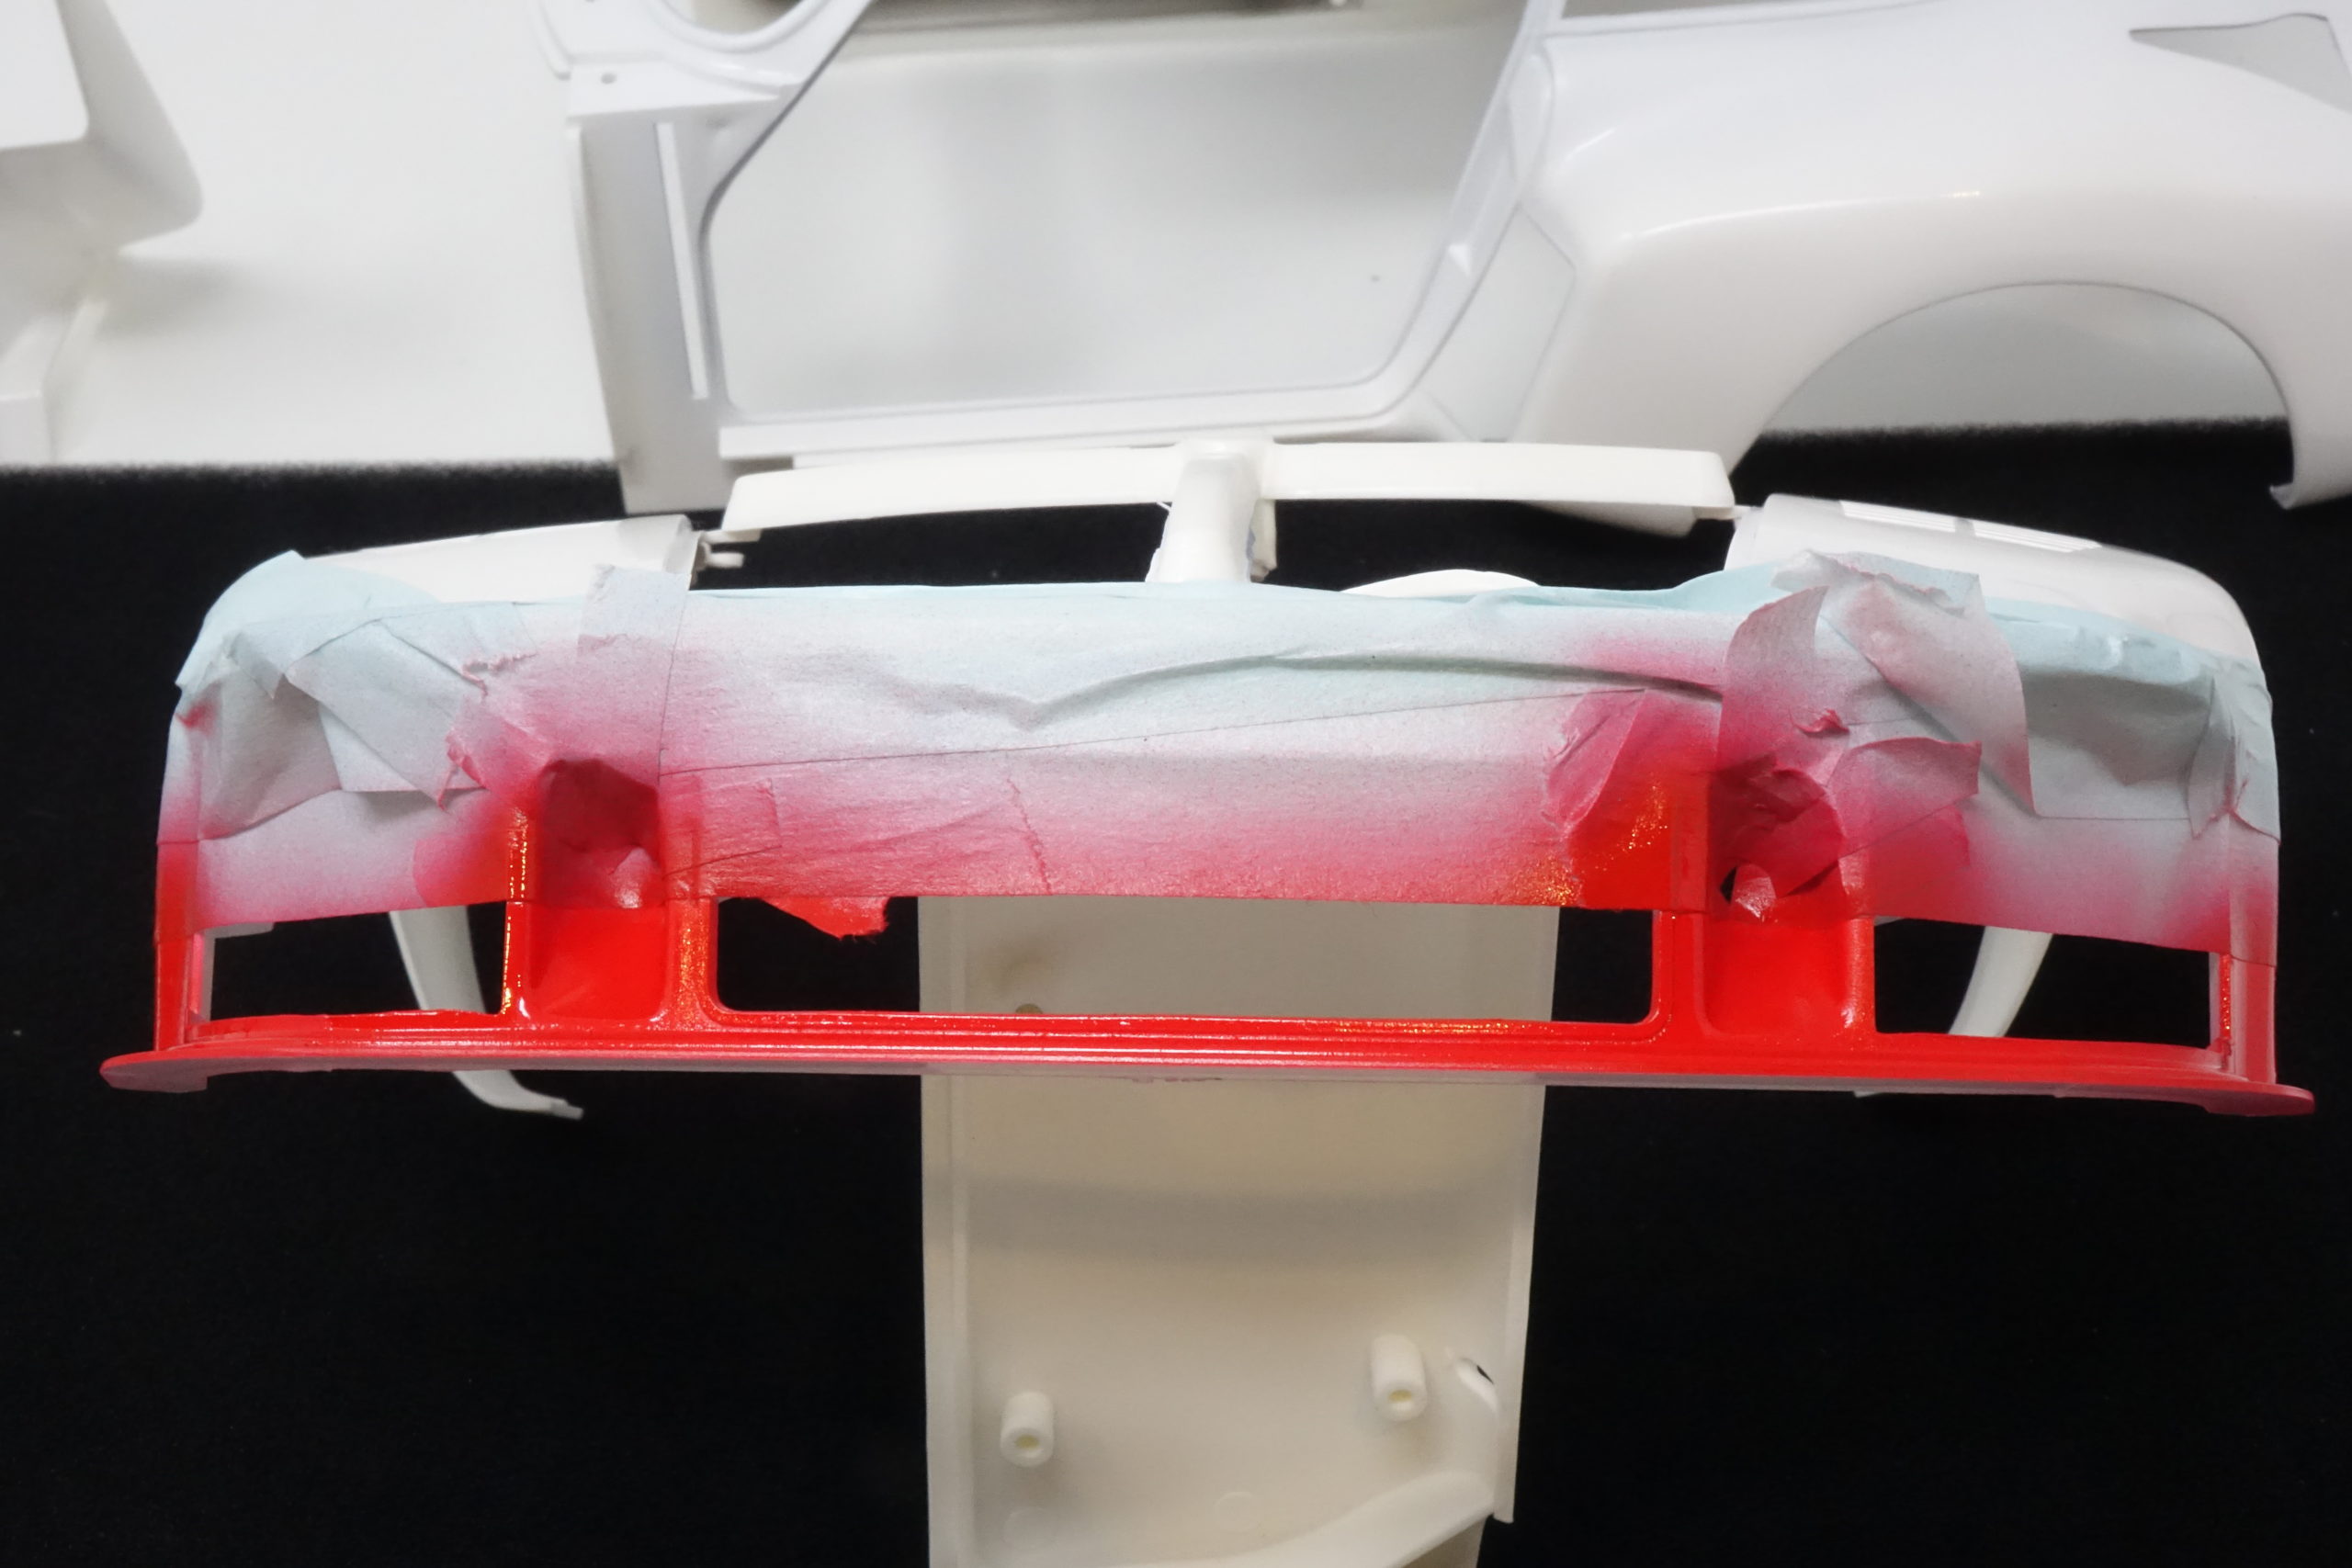
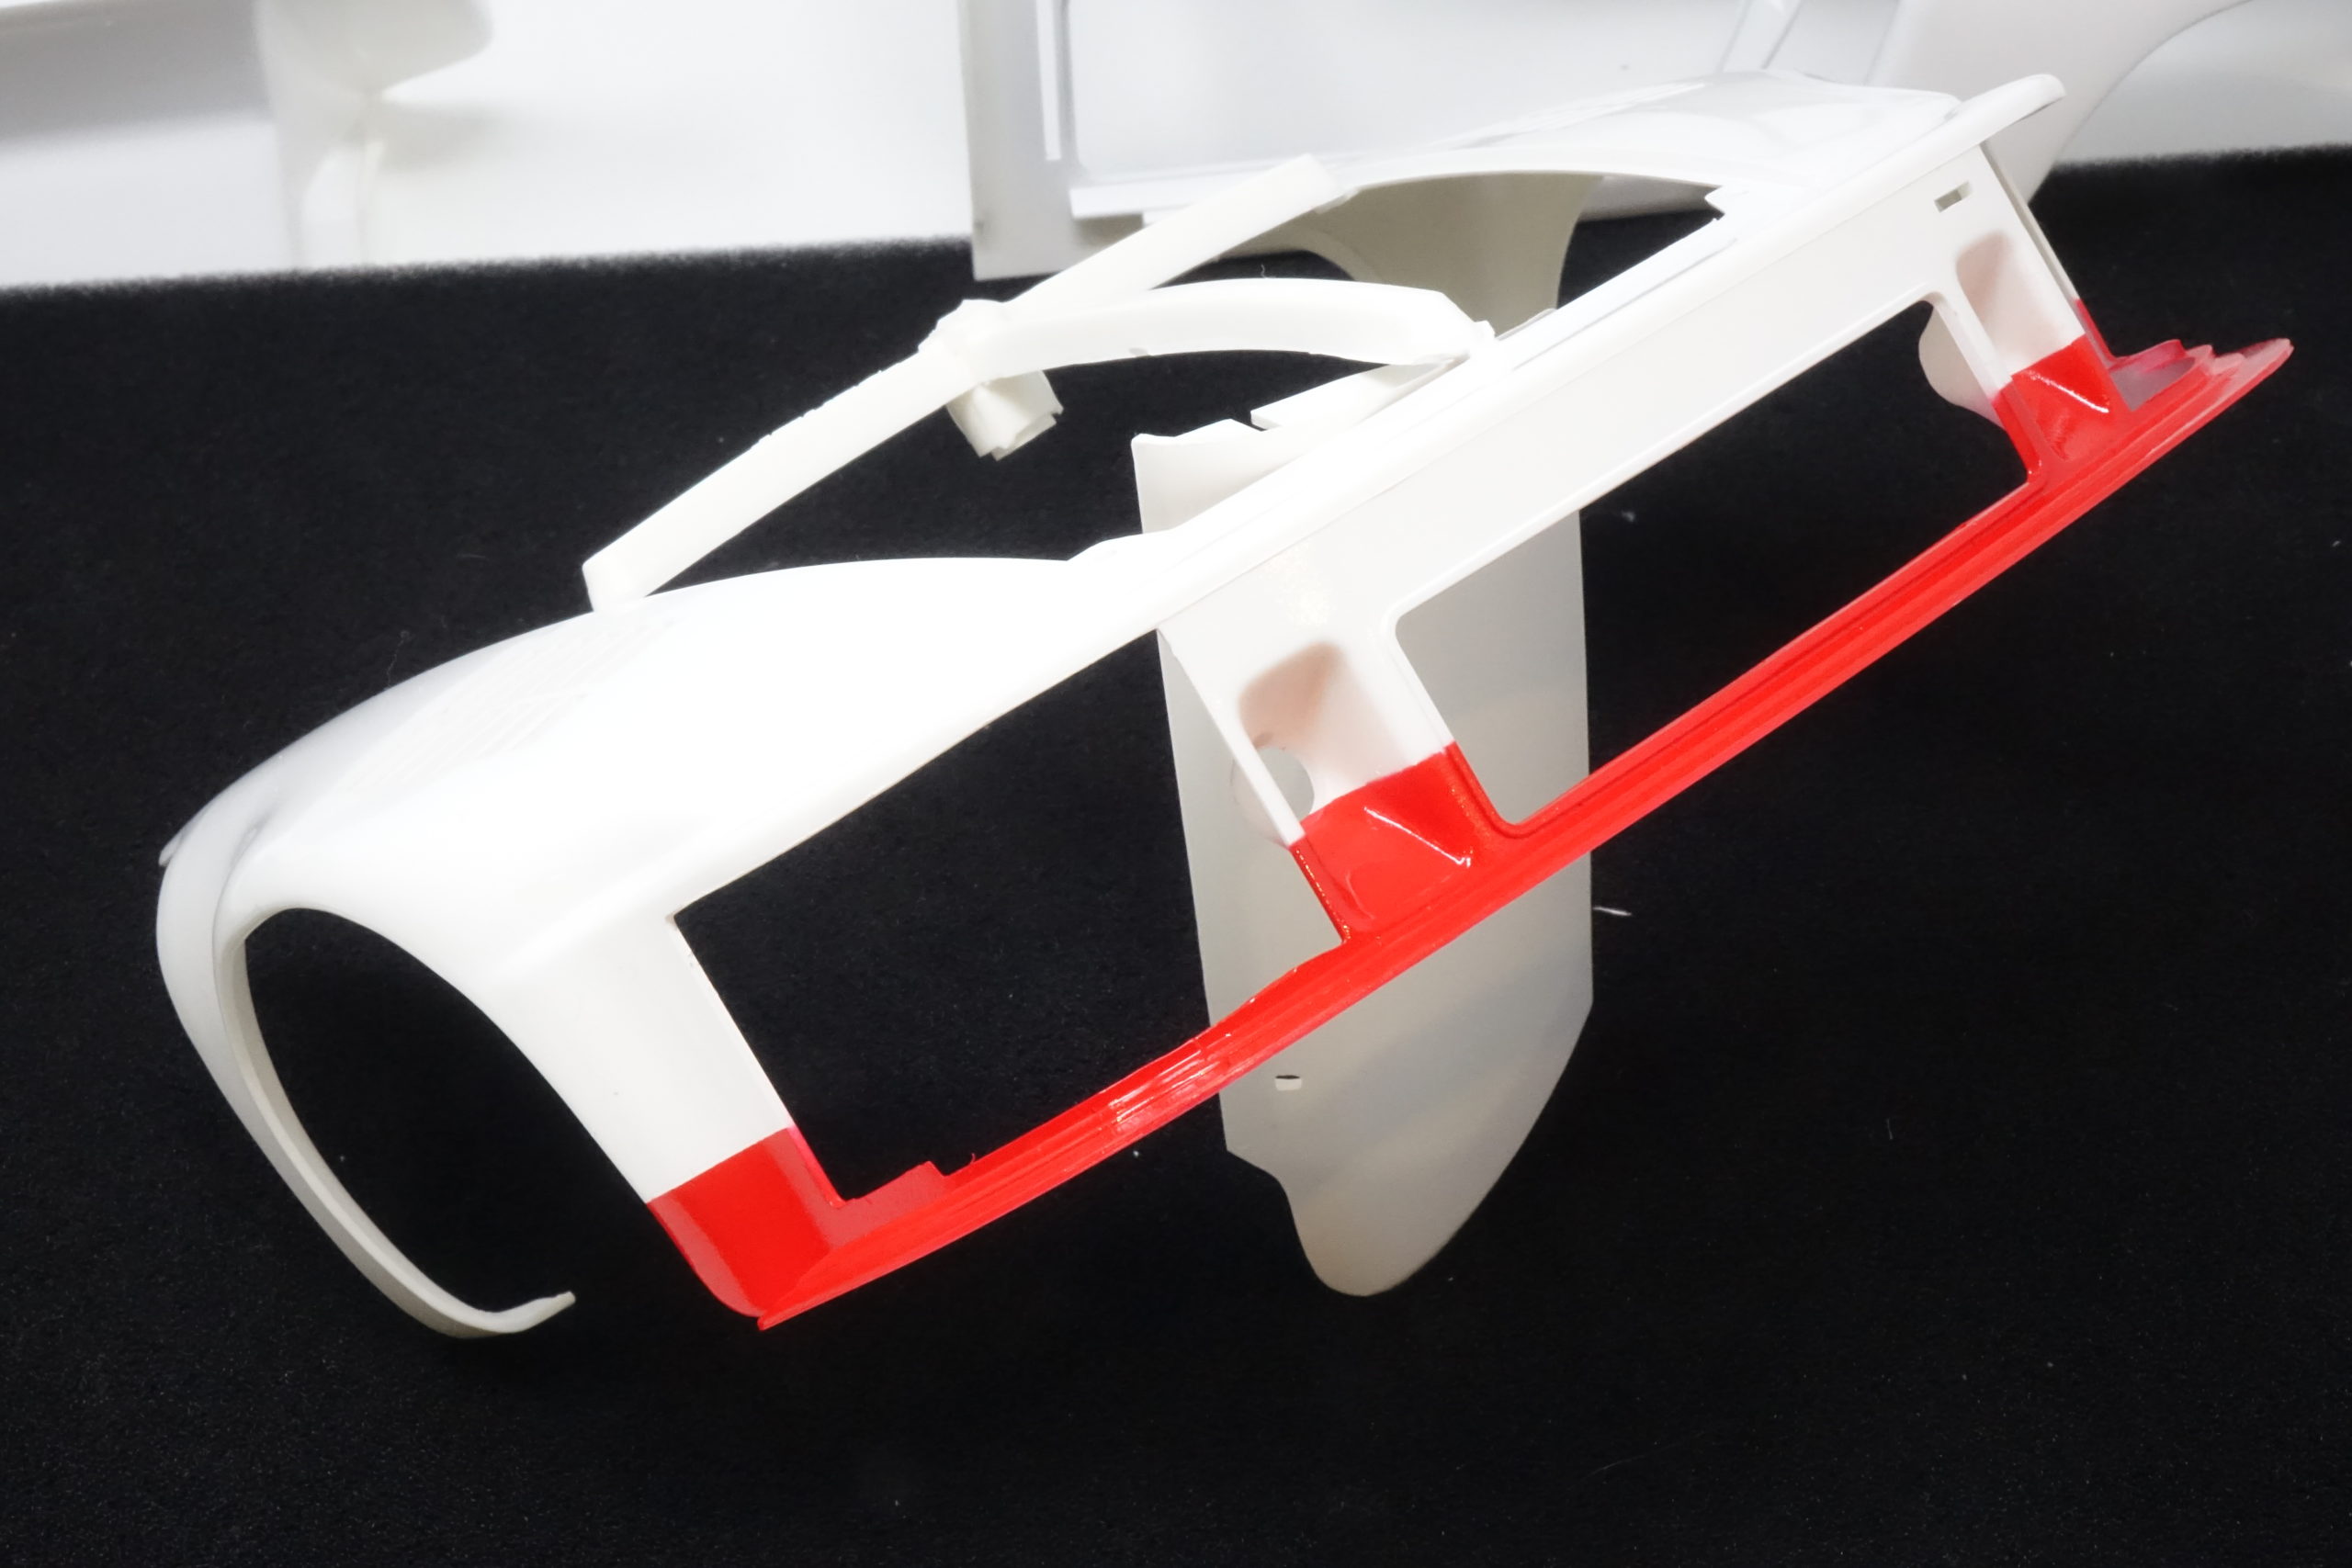
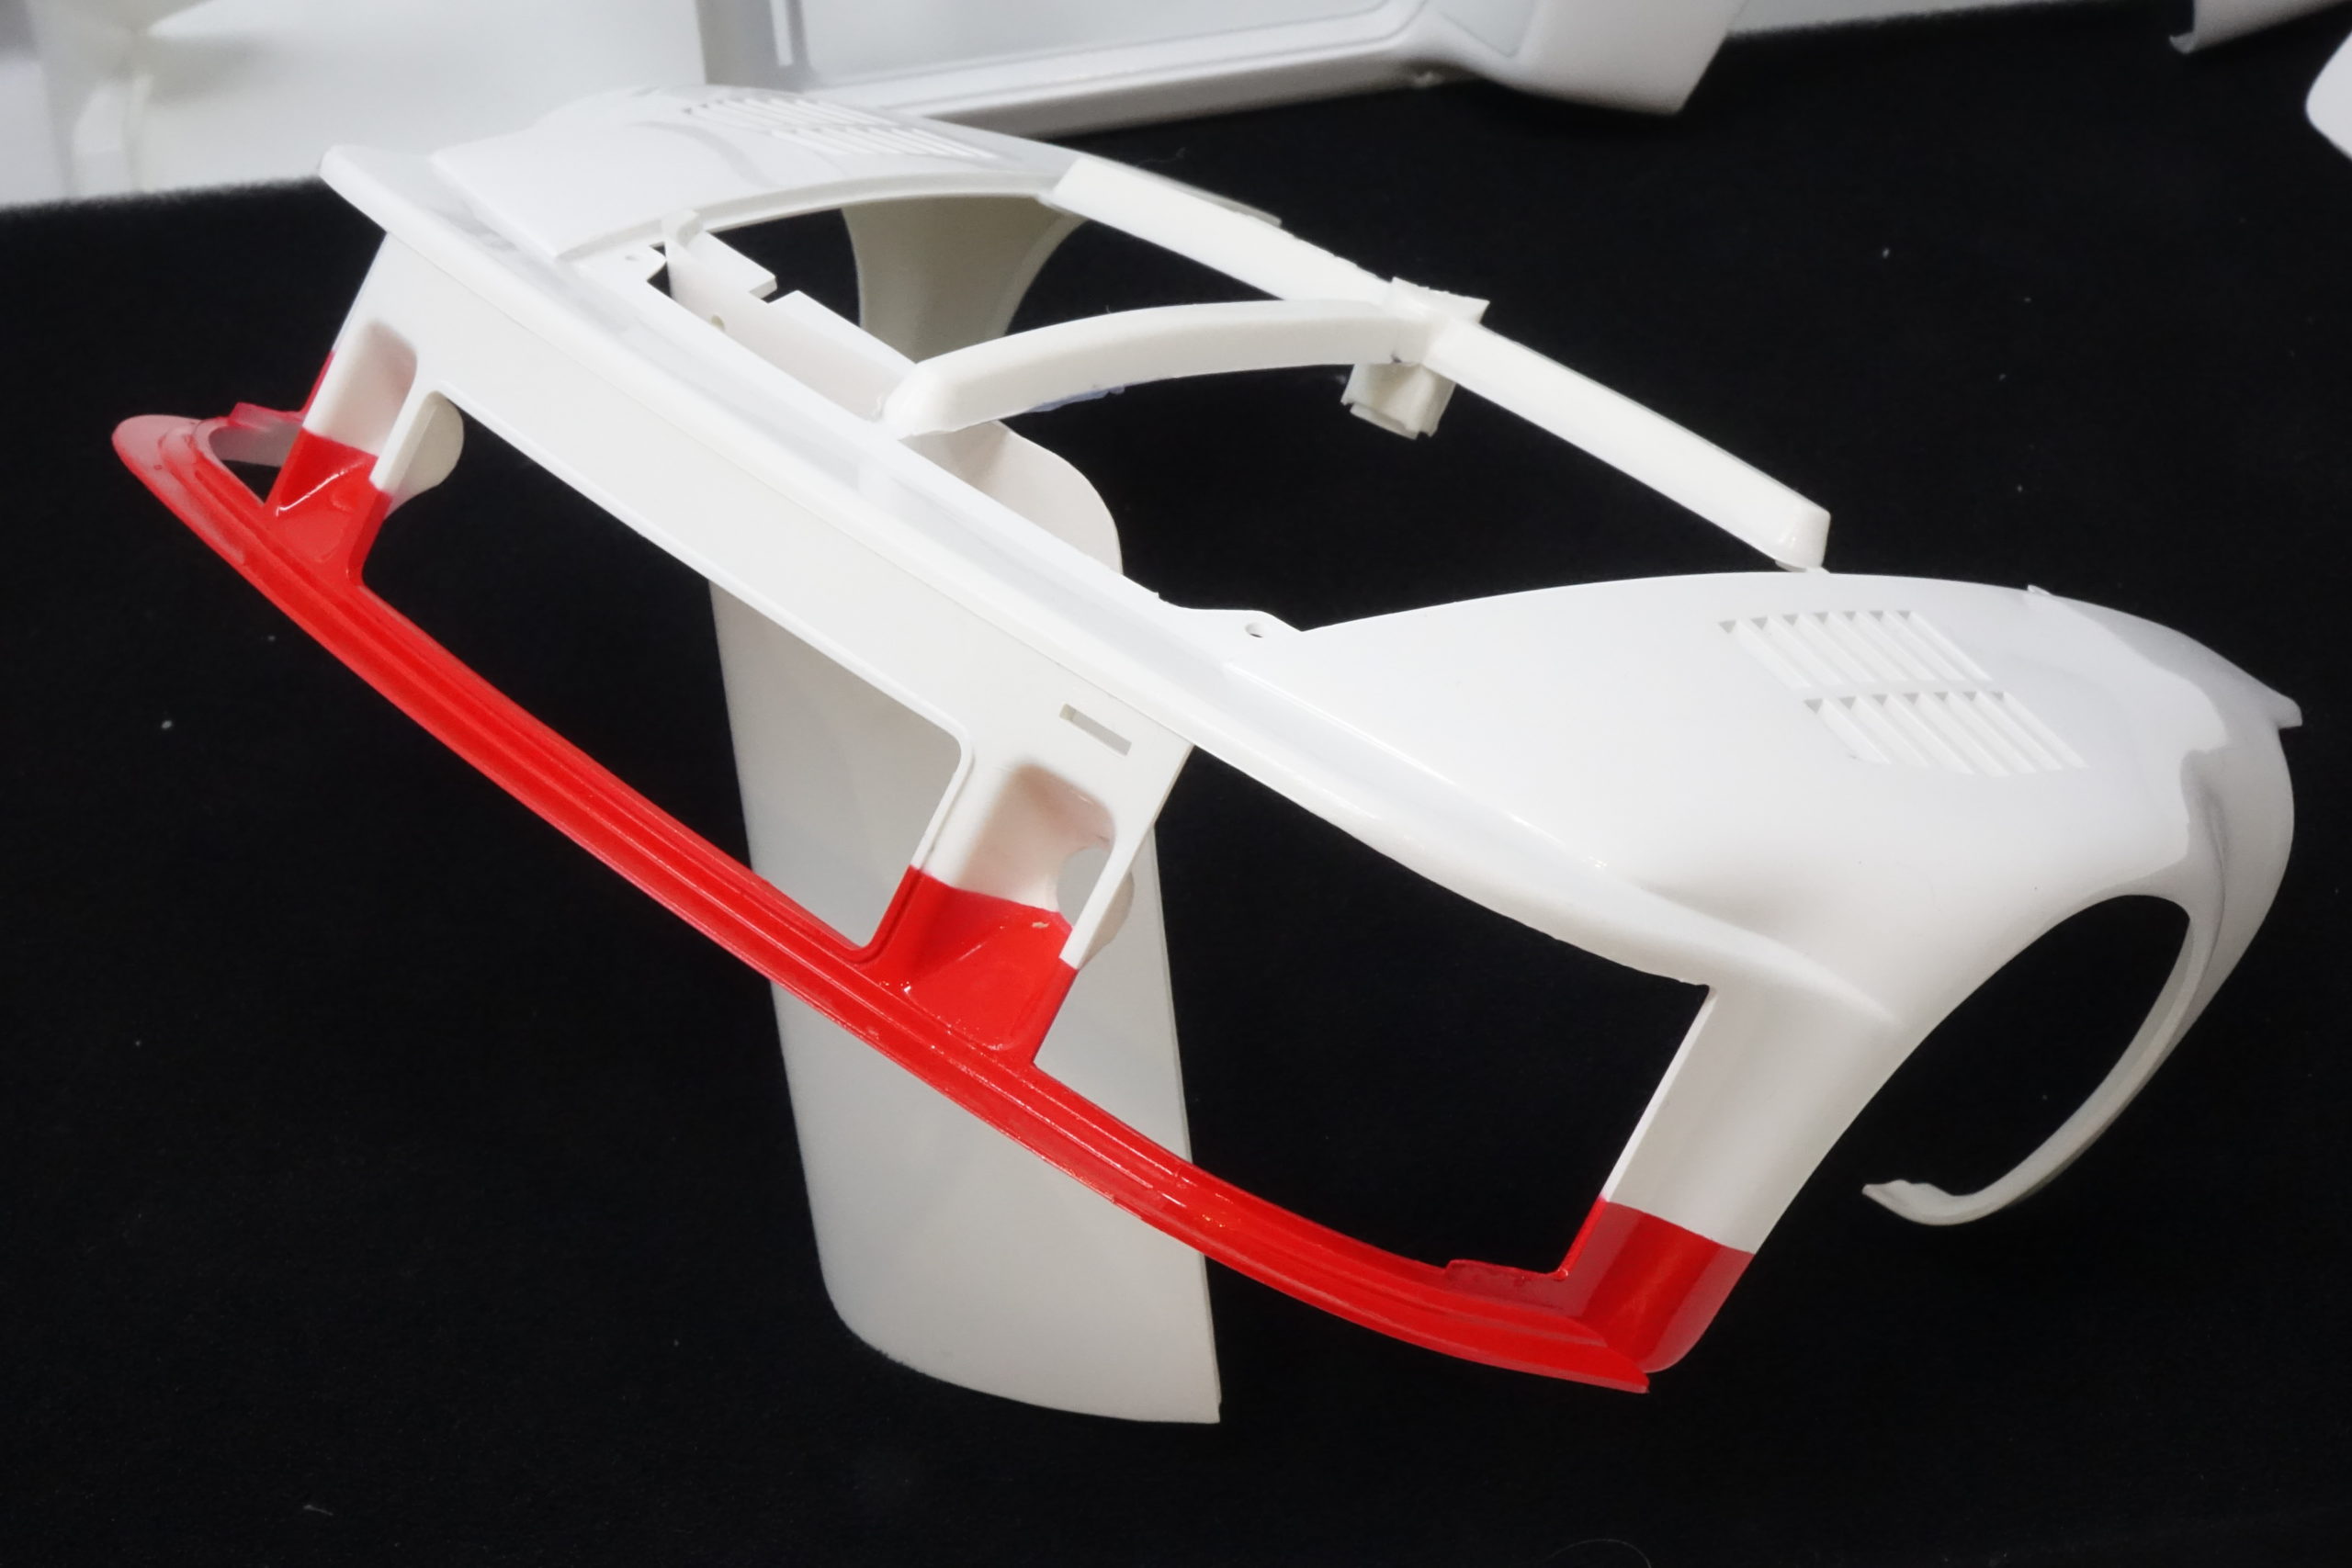
LP7 Red on lower front spoiler
Decals on all body parts – except sides of rear spoiler which are not yet painted in black
Lacquer
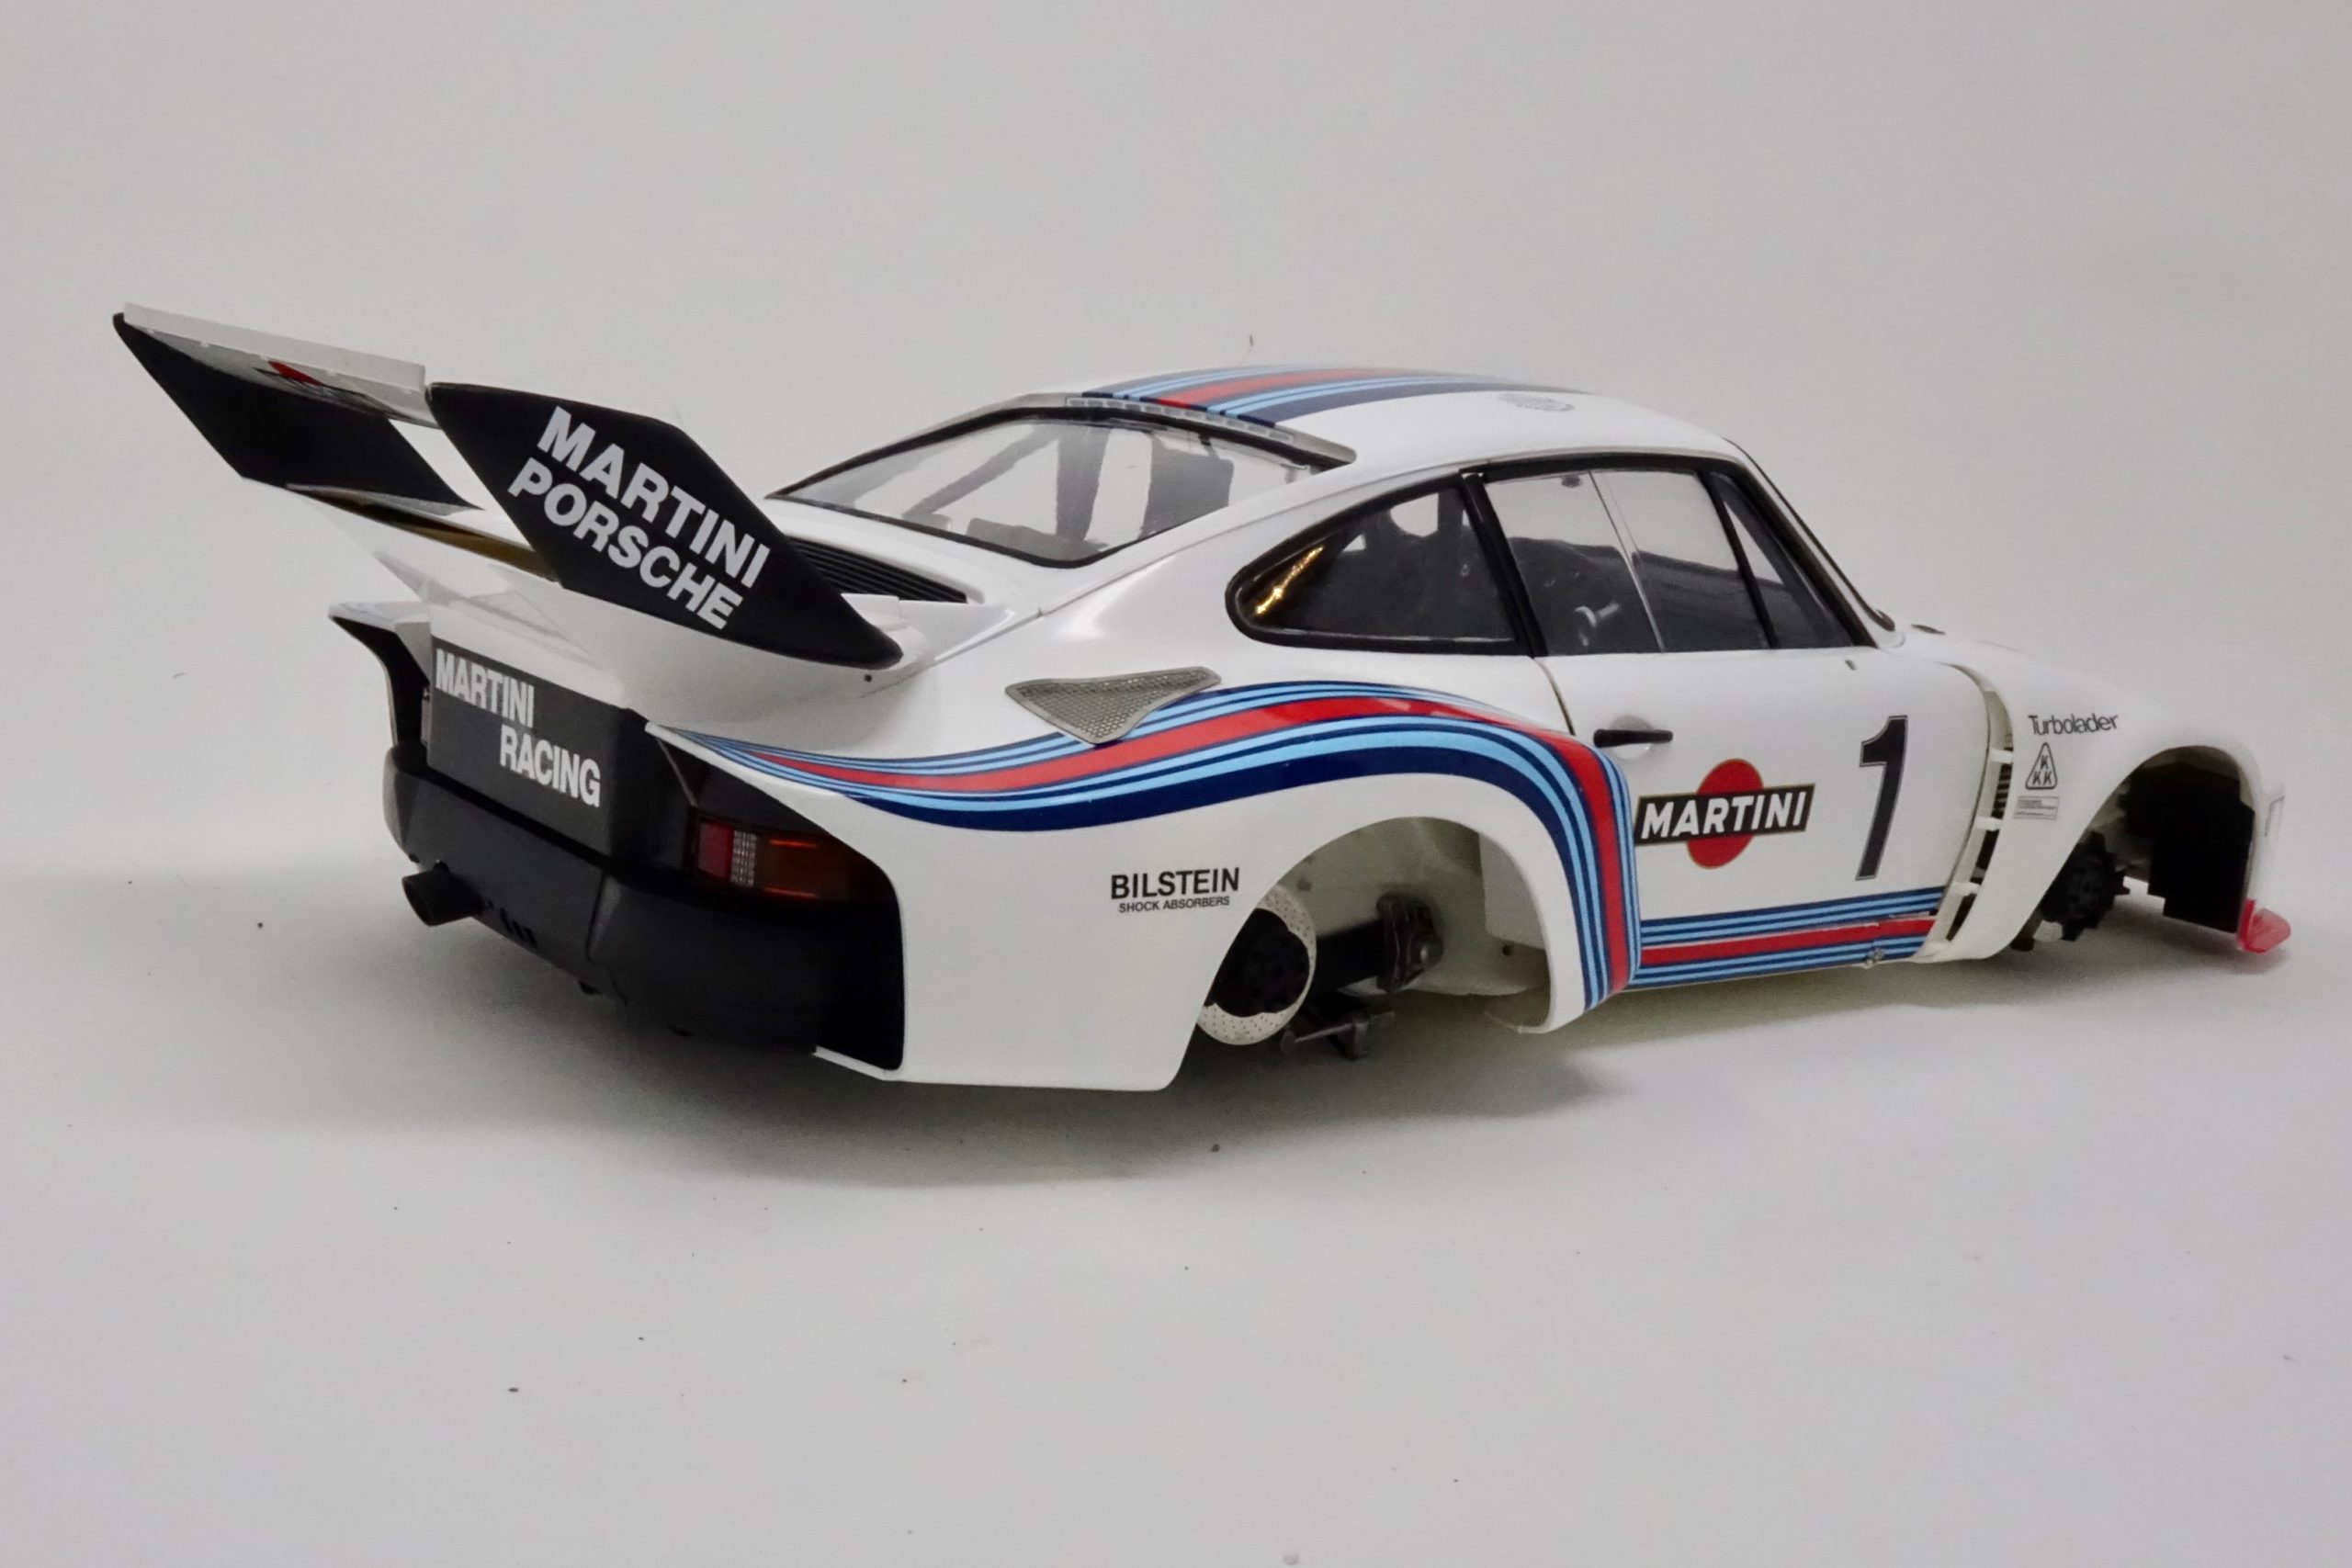
Then the semi gloss black parts of body work (rear panel, spoiler etc)
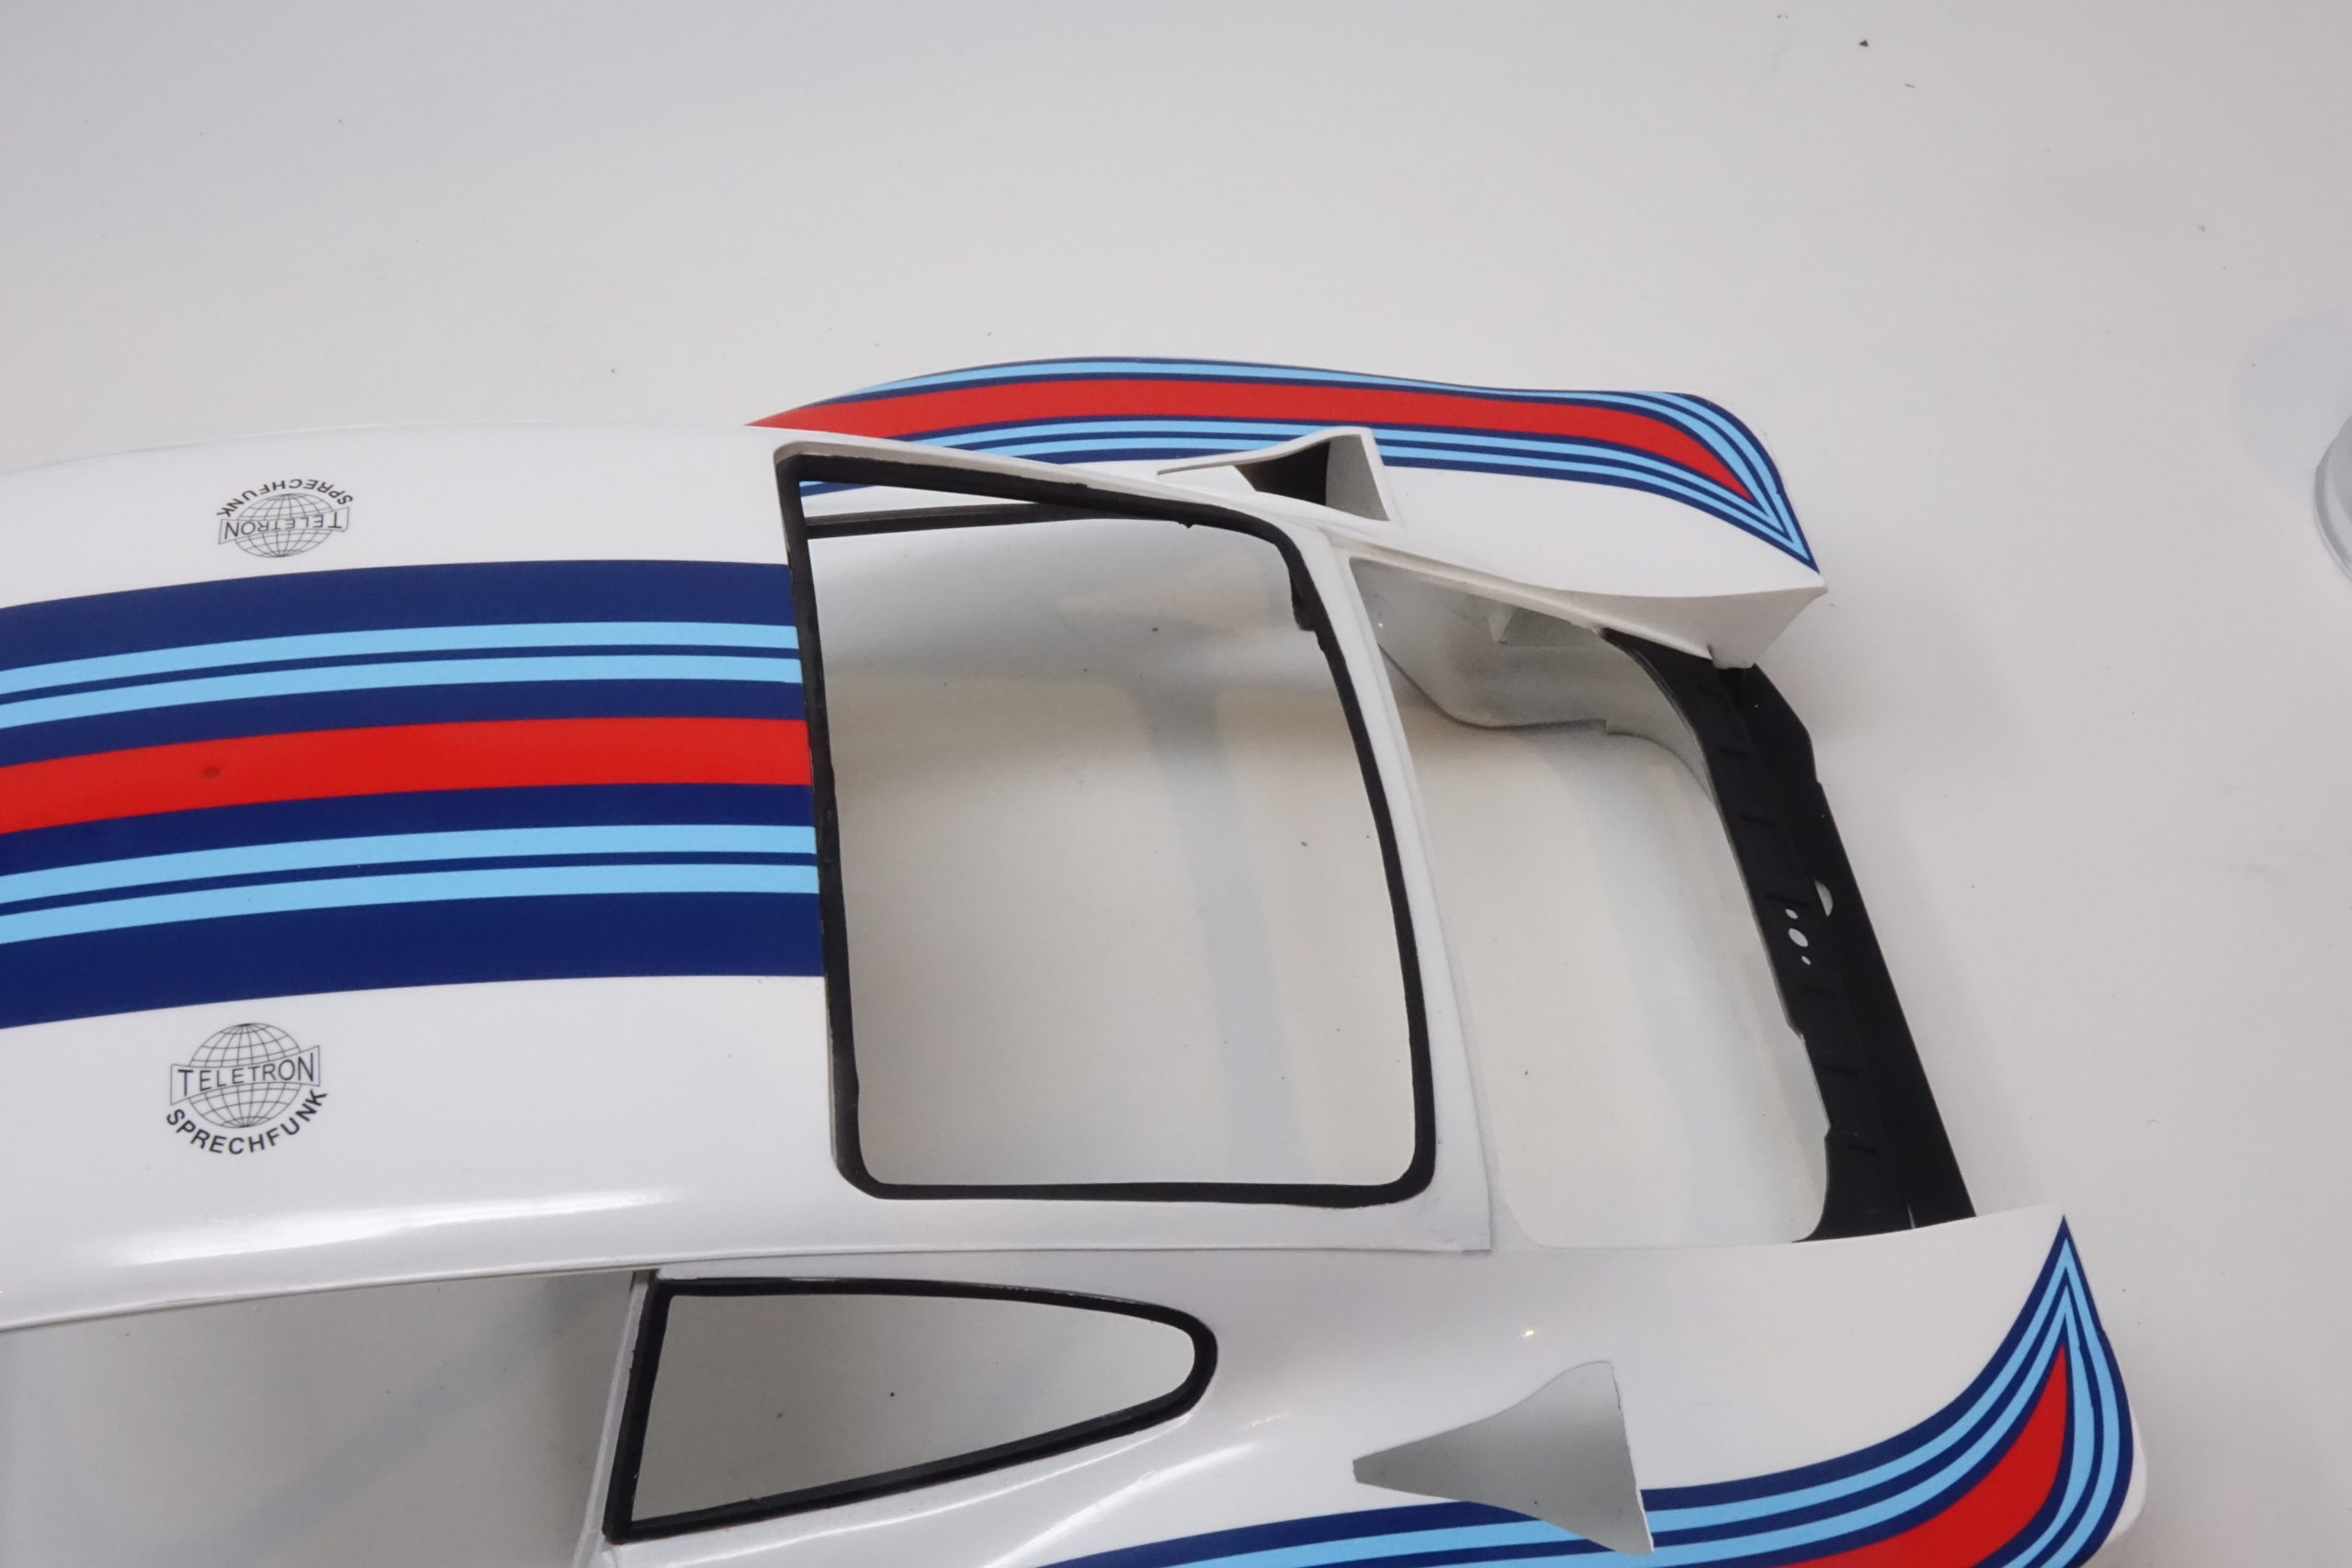
window rubber seals in LP3 Flat black
Assemble doors
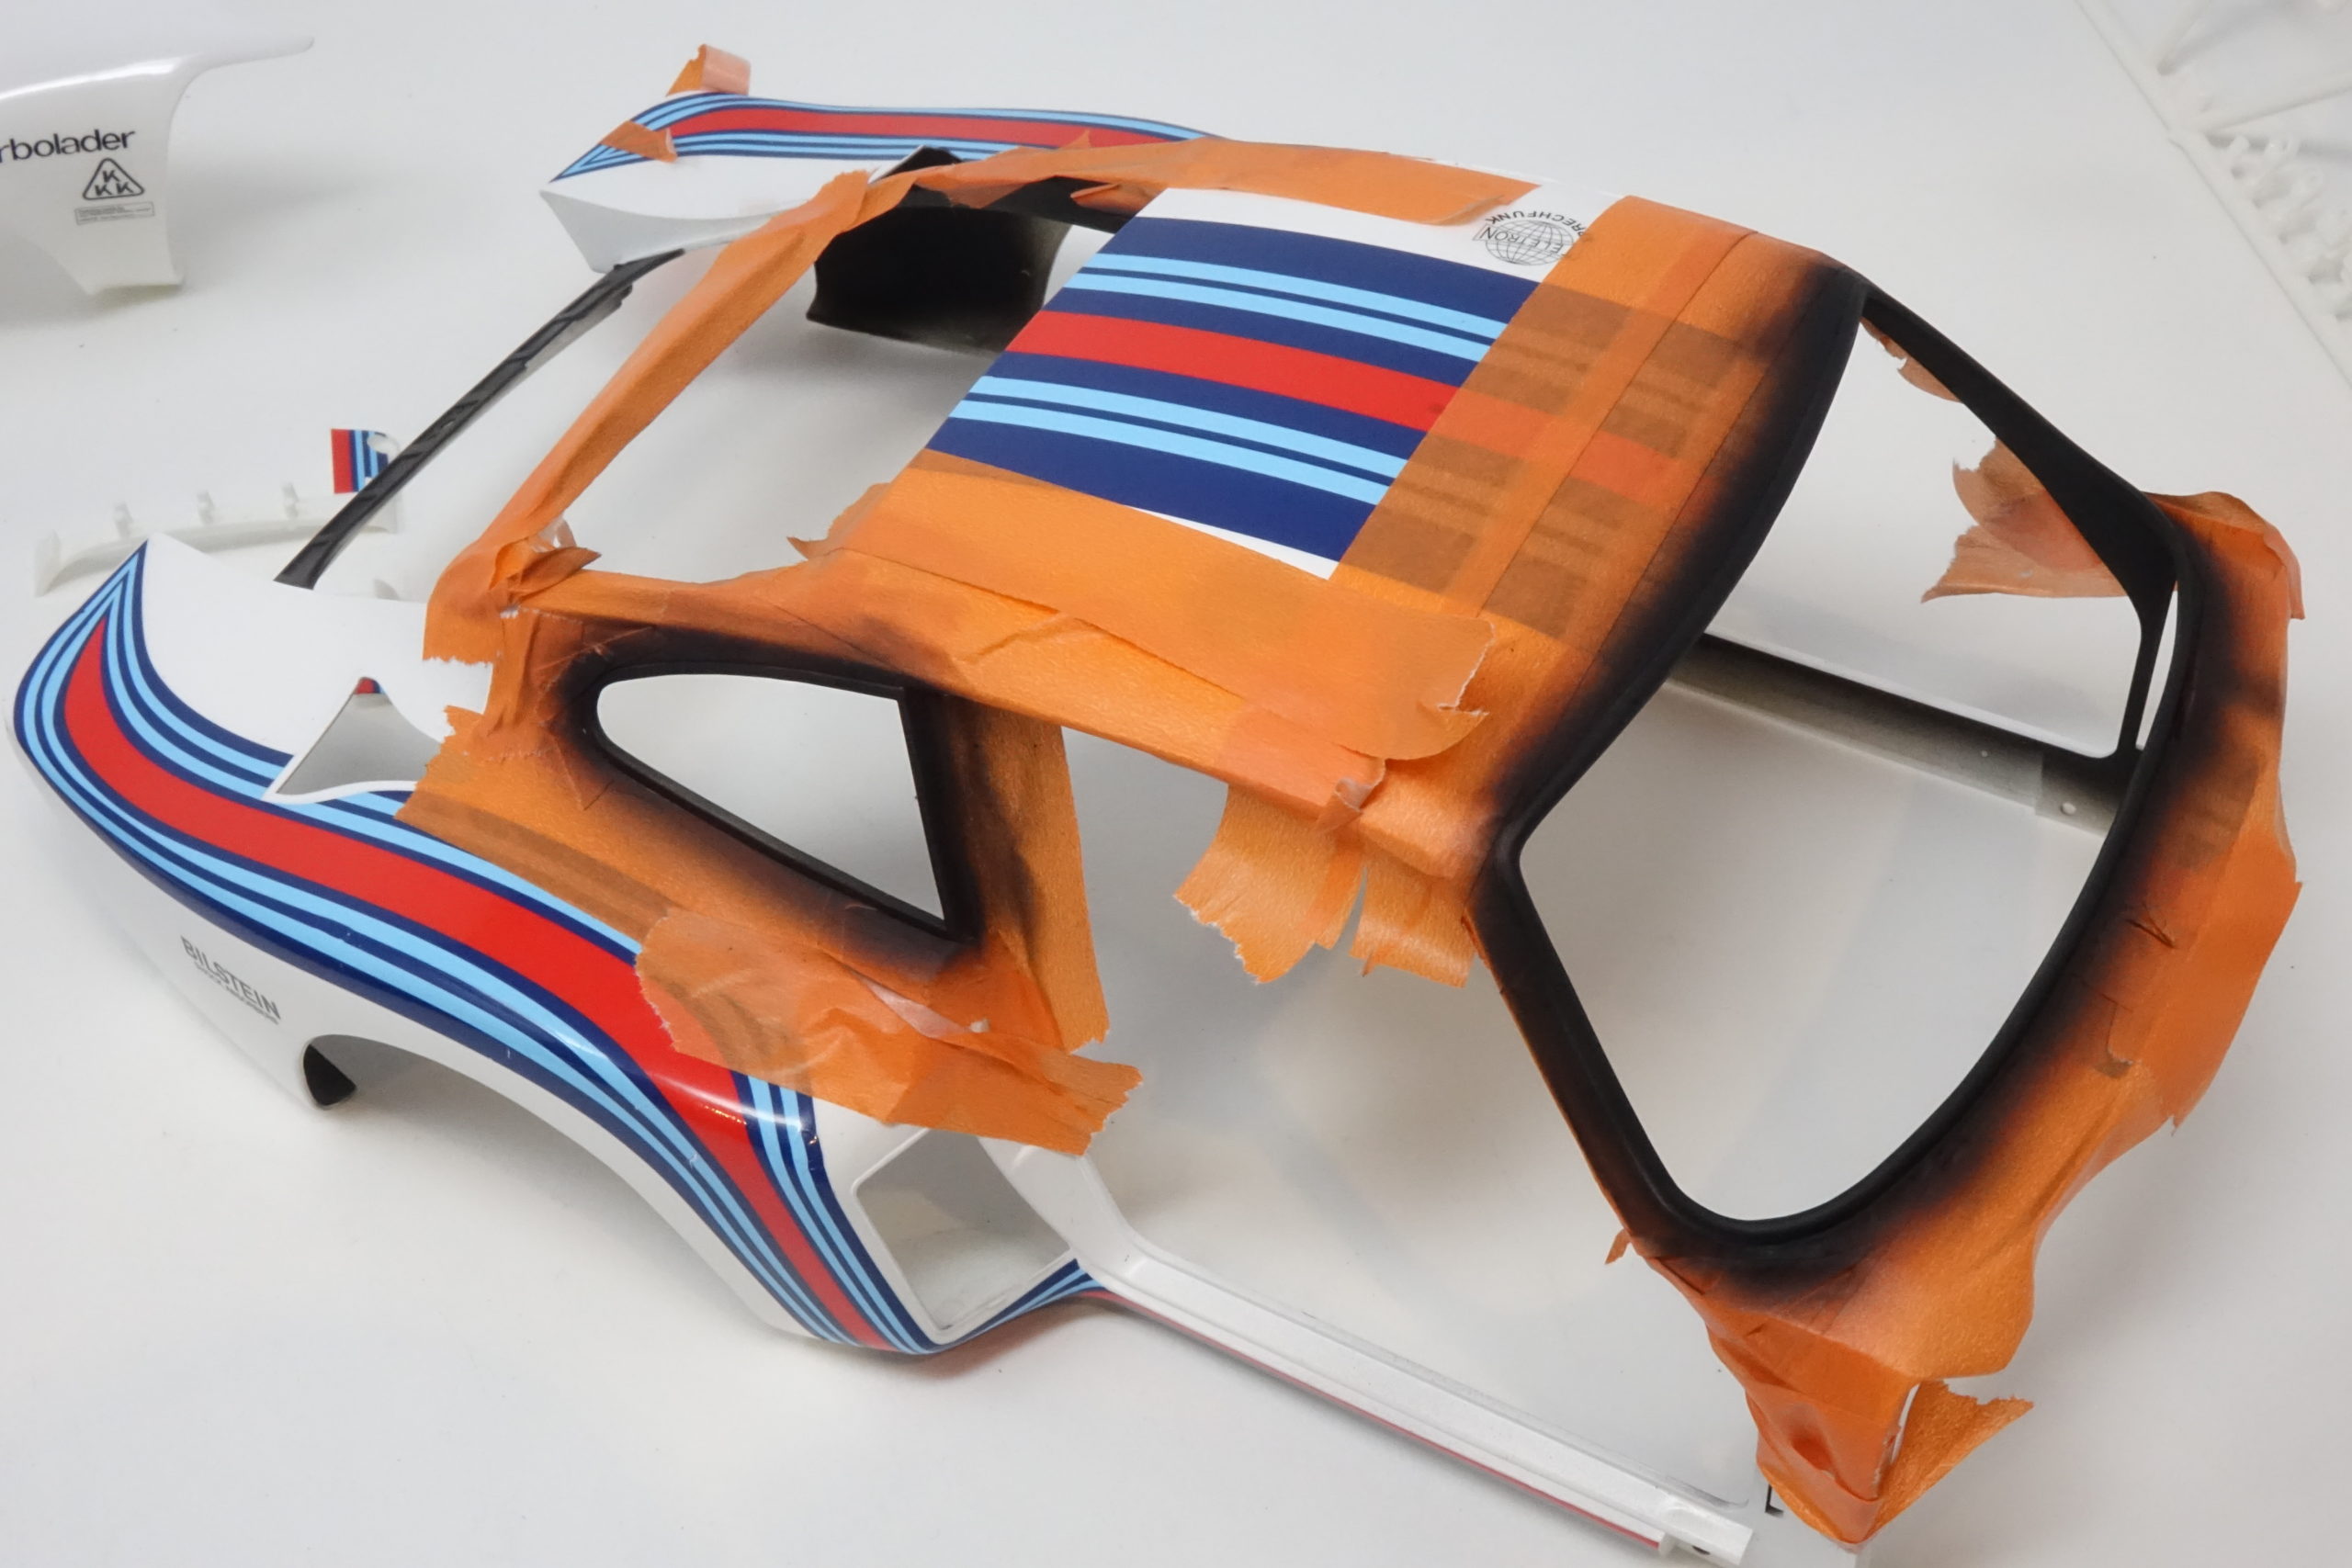
Having Keyed and Cleaned all parts, first step was to spray LP Flat black over all areas that needed it in the inside of the body shell. Just small amounts of masking needed. Some other areas eg behind rear valance were painted in Semi Gloss Black as well. Major masking not needed – with a fine airbrush setting and angling the model, it’s quite easy to spray the inside areas without contaminating the exterior surfaces – with care!
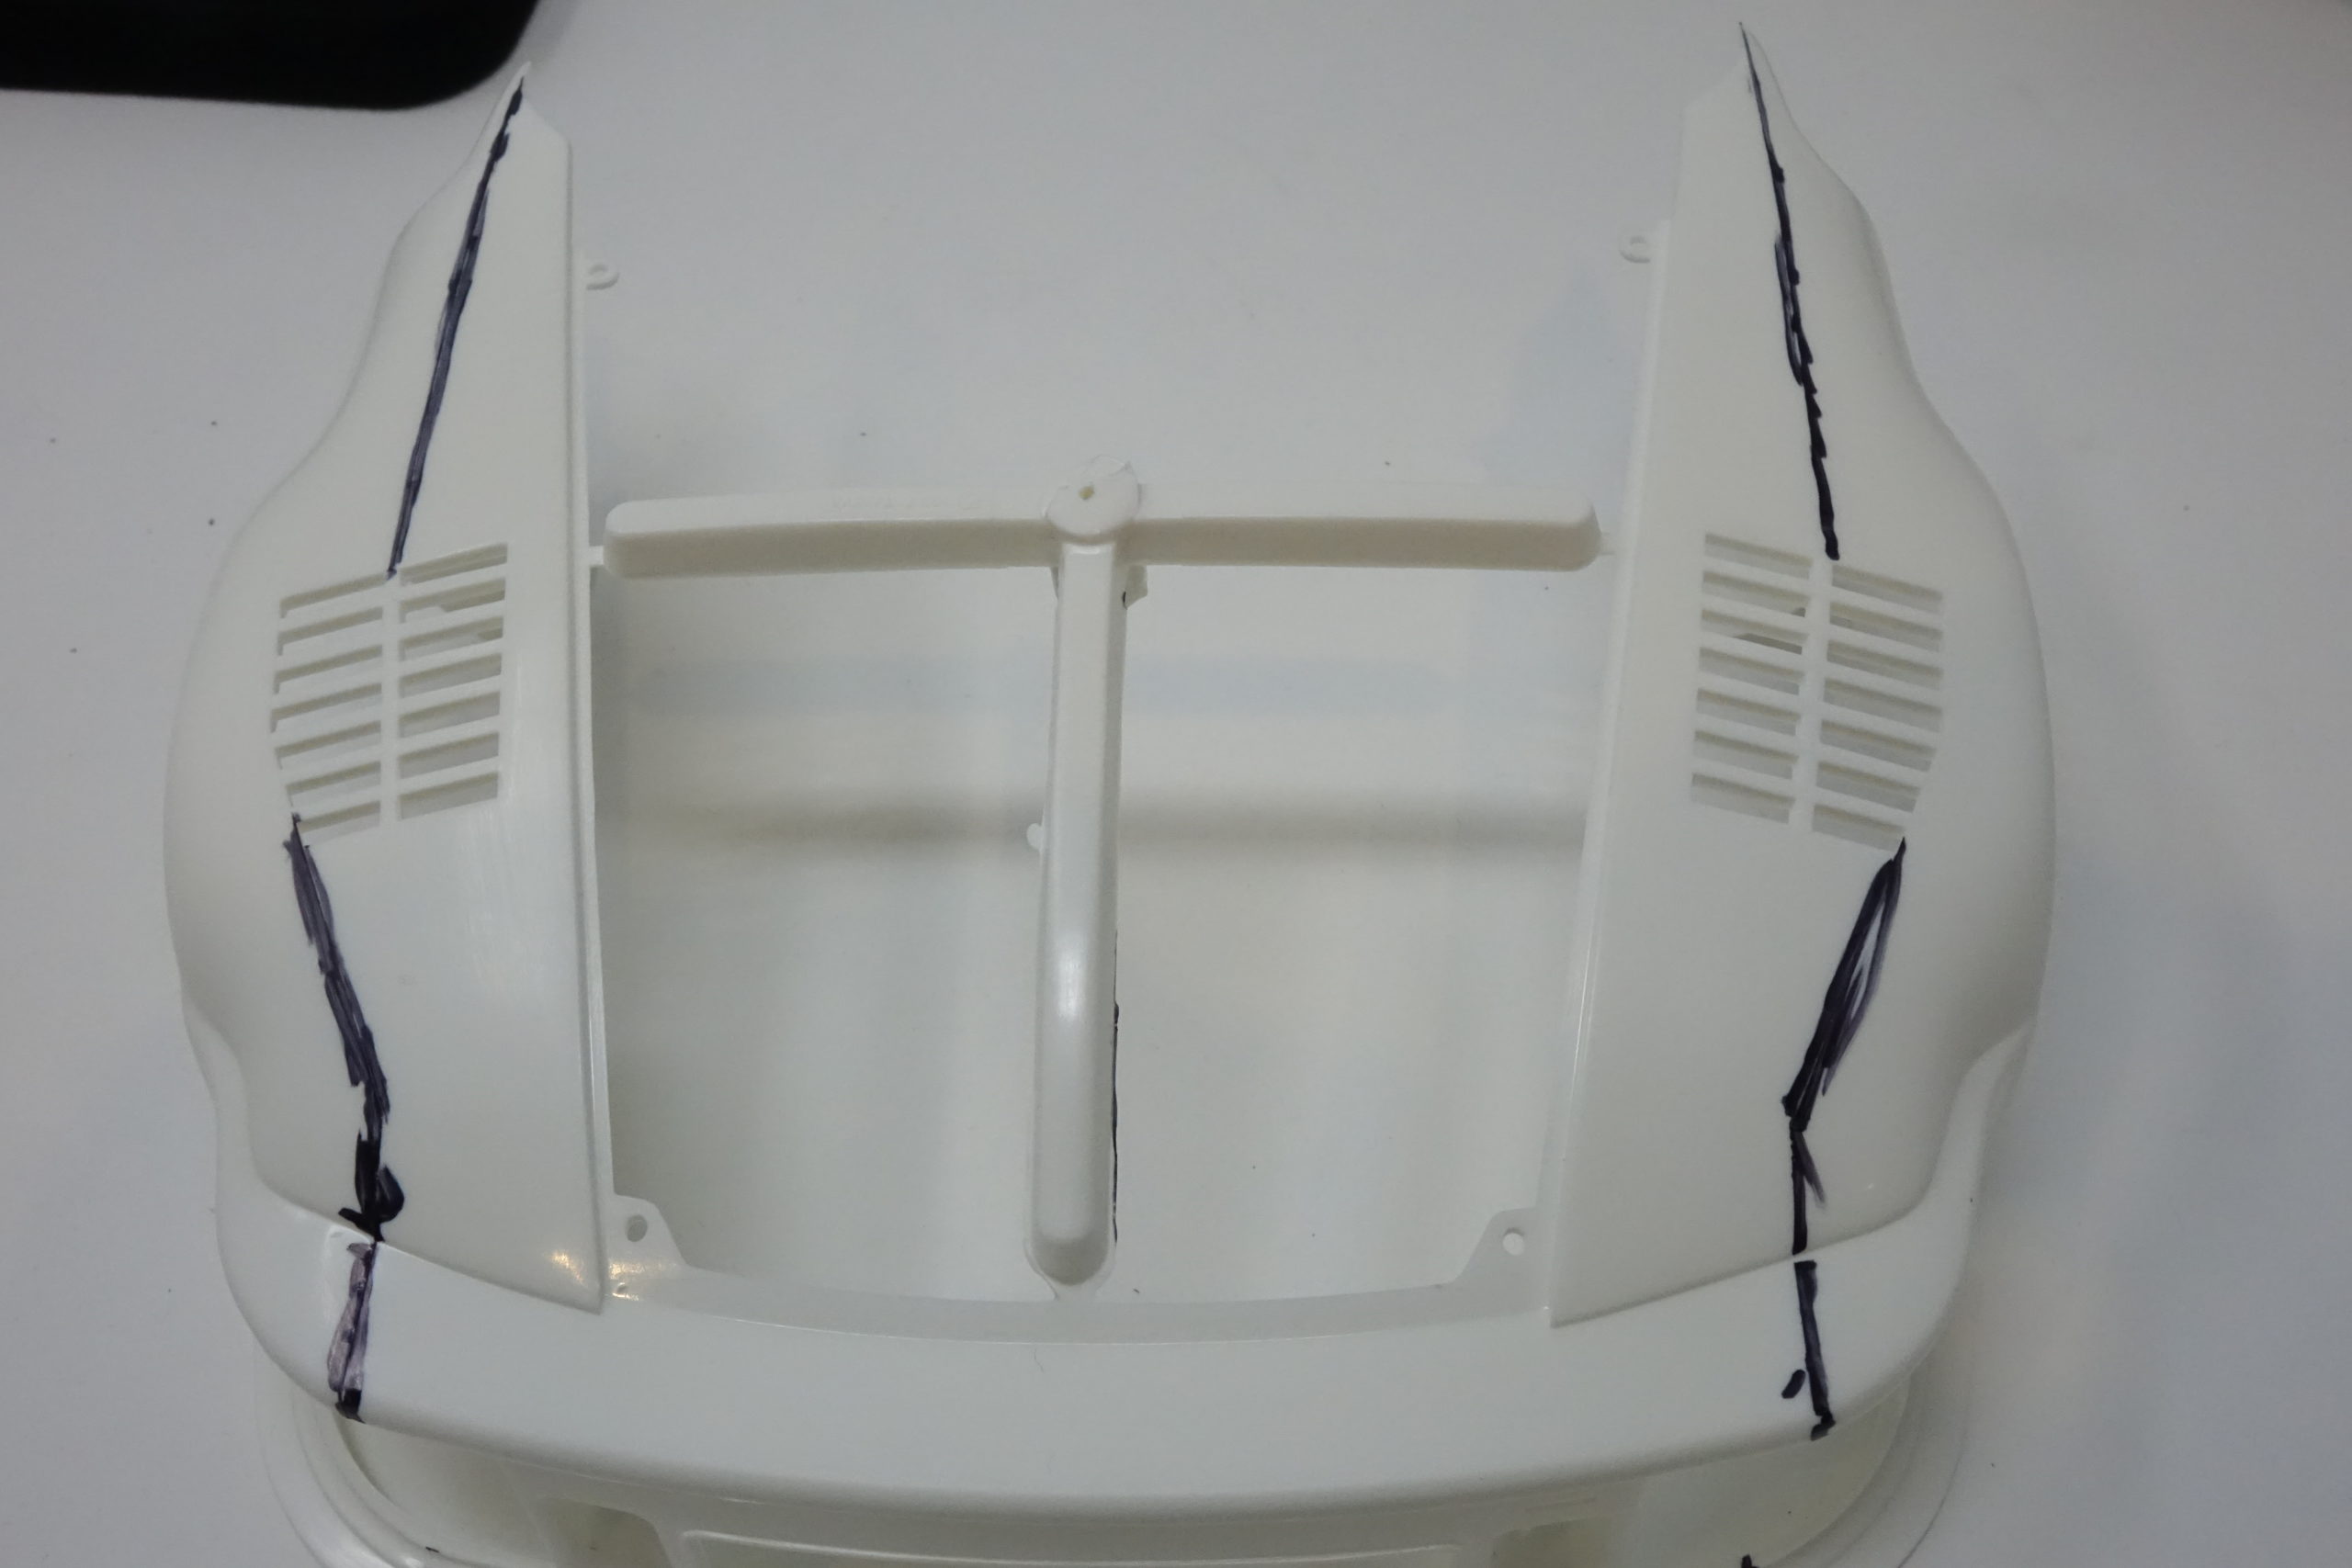
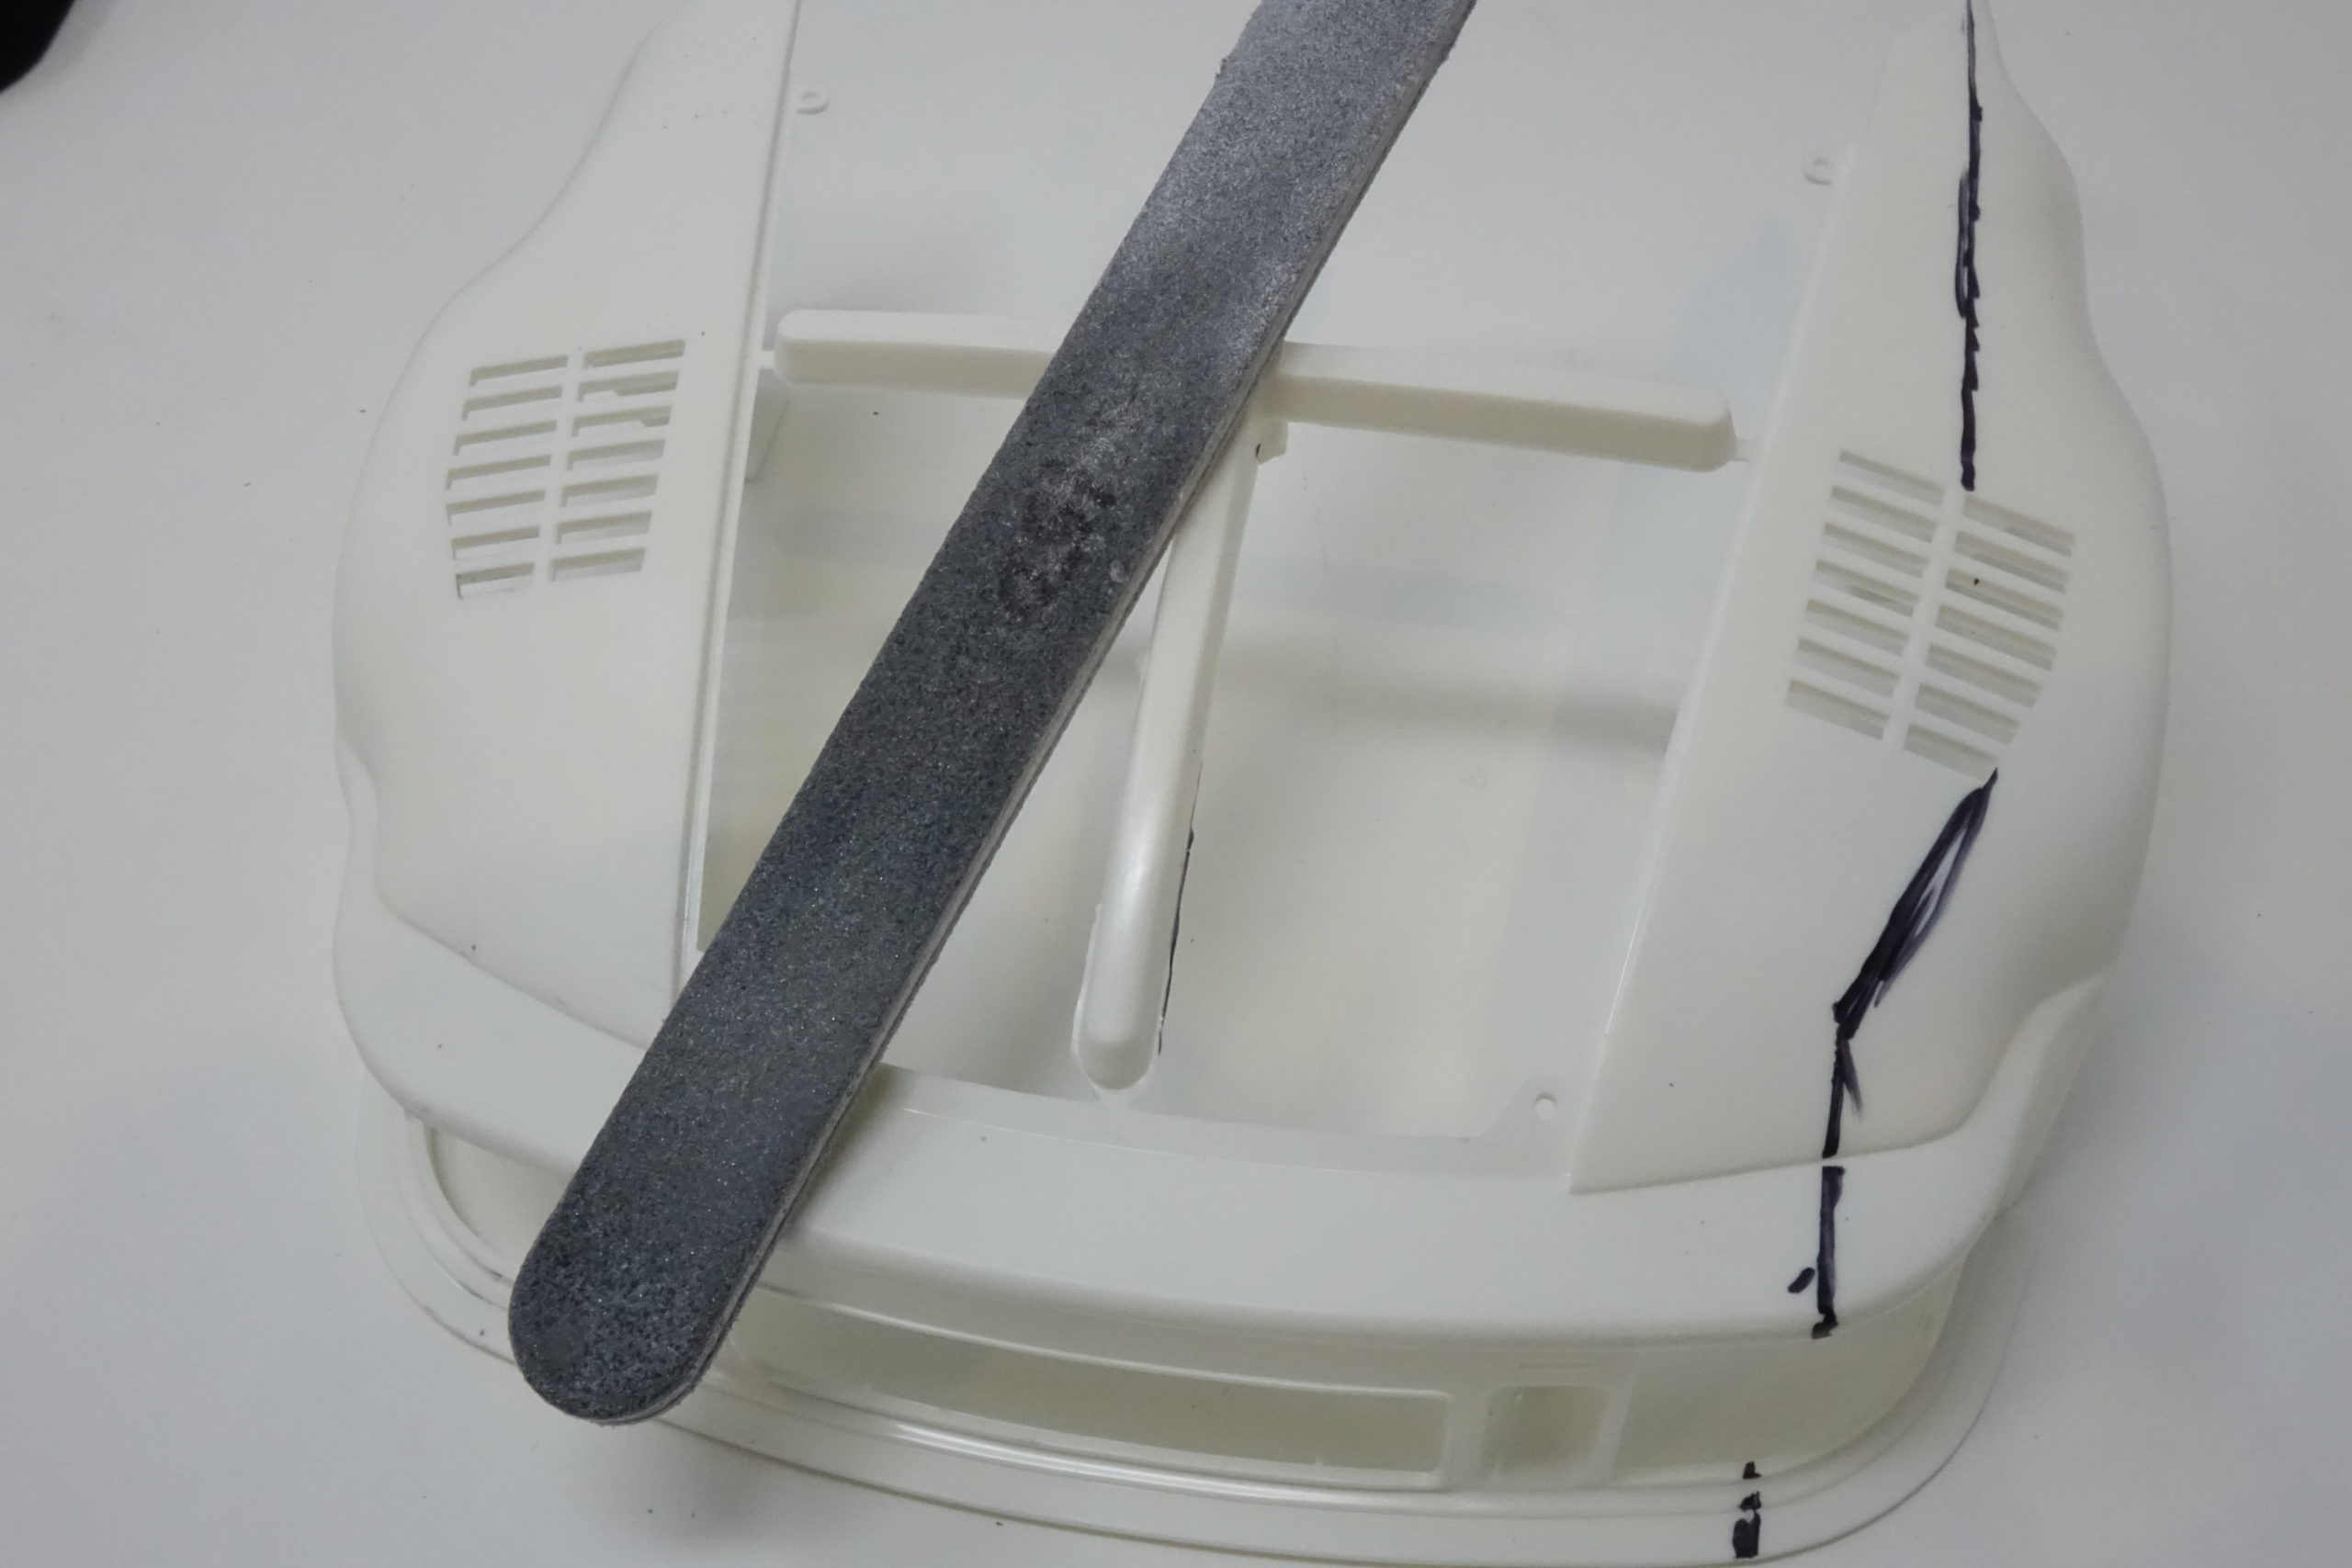
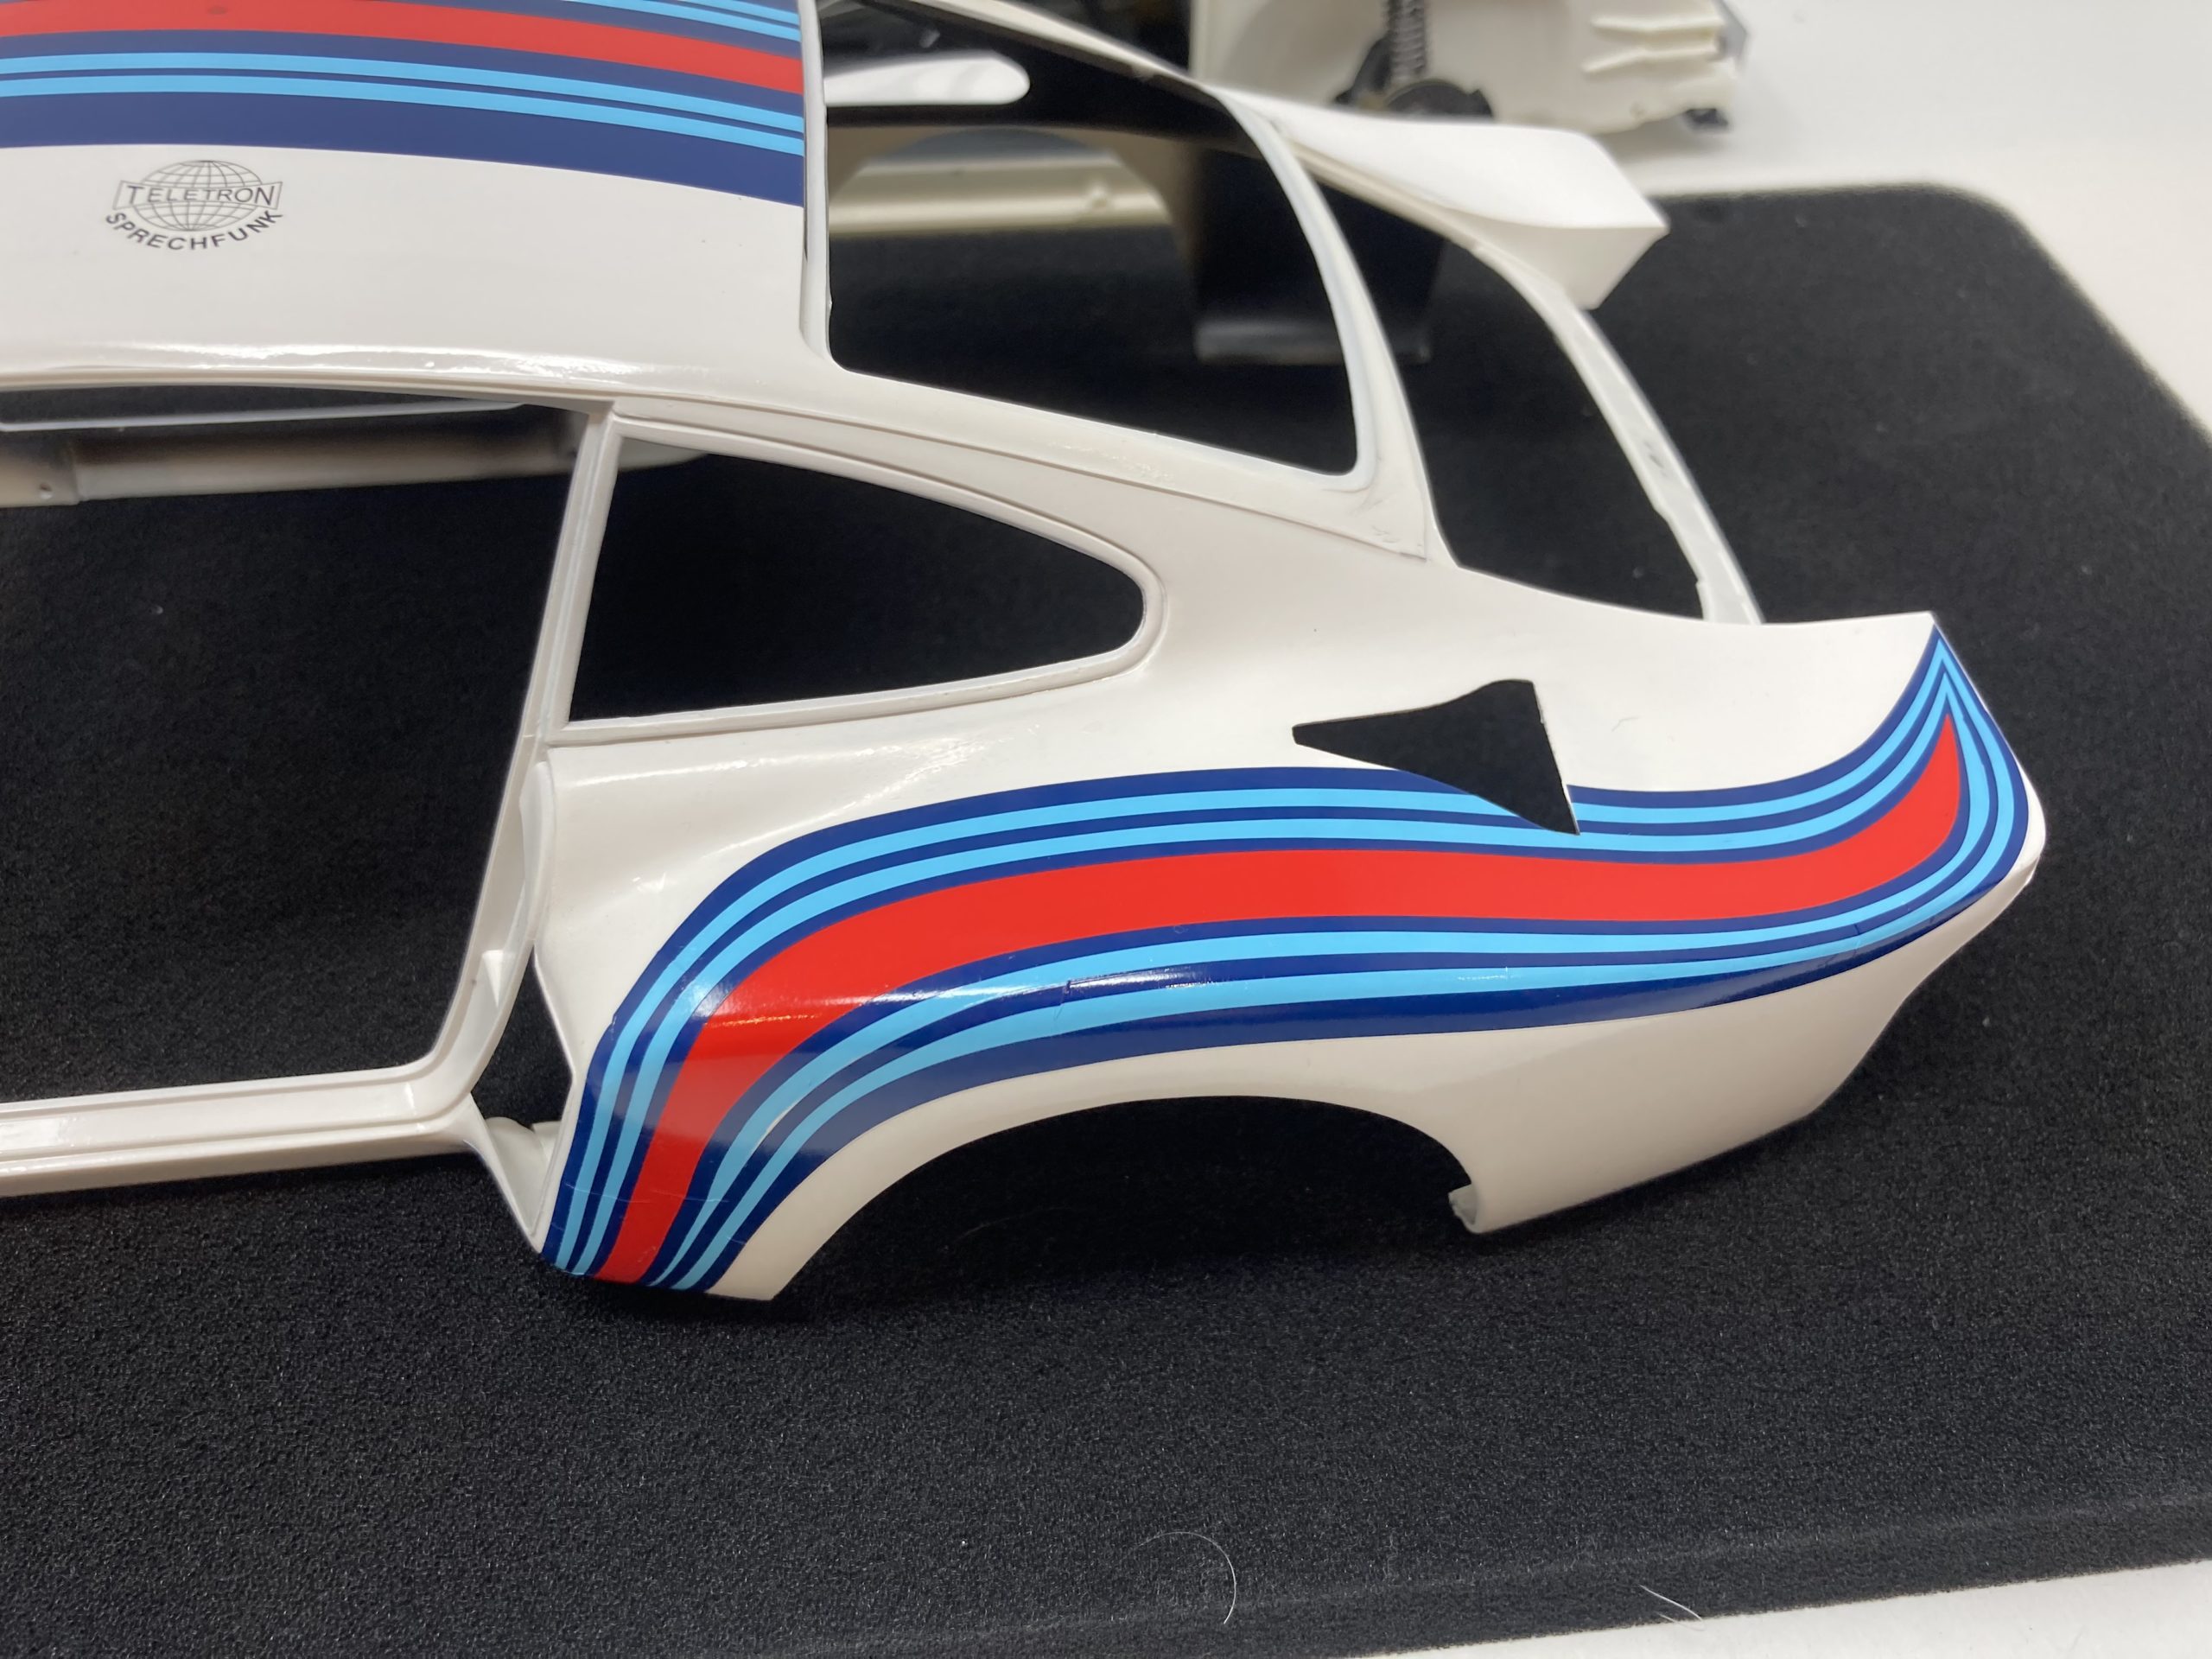
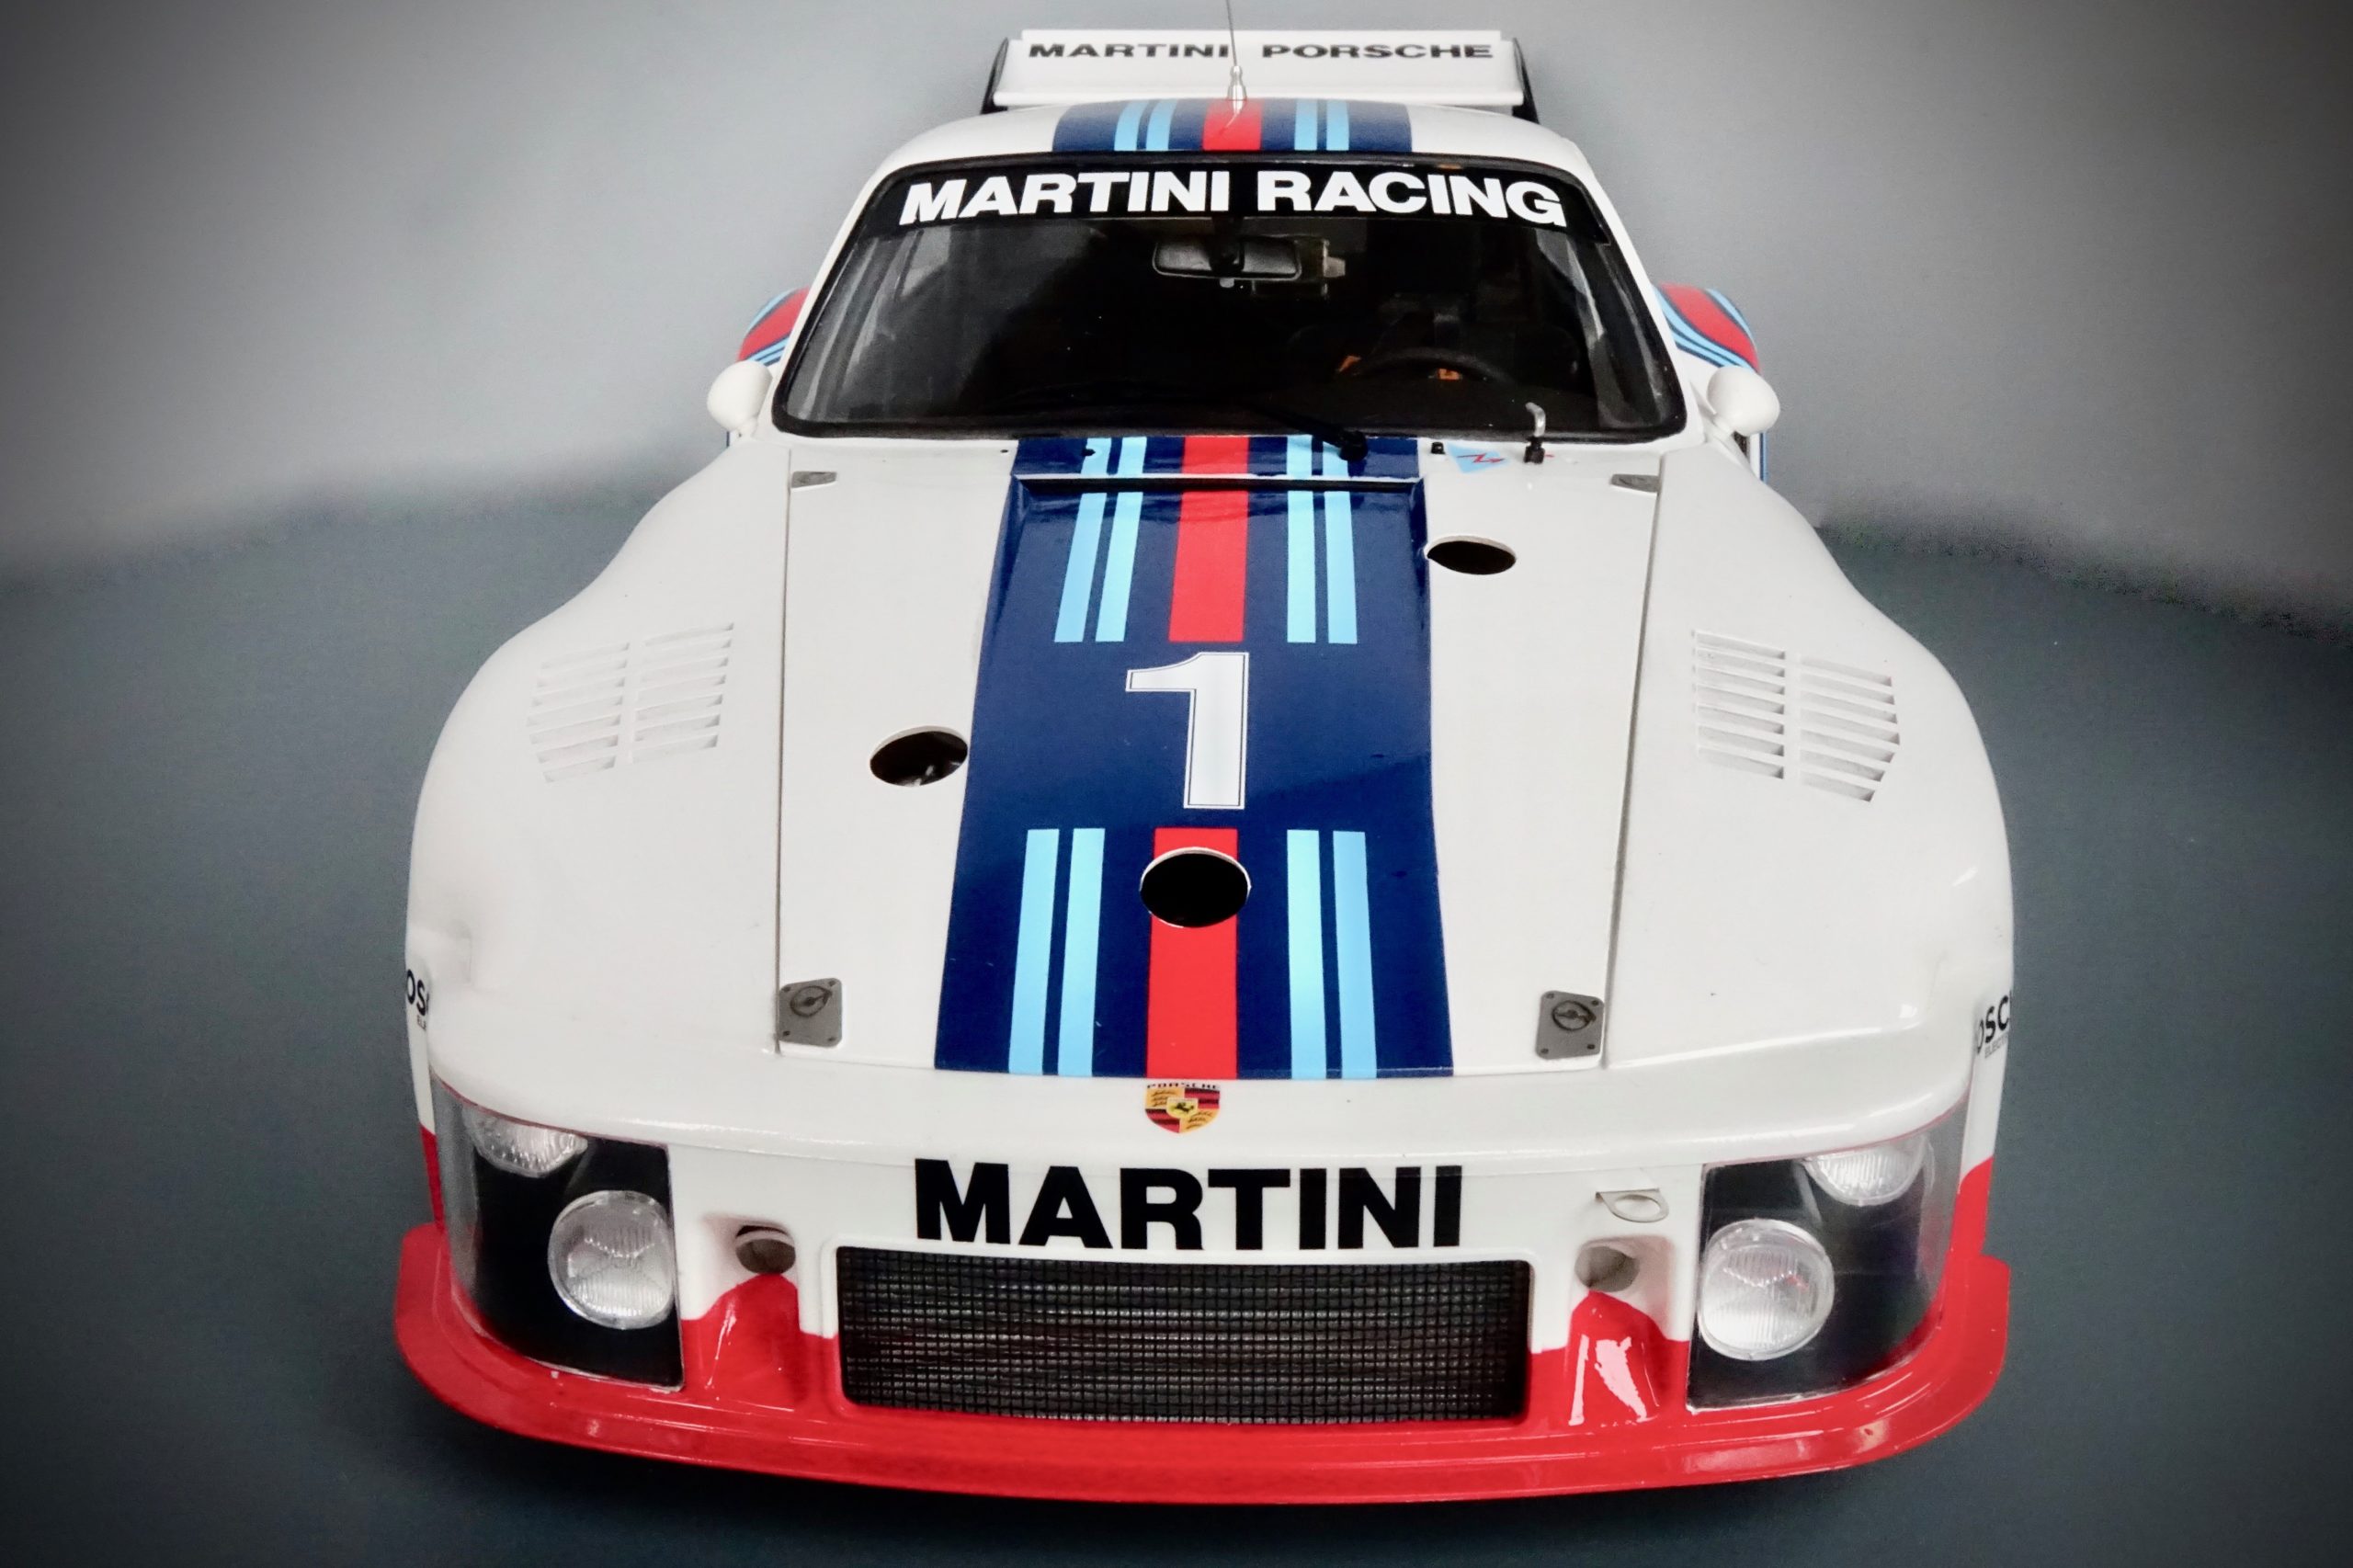
On the body itself there were just a couple of small areas of moulding seams that needed removing – using a Sharpie marker pen to highlight the seams and then medium grade (about 150 grit) sanding stick to remove the seam. All body shell and associated parts then painted in LP2 Pure White, followed by any sanding/buffing where needed to prepare the paintwork for the later decals and clear lacquer.

Care needed when assembling and installing the additional body fittings eg rear radiators – not so straightforward – one or two parts (uncharacteristically for Tamiya) weren’t great fits.
LP7 Red paint applied to lower part of front bodywork – a bit of careful masking.

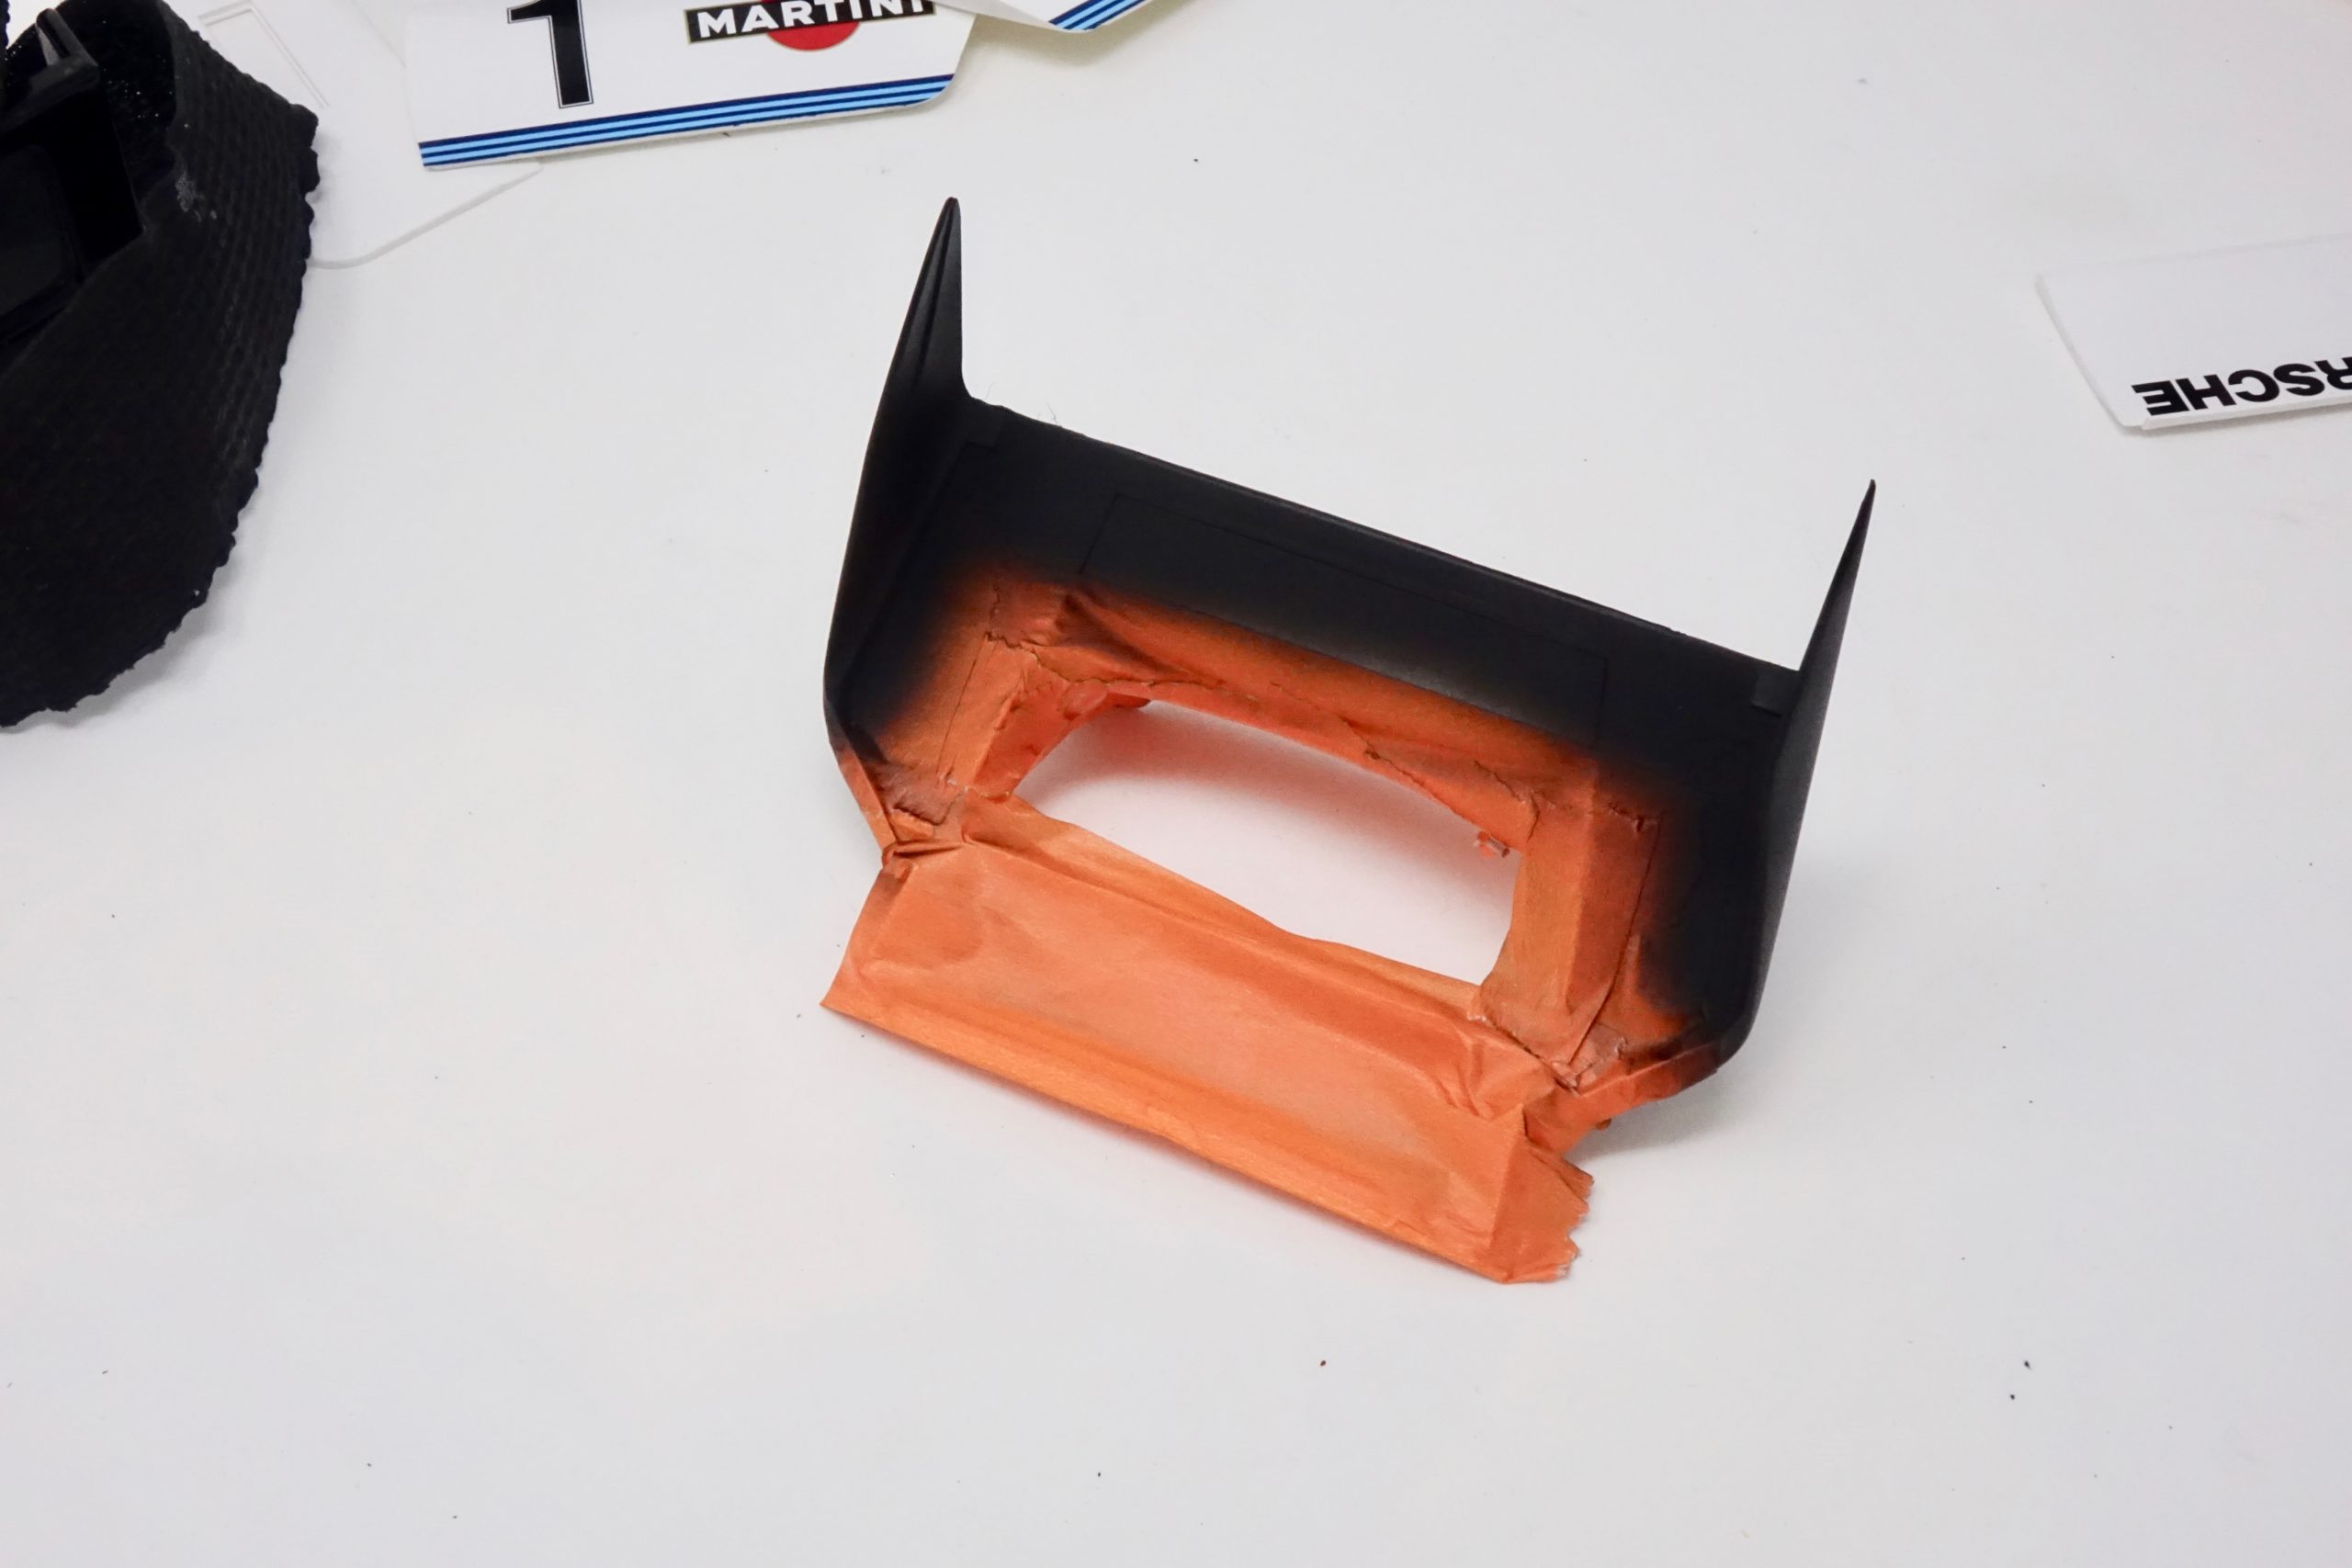
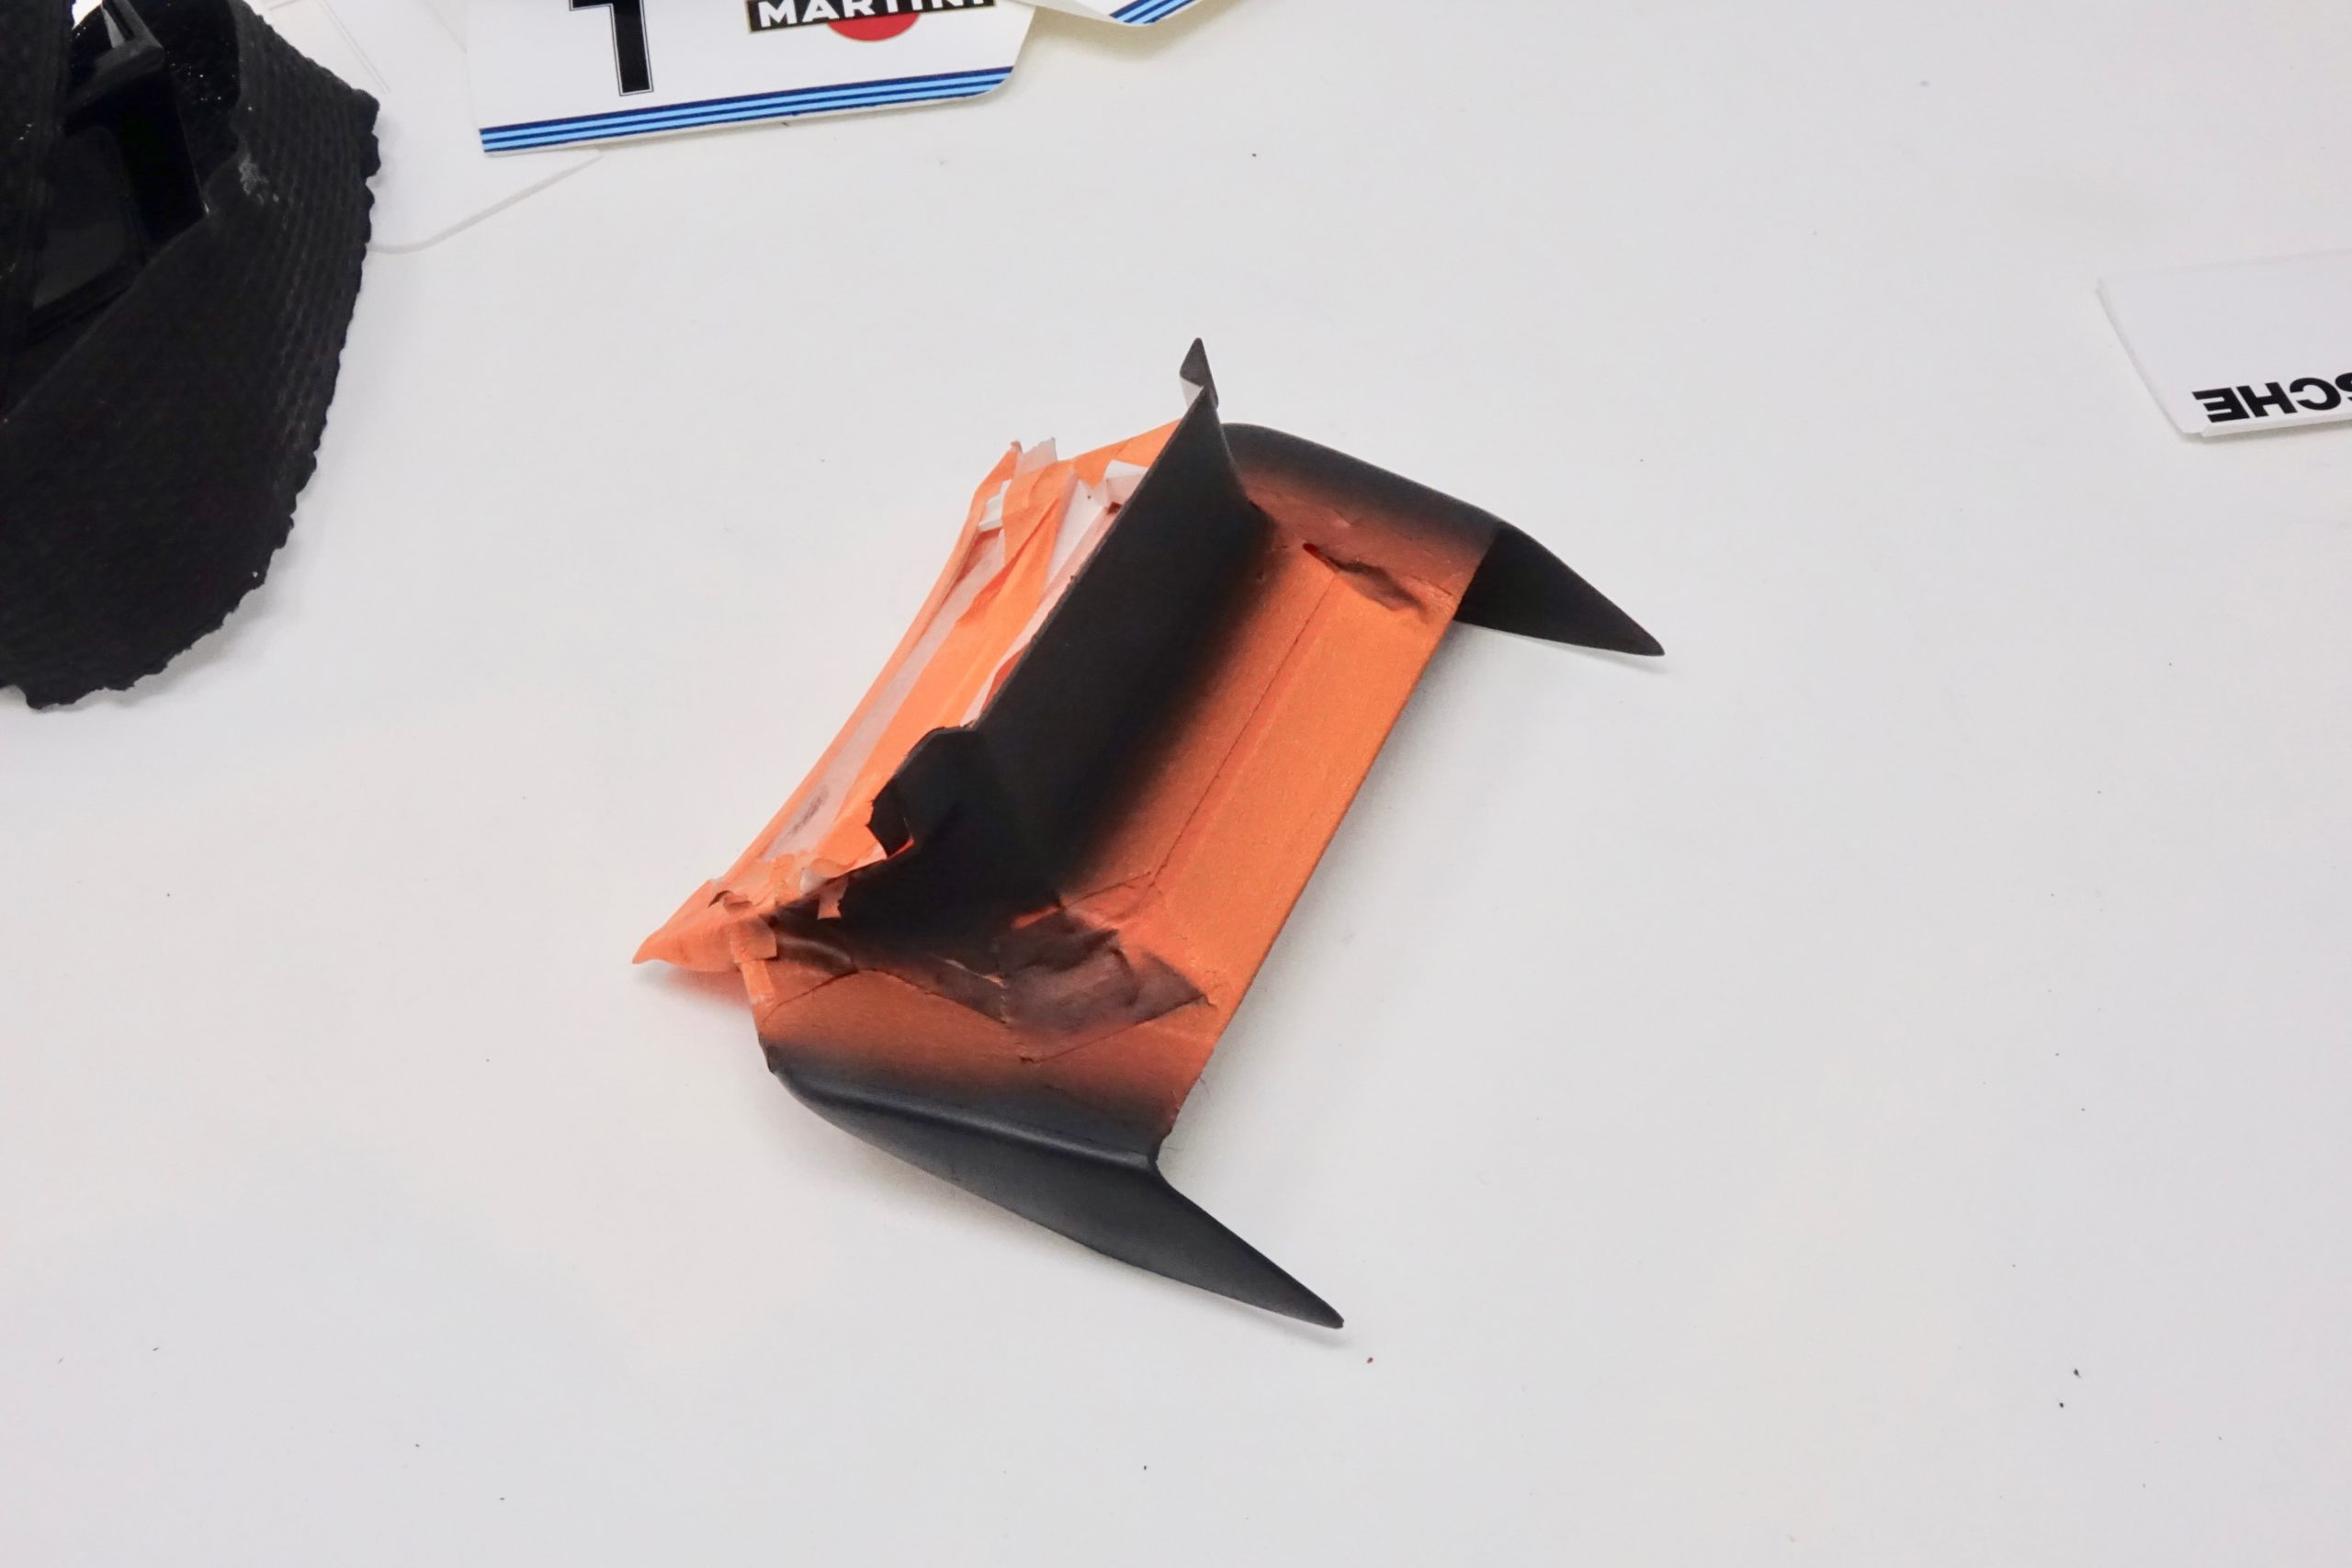
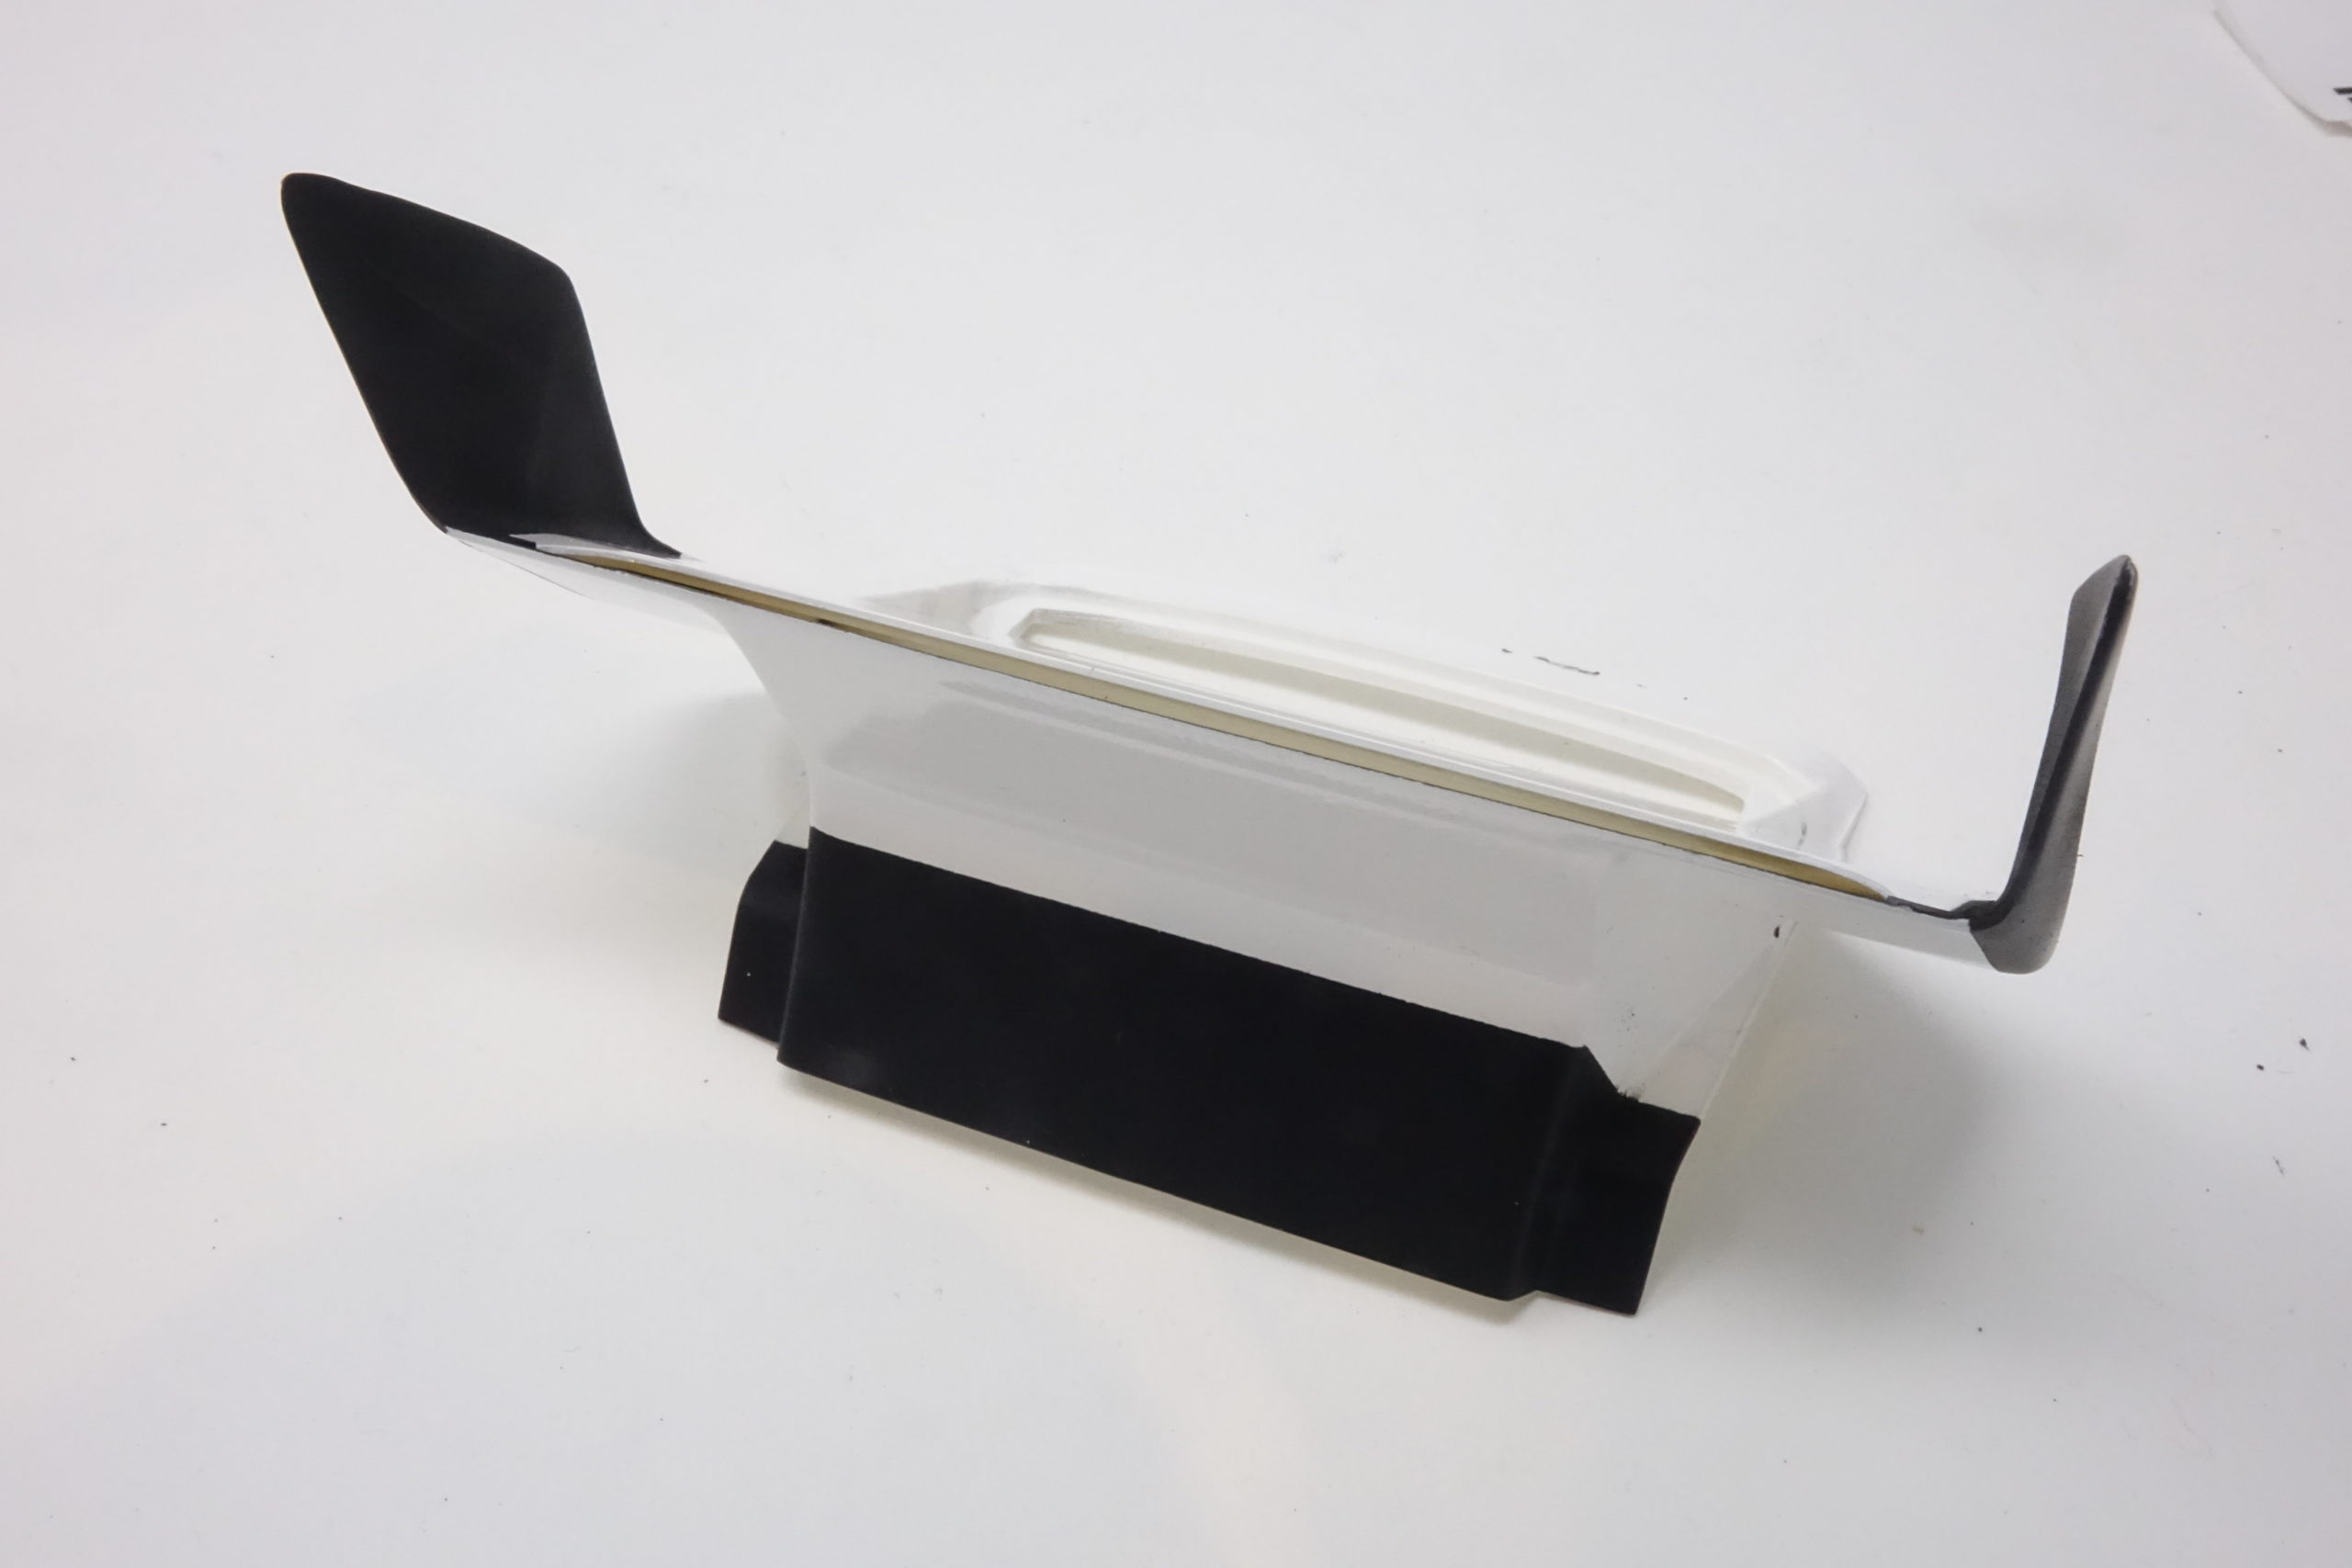
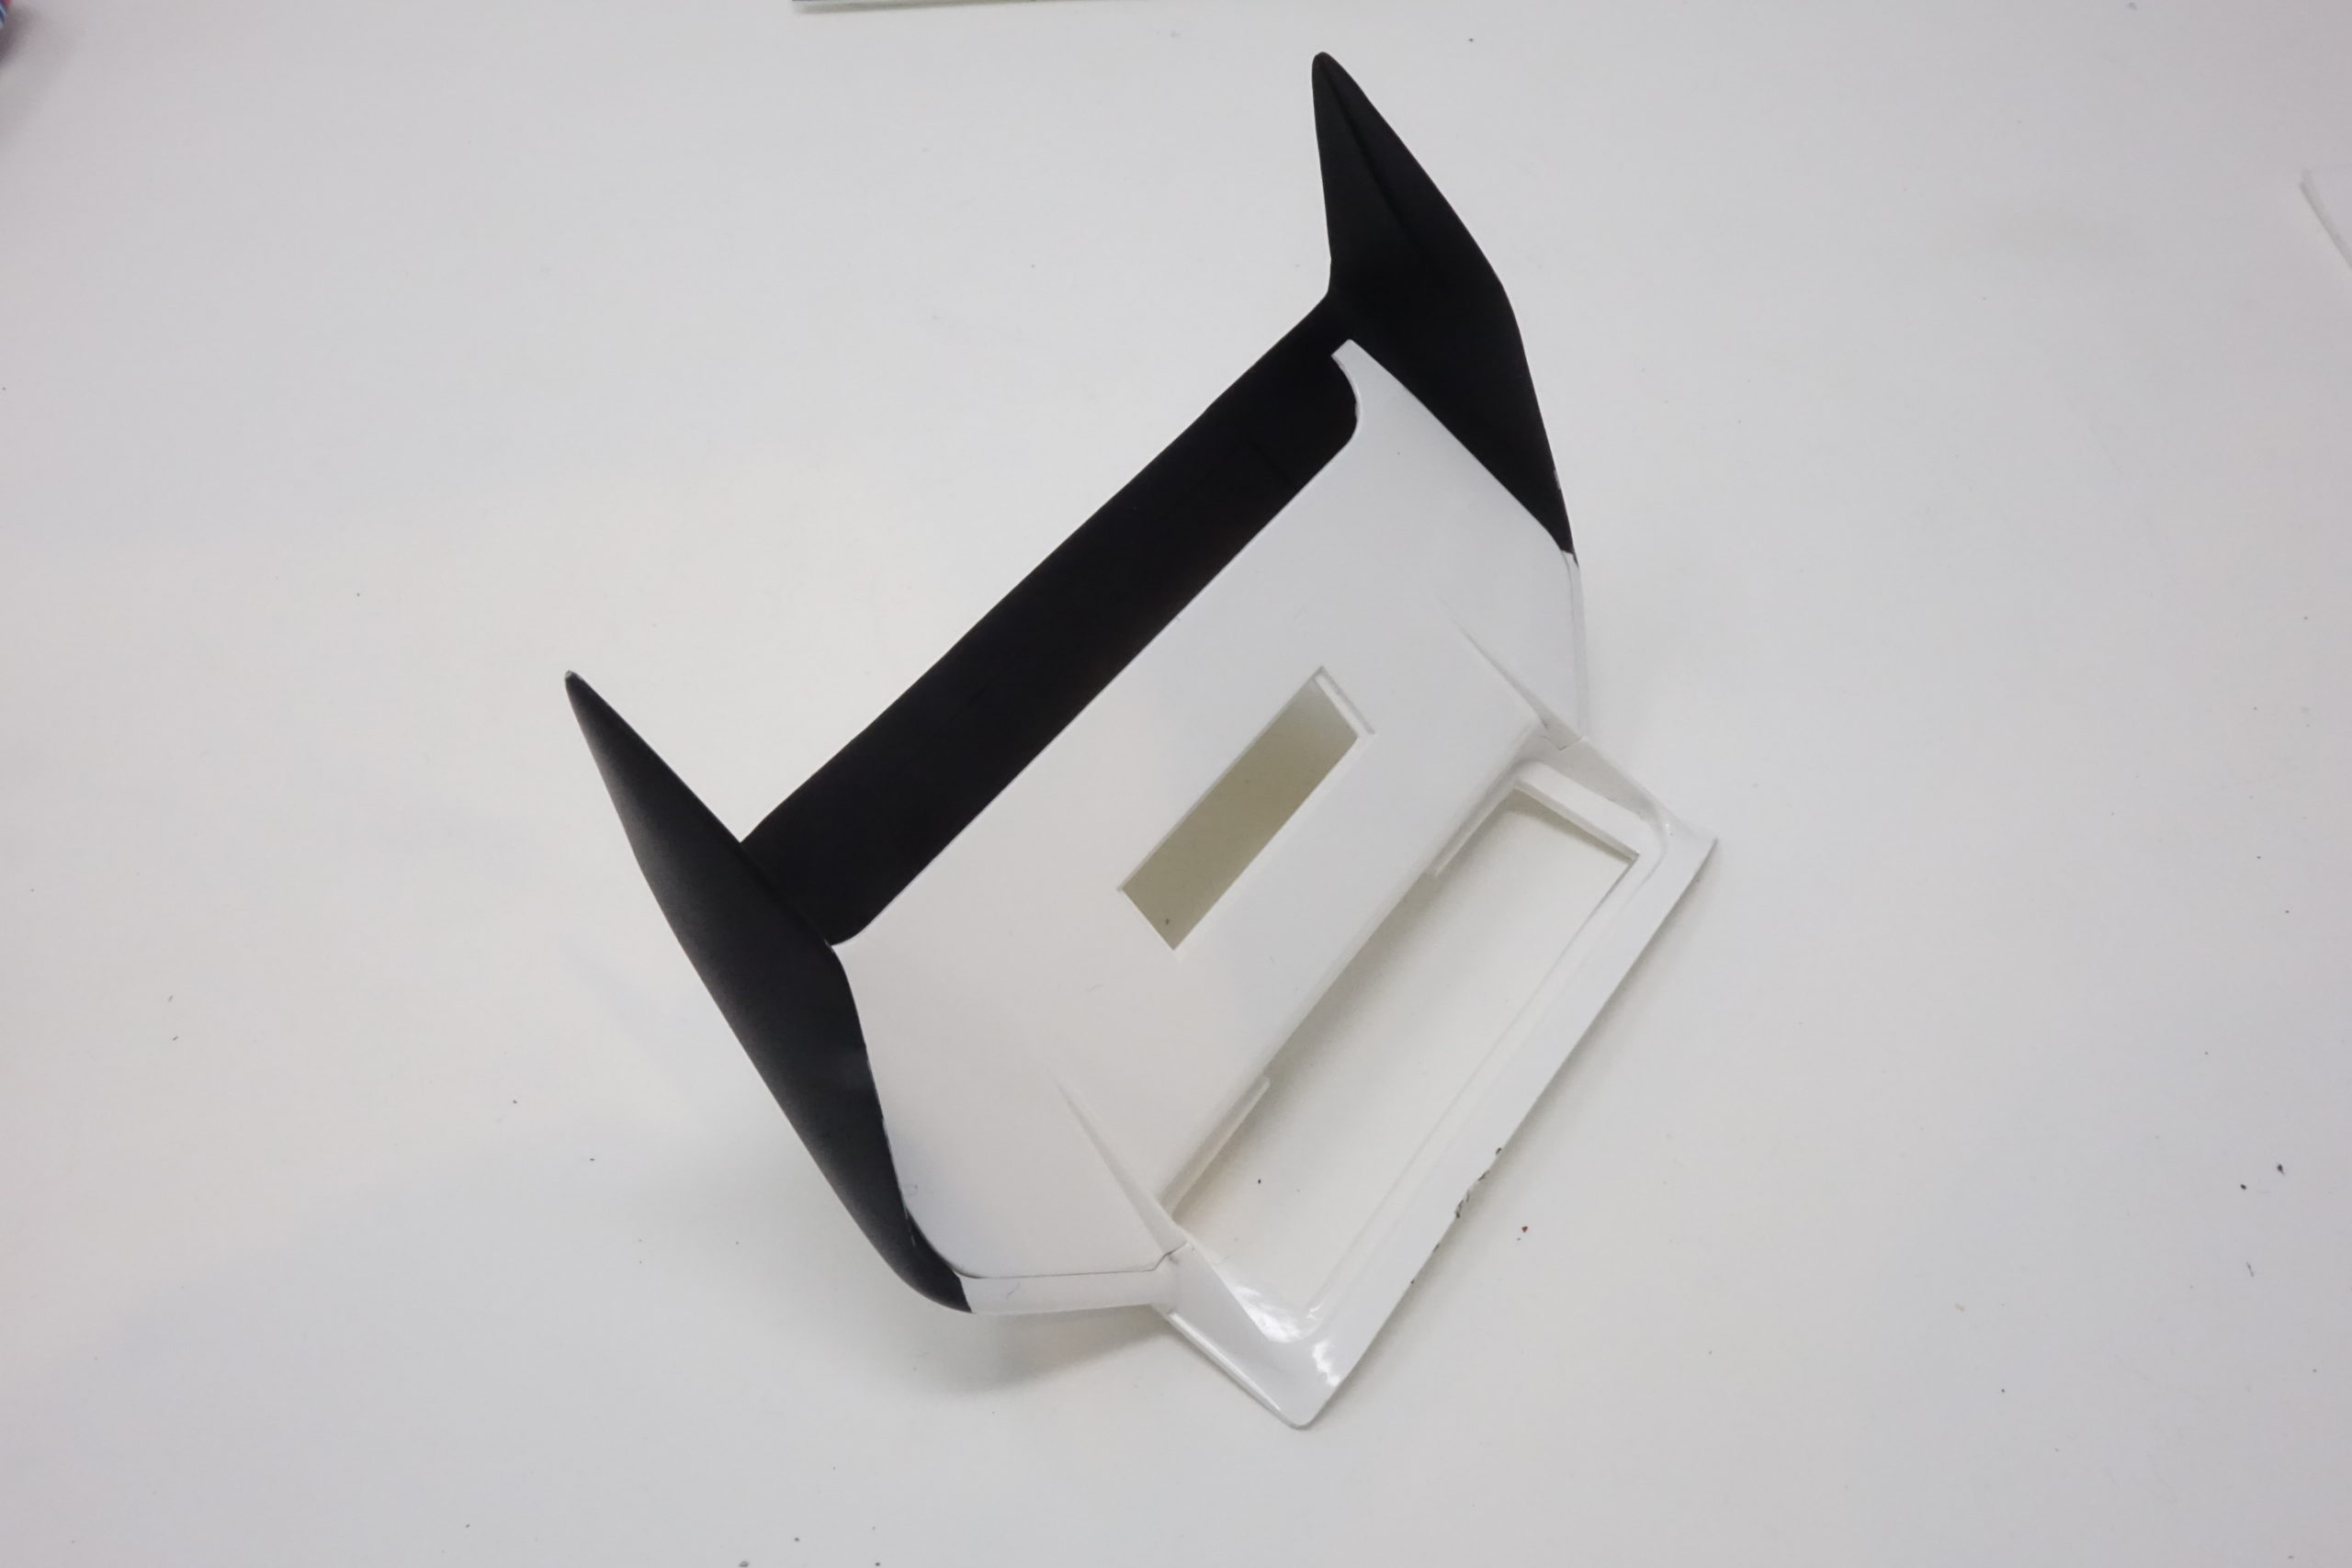
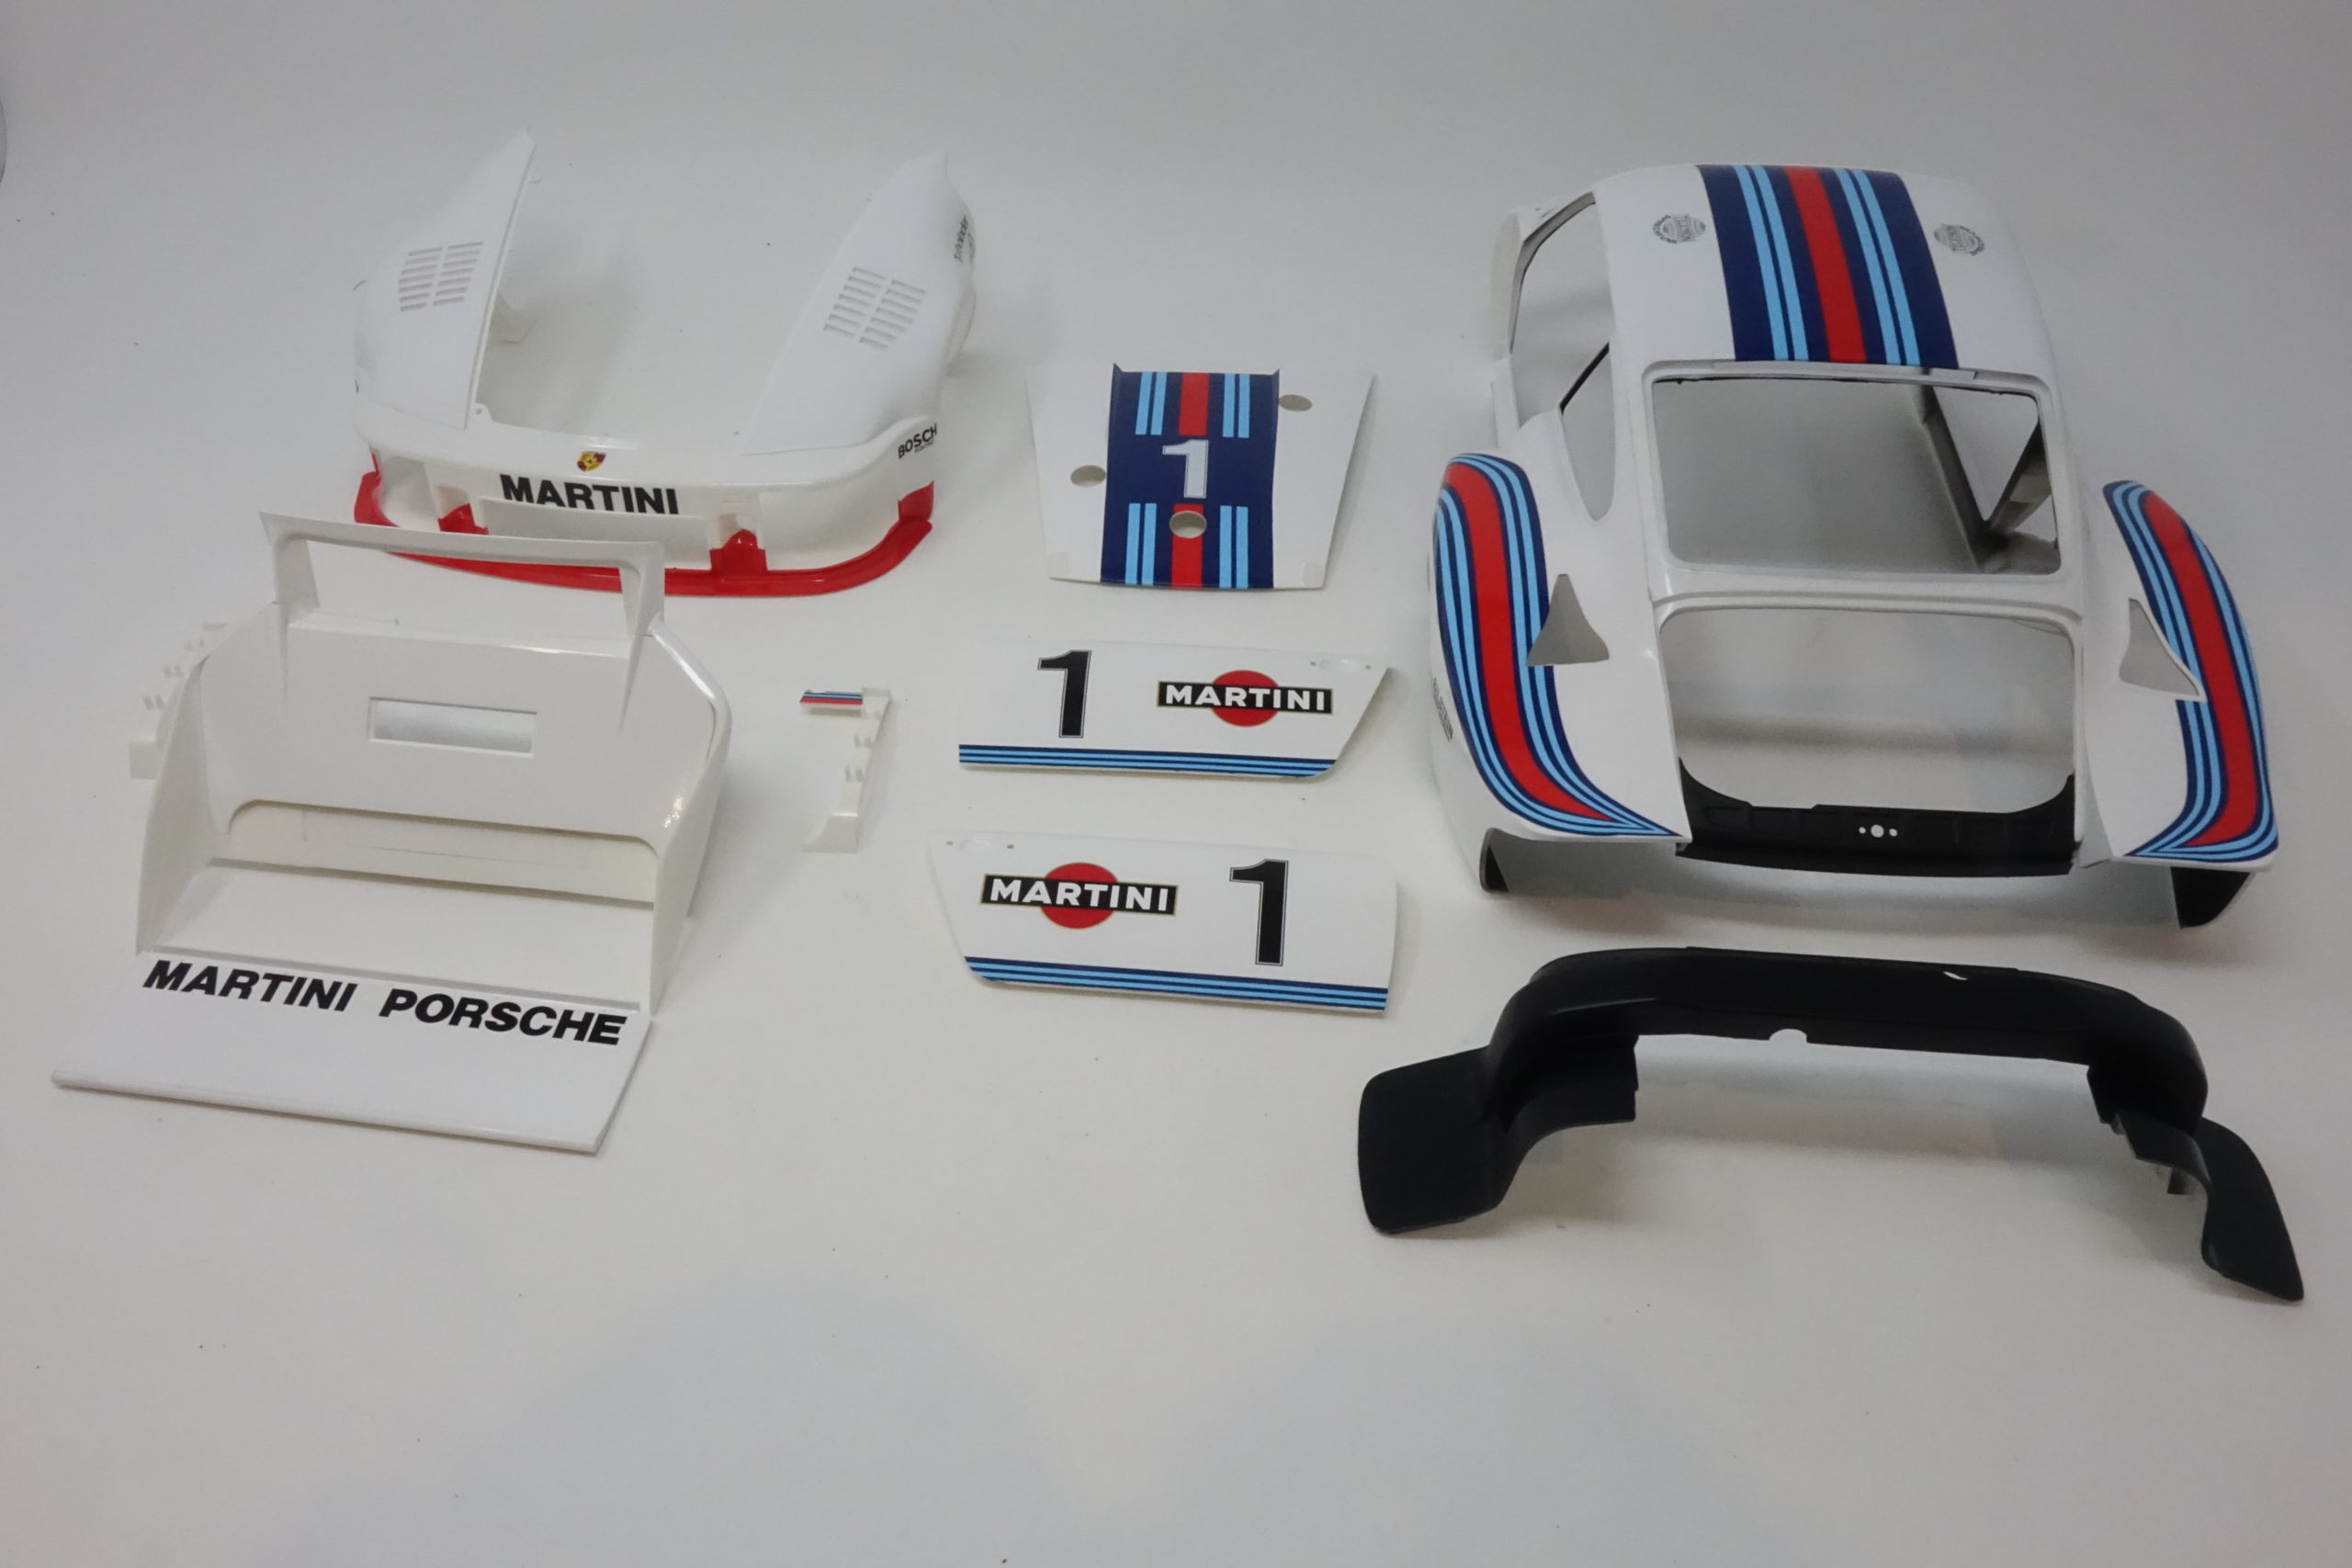
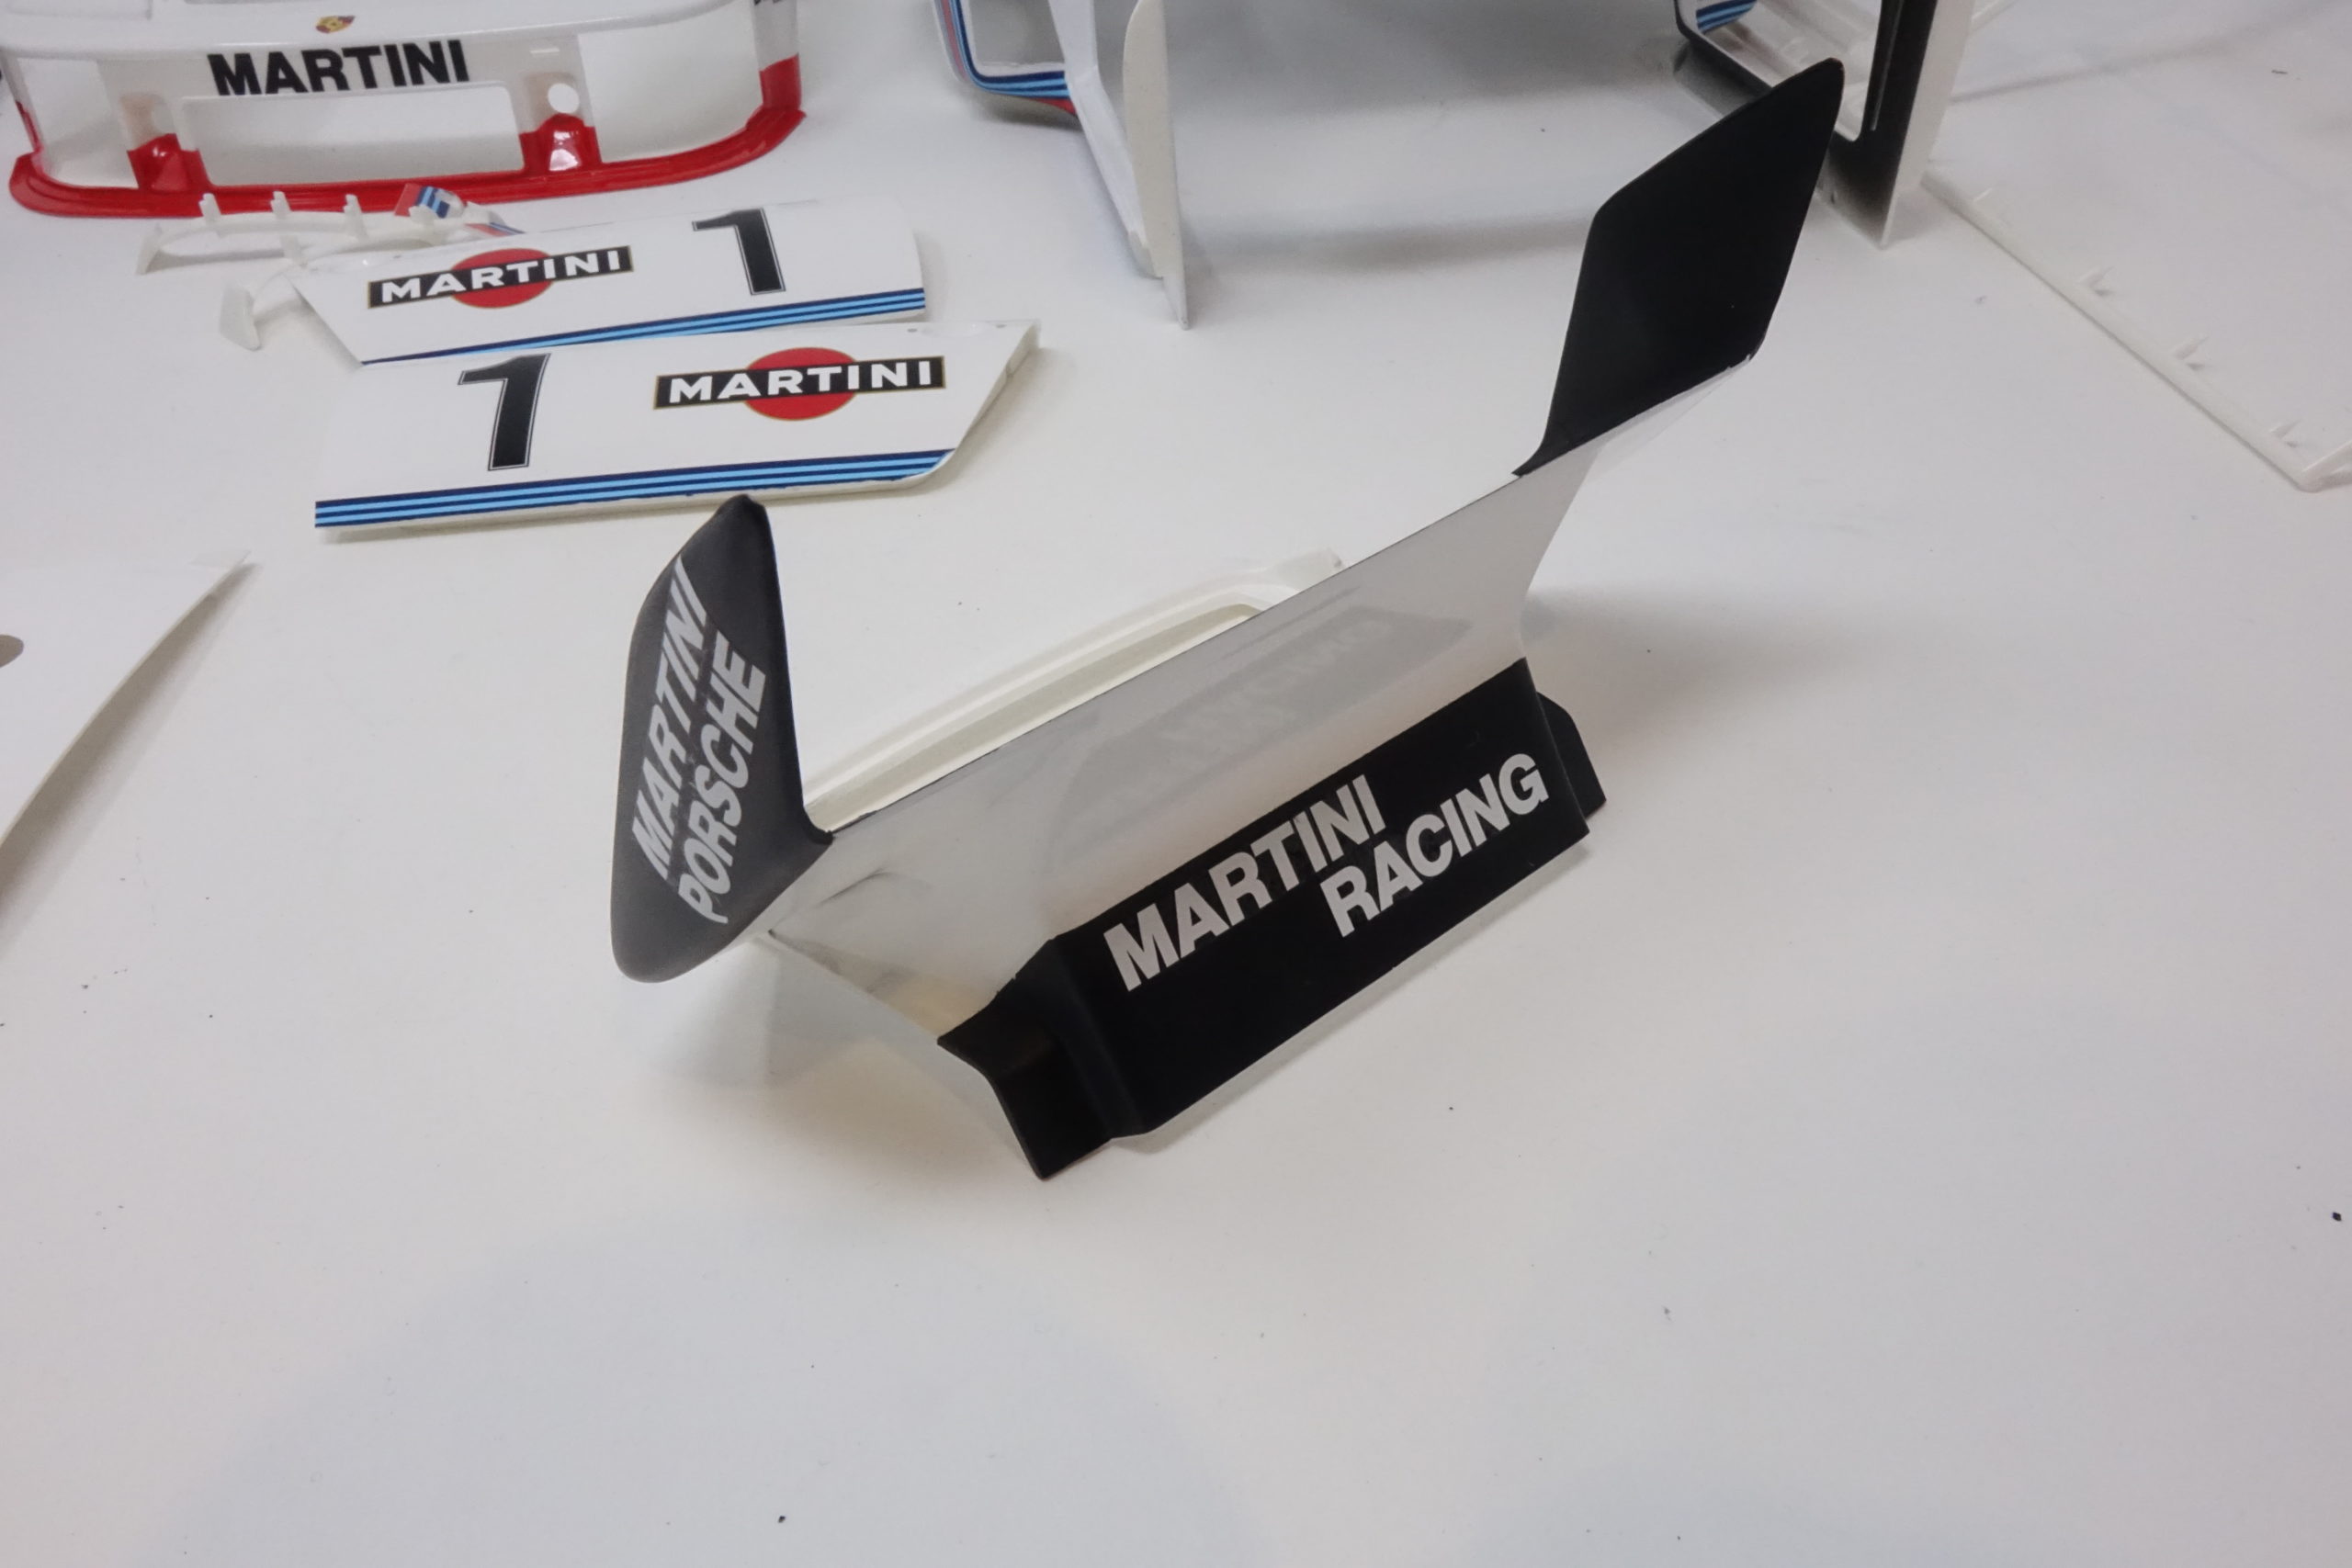
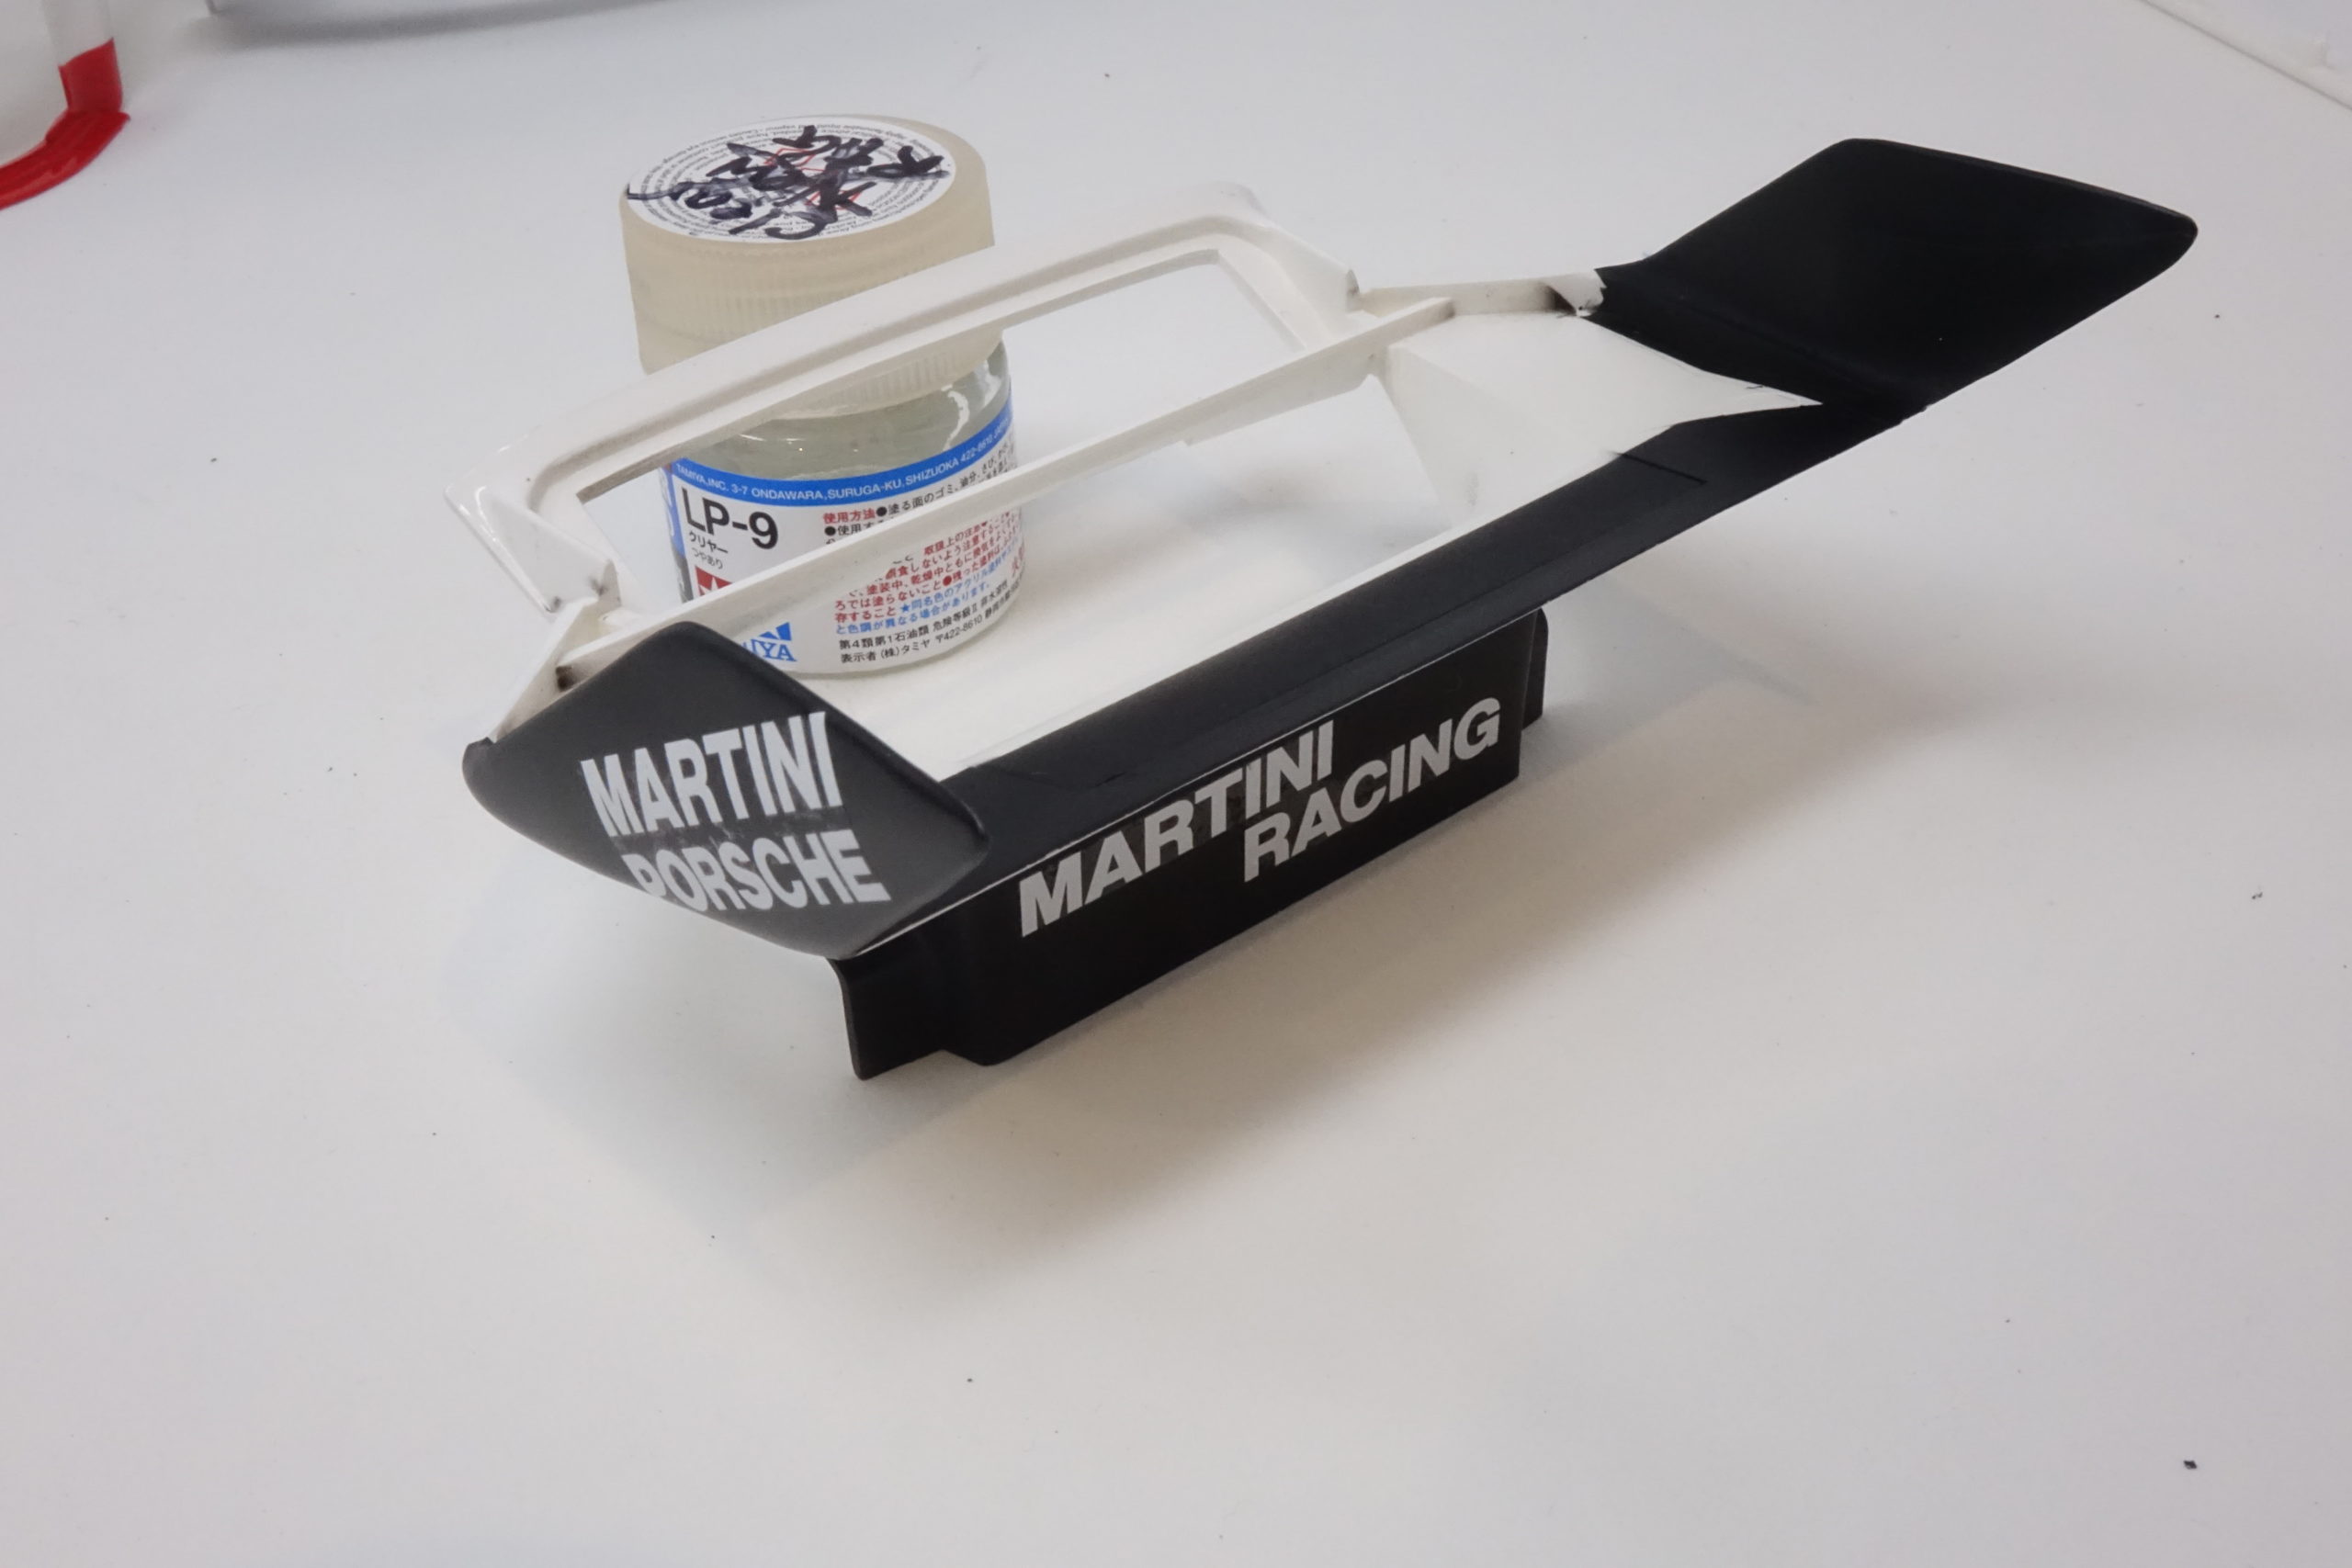
I found it to be tricky to get the lines straight in the masking on the rear spoiler to apply the black (photos). A planned sequence of steps needed. The SGB was coated with SemiGloss Clear lacquer after the decals were later applied to it. Assembly of the separate parts of the spoiler was done later in the build after all the paintwork/decals/lacquer completed. [For the eagle eyes out there- I actually did this step after all the decals etc had been applied to the main body!]
Notes on Decals
This was always going to be a difficult part of the build – large decals which, because of their thinness, would crease very easily. So, everything had to be organised and carefully planned. Even the main bonnet decal, which is on a flat surface, was tricky – because any attempt to slide the decal results in it stretching slightly and then creasing – and removing creases is extremely difficult. These are fantastic quality Cartograph decals – very accurate but very delicate! I used photocopied cut outs to mark positions of main decals – eg roof/rear wings – using masking tape markers to allow easy positioning without having to move decals around much.

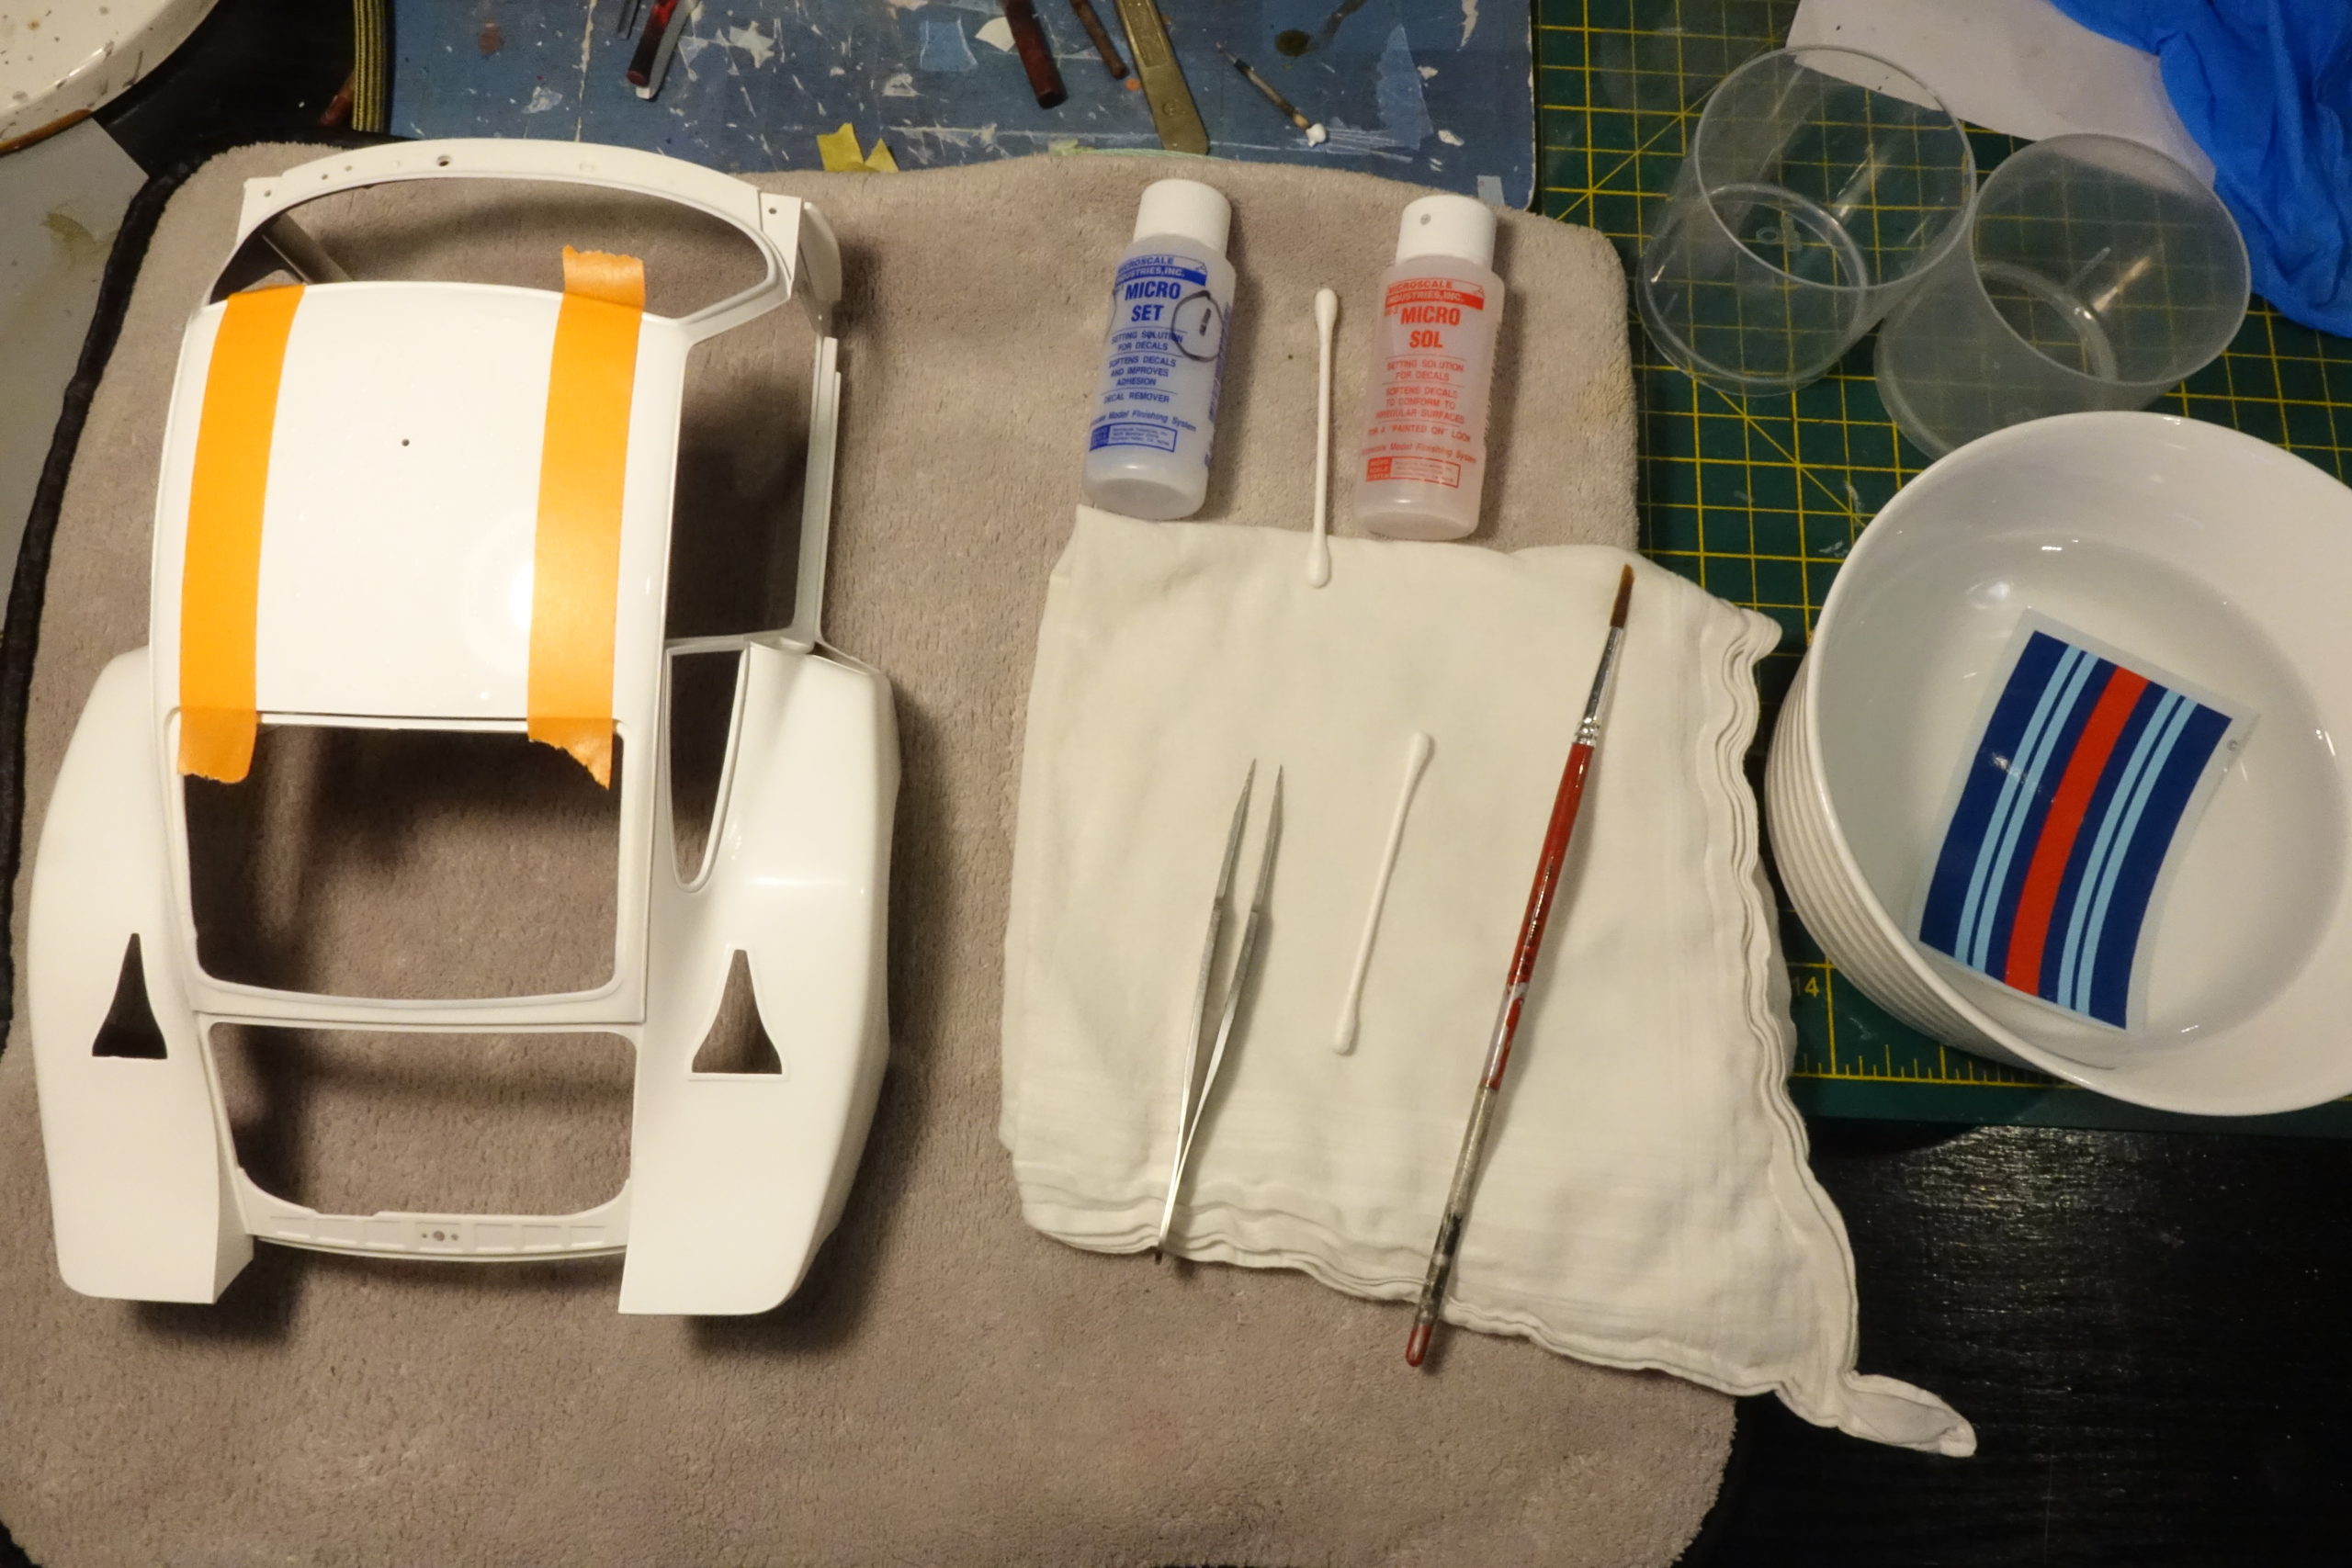
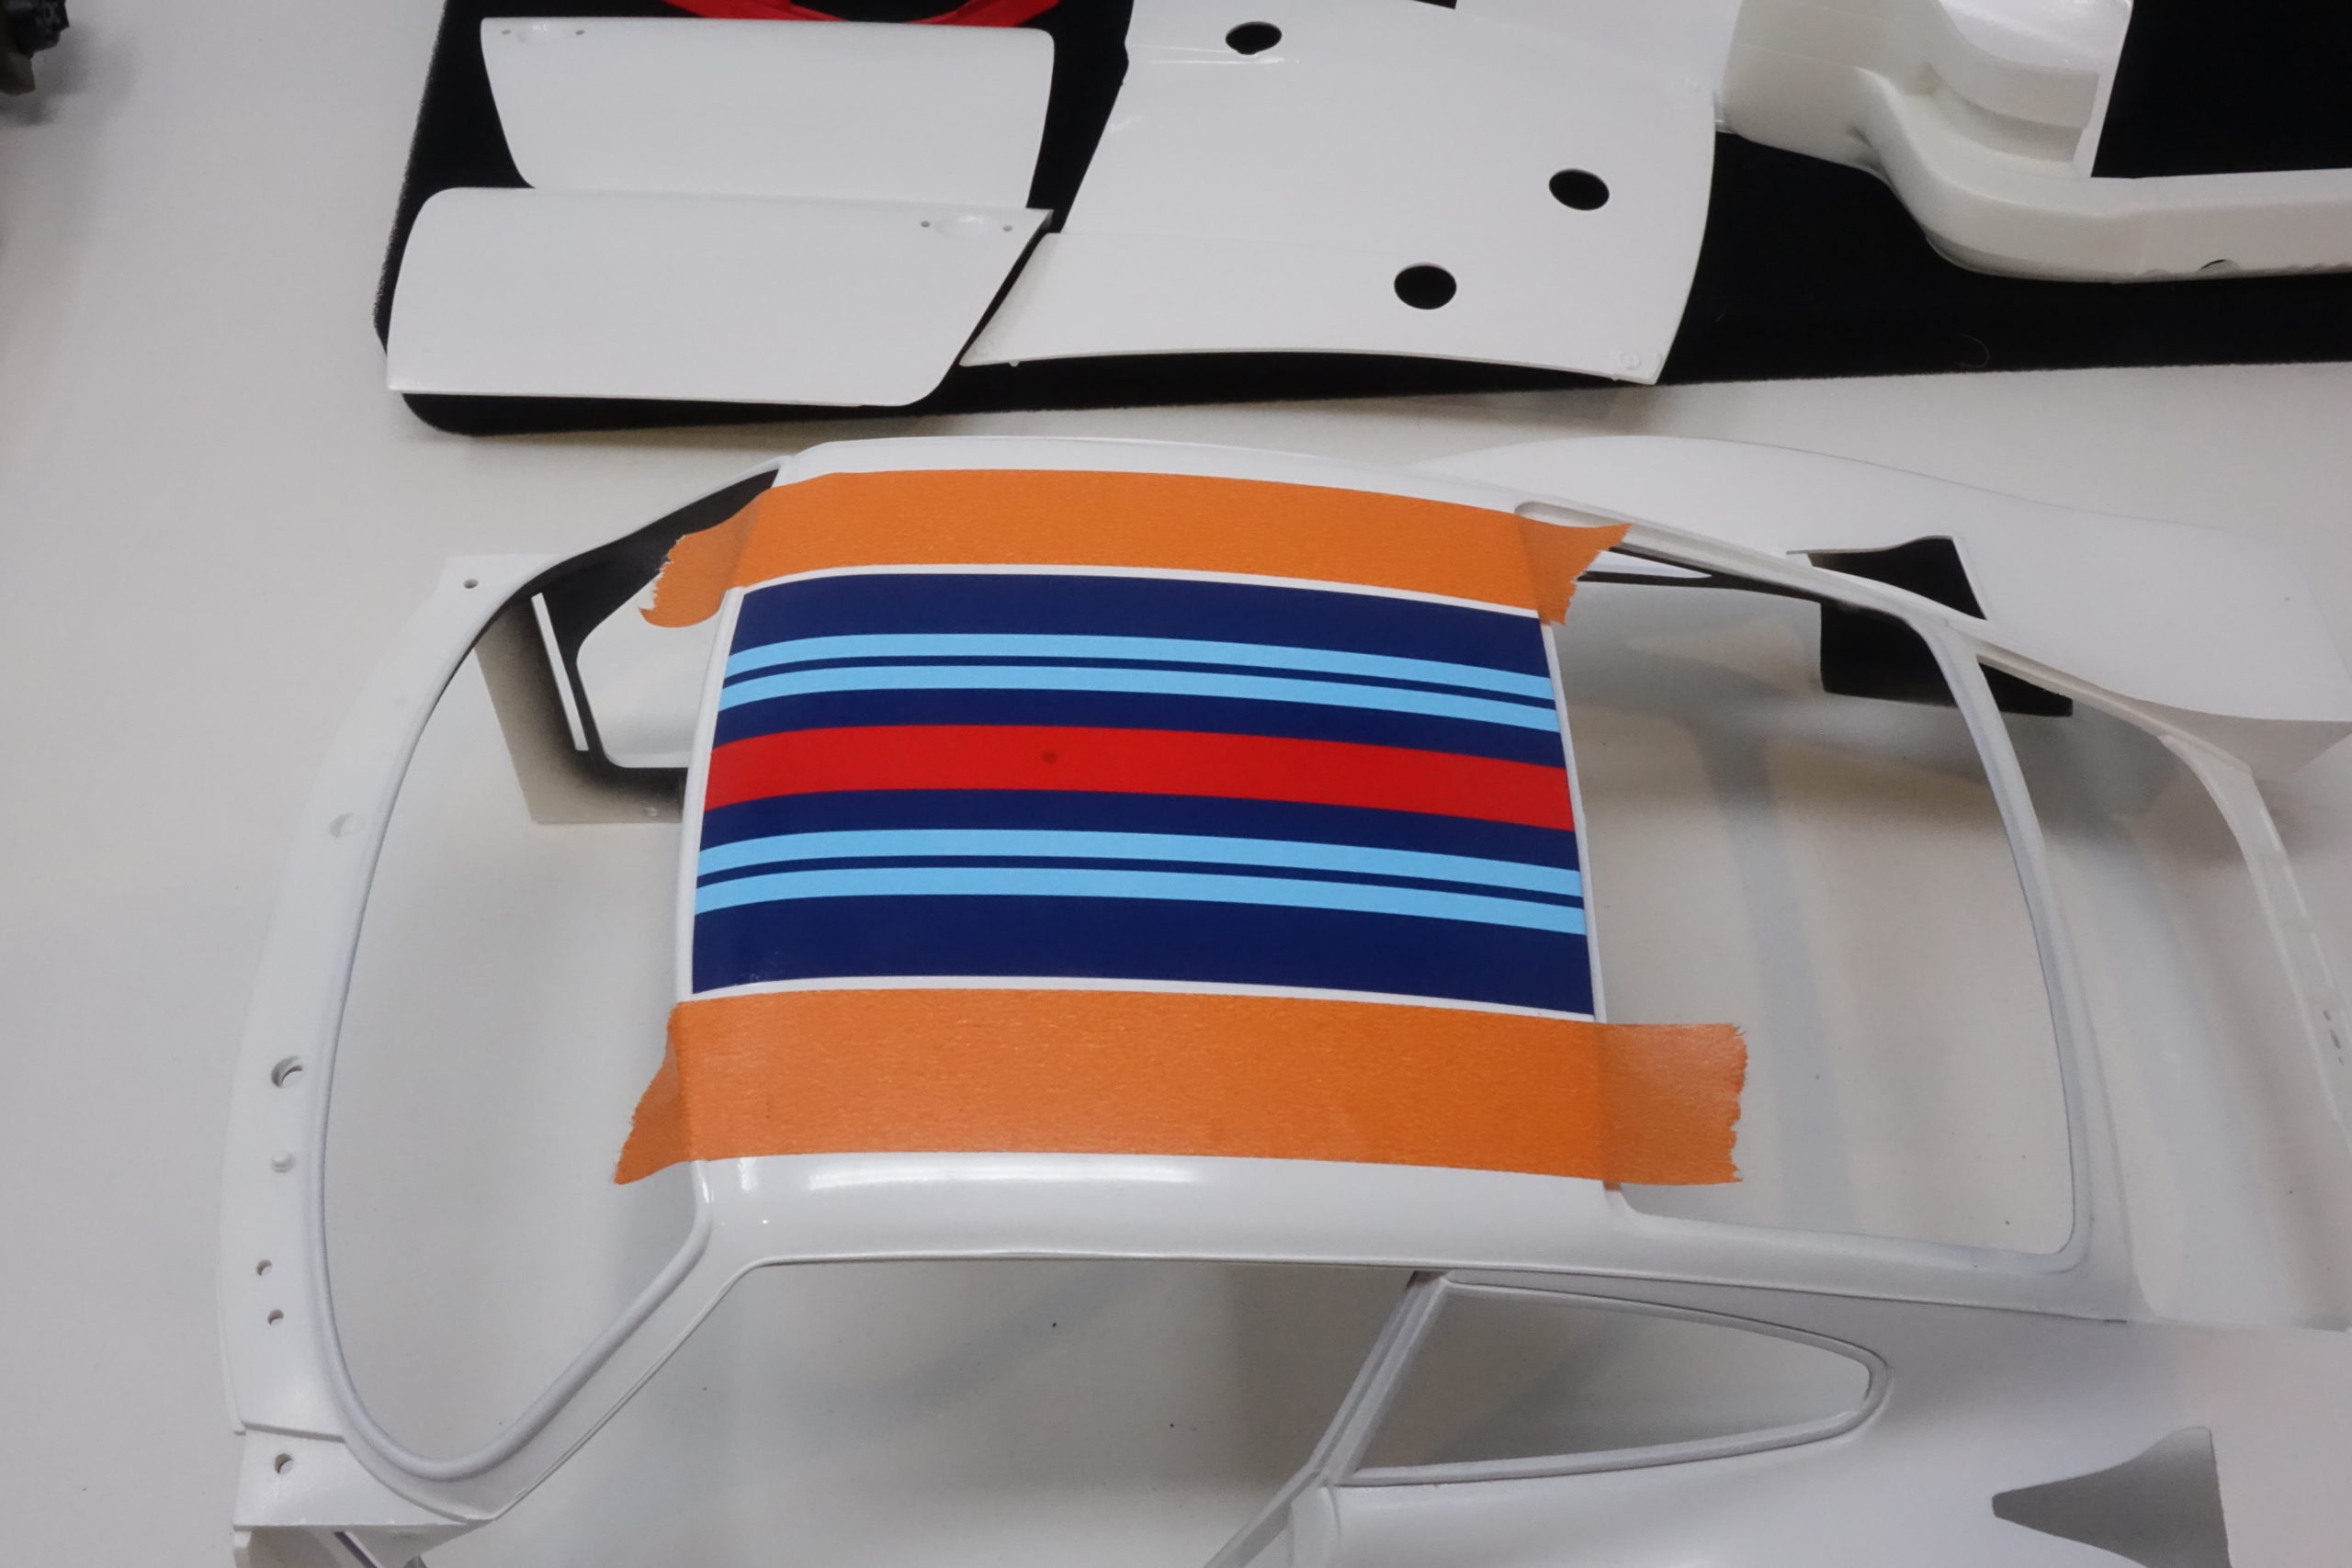
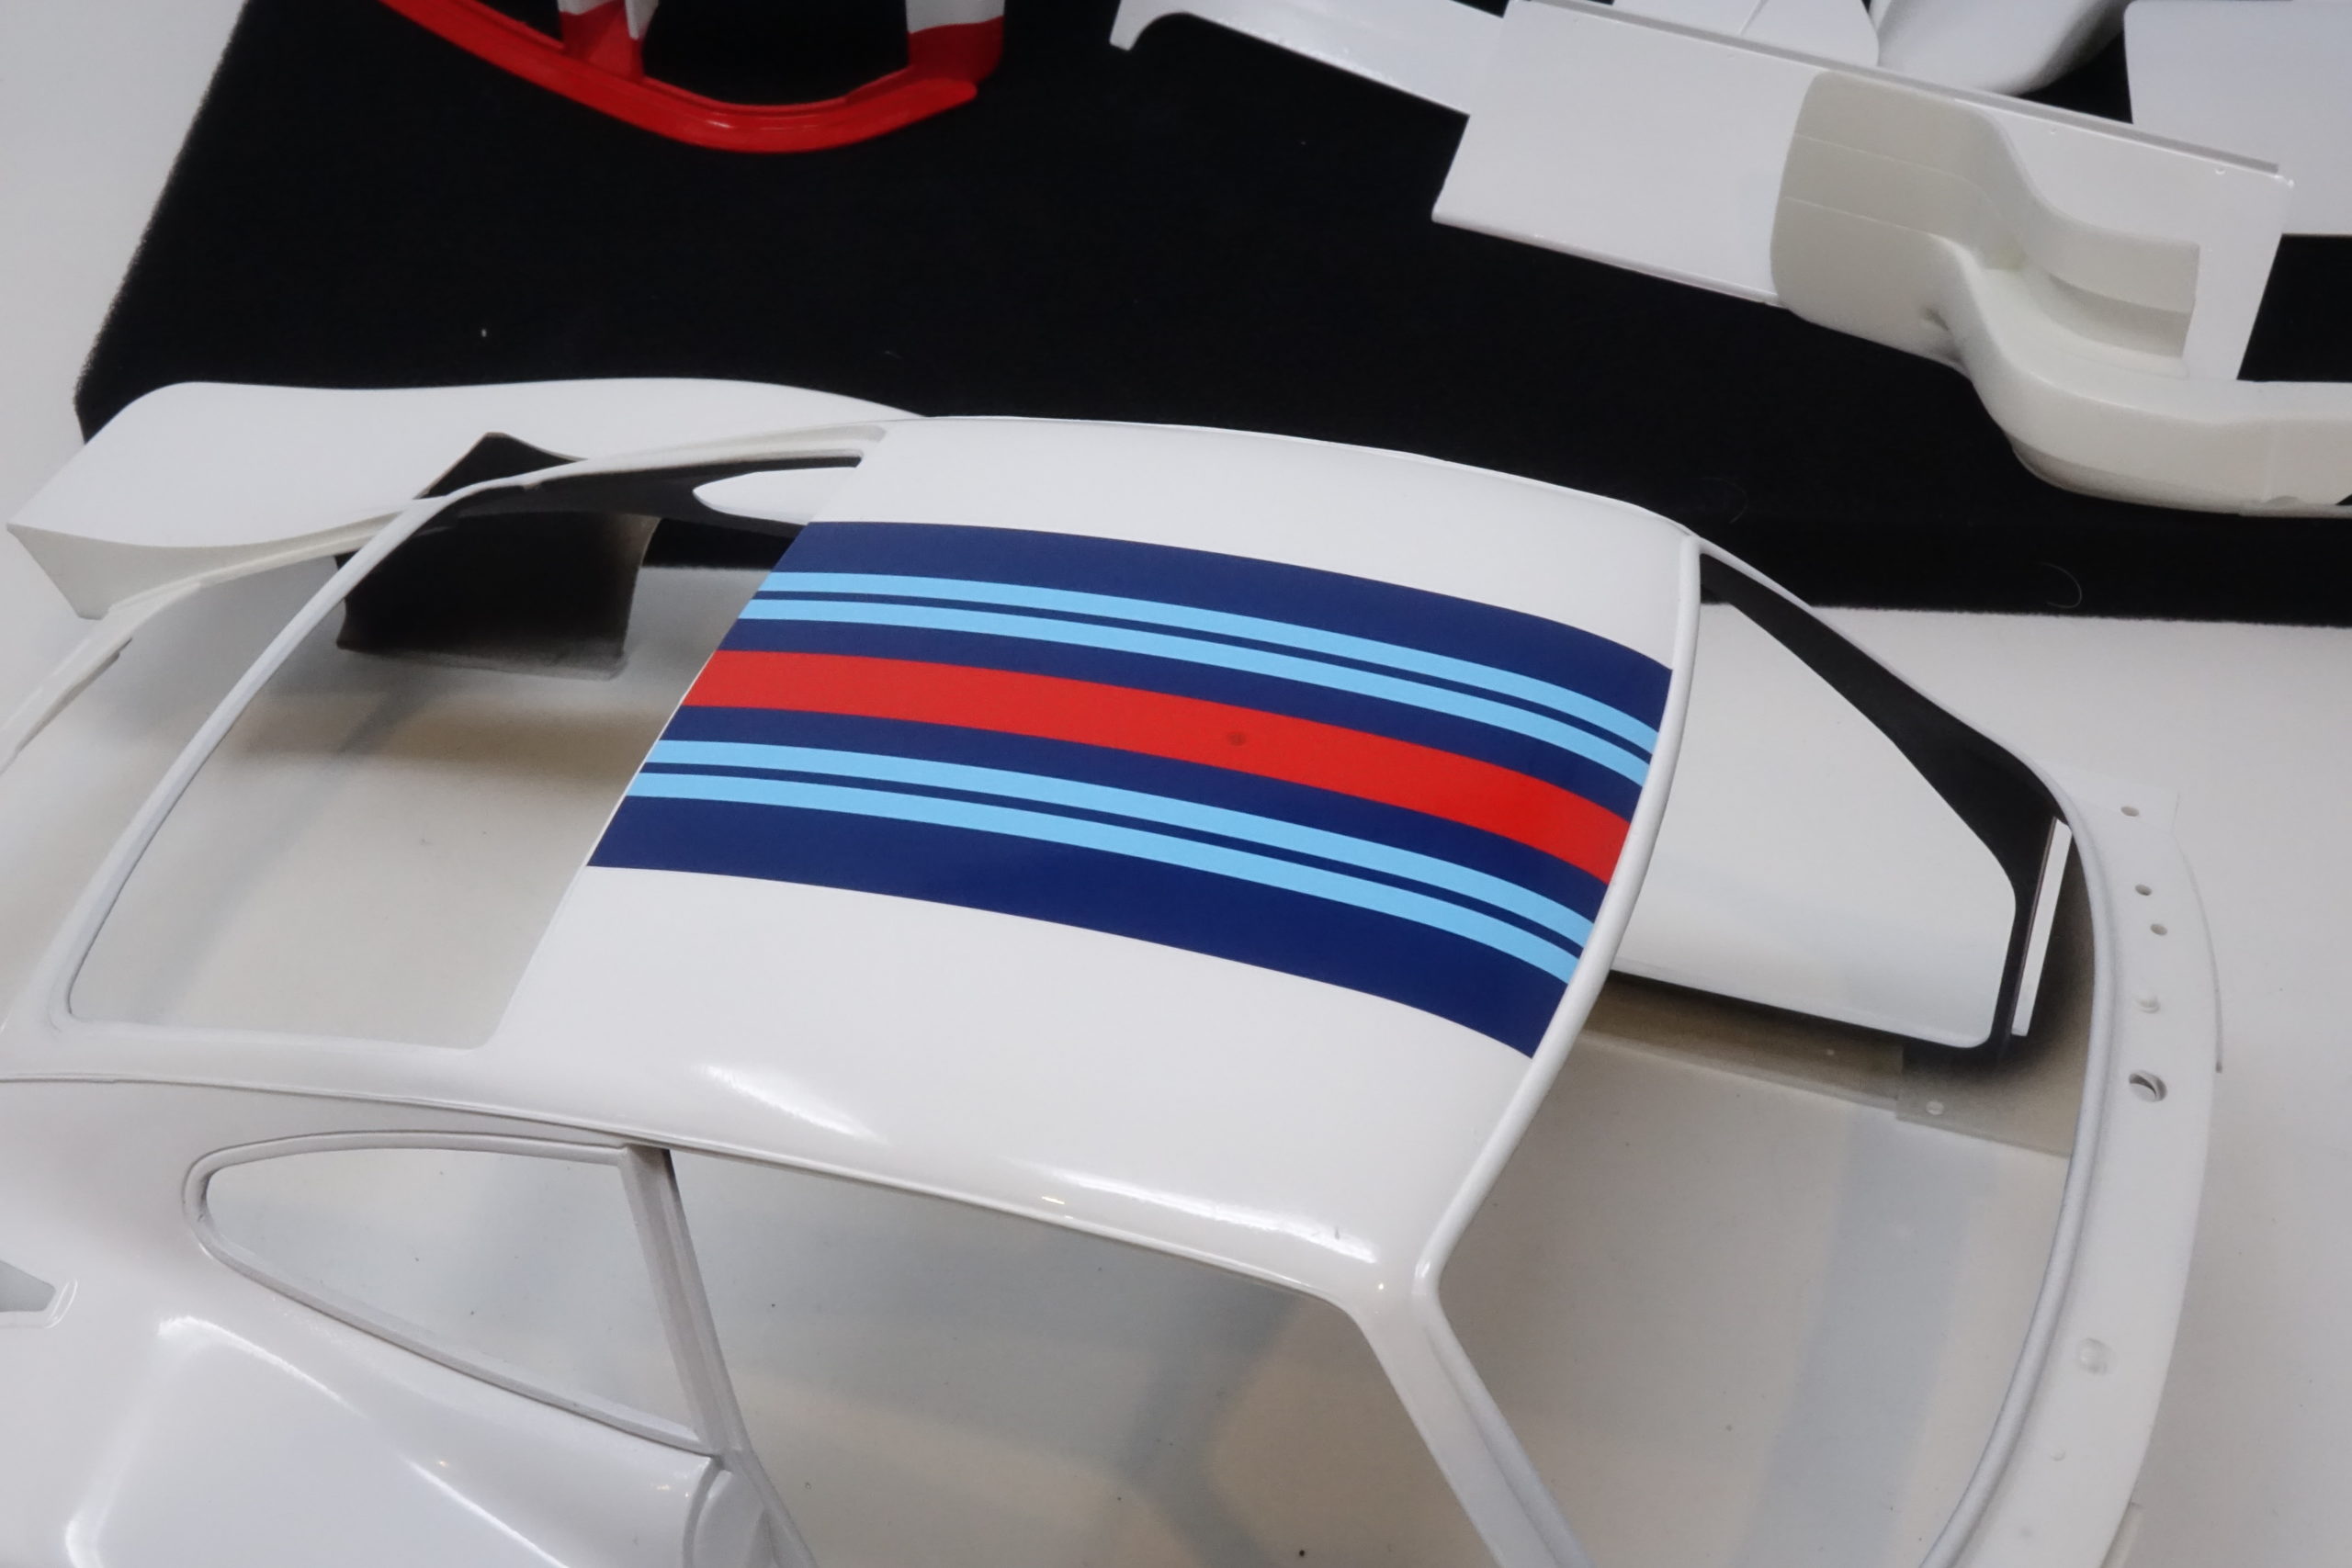
The decals ‘stick’ very quickly so it’s a good idea to put them on quite wet. I used Microsol/microset (photos) – using ‘sol’ to get good adhesion, especially on edges of panels (like the door bottoms) and ‘set’ for the decals (like the big side stripes) to soften them to fit around the curves and smooth out creases. I always find this to be a major challenge – there is no turning back! So, it’s best to plan decal positions before starting (hence the value of the cut outs) – and be really well organised with all the materials and tools set out before starting. I found the trickiest area for the decals was in the bottom and rear of the door/cill, where several decals had to meet up – and similarly at the front of the cill around the screw holes.
Lacquer on the decals and paintwork
No real problems here – except the areas are large. I find it essential to thin the lacquer to the correct amount to suit the airbrush. Extra coats were applied to the decal areas because of later sanding polishing where it could cut through.
After lacquering, imperfections were sanded away with 240 through to 6,000 grit and then polished by hand with Novus medium paste by hand with microfibre. There are lots of other mild abrasive/polishes available.
I also added the decals to the rear spoiler/wing assembly and then gave the black areas a coat of Semi Gloss Clear Lacquer.
Detail painting
The window rubber seals were painted the very last step, after the decals had been applied and the subsequent Gloss Lacquer had hardened .The surrounding bodywork was masked off and extra care taken in areas where decals were placed – even though they had been lacquered over. Flat Black was airbrushed with a very fine airbrush setting to avoid bleeding/unnecessary over painting. The rear screen rubber is a bit of a problem because the the way the body is moulded is not so good here – leaving an ill-defined area for painting. This took a bit of sorting out. A bit un-Tamiya like really.
Particular points to be aware of in the final assembly
This is where we are so far (the wheels have been loosely assembled)
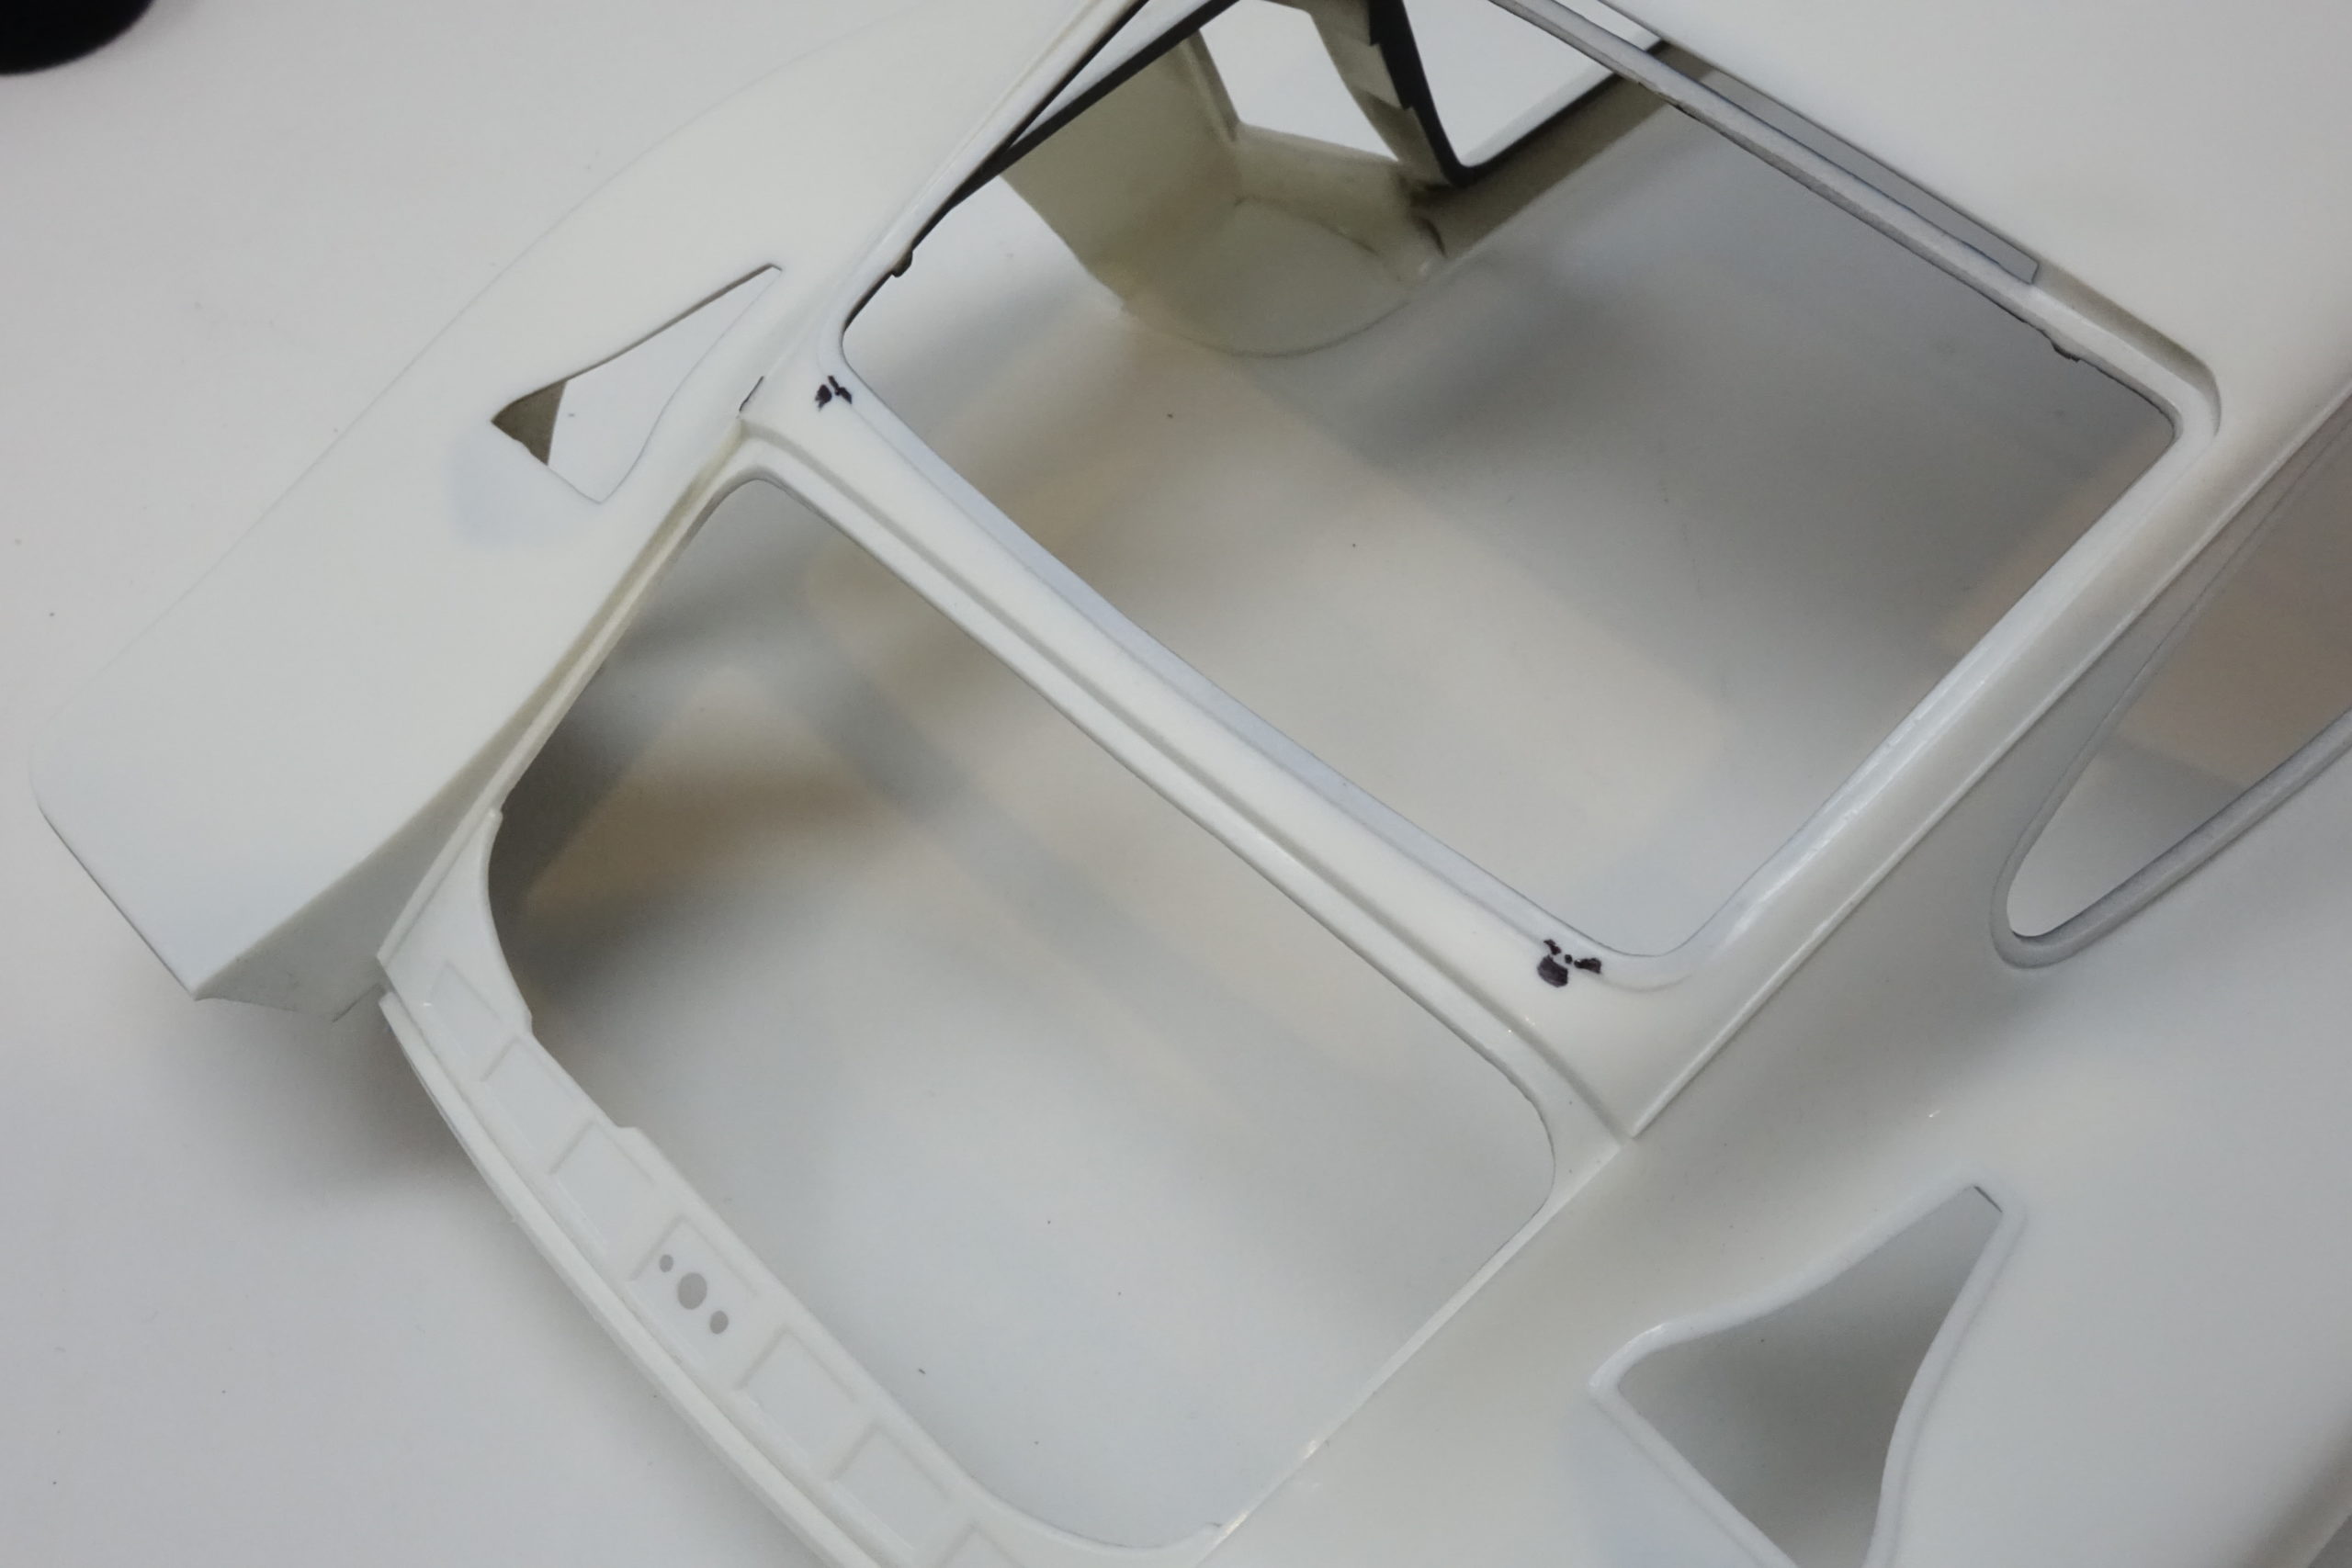
Fitting of windscreen and subsequent fitting of body shell to chassis – there is very little clearance (or none in my case!) between the brackets which are used to clamp down the windscreen and the leading edge of the dash board. My advice here is – as early in possible in the build, check how this will fit. After assembly and fitting of dashboard (there is no real scope here to fit this incorrectly) – but when it possible to test fit the screen to the body shell (it’s not glued, so is easy to fit and then remove) then do it. My advice is to line up the screw fixing holes between body shell and under frame – these are the reference points – and check to see if the windscreen brackets clear the front of the dash. On my build they wouldn’t fit and I had to shave plastic away from the back edge of the brackets to gain enough clearance to allow the body shell to fit.
The brackets which will be used to hinge the doors – these are glued on the inside of the body shell – suggest using epoxy or make sure they are very tightly glued, because when the doors are fitted in the very late stage of the build, they have to be pushed very firmly on to the brackets – and this can easily force off the fittings (as I found out). And….the door brackets are handed – although they look very similar. Be careful to fit them correctly! I have found that the door hinges are binding slightly, so it is difficult at the moment to open the doors fully without them popping off their hinges. They clip back on easily enough, but I haven’t solved the problem yet.
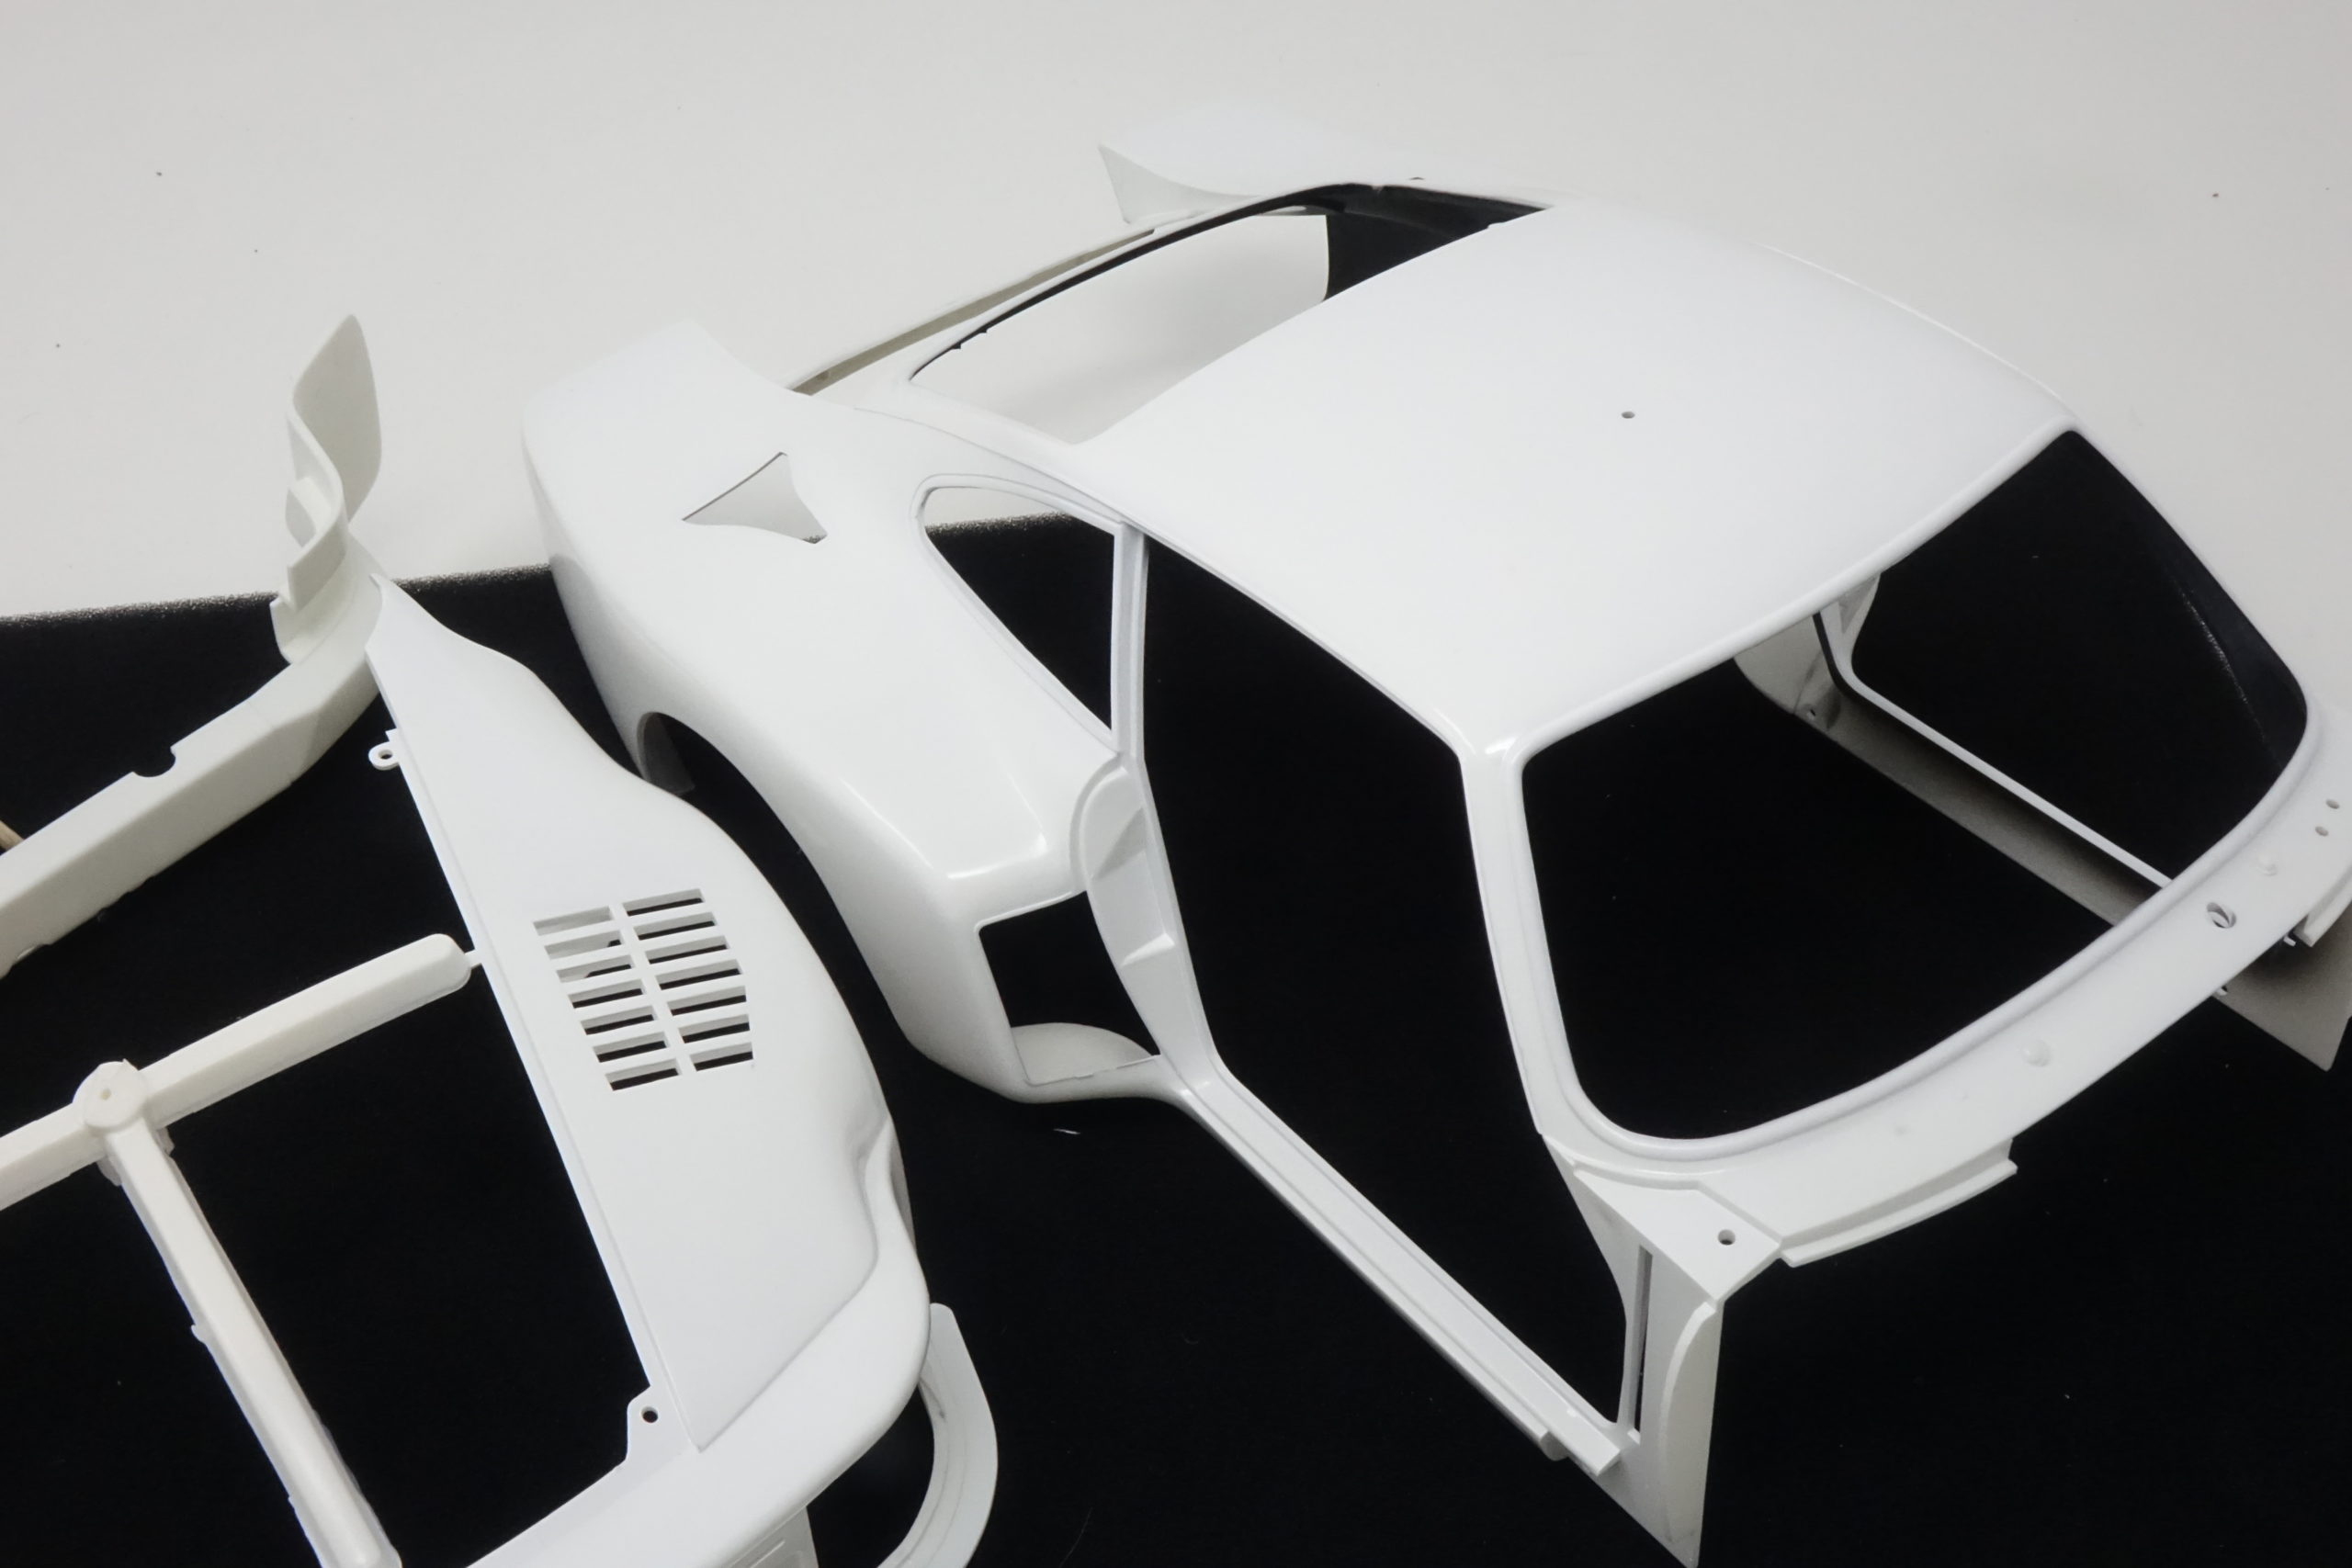
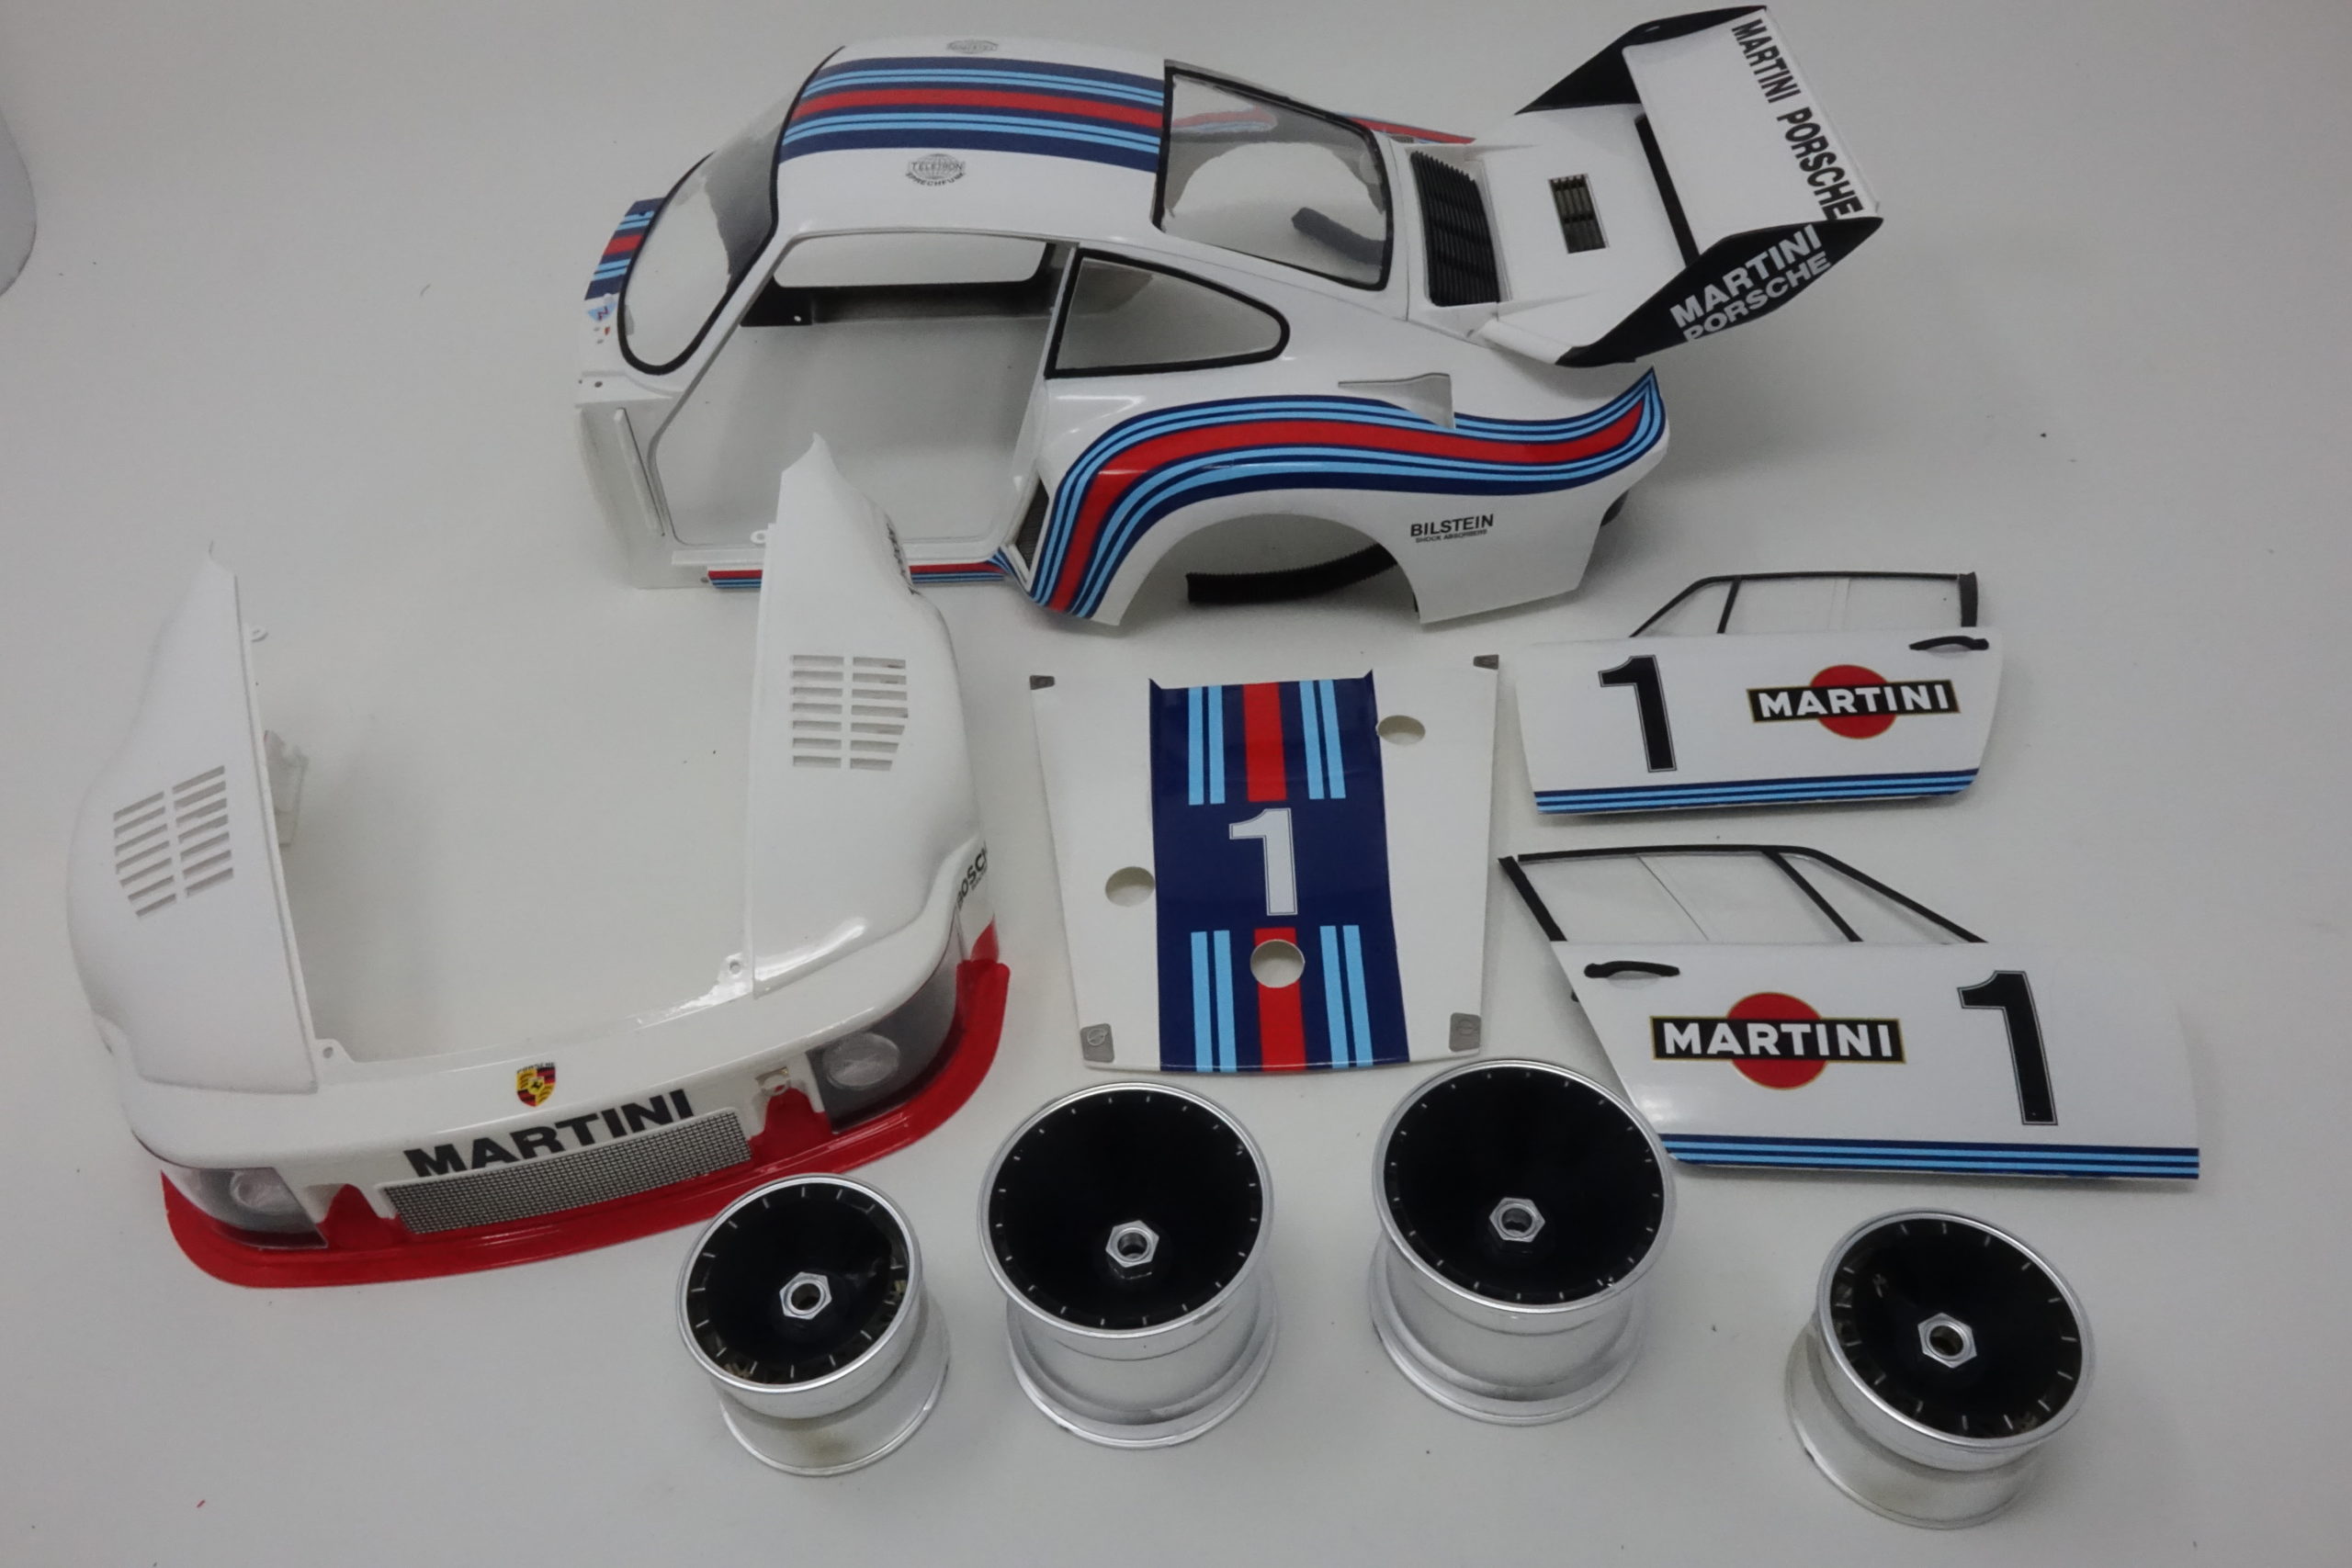
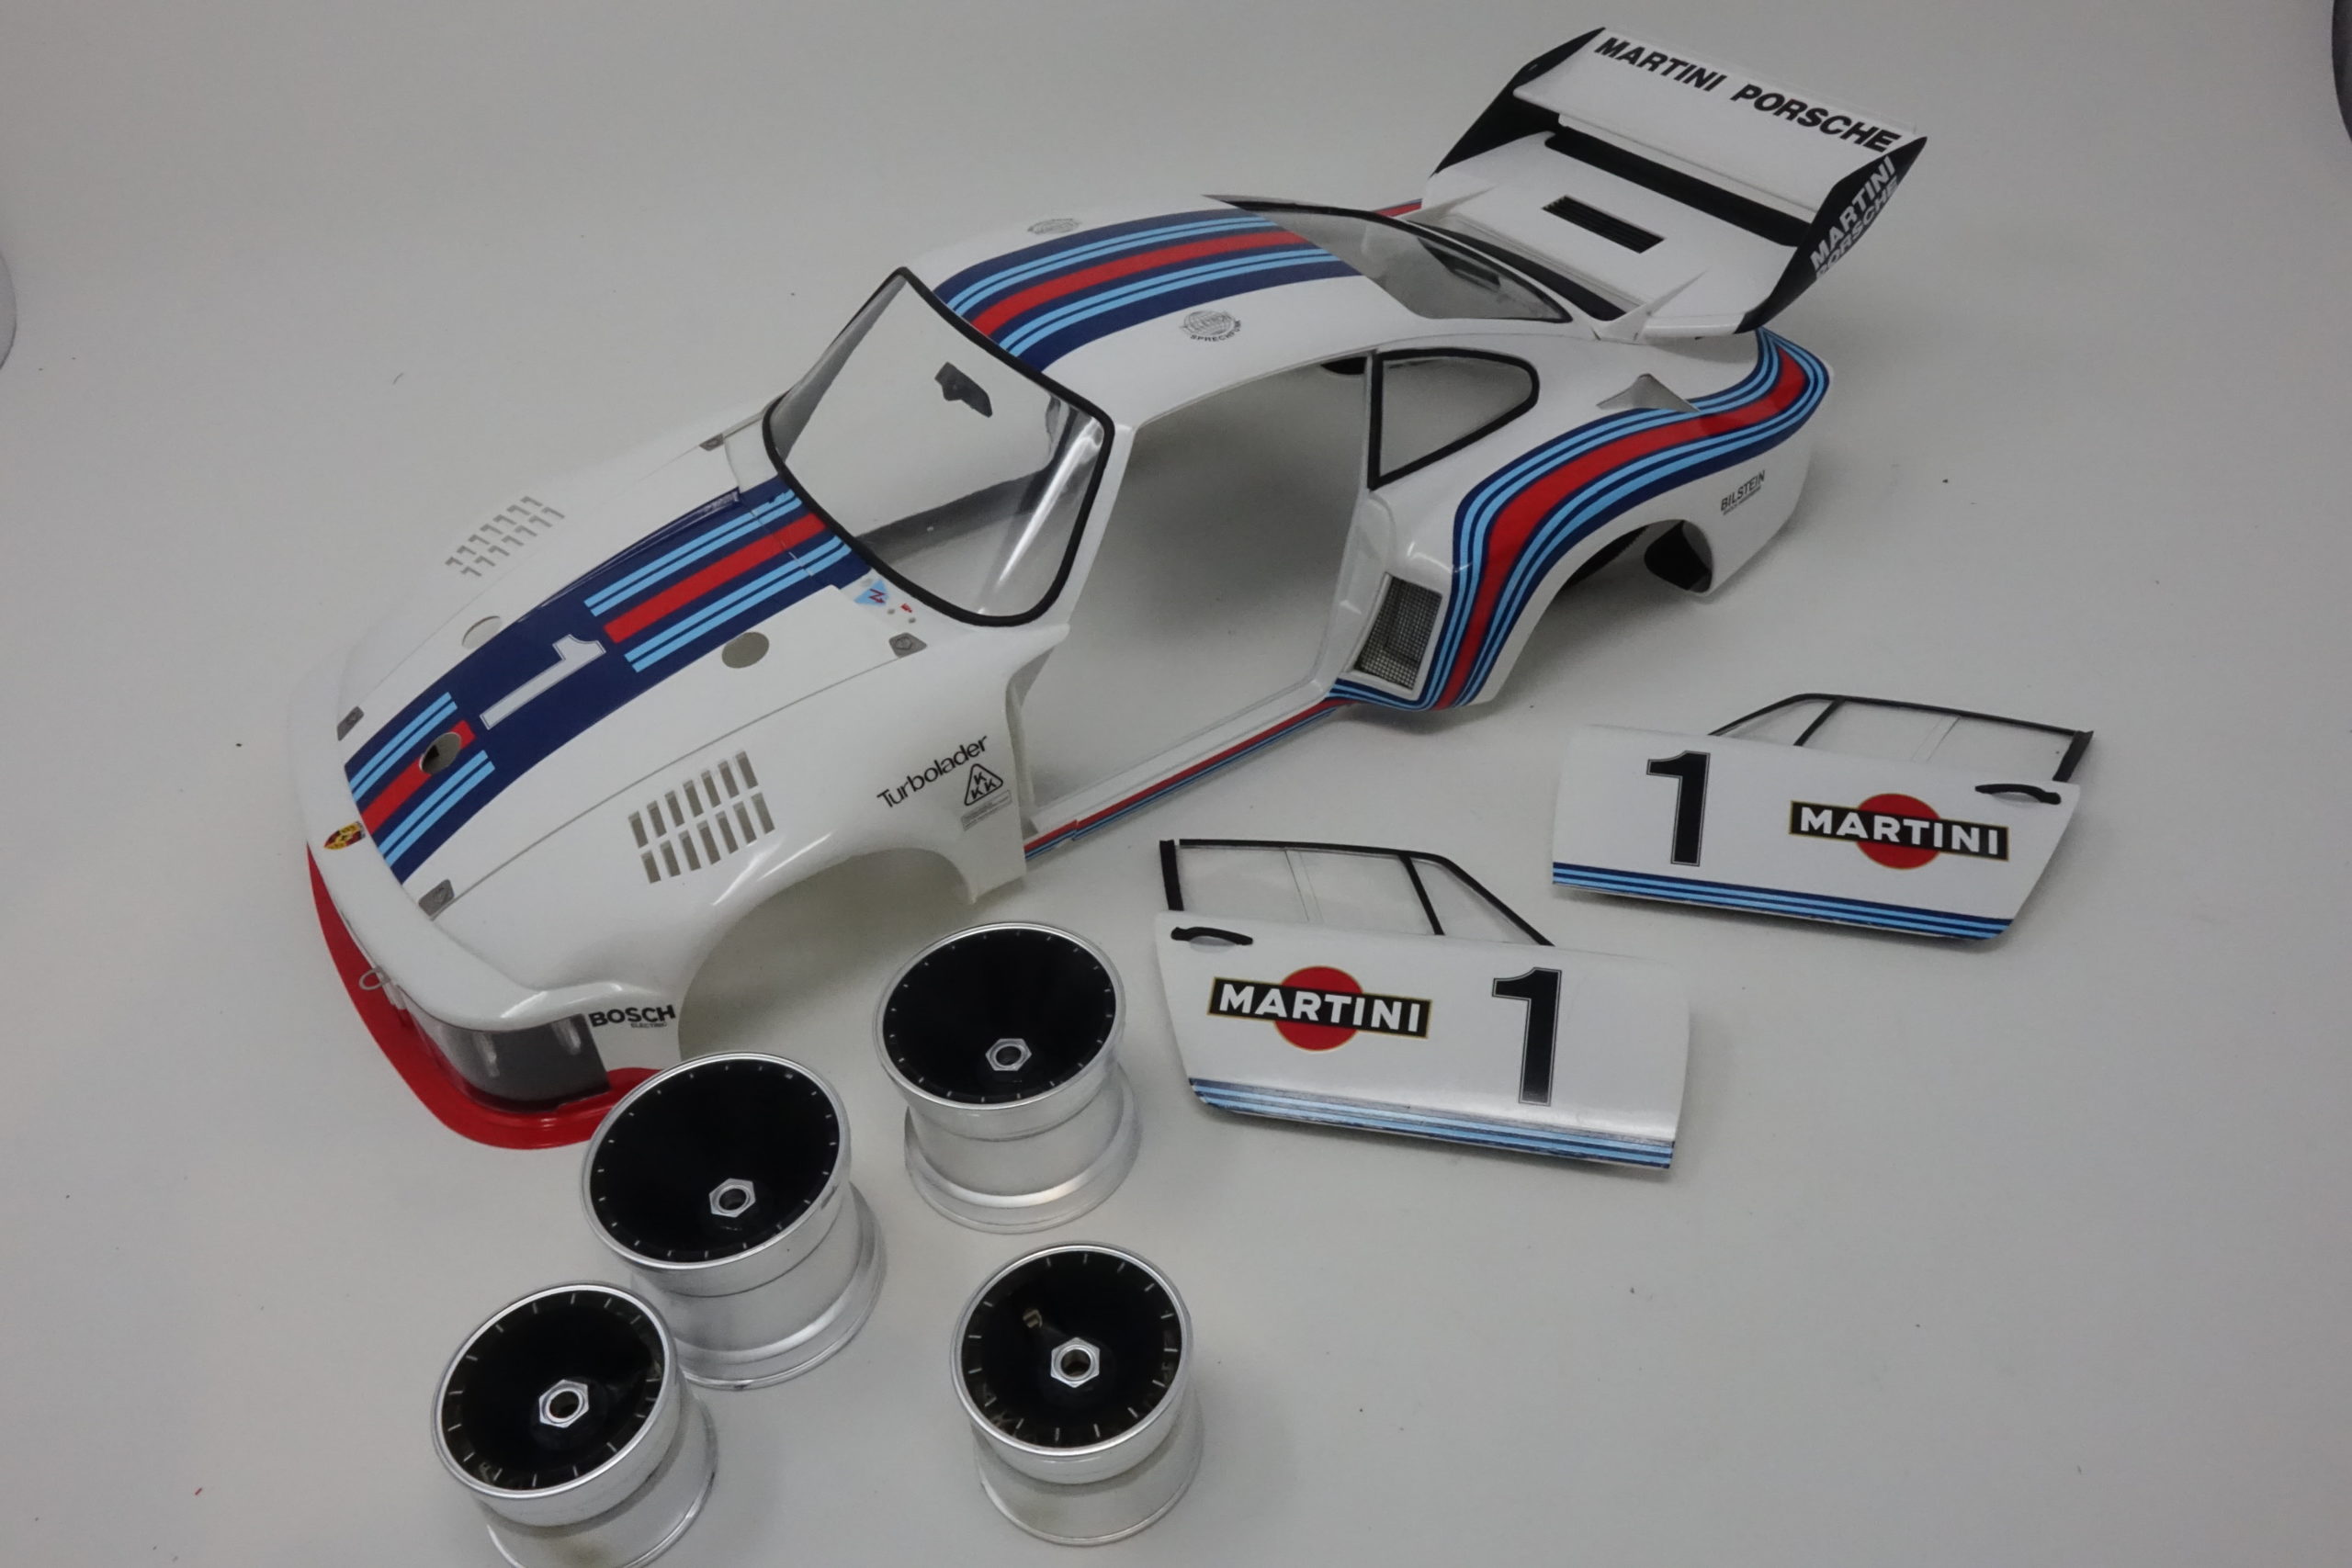
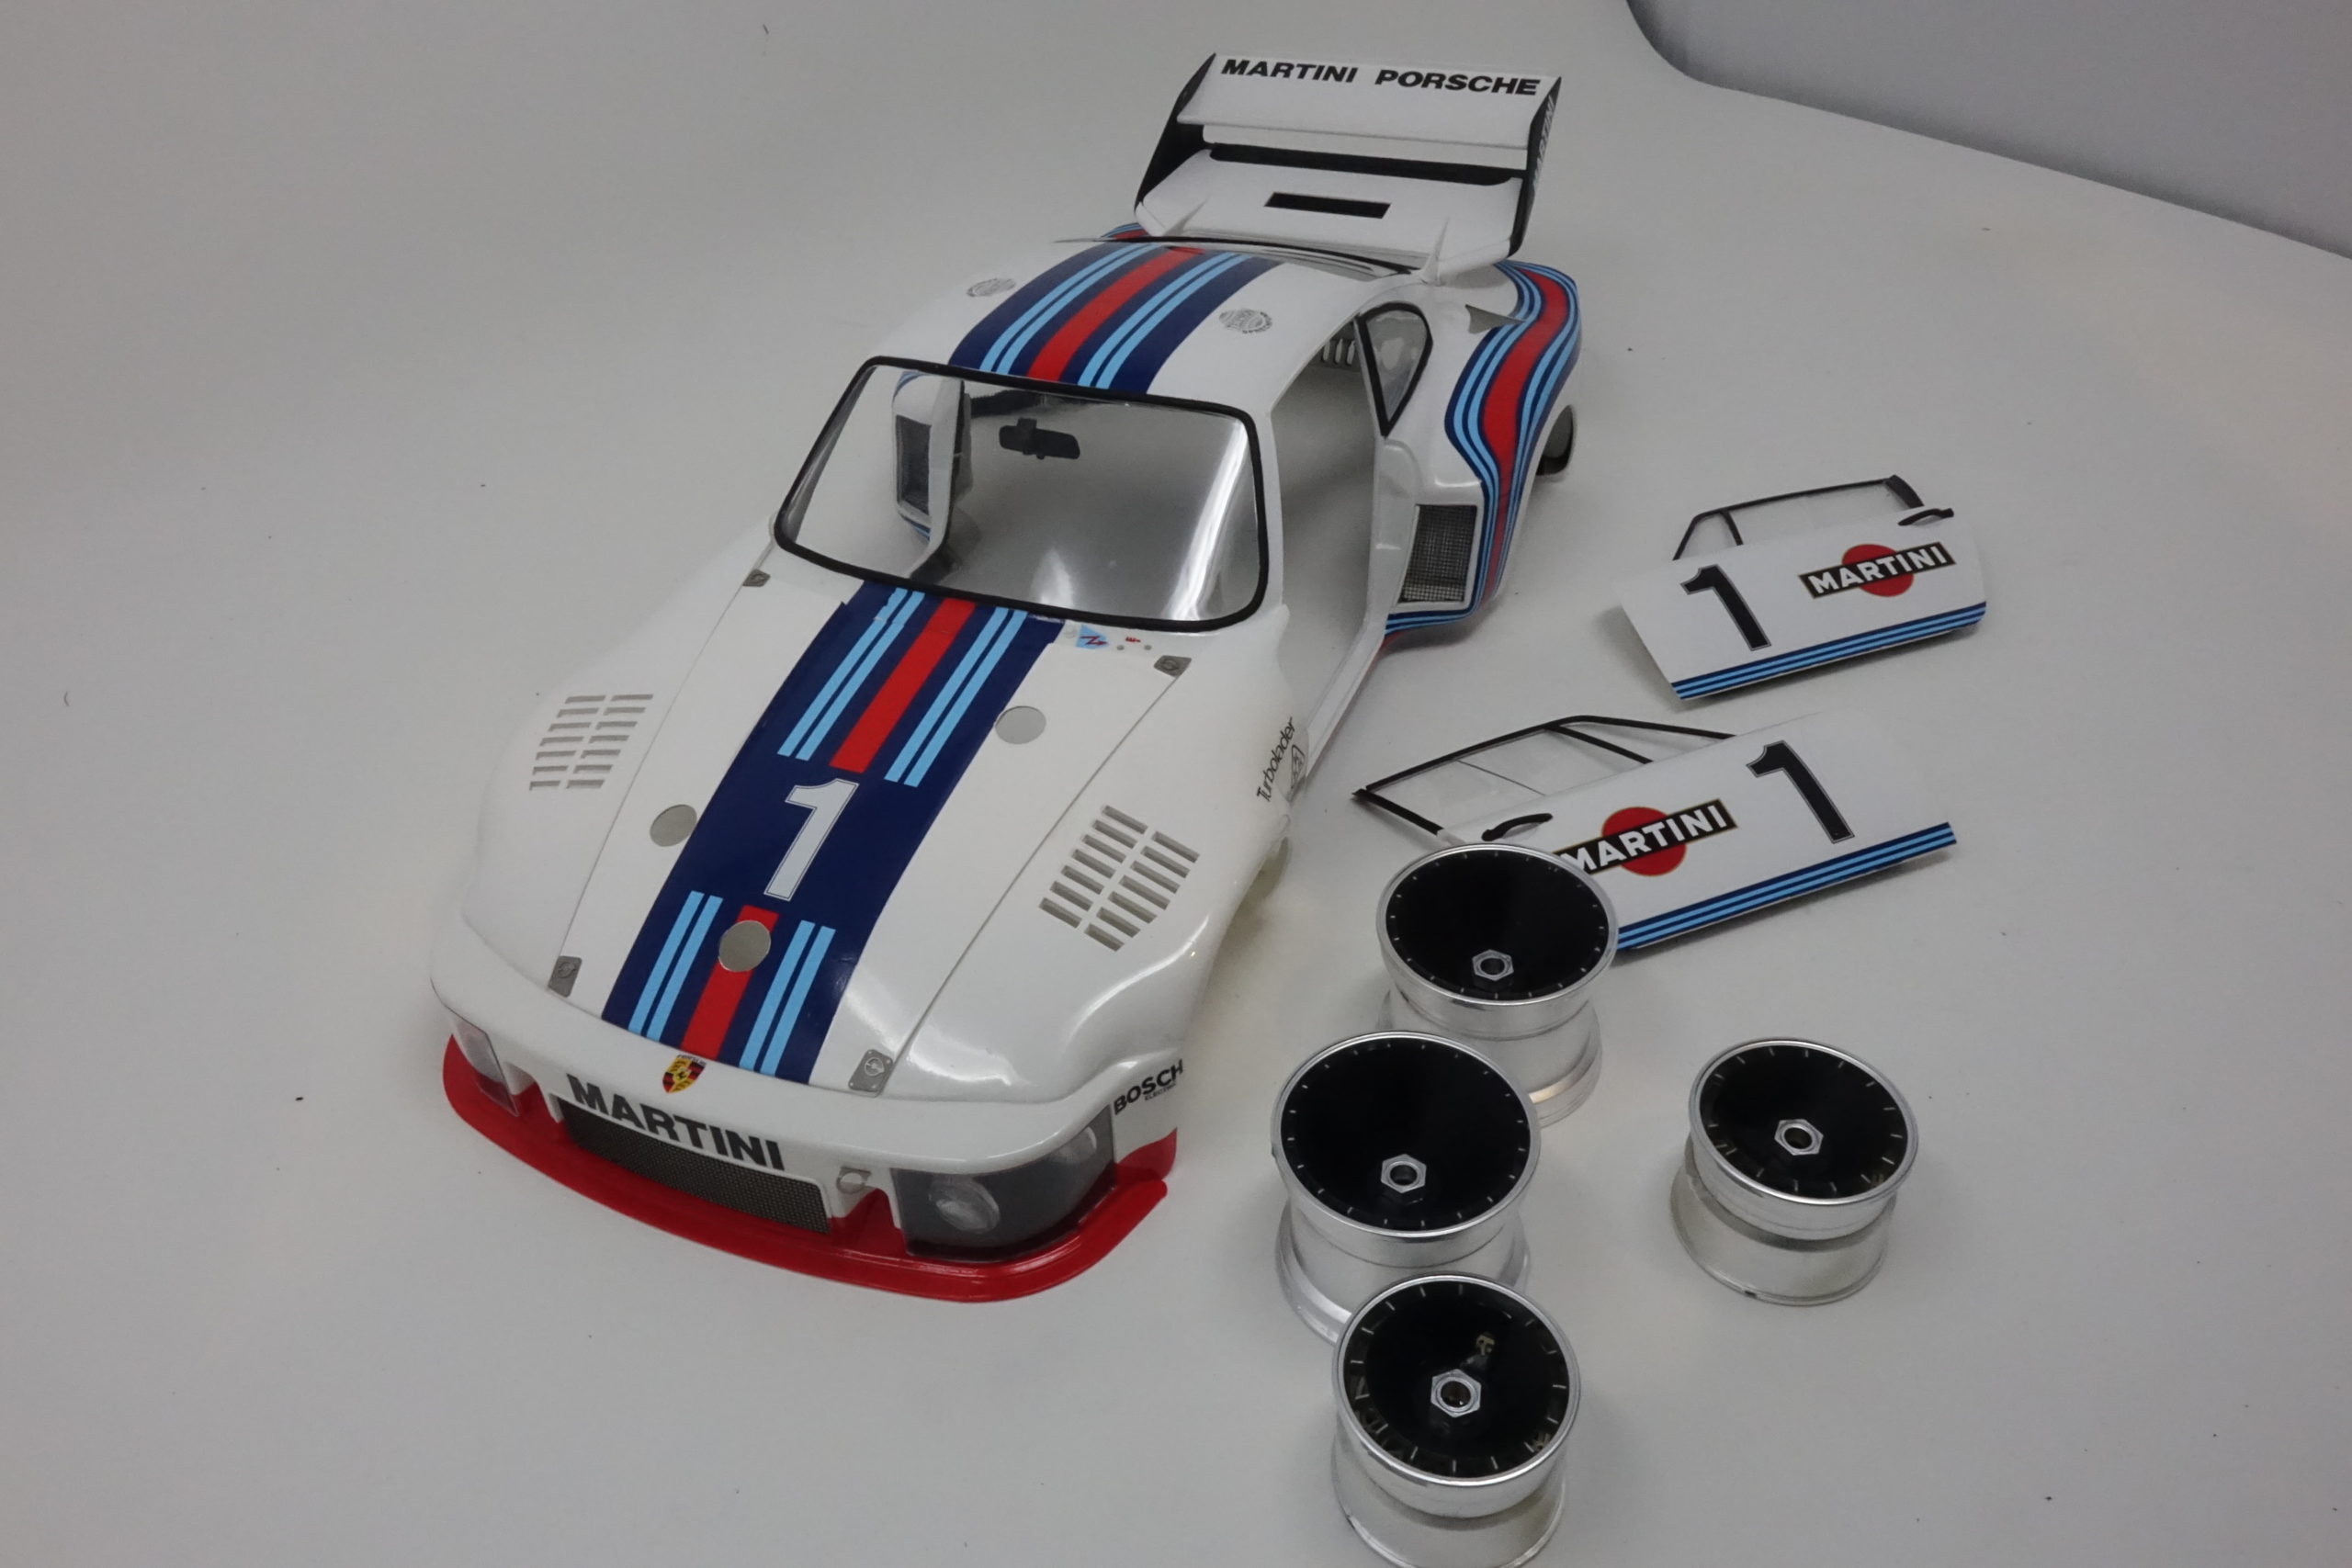
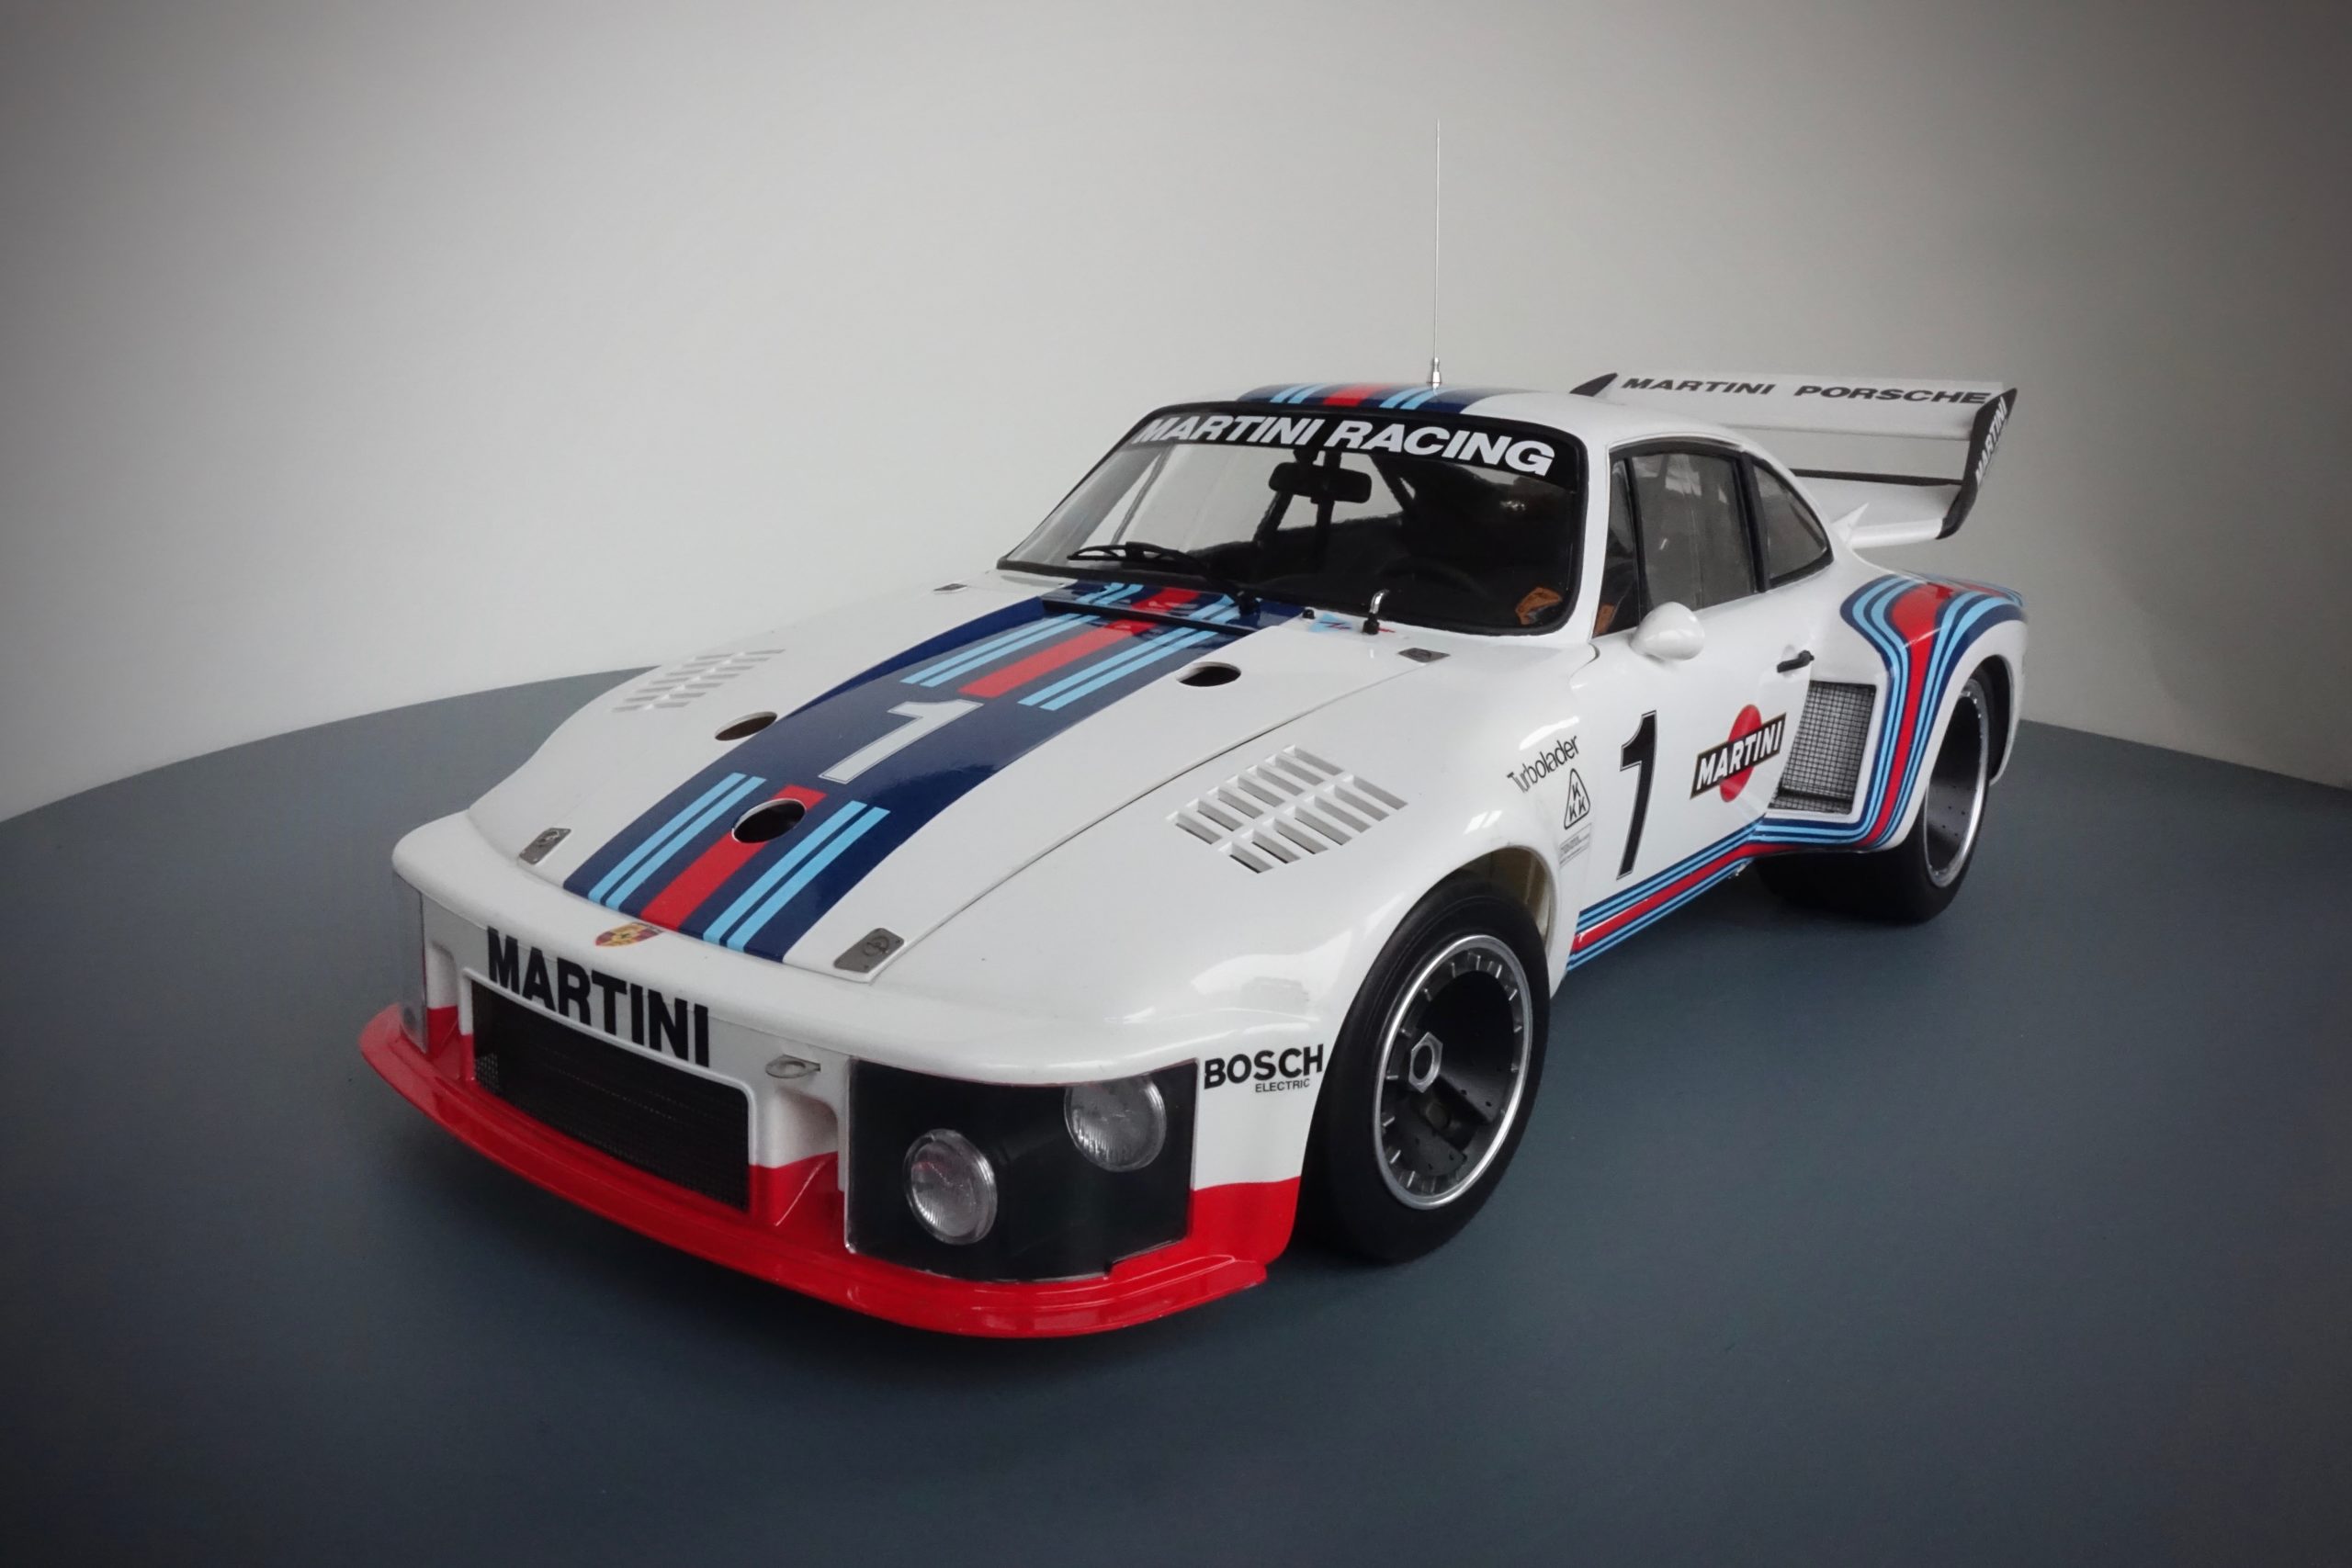
Other than these points the finally assembly was very straightforward. Looking like a car now….
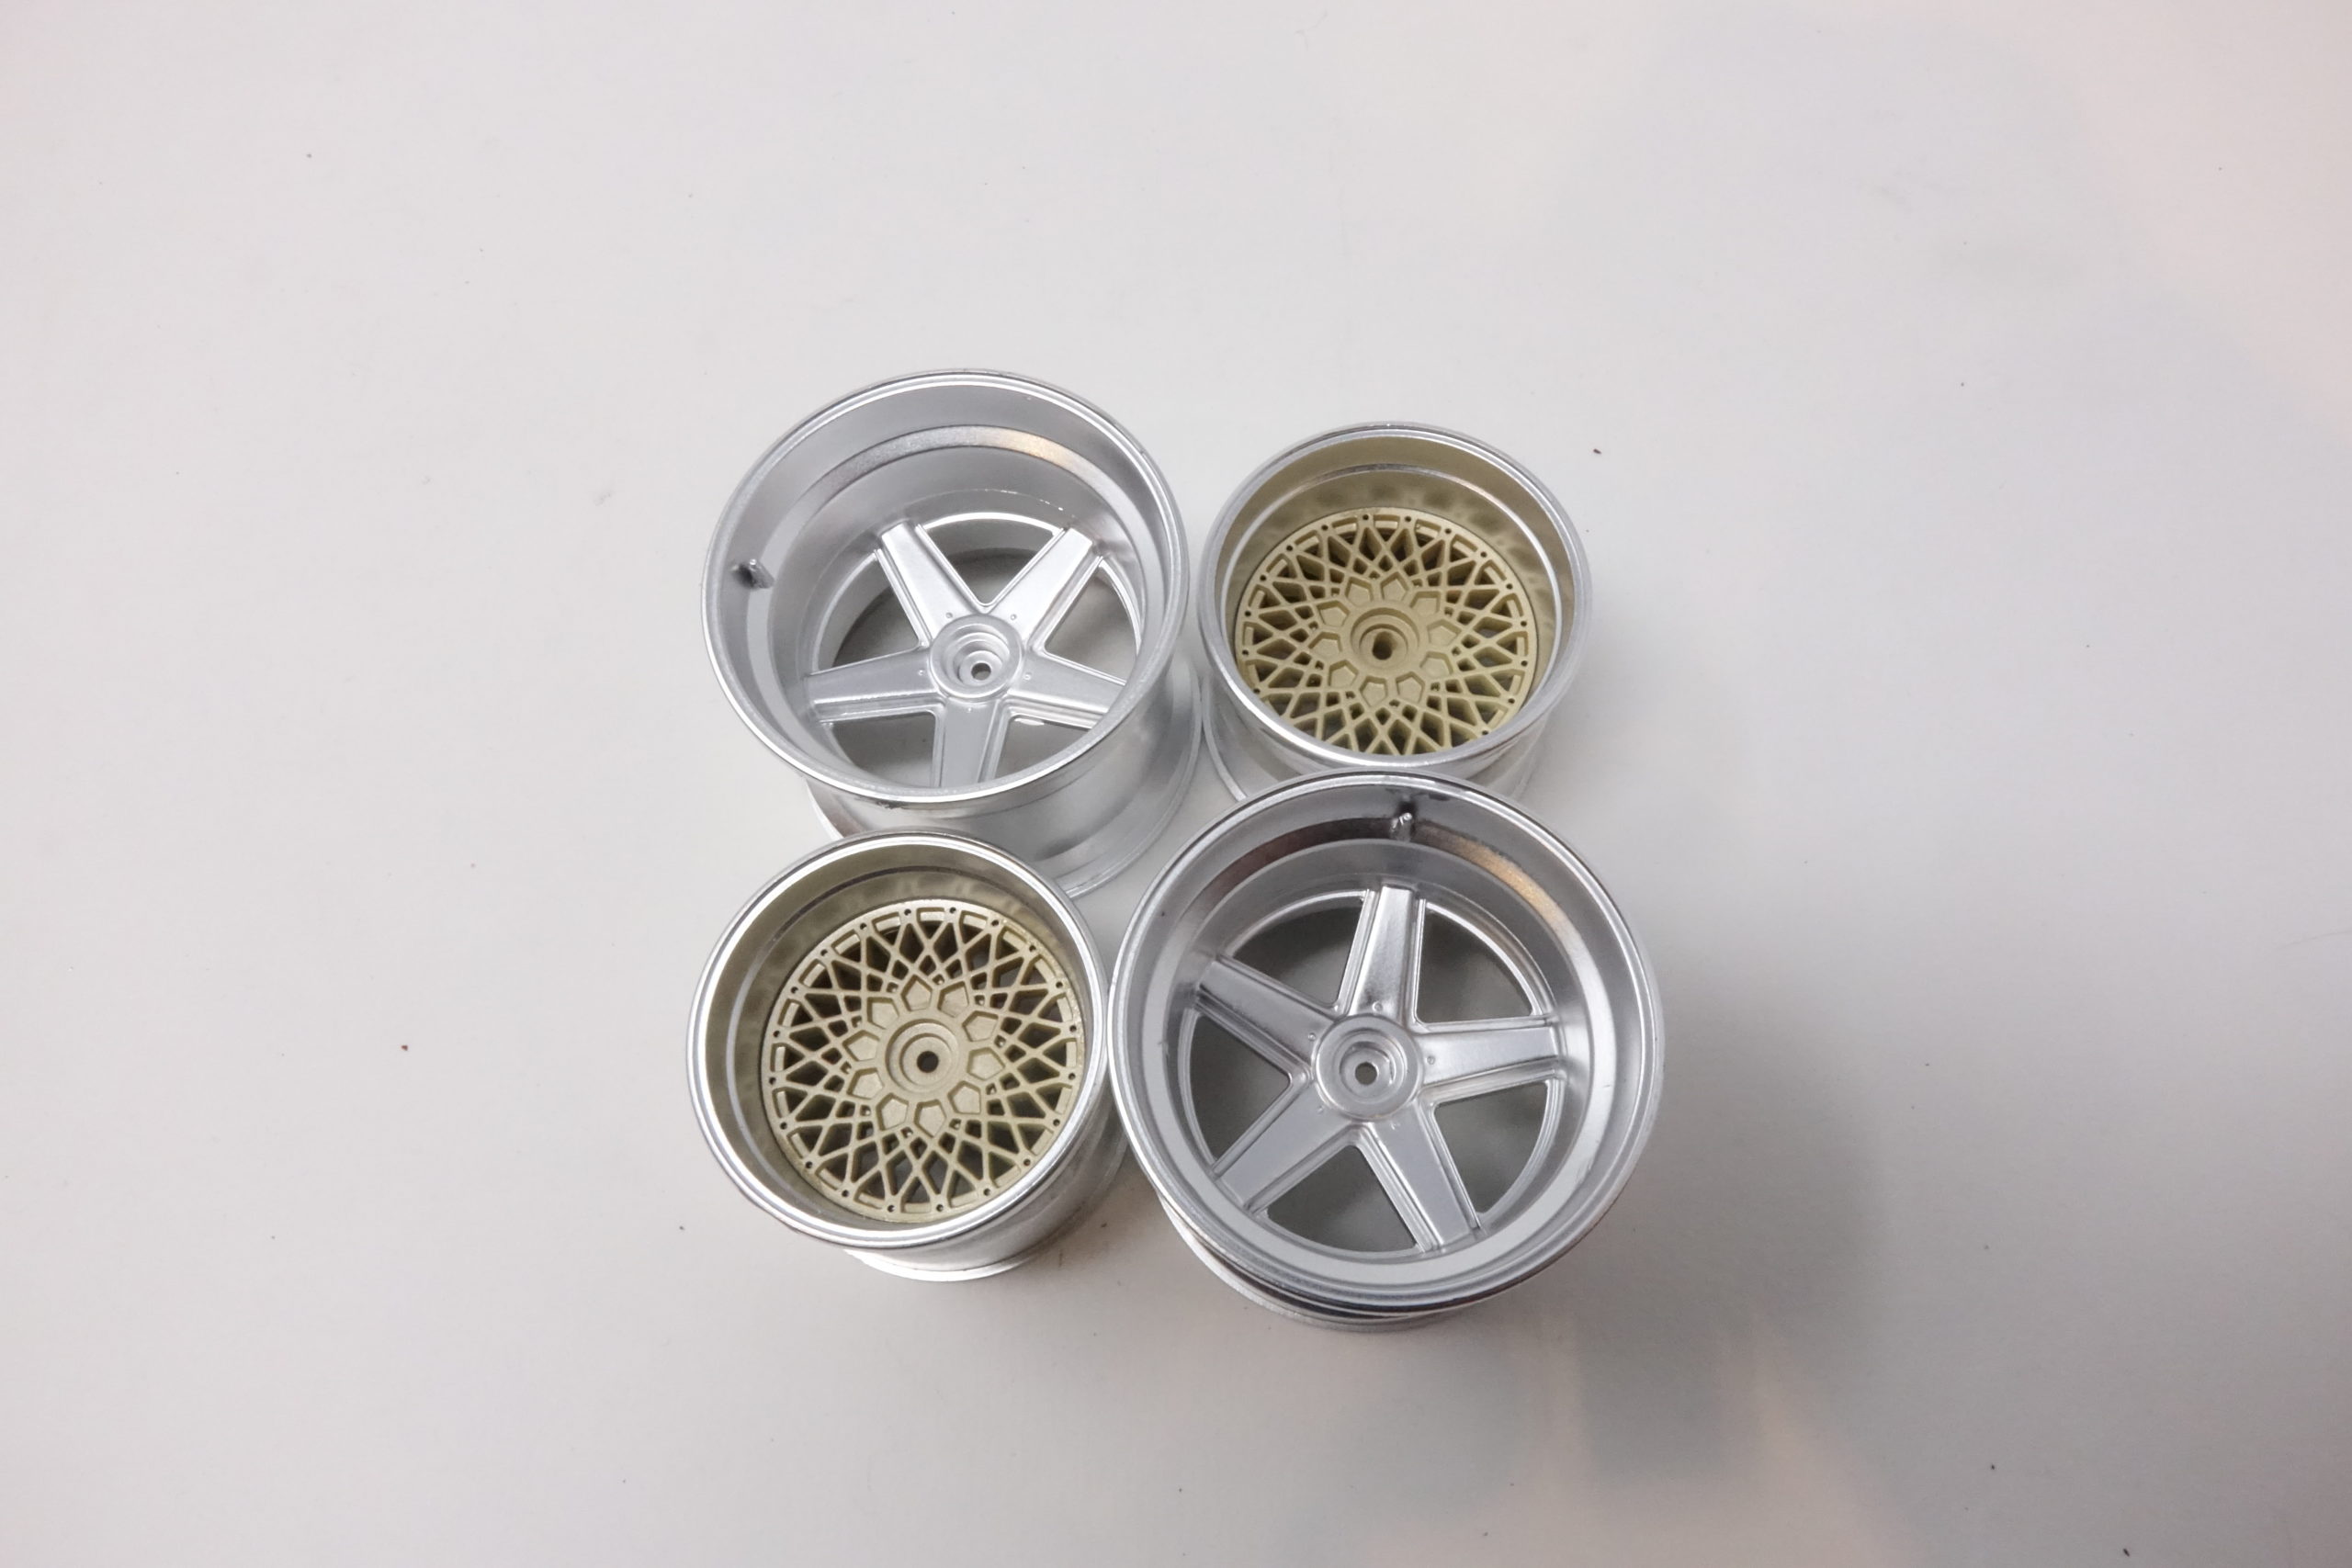
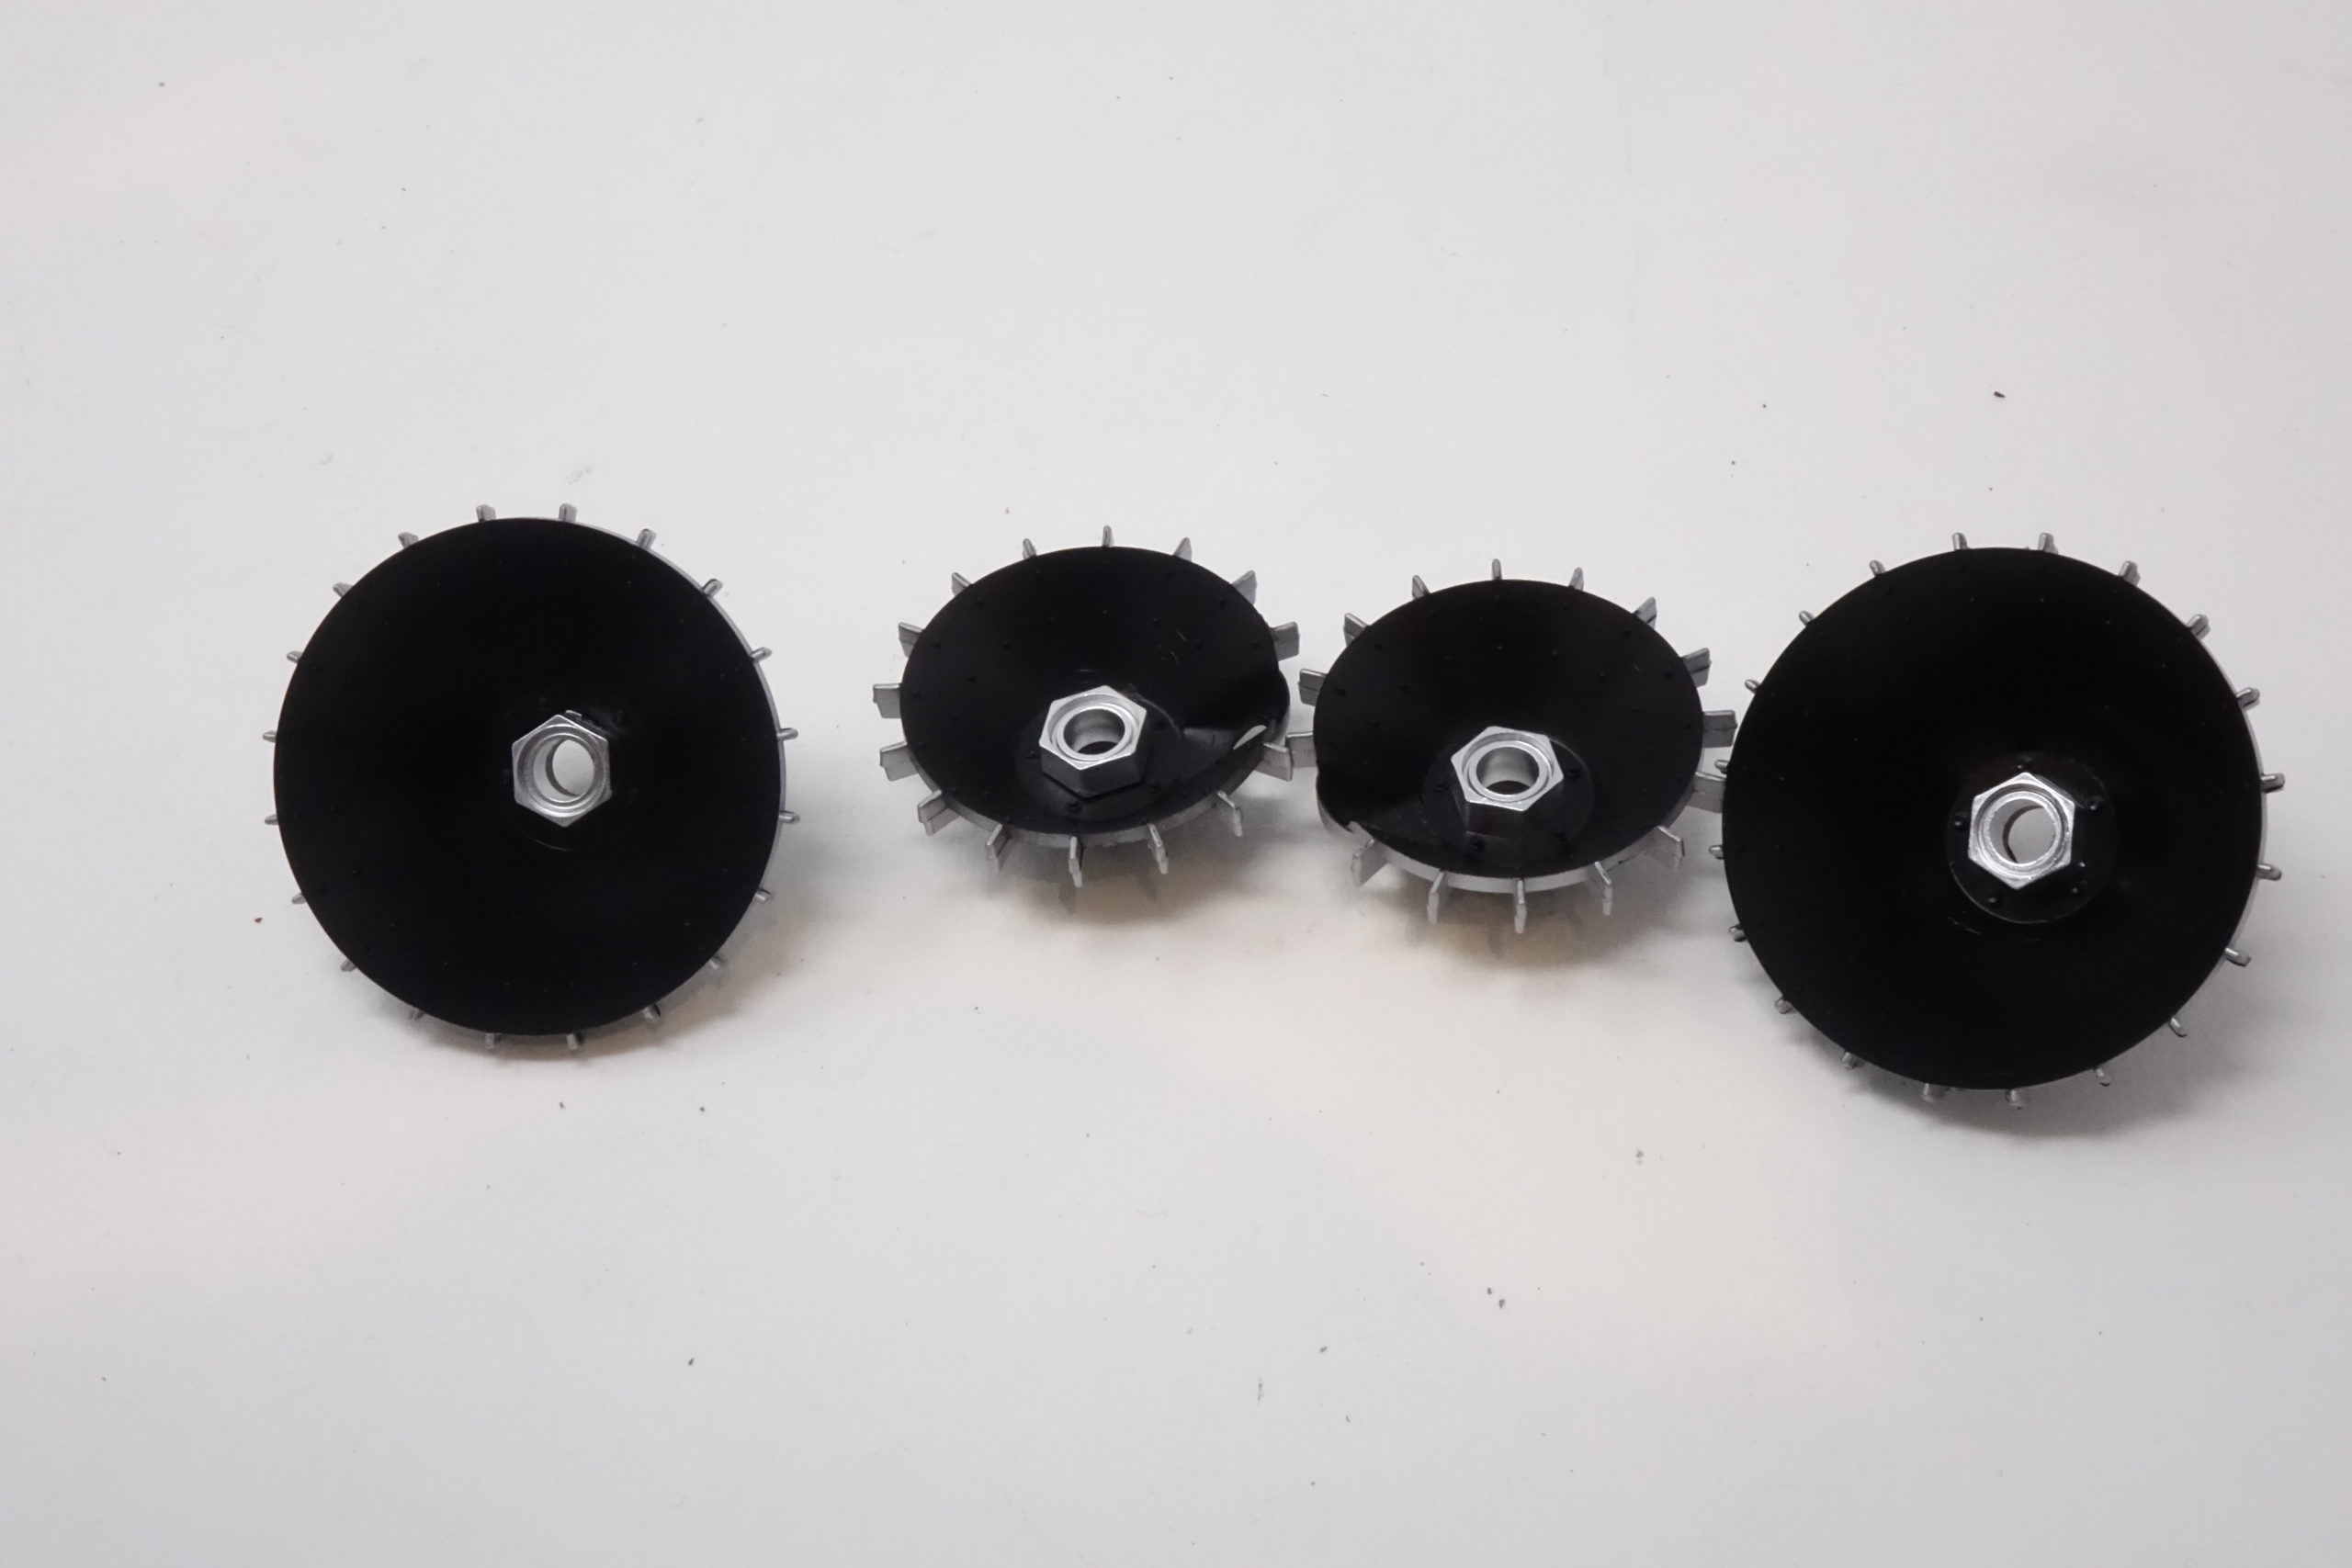
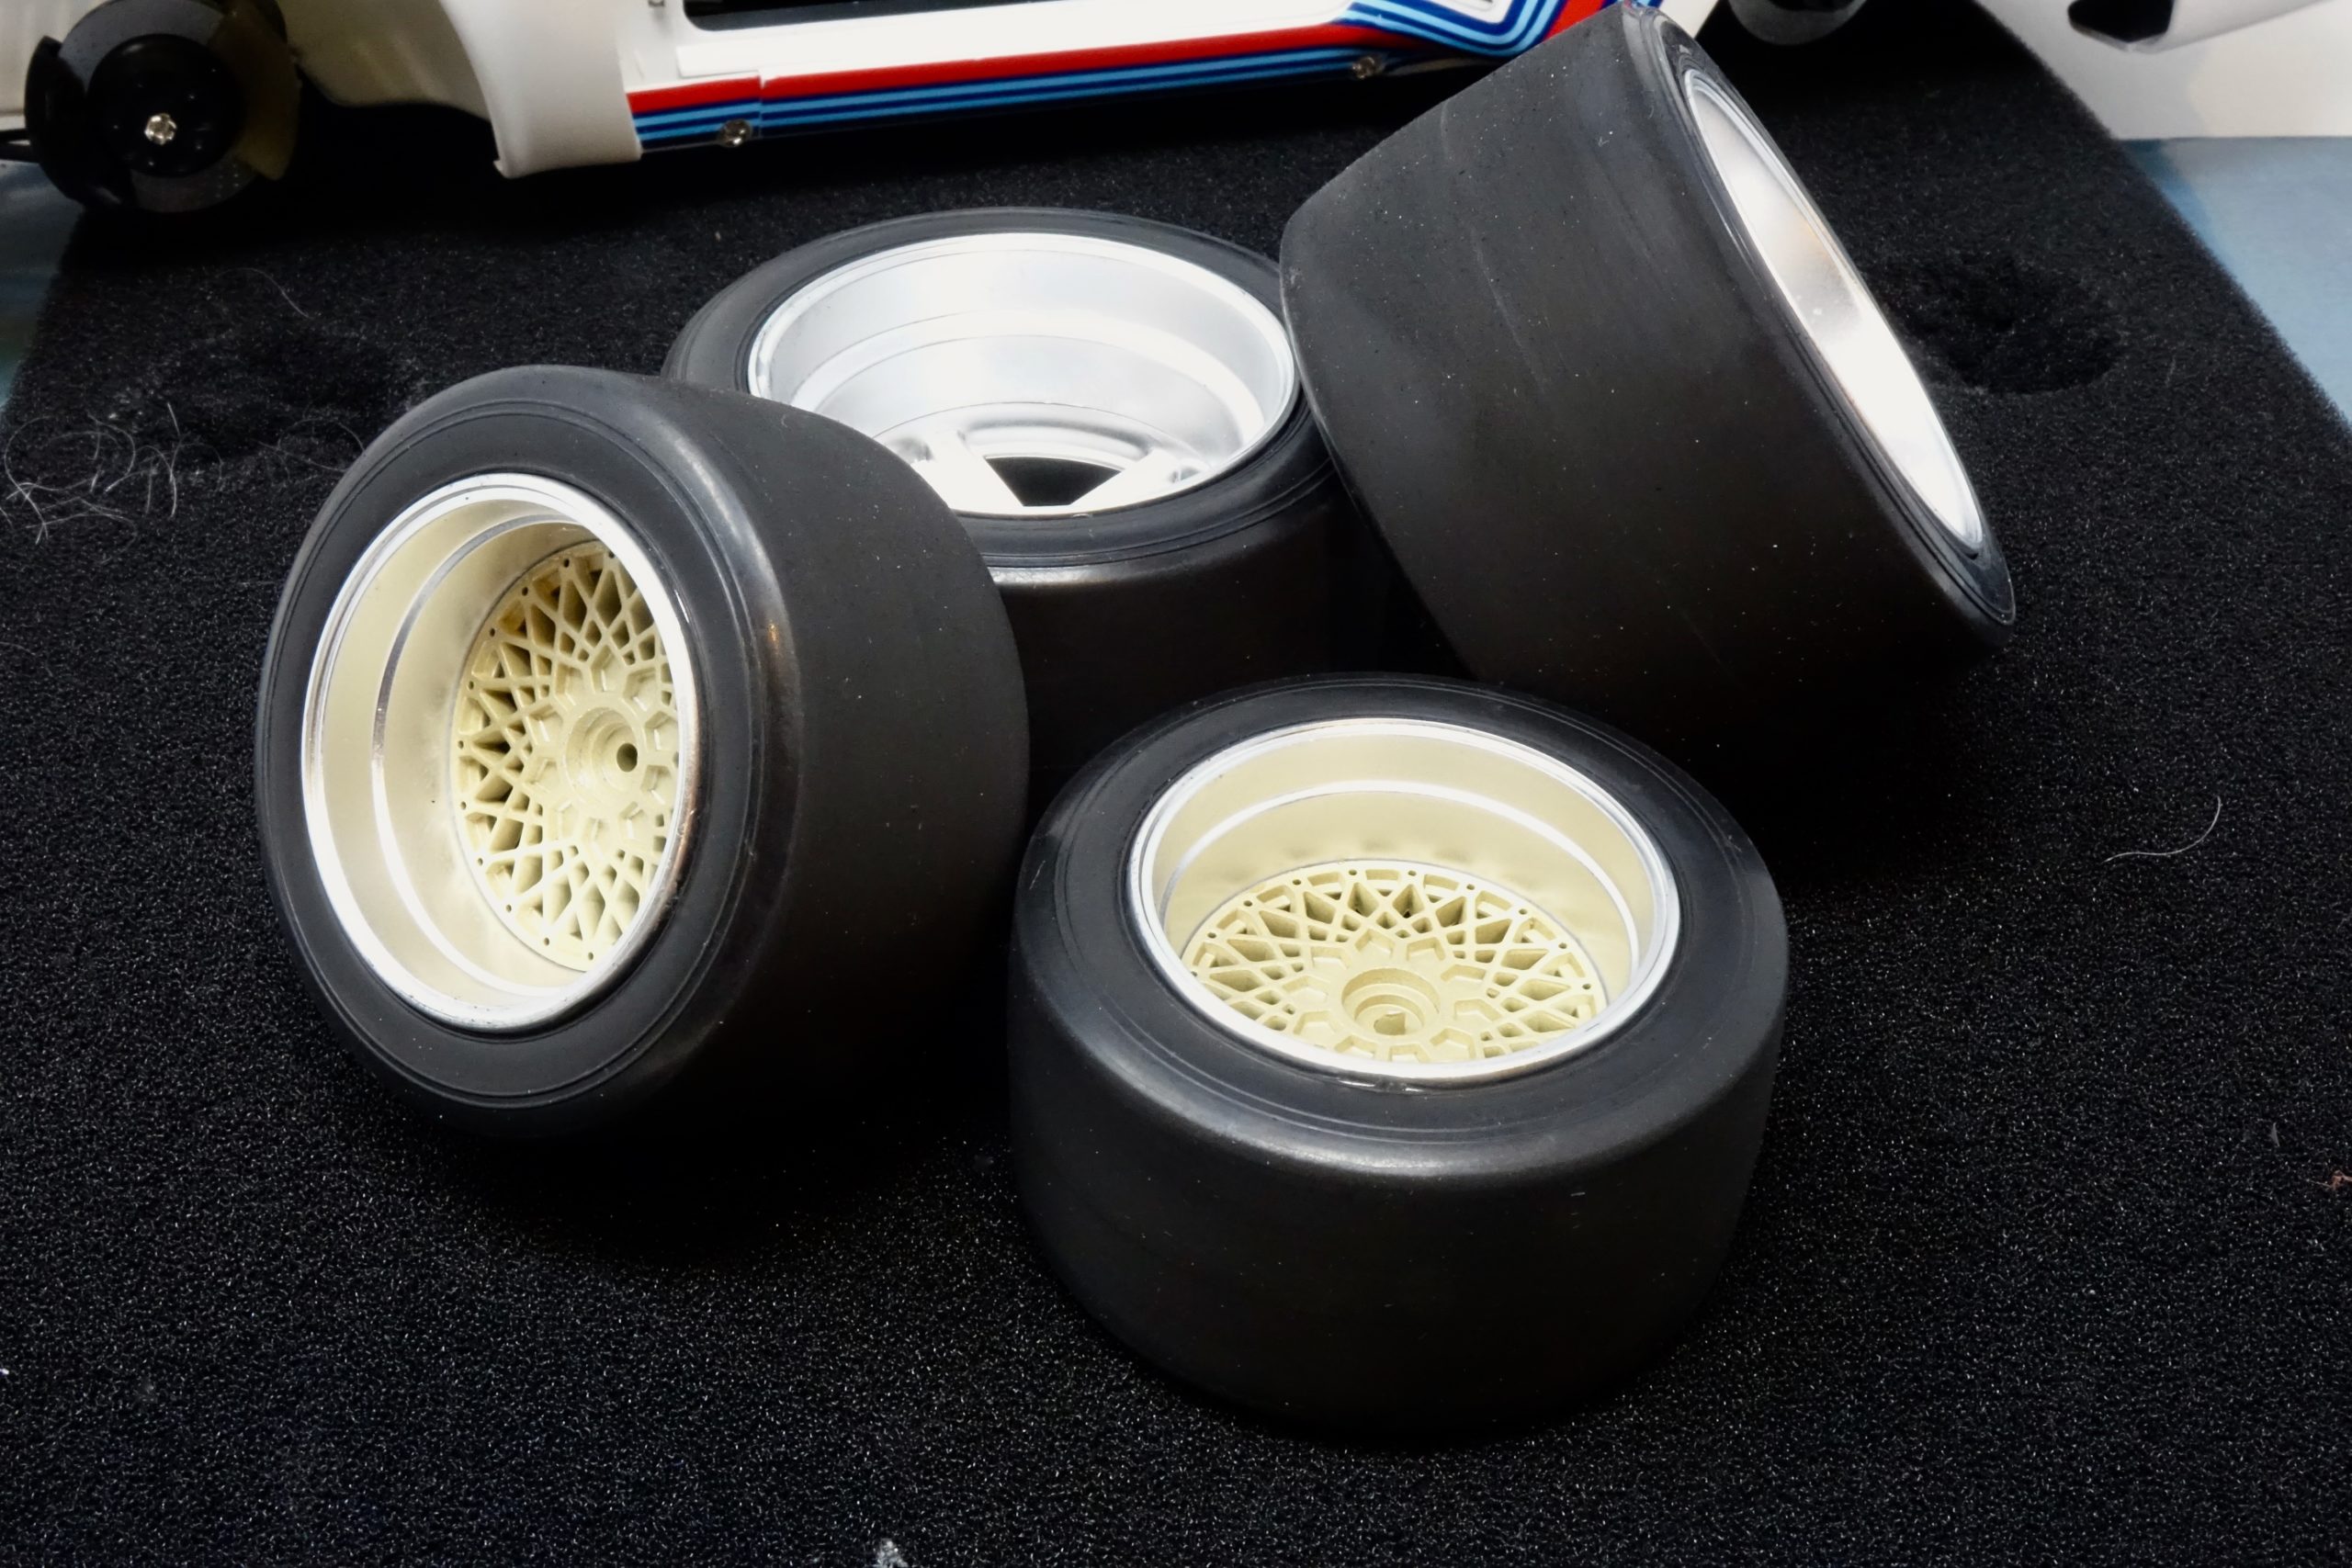
Wheels were assembled as per instructions. The centres of the front wheels were painted in LP Gold (but then get covered by the dust shields!). The satin chrome finish was perfectly ok here – so no painting needed. The tyres had quite prominent seam mould marks down the centre areas – so I gave them a good sand down with 100 grit sand paper.


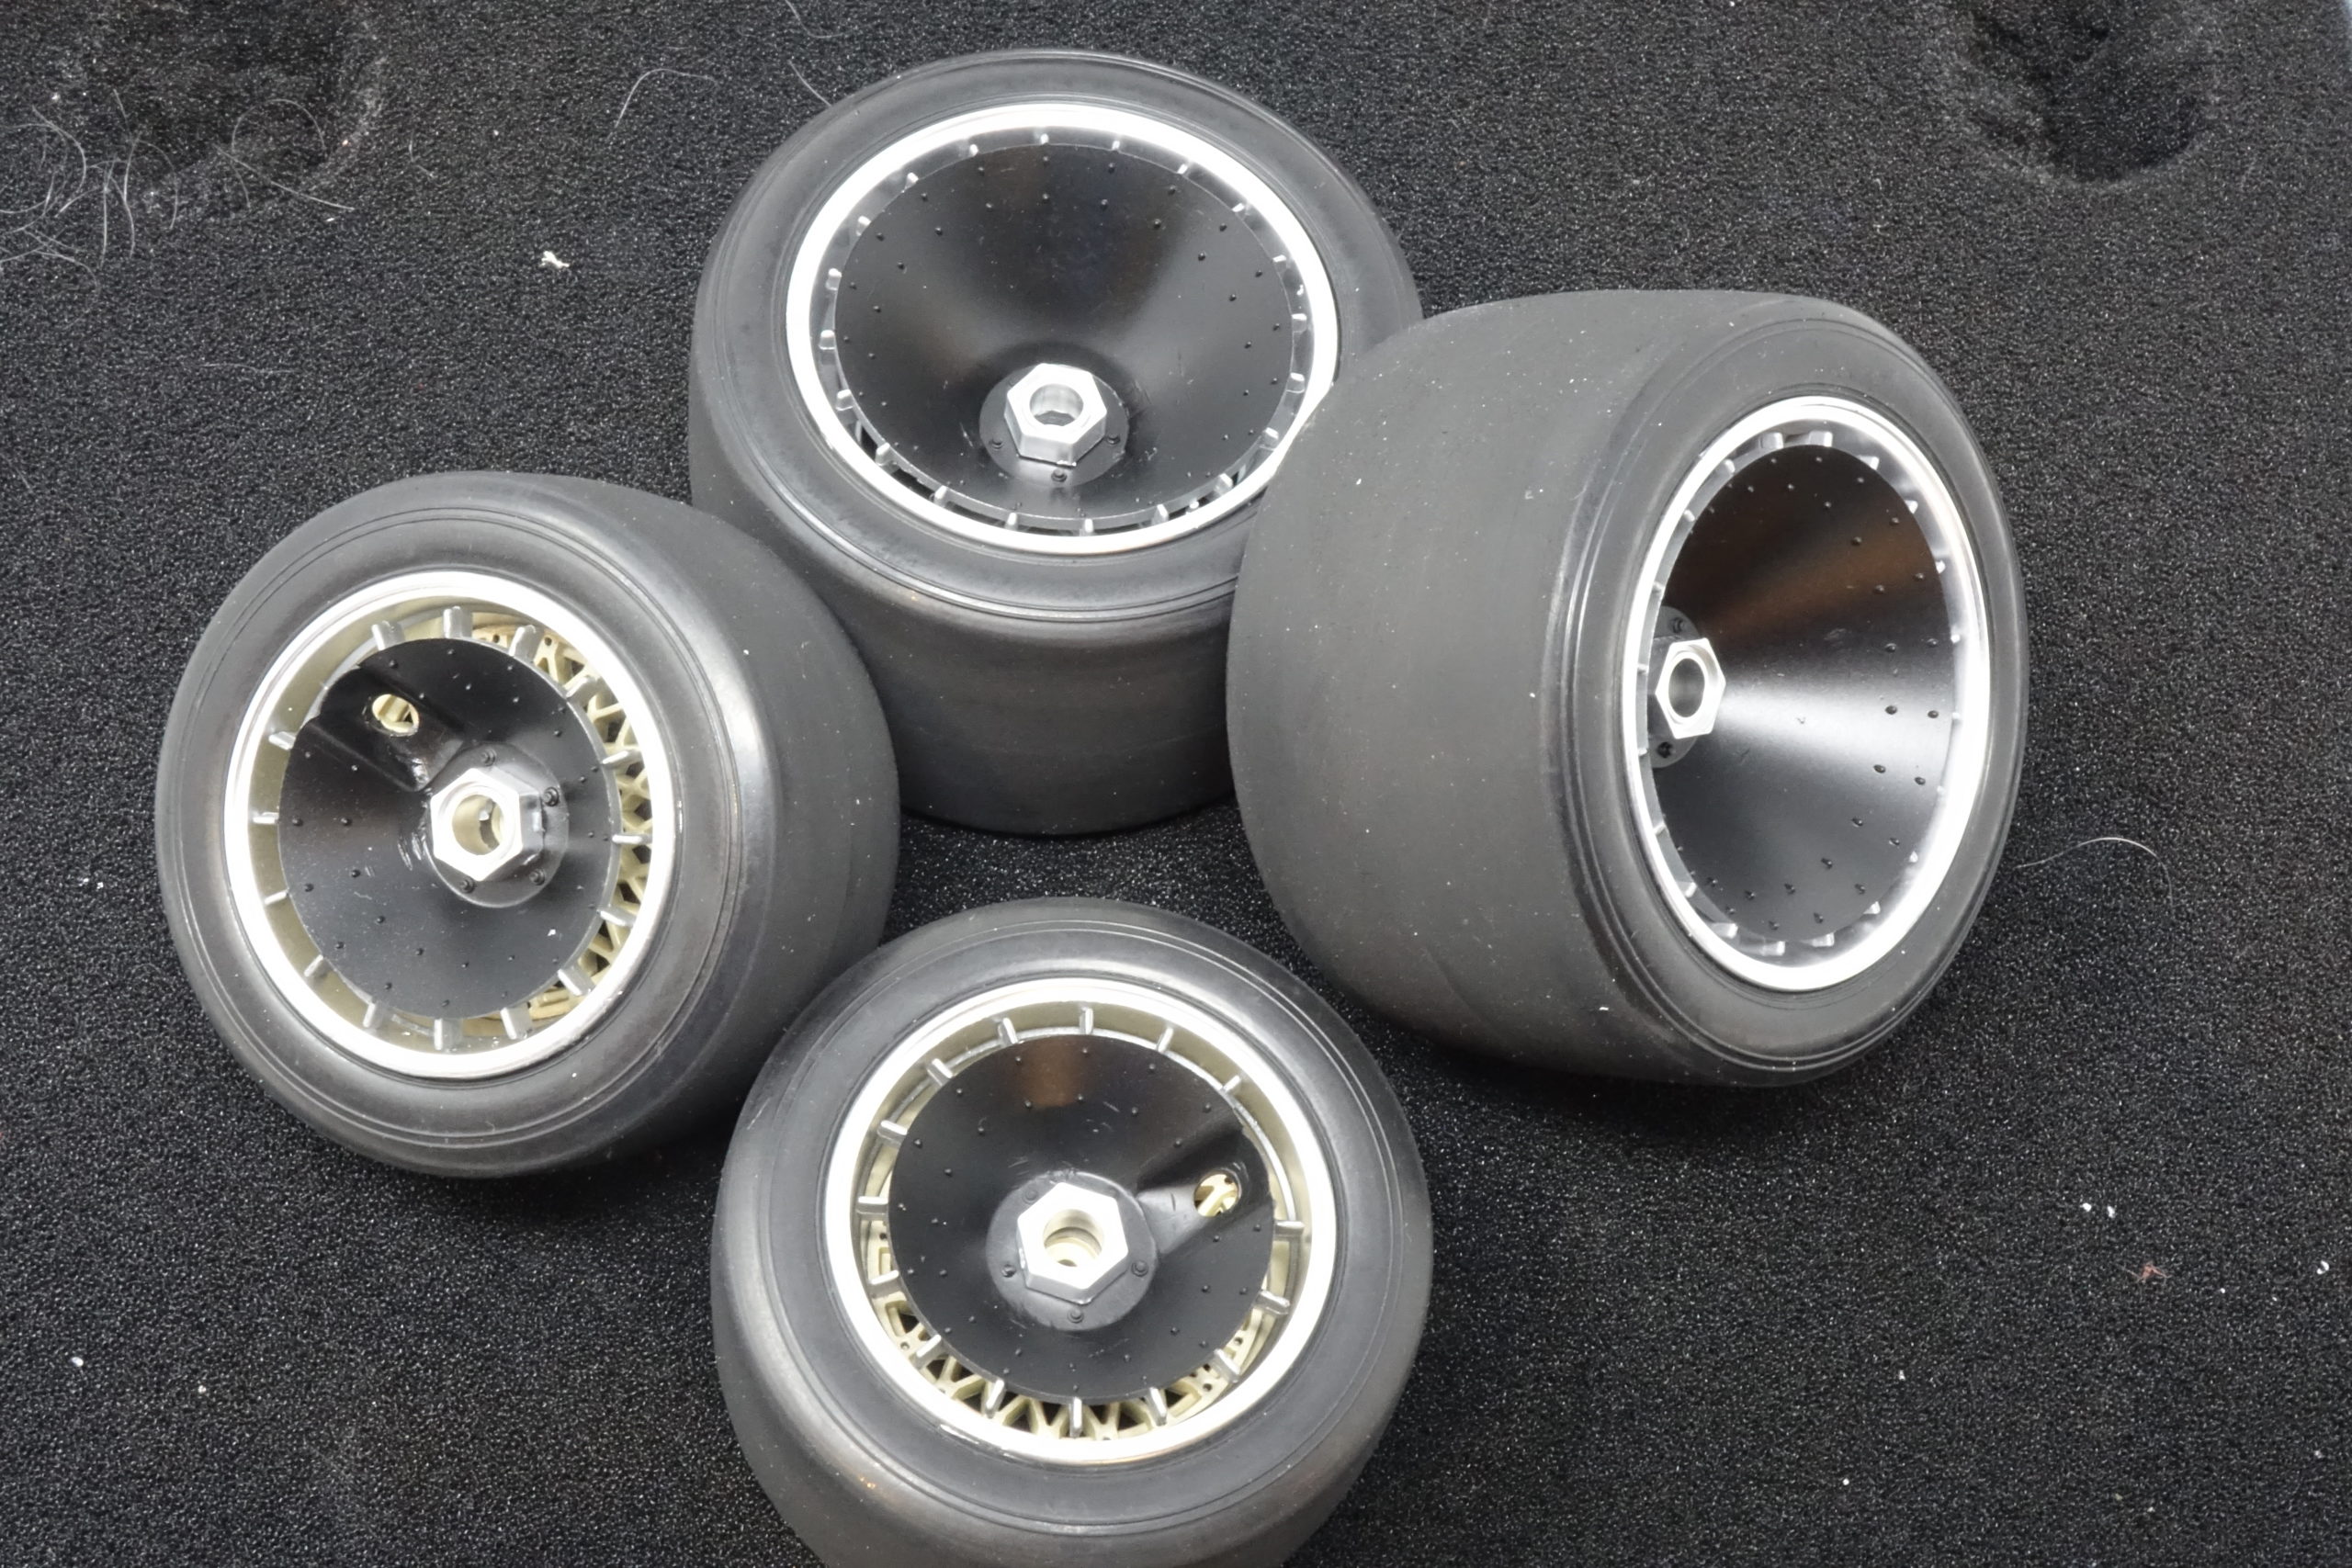
When fitting wheels to the hubs with the 6mm screws I checked the screws were a nice comfortable fit into the captive nuts installed much earlier in the build. Previous experience with these has told me that it is very easy to cross thread or jam the screw and then it’s an impossible task to remove it. On this model they all fitted a treat – but I still went very gently with any slight resistance being a warning for potential trouble. Fortunately here there wasn’t any!
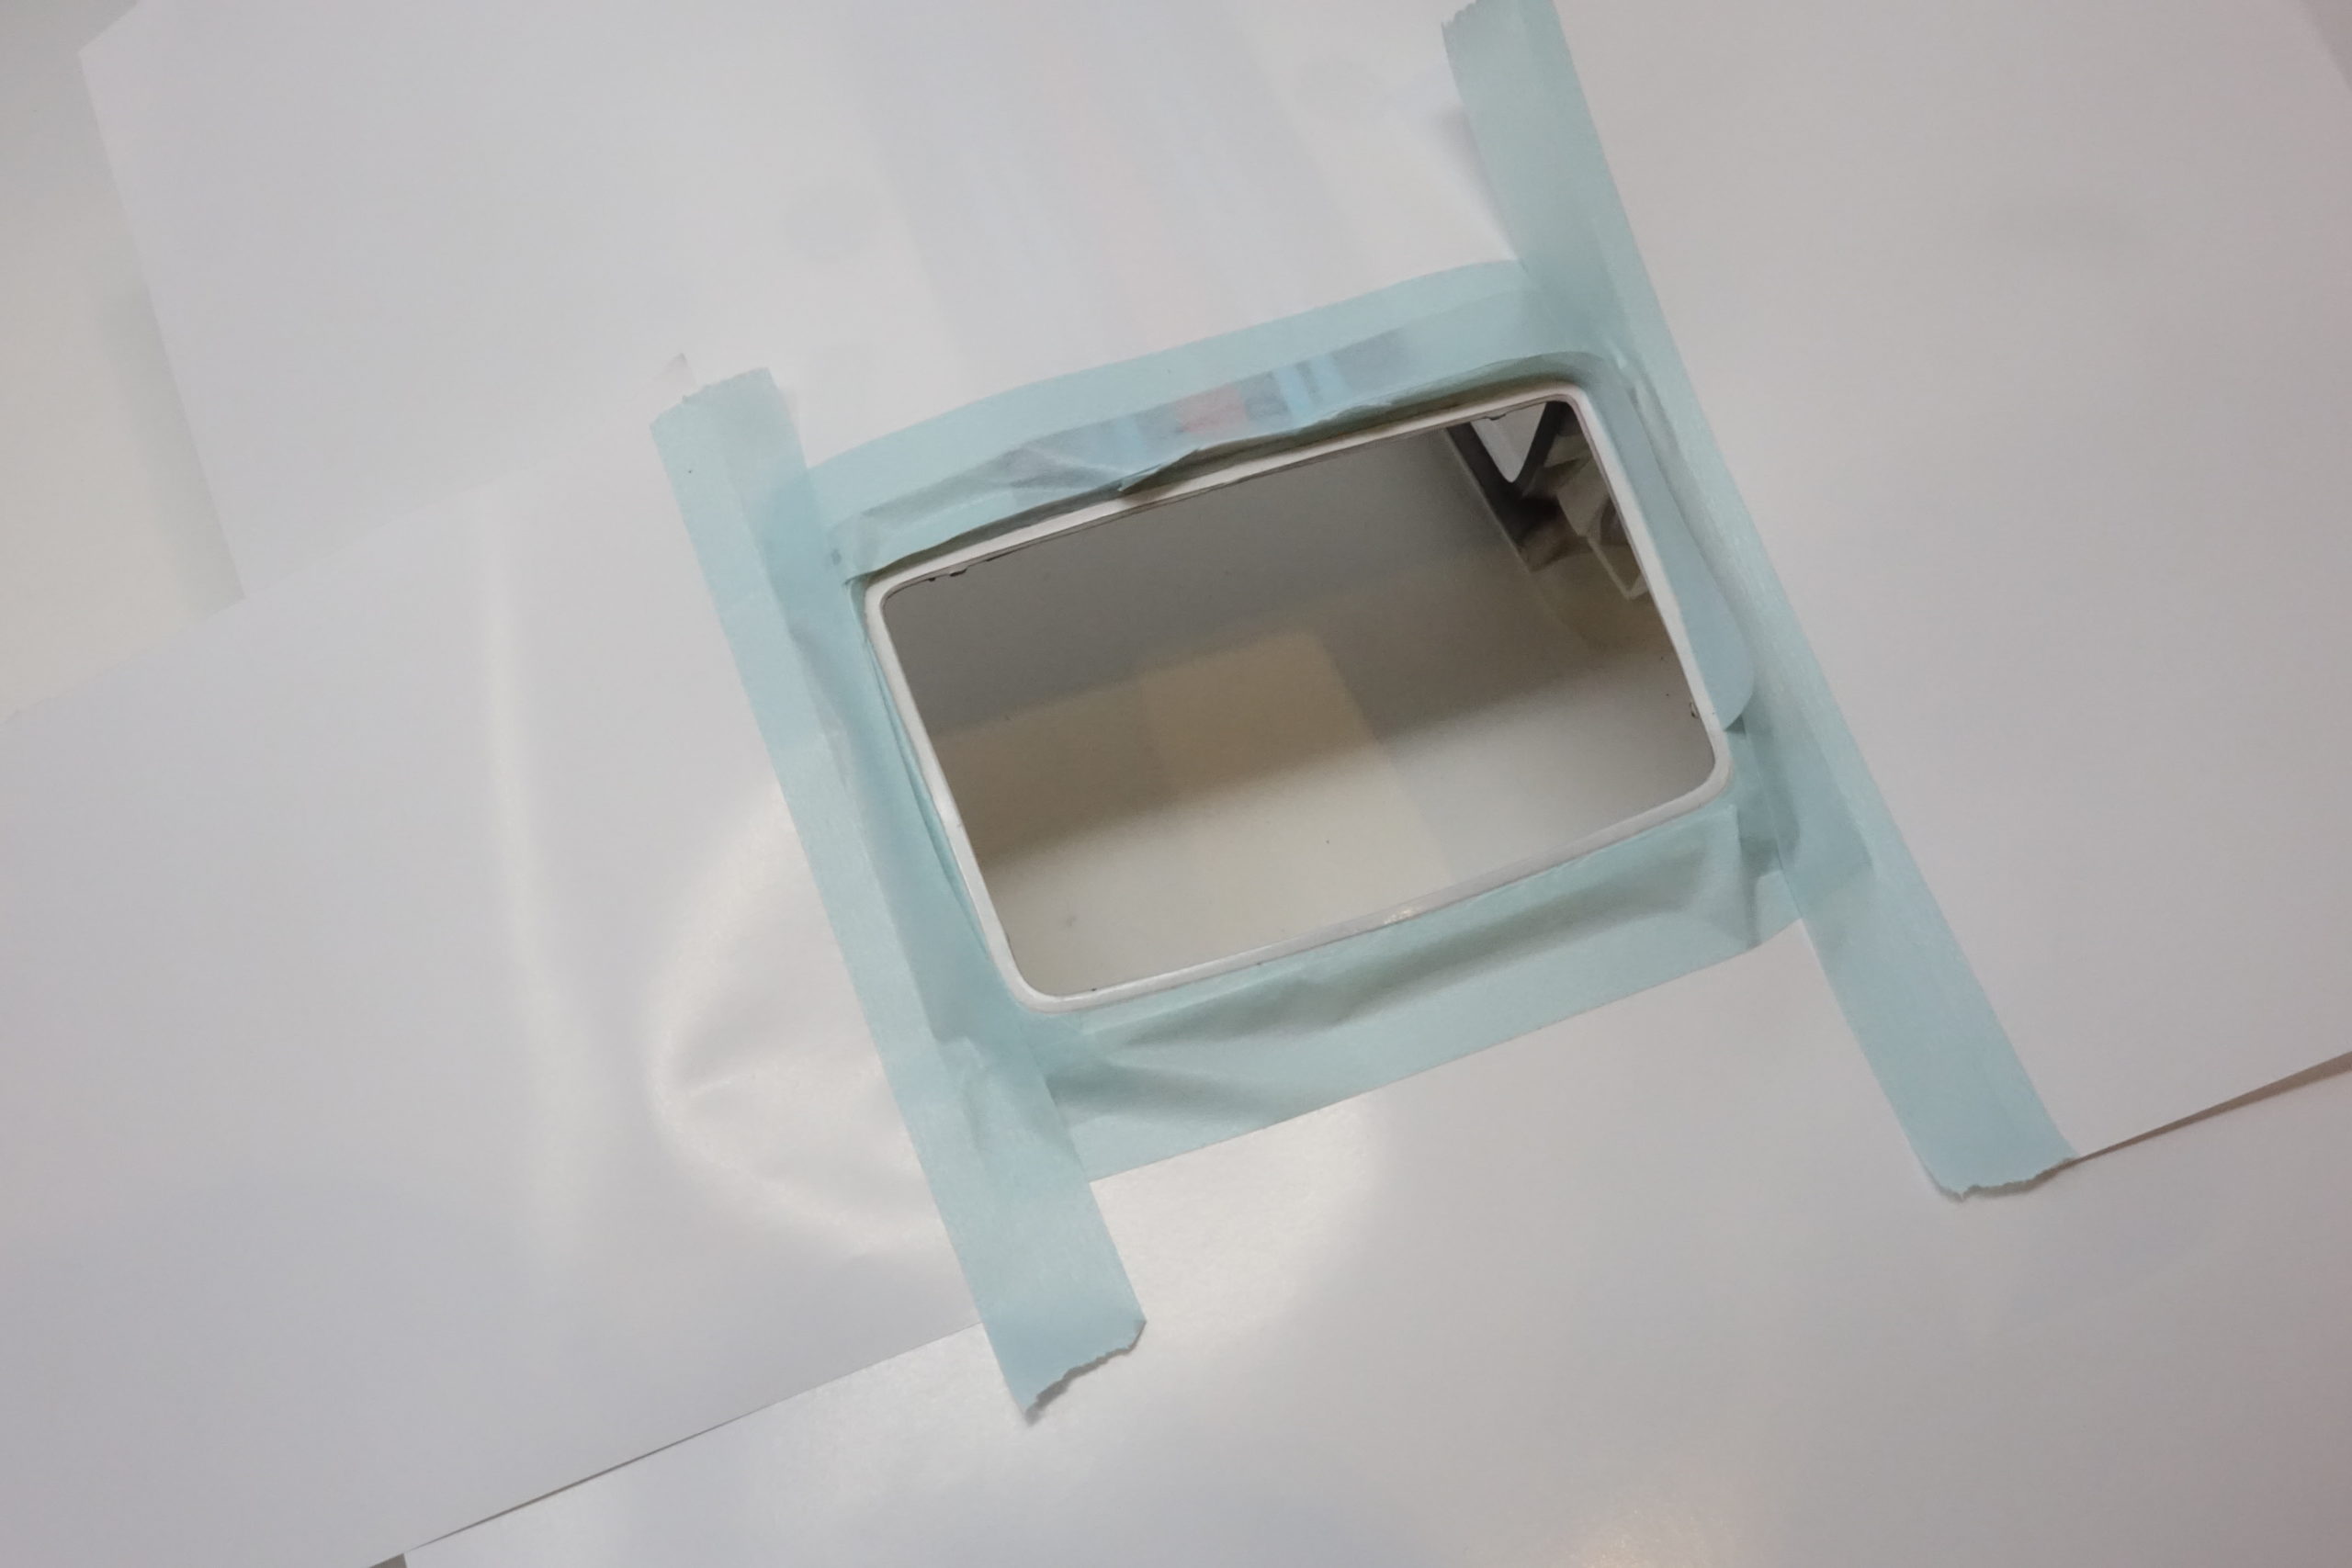
A few more bits and pieces to fit – windscreen wiper, wing mirrors….etc…and we’re done!
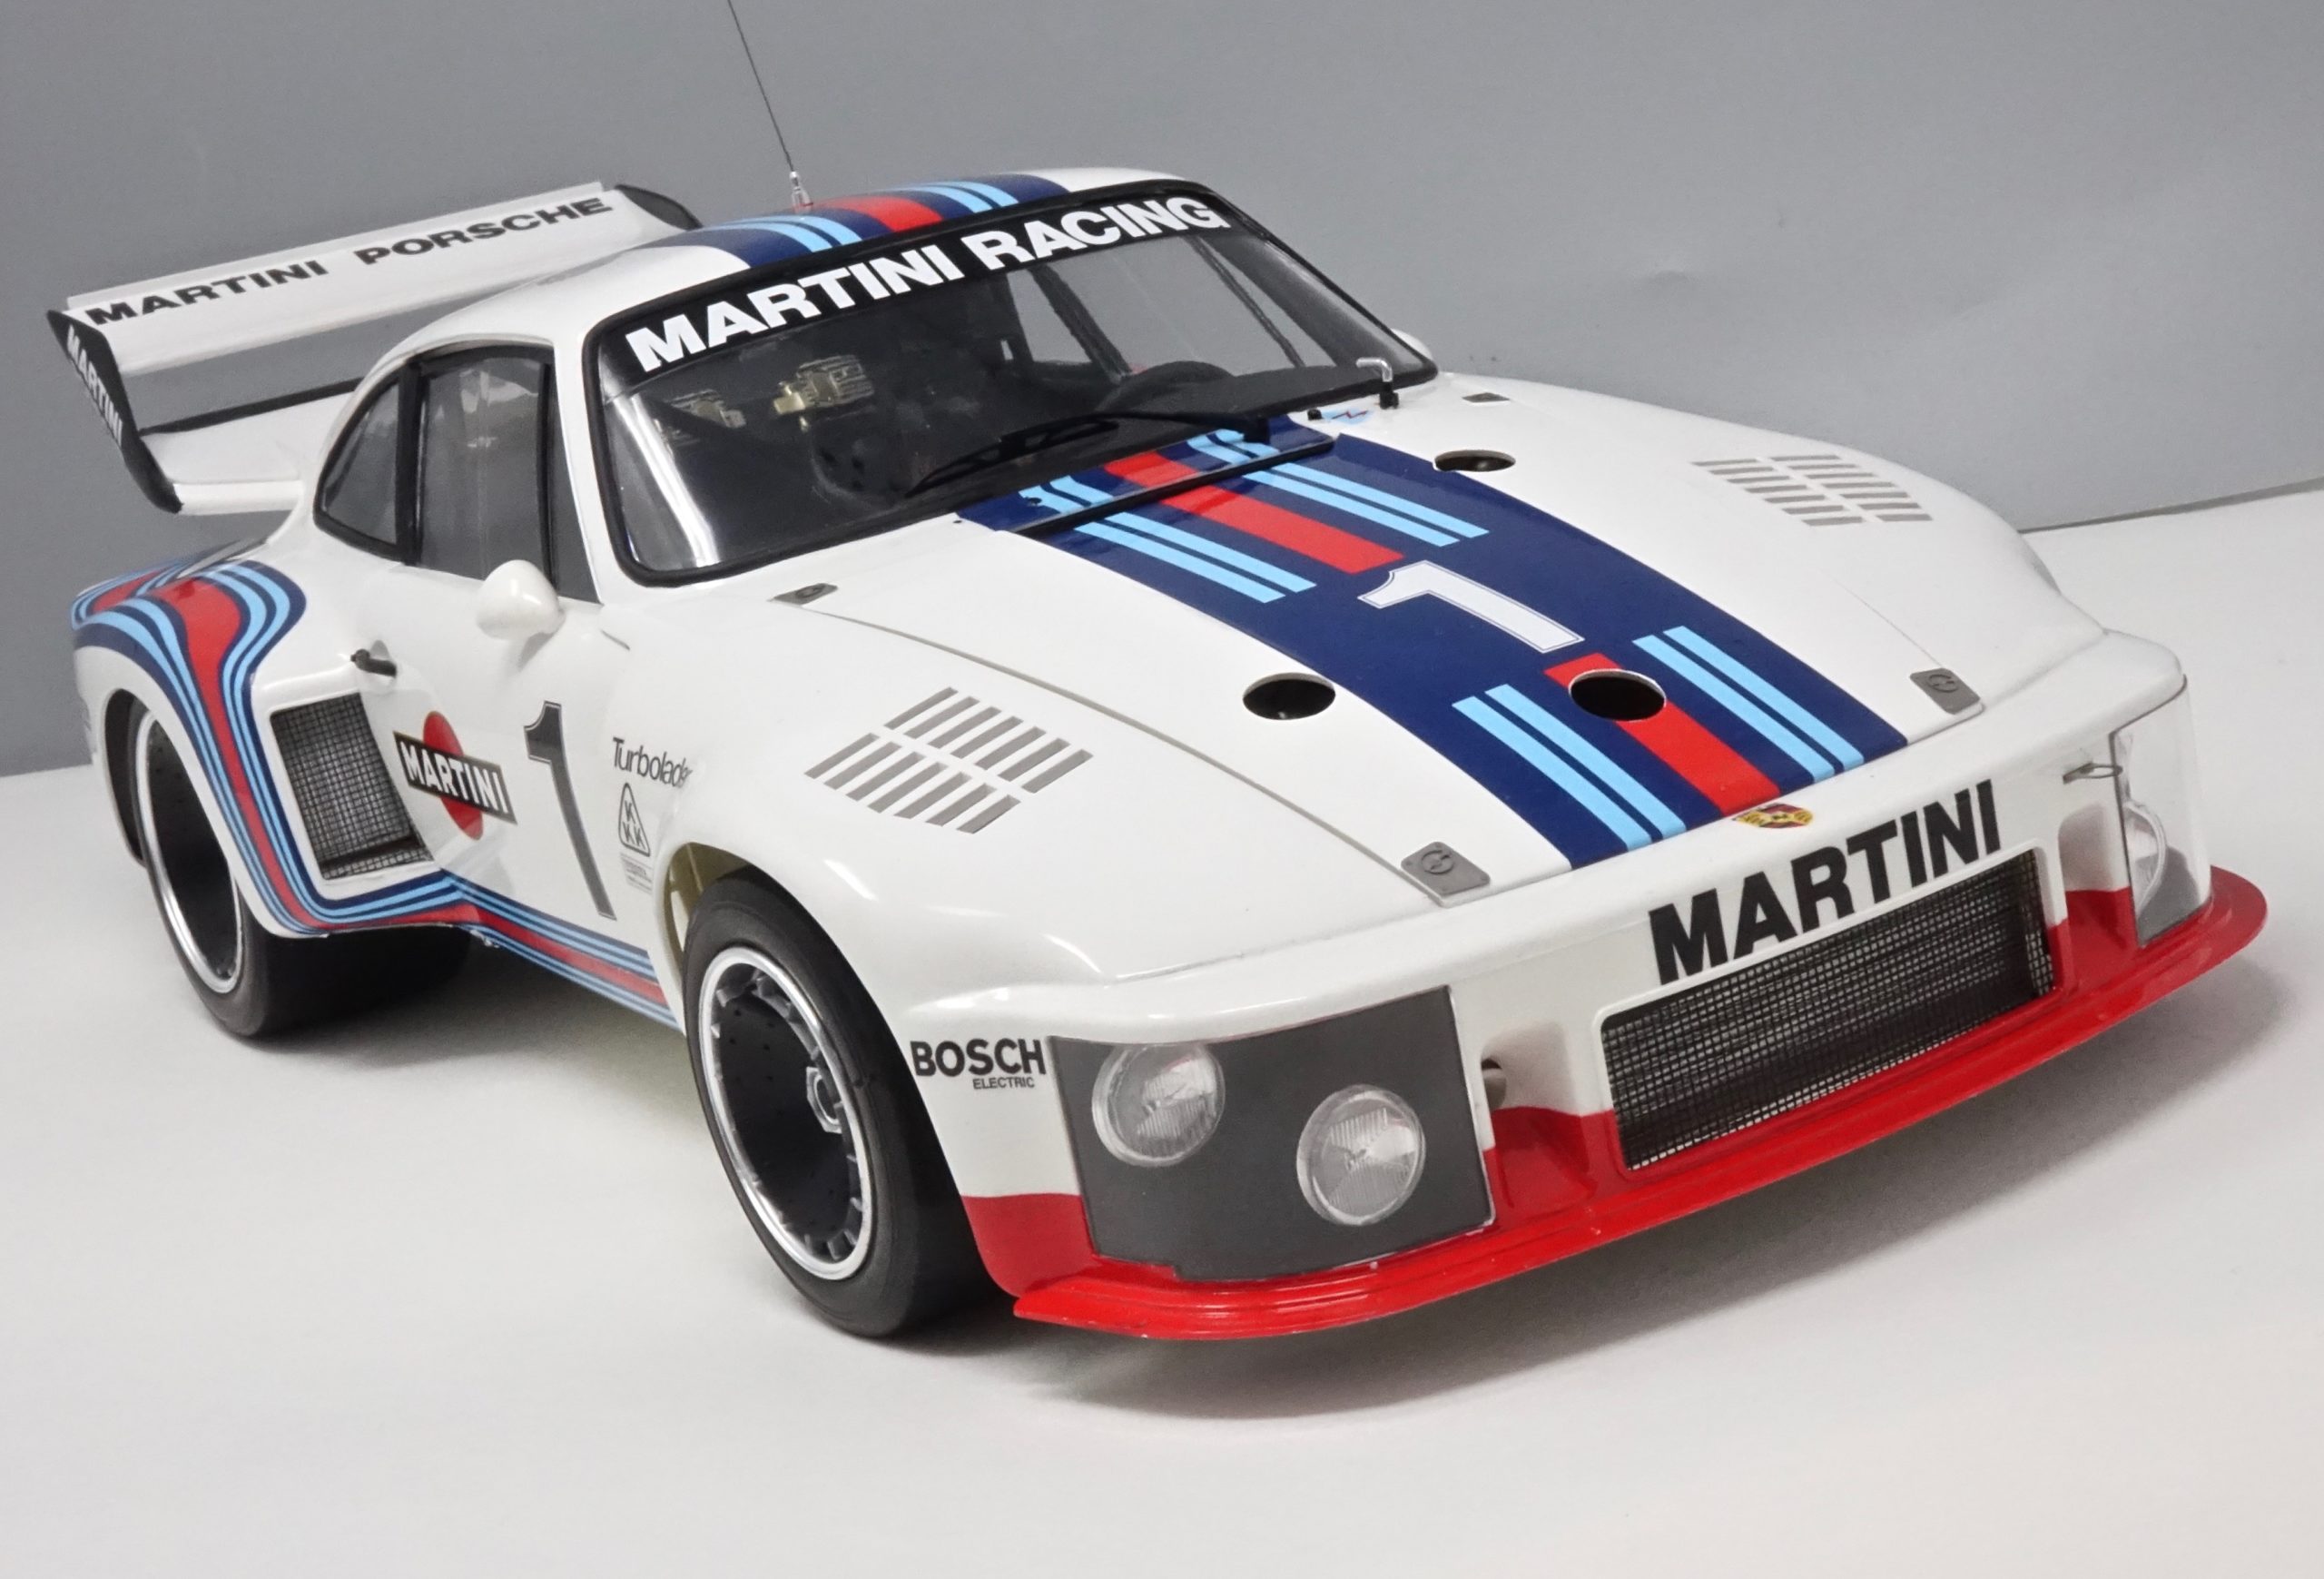
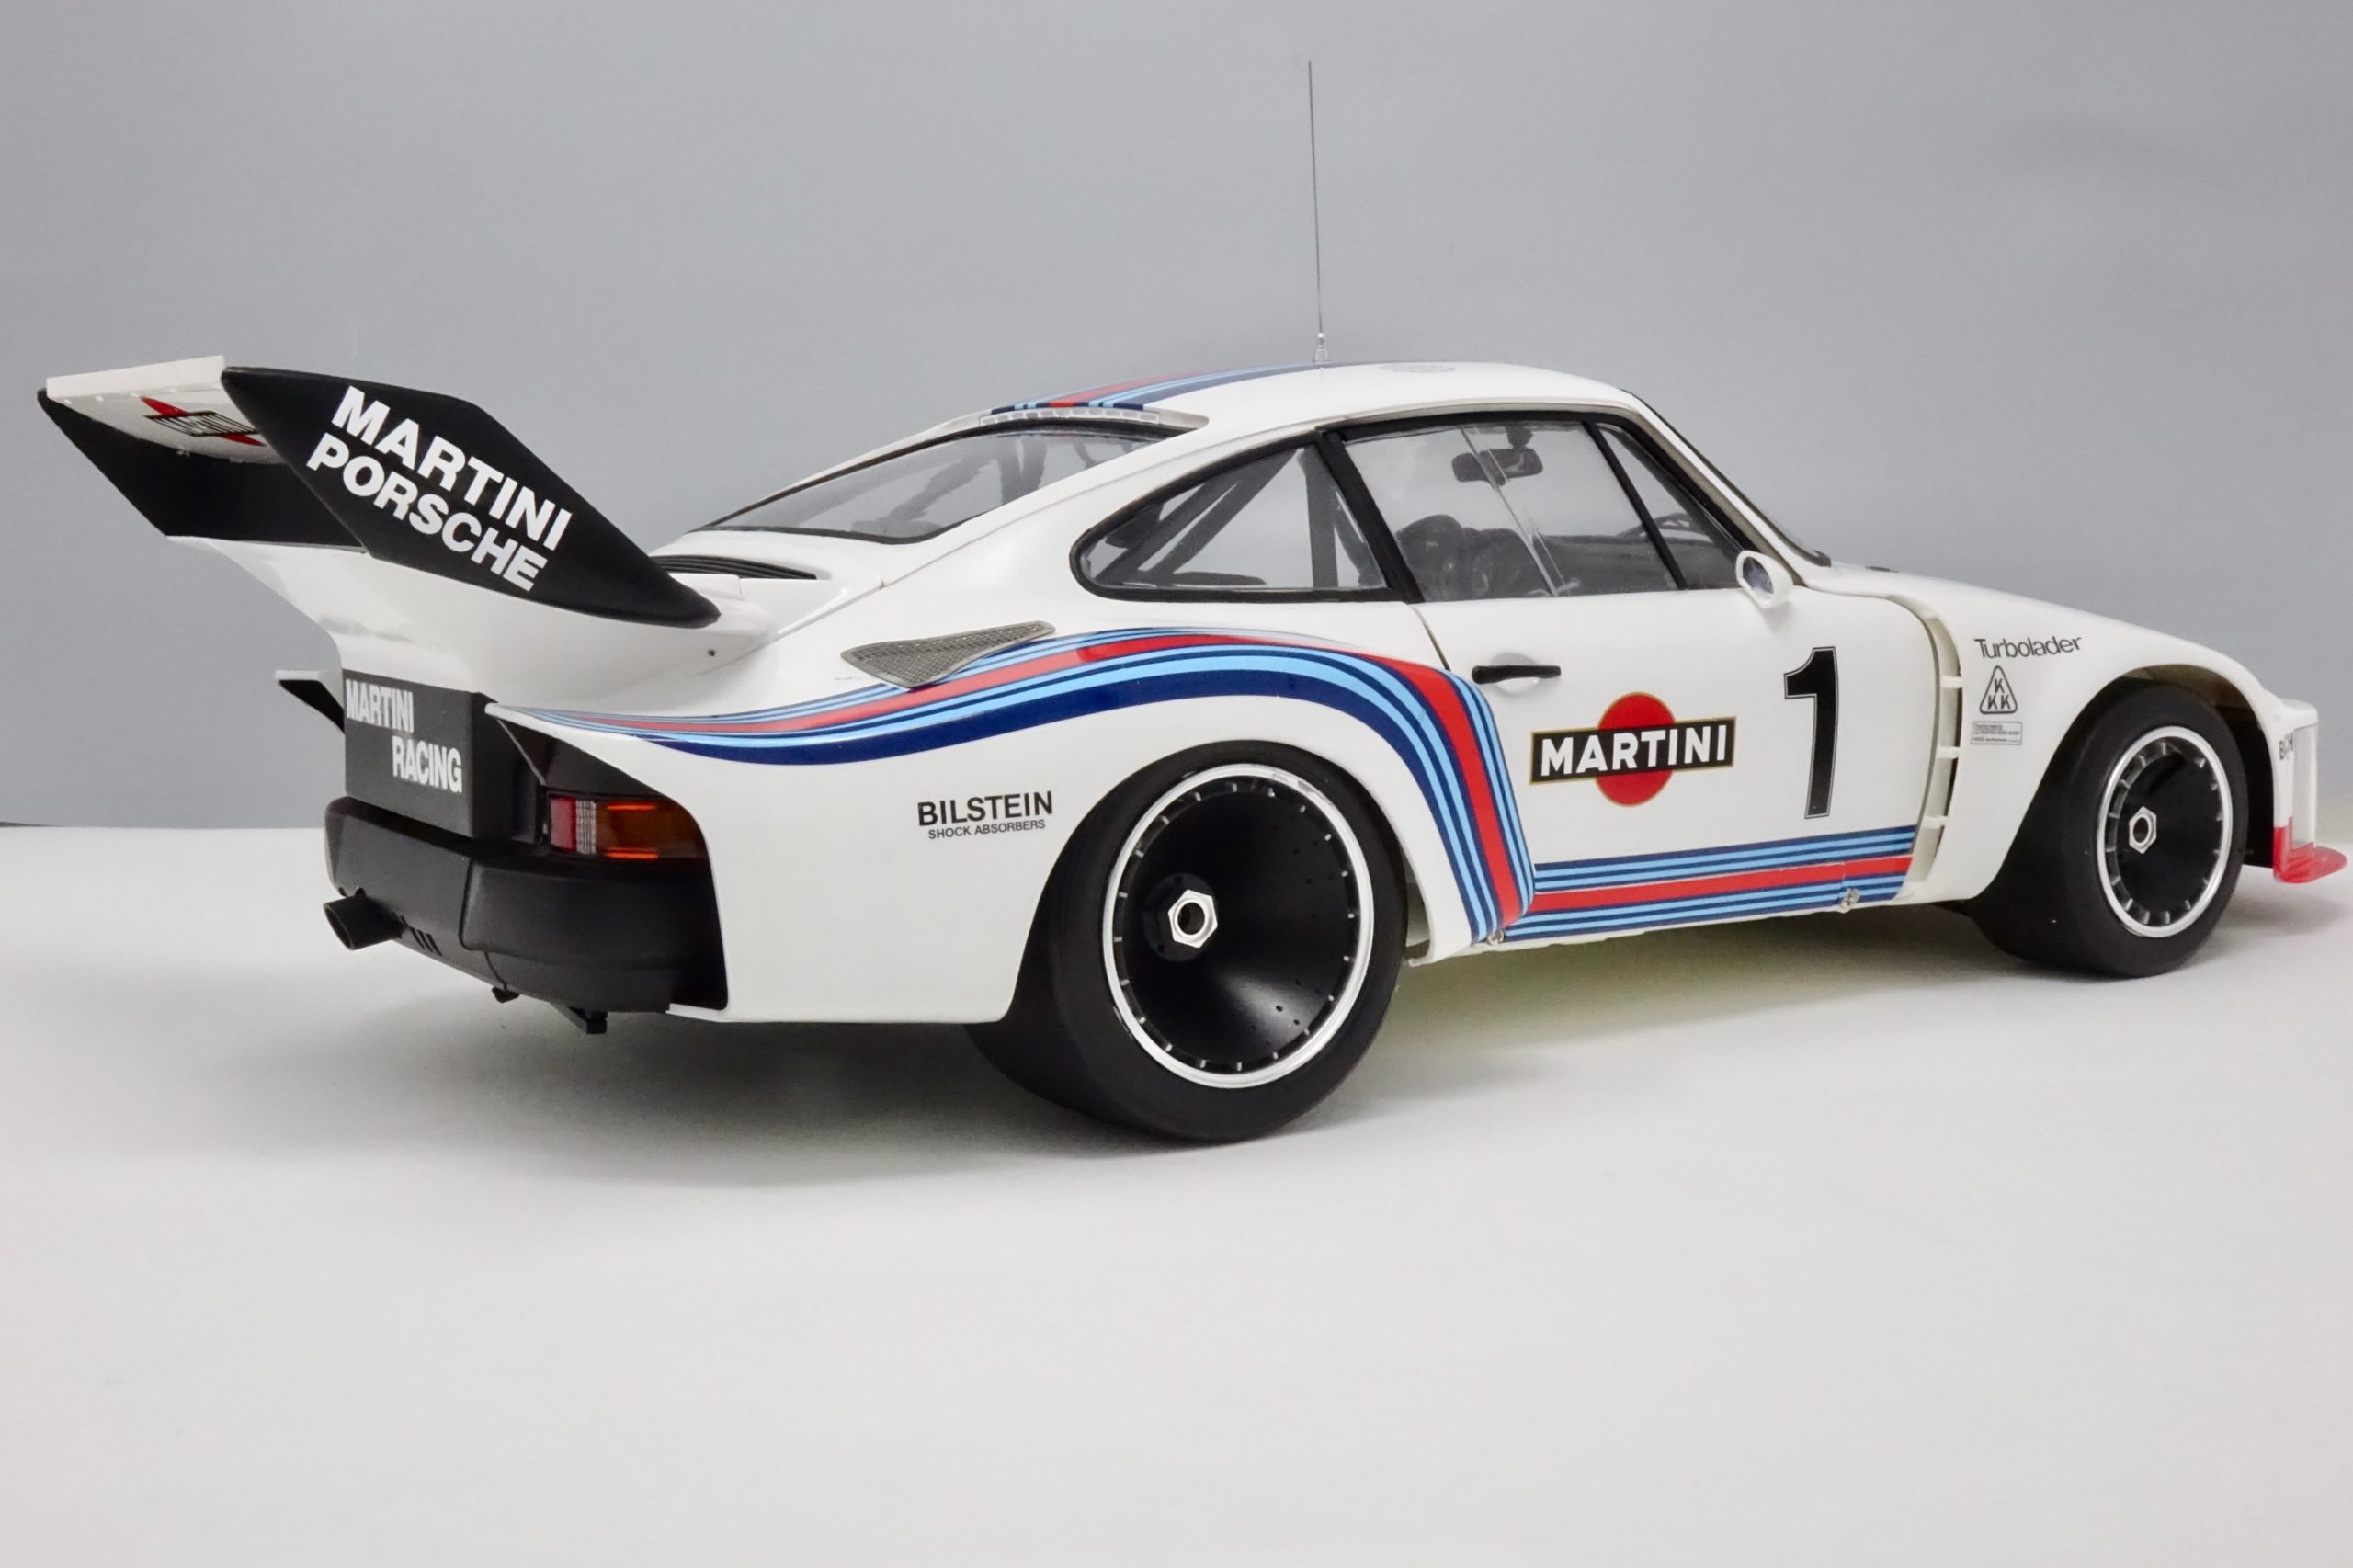
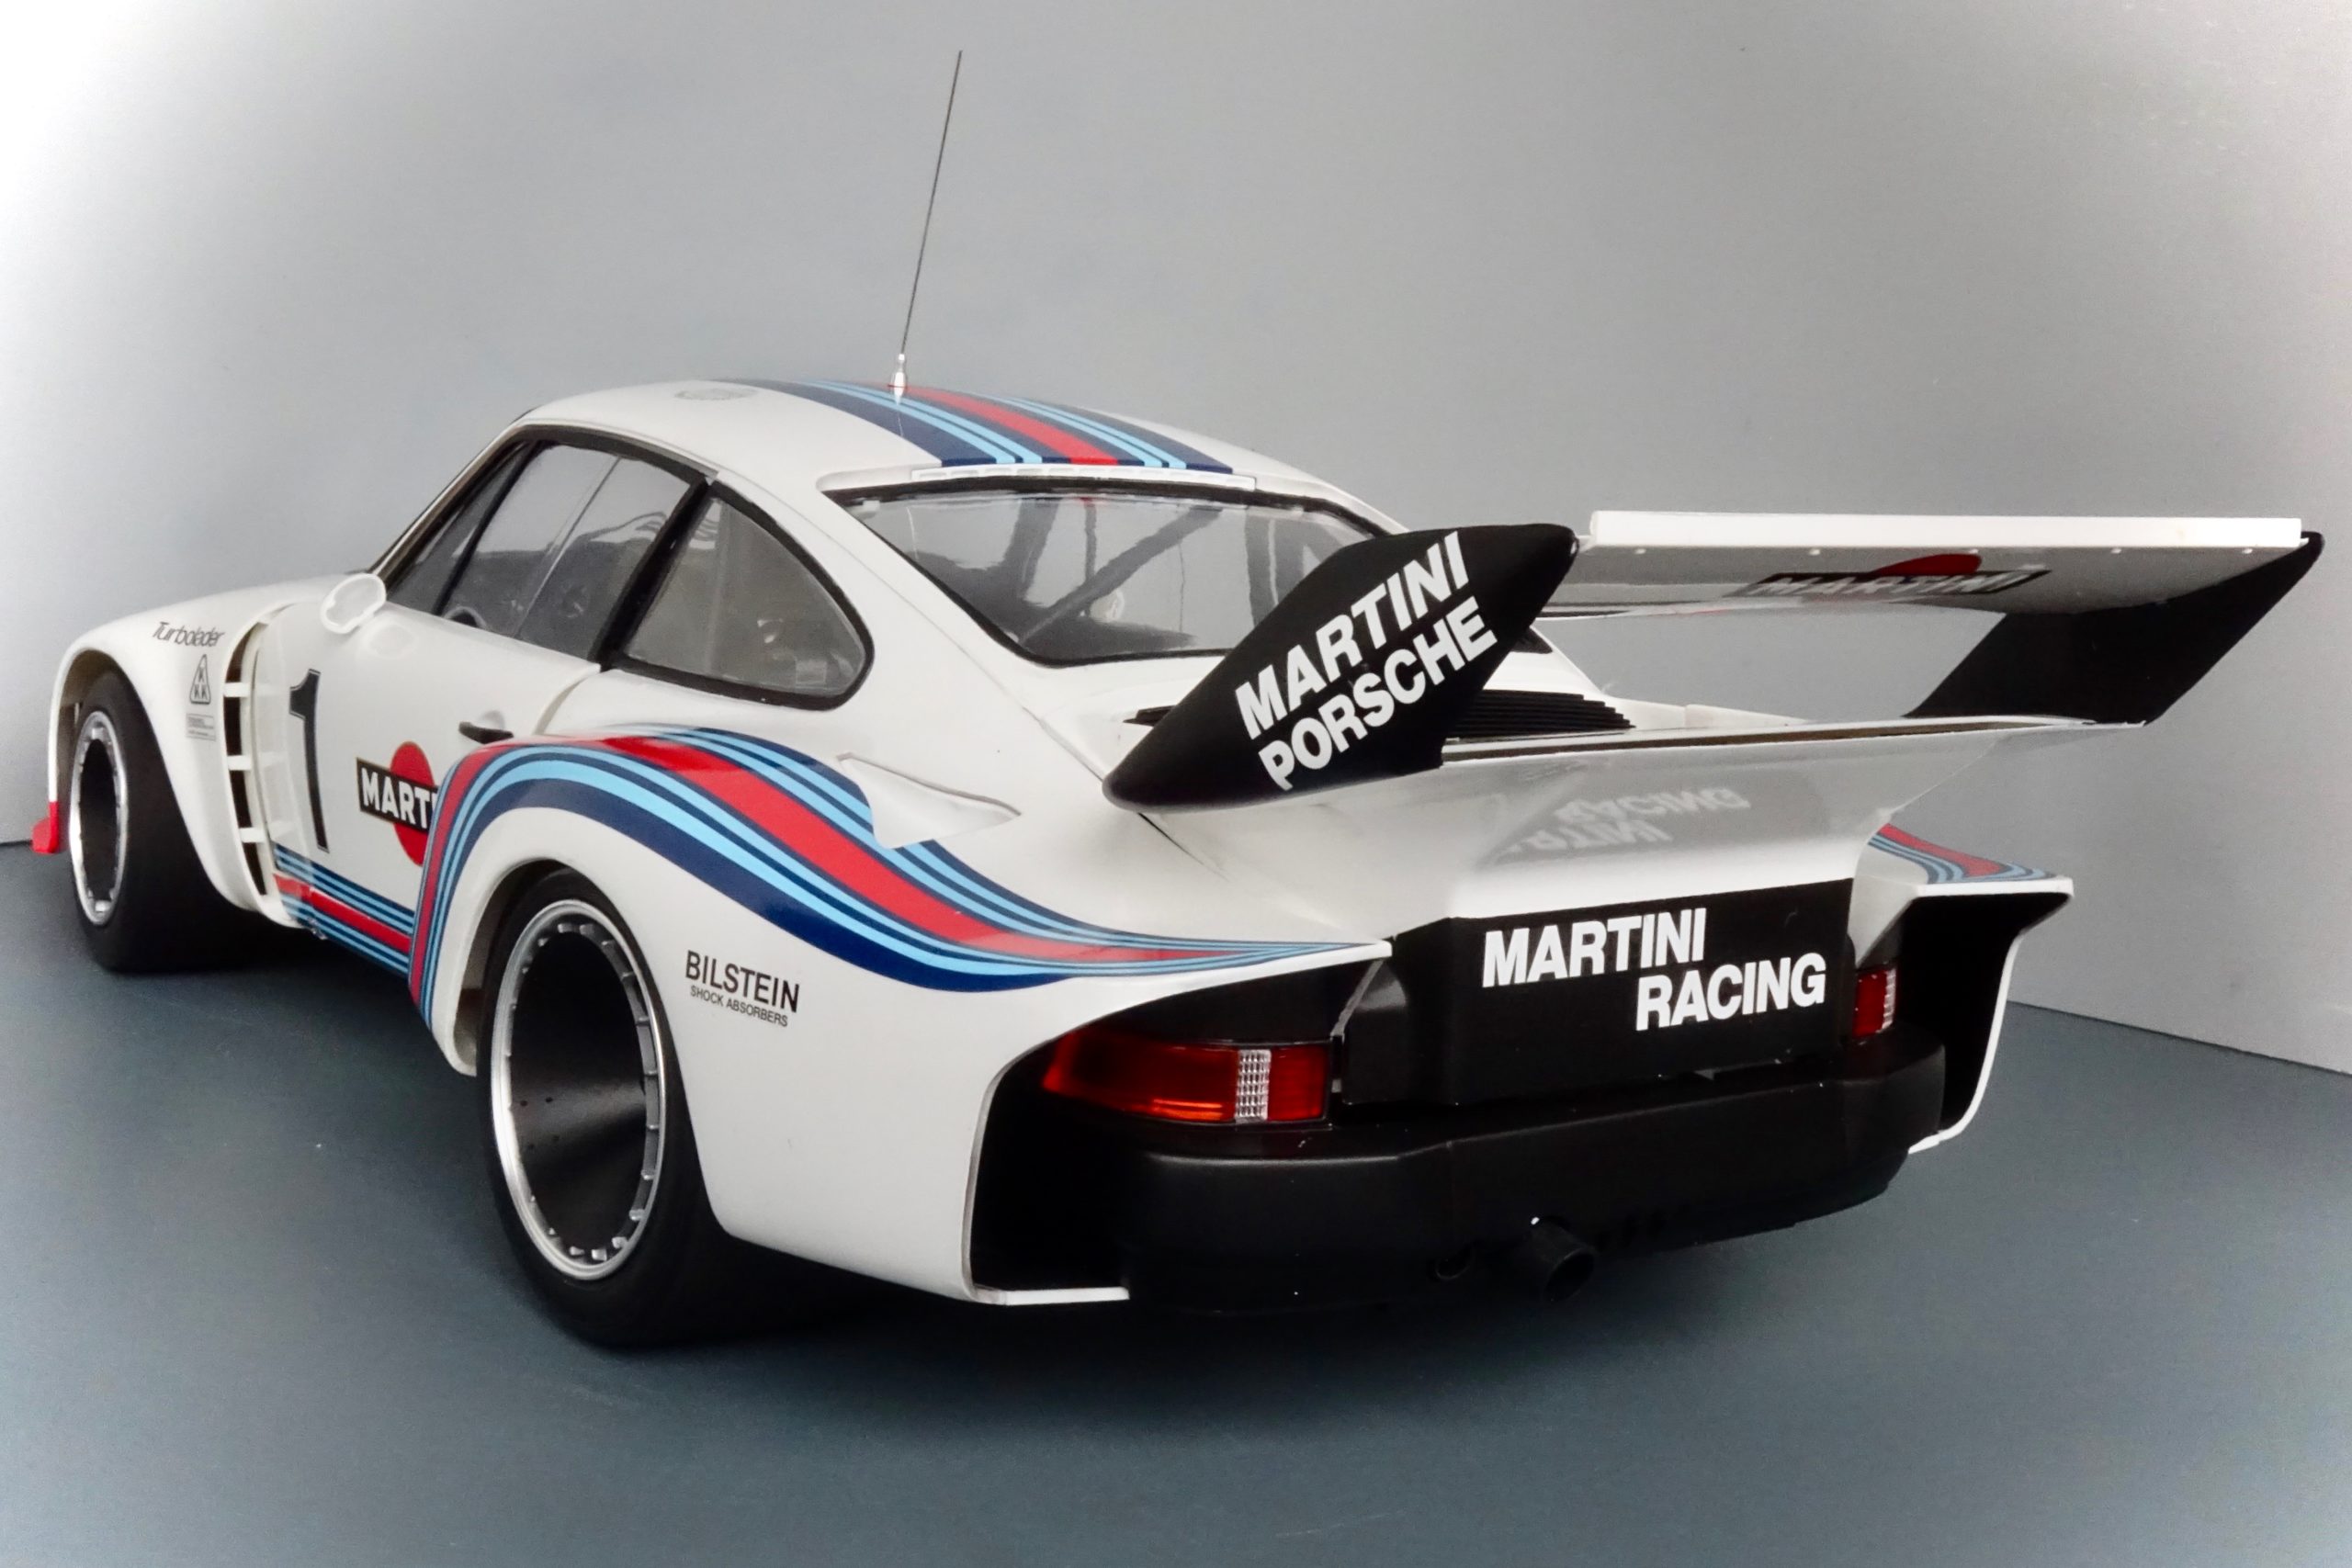
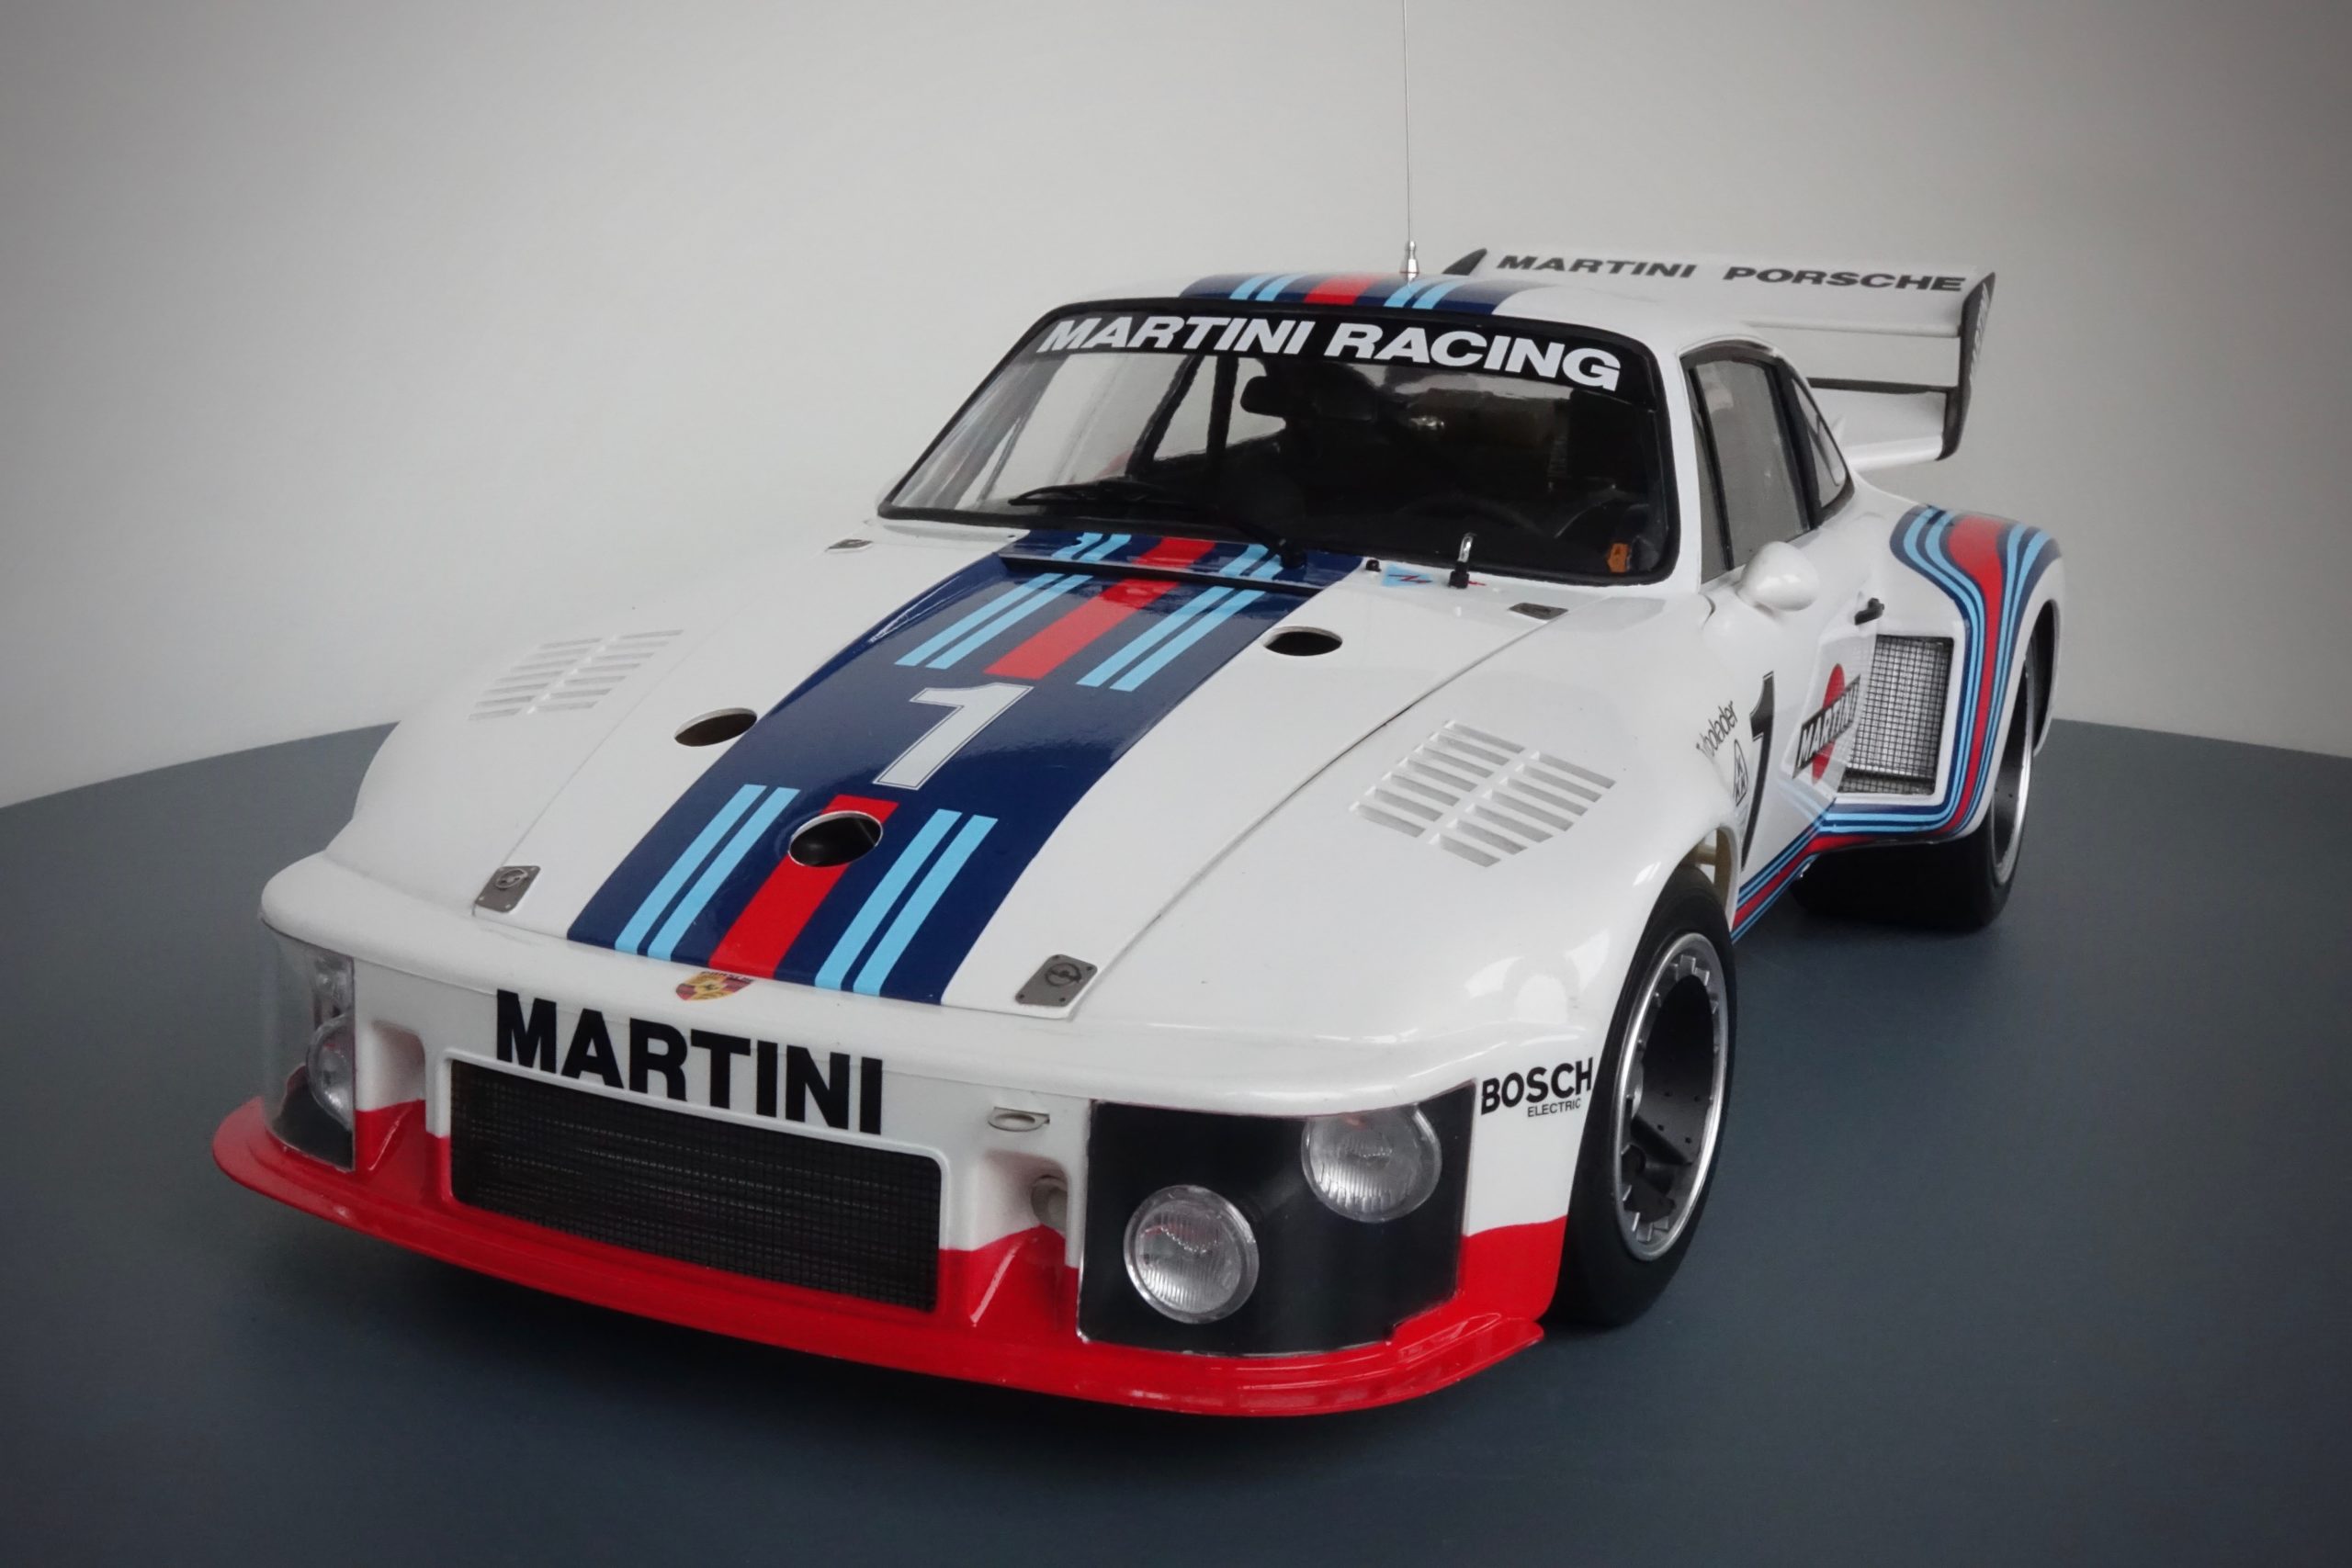
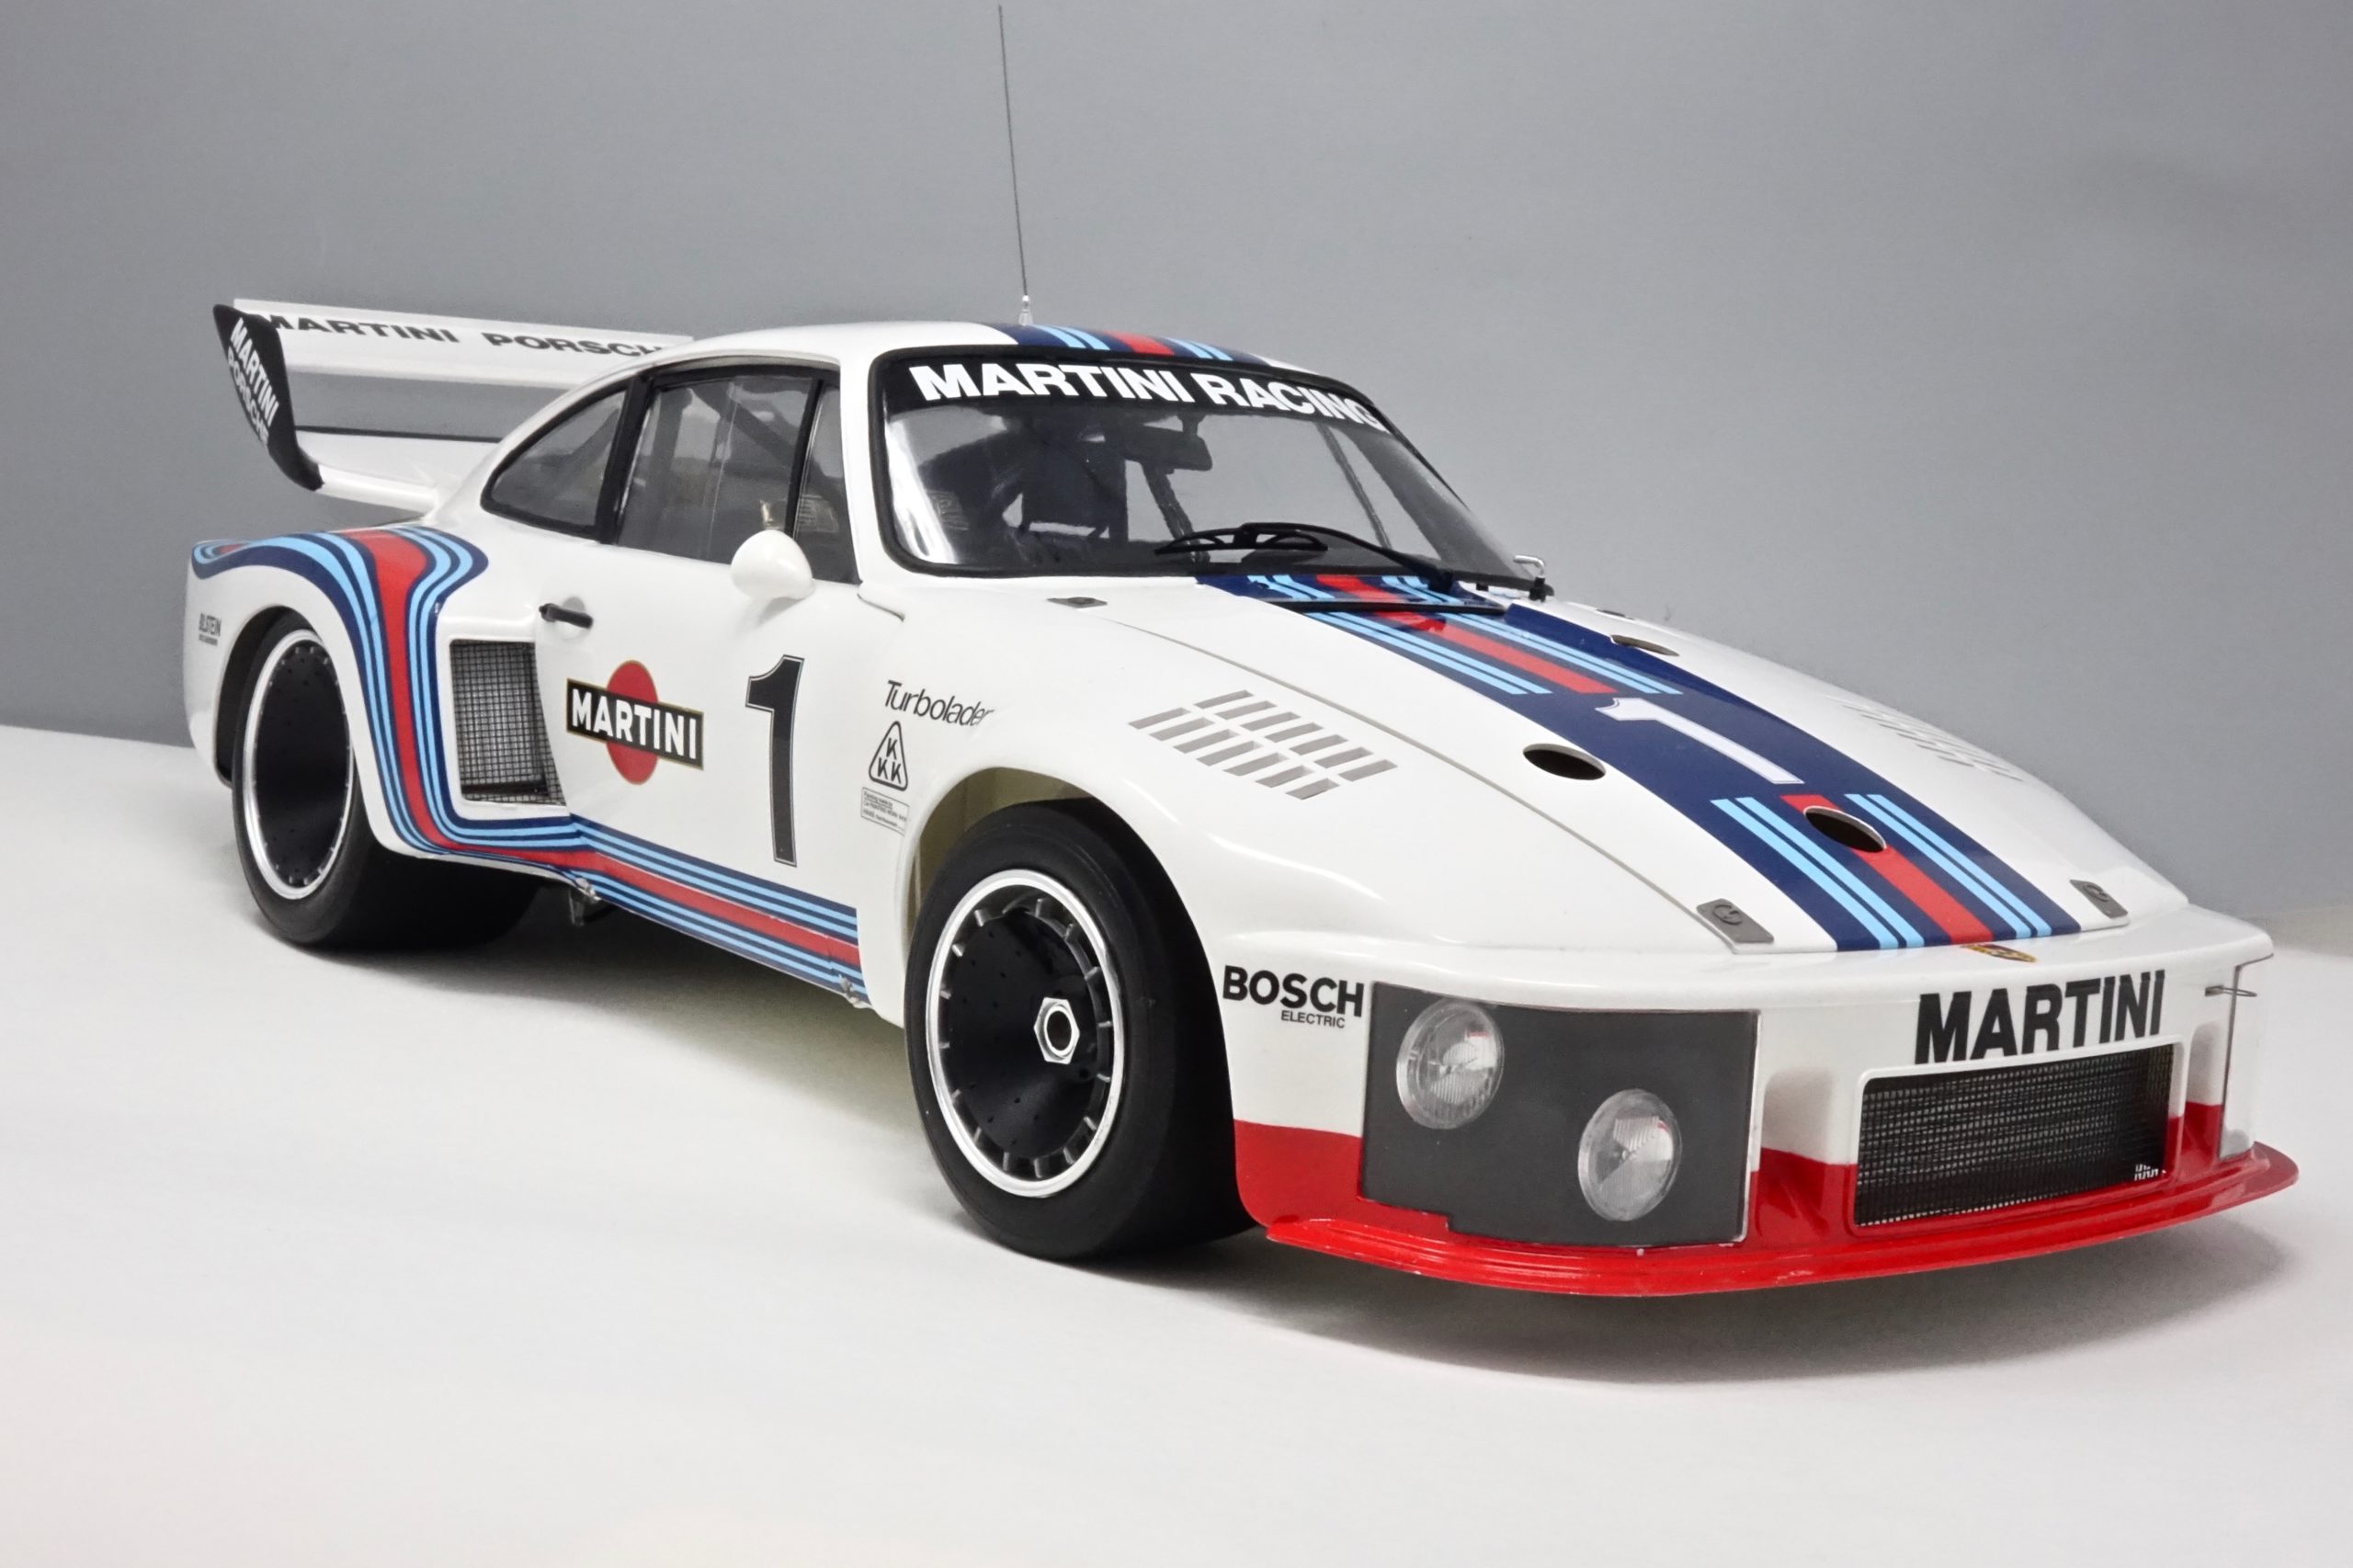
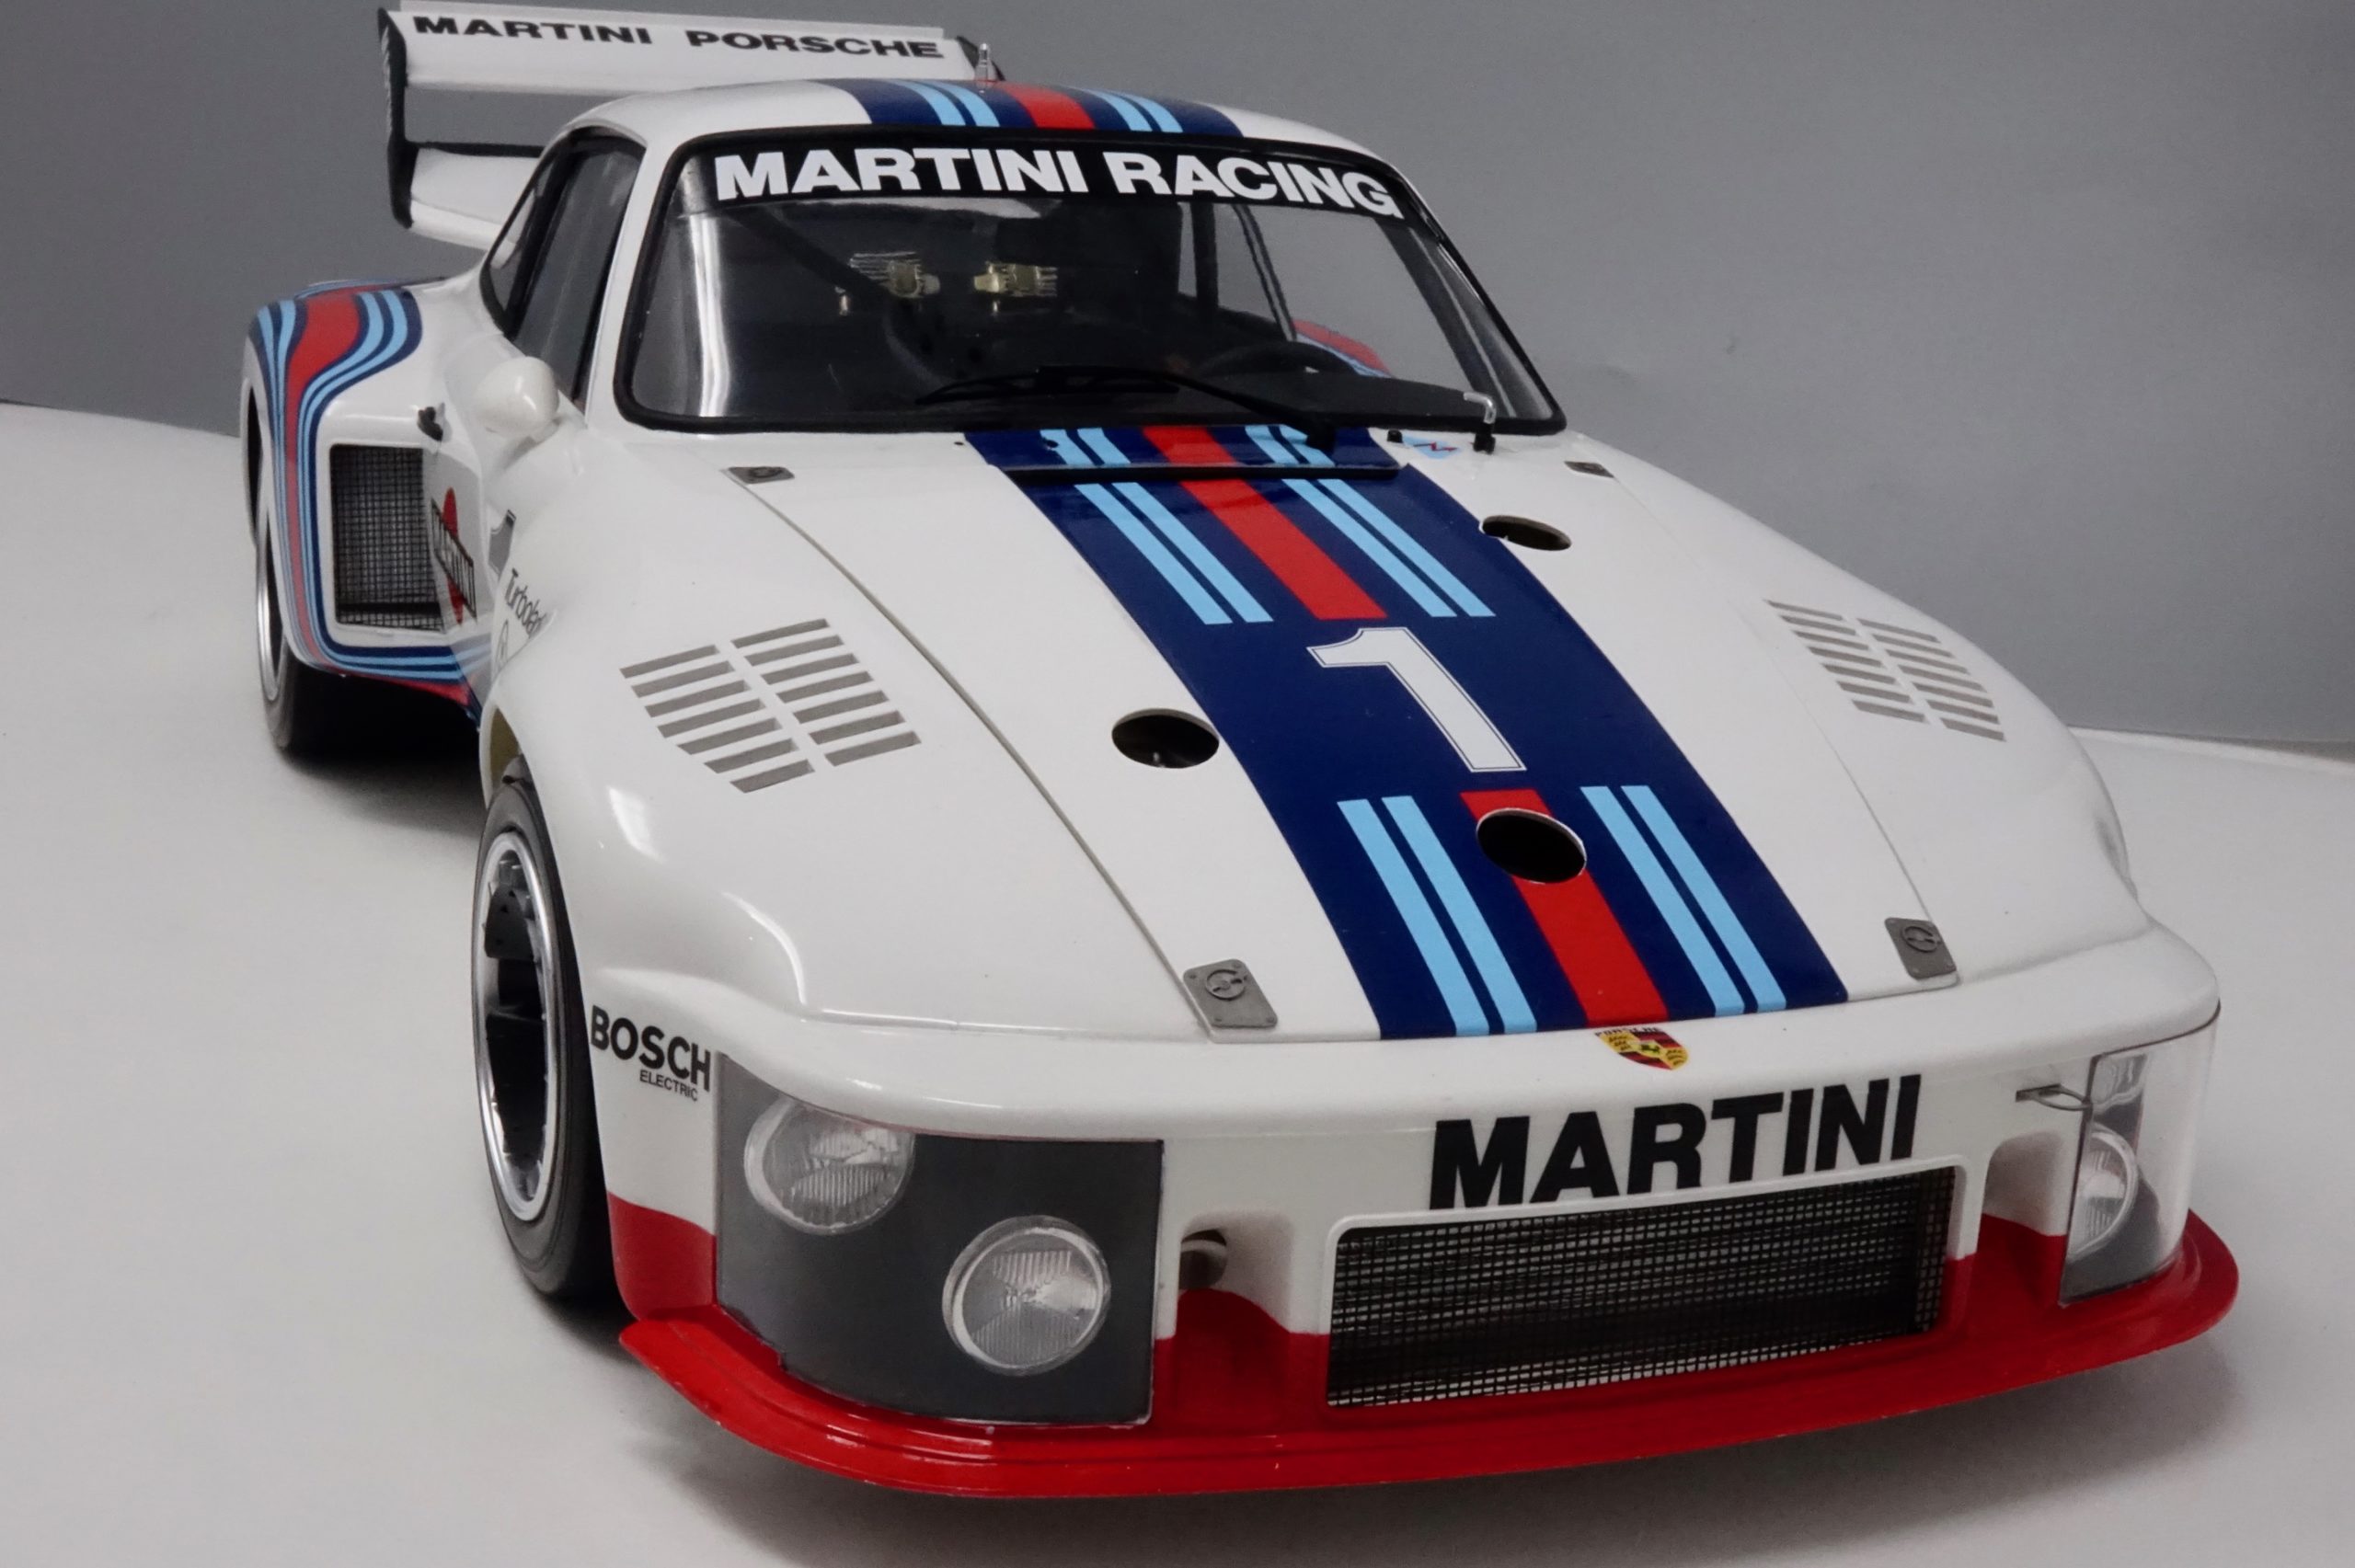
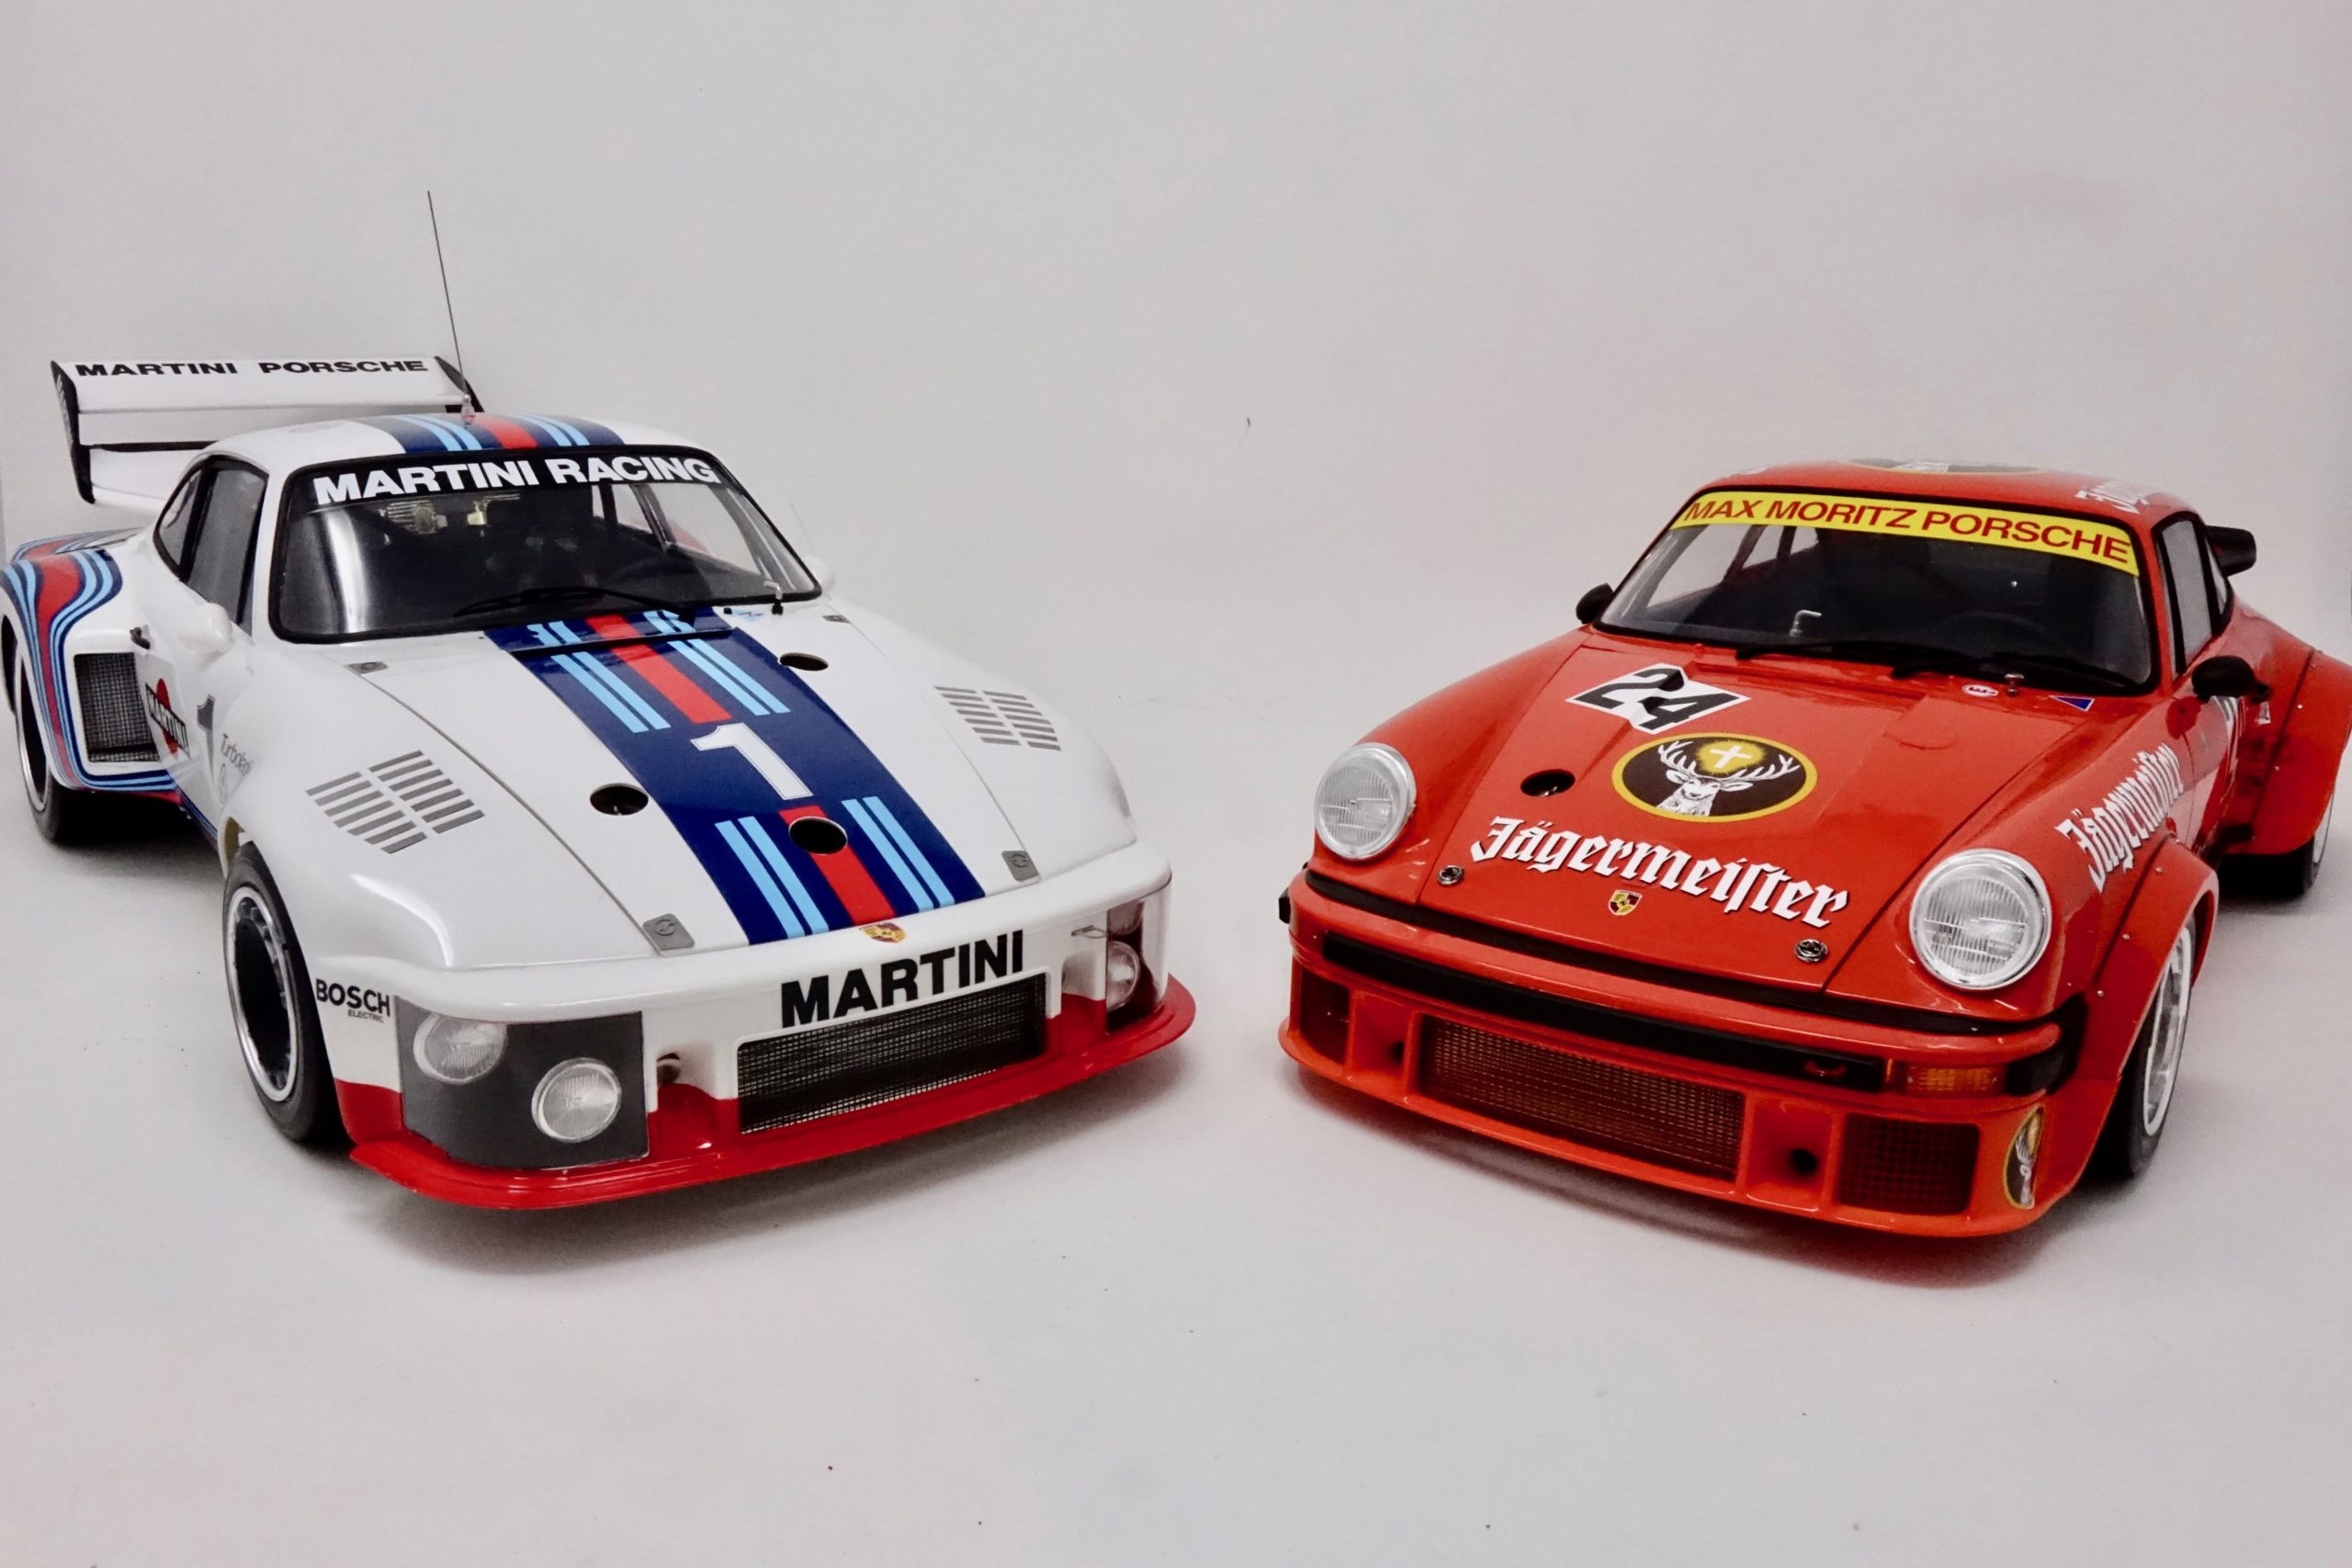
So, there we have it….. a finished model. Phew! And I couldn’t resist popping it alongside its stablemate-to-be…. my 934 🙂
Gallery


Verdict on this kit
Build time
It’s a big kit and I’m a careful builder (or is that just slow!) – but about 75hrs. Paintwork preparation, painting/buffing/polishing and decals are time consuming. To build it without de-chroming, sanding and repainting the satin chrome parts and generally just using parts straight off the sprues could save 20 hrs or so – but why rush…?
We don’t want to be rushing things!
Suggested tools
In addition to basic modelling tools and materials, I would strongly advise anyone who doesn’t already possess the tools for Photo Etch parts that this would be an ideal time to invest in a Diamond File and a pair of PE pliers. Tamiya have them both – I’ve had mine for years and without them I would struggle.
I think it would be impossible to get a good quality finish with the paintwork without an airbrush set up.
For decals, I would strongly advise the use of a modellers decal softener for the large, curved surface decals.
And, don’t underestimate how much paint is need! I used 5 bottles of Tamiya LP Pure White and 2-3 bottles of Clear Lacquer, in addition to the blacks and all the other colours. And thinners – lots of it for paint mixing and air brush cleaning.
Other than that a good selection of regular tools and materials.
Kit specific advice
I’ve highlighted in the build where particular attention has to be paid to sequences – this is particularly important in the painting stages. For anyone who hasn’t attempted a build as big as this it really is time well spent planning well ahead. The instructions – step by step – are really good, but you still have to be thinking well ahead.
I mentioned that I photocopy the whole instruction booklet – this allows me to make notes, highlight steps, check off sprue parts, add reminders to myself…etc. of course you could do this on the booklet, but it does get very messy. I also find that photocopying the decal sheet and using cut outs to check positions of complex decals like these to be very useful indeed. And I mention decals again in the paragraph below……
What we’ve taken away from this build
Firstly I have to say that I’ve really enjoyed this and what you see in the review and photos is all ‘out of the box’, with no detail-up extras anywhere.
I mentioned in the intro that I’d built the 934 Jagermeister not so long ago – and it was inevitable that I would compare it. The 934 was a fabulous kit – and this one equally so. It is more complex than the 934, as was the original car, extra bodywork being the most obvious difference. I was (ignorantly) expecting there to be a fair amount of duplication in this kit compared with the 934, but not to be – there are significant differences in the suspension, engine, interior – and more detail in many places.
The PE parts are really excellent quality and do add significantly to the kit. I would say that for any modeller with some experience this is a straightforward build. The instructions (as always the case with Tamiya) are so clear that it’s difficult to go wrong. Other than a few minor problems in some areas (which I’ve highlighted in the build notes) all the parts fit perfectly- and this is so important when the major assemblies need to come together.
I suppose the crunch details with this model are the paintwork and, especially, the big decals. They are not for the faint hearted I must say – but perhaps that’s just me – and I wouldn’t want to put anyone off because of this.
The quality of the decals is excellent and they did behave themselves . Perhaps it’s just the thought of ‘what if….? You just have to be well organised, have all your materials to hand and be confident. If you are apprehensive then leave it for the next session – a cool head is very useful!
This is a fantastic model – it’s a big kit, being 1/12 scale and would be a very impressive addition to anyone’s collection. Full marks Tamiya and more of the same please! Very highly recommended!
Name – Tamiya 12057 Porsche 935 Martini 1:12 Plastic Model Car Kit
Number – 12057
Scale – 1/12
Price – £132.95
Availability – IN STOCK – Available to Buy Now! Buy yours here!
Thanks for your excellent review and thoughts on the build. I have just retired and taking up my old hobby again with this kit. Perhaps a bridge too far, but I’m not in a hurry and looking forward to the challenge. I have had the kit for a month now and have focused on gathering supplies, reviewing the instructions, and learning how techniques and materials have changed in 40 years. I have started now and am finding the seatbelt assembly challenging. I don’t fully understand the glue-up of the PE buckle parts. My interpretation is that the 7 pieces must be glued together. Also, I don’t find the instructions for the cloth belts to be entirely clear. Since the kit includes two sets of belts, I assume that each belt has a mirror image to create a top and bottom by sticking them together. Again, great build and thanks for the detailed comments.