
Have you ever wondered how a Scalextric car is made?
We’ll be following the journey of the new Corvette C8R through its development from CAD file to delivery. Last time, Scalextric designer Caitlin Williams talked us through the design and prototype stage and we left the story with the CAD files on their way to China…

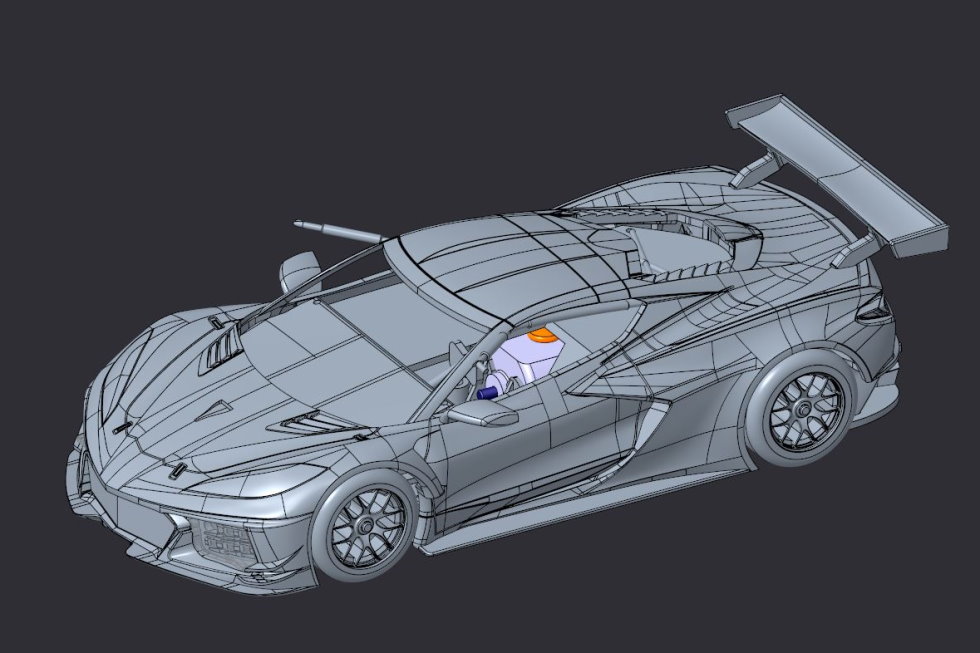

The factory in Shenzhen received the CAD files at the end of May 2020. The team in China are the experts at turning data into the physical tooling required to produce an injection-moulded model, so the next few weeks were spent with some back-and-forth between Caitlin and the factory, reviewing the files and proposing modifications. Once these changes were agreed, work began on the tooling.
Usually, it takes only eight to ten weeks before a first test shot of the mould is sent to Margate for evaluation. However, the impact of the Coronavirus pandemic meant the Corvette ‘first shots’ weren’t received until early January 2021.
“Receiving first shots and running samples is always really exciting” Caitlin said “I’m still amazed that something I designed virtually on a screen is now physically sat in front of me!
“The first thing we do is check the mouldings themselves, ensuring that there are no ‘short shots’ when the plastic doesn’t fill the mould cavity; no ‘flash’, excess plastic round the parts that’s seeped between the mould halves; no burn marks or cracks and no ‘knit lines’ – areas where you can see where the plastic has come into the mould cavity from 2 different injection points.
“Once we’ve checked the mouldings, we then test the running sample. We test the downforce and ensure it’s within our tolerance, check that the correct colour LEDs are used in the front and rear headlamps. We then take the car apart to ensure that all of the internal components are fitting together correctly. After that, the fun bit… taking it for a test drive! We then give feedback to China and suggest if any mods need making.”
“The Corvette mouldings and running samples were approved first time. We had quite a lot of collaboration with the factory before they started tooling and that ironed out pretty much all of the issues! Design revisions usually go to the top of my priority list so that it doesn’t delay production. They normally don’t take too long to complete, perhaps a day or so, most of the bigger design changes are done before tooling takes place.”
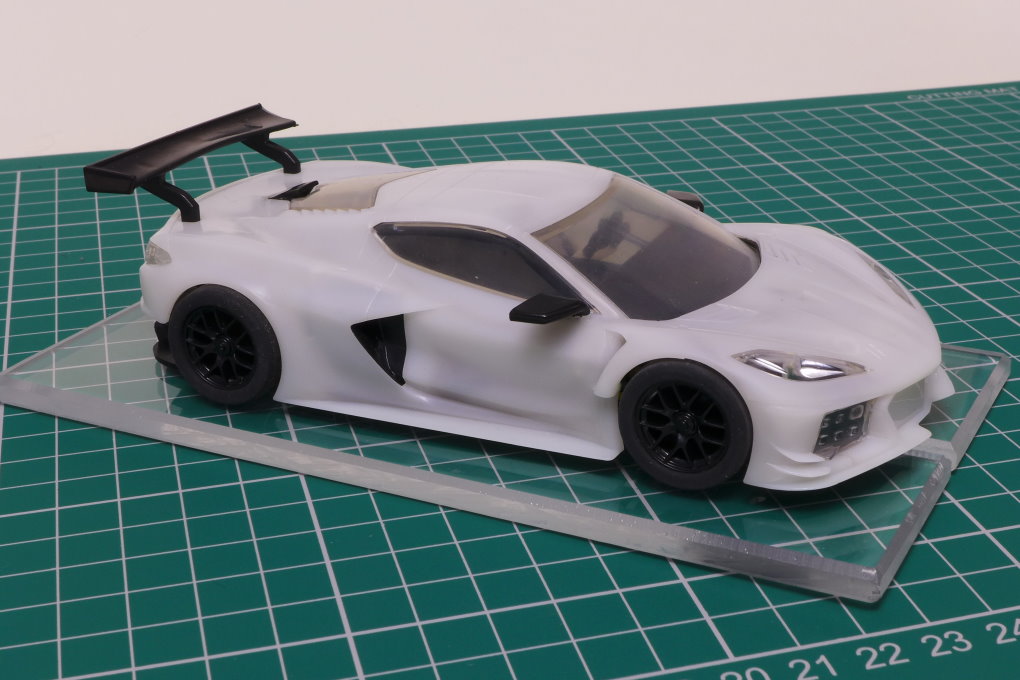
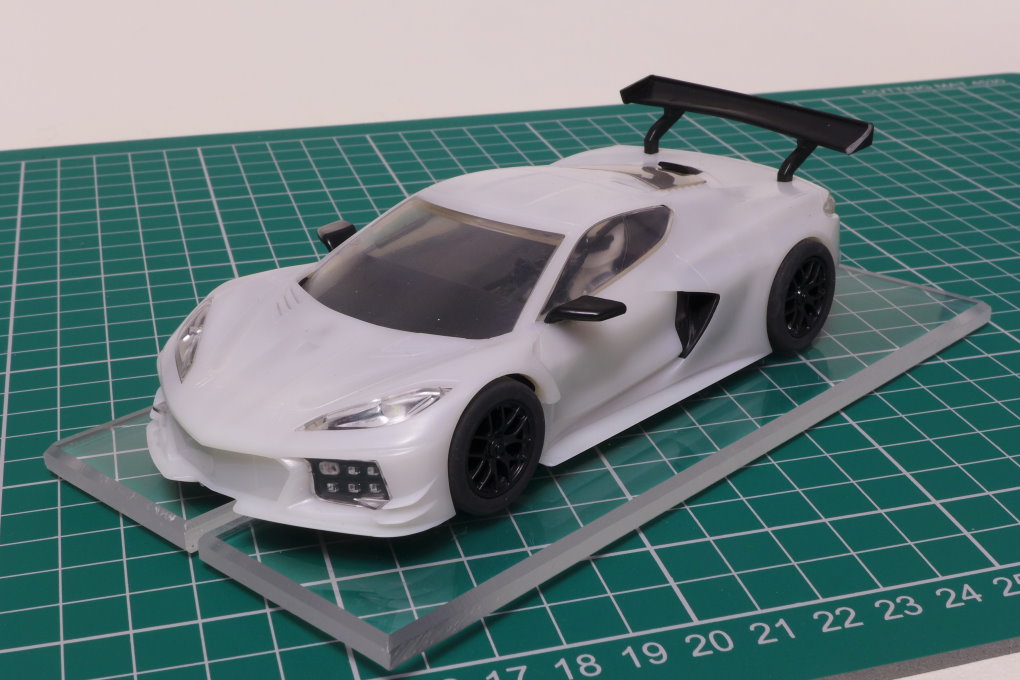
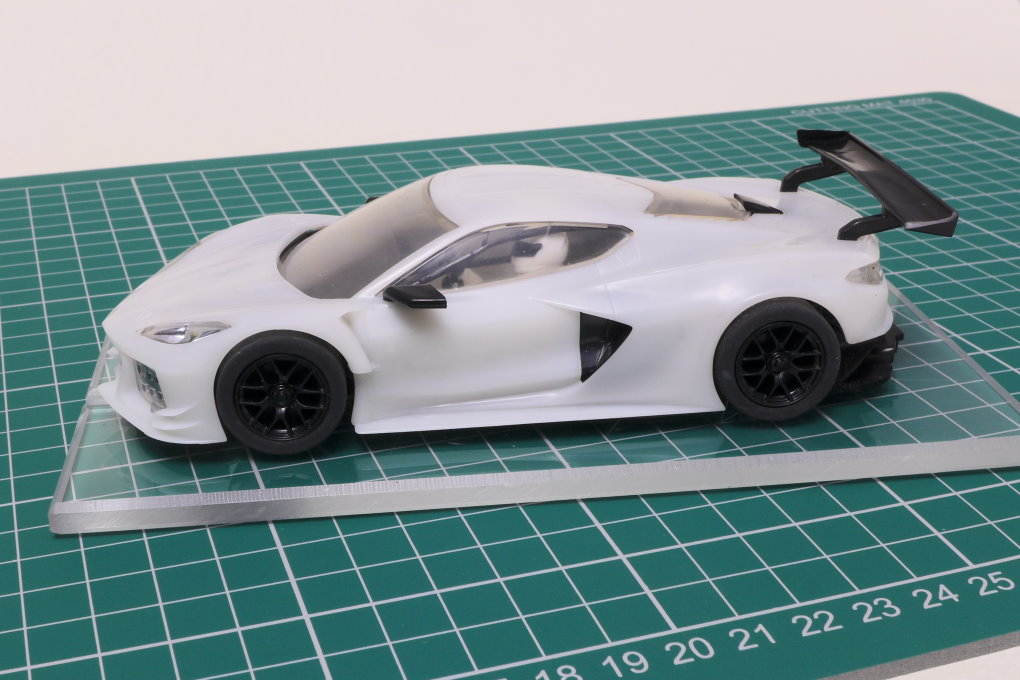
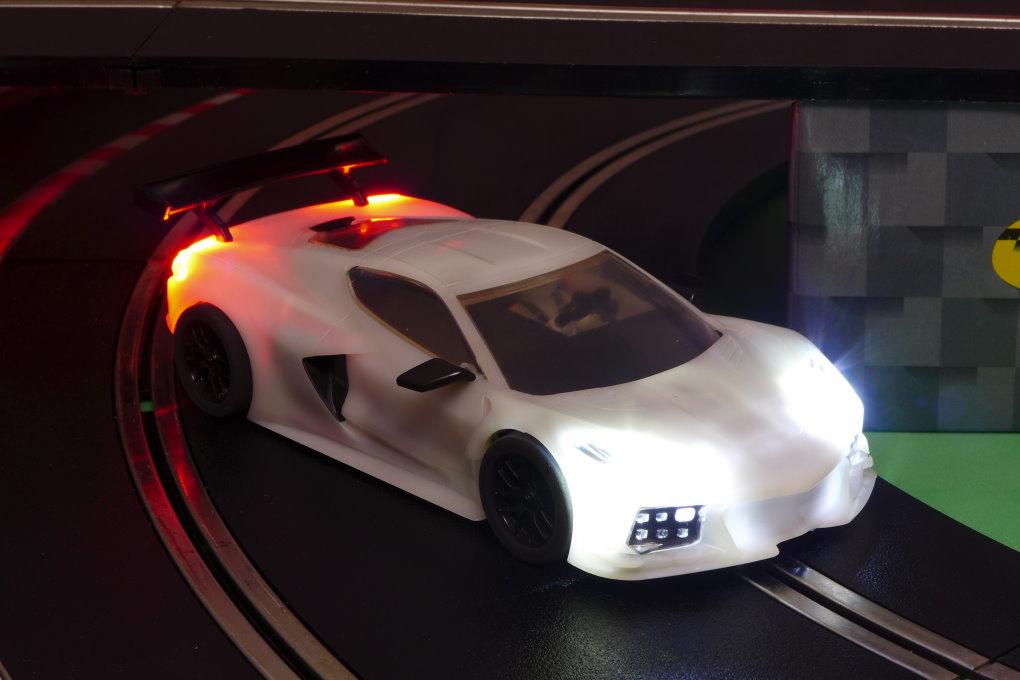
Caitlin very kindly sent me one of the first shot running samples earlier this month. Although I’d seen and handled test shots before, it was fabulous to be able to spend time taking a close look, taking the car apart and running it on my home test track. The first thing that struck me were the fabulous lines of the car – Caitlin has successfully turned the raw data of the Chevrolet CAD drawings into an exciting-looking GT slot car.
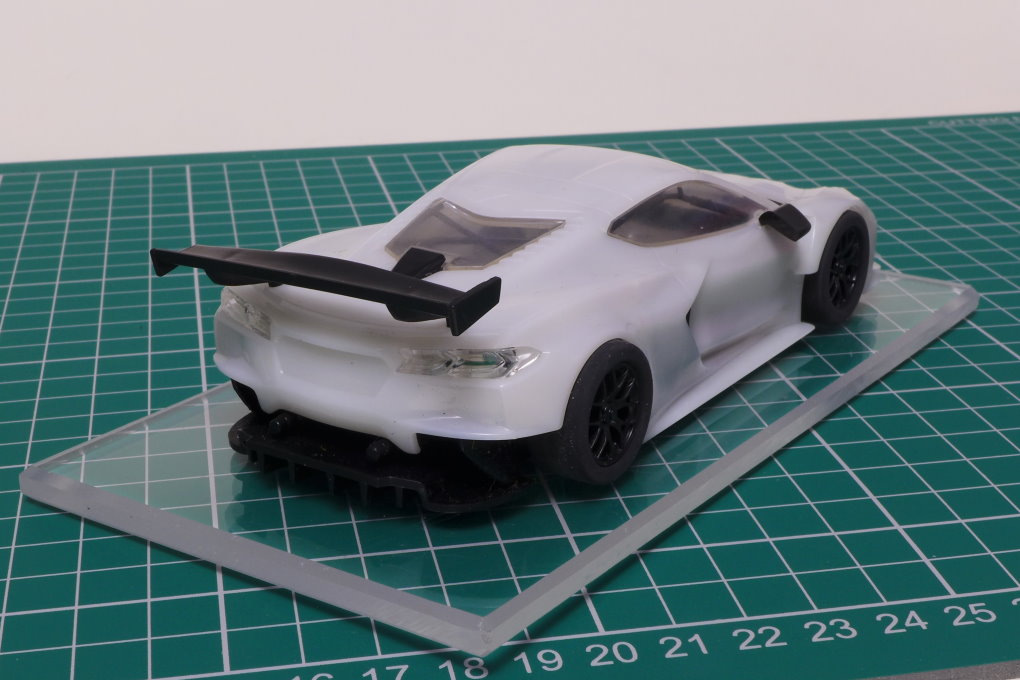
I admired the precise but robust detailing at the front and the separately moulded side vents Caitlin mentioned last time. There is the usual flat tray cockpit interior, which includes a roll cage and rear air intake. The windows, headlights, rear lights and lower front foglights are transparent mouldings. The rear axle brace is part of the body shell. The separate wing mirrors are bulky – as they are on the real car – and the rear wing is low and sleek. The wing was loose on this first shot, and I push-fitted a spare right mirror (the original was missing) – that’s why it’s a bit ‘droopy’. It will be interesting to see how the fitment of these separate moulding appears on the decorated samples. I have to say, it took some work for my untrained eye to look at this monochrome test moulding and imagine the finished car.
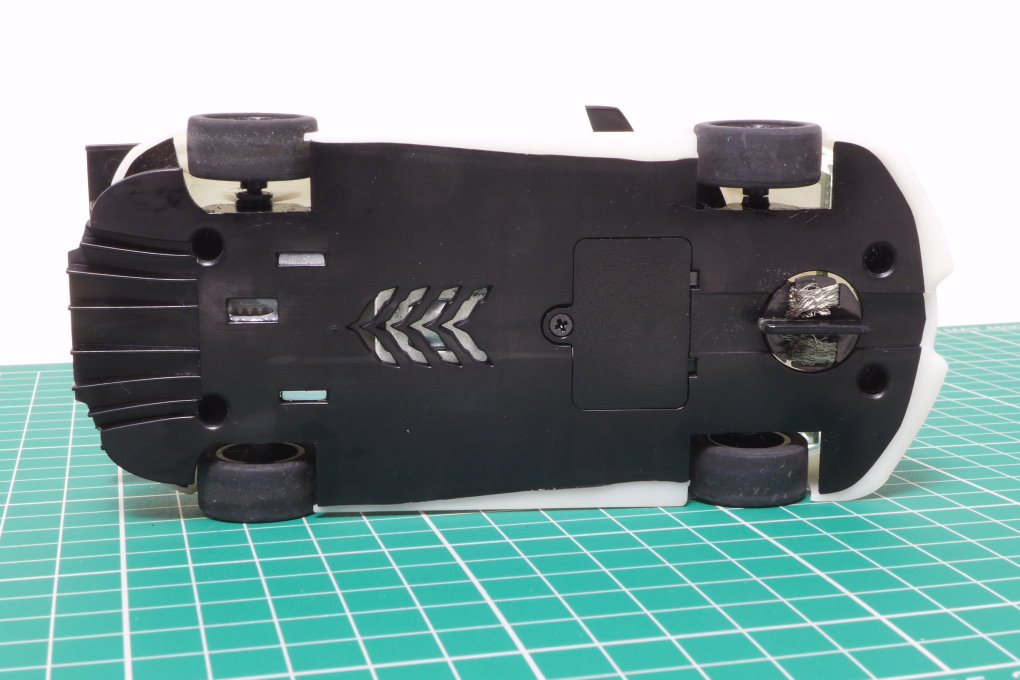
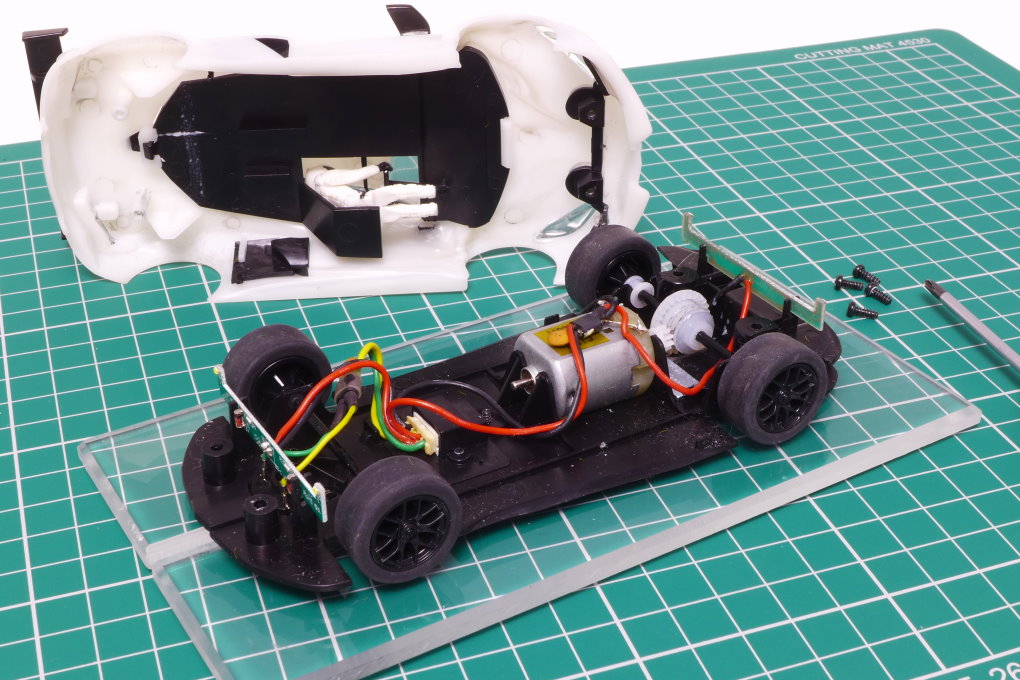
Inside is the now standard GT in-line motor configuration and front and rear LED light boards. The car is Digital Plug Ready, with the gap between LED position and end of the guide 15.7mm – very slightly outside the ideal range for the ARC Pro sensors, but perfectly good for reliable digital lap counting. Underneath is flat and smooth – engraving the chassis is one of the last things to be done. There are some cool chevrons over the motor cover, plus a pronounced GTLM-style diffuser at the rear.
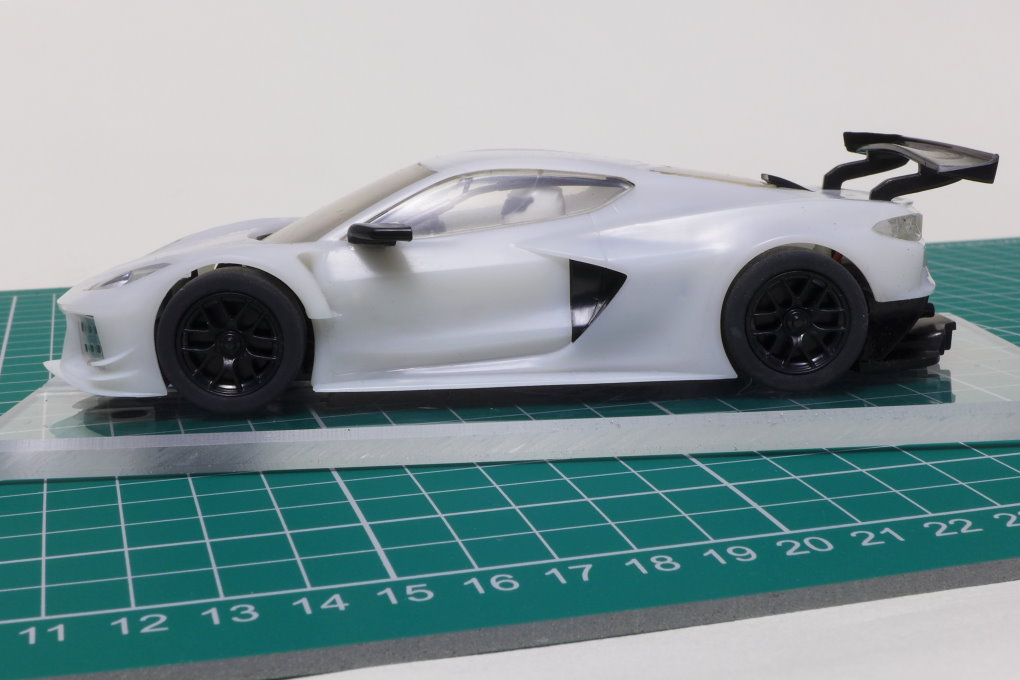
Four screws attach the body to the chassis – three is more common on the newer Scalextric GT cars, but I didn’t find the extra screw at the back inhibited any body rock. The width of the body at the rear wheel wells was exactly 64mm. The wheels did protrude slightly – I presume tucking those inside will come later in the development process. Wheelbase is 85mm and the distance from guide pivot to rear axle 91.5mm. I approximated the height at 37mm.
The traction magnet is positioned just in front of the rear axle and the reading on my DIY magnet gauge was 49.1g – that’s with the magnet in the car and rear axle sitting on the scale. Almost identical to my Scalextric Porsche 911 RSR and similar to the other Scalextric in-line GT cars.
On my SL6 test track, the car initially had very little grip at the back. Cleaning the tyres on tape and roughing them up just a smidgen made a big difference. I also loosened off the body screws a little. It looked like the Corvette had already completed a lot of test laps with that wing mirror broken off already! Although the motor seemed a little tired, I found the car really good fun to drive. It wasn’t glued to the track and the rear would slide rather than the car tip. That’s exactly how I like it – and is a good indication that non-magnet Scalextric racers will find this an excellent addition to the GT grid. The chassis is low and flat, but it coped fine with the precipitous crest on my layout’s flyover.
I fired up the ARC app for some two-minute timed runs for this first shot running sample. In three runs I worked up from 22 laps to 23 and reduced my best lap from 5.13 seconds to 4.98 and then 4.85. Just previously, I’d run 24 laps and 4.65 seconds for my benchmark Porsche 911 RSR. So that was pretty good for the Corvette, especially as the motor was down on some horsepower. The very smooth and predictable handling was extremely encouraging and I had a strong feeling that lap times would drop further the more I drove the C8R. Unfortunately, it had to go back to Margate…
Since the arrival of the first shot cars, Caitlin has loaned one to the Hornby graphic design team to work on the two liveries. We’ll be looking at that part of the development process next time.
I hope you’ve enjoyed that insight into the ‘first shot’ phase of the Scalextric Corvette C8R. I want to thank Caitlin and her colleagues for sending me the car and answering my questions for this blog – as always, I have learned plenty from them. Join me next time, when we’ll continue with the Corvette’s long journey from CAD drawings to the Jadlam warehouse.
By the way… The silver C8R will be the first car to be released – scheduled for the third quarter of 2021 – with the yellow car following at the end of the year. They can be pre-ordered here and here.