
Scalextric completely redesigned their 1:64 scale slot car system in 2019. They did a great job.
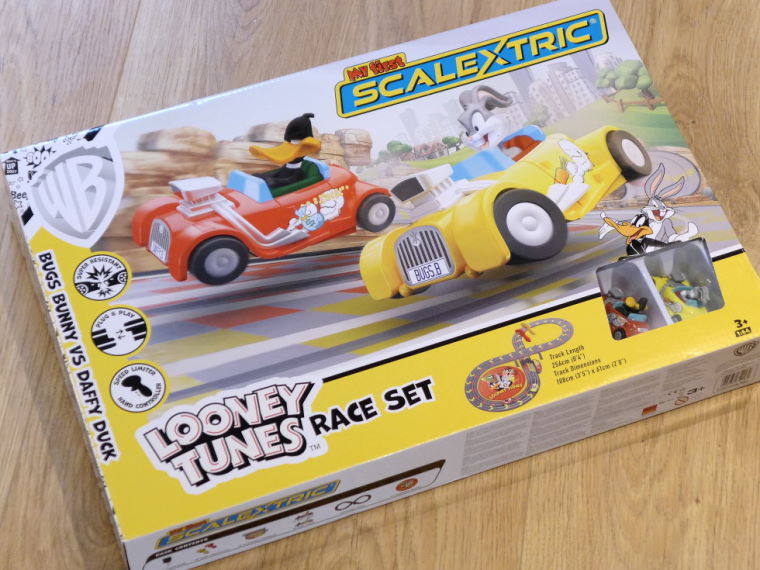
The new Micro Scalextric and My First Scalextric sets are a perfect first step into slot car racing and a brilliant addition to any family’s toy box. You’ve read the reviews, studied the buying guides, chosen your first set – and now it has arrived. To help you get the very best experience from your set, here are a few tips and tricks.
Preparation
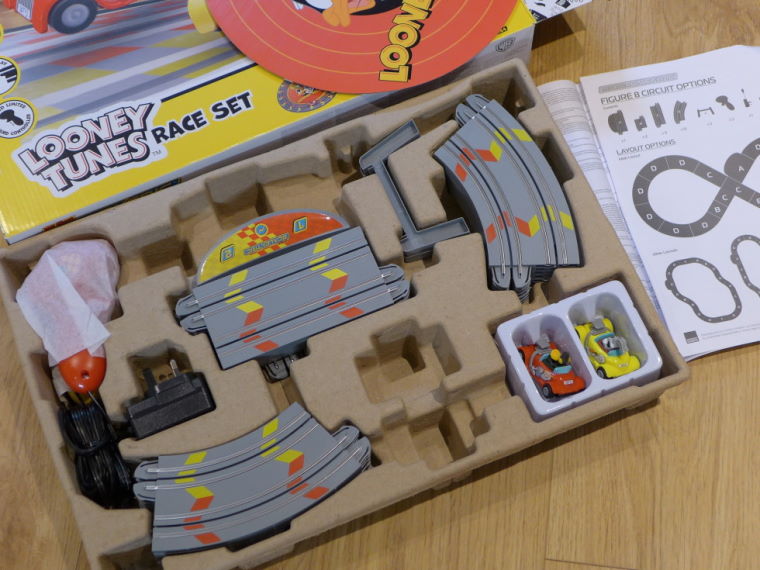
If the set is a Christmas or birthday present, it is important to be prepared for the big day. Give yourself an hour of quiet time beforehand to explore the box and its contents. The first thing to do is see if there’s anything else you need to buy. The Micro and My First Scalextric sets are sold as either mains or battery-powered. The mains-powered sets are ready to run, the battery-powered sets require six AA batteries. Jadlam are one of the only retailers to offer both power options for each set.
The instructions are the next thing to find and to read. These give clear advice on setting up the track, cars and controllers – plus some basic maintenance tips. There are some important safety notes in there too. The instructions should be read and kept safe. You could even photograph or scan them as a backup.
Before you unpack the set, take a picture to remind you how everything fits in the box – this will be useful when you pack away. If you haven’t already, vacuum the carpet or sweep the floor where you will set up the track.
Track
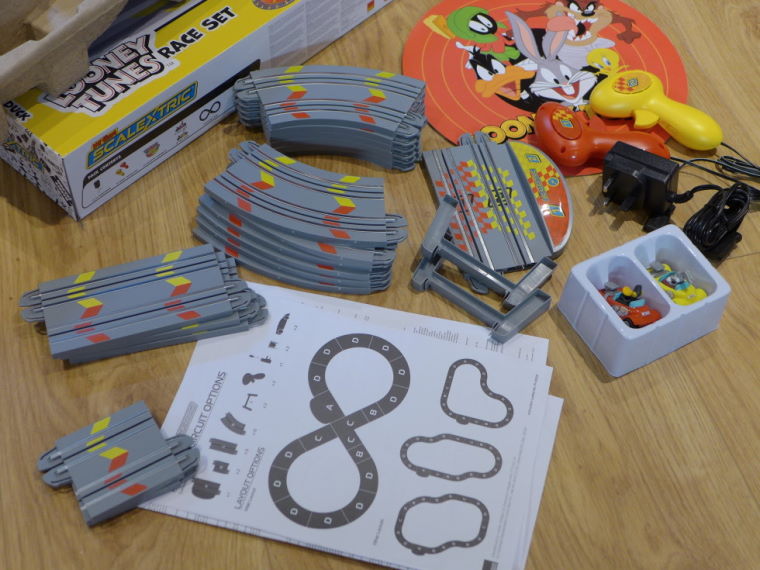
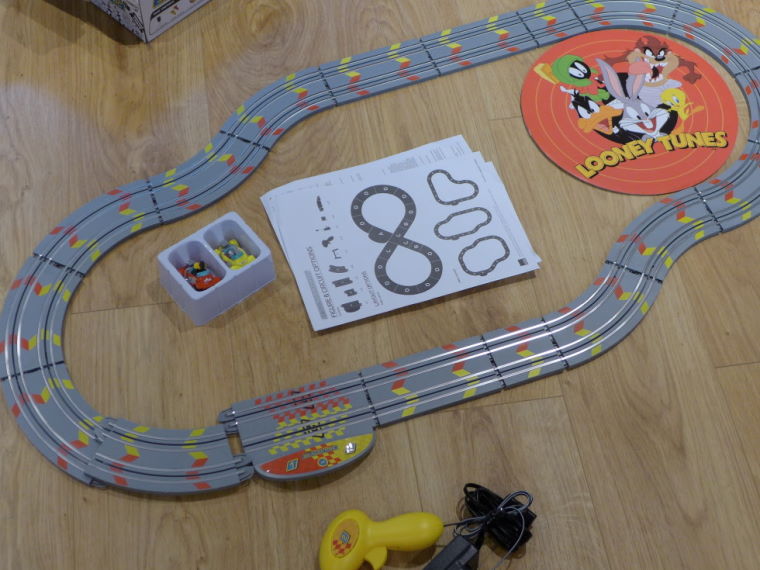
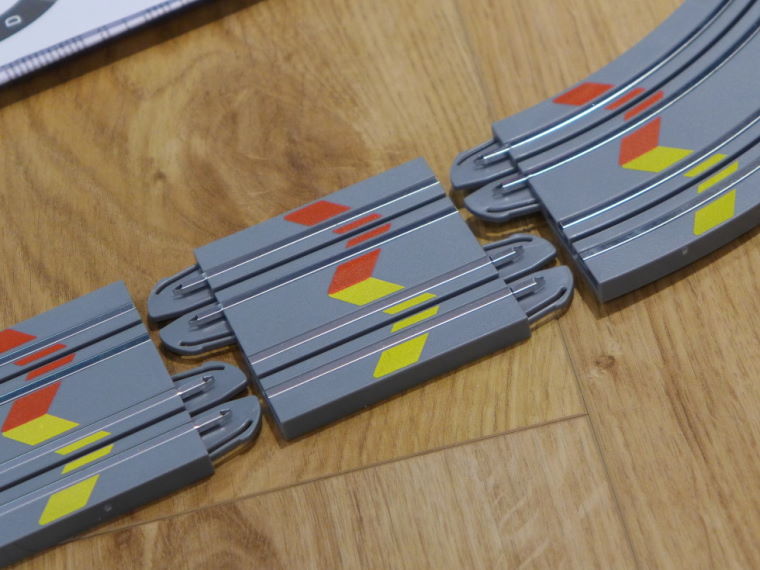
Now it’s time to unpack the box! Use the instruction sheet to identify all the contents and then to lay out the track pieces as a circuit – but don’t connect them yet. There will be a number of layout options suggested – even in the smallest My First Scalextric sets – and you will quickly see which ones will fit into the space you have available. Of course, it’s great fun to design and build your own circuits, but it’s best to follow the plans in the set instructions for this first test.
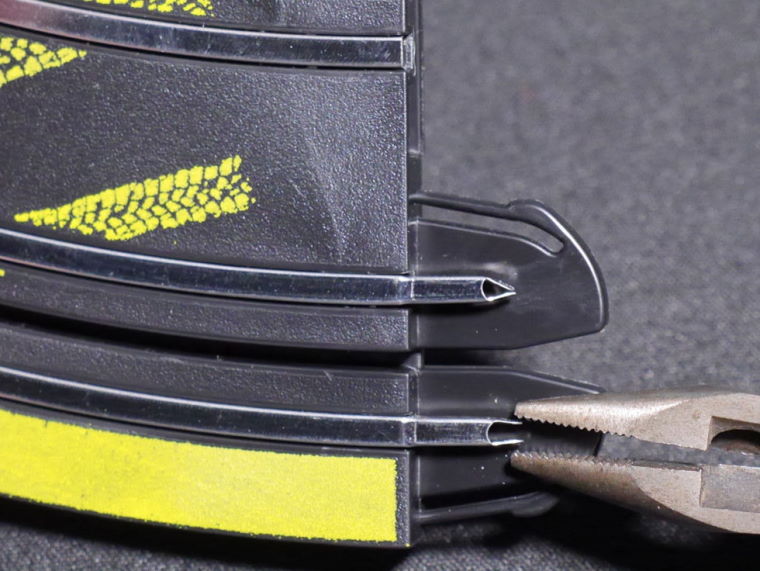
When you’re ready to start connecting up the track, take you time to get it right. Keep the track pieces flat on the floor and straight-on – avoid connecting at an angle. Make sure the metal tabs are seated in the corresponding metal holes on the next piece of track. If you look closely, there are two tiny prongs on the end of each metal tabs. These can catch when connecting the track and are best closed up with a small pair of pliers. Do be gentle!
The plastic clips need a firm push to click into place and to hold the track together tightly. These are really well designed and do their job perfectly. It’s always a good idea to build any loop-the-loop sections first and connect them into the layout as a complete unit. The final connection of any circuit is always the trickiest – keep the pieces as flat and as straight as possible. Once the entire track is connected up, add the bridge supports if you have flyover in your track design. When taking the track apart, pull firmly and straight and flat – just like assembling the track – although the very slightest of wiggles can help.
Controllers
The controllers have four power-limiting settings – 25%, 50%, 75% and 100% – selected by a sliding switch just below the trigger. The switch limits how far the trigger can be pressed and therefore how much power goes to the car. Full power on the 25% setting will be reasonably slow and might not be quite enough to get round a loop-the-loop. The 50% and 75% settings are perfect for full-throttle racing, with the highest setting requiring some skill and throttle control to keep the cars on track – especially on the bigger sets. These controllers are ideal for small hands and for learner-drivers – guaranteeing lots of fun without too many crashes.
Cars
The cars in the Micro Scalextric and My First Scalextric sets are really robust and trouble-free. They are fitted with traction magnets which keep them stuck to the track. They may fly off on the corners if you are using the 100% setting – that means you are going too fast! Remember, fast on the straights and the loops, slower on the corners.
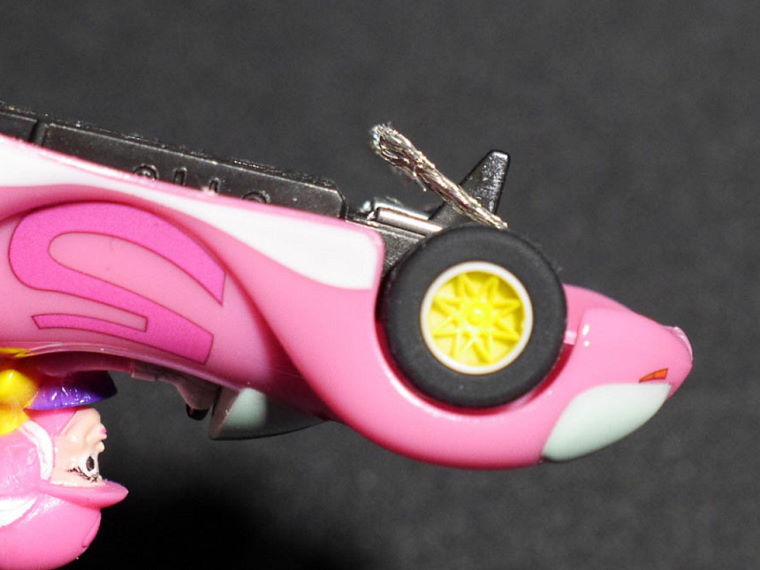
It is important to keep an eye on the pick-up braids at the front. These connect the car to the electrical power in the track. The photo below shows how the braids should look. The end of each braid should be pointing straight back towards the rear of the car at all times. The braids can get crooked after a crash – it’s always a good idea to check they are nice and straight. Lifting the braids to a 45-degree angle does help with connectivity and smooth running.
Spare braid plates are included with the set – and available separately (part number G8047 here) – if the original ones get damaged or worn beyond just needing to be straightened-out. You’ll need a small cross-head screwdriver to change the braid plate, which is explained in the set instructions.
Removing the screw also releases the car body. Very occasionally, the body can get a little crooked and may affect the performance of the car, making it slow or more likely to crash. Simply remove the screw and the body, replace it so it is straight and with the two rear clips in place – and then reassemble.

Maintenance and problems
The new Micro Scalextric and My First Scalextric sets are so well designed that – with careful preparation – you shouldn’t experience any problems. Of course, looking after the set and keeping the track and cars clean is important. A track runs best and stays cleanest on a board or table, but if you are using the floor – as most of us do – you will occasionally need to remove carpet fibres from the cars’ axles and gears. This is explained in the set instructions. Every now and then, clean the rear tyres on the sticky side of some masking tape – see the picture above. When you are ready to pack away, it is always a good idea to store the set in the original box, using the picture you took earlier to make sure everything fits.
What next?
A Micro Scalextric or My First Scalextric set is a perfect first step and is brilliant fun. However, most people will want to add to it pretty soon. Although the new system is only a couple of years old, Scalextric are regularly adding new cars, track pieces and accessories to the range. You can find plenty of options on the Jadlam Toys & Models website here. A good-value upgrade is simply to buy a second set – you’ll get a load more track, two more cars and spare controllers.
The 1:64 scale means that there are plenty of non-Scalextric accessories available to make your track look great. Lego goes really well with Micro Scalextric – especially the figures. You can find Jadlam’s range of Lego here. Mixing in different toys from the toy box can really enhance the enjoyment and allow some wonderfully imaginative play. An afternoon creating scenery from coloured paper and craft materials can also transform the look of your track – particularly for the superb Looney Tunes, Wacky Races and DC Comics themed cars that are available.


If you want model railway levels of realism, then Micro Scalextric is a perfect scale to utilize the various OO and HO gauge buildings, accessories and scenics available in the Hornby and Railways sections of the Jadlam website.
Help and advice
If you have a problem with the set that can’t be solved using the instructions, do check the FAQs and the various How To blog posts on this site. If those don’t help, then contact Jadlam for support. Although the Jadlam staff don’t work weekends or the Christmas holidays, you might get answers from helpful enthusiasts on the various Scalextric fan groups on Facebook and the Scalextric Forum at www.scalextric.com.
Finally, the new Micro Scalextric and My First Scalextric sets are not compatible with previous pre-2019 versions. You can find out more in the Micro Scalextric History and Compatibility blog post here.