
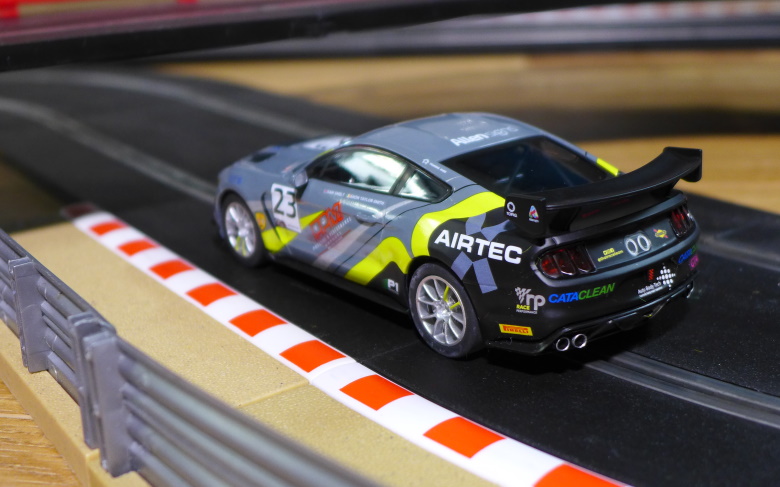
We all want a new car to drive perfectly out of the box.
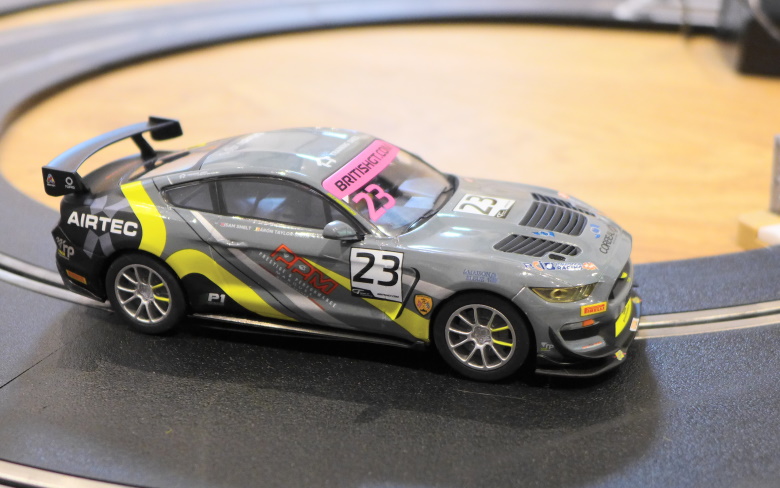
Sometimes we’re lucky, but usually the car needs a little work to get it running like it should. In this post we look at how to quickly check over a new car and then introduce four easy tweaks to improve handling and lap times. The test bed for this process is the new Scalextric Ford Mustang GT4 (Reviewed here). By the end of the article, we’ll also have put together a very basic Scalextric toolkit. Don’t forget that all the parts of a slot car are described and explained in the ‘Scalextric Tuning 1: Parts of a Slot Car‘ blog post.

Checking A New Car
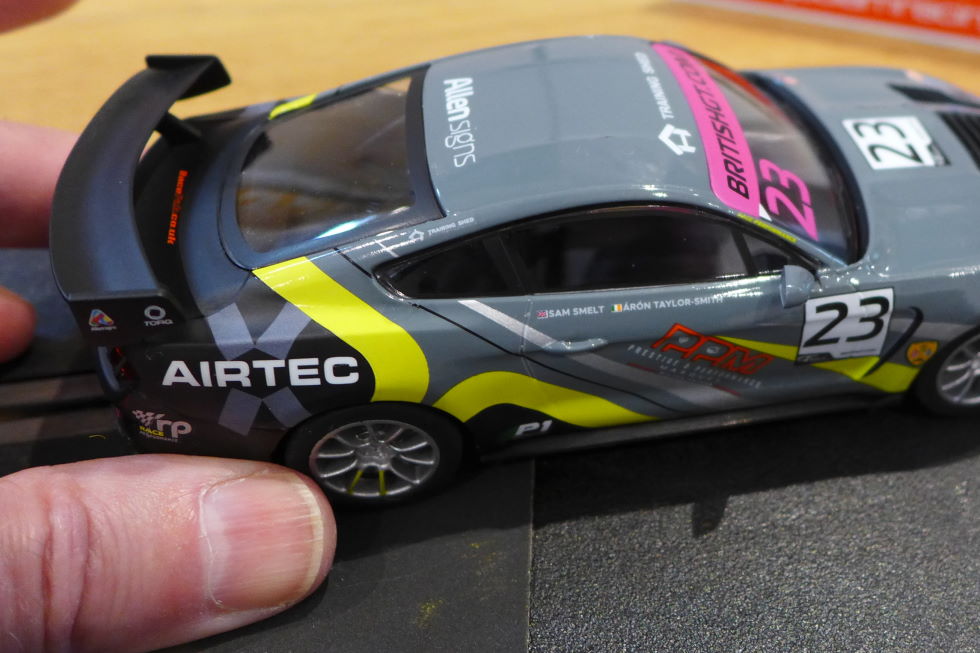
The Mustang looked sensational in the box. It had survived its long journey from the factory in the Far East, via the Scalextric warehouse in Kent and Jadlam’s retail store in Somerset. Scalextric cars are designed to be simple and robust and are manufactured in factories specialized in producing electric-powered models. They are lubricated and tested at the factory and go through a quality control process. Although I have seen the occasional car that is sub-standard, I have been delighted with almost all my Scalextric cars.
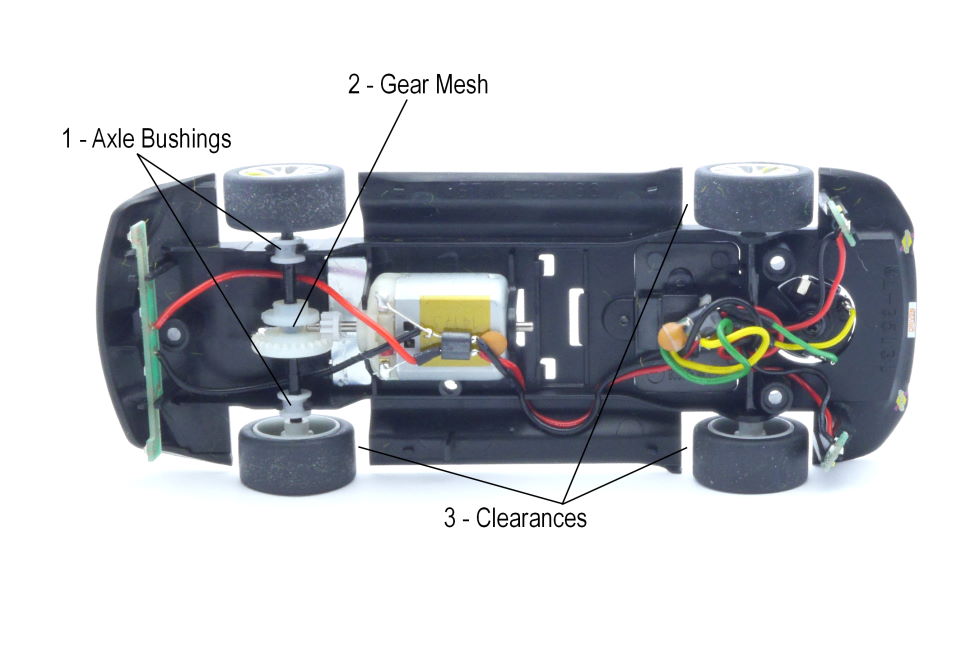
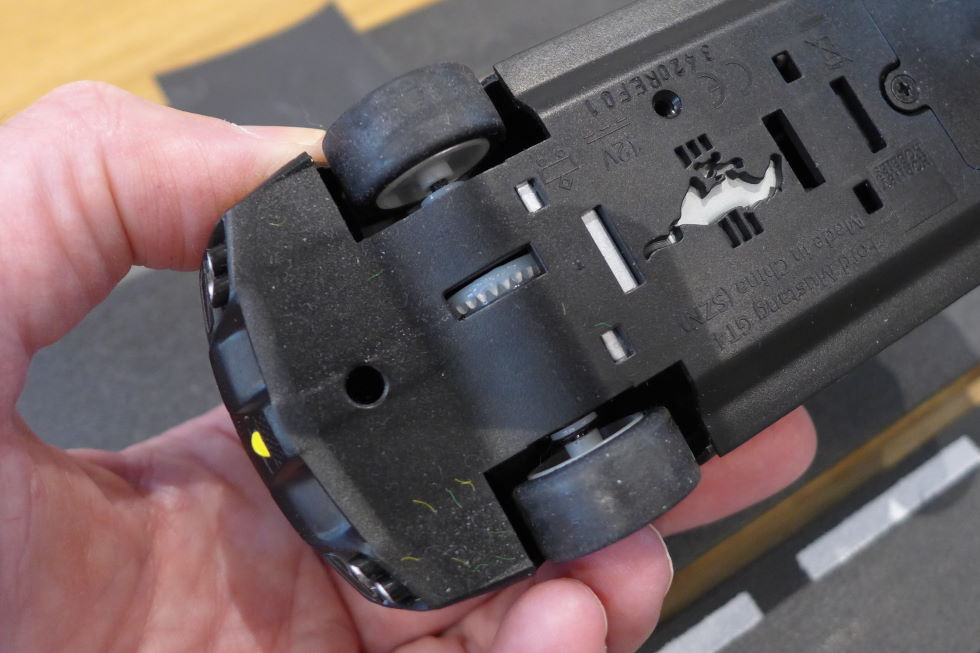
When I take a new car out of the box, I give it a very quick once-over. After checking nothing is missing or broken on the body, I roll the rear wheels with my finger-tips and make sure the mechanism is nice and smooth. I do the same with the front wheels. I also gently move the guide blade from side to side to make sure it is not caught on anything. If something doesn’t feel quite right, I remove the body by unscrewing the three body-fixing screws on the underside of the car. You’ll need a small ‘Size 0’ cross-head or ‘PH0’ Phillips screwdriver for this.
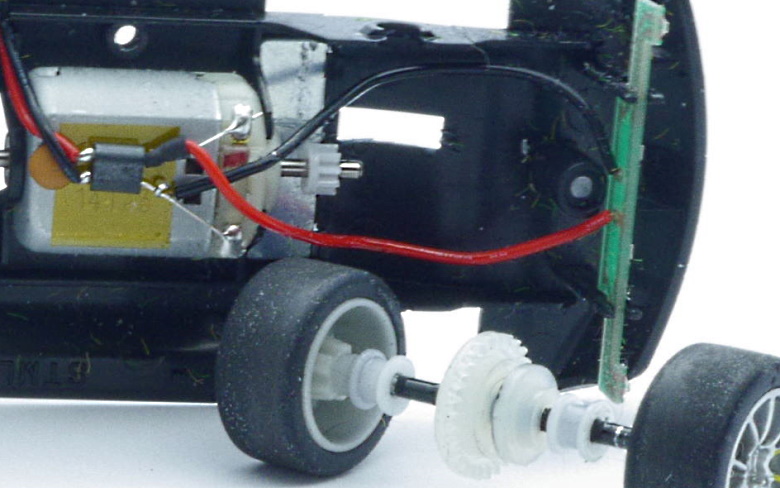
The main thing I’m looking for is if the Axle Bushings have popped out of their sockets in the underpan. They can easily be pushed back in: line up a bushing with its socket and push down firmly on the wheel – then repeat with the other side. Next, I look at the Gear Mesh, which should be smooth and give a satisfying clicking noise when you roll the wheels. If not, a gear might be cracked (I’ve not yet seen this on a Scalextric car), but more likely you’ll find a piece of debris stuck in between the small pinion gear and the larger crown gear. I have seen one of the wires to the rear light board caught in the gears – potentially damaging the gears (and the wire!) and burning out a digital chip. I presume this is why the Scalextric factory now fits the wires under the axle. Also check the motor is firmly in the motor mount and has not lifted up at the back. If so, it should click back with a firm push.
The final thing to look at is the Clearances between the tyres and the underpan. There are huge gaps on the Mustang, but some cars might be tighter and a little ‘flashing’ from the moulding process could be rubbing on the tyres. Use an emery board to sand away any flashing or increase the clearance a little. With the body back on, check the tyres aren’t rubbing on the body. Slightly loosening the body screws will help.
While the body is off, you can clean up any excess lubrication that has found its way onto the underpan. Lubrication is important on the axle bearings and gears, but too much just gunks up a car and can end up causing an oil-slick on the track. Use a cotton bud (Q-Tip) to mop up any oil or grease from inside the car – and if any has oozed out of the bottom of the underpan.
You can also check that there are no loose wires (especially the green and yellow wires to the braid contacts) and the wiring loom plug is firmly in the socket of the DPR hatch (or digital plug on a digital car). Loose wires are rare on a brand new car, as the cars are checked on a power source at the factory.
A First Outing On Track
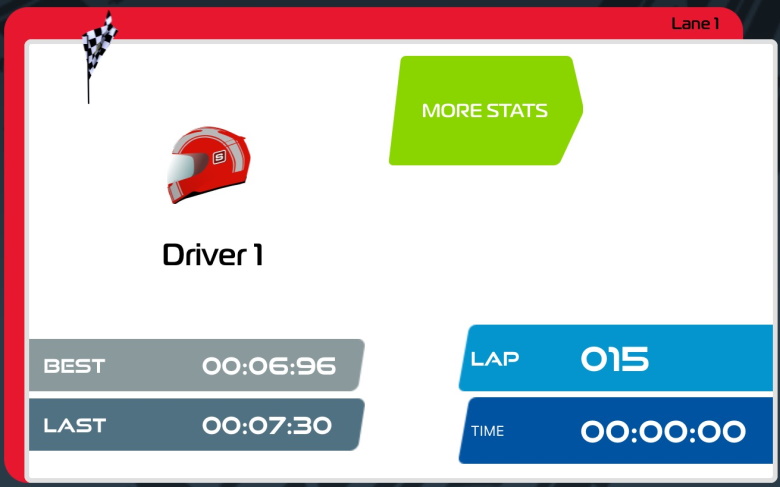
My New Mustang GT4 was in great shape out of the box. Everything felt smooth, but I had look inside anyway. Nothing was out of place and the lubrication was perfect – enough, but not too much. I put the car on my SL6 track (see blog post here for details of the track and my test routine), did a few test laps and was a little alarmed how tail-out the car was – there seemed very little grip at the back. I set up a two-minute endurance race in the ARC app and did 15 laps and a best time of 6.96 seconds – not great at all…

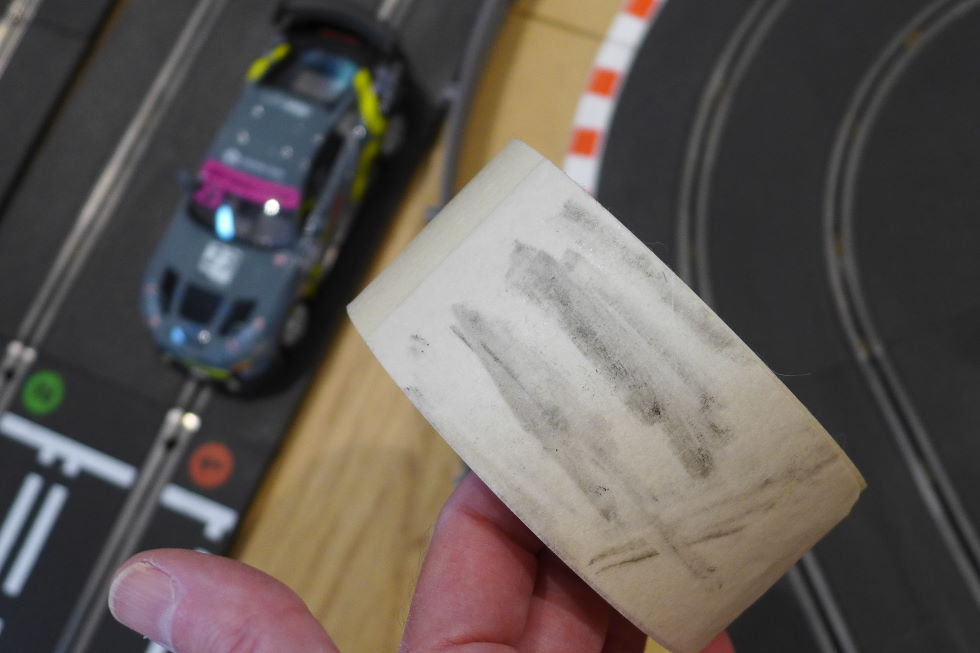
Tweak #1 – Tyre ‘Scuffing’
A lack of rear-end grip isn’t unusual with a new car and some ‘scuffing-up’ of the tyre surface is a quick and easy tweak. This requires a piece of sandpaper that is big enough to fit under the rear of the car so both tyres are sitting on it. I usually go for 600-grit paper.
This next bit needs some dexterity! Lay the sandpaper on the track – underneath the rear tyres. Hold the rear of the car up and rest your hand on the sandpaper to keep it in place. With your other hand, squeeze the throttle trigger hard and gently lower the rear wheels onto the sandpaper… The first time you do this, the car will probably shoot down the track and the sandpaper will fly off in the opposite direction! Be patient and you will get the knack.
The idea is to just lower the tyres enough so there is a bit of bite on the grit of the sandpaper – enough to begin to rough up the surface of the tyres. At this stage, all we need is a few quick 2-second sandings – there will be a mottled appearance of shiny bits and rough bits on the tyre surface. A proper ‘tyre truing’ will come later… but this ‘scuffing’ is a quick and easy tweak.
**Caution** I don’t recommend sanding tyres when a digital chip is fitted in the car. The added friction of the sandpaper requires more power to go through the chip to the motor. This risks damaging the C7005 retro-fit chip, the C8516 F1 digital plug and older versions of the C8515 standard digital plug. The latest version of the C8515 plug and the Slot.it SP15B chip are both designed to handle more power, but I would still urge caution. It is always advisable to remove a chip before tyre sanding.
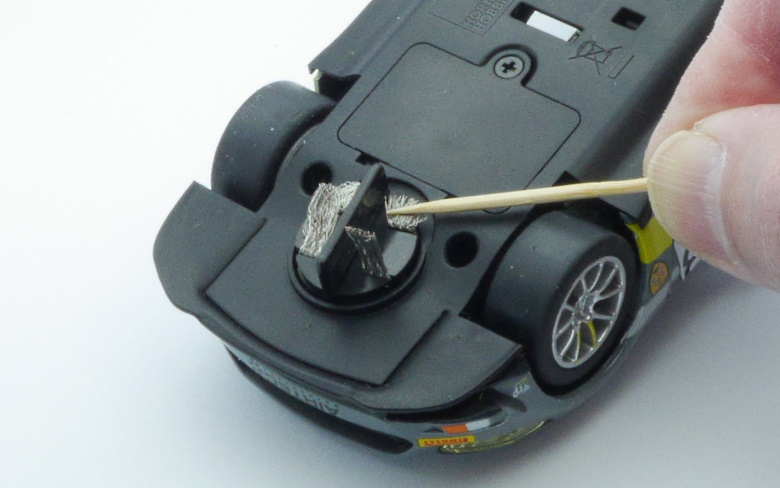
Don’t forget to clean the tyres after you sand them. Use the sticky side of some wide masking tape. Tyre cleaning should be done routinely before a race or a timed test session, although the tape won’t normally be as dirty as after sanding the tyres…
The Mustang felt like a different car when it returned to the SL6 test track with its ‘scuffed’ tyres. The rear had much more traction – I could brake later, drive through the corners and get on the throttle quicker on corner-exit. There was still some tail-out slide if I wanted it – but it was nicely predictable and easy to control. The Mustang was handling exactly how I like a slot car to behave.
I set up another two-minute race in the ARC app and completed 20 laps and a best lap time of 5.40 seconds – a huge improvement…


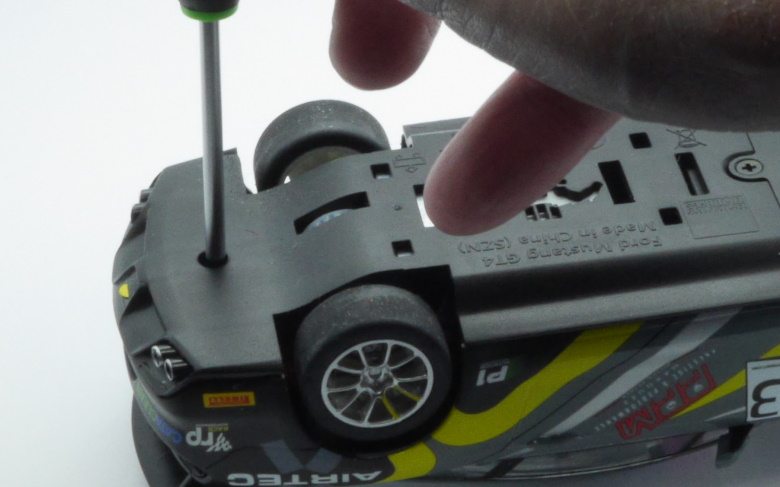
Tweak #2 – Loosen The Body Screws
The second basic tweak requires that cross-head screwdriver again. Simply loosen each of the screws holding the body by one full turn anti-clockwise. For the Mustang, there are three screws – other cars may have four screws holding on the body. Before loosening, the body and underpan of the Mustang felt locked together. Afterwards, there’s some side-to-side movement, a rattling sound and a tiny gap opens up. This is all very good. Few Scalextric cars will give this degree of body float simply by loosening the screws, but it is worth doing in any case. We’ll look at more advanced body float techniques in another tuning article.
Why do this? The theory is that if the body is ‘floating’ a little, its weight is not transferred directly to the underpan, which would risk lifting the inside wheels in a corner. In a nut-shell, this lowers the effective ‘centre of gravity’ and helps the car corner better – making the car less likely to tip, lose traction or fall over. This is a particular issue for taller cars like the Mustang that have a naturally high centre of gravity – in other words, they have more car and more weight higher up than a low and sleek car.
Did loosening the body screws help? There wasn’t a dramatic change to the feel of the car, but a two-minute test saw the Mustang clock an improved 21 laps and a new best time of 5.01 seconds. I was clearing getting more confident with pushing the car into corners – and the body float had almost certainly helped with that…


Tweak #3 – Re-Route The Wires To The Rear Light Board
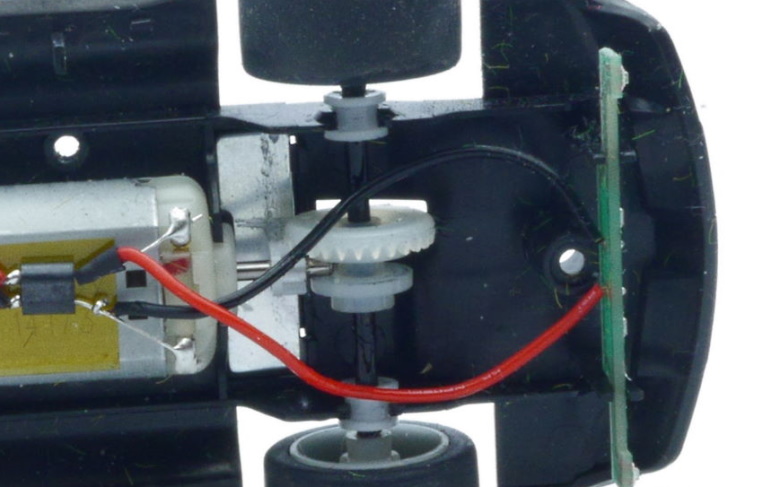
I mentioned earlier that Scalextric fit these wires underneath the rear axle and this avoids them getting caught in the gears. However, the wires do rub on the axle, causing friction – and friction is a bad thing for performance. The motor will need to work a little bit harder to move the car the same speed. In all honesty, the degree of power-loss is minuscule and there is a slightly increased risk from the tweak of the wires fouling the gear. If you don’t want to do this tweak, that’s fine – it’s simply a way of introducing the concept of minimising friction.
With the body removed, un-clip the rear axle bushings from the underpan, remove the axle assembly, lift out the rear light board, re-fit the axle underneath the wires and then replace the light board. I’d suggest moving the wires away from the gears – I ended up squeezing both together on the red wire side (after I took the picture), but make sure you’re not obscuring the screw hole.
A two-minute timed test run after this tweak yielded 22 laps and a best lap time of 4.96 seconds. Some of that improvement will be down to the car loosening up and the driver becoming more familiar with it, but the re-routing of the wire will have provided a ‘marginal gain’ – and these small improvements do add up…

Tweak #4 – Re-Profiling The Braids
There are two things I like to do with the standard braids. One tweak gets the guide lower in the slot to improve speed through corners. The other improves electrical pick-up. Neither requires any new parts, although a tooth pick or cocktail stick is a useful tool.
The first tweak involves lifting up the main flap of braid and then fishing out the smaller flap underneath. This is usually wrapped under the top braid and faces forward – we want it to trail backwards, the same as the top braid. It is too fiddly to do this with your fingers, so hook the tooth pick underneath the bottom braid flap and pull back. The braid will need flattening and straightening and the top flap pushed back down. The top flaps now sit on the plastic braid plate, rather than a second layer of braid. This lowers the guide blade slightly in the slot.
The next step is to spread the ends of the top flaps of braid so the trailing edge is slightly wider than the front. This is a case of gently pushing the end of the braid with your finger tip to spread the strands a little. If you can, bend up the end in the same movement. This slightly loosened and ‘bushy’ end to the braid give a better connection to the track rails, getting more consistent power to the car. However, don’t overdo it! On a digital track it is especially important to have neat braids that aren’t too spread out – bushy braids can cause a short circuit going over lane changers.
The braids on the Mustang were slightly different lengths – as they were on both of the spares under the box. This isn’t perfect, but not the end of the world. It meant one braid was better profiled than the other. Even though not perfect, the braid tweaks helped the Mustang to 23 laps in two minutes and a new best lap time of 4.75 seconds. This was a lap better and only 0.08 of a second slower than a two-minute test run by a Porsche 911 RSR that has – up to now – been my favourite of the Scalextric GT cars. The Porsche is standard with only the four tweaks outlined here. The Mustang proved itself to be a pretty good car to get that close…


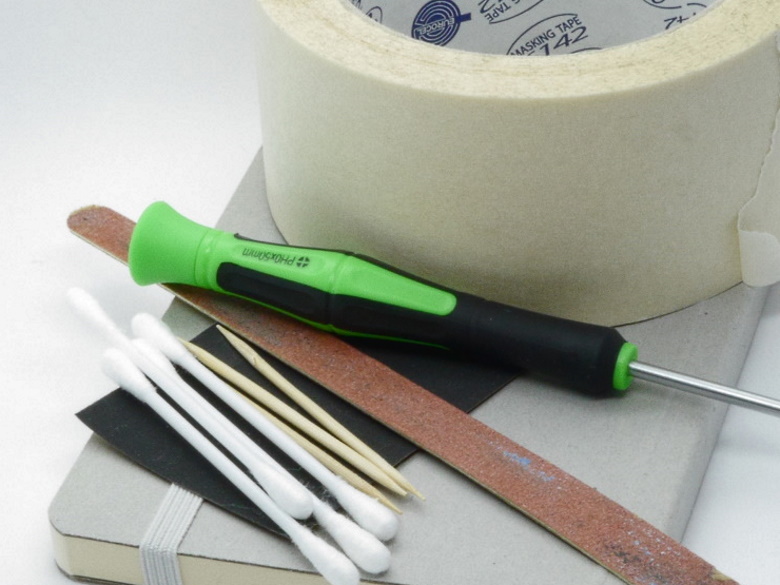
Basic Scalextric Toolkit
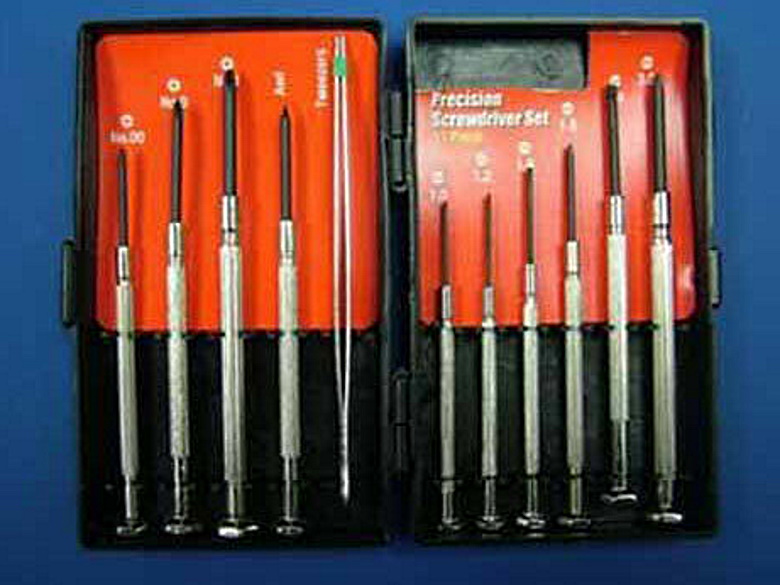
- Size 0 cross-head screwdriver or PH0 Phillips screwdriver – or this precision screwdriver set, that also includes a pair of tweezers.
- Packet of cotton buds (Q Tips). Branded versions are less likely to shed cotton fibres, so are worth the extra cost.
- Emery board. Borrow one or add a pack to your pharmacy / pound shop list.
- Sand paper – 400 or 600 grit, if possible. If you don’t have any, buy a pack of assorted grits. Pound shop sandpaper is fine.
- Masking tape. The 50mm (2-inch) wide stuff is best.
- Tooth picks or cocktail sticks.
- Notebook or text file. Helps you to remember what tweaks and tuning you’ve carried out on each of your cars – plus any testing data.
We’ll gradually add to this toolkit as we progress through the tuning articles. I hope you enjoy trying out these tweaks on your new or nearly-new cars. Let us know if they help improve handling, reduce laps times and increase your on-track fun.
In the next blog post, I’ll look at on-going maintenance, repairs and spares to help keep your Scalextric cars in top condition.