
A note from the author…
I’m Rob, a normal guy who enjoys making models! I’m by no means a ‘professional’ modeller, but I am passionate, try my best and kits generally turn out well! All my builds are done at home in my spare time with typical model tools and accessories – all views and opinions are my own and not that of Jadlam.
Kits included in this review:
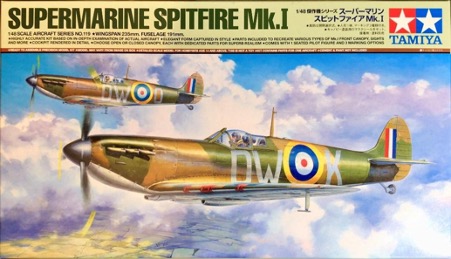
Name – TAMIYA Spitfire Mk1.A 1:48 Aircraft Model Kit
Number – 61119
Scale – 1/48
Price – £29.99 RRP
Availability – Available Now! Buy yours here!
Having recently built the Airfix Supermarine Spitfire starter set i’ve decided to take it up a notch and embarked on the Tamiya 1:48 scale 61119 Spitfire. This kit is a big jump, not in only scale, but price, difficulty level and historic accuracy – but with Tamiya’s incredible fit and finish it should be a relatively easy step.
Hopefully this will outline my journey and encourage you to follow in my steps…
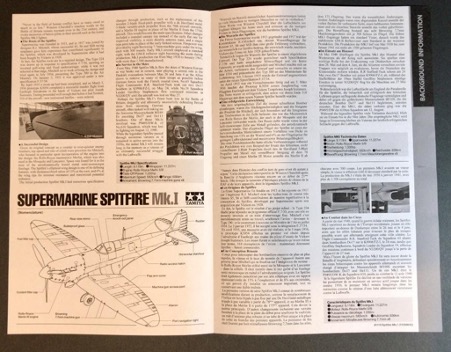
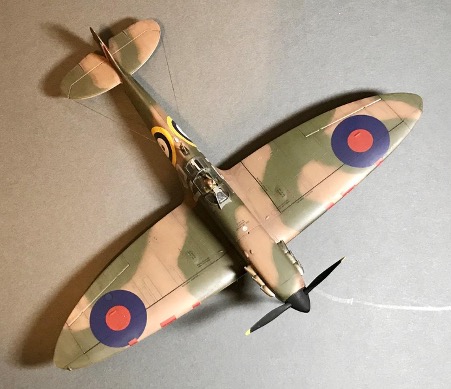
I’ll get straight into it with what you get in the box. There are full colour call outs for three different aircraft, the aircraft depicted in the lovely box art is actual size and the two alternate versions half size, this is a real help for painting and applying decals. The star of the box art and first option is a Battle of Britain variant, this has the classic two tone camouflage with sky bottom side. The second option is for an early pre-war spitfire once again with the well-known two colour scheme on the top and a natural metal finish on the lower fuselage. Tamiya hasn’t gone as far as to include a two blade propeller version though. The final option has a natural metal and black and white wing identification markings of a spitfire used in Operation Dynamo, the British evacuation of Dunkirk. This is the version I have chosen to build for a few reasons which I will go into later.
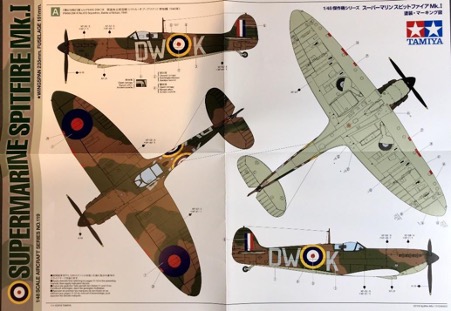
Next out of the box are the instructions.
These are what we have come to expect from Tamiya; detailed and clear with all paint call outs in Tamiya codes – this suits me as I use Tamiya colours most of the time.
Something I haven’t seen in a Tamiya kit (at this scale anyway) is a separate sheet with a little background detail for the spitfire, A nice touch and informative for those new to the aircraft.
Next up are canopy masks and metal stickers. The canopy masks aren’t die cut, so you’ll need a steady hand with a number 11 blade or scissors to cut them out. It’s easier than doing your own masks, but given the quality and price of this kit I think die cut masks would/should have been included.
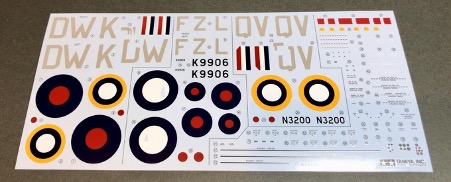
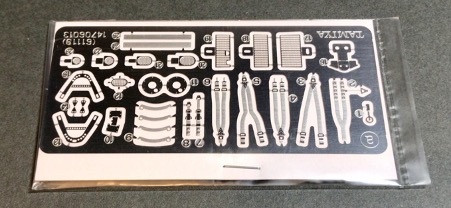
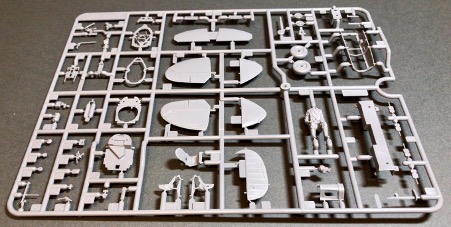
The decals are the normal Tamiya style, some may argue they are a little thick, but they are nice and opaque and crucially all in register. Tamiya have also included a small fret of photo etch with a bit of cockpit detail, radiators and most important several harness options depending on if you decide to include the pilot or not.
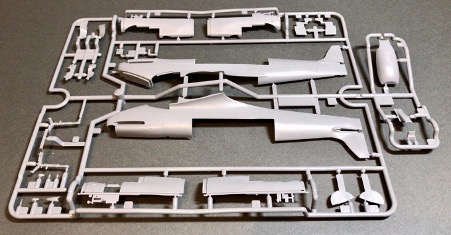
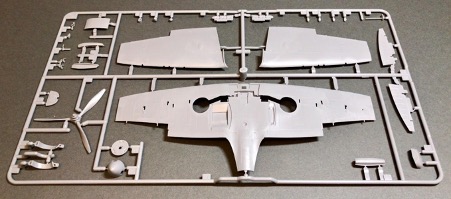
Not much to report about the sprue’s. As you would expect from a new Tamiya kit the quality of everything is absolutely top notch, No flash or mis-moulding at all. This means very little part clean up required, so hopefully an easy and accurate build.
The clear parts are just that; crystal clear – very nice indeed, other manufacturers need to take note as sometimes their parts end up a little cloudy. Overall the contents of the kit are exceptionally high quality and I am excited to put it all together! The kit costs approx £30, so it seems a little expensive, but if it builds as well as it looks the extra outlay could be justified.
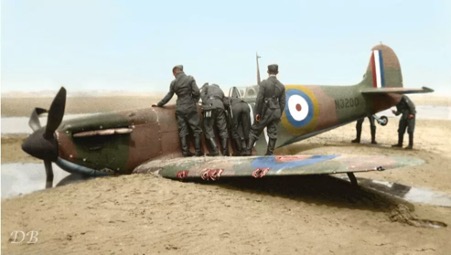
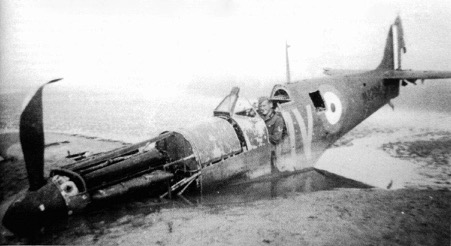
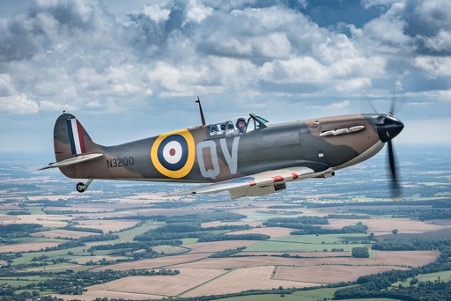
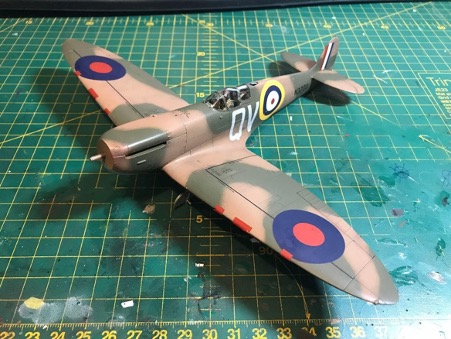
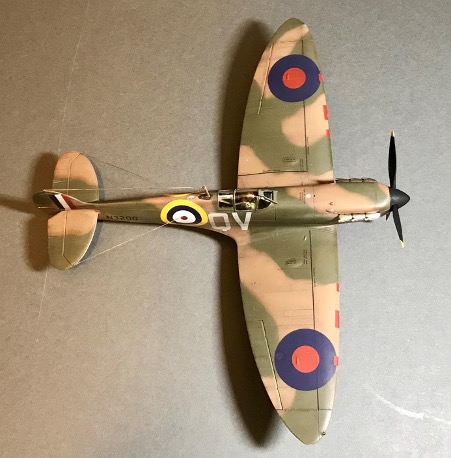
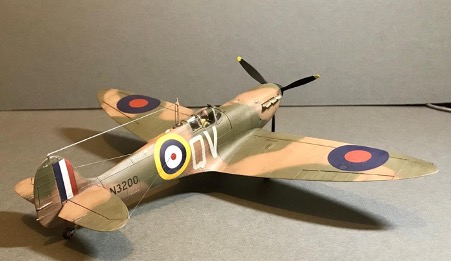
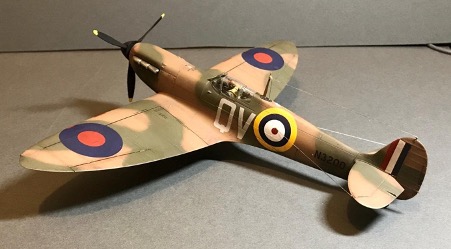
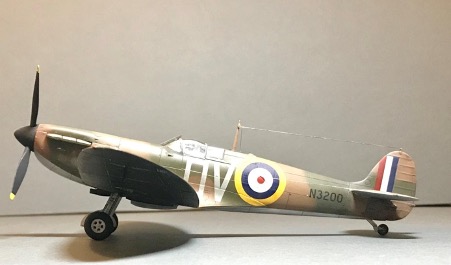
As previously mentioned I decided to build the N3200 spitfire used in Operation Dynamo, this aircraft was actually shot down at Dunkirk during the evacuation. The good news is the story didn’t end there and the aircraft was restored by the Aircraft Restoration Company in 2014 and is once again flying, it currently resides at The Imperial War Museum at Duxford, which isn’t too far from my house! I like the story of this spitfire and the fact there are plenty of pictures of it really help.
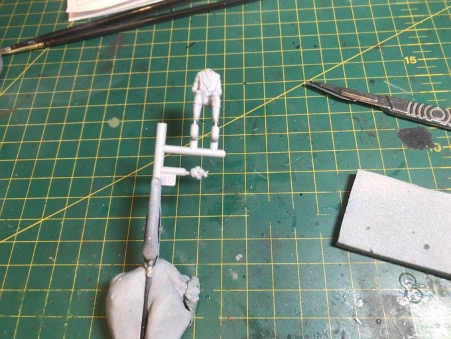
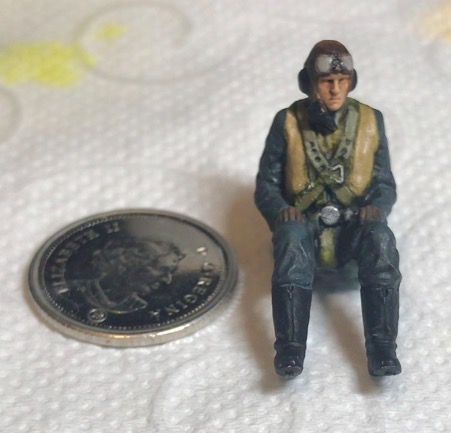
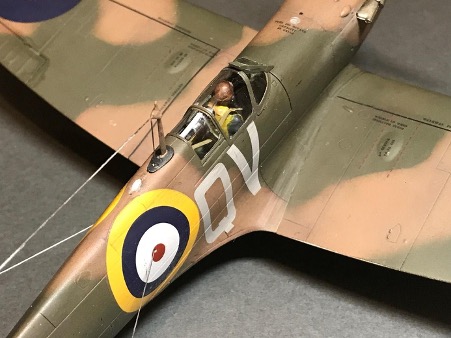
As with just about every aircraft model the instructions start with the cockpit or “office” as it’s sometimes referred to. I chose to deviate from the instructions at this point and start with the pilot. The reasoning being this choice was very simple; you need to decide if you are going to have an open or closed cockpit at the very start of the build. I really wanted to try and use the pilot as it’s a really nice figure, but didn’t want to commit to a closed canopy before it was finished as my figure painting is a bit hit and miss.
The first step was a little bit of clean up with my trusty #11 blade and a light coat of primer, next I applied the base colour for the figure (Tamiya XF-50 Field Blue) with the airbrush. Using the airbrush means a much finer even coat that helps with the detail later.
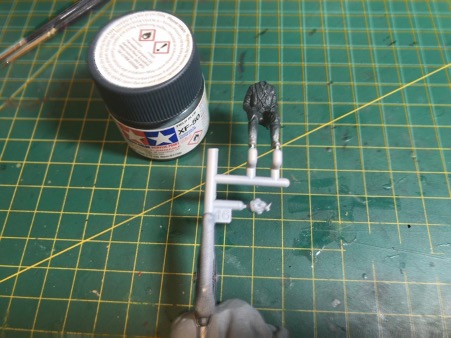
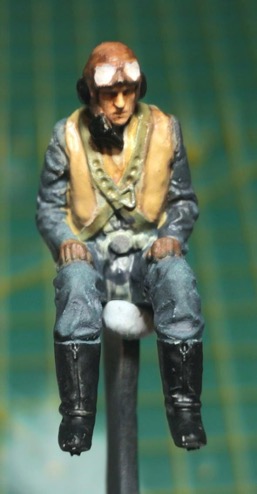
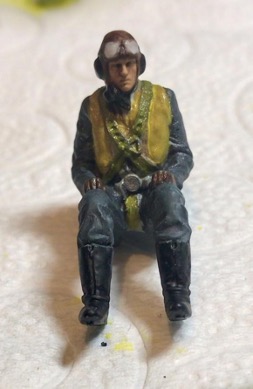
I painted the head in Tamiya flesh, once again it’s important to use the airbrush to retain the detail. I then brush painted the remaining colour in accordance with the comprehensive call outs on the instructions. I then applied a wash to the face to pick out the details, this was a simple mix of brown oil paint and lighter fluid. You can keep removing the wash with lighter fluid to achieve the look you want. At this point I christened the pilot “Ginger”.
I added some oil paint shadows and highlights and a Matt clear coat made it less “shiny”. The final stage was to use the original colours to pick out the details, I then use a small blob of canopy glue on each of the goggle lenses, Ginger was ready for duty.
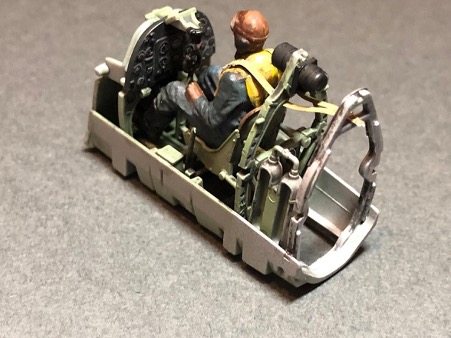
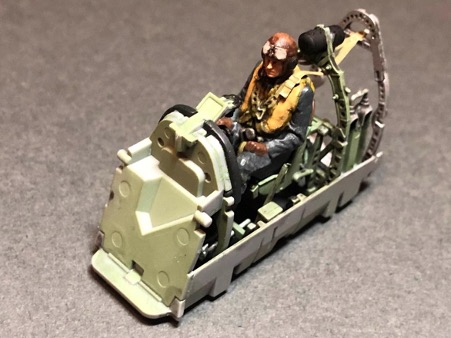
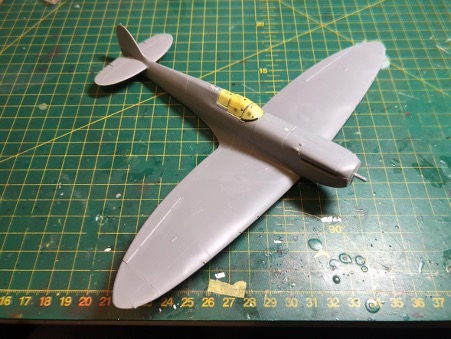
A bit of a jump now to the completed cockpit. To be honest there isn’t a great deal to say about the assembly. Just lots of small details to attach and paint. As with the goggles I used a drop of canopy glue on each instrument to help them look glazed.
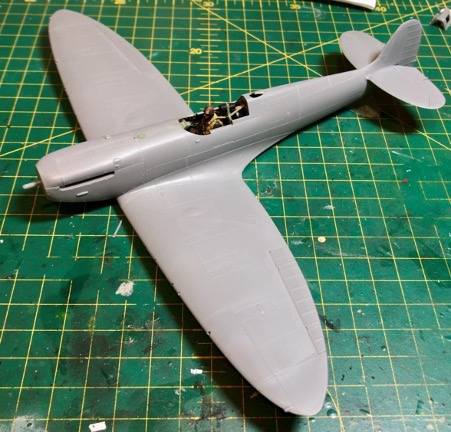
Now this may look like a big jump again, but there are fewer parts in the entire fuselage assembly than there are in the cockpit. Everything went together very well, no need for filler at all. I would have like to have seen a single piece engine cover, but minimal clean up was required. Glazing installed and masks applied. Lets get painting…
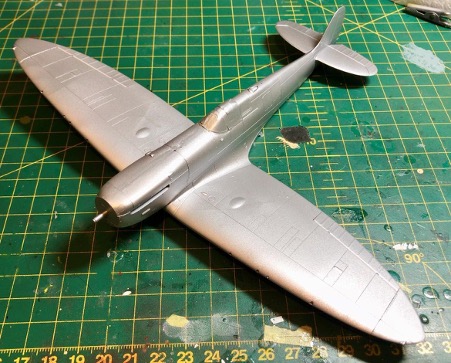
Primer – I used Tamiya AS-12 as it can be applied as a primer and also gives the bare metal finish I needed for the underside of the fuselage. As you’d expect you need several light coats rather than a single heavy coat.
After some masking it was time for the base coat. I ignored the strange (but likely accurate) mix recommended by the instructions and went with good old XF-52 Flat Earth (its what I have always used on early Spitfire’s). Next I did some pre-shading with red brown (XF-64)
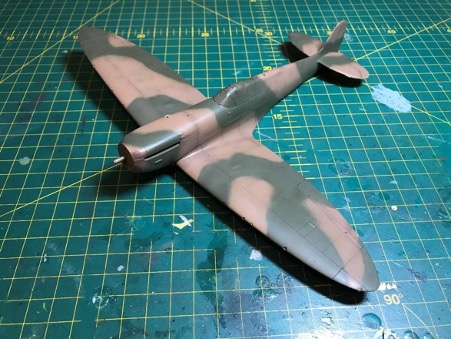
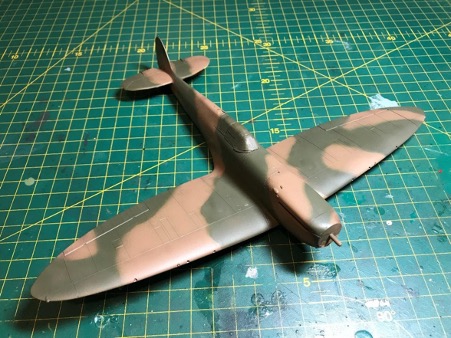
A bit of a misstep here, I wanted to try a hard edge to the camouflage pattern as I thought it would be a bit more scale accurate. So I used the full size colour call out and some baking parchment / greaseproof paper to trace the pattern. I then cut out the pattern and transferred it to masking tape, which in turn was applied to the model. It’s not something I had done before, but I had seen a few videos on You Tube of guys using photocopiers to get a similar result.

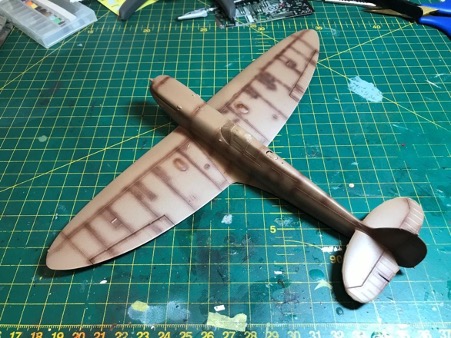
As stated though it was a mistake, I hated the hard edge look of the masked camouflage – I immediately traced around the edge with the airbrush freehand and was a lot happier with the result. Please note that photographic evidence of the hard edge scheme has been destroyed as it upset me so much – but we live and learn.
I went back over the dark earth areas again to blend in the pre-shading lines. Speaking of pre-shading; you may see that there isn’t a great deal of evidence of it, that was a deliberate move as this wasn’t going to be a heavily weathered build.
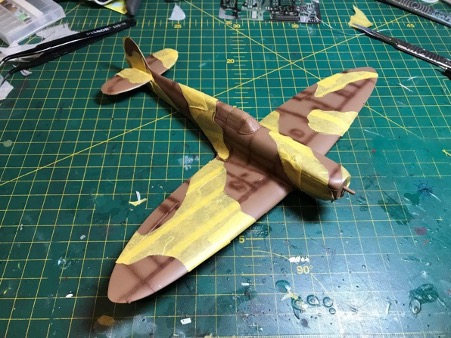
Before application of decals came the mandatory gloss clear coat. I think this is an essential step, but know a lot don’t bother with it.
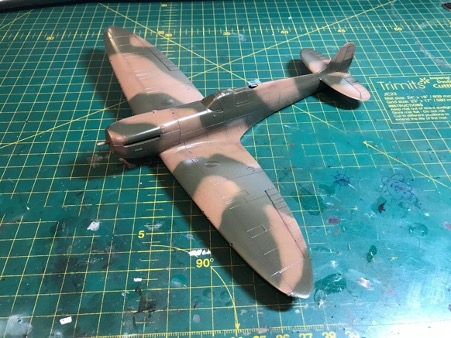
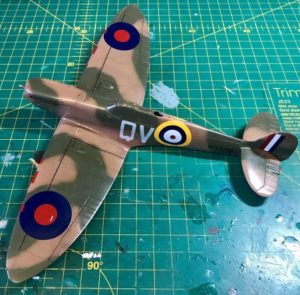
This next shot shows the model around half way through decal application, there are quite a few small decals that can be slightly frustrating, but I took my time and did a few at time. I always use Micro Sol and Micro Set for decals as this makes things a lot easier.
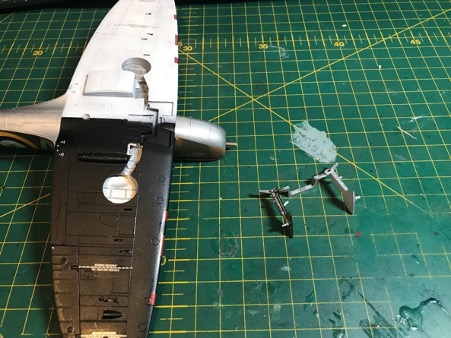
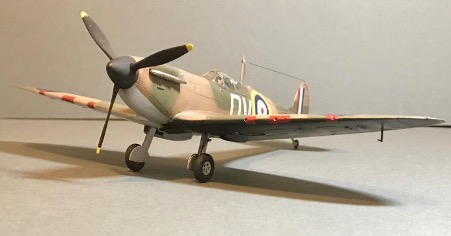
One of the great things about this kit is how the undercarriage works. Anyone that has built a spitfire will know what a pain aligning the undercarriage can be. Tamiya’s engineers have come up with a new approach, both legs of the landing gear are moulded as one part and a channel is left on the lower wing, there are two covers and an air intake that conceal this channel.
The part fitment is so good that filling isn’t required and the parts can be pre-painted and simply glued in place at the relevant point in assembly. Big clap for Tamiya here please…
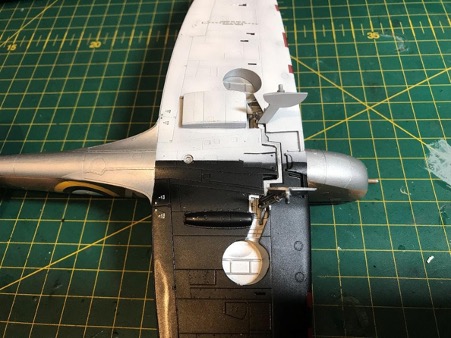
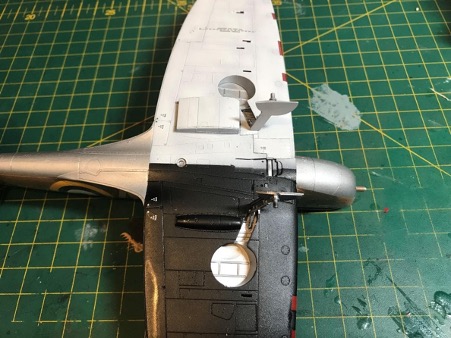
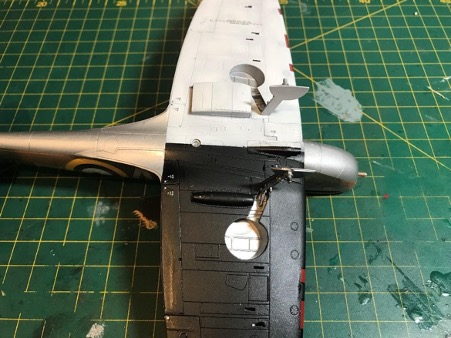
On with the aerial mast and wires. (yes I know this aircraft is too early for the IFF wires, but I thought they looked cool) then a very light oil wash to highlight the panel lines, again this was kept to a minimum. Now it’s down to just getting the last few bits and pieces painted and ready to go on. The observant will notice the Pitot tube is the wrong colour, this was rectified after fitting.

Although slightly expensive for what you get, the kit sets a new benchmark for 1/48 scale Spitfires. The photo Etch parts and sheer number of small parts may make things slightly tricky for a beginner, but if a bit of time is taken excellent results can be achieved with a relatively low amount of skill. Where this kit pulls ahead of the competition is in the sheer quality and engineering, everything just fits together beautifully and very little part clean up is required.
Sure the Eduard kits have nicer surface detail (rivets) but the Tamiya kit is in a different league from the perspective of enjoying the build. Given the way the kit is set up it can only be a matter of time before we get a new mark II, V and Mark IX. When and if they do arrive I’ll be first in the line.

Get yours here on our website – https://www.jadlamracingmodels.com/tamiya-61119-spitfire-mk1-a-1-48-aircraft-model-kit/