
A note from the Author
Hello fellow model makers! I’m John and, although I’m no expert at all – just a car enthusiast and keen model maker – but I always strive to improve and achieve the best results I can. I’ve built models from being a youngster – competition/sports cars of the 60’s/70’s are my number 1 ‘thing’ – and now I’m fully retired I can put the extra hours into this wonderful hobby.
….and now for something completely different…!
Well, it is for me anyway!
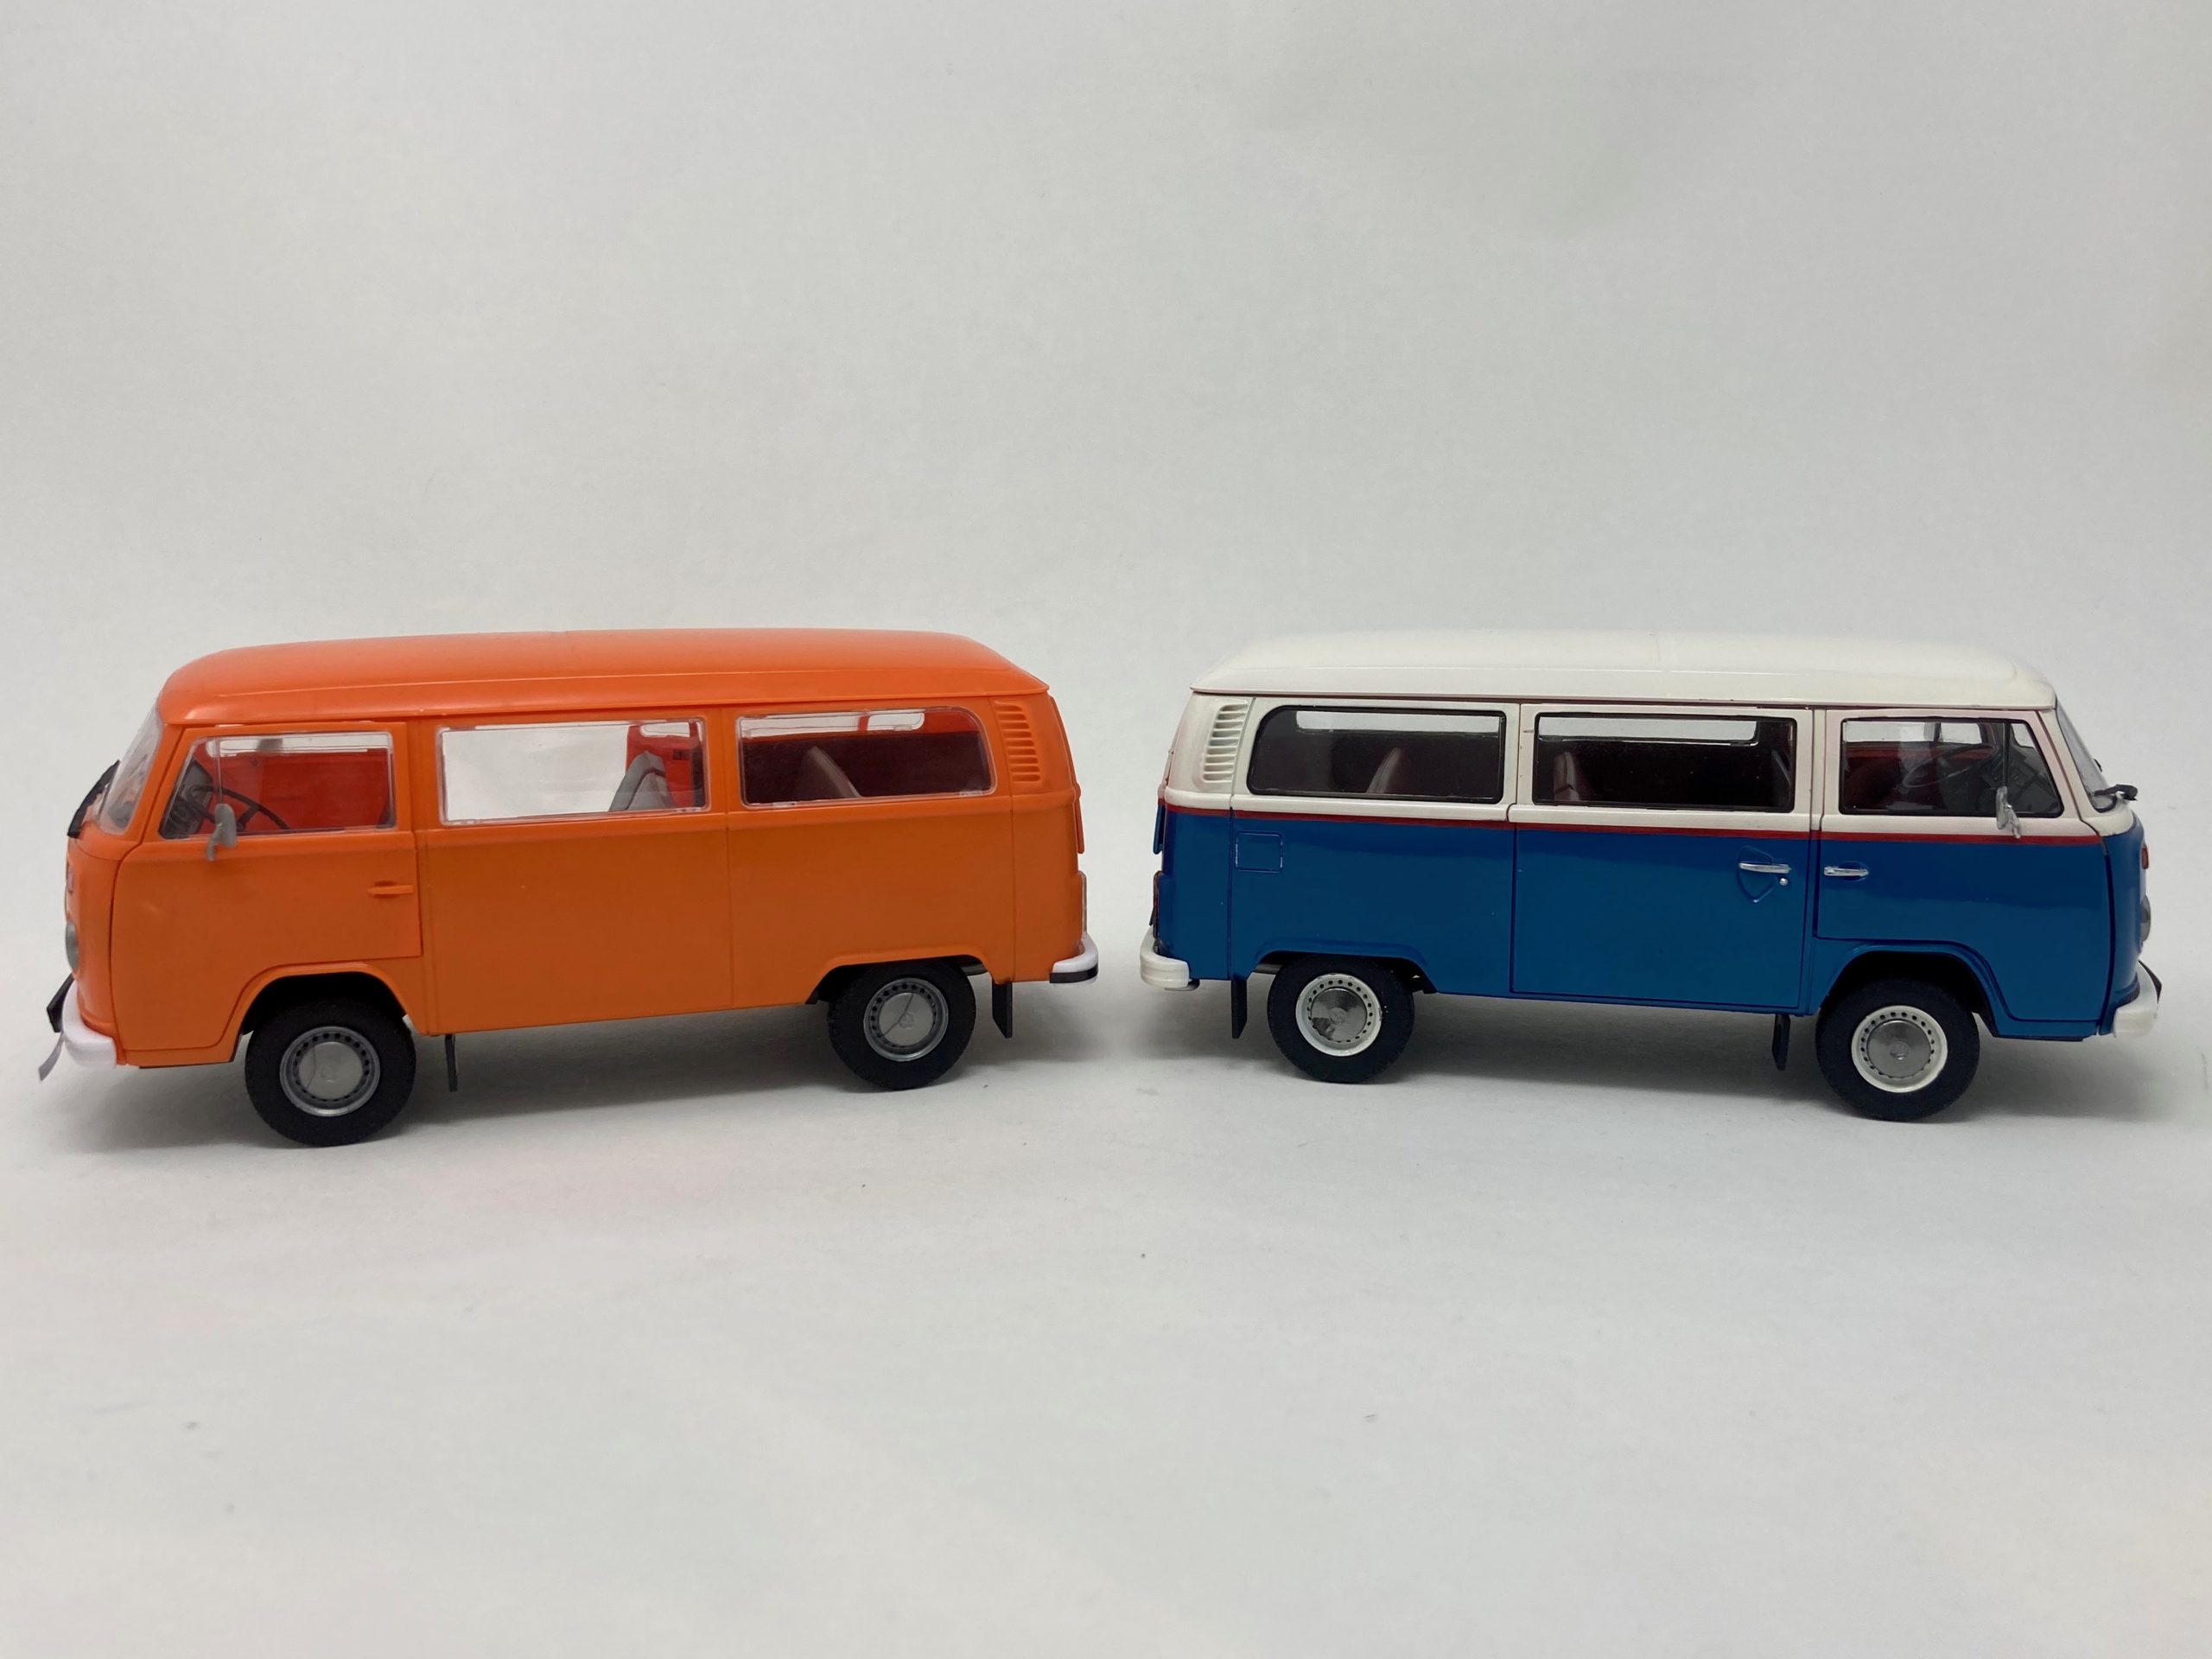
The brief here was to build this new release “Easy Click” straight out of the box, in its simplest form – and then explore the possibility of building a second kit and developing it in some way into a more detailed model. How does it fare as an entry-level, easy build? – with no glue, decals or even paint? And could it form the basis of a more adventurous build?
Build number 1
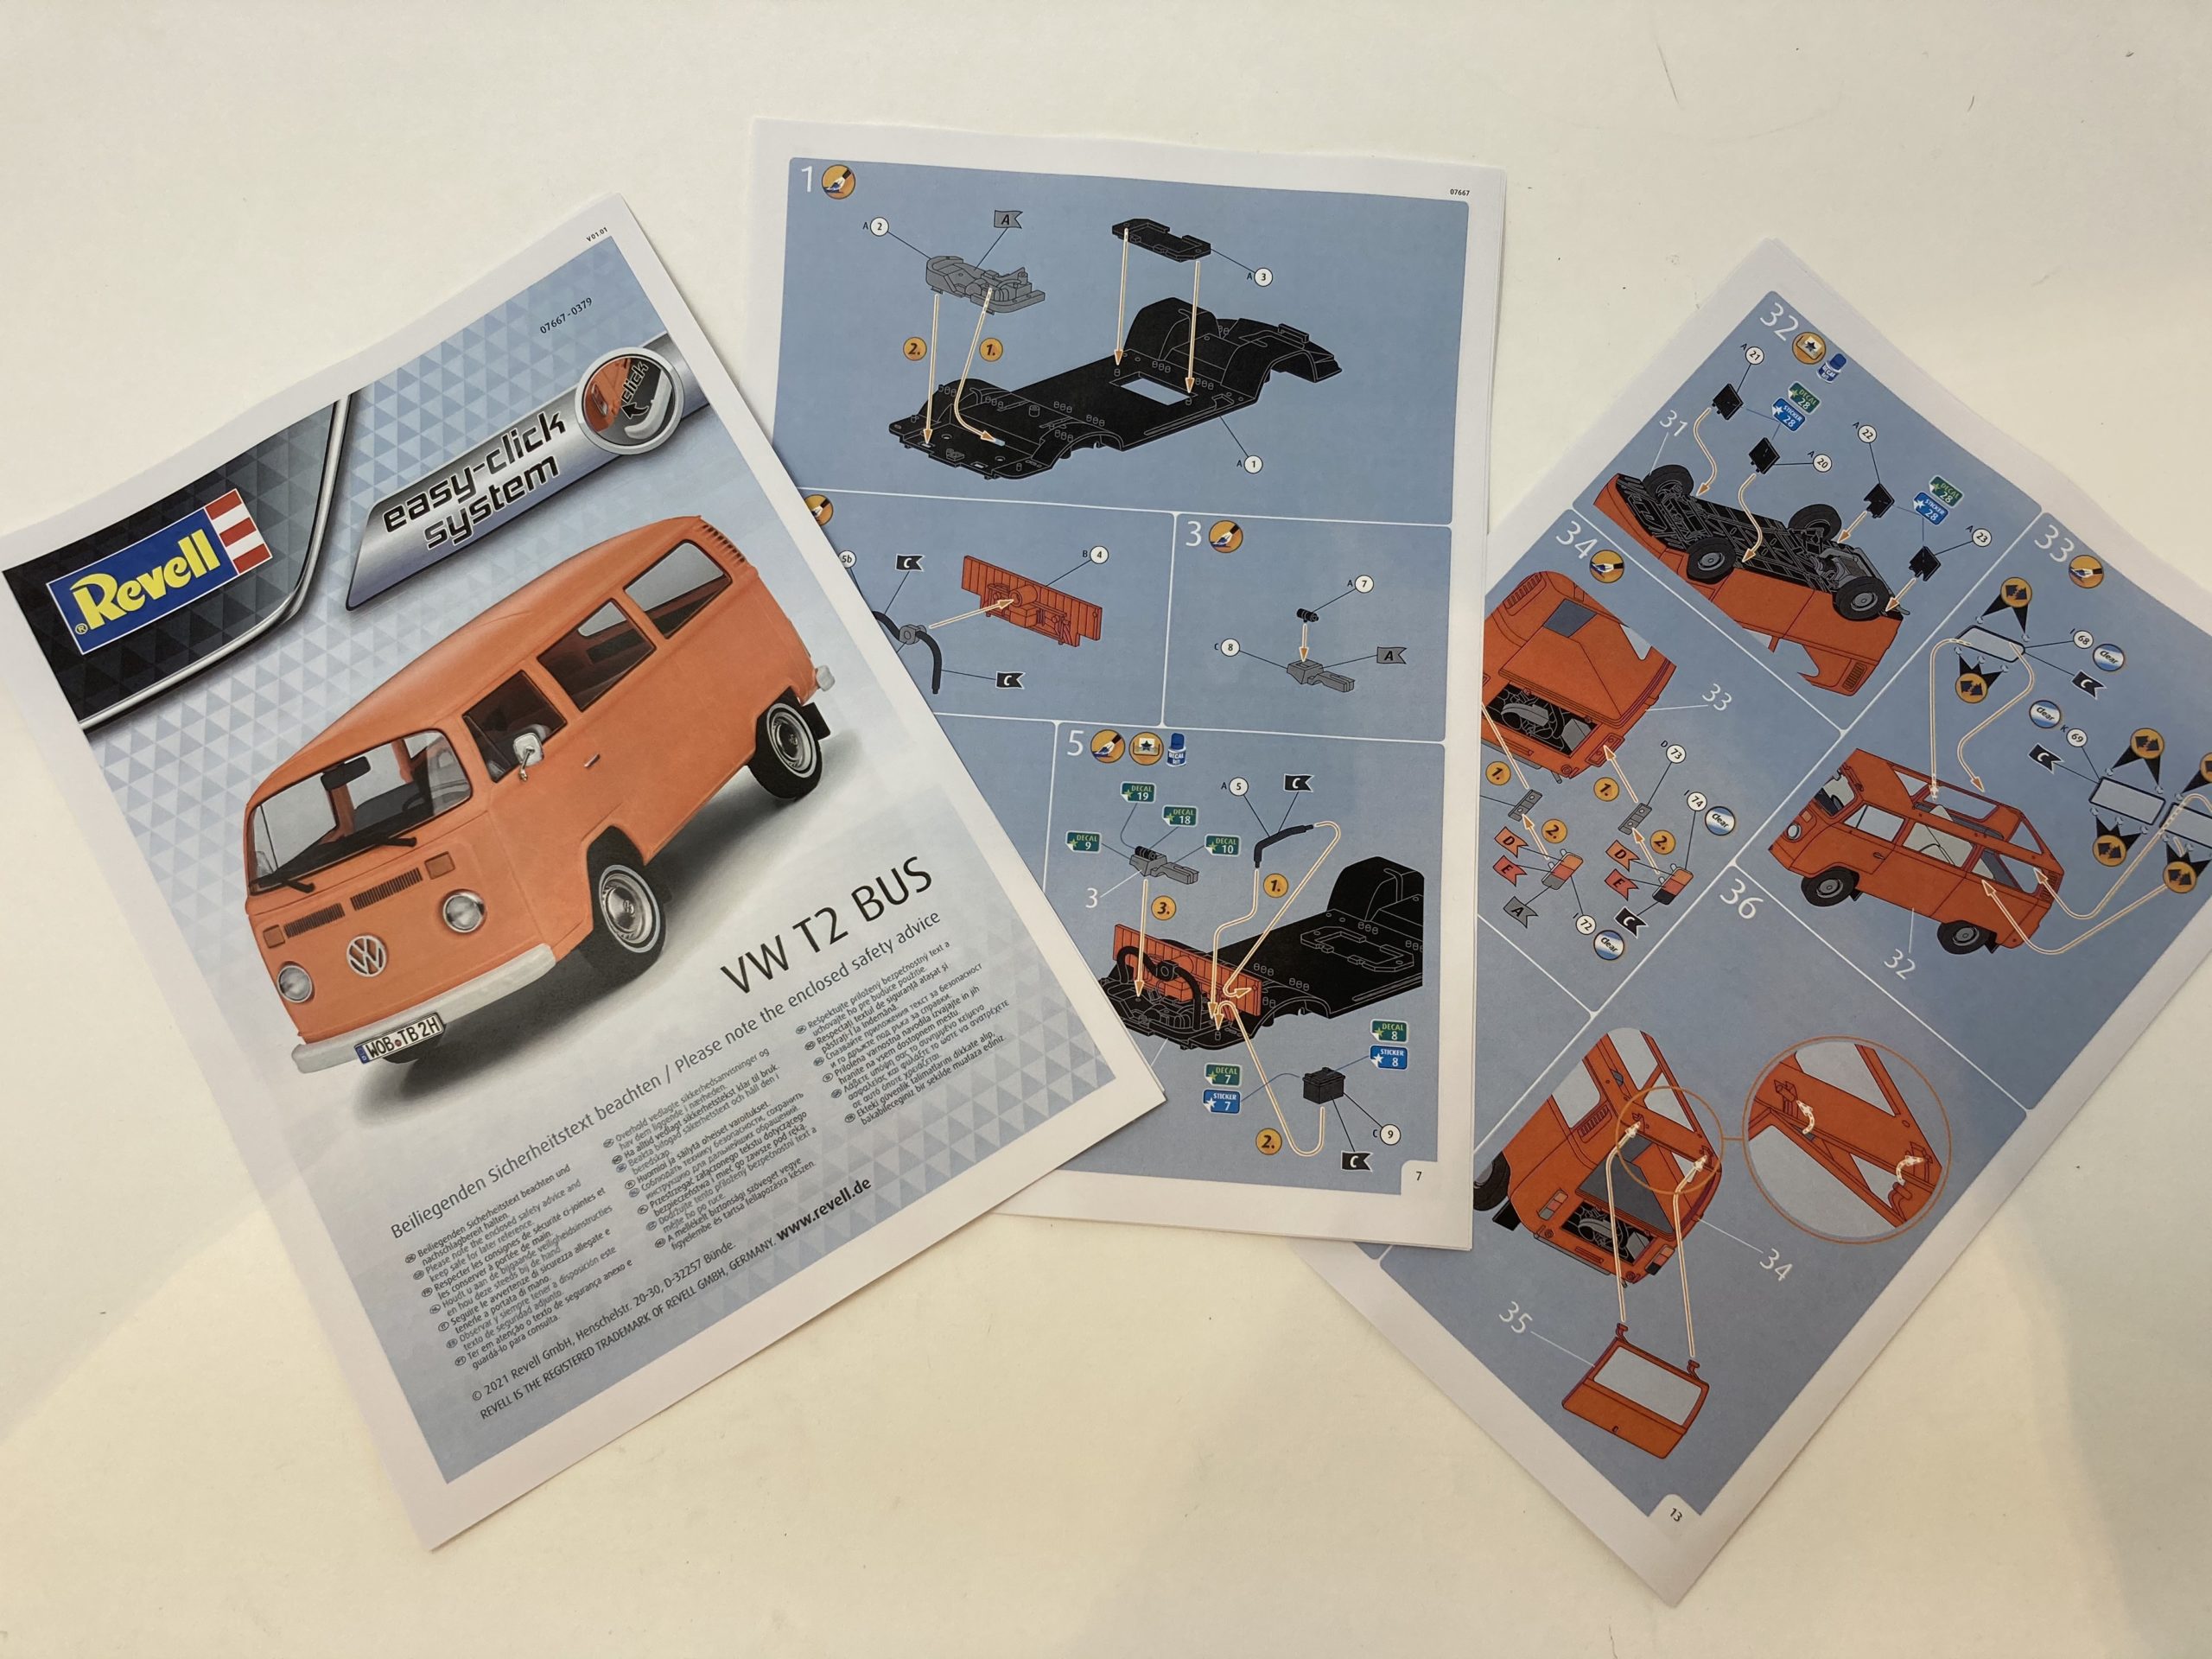
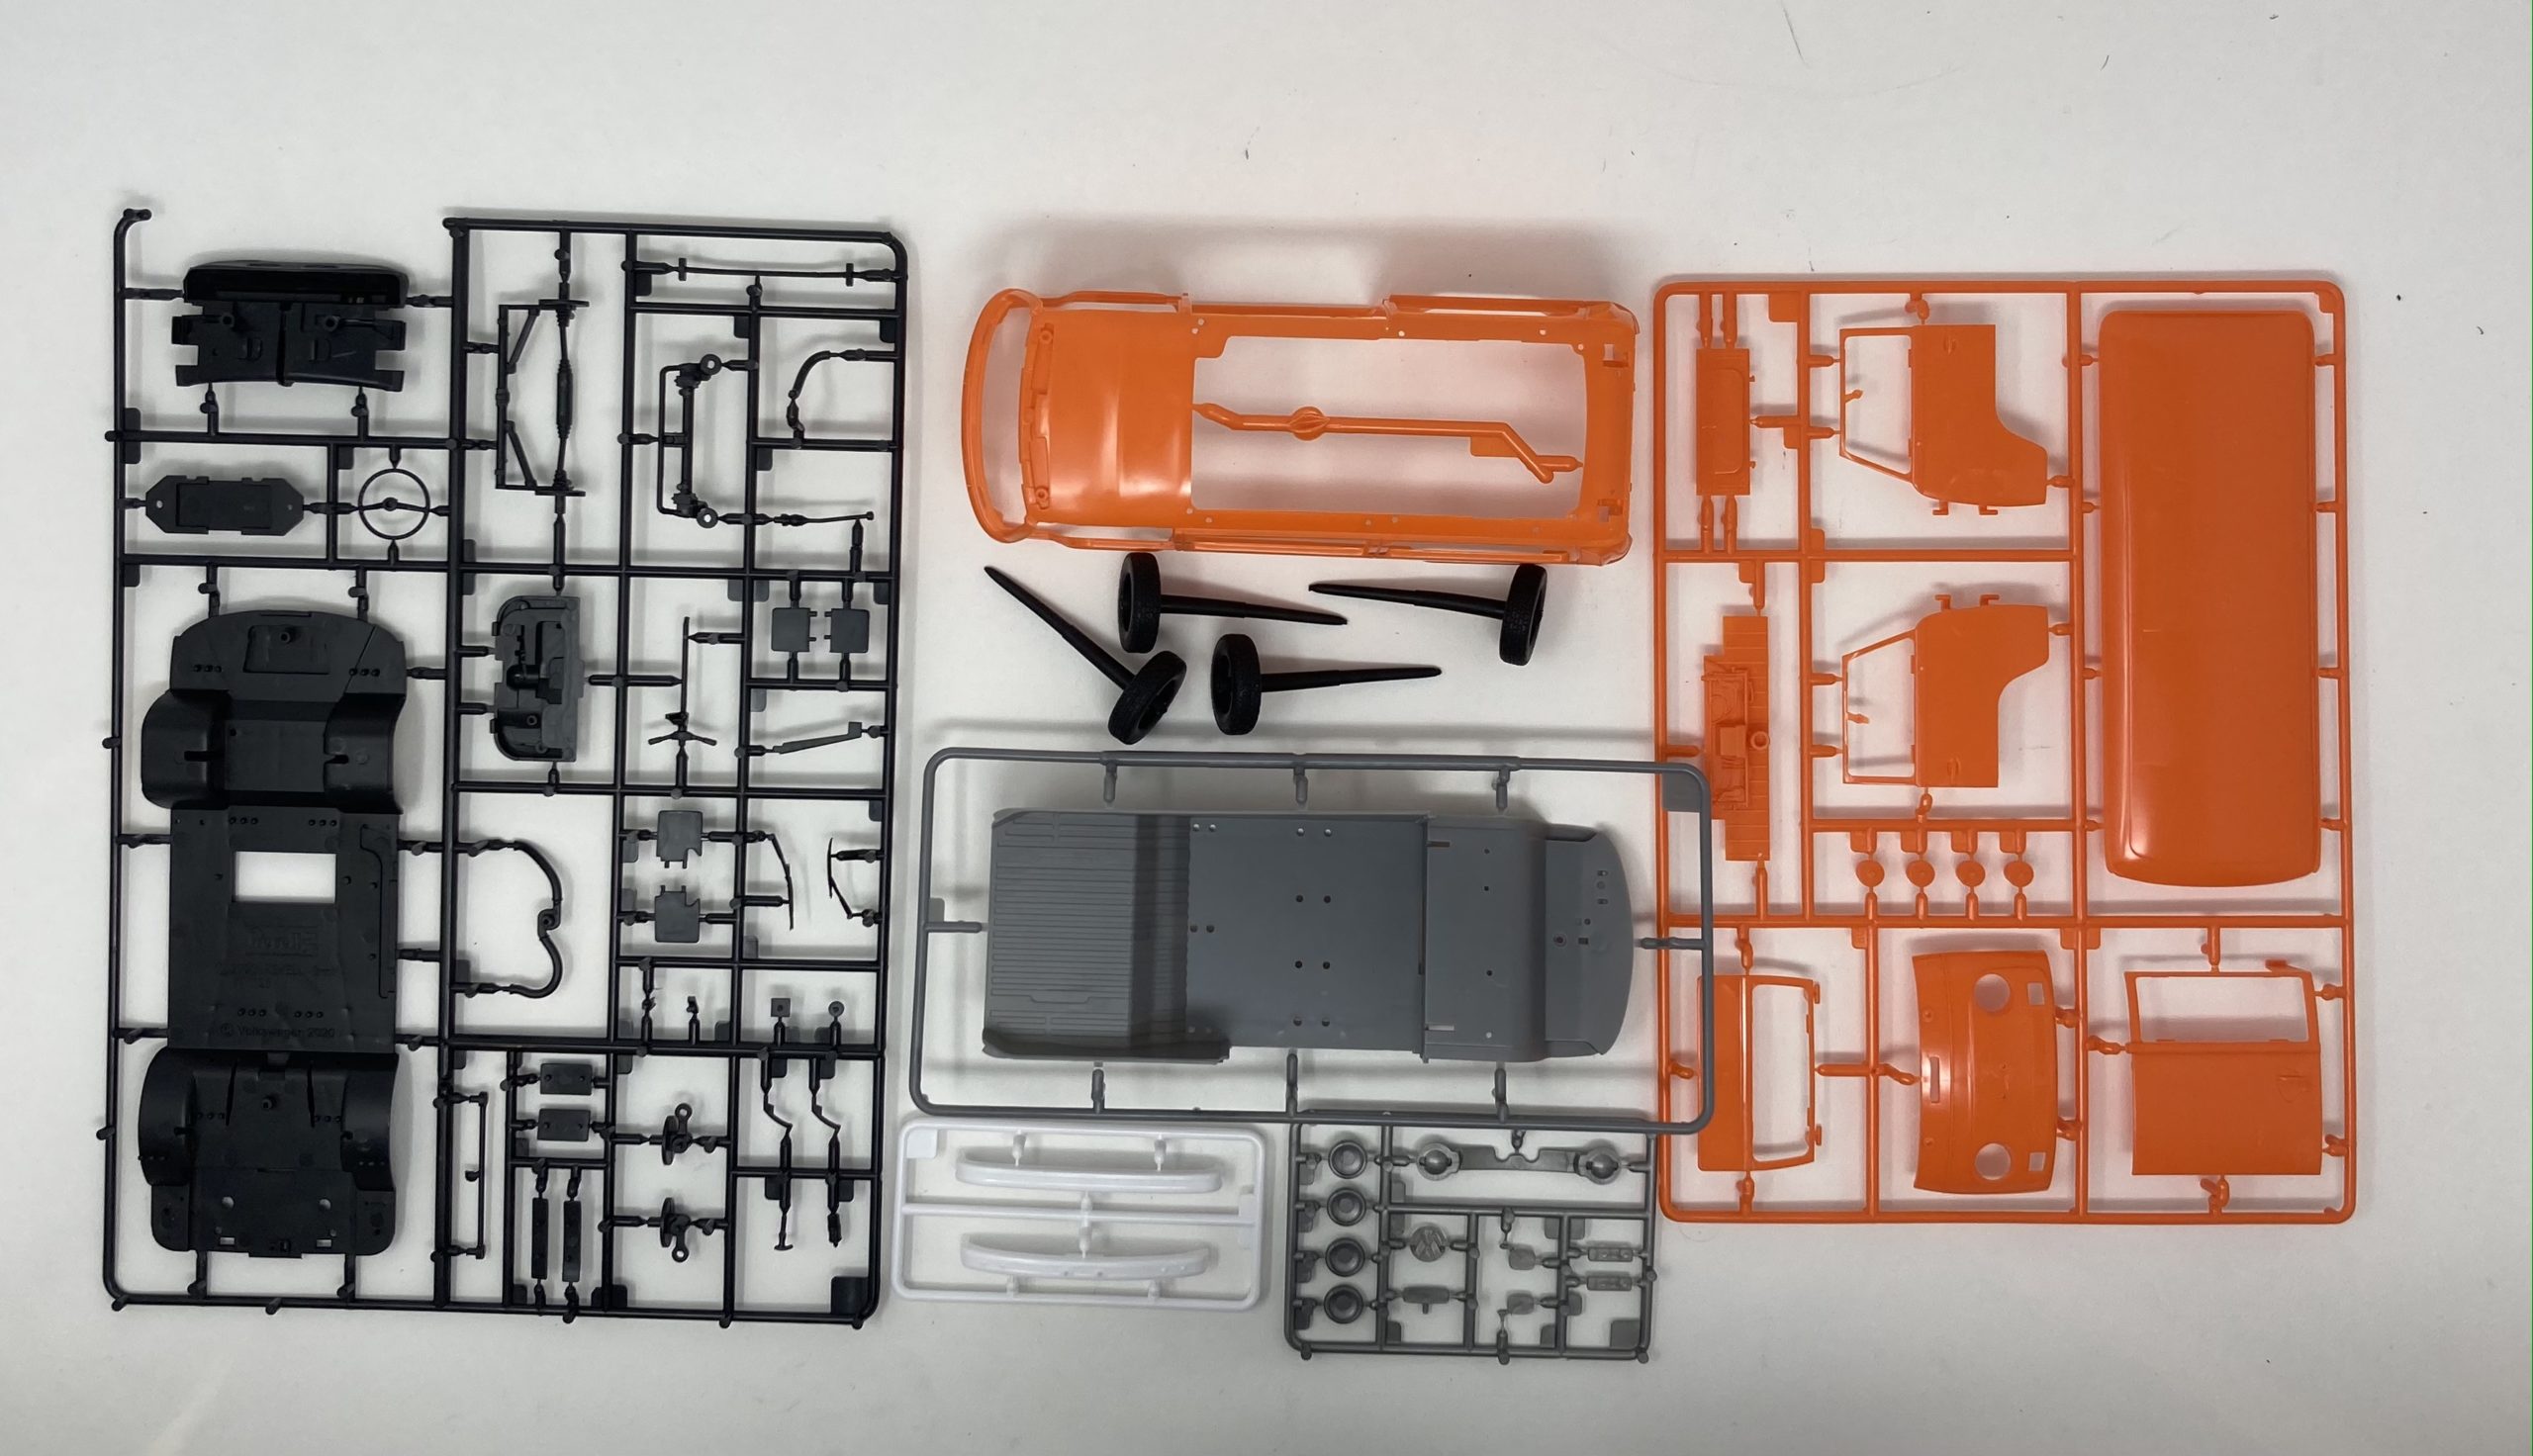
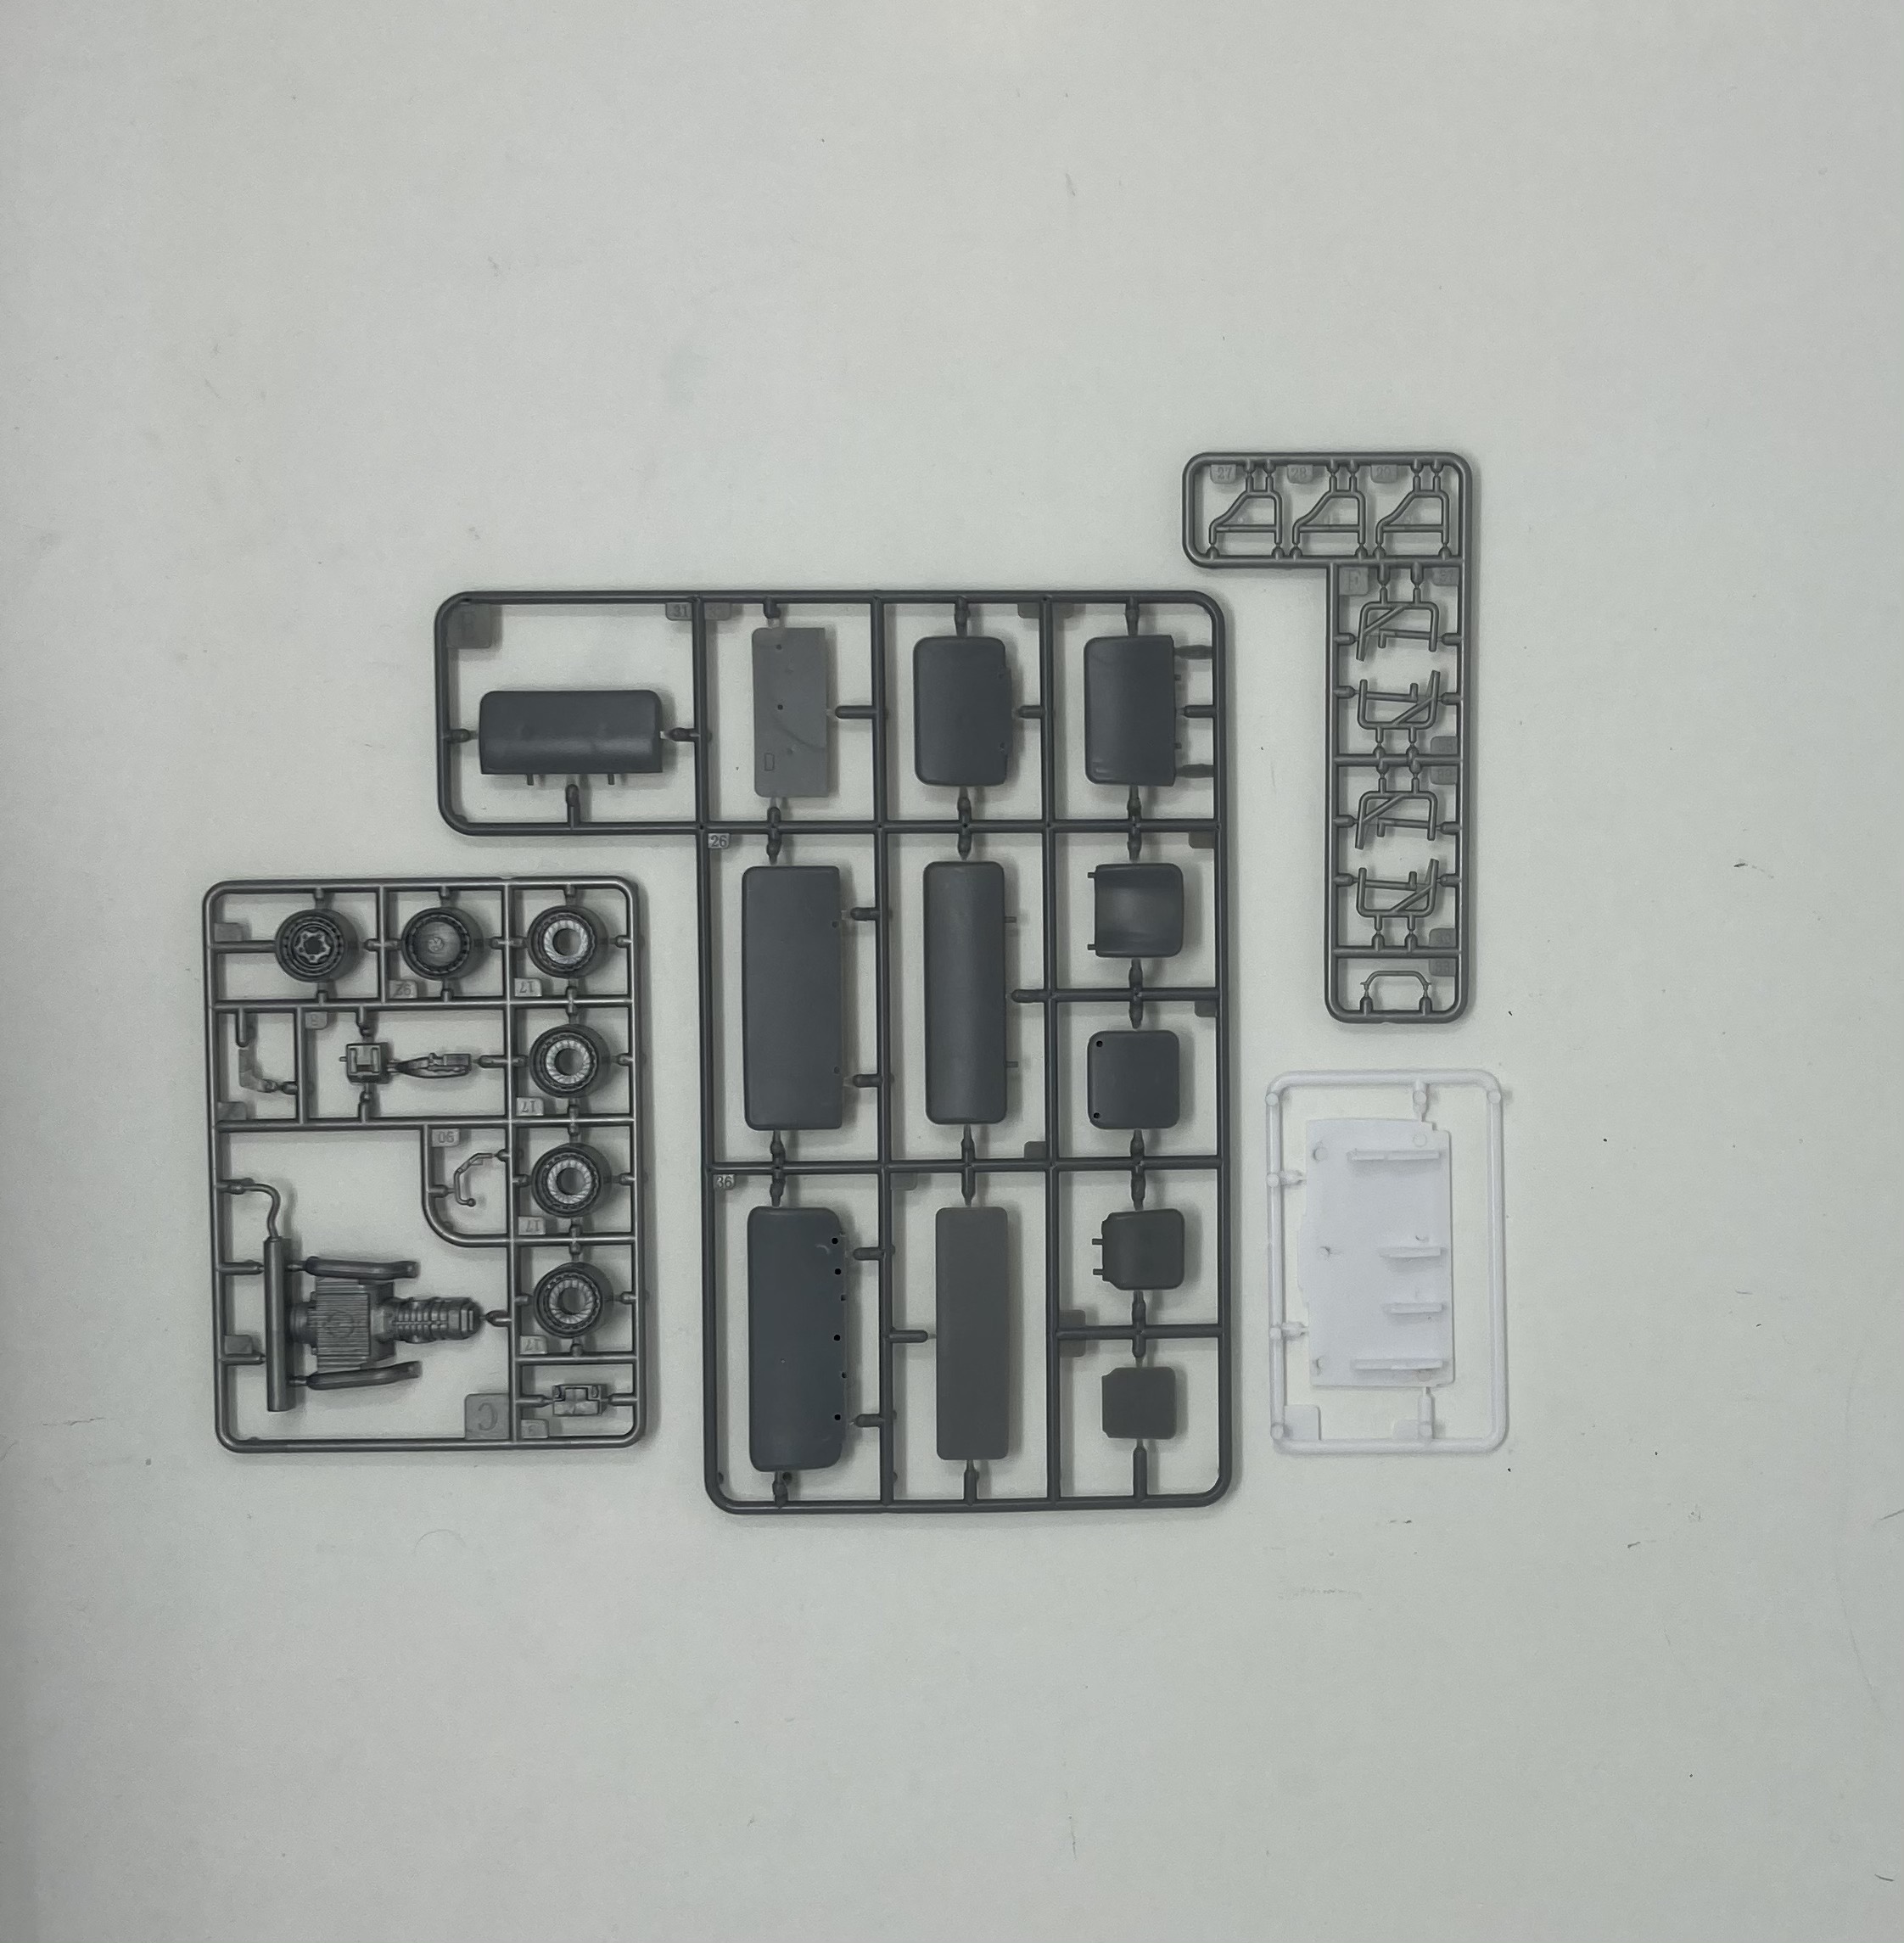
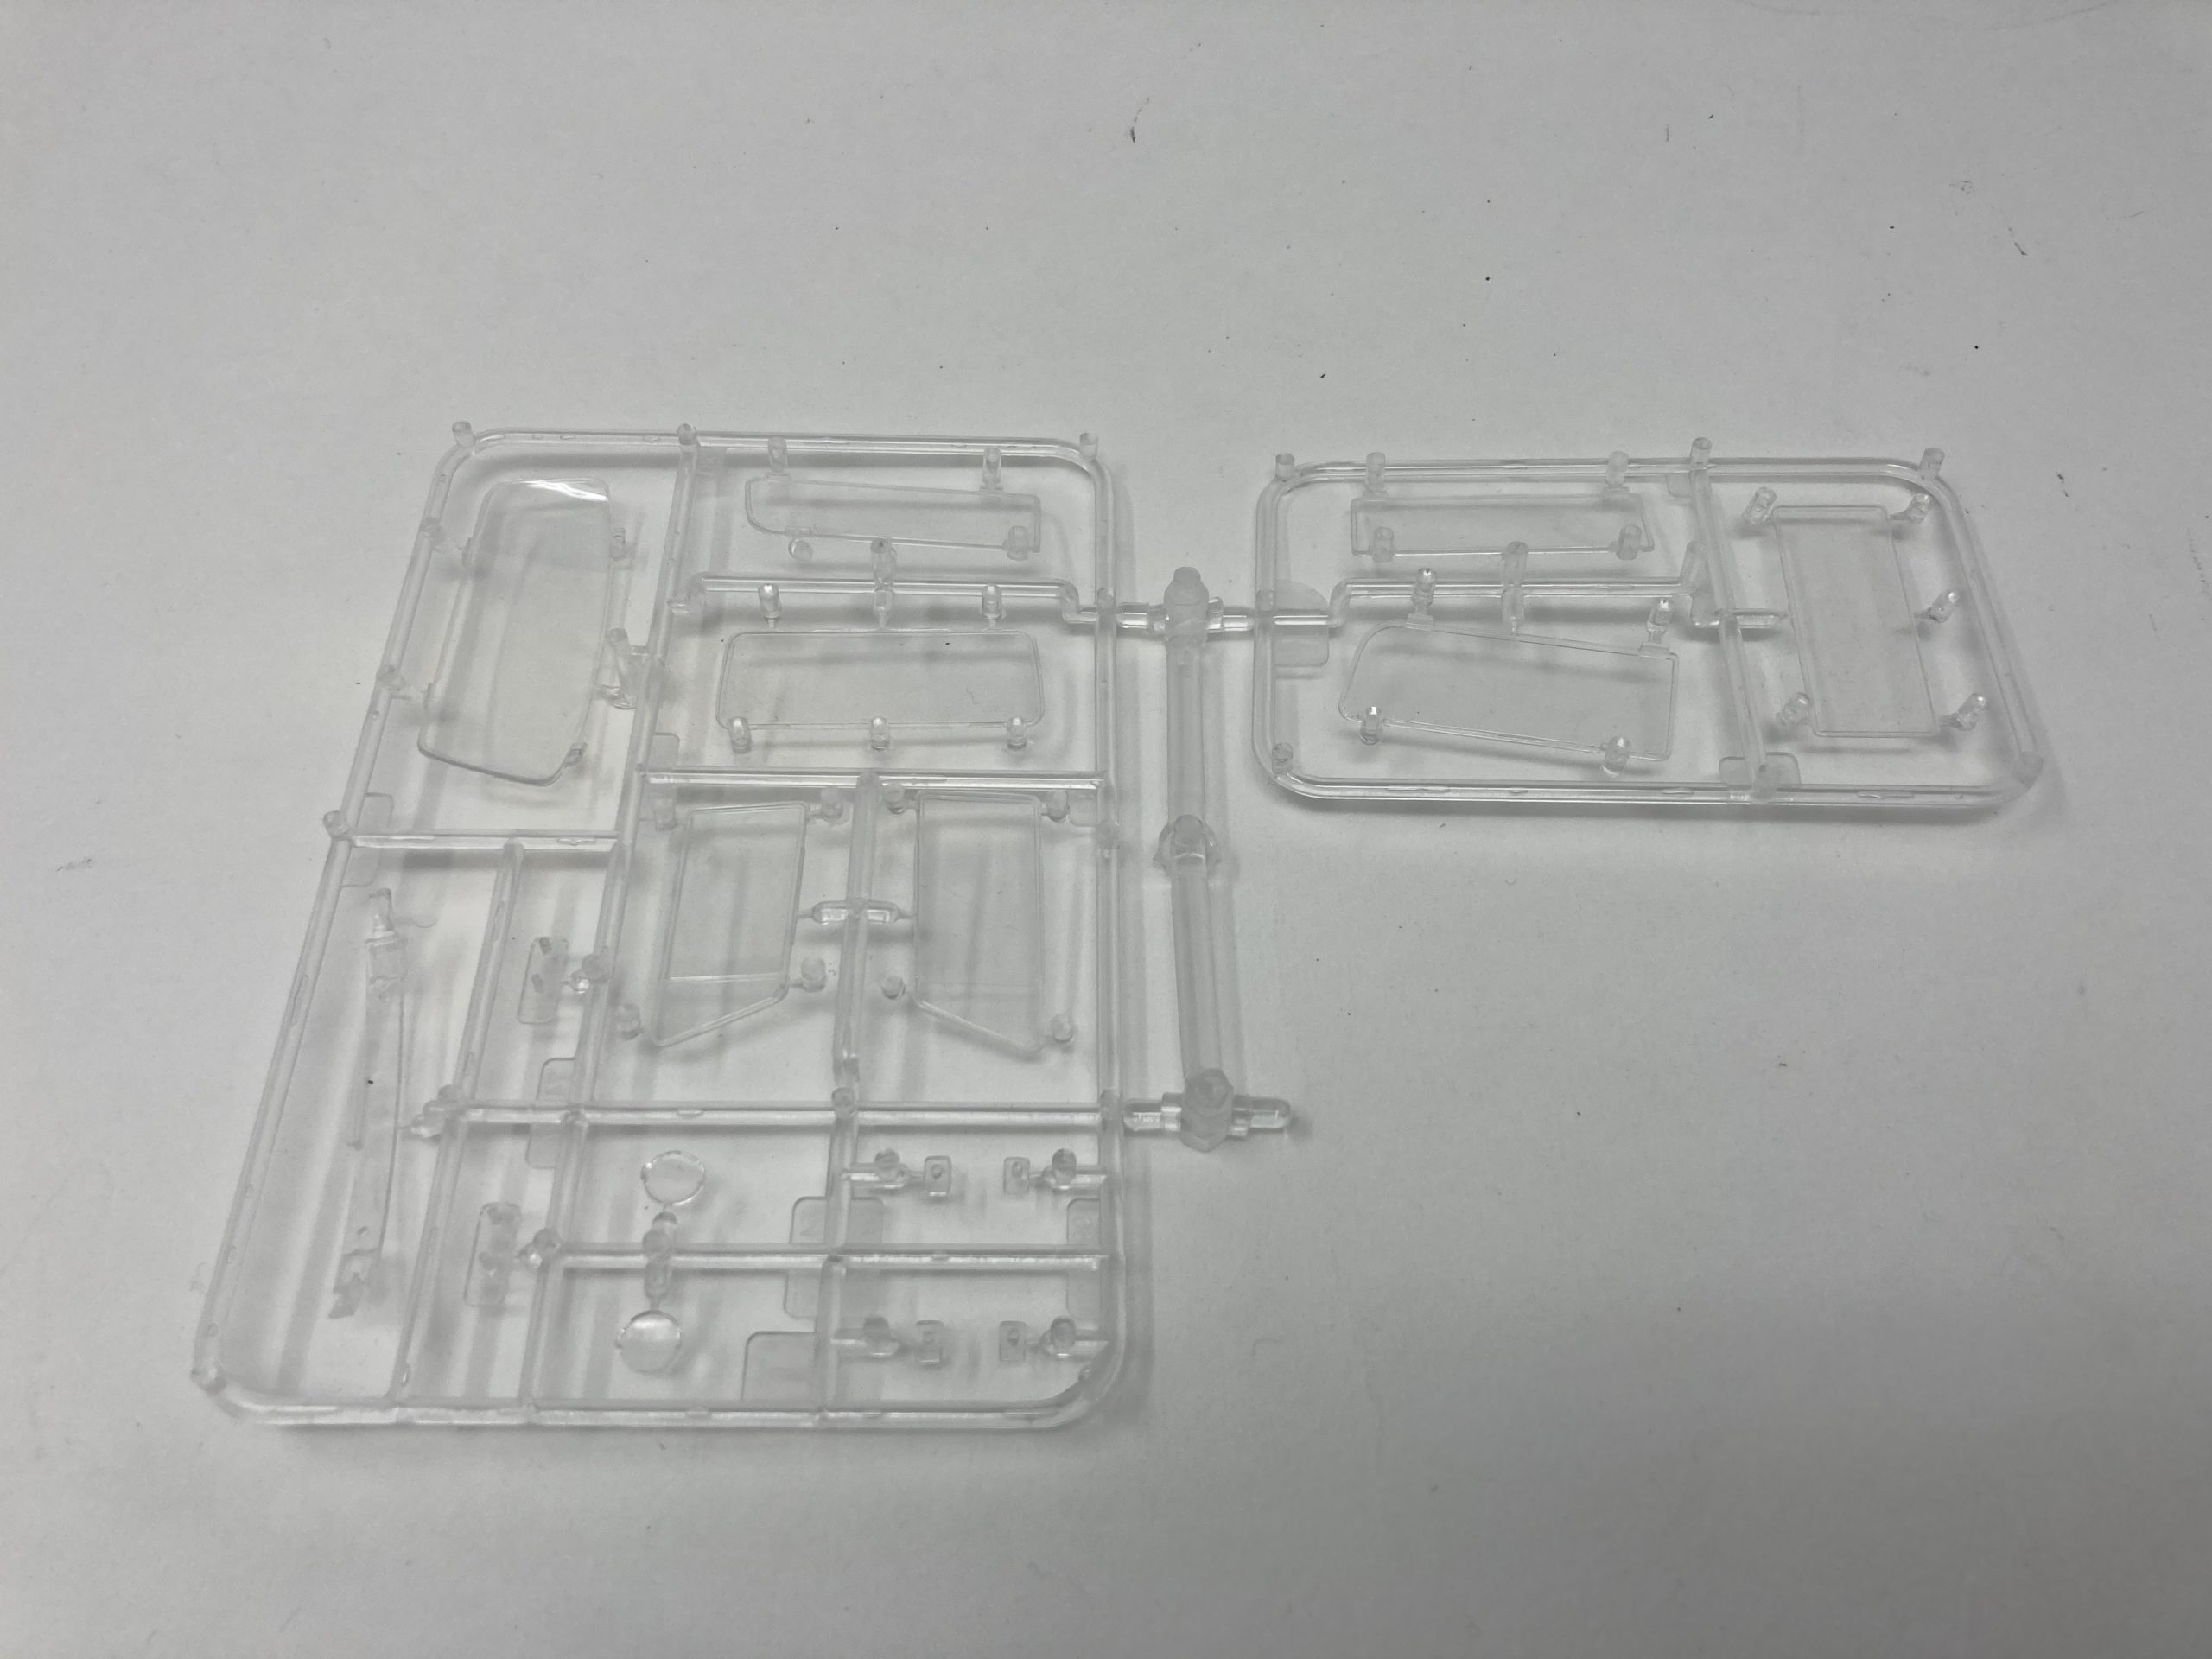
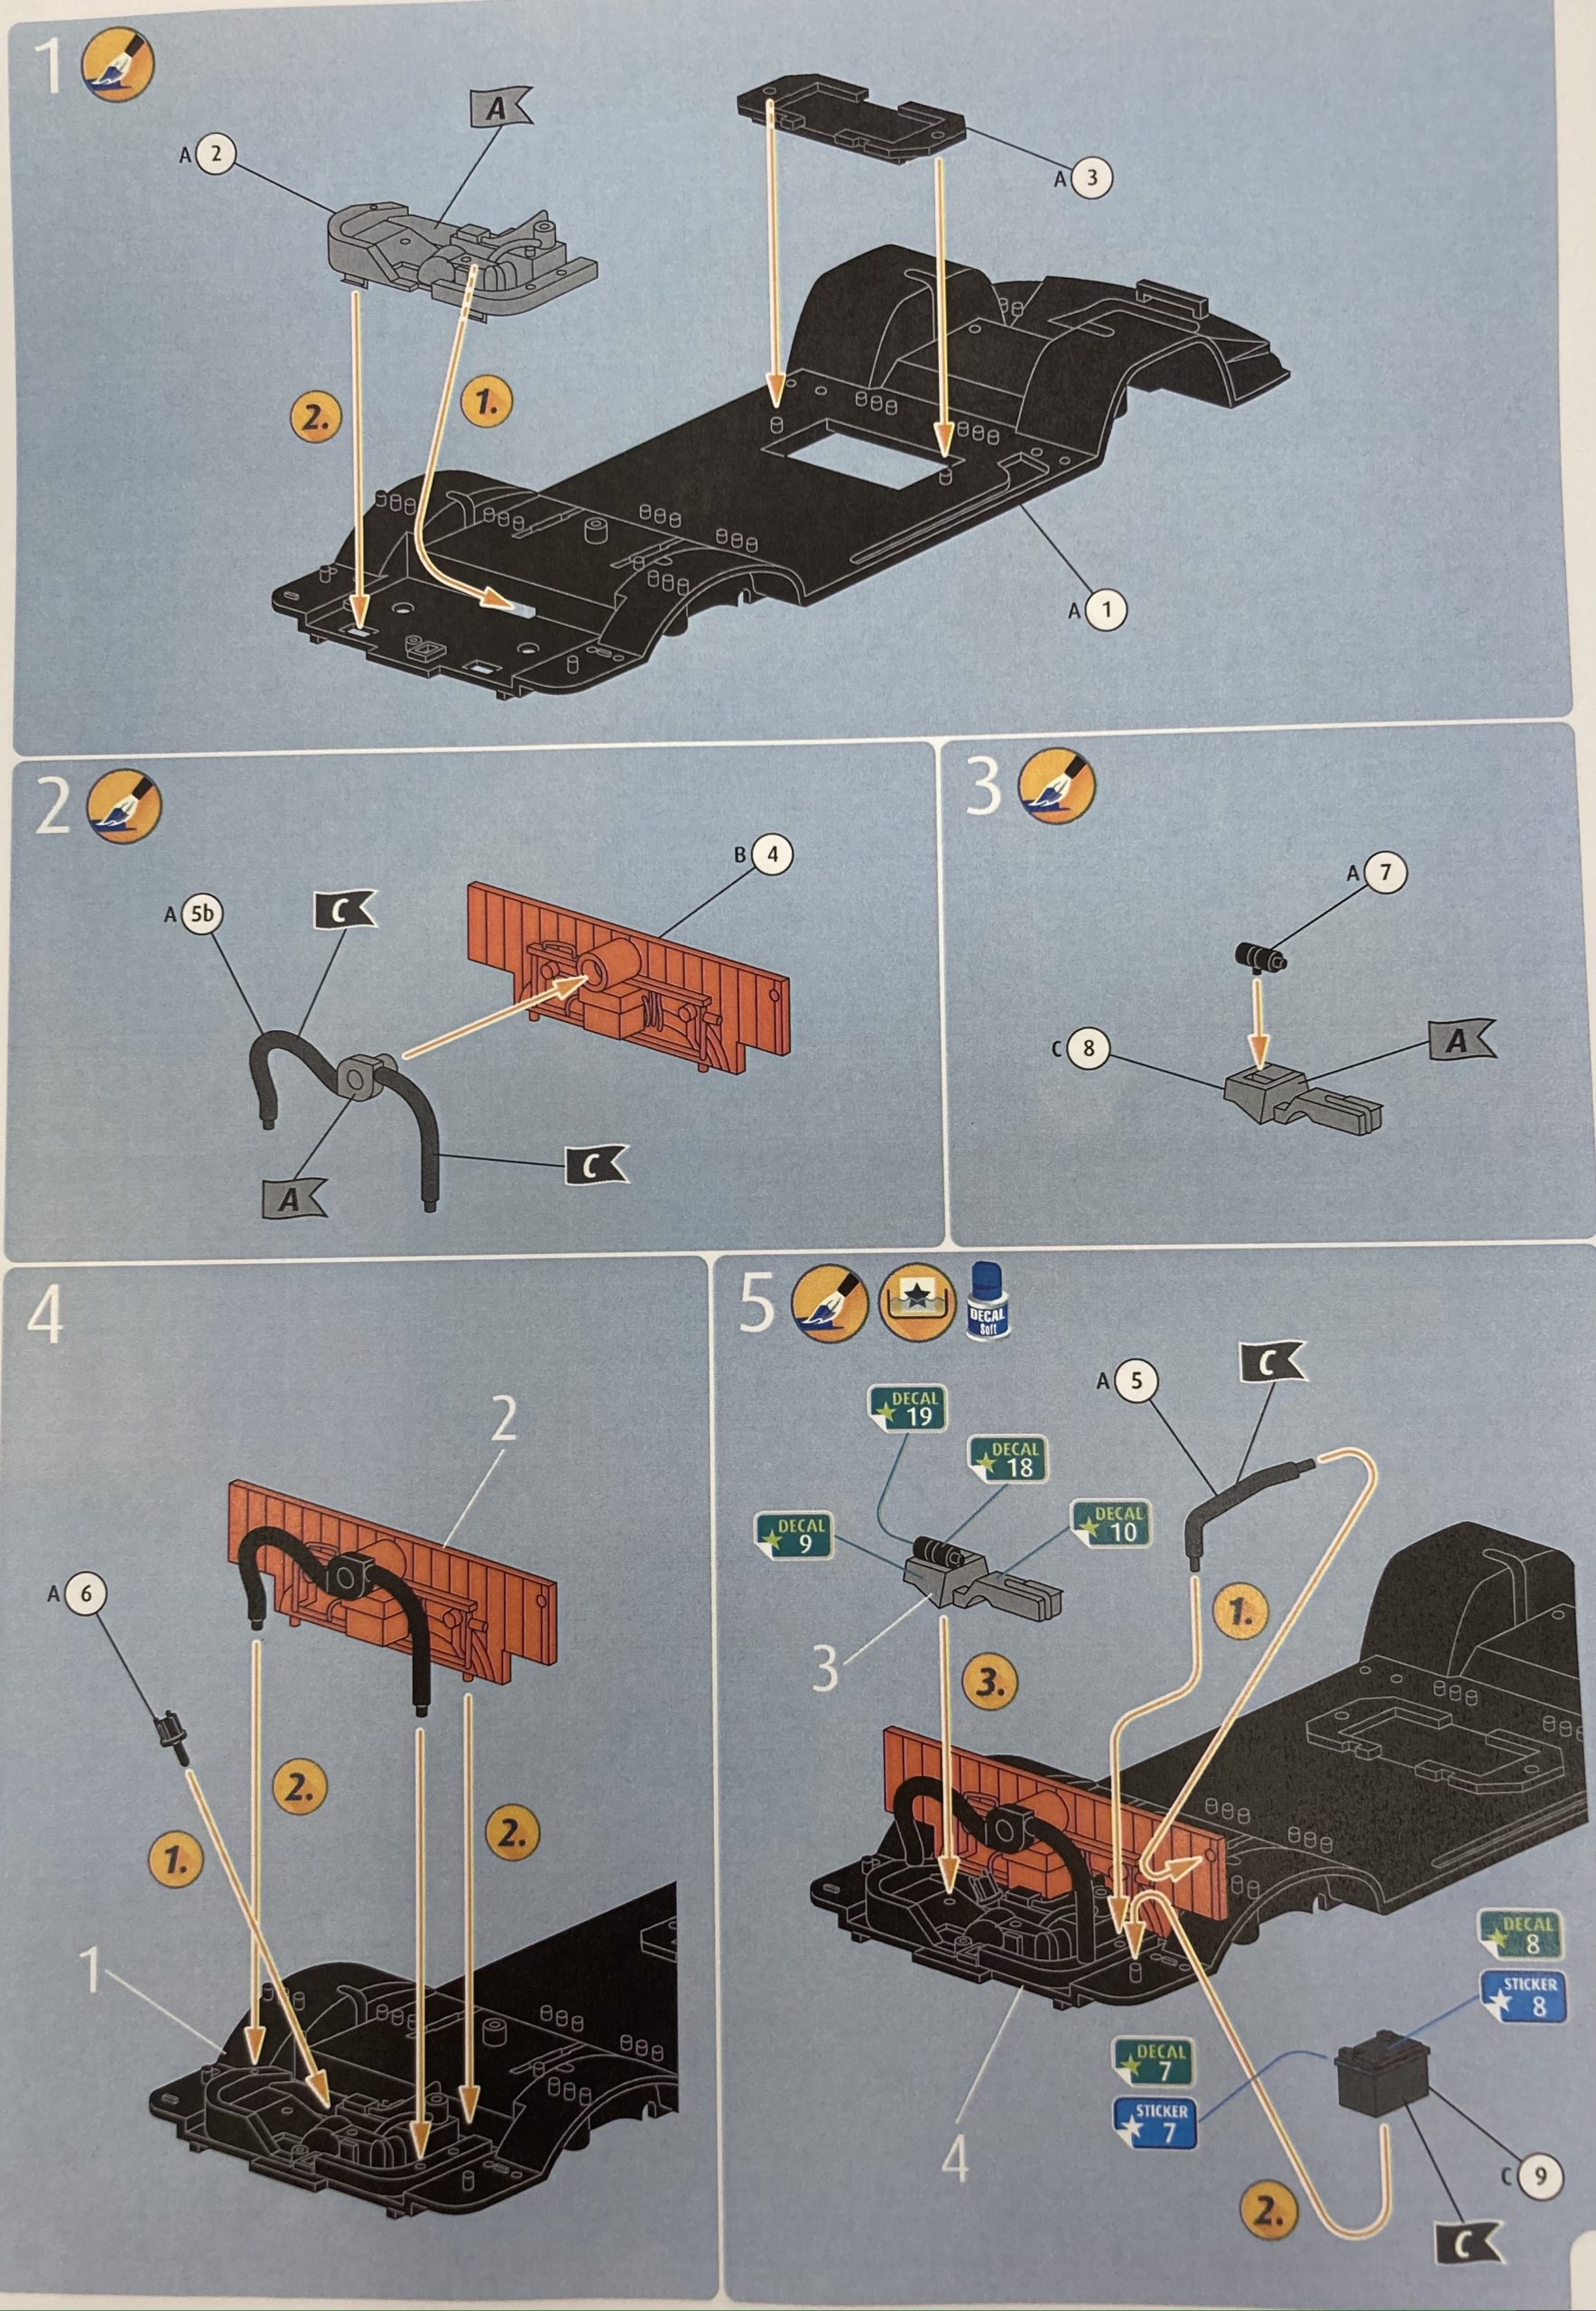
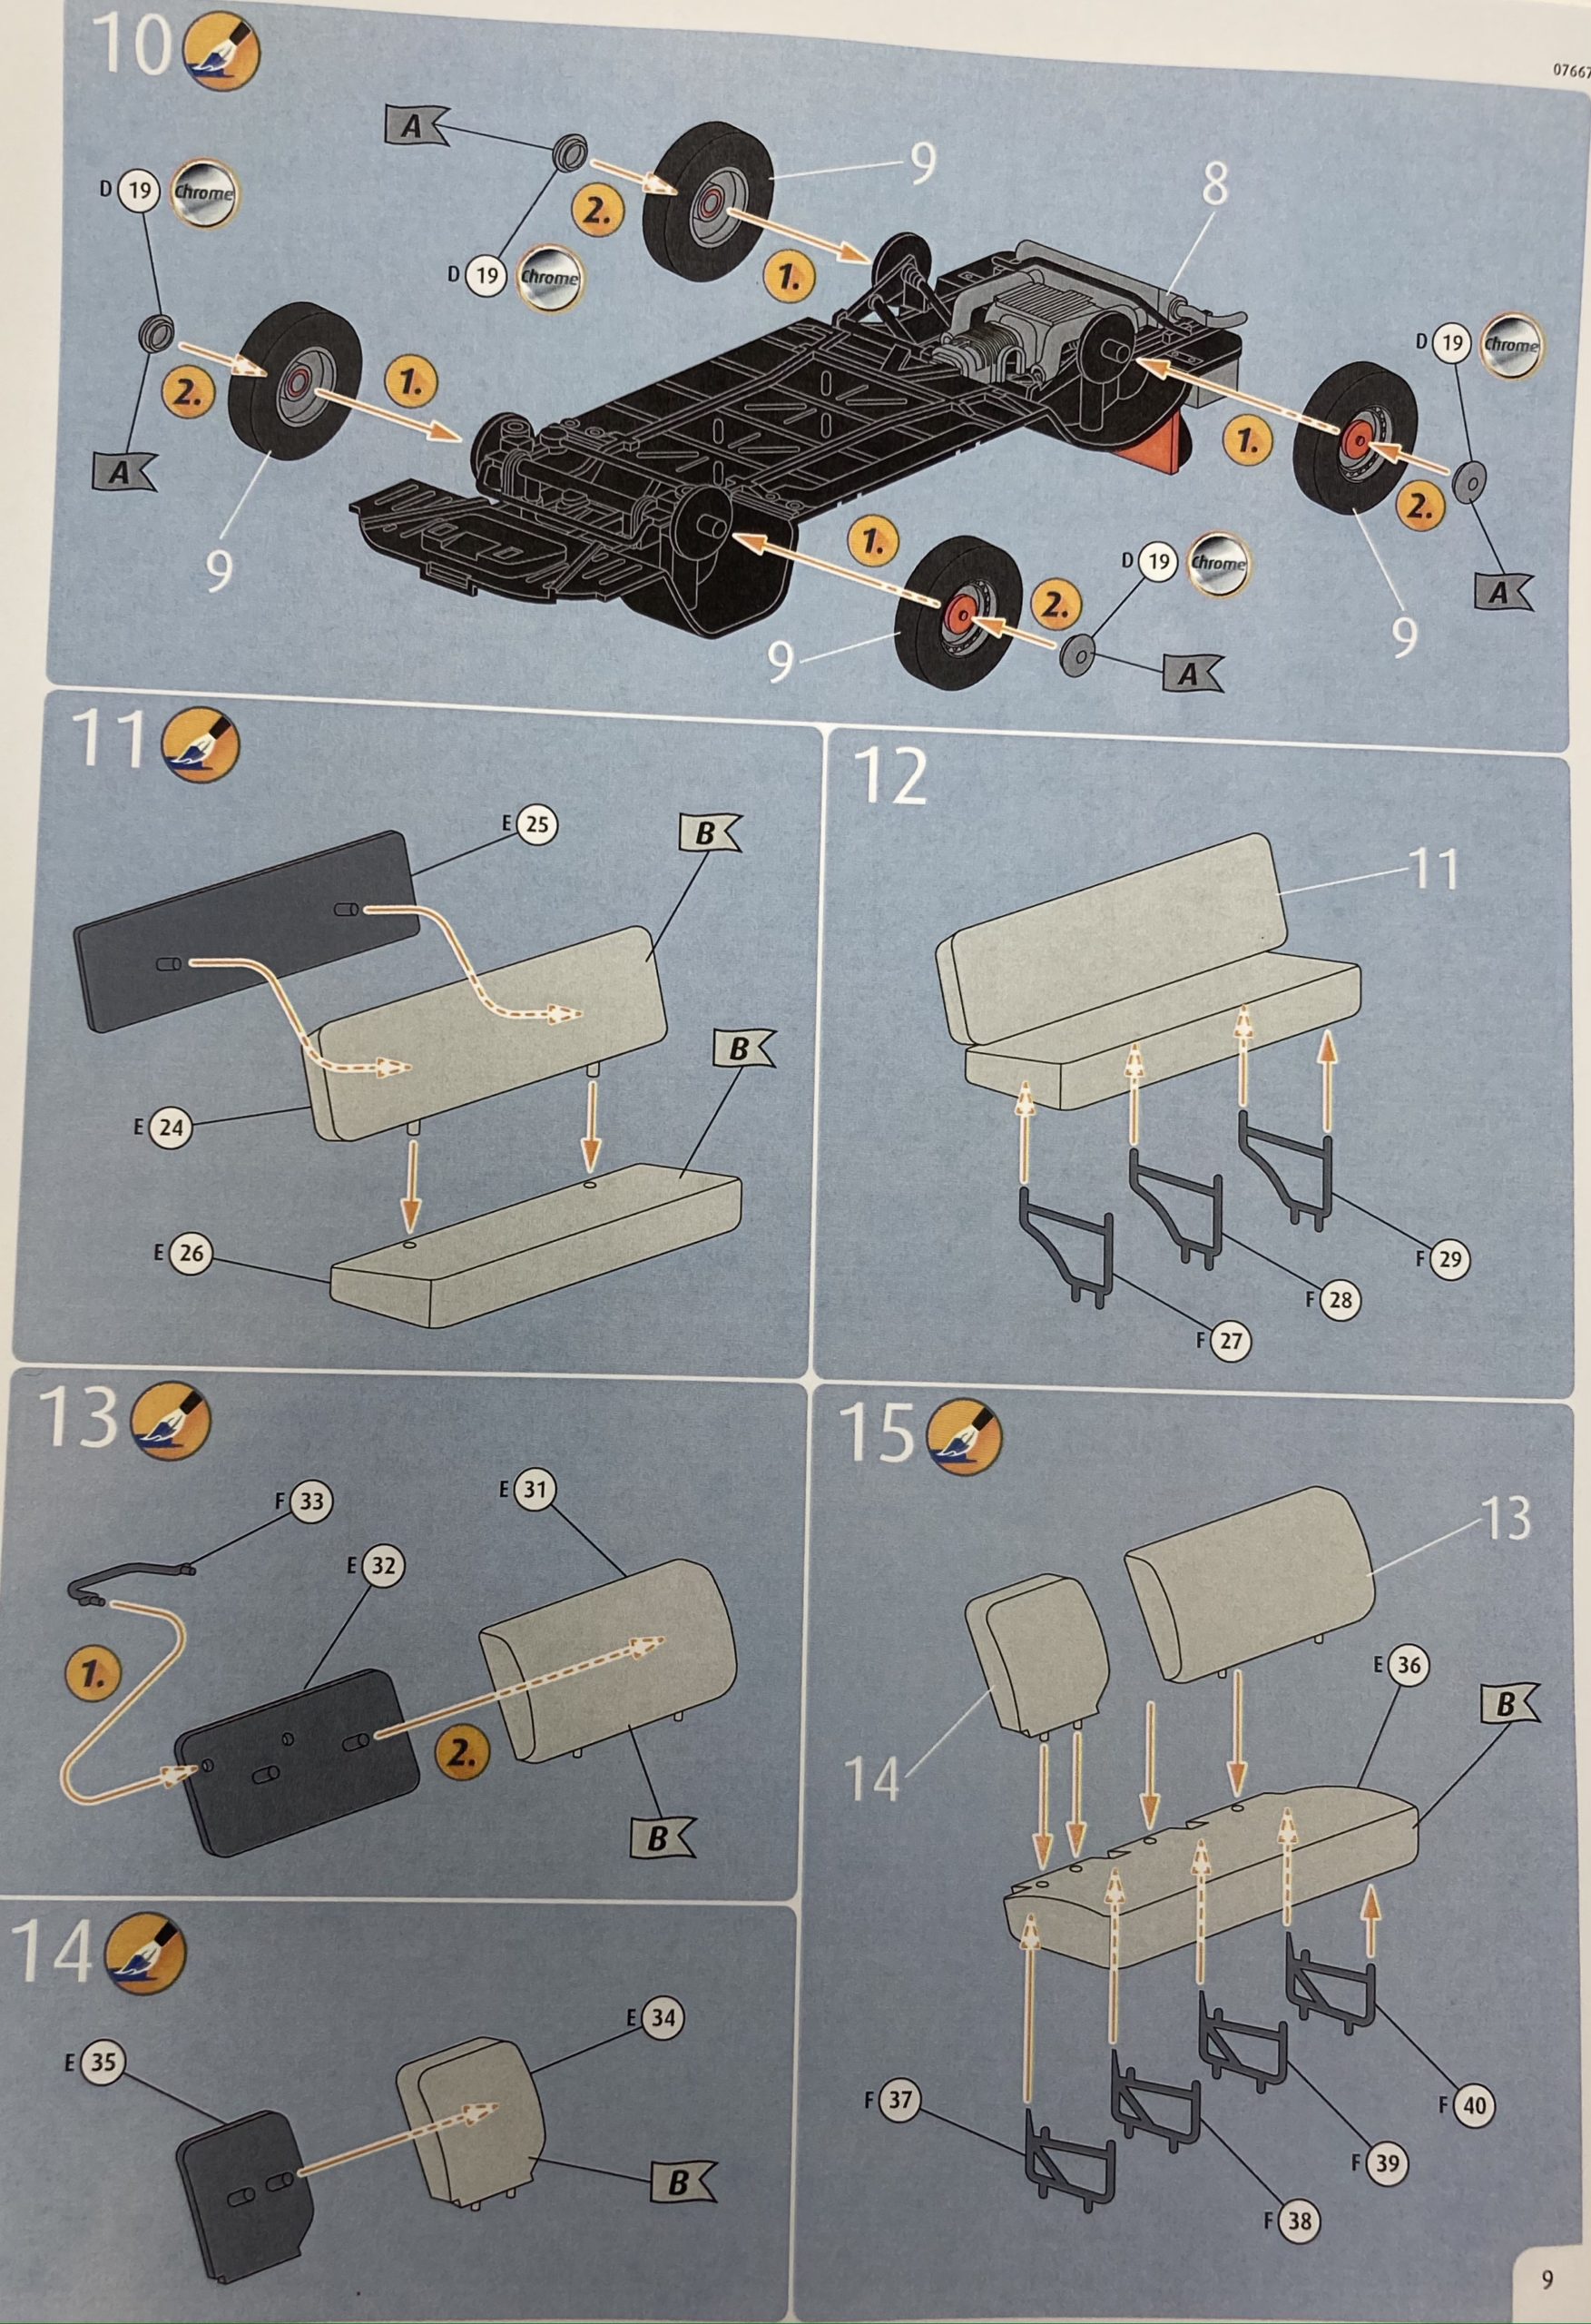
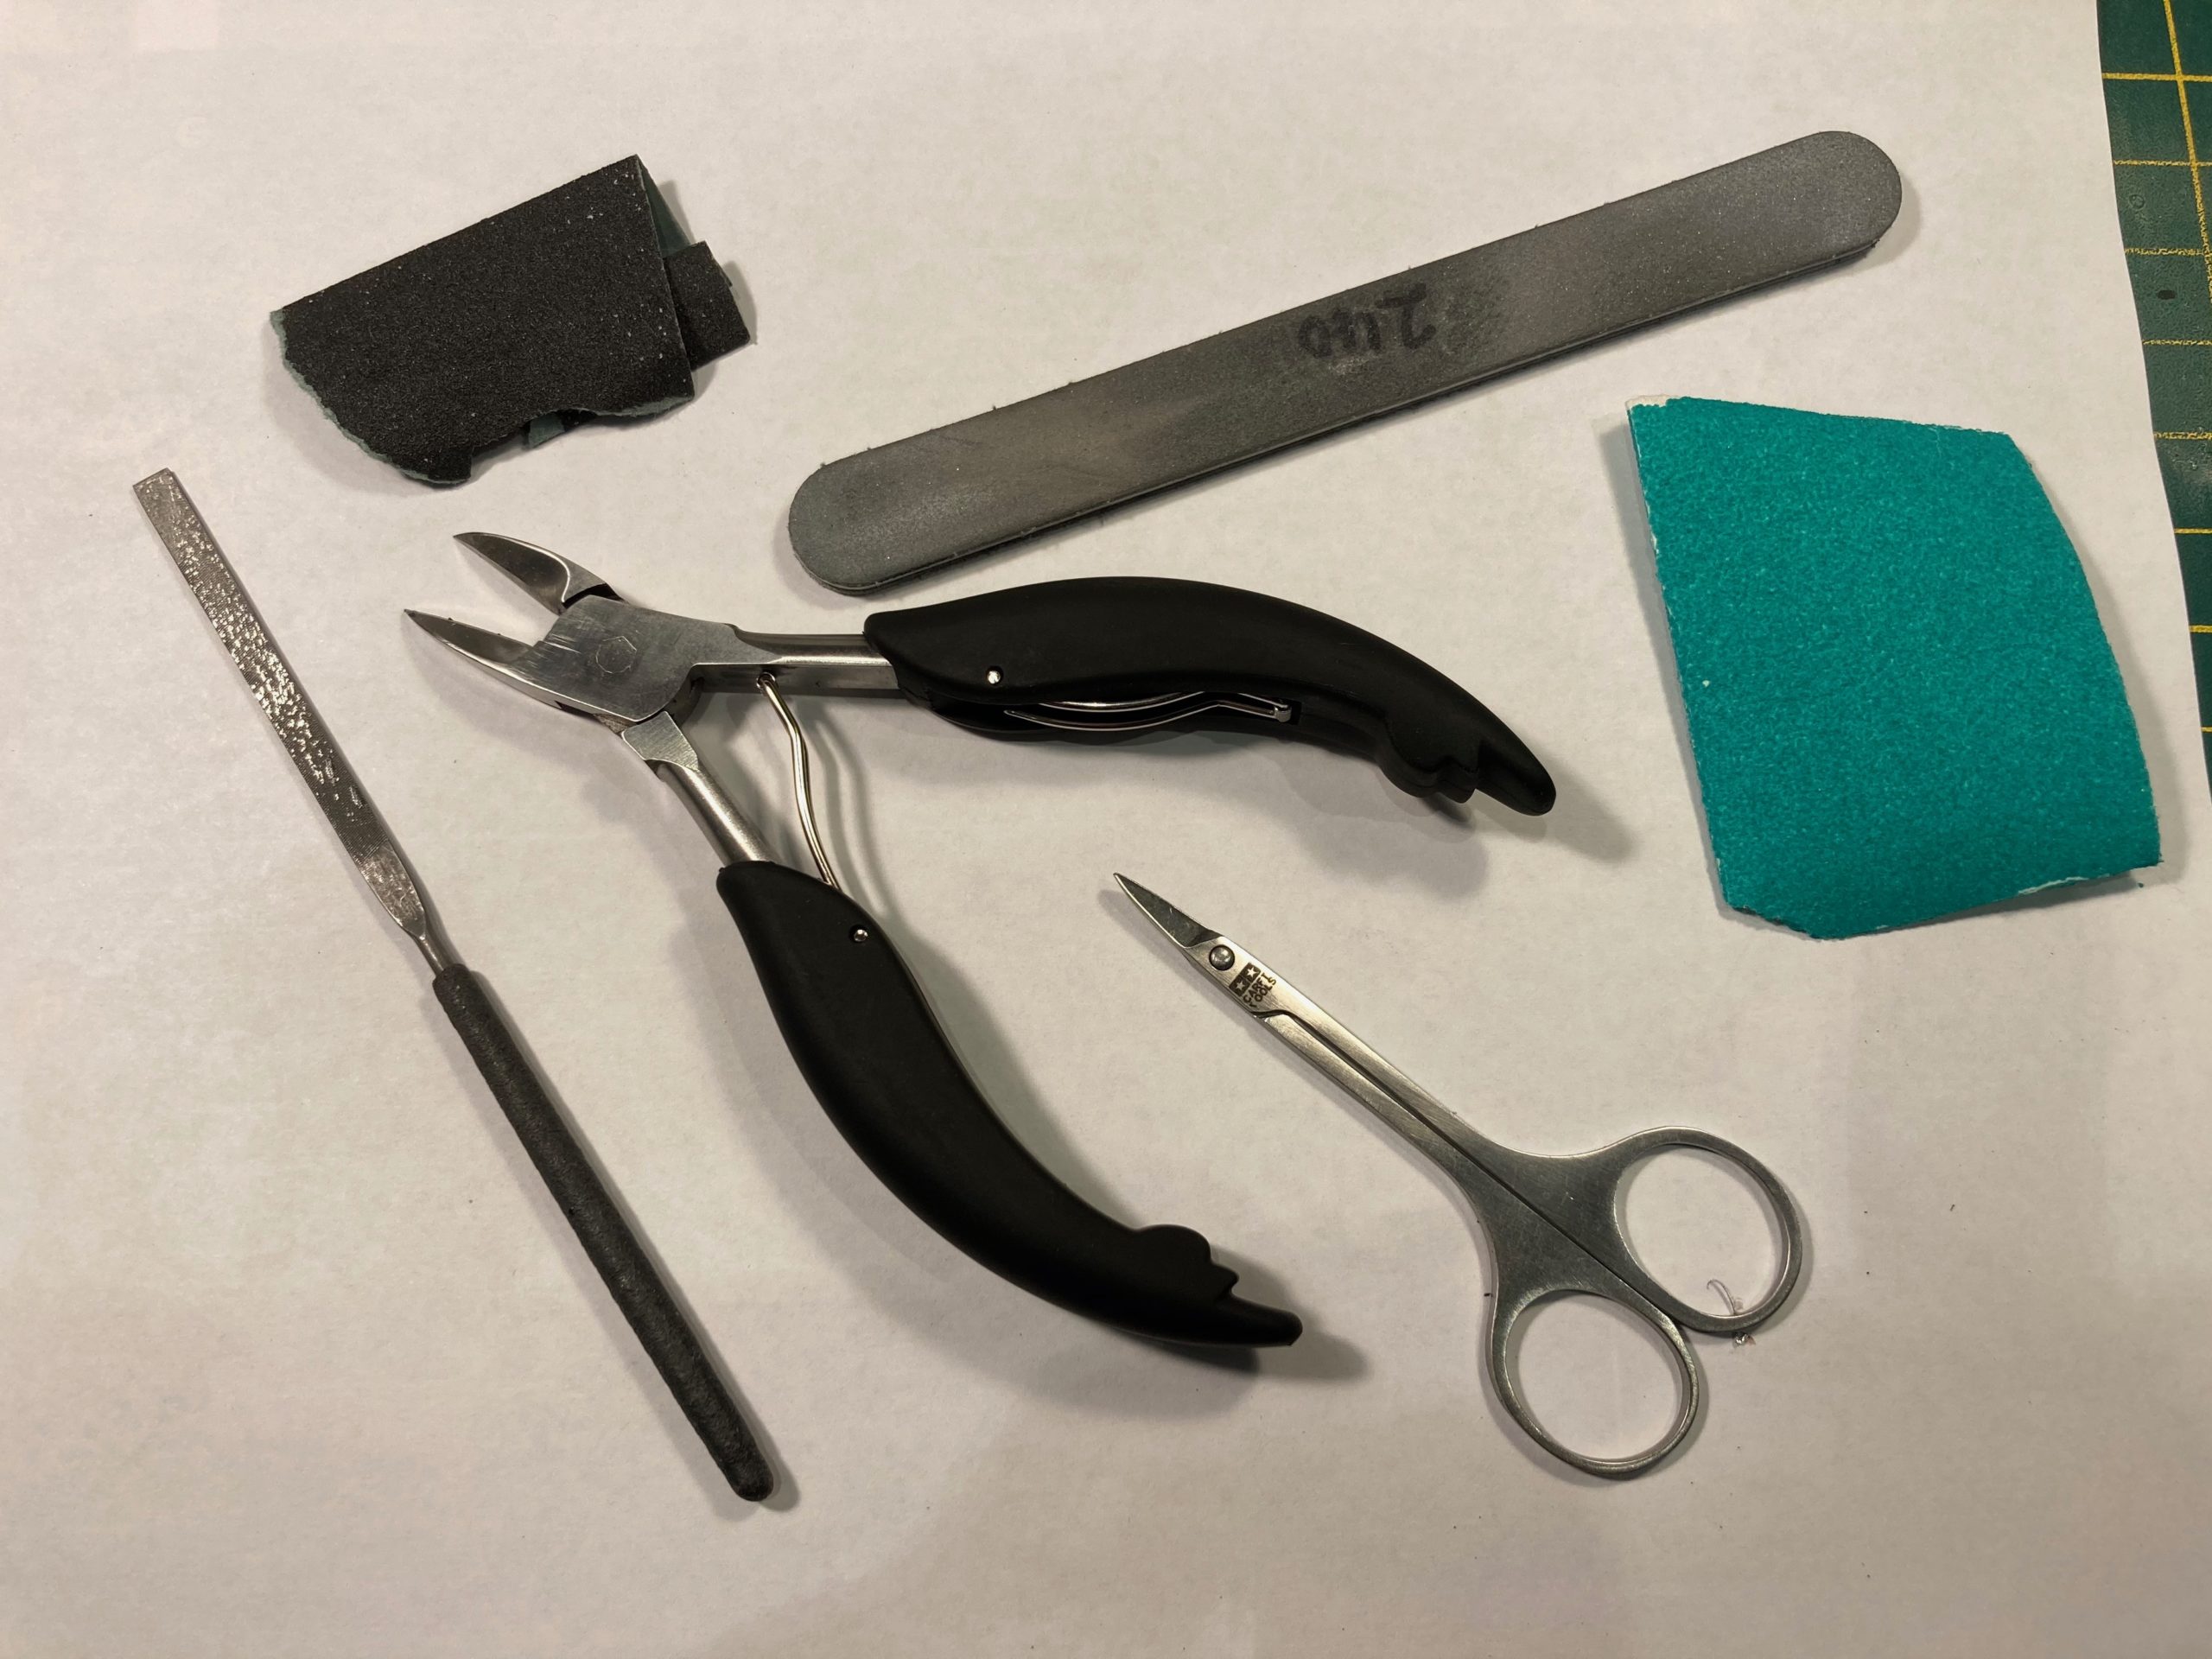
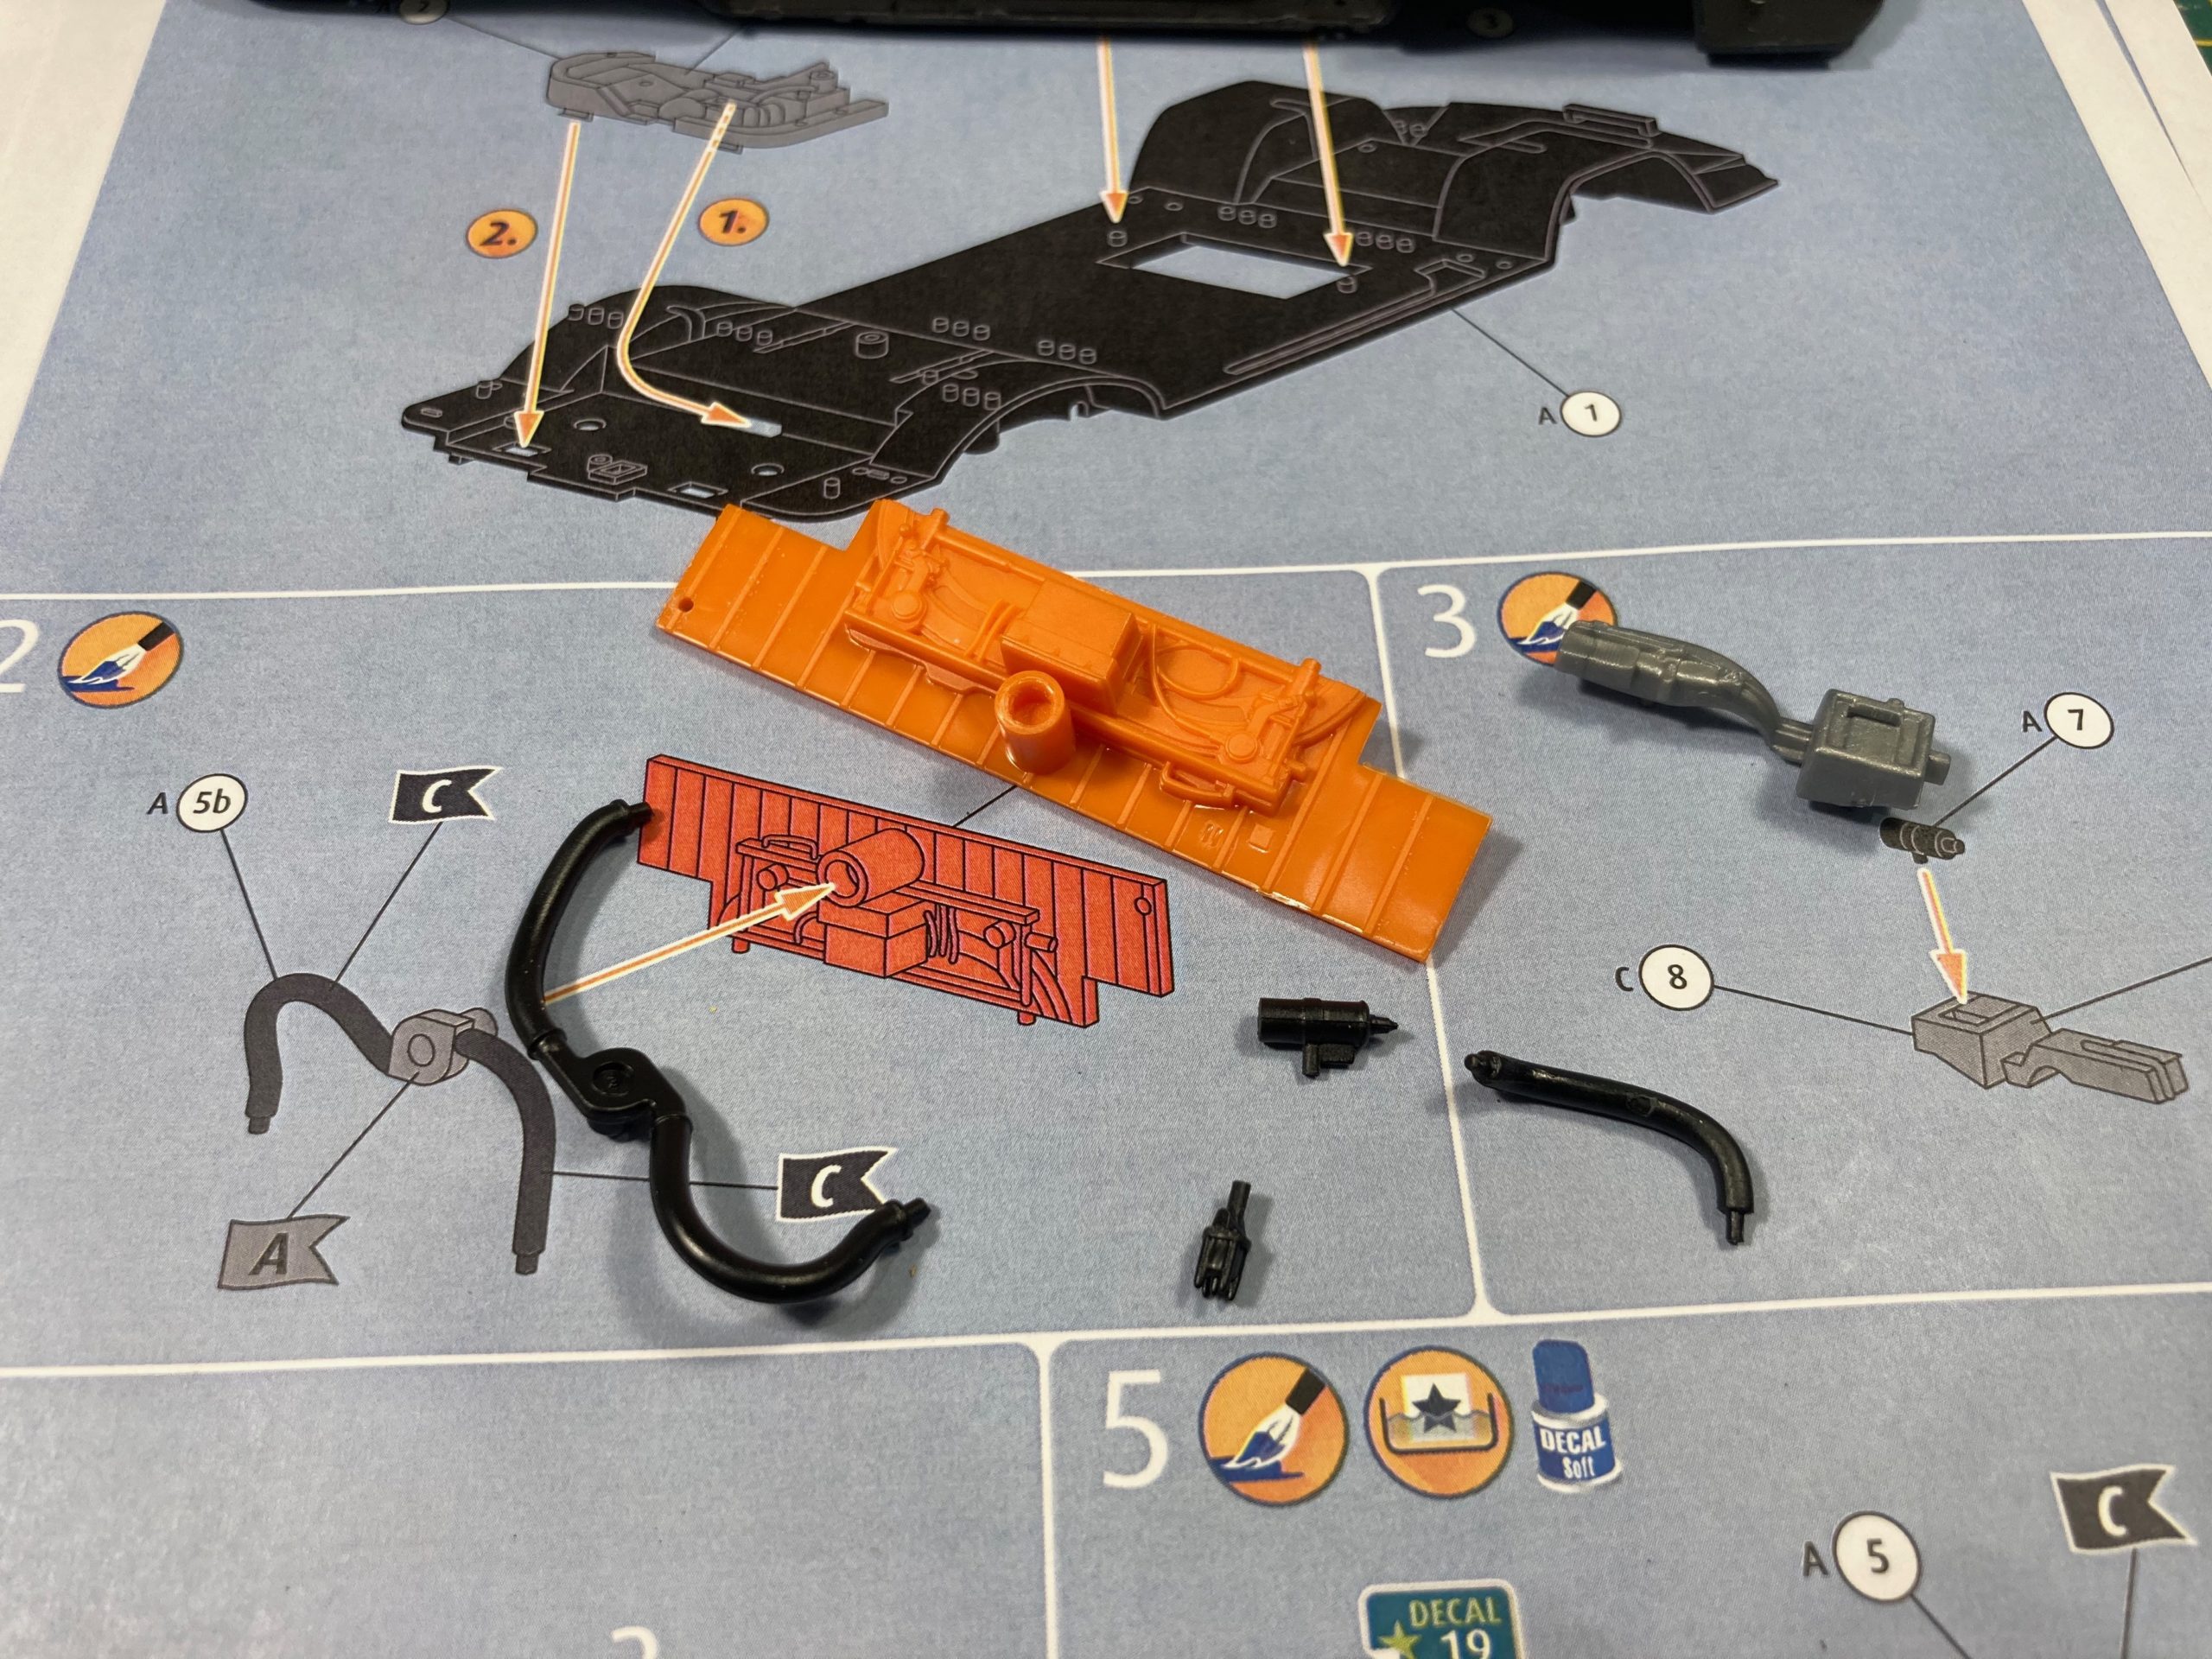
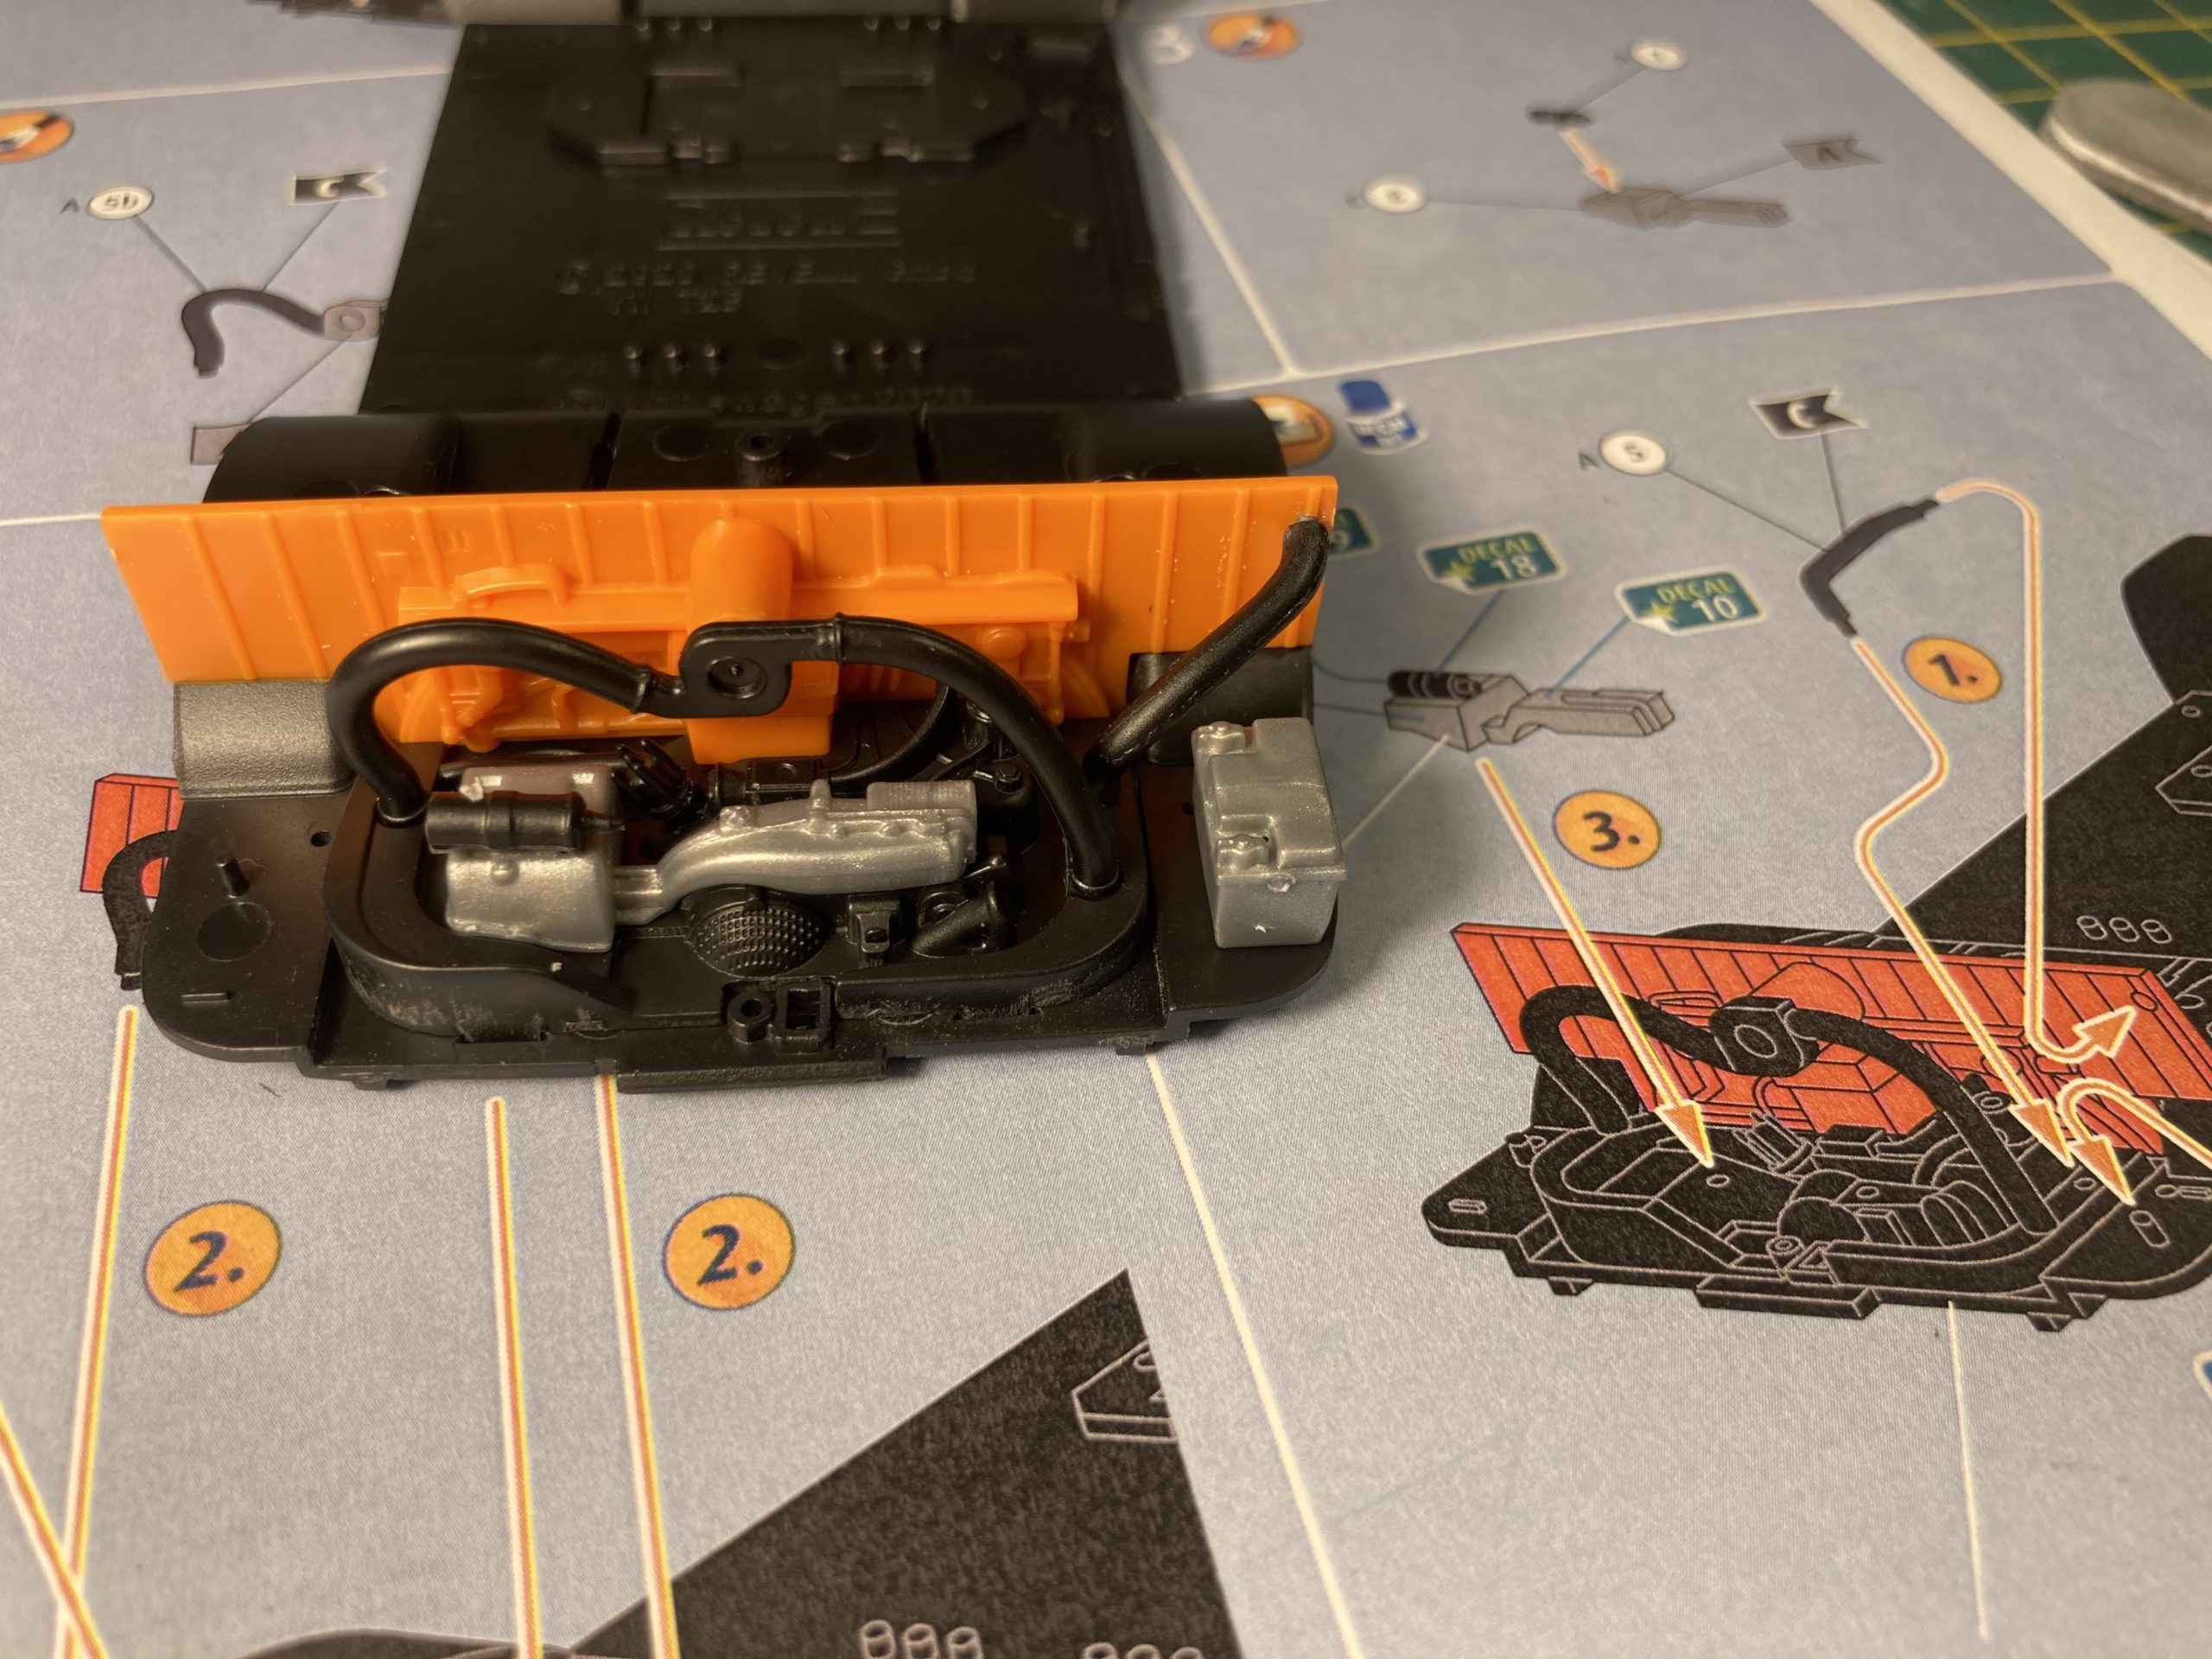
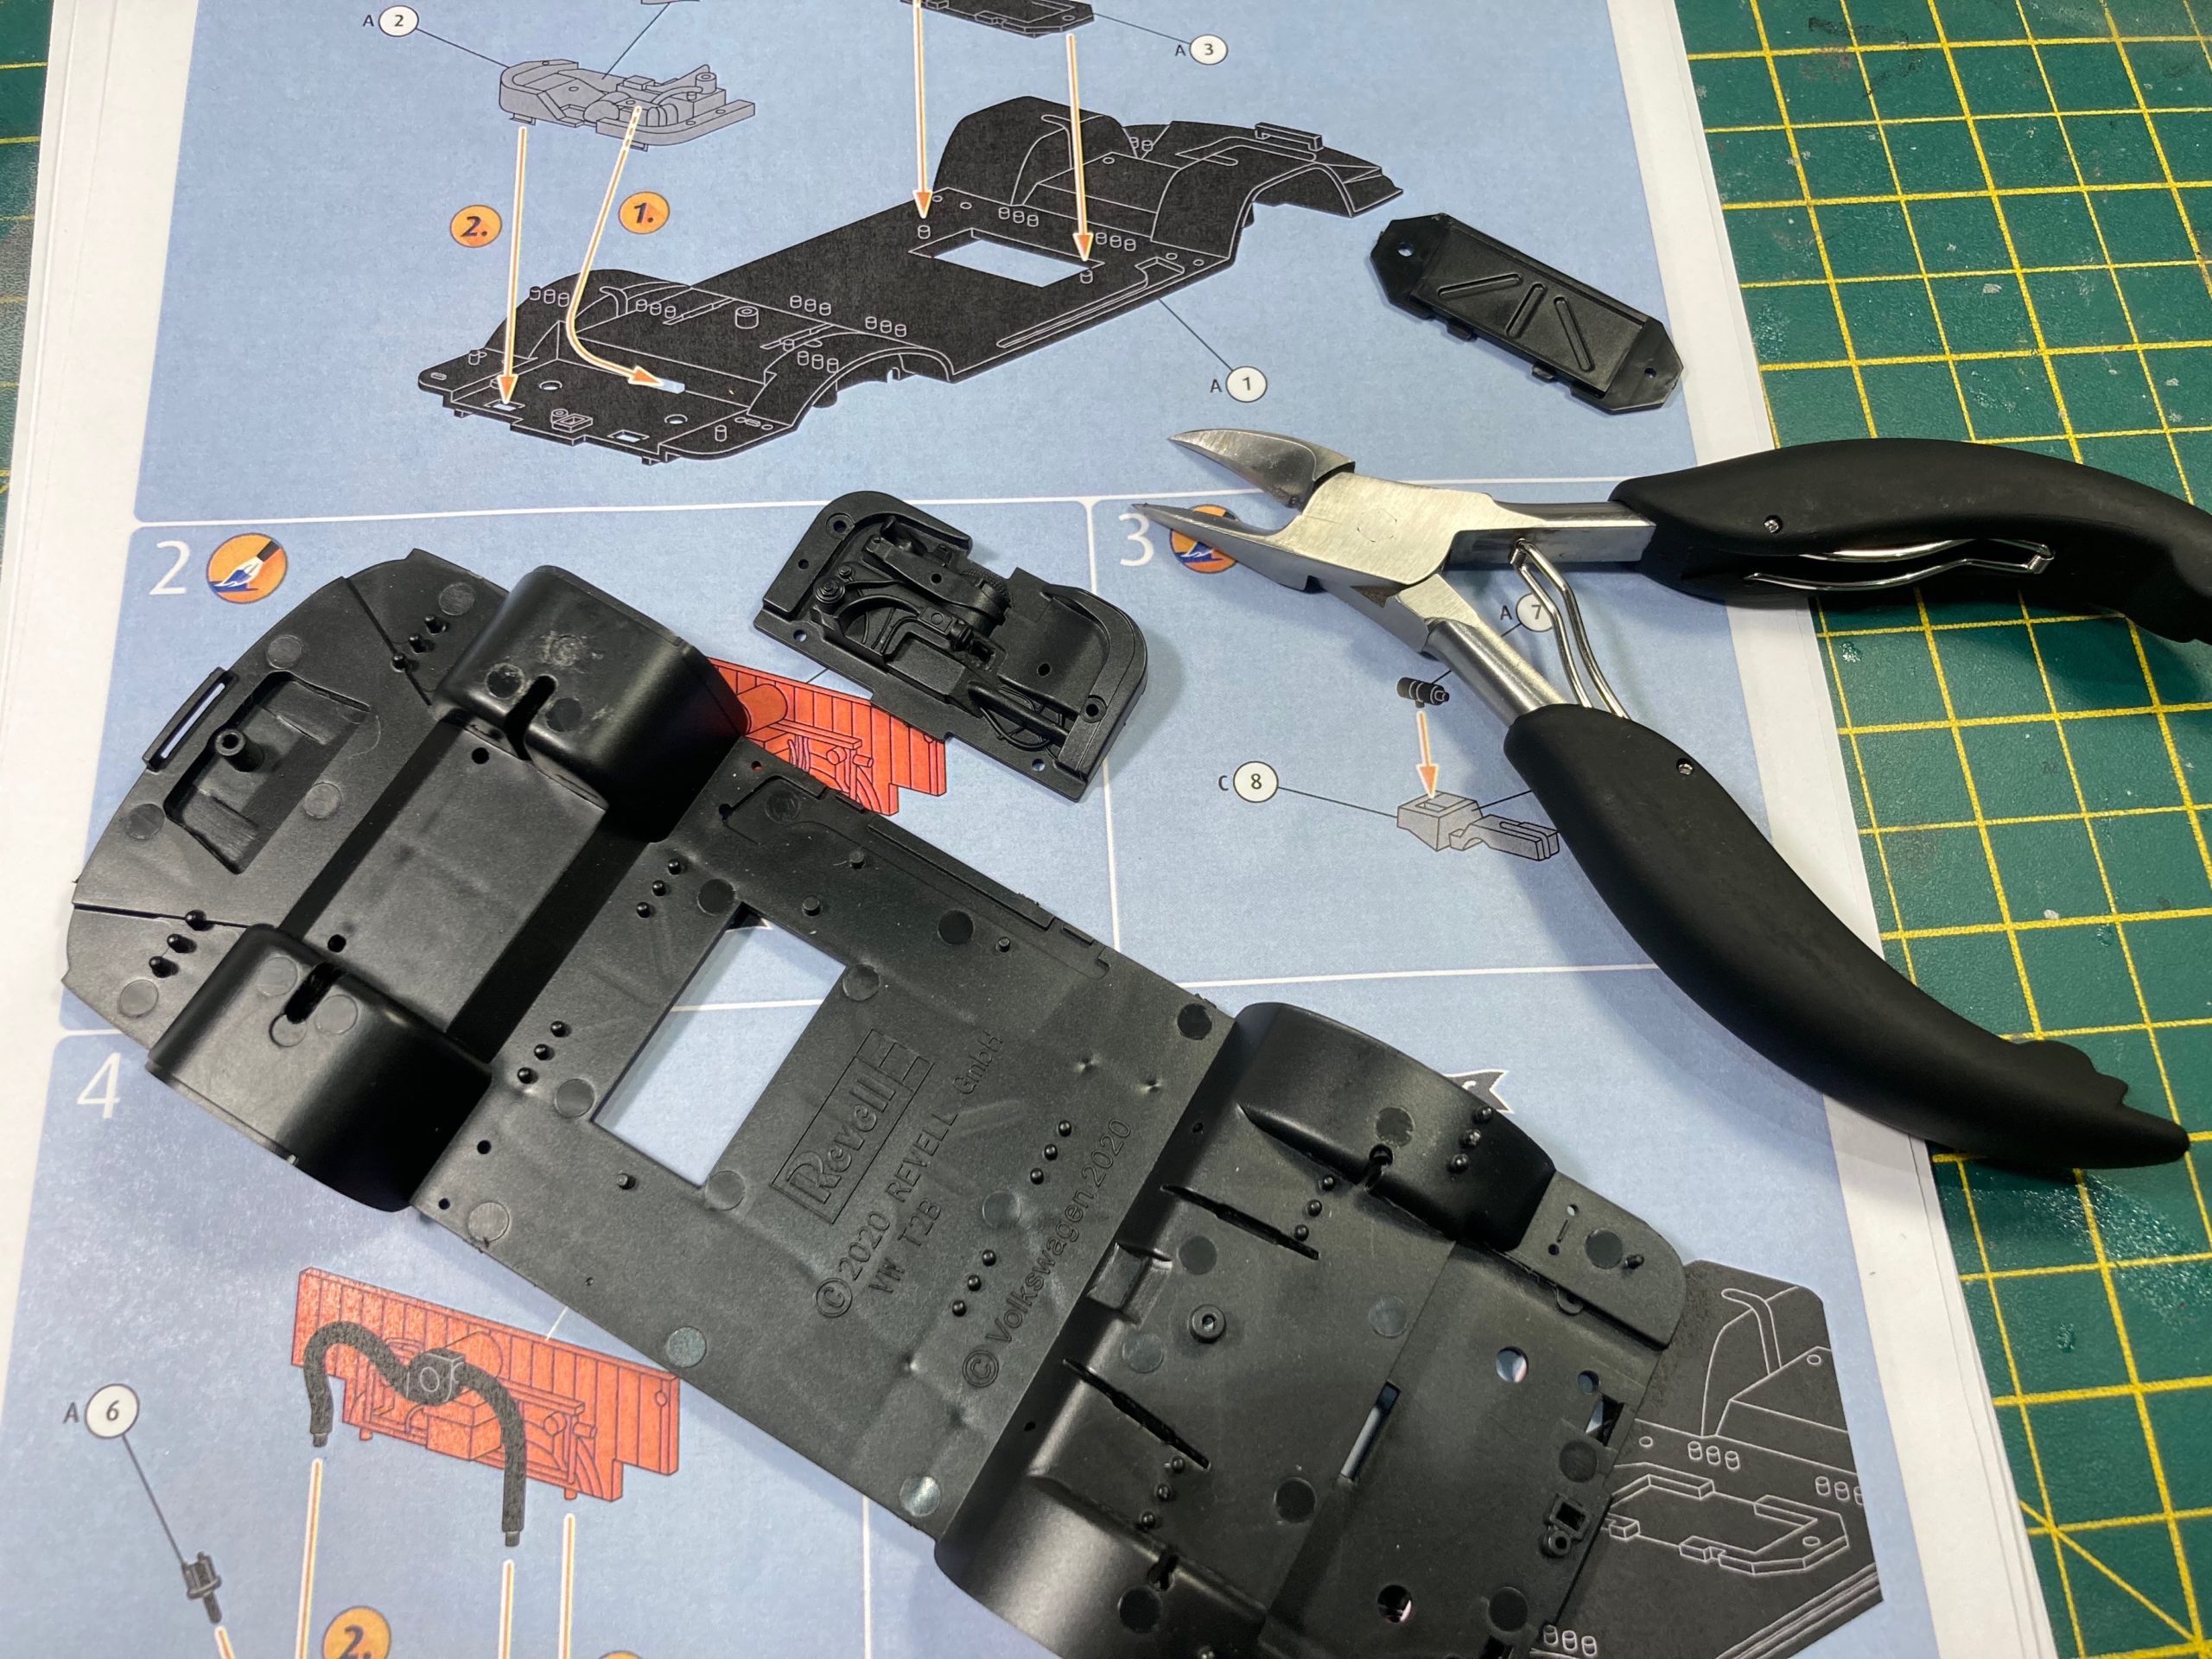
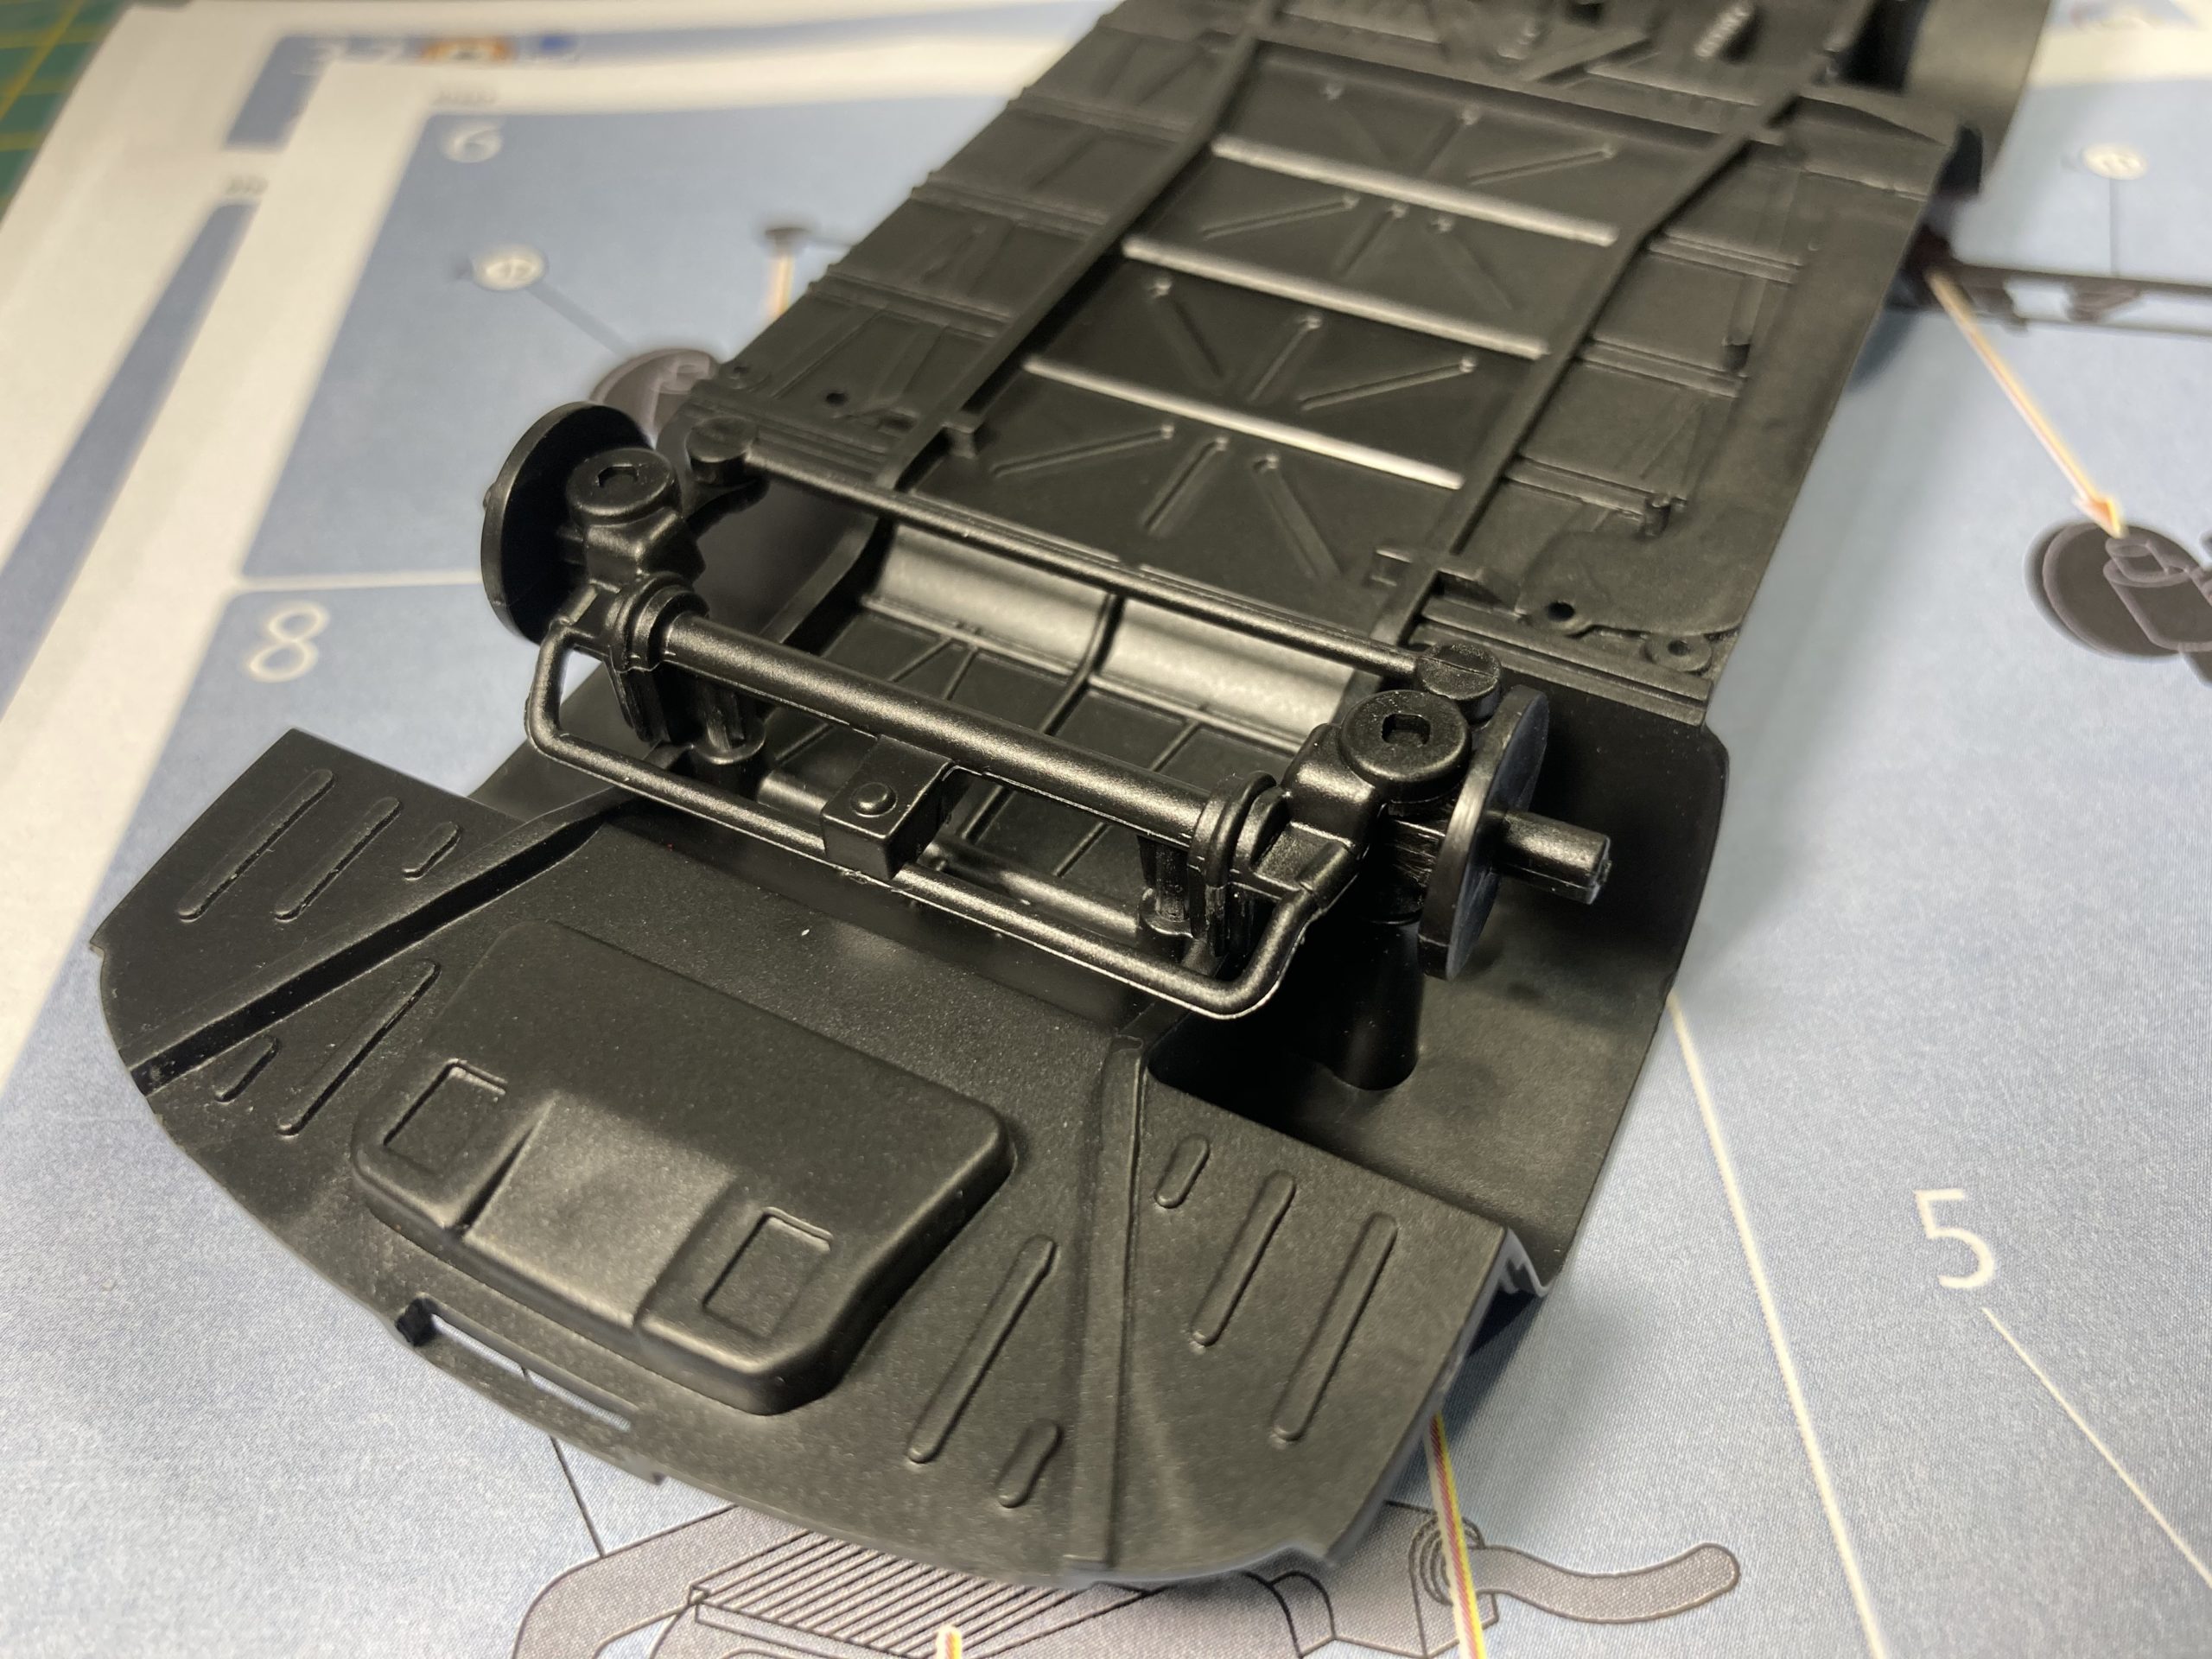
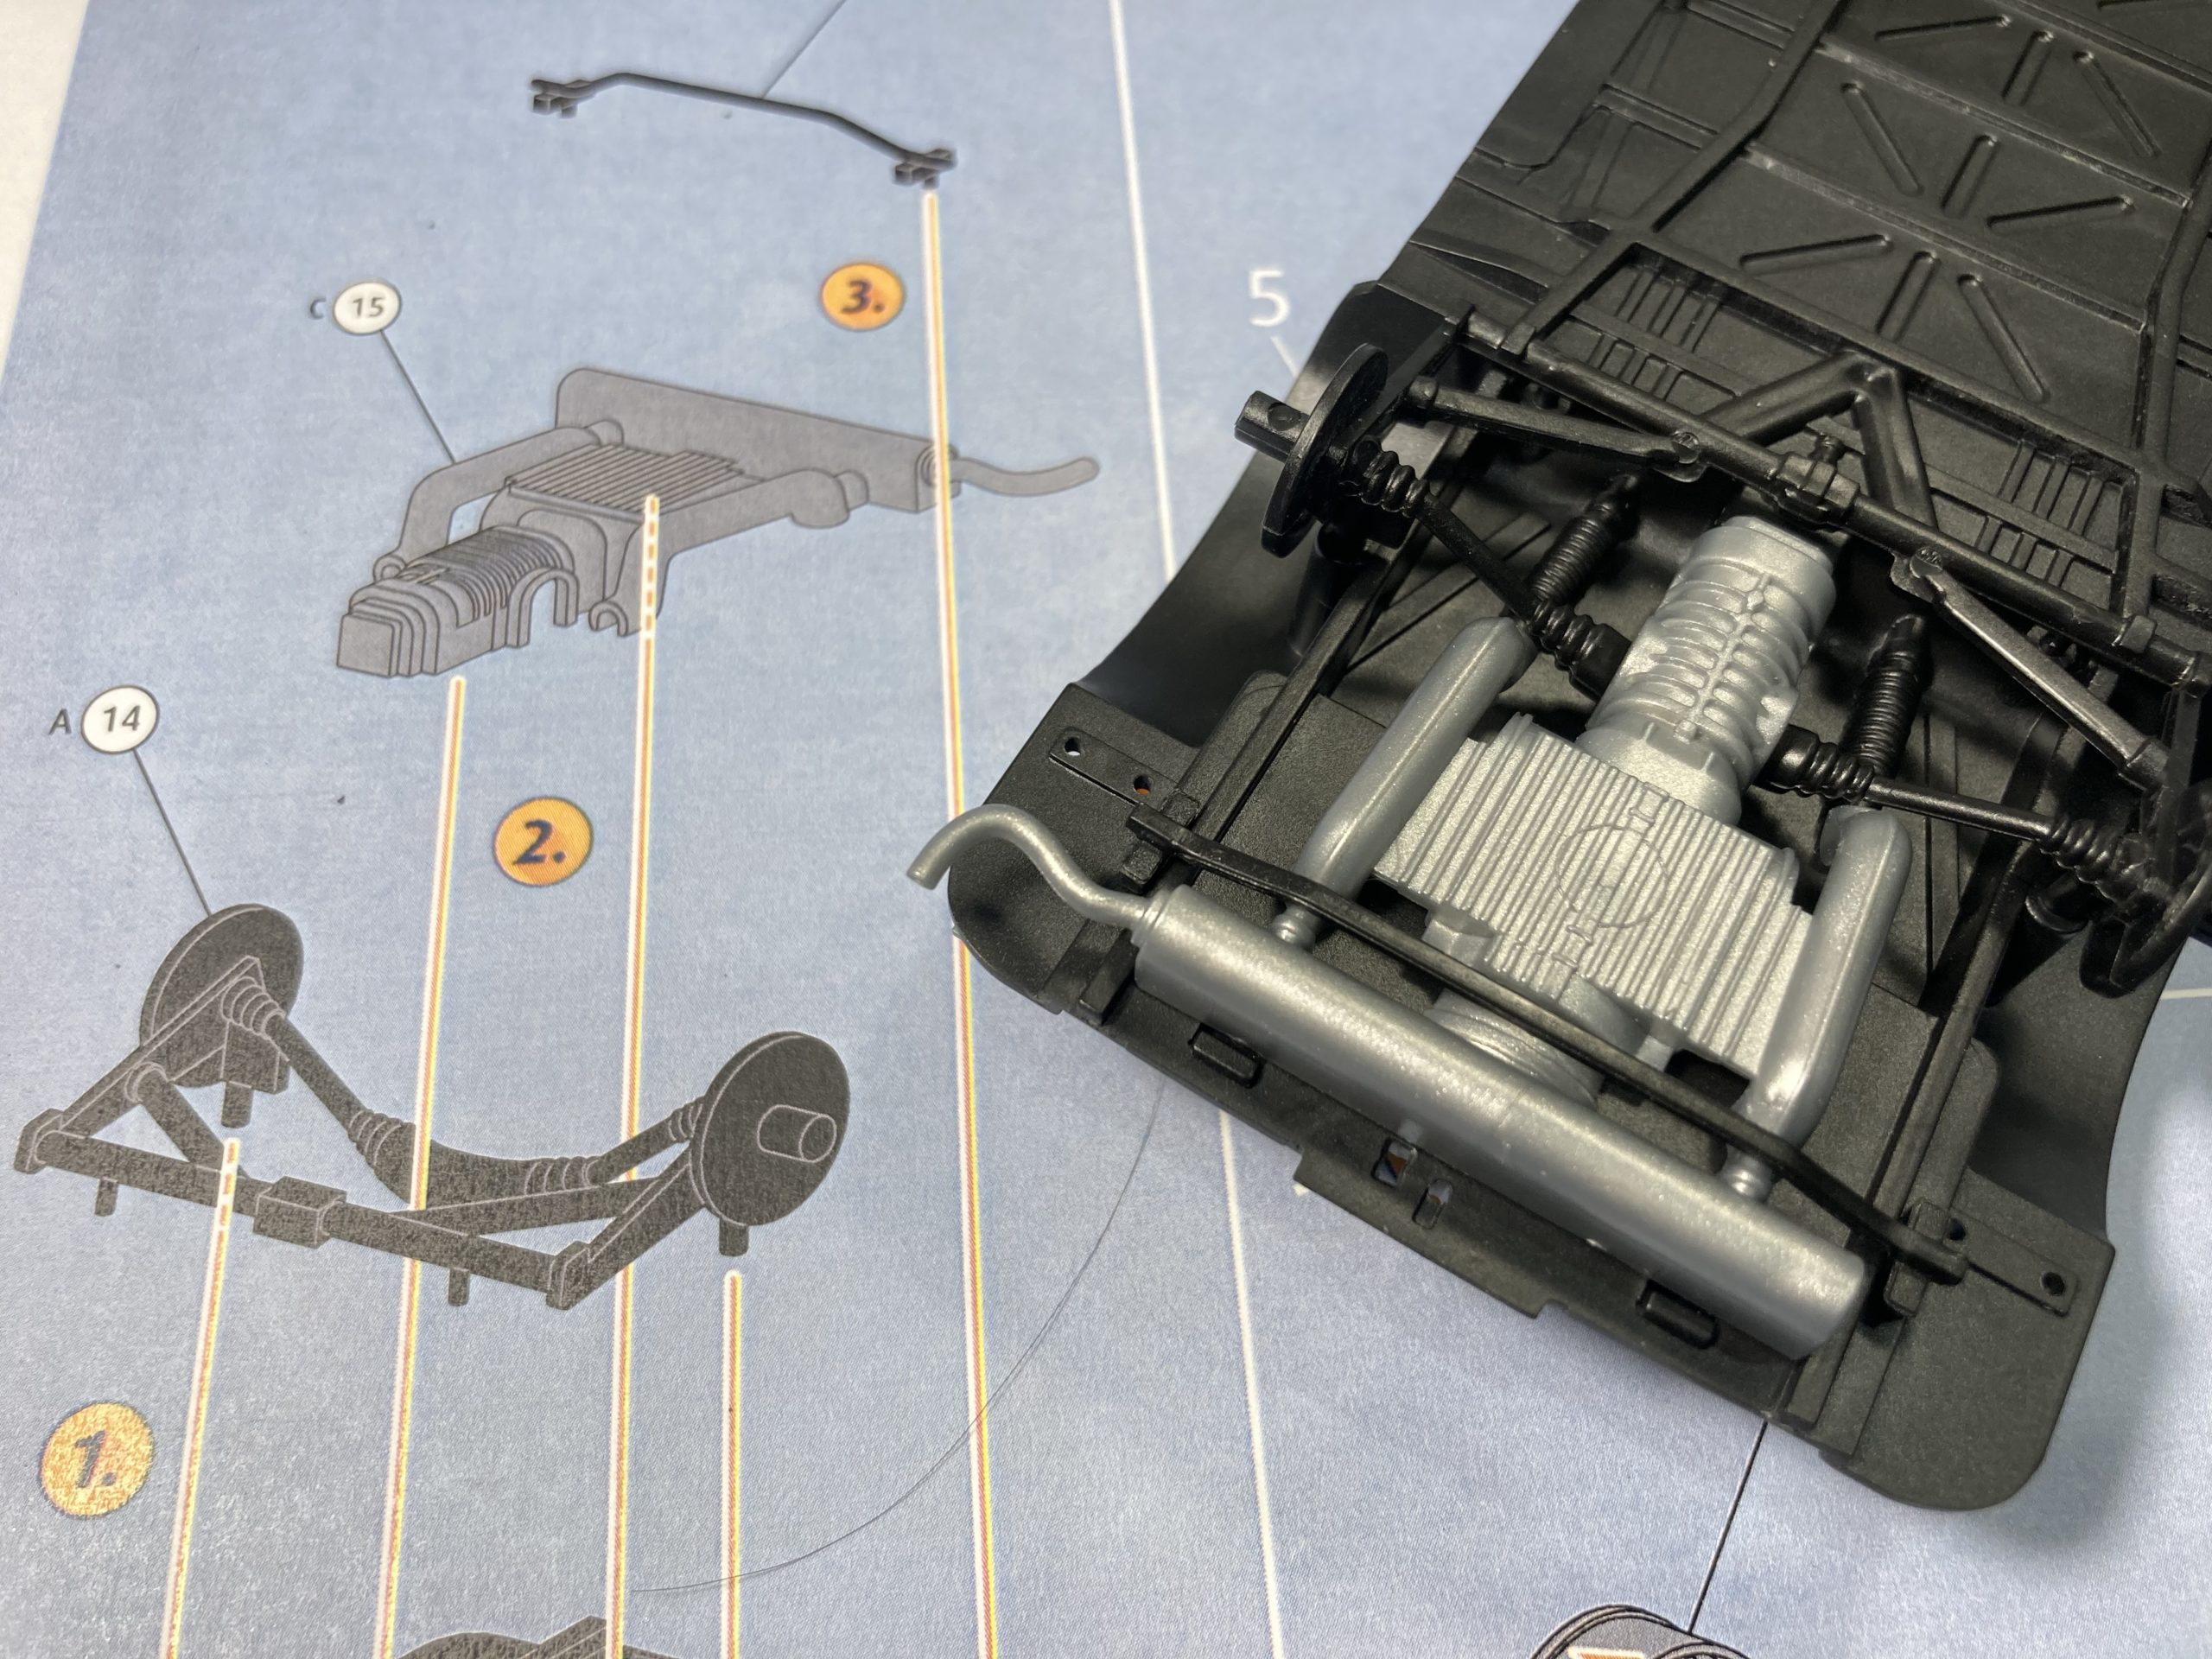
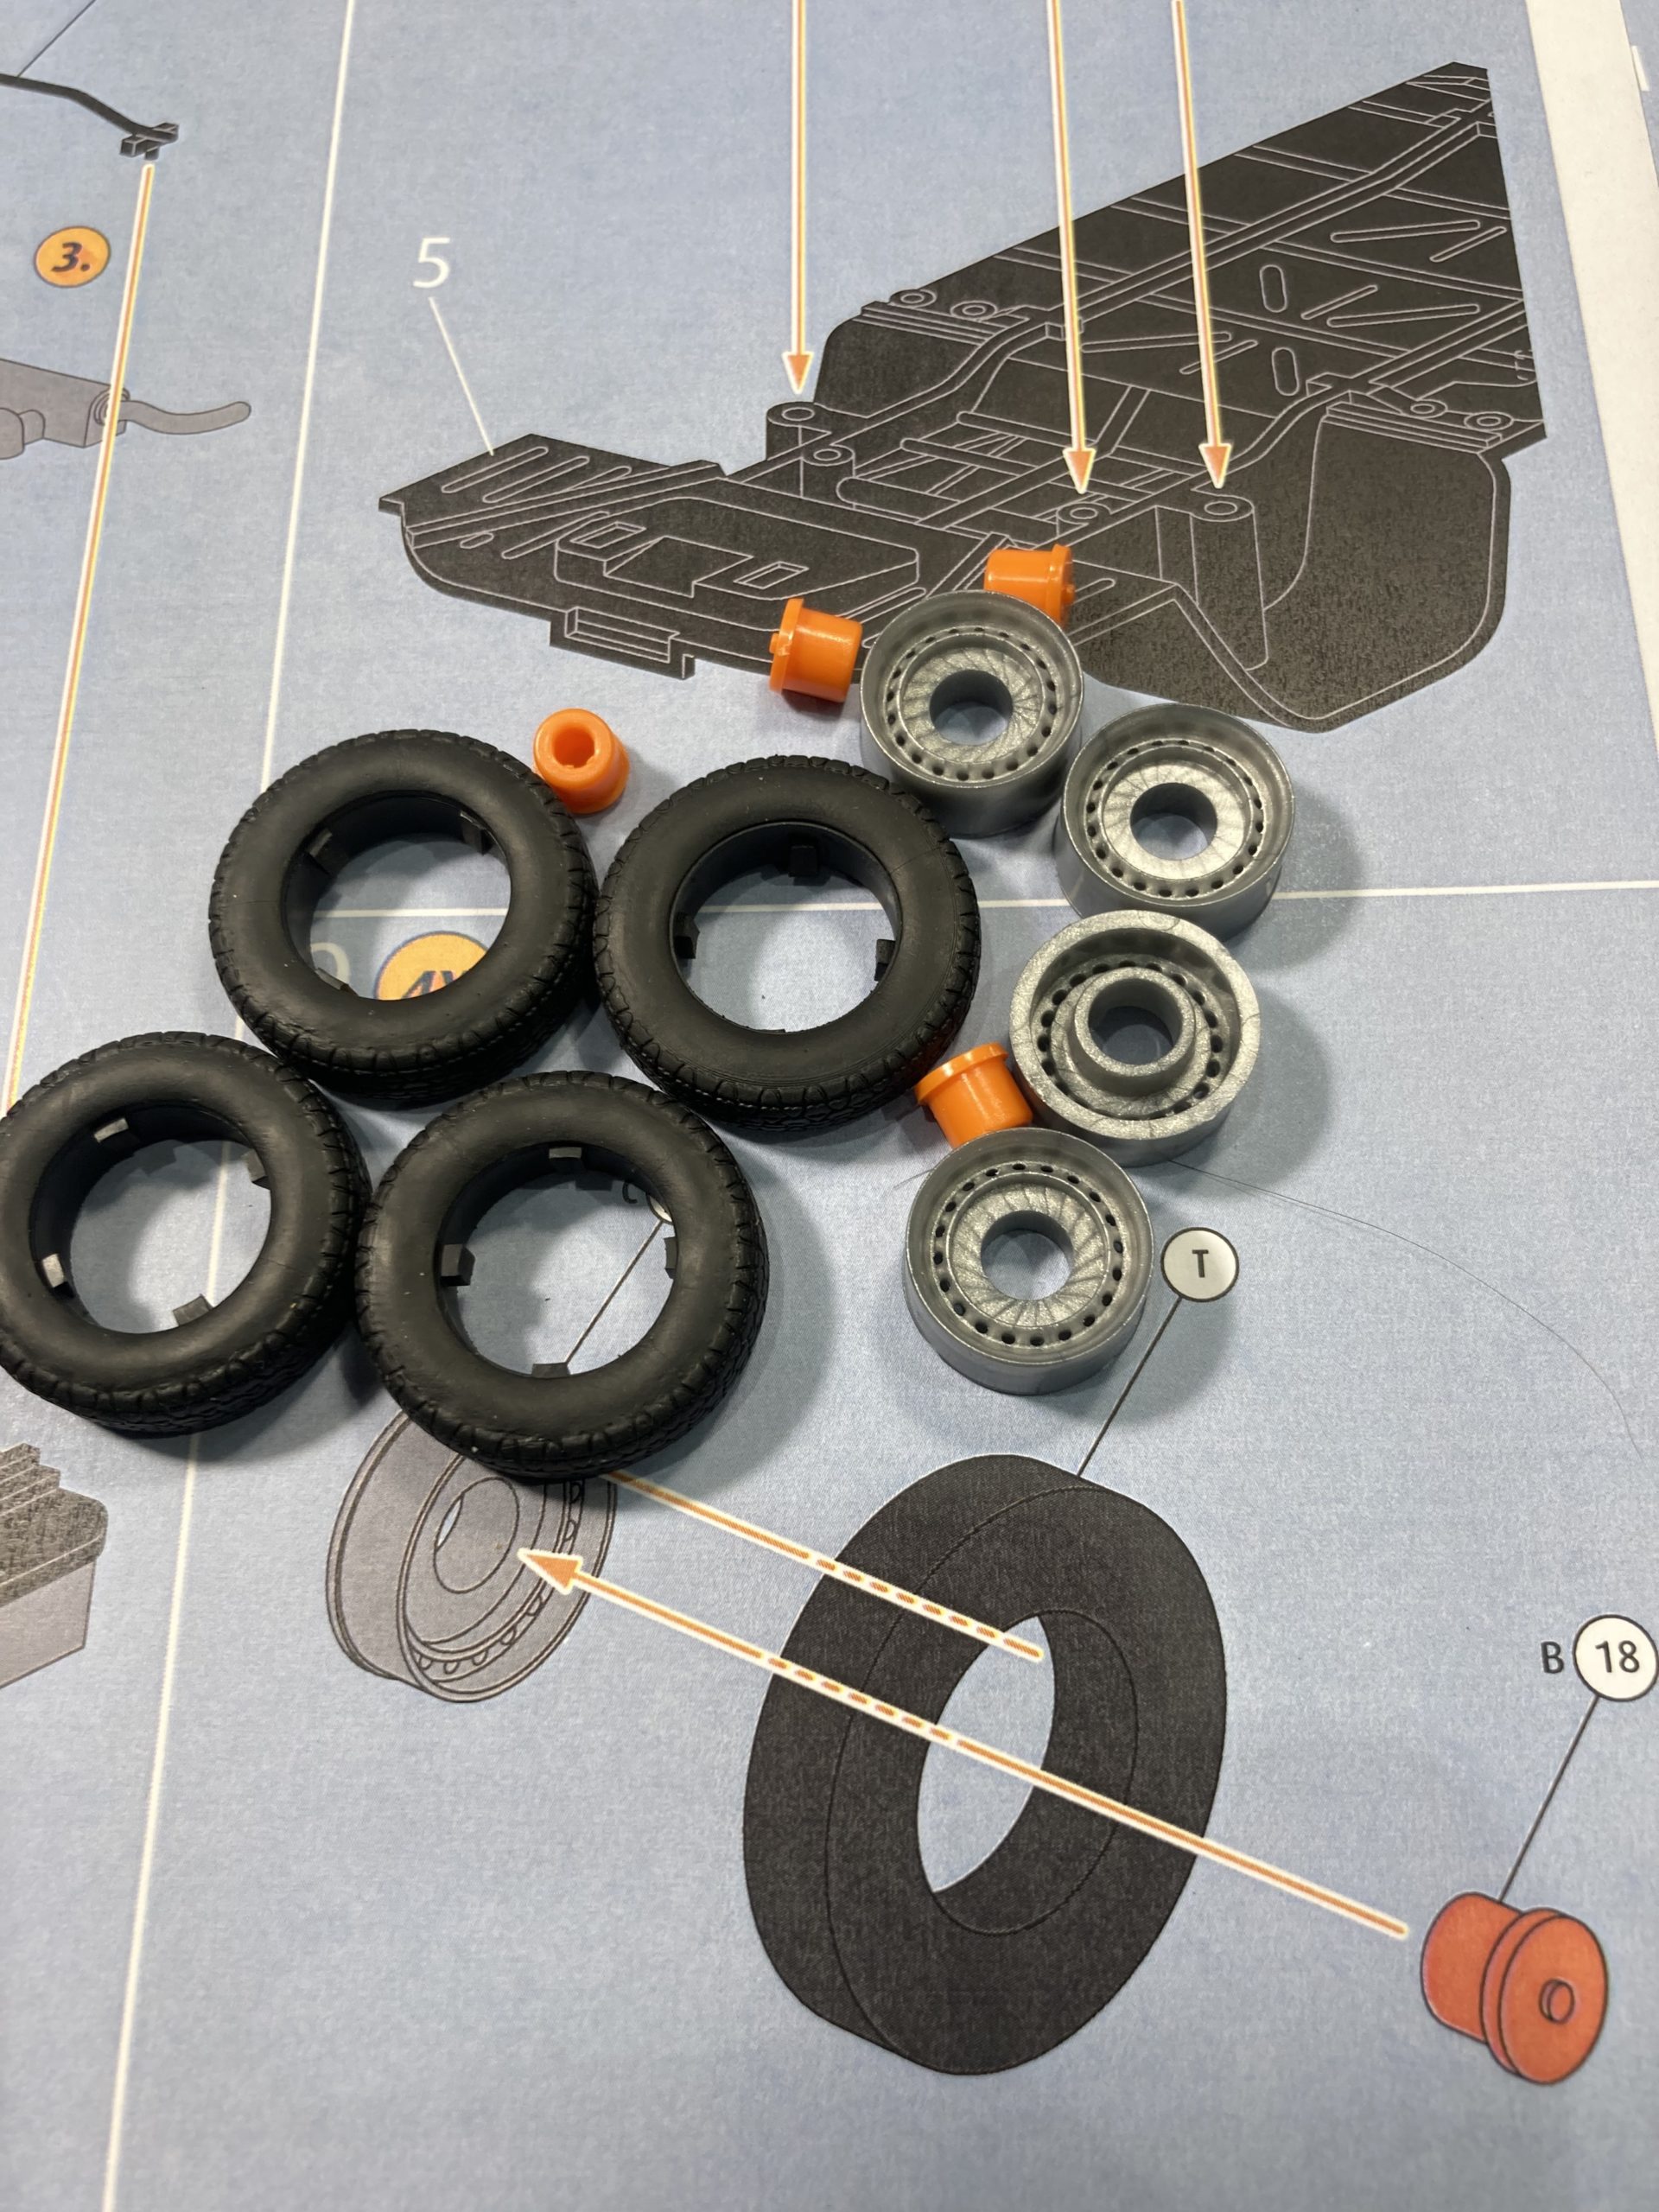
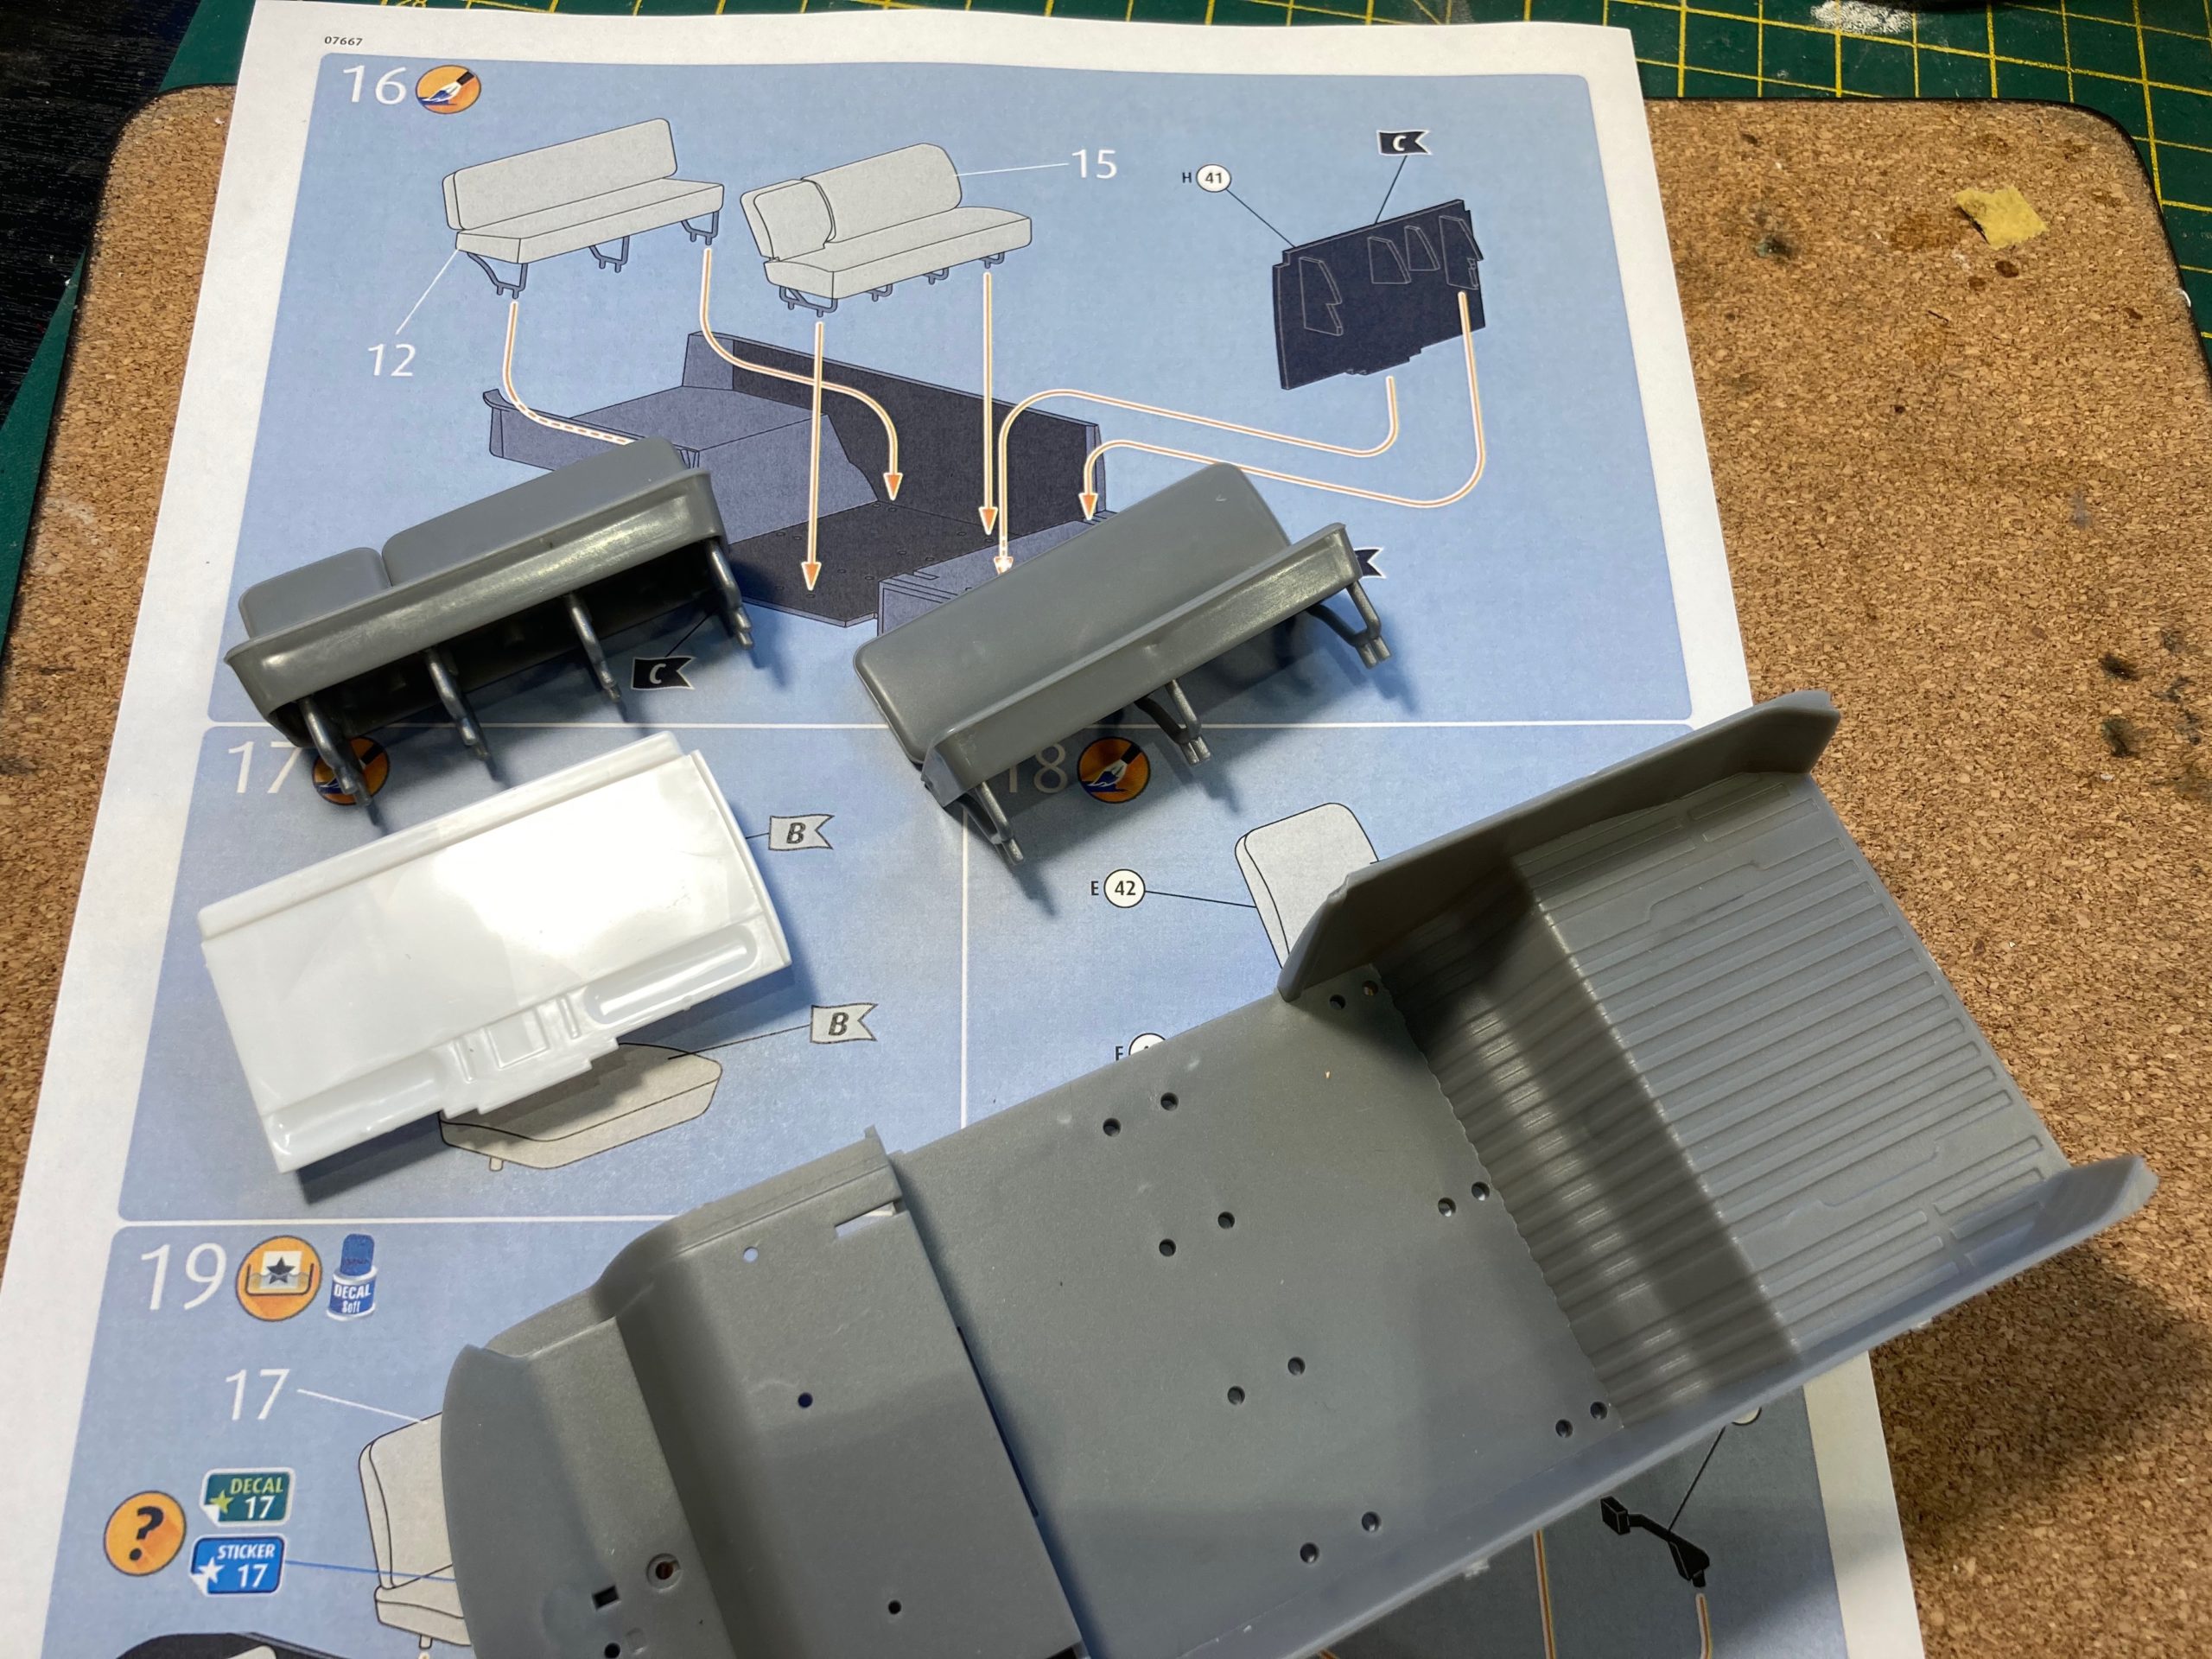
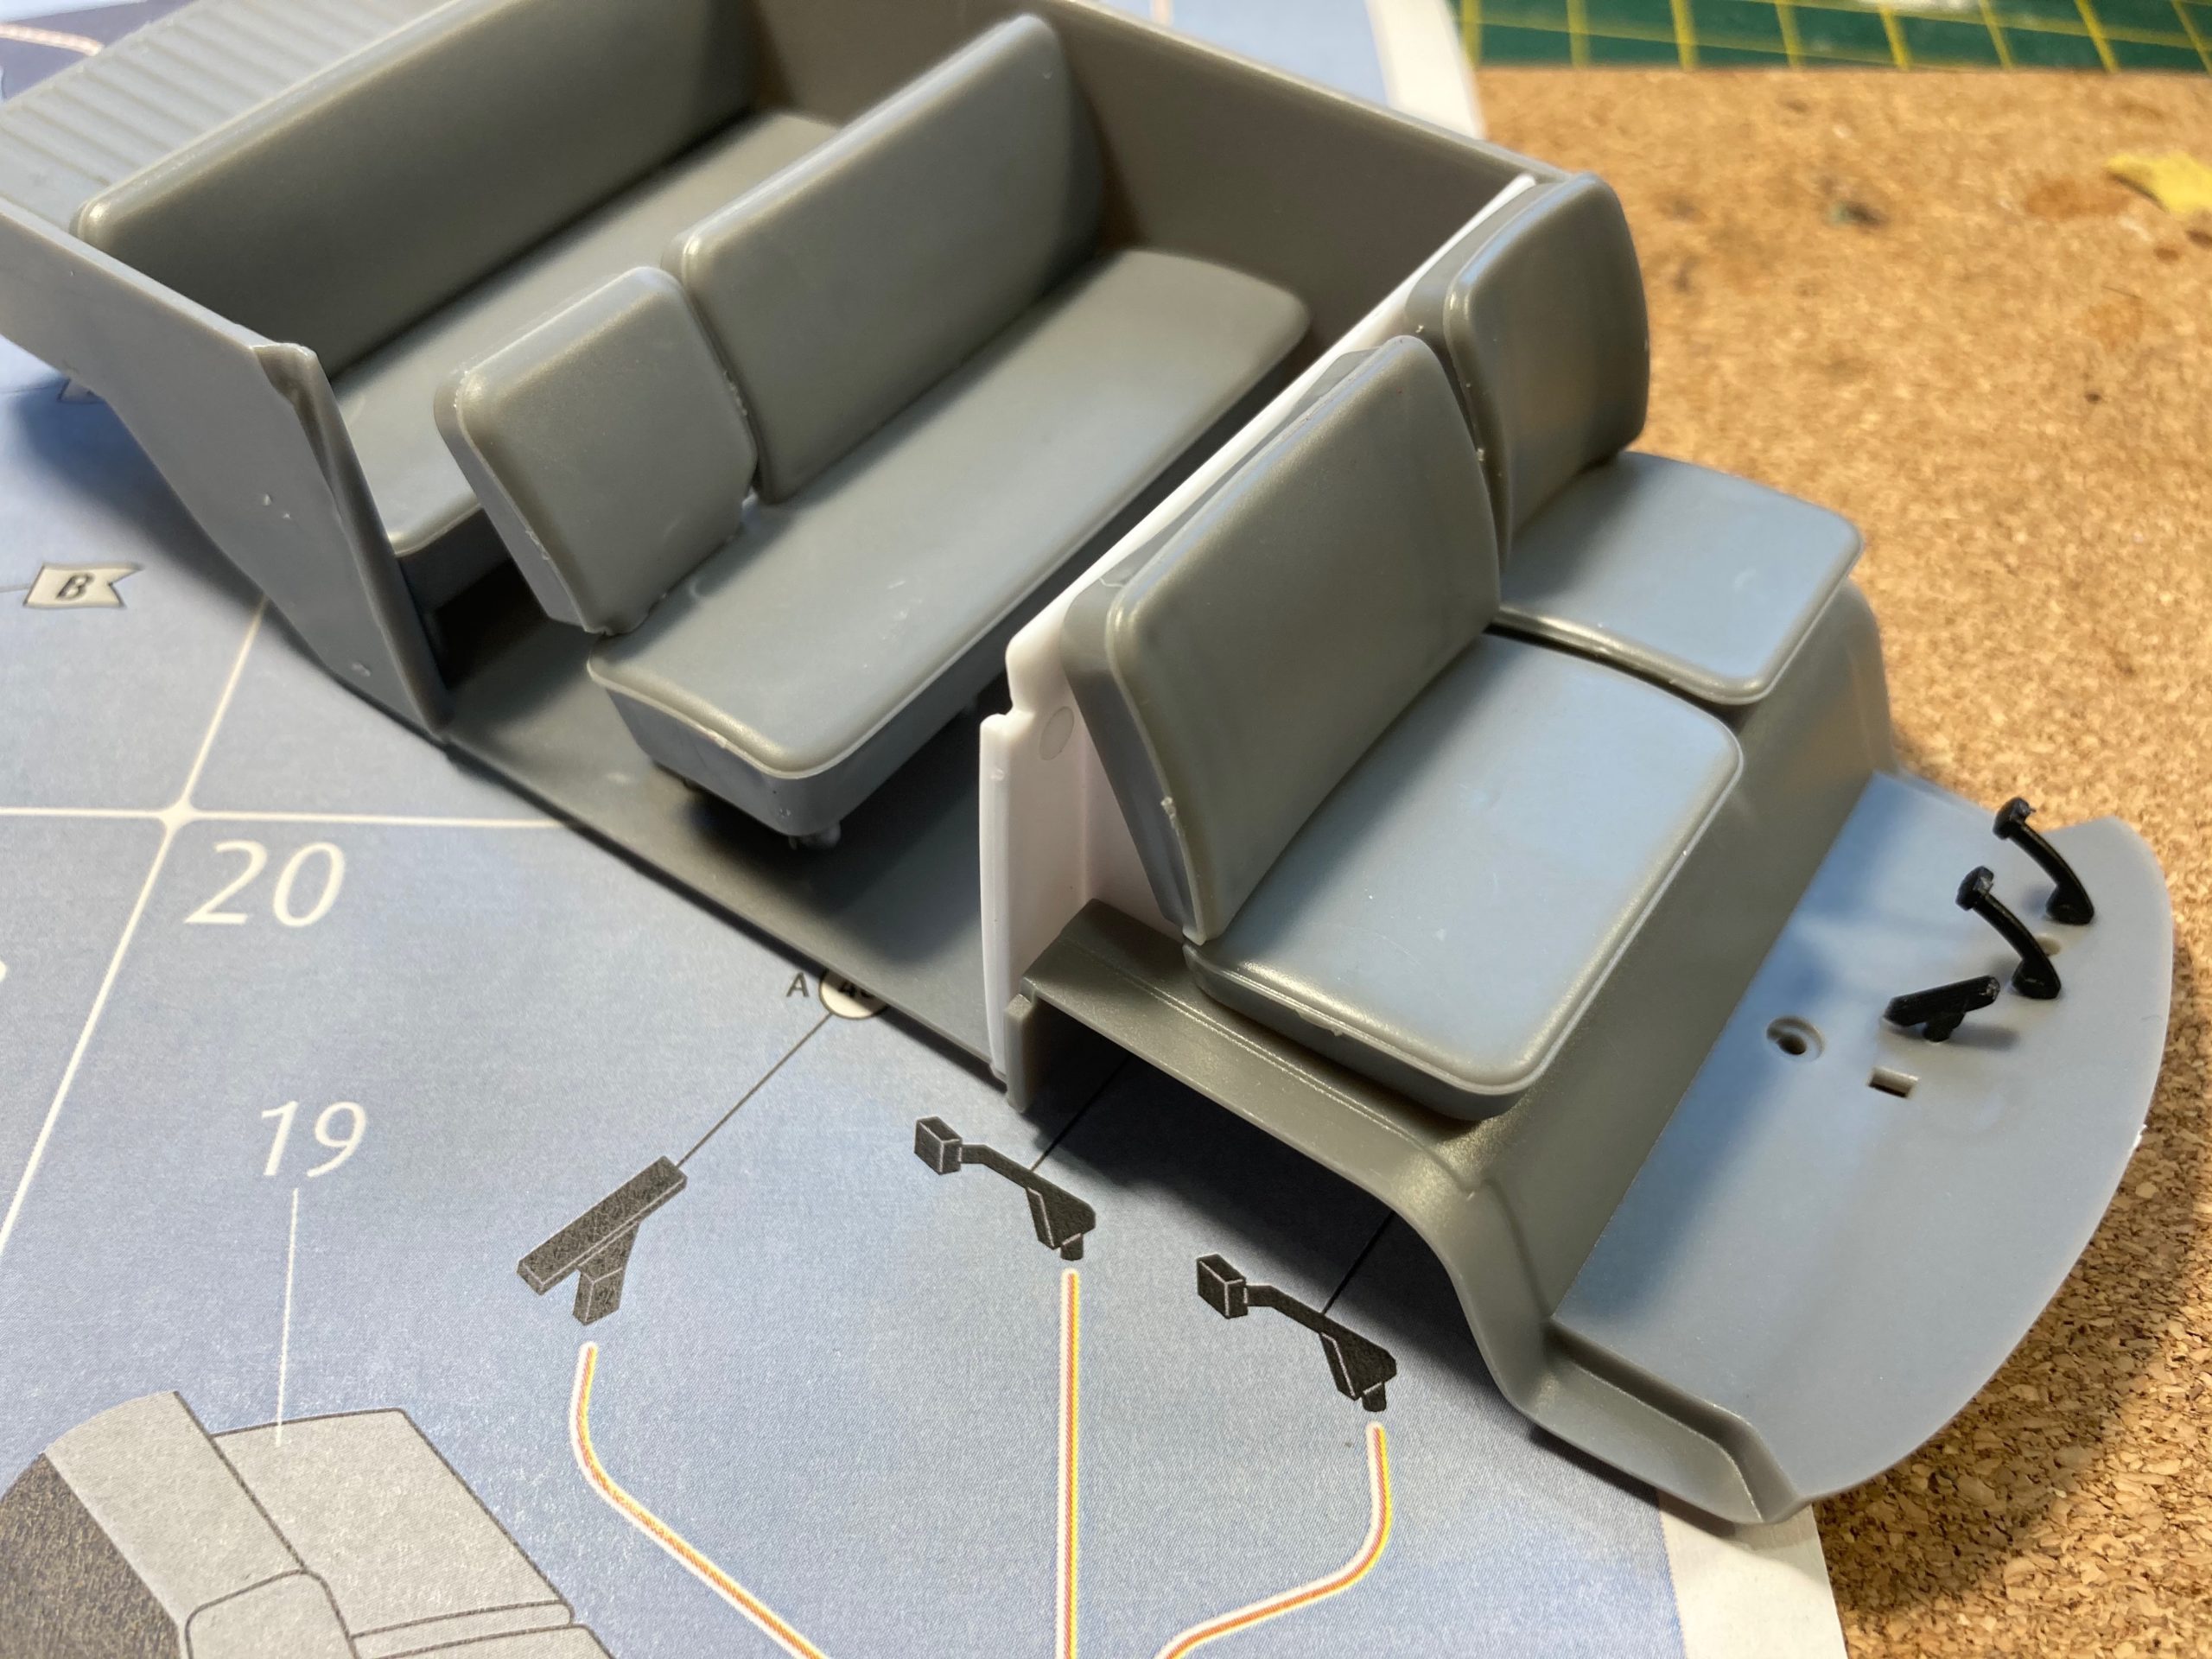
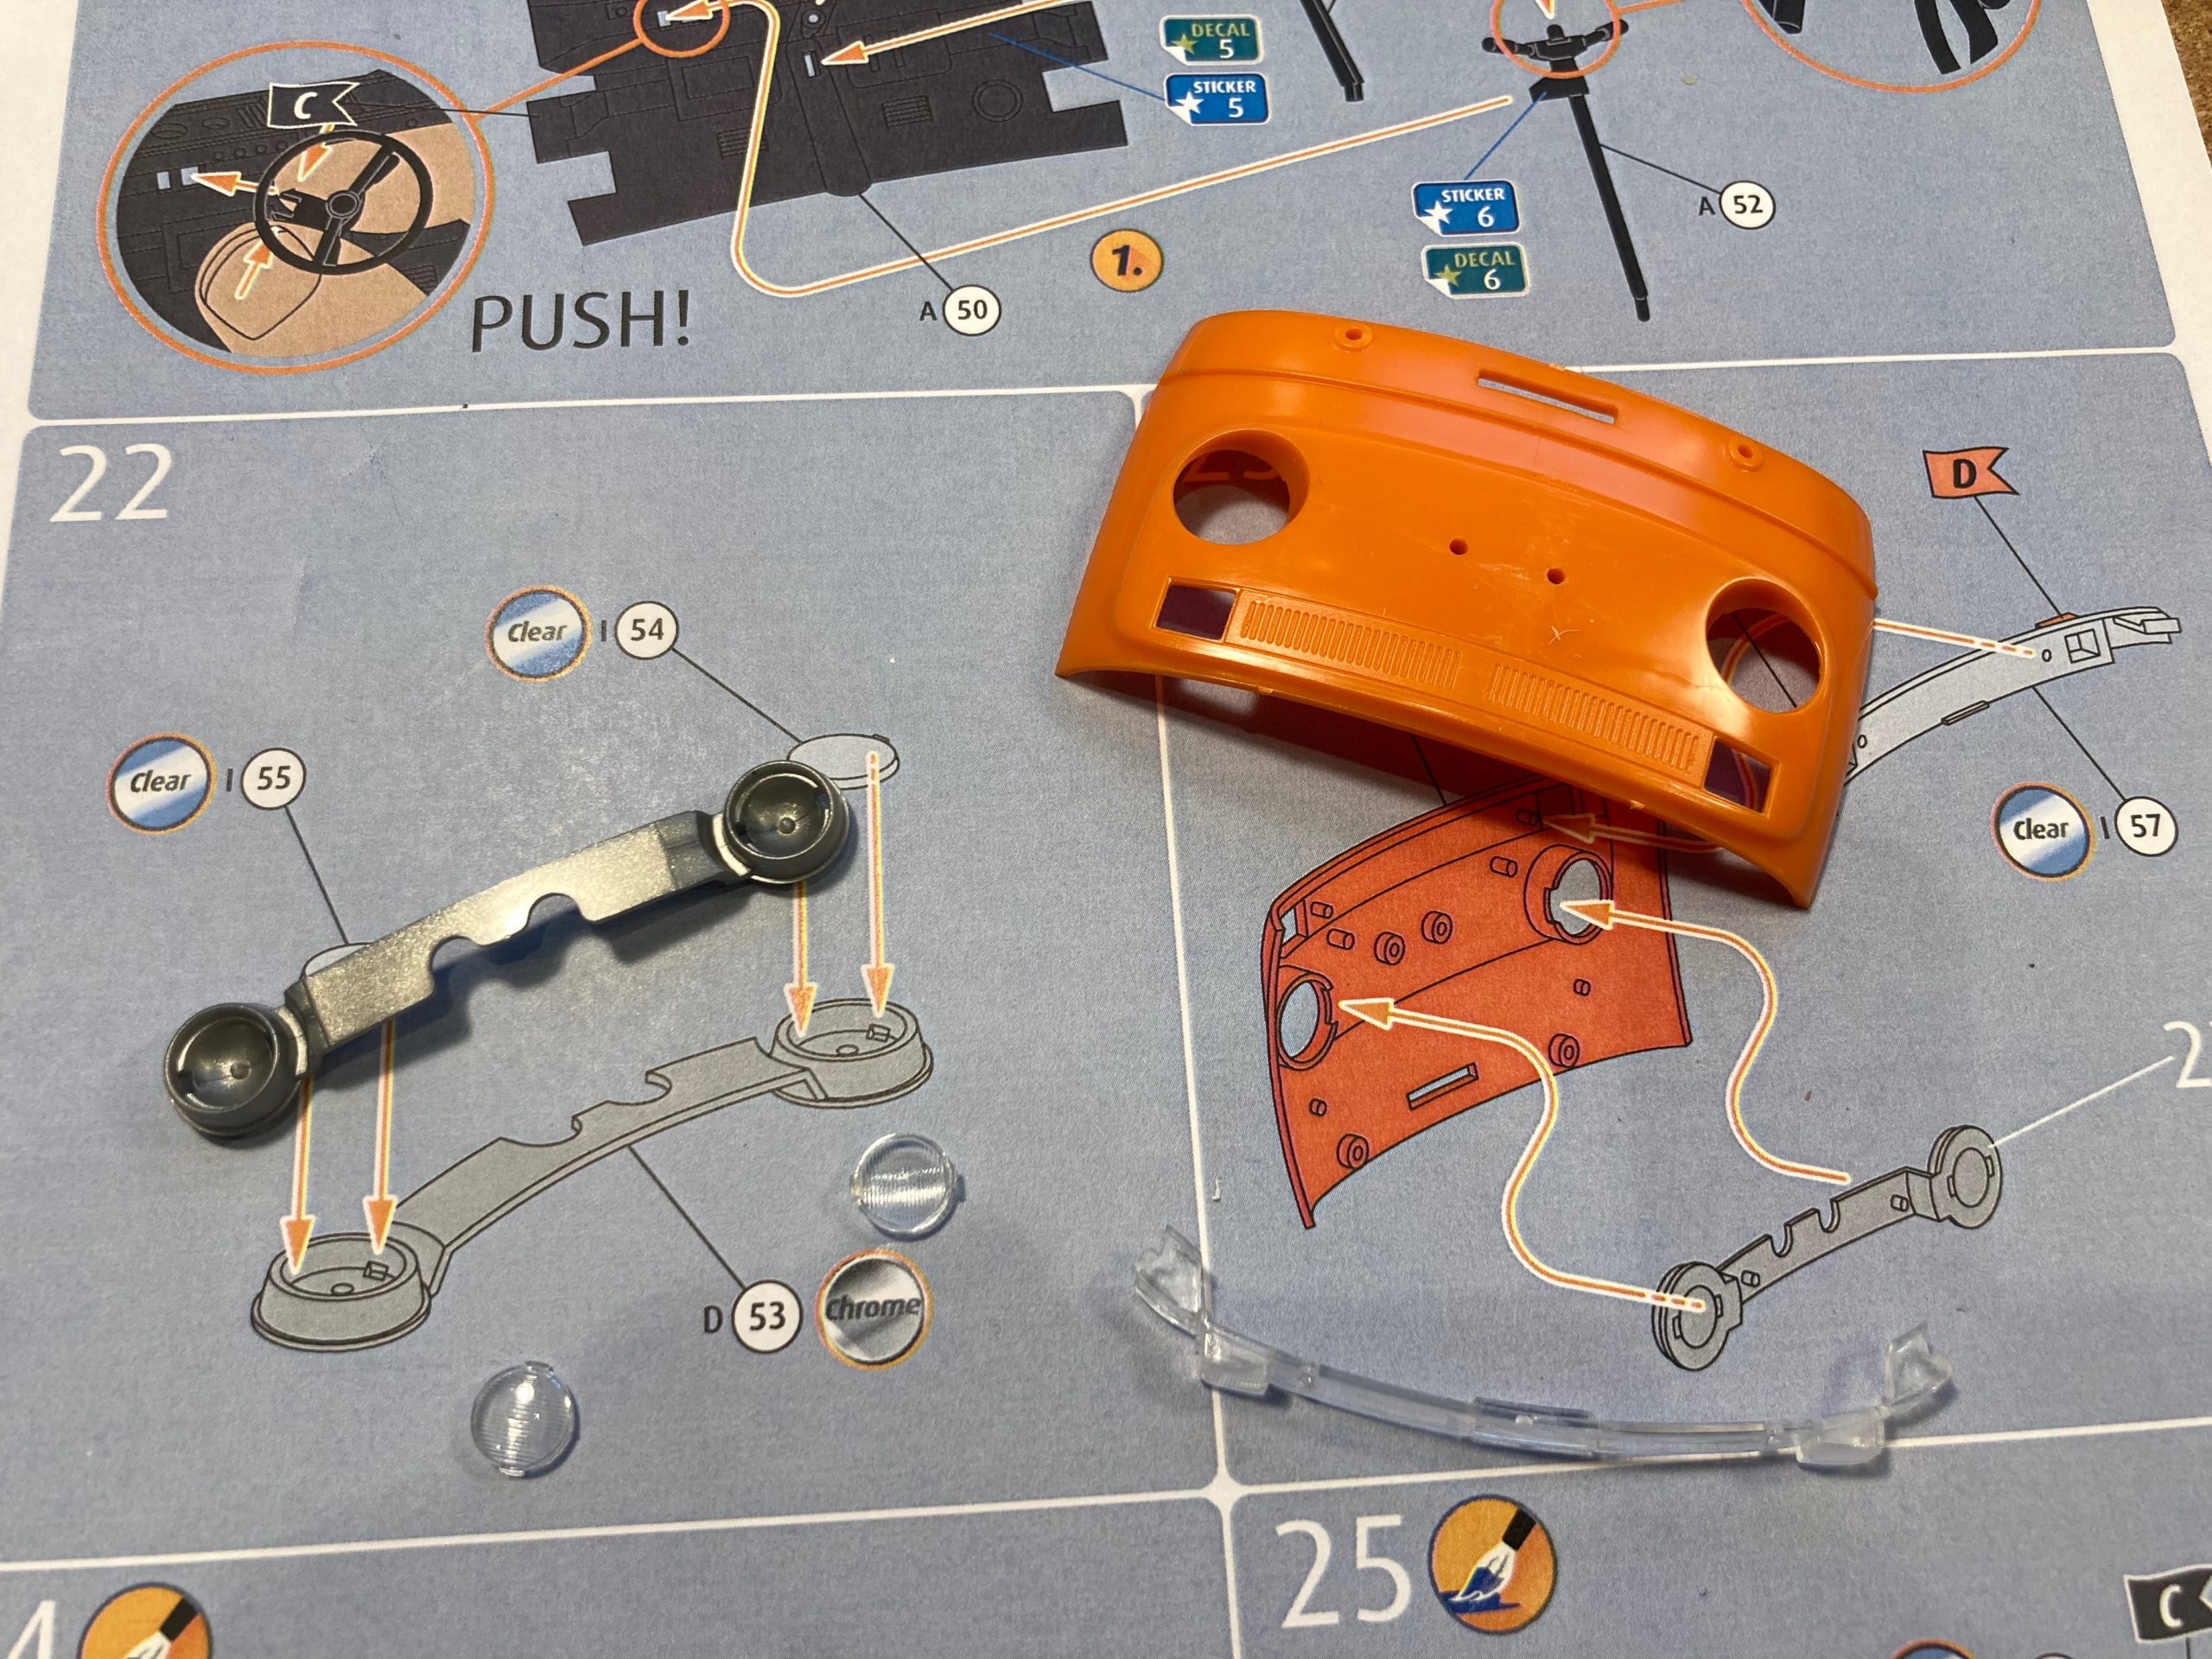
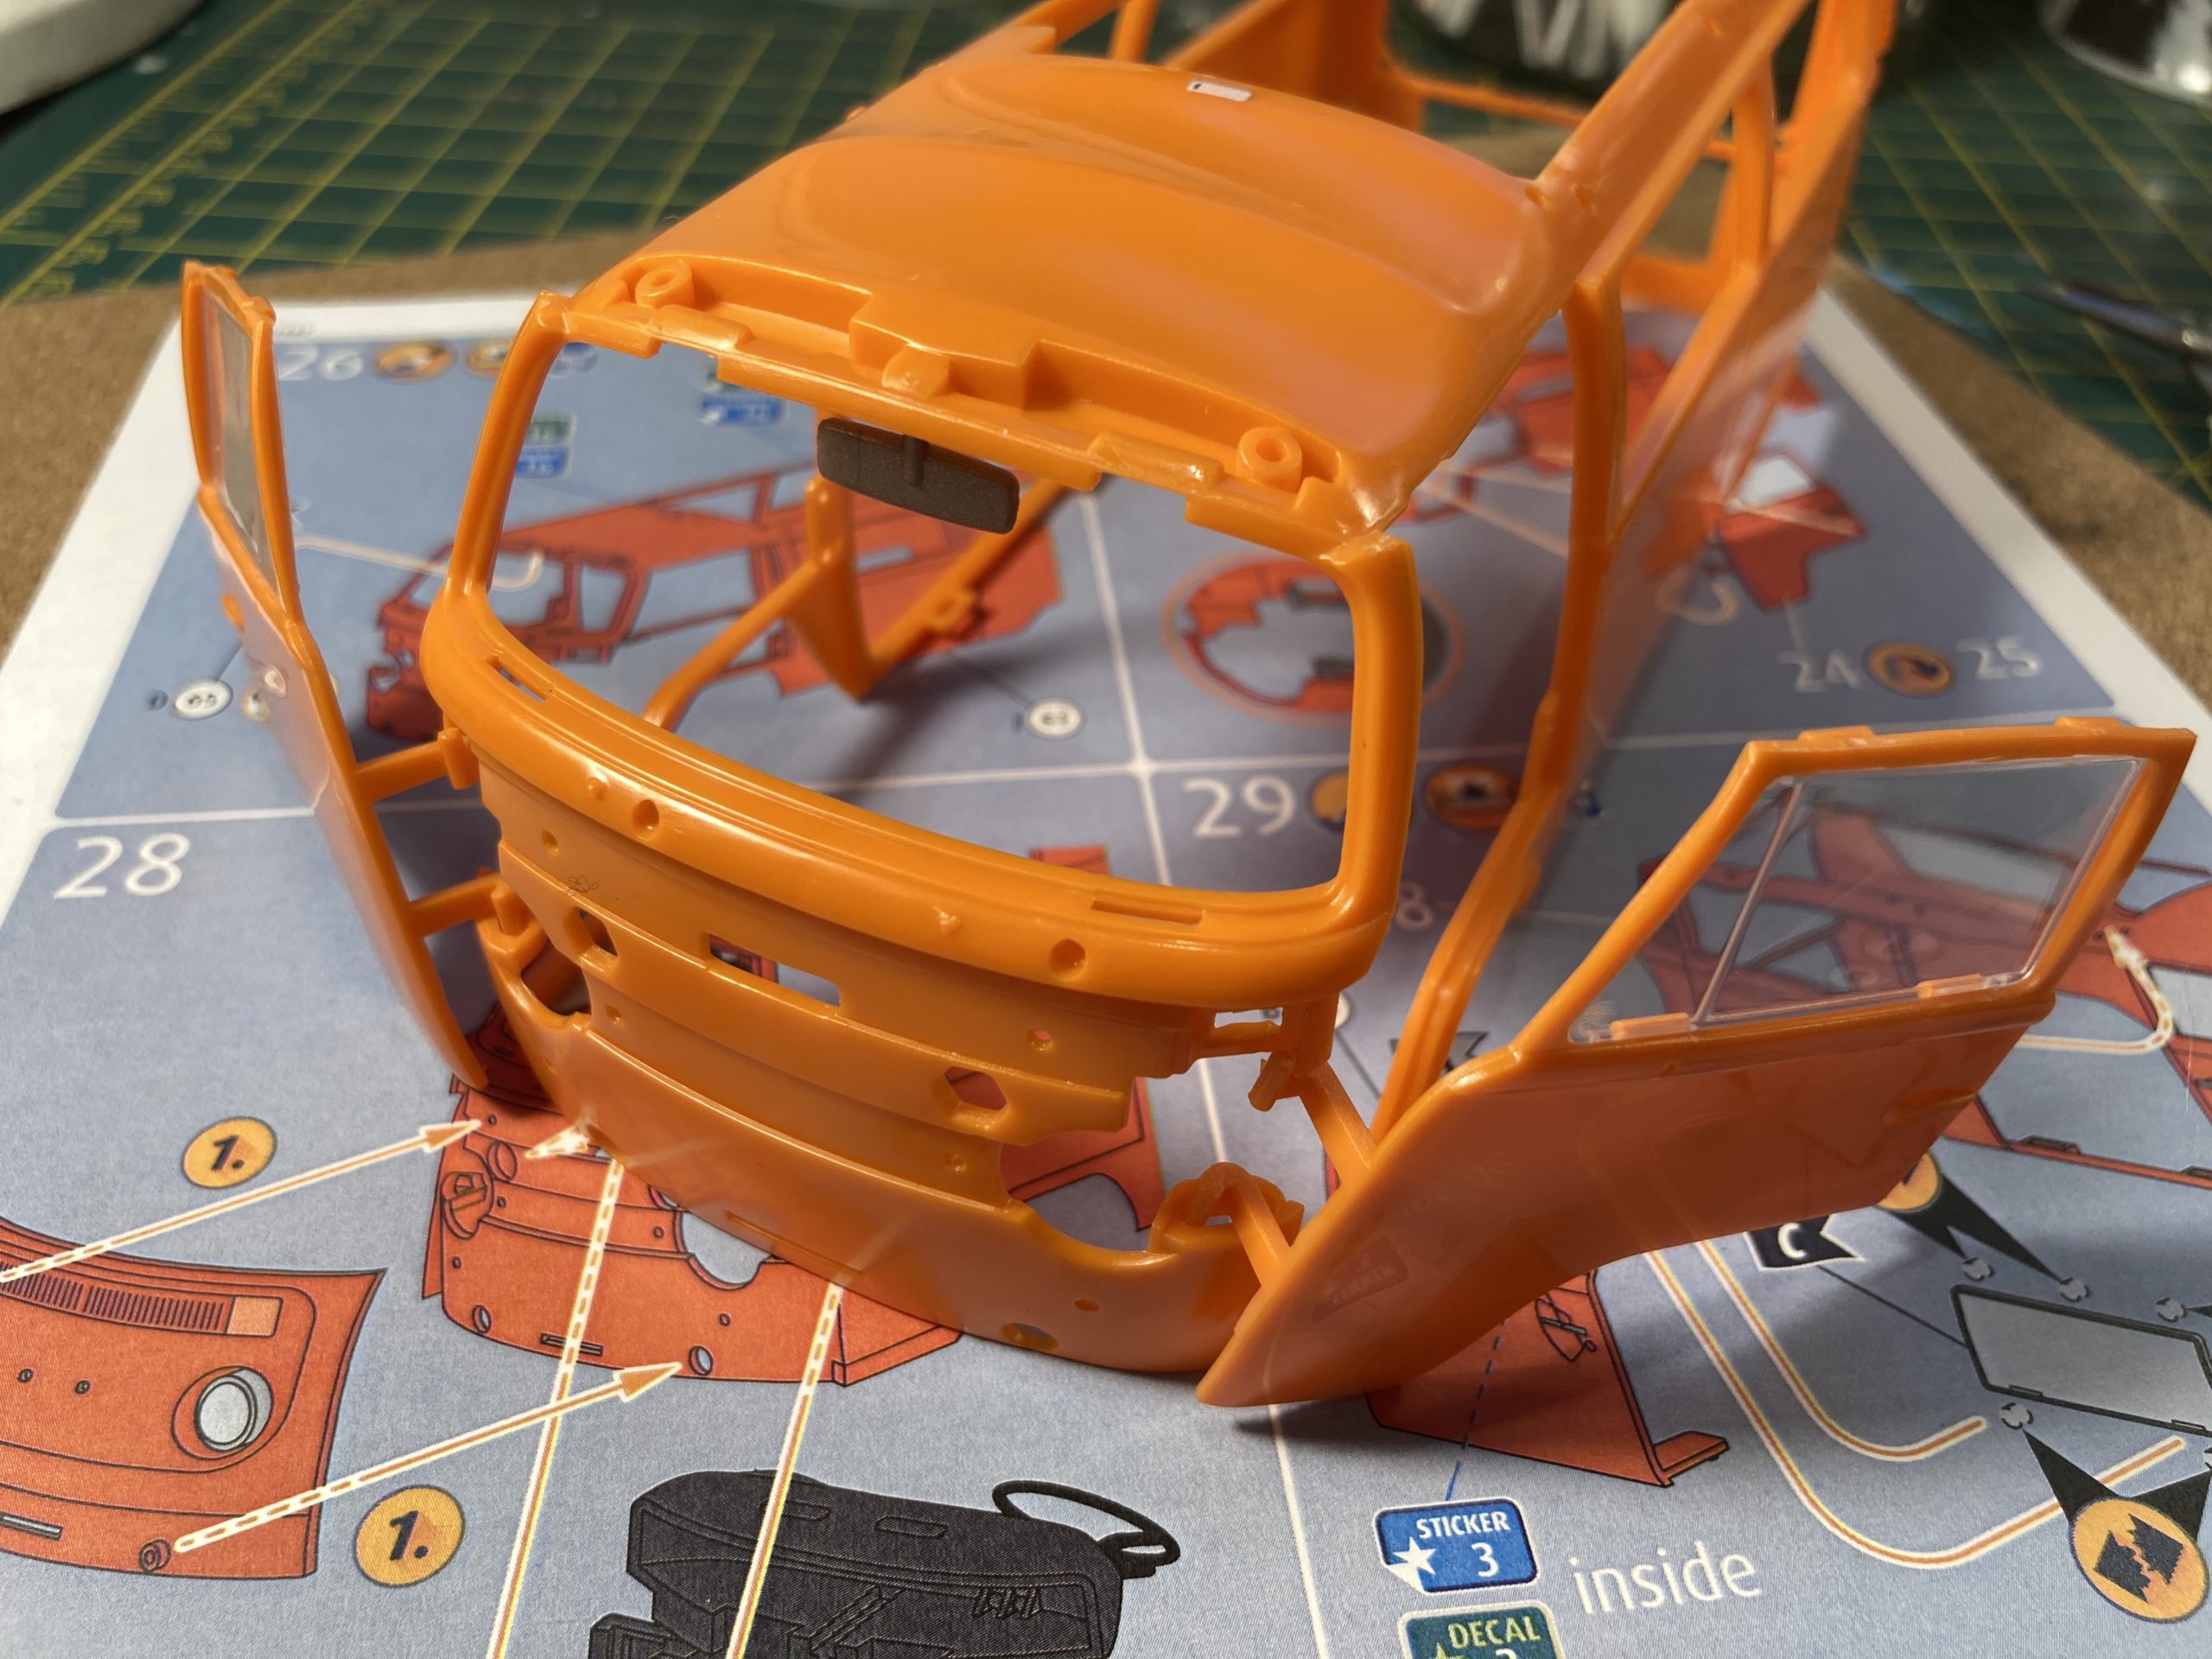
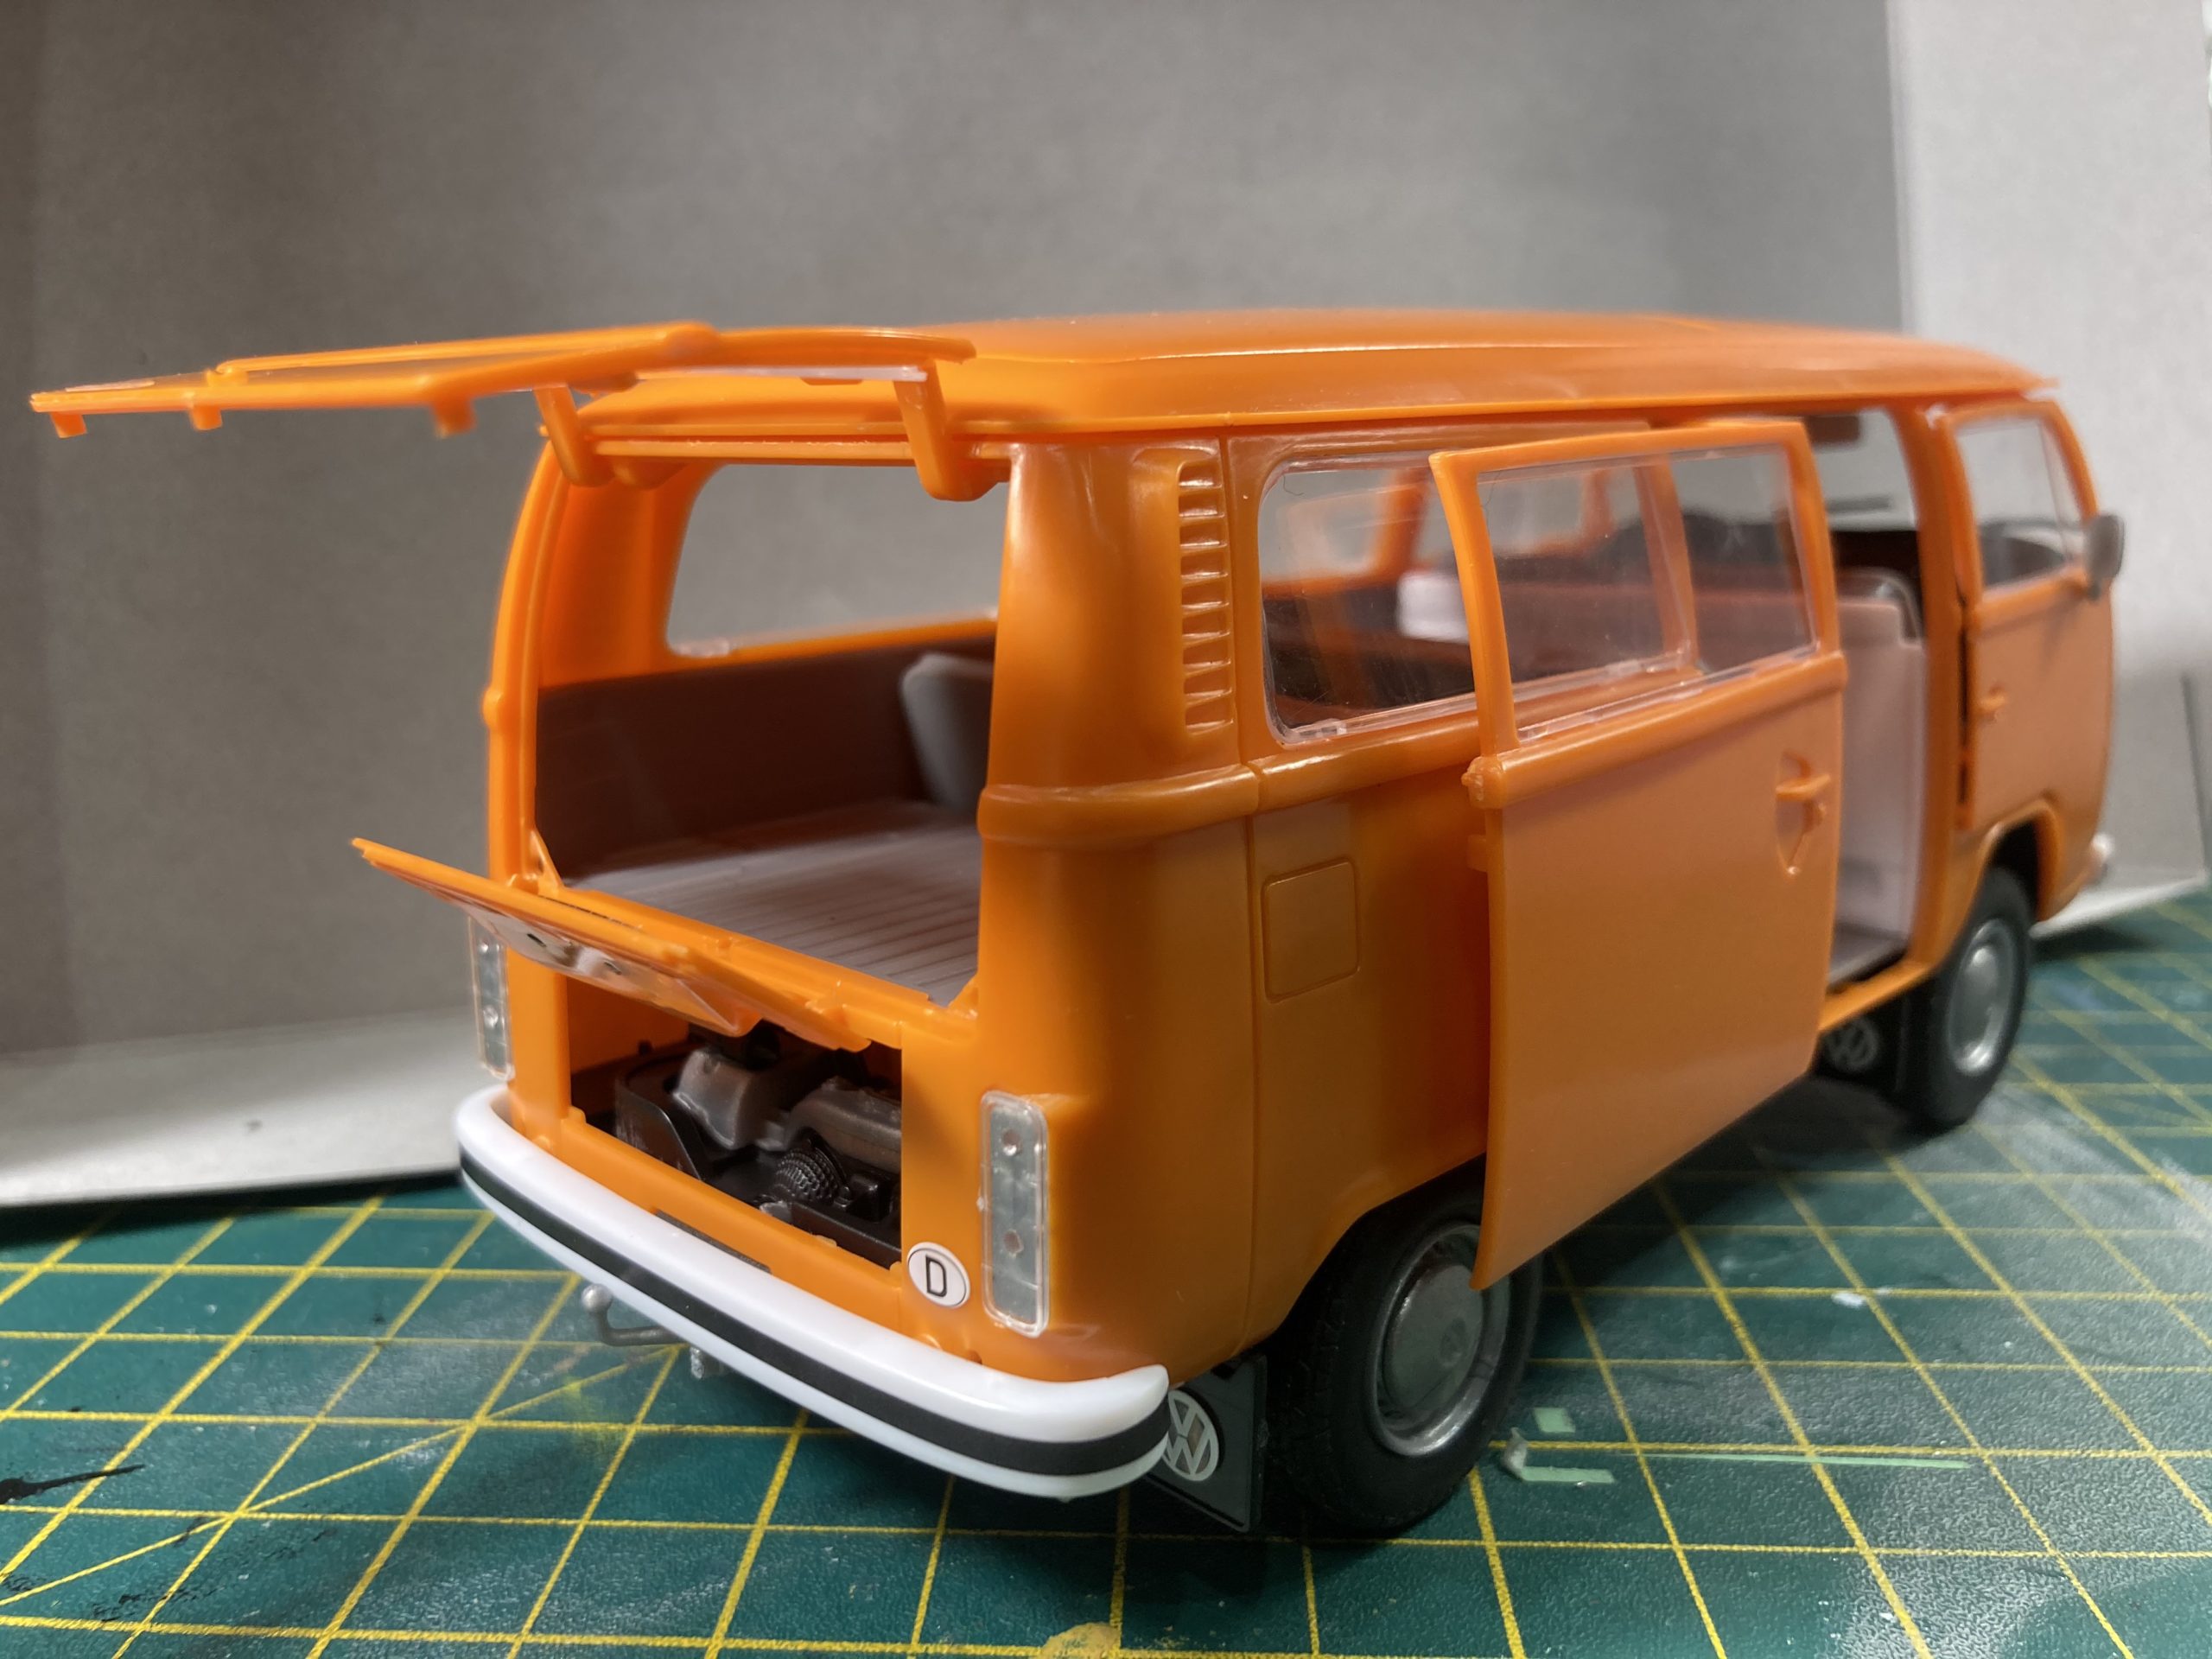
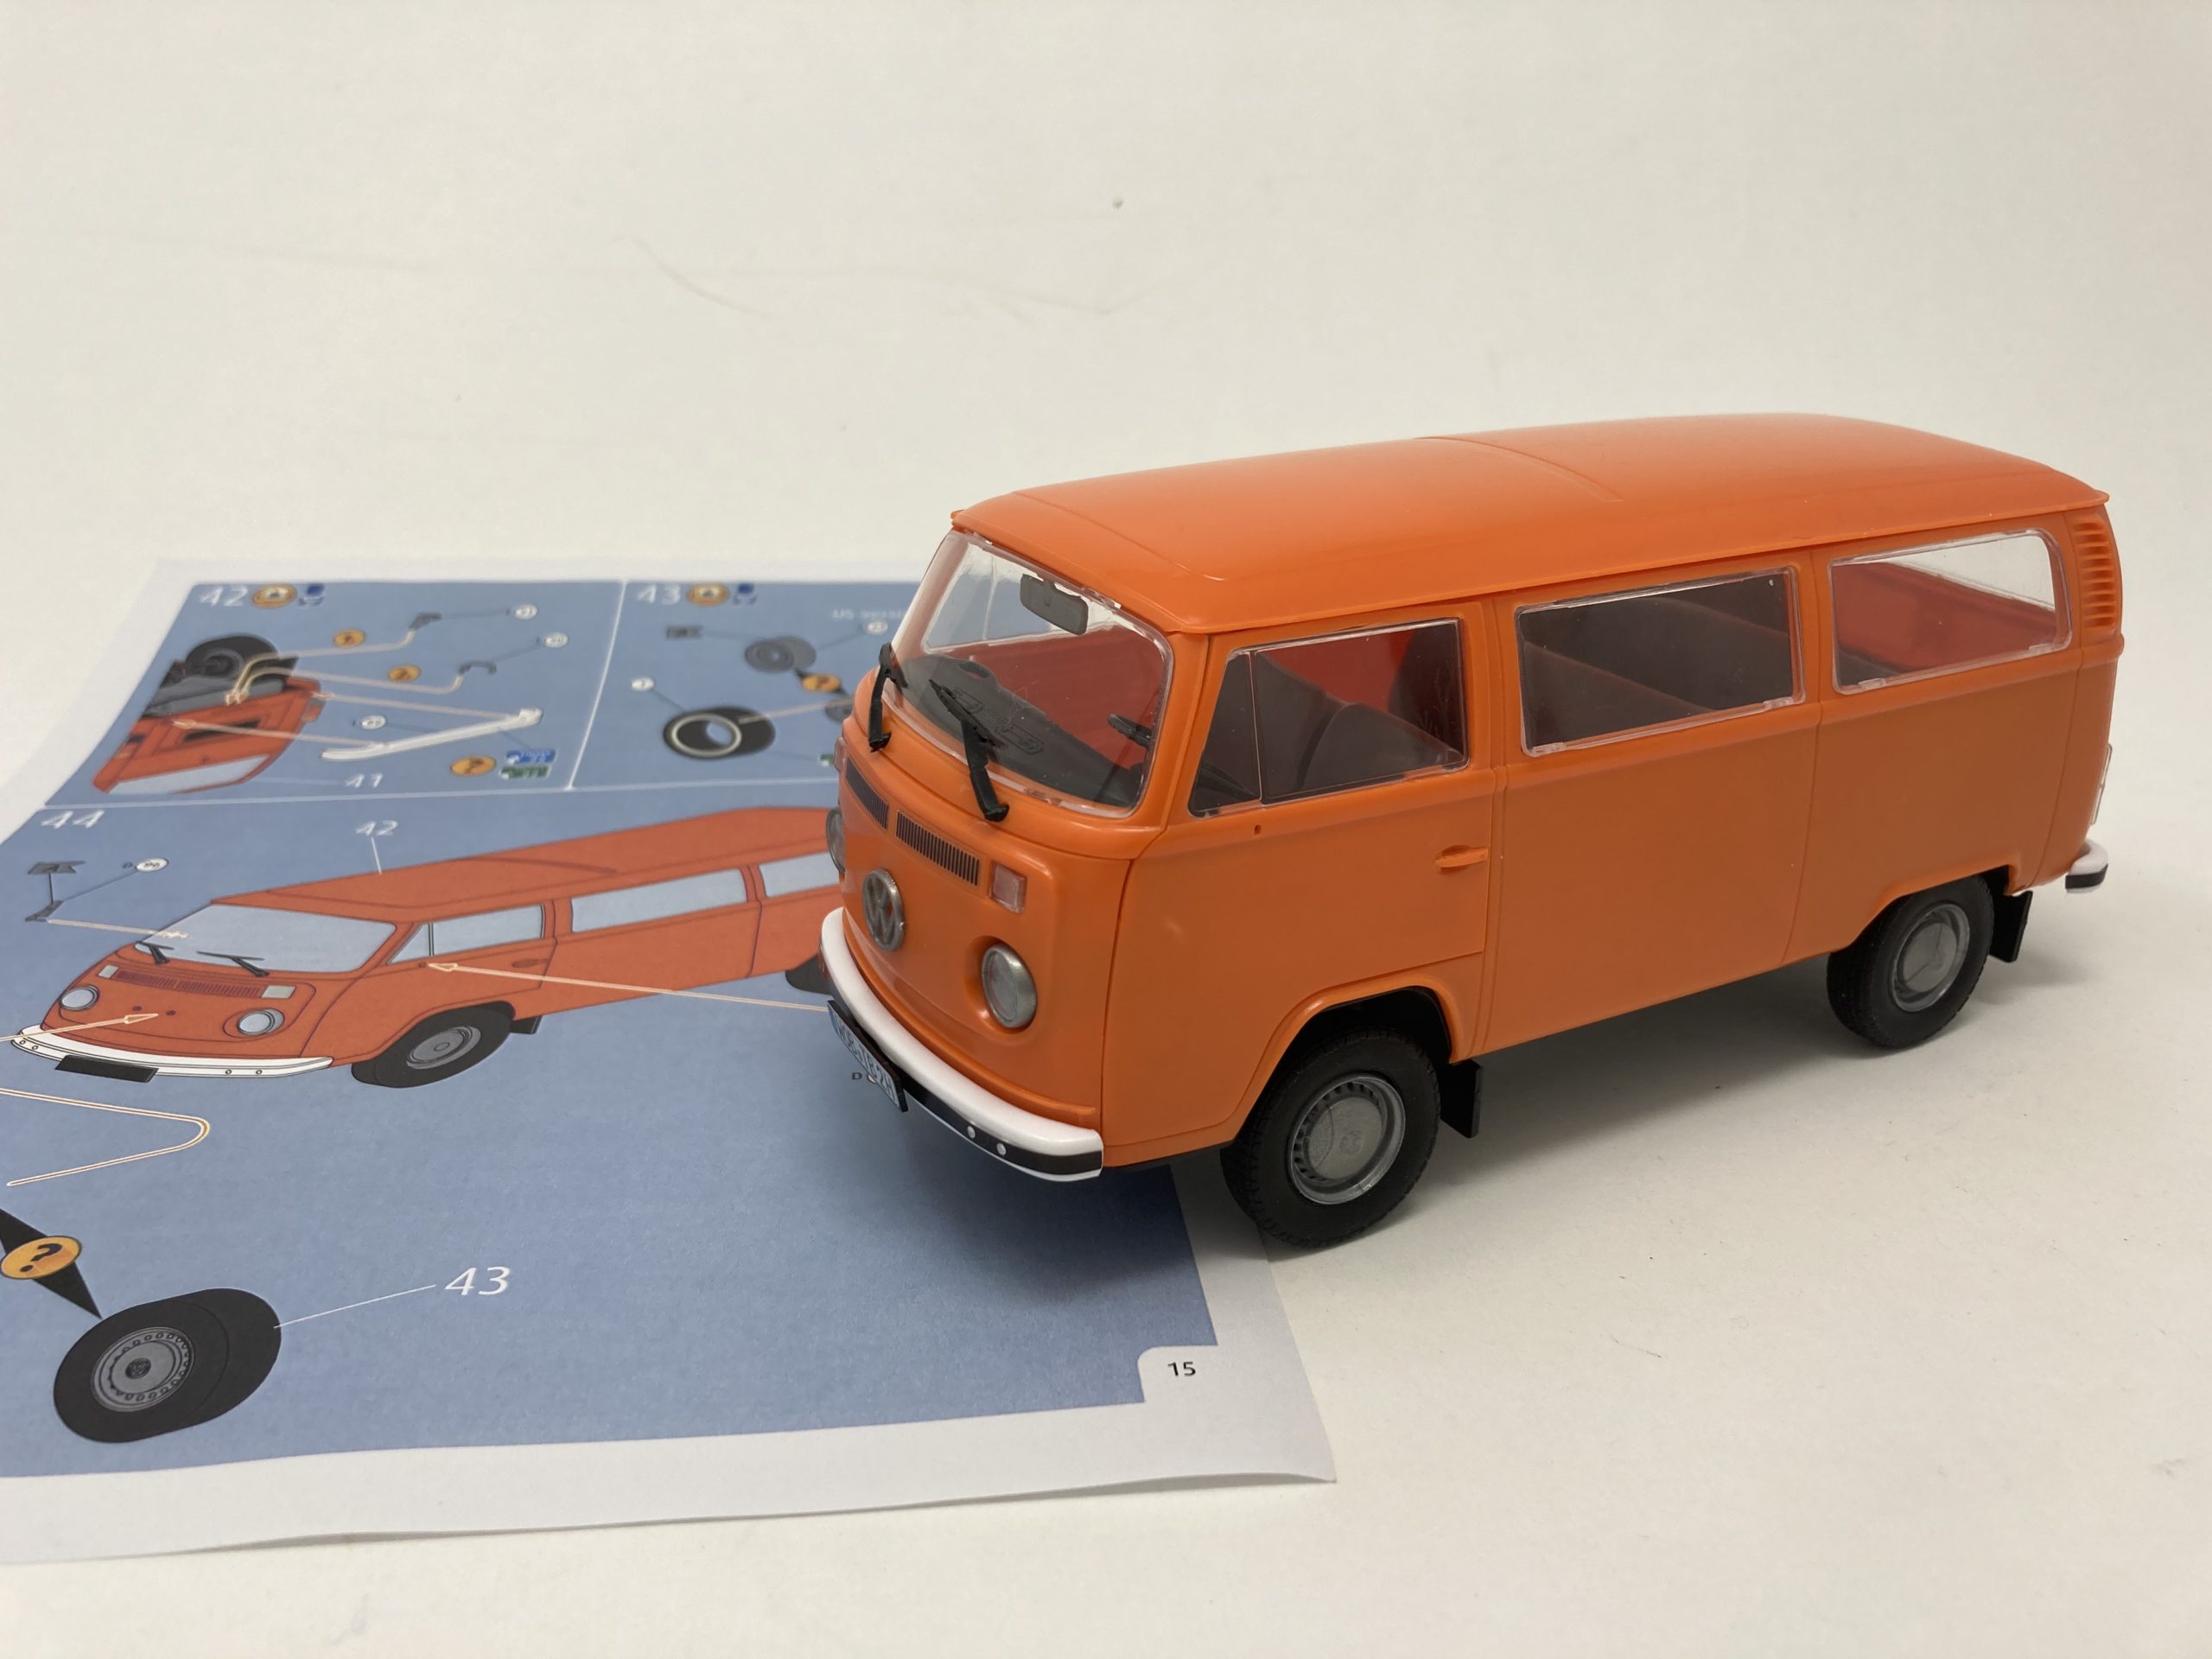
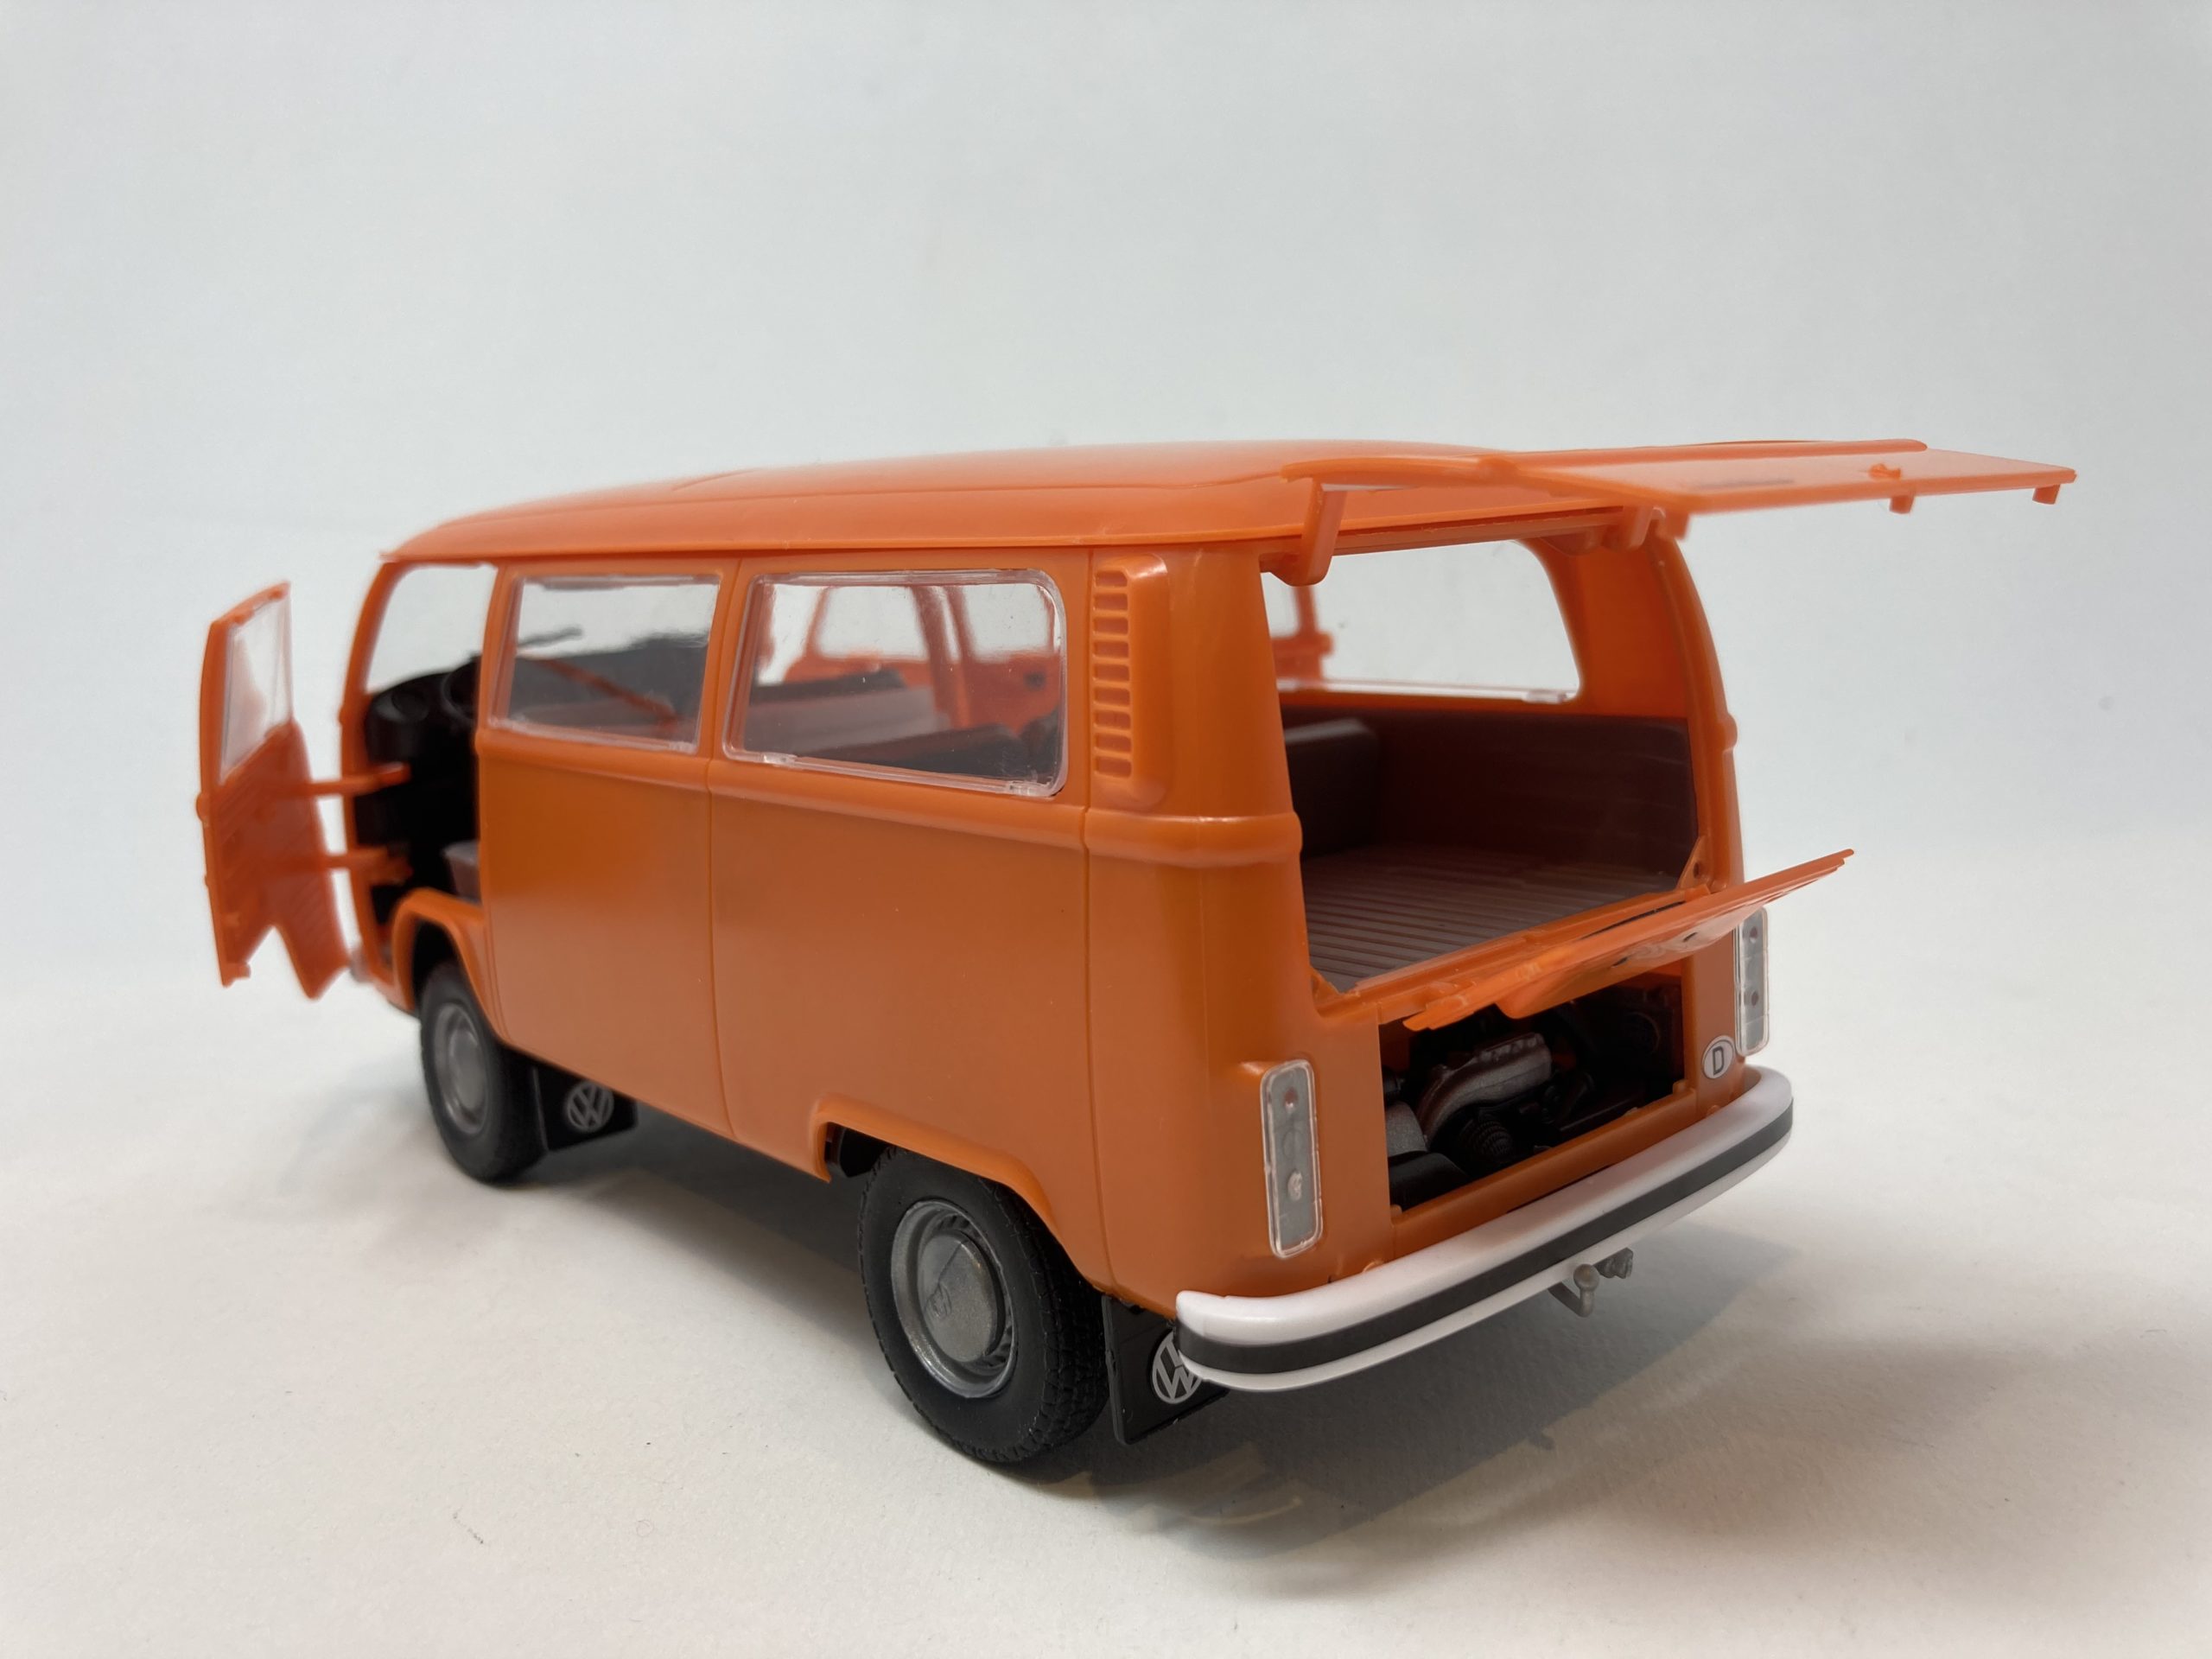
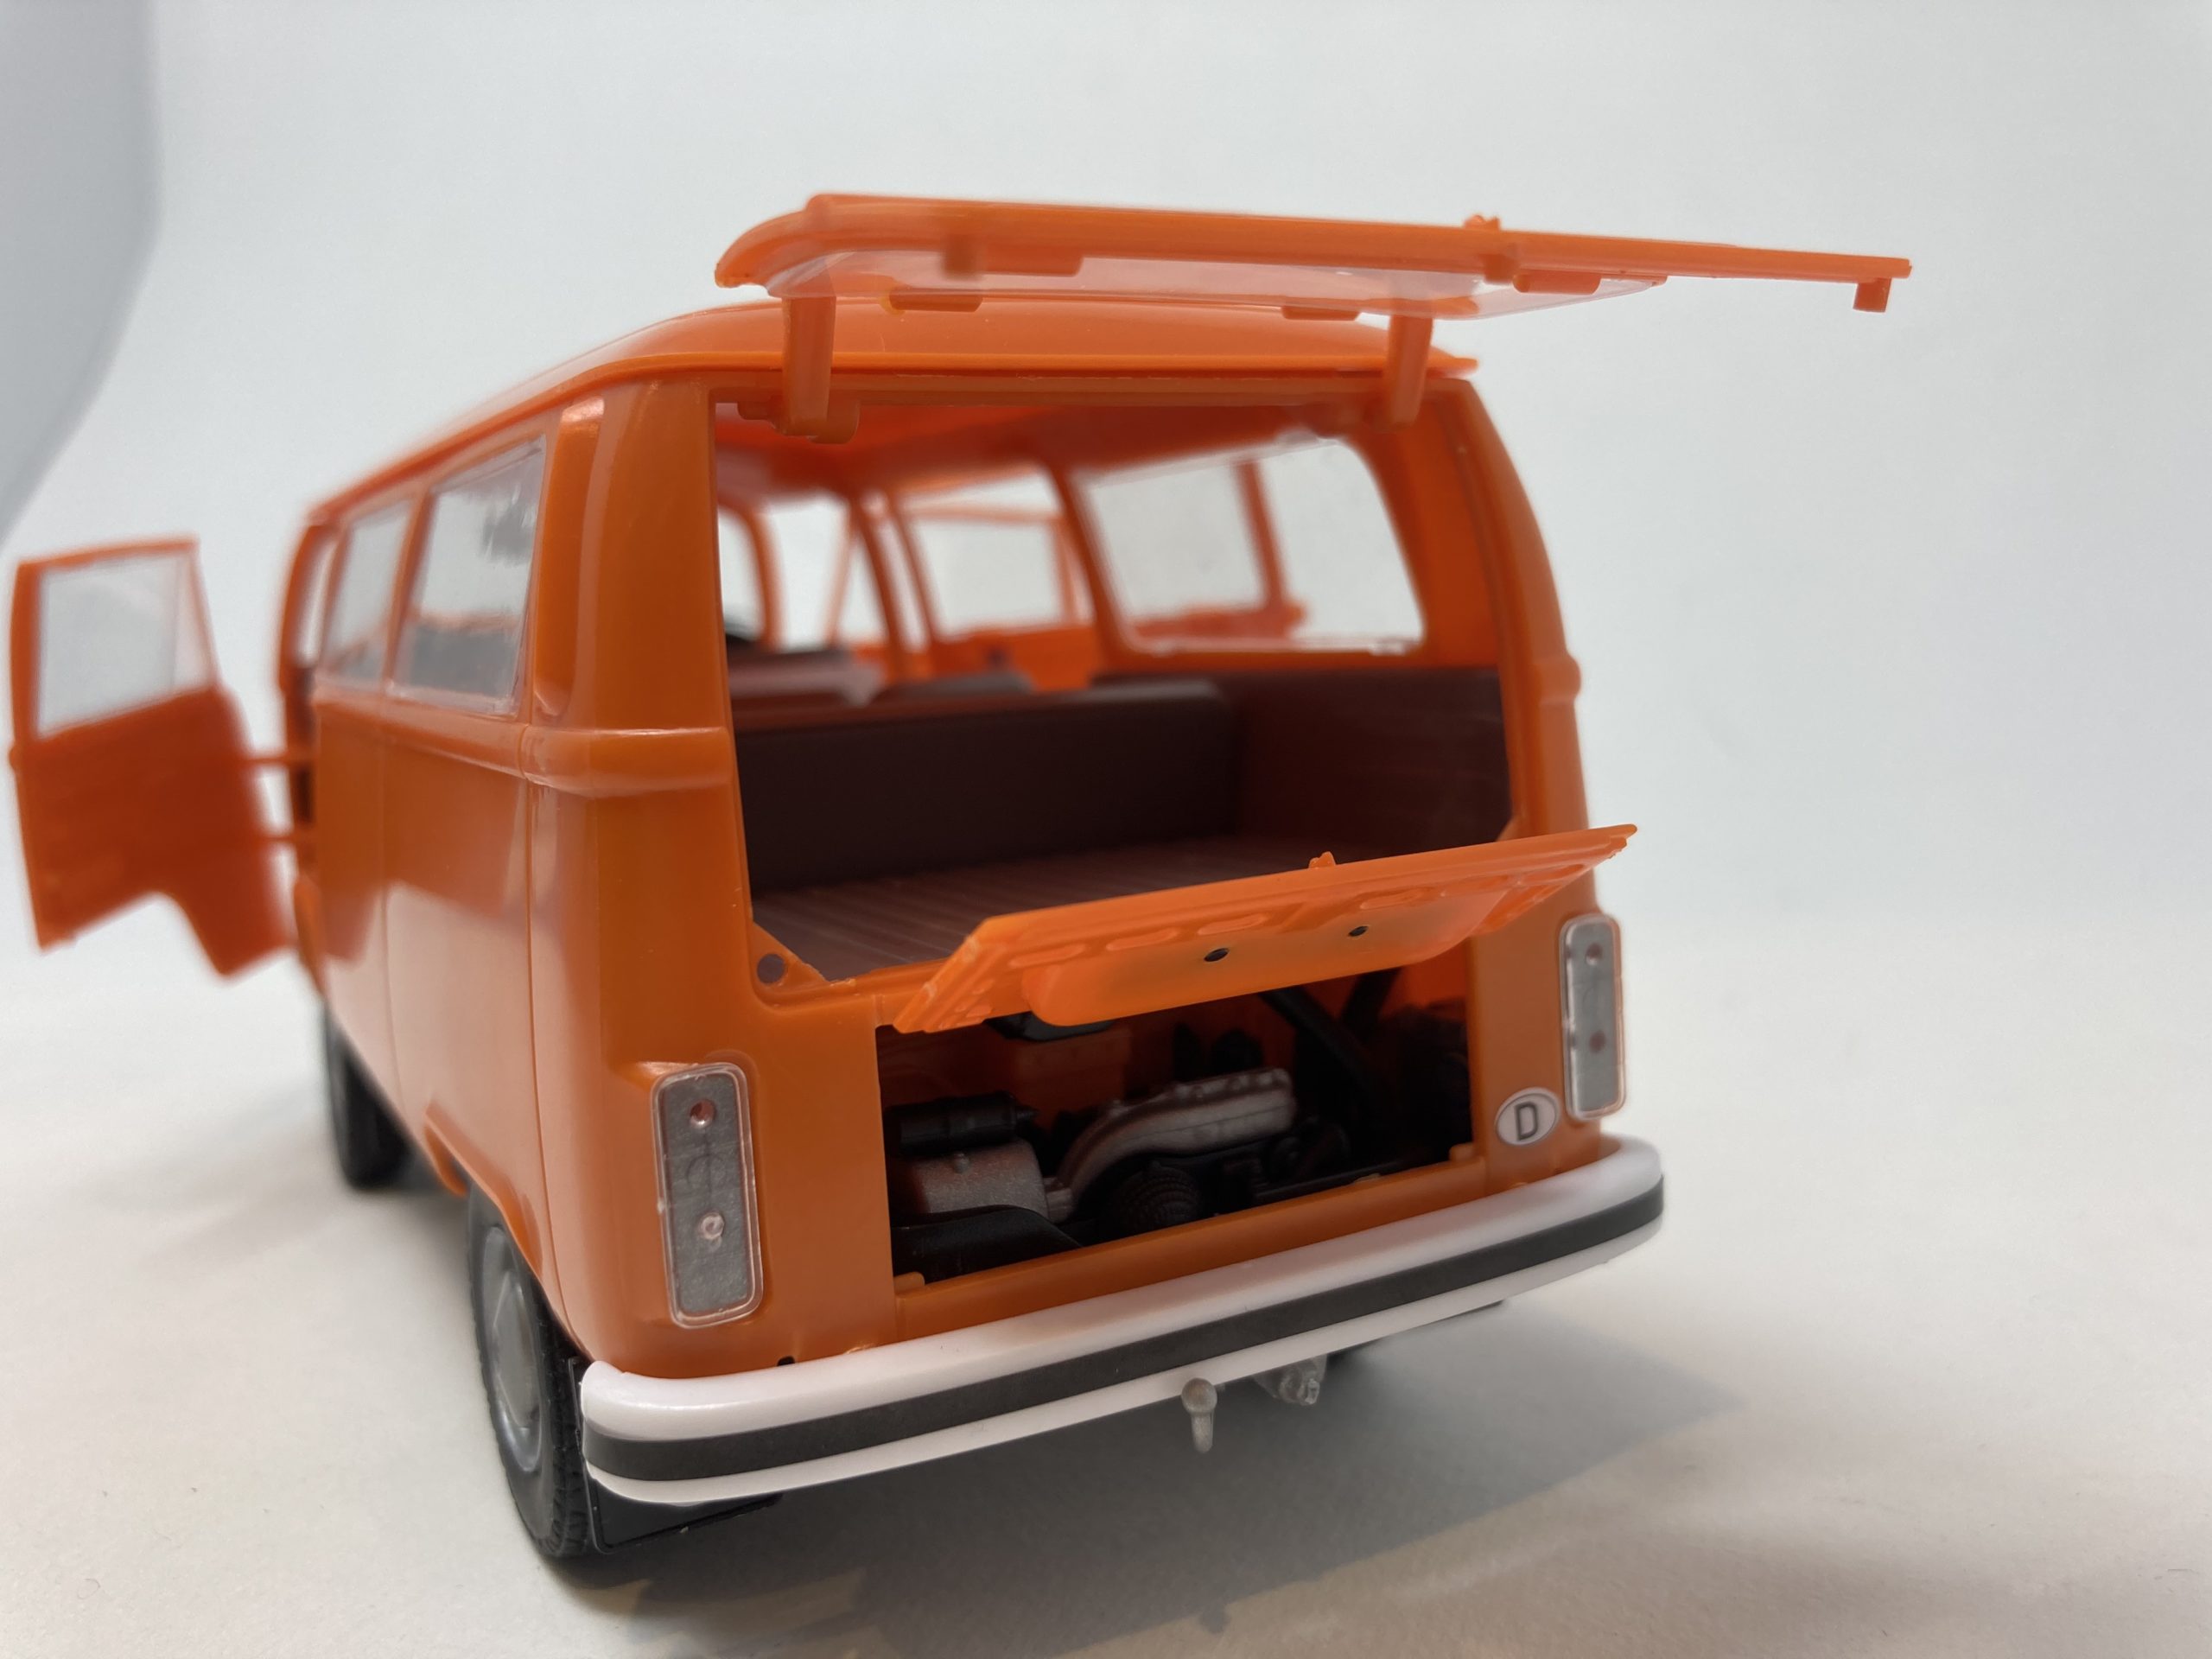
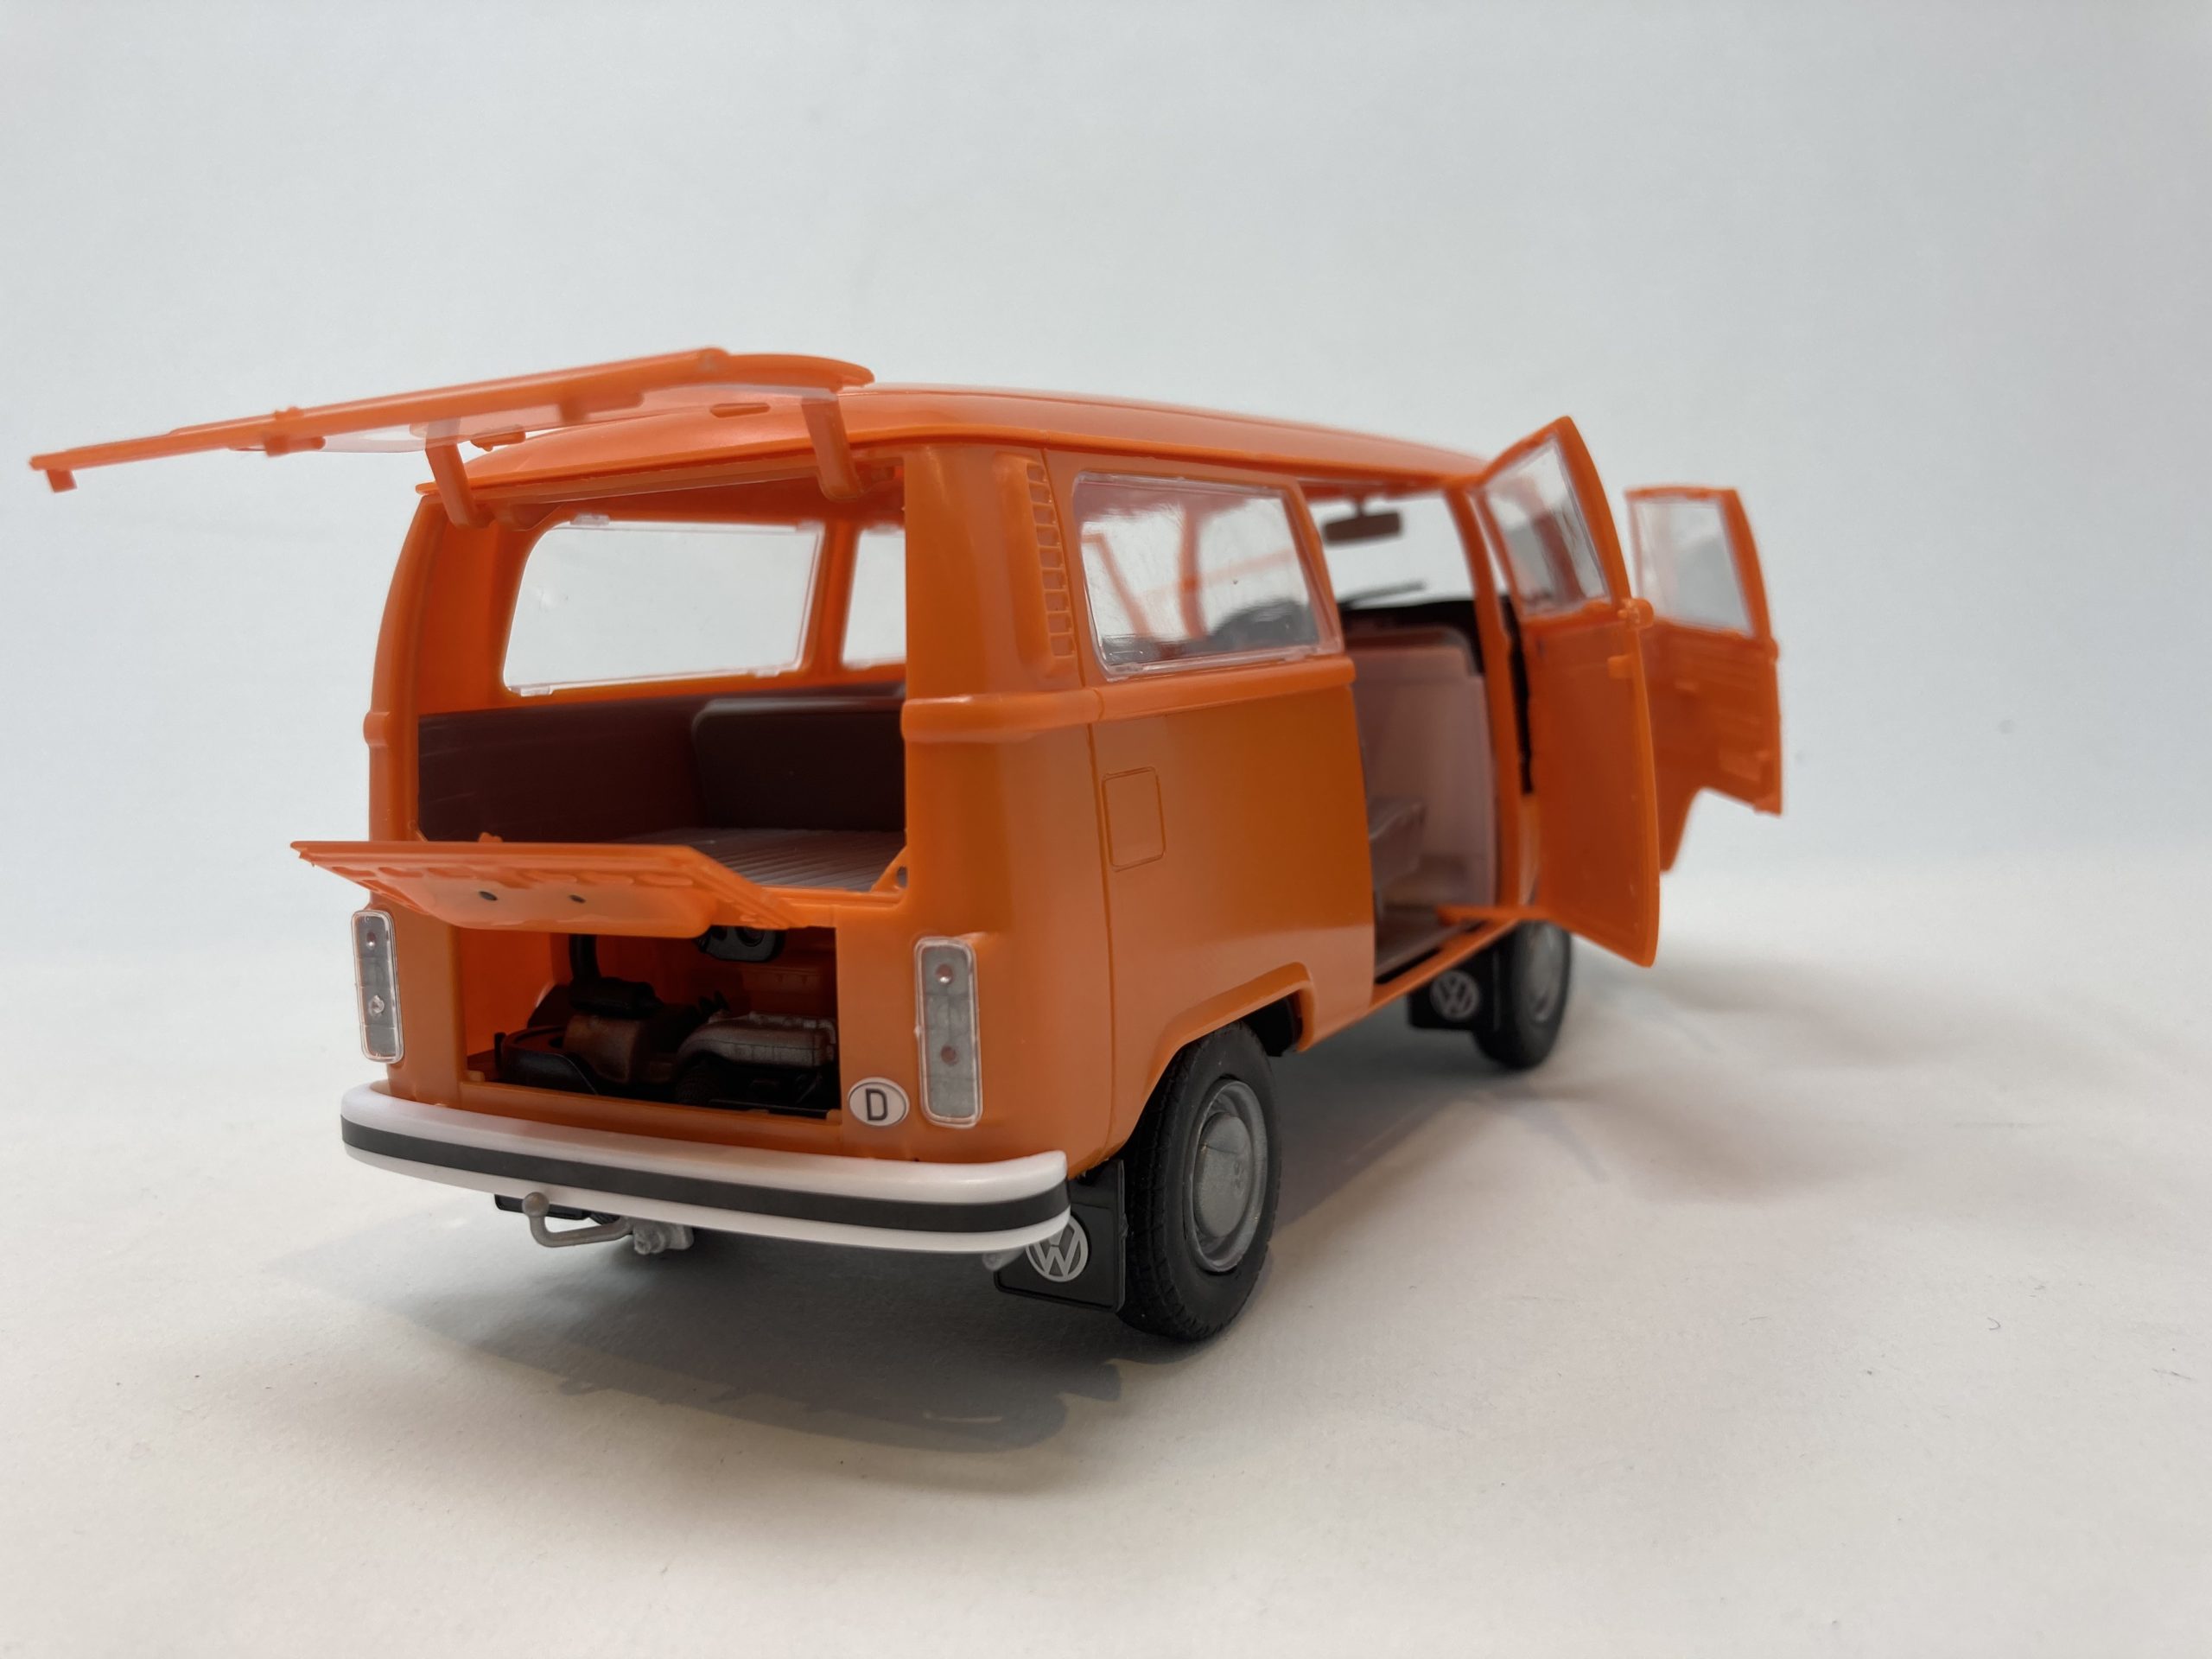
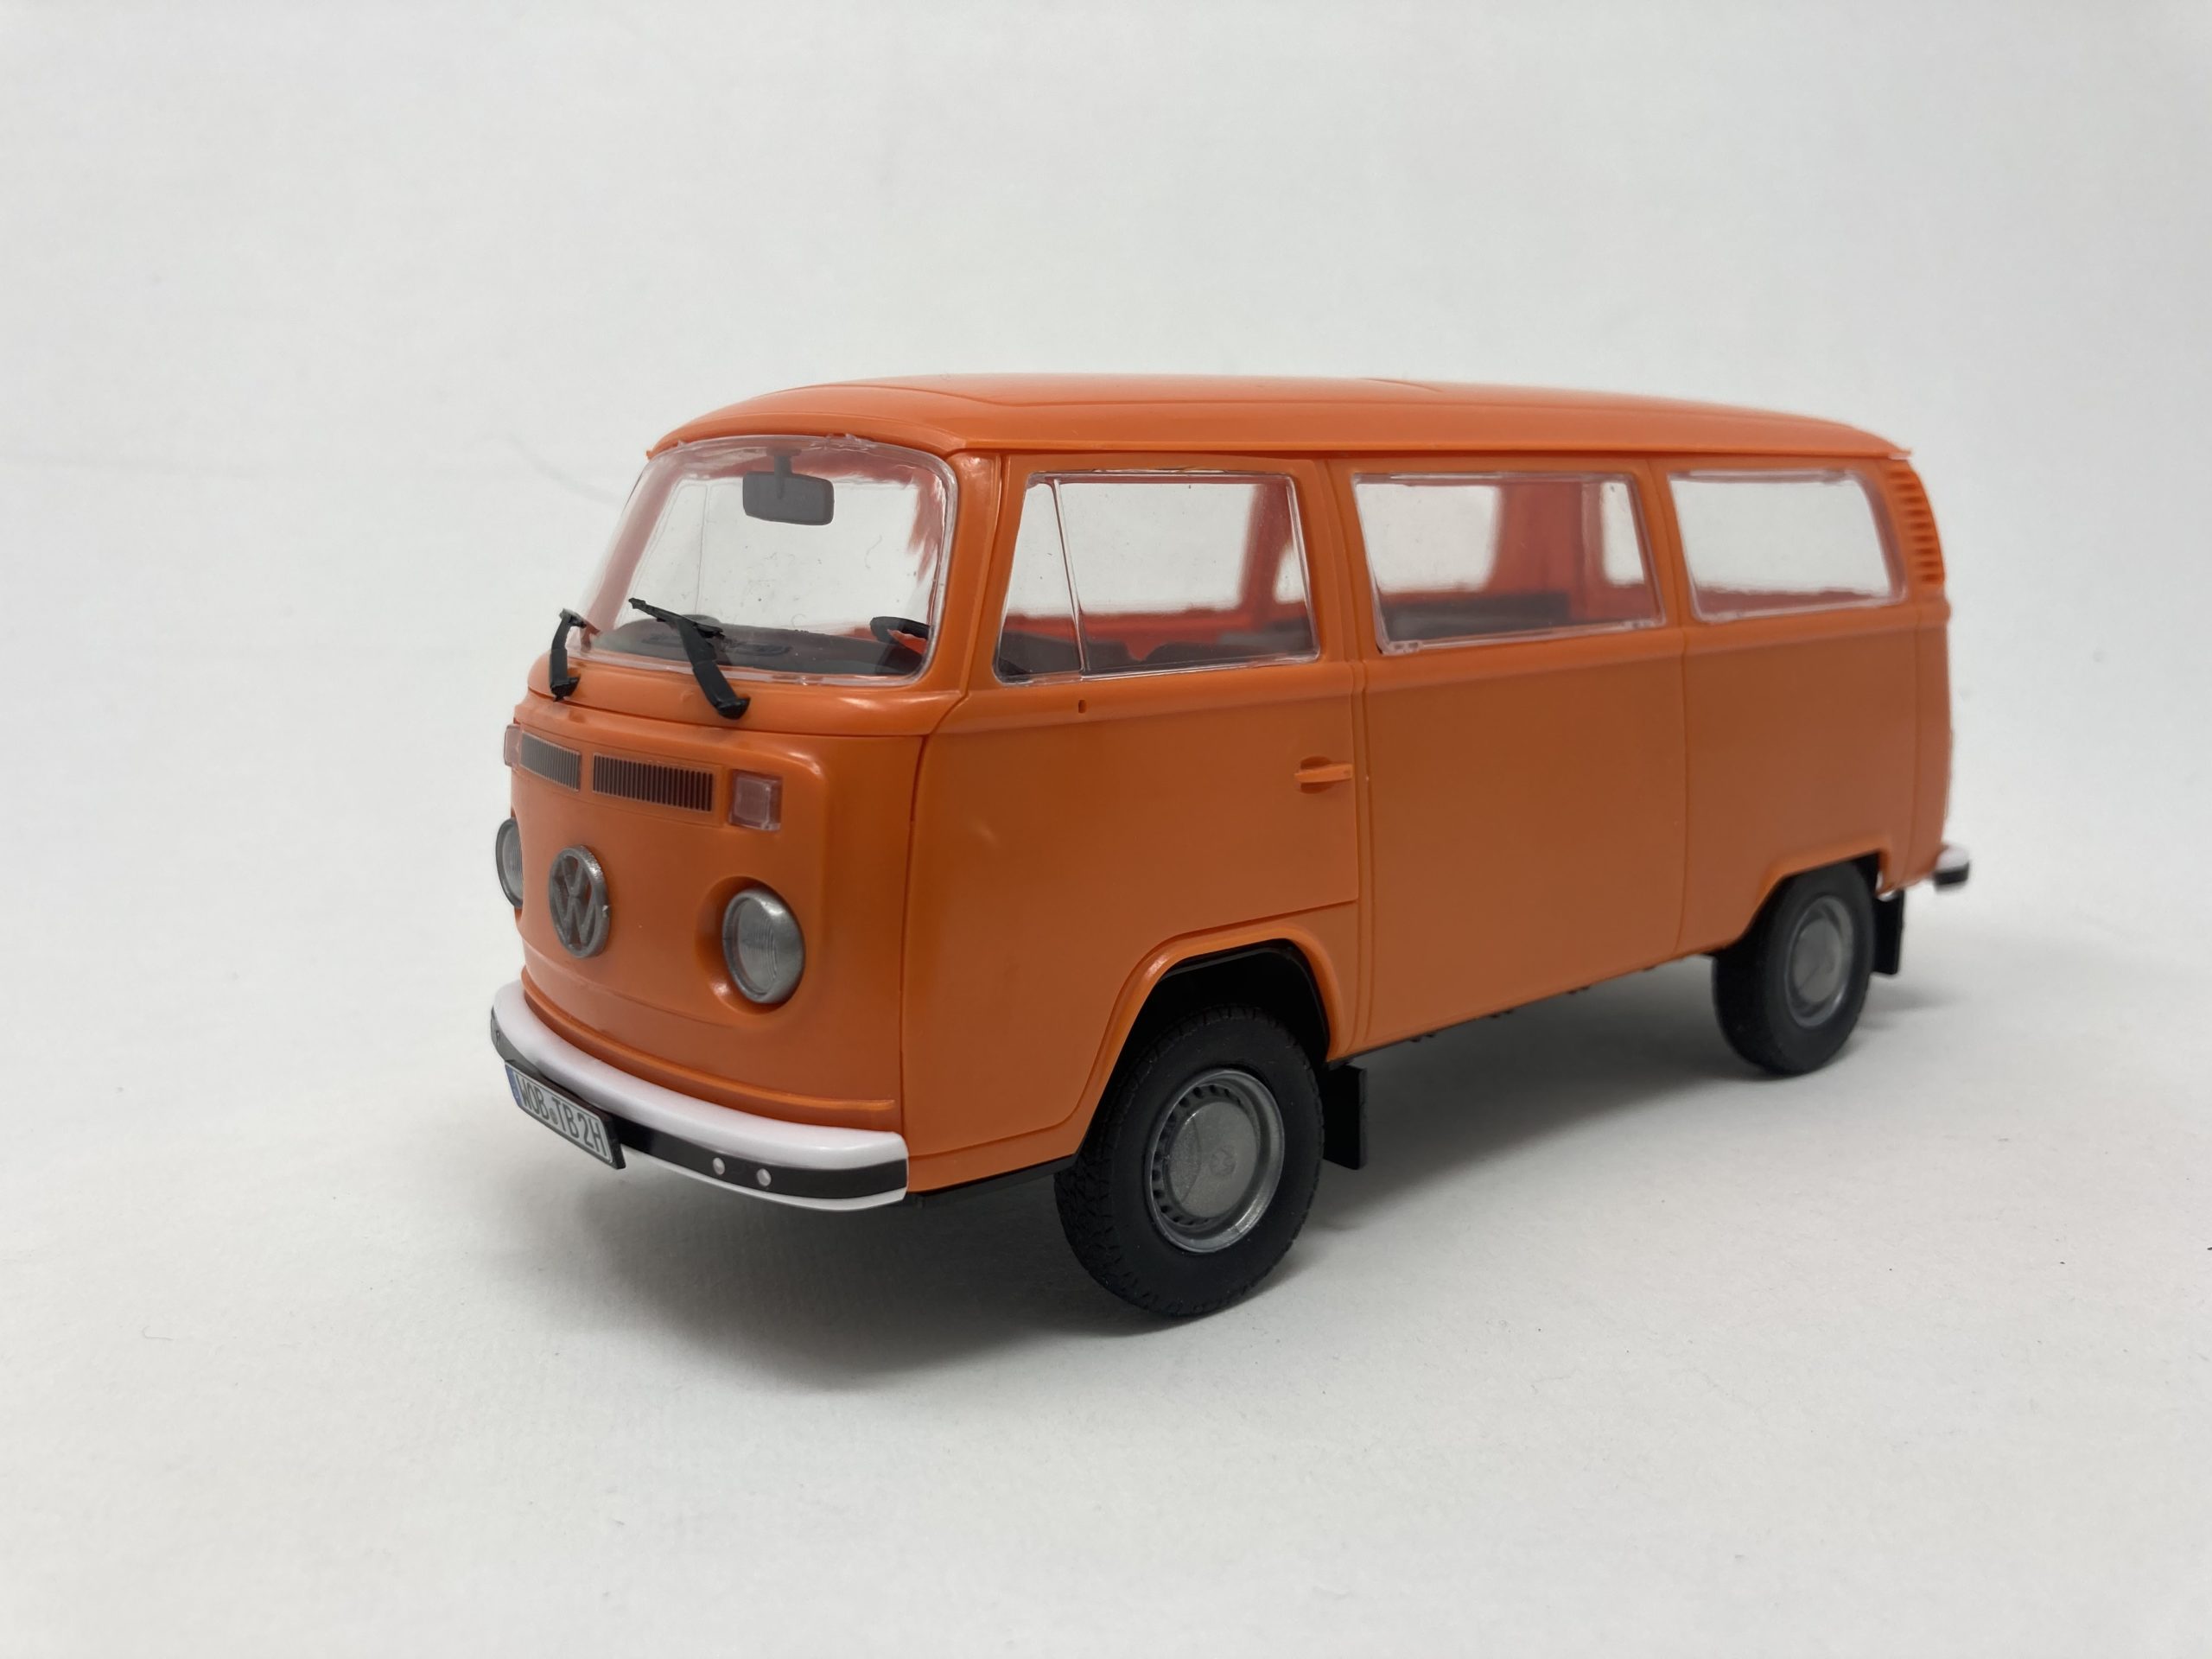
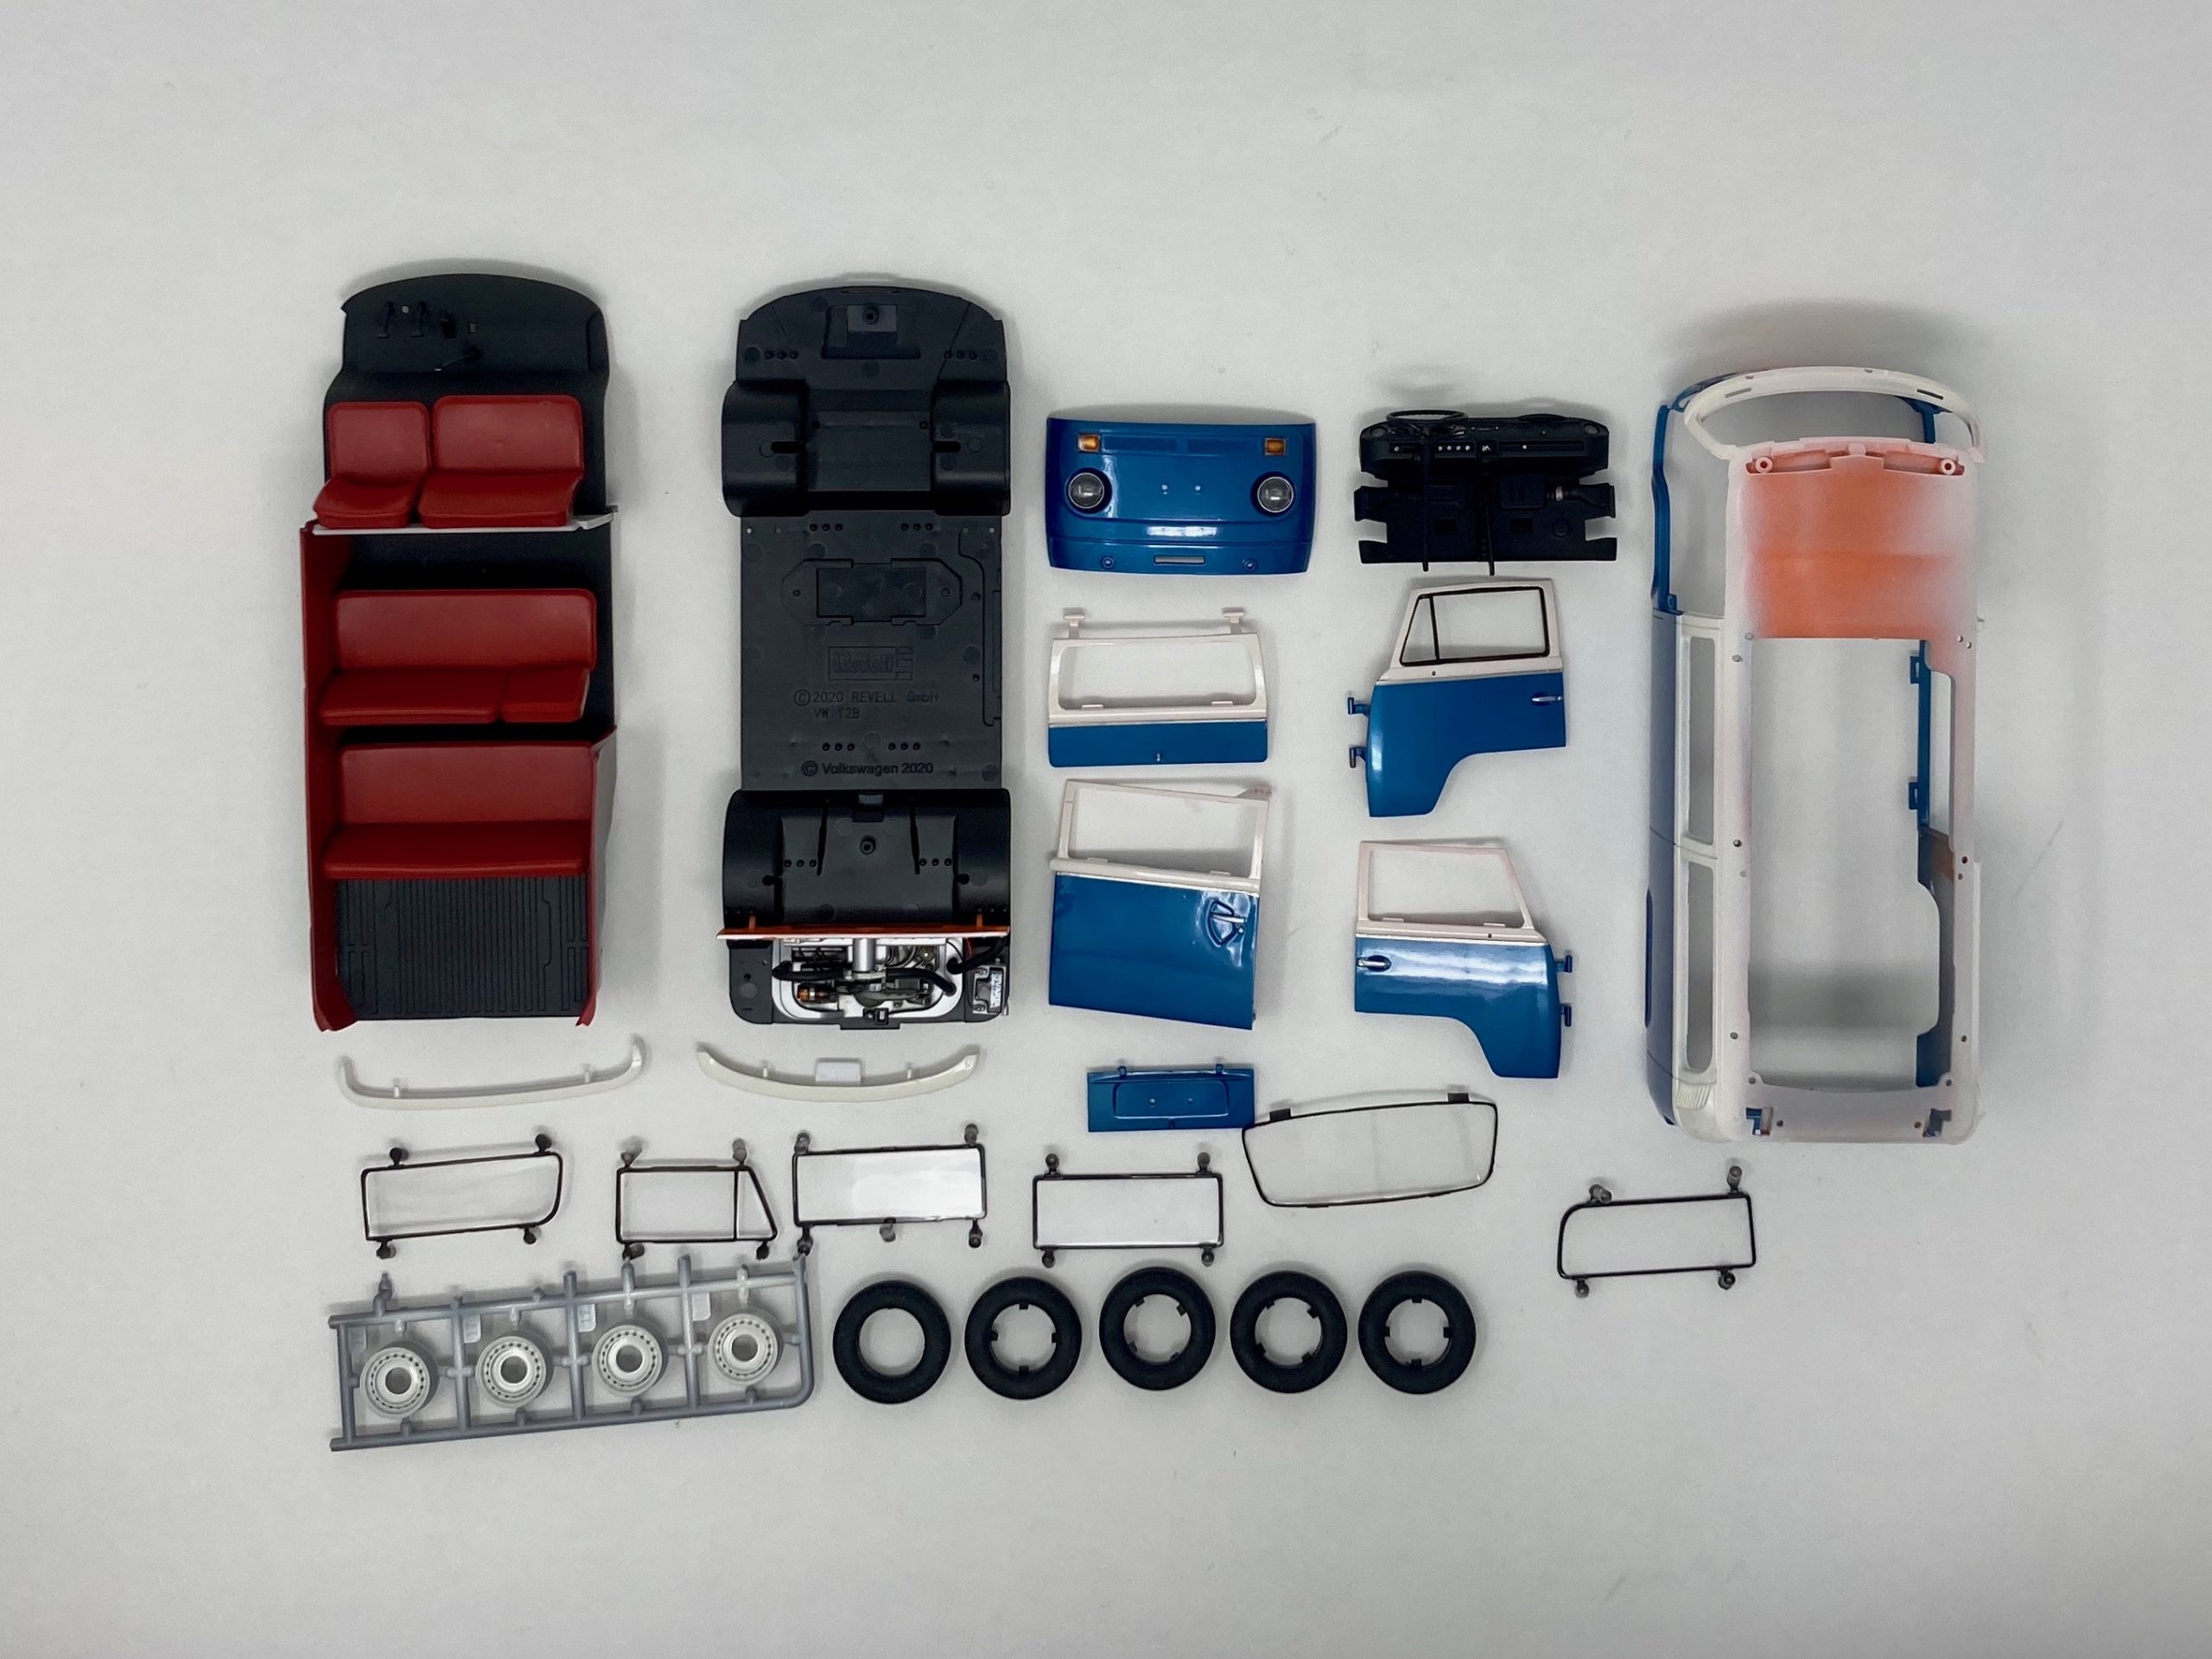
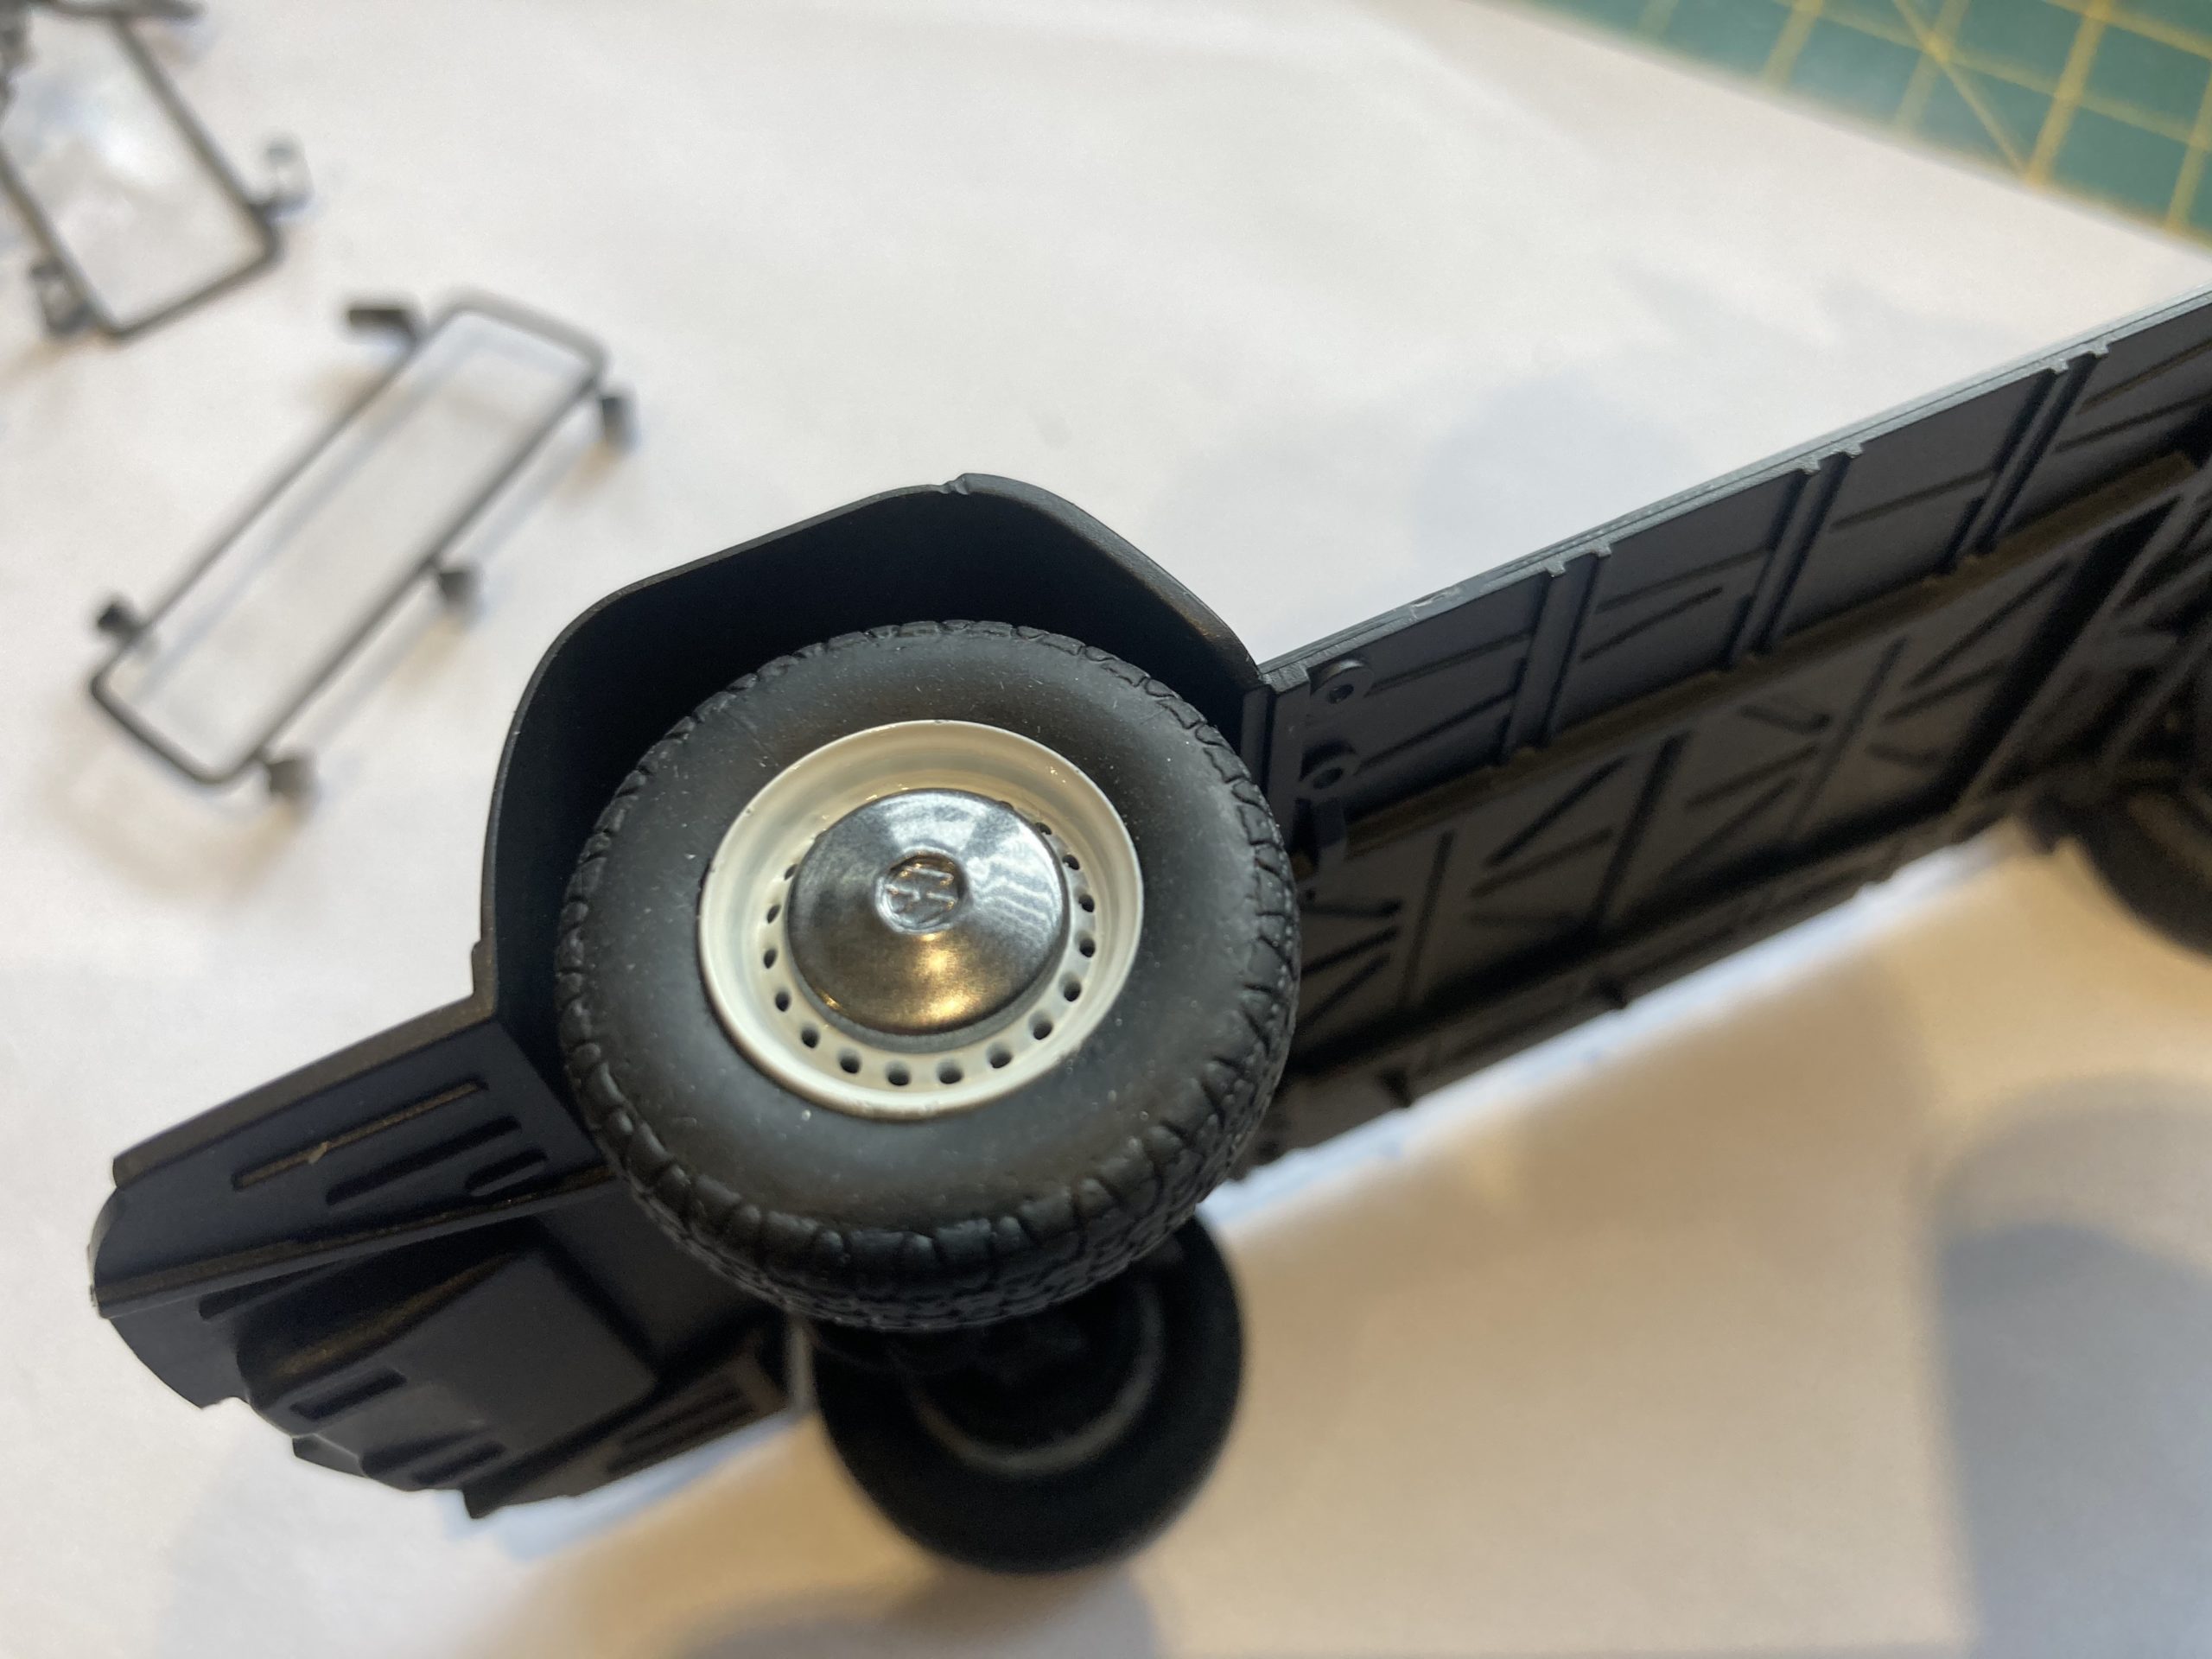
So, first off – the kit out of the box with absolutely nothing added. I think that this series of photographs here is probably sufficient, without any commentary, to show what’s included, how the build proceeds and what the final outcome looks like. The only tools used were some snips to remove parts from sprues, a basic file and a sanding stick (or sandpaper) to remove sprue trimmings. This was a pre-production kit supplied to me, so there is no box – just some poly bags and photocopied instruction sheets. I’m assuming that the mouldings in the actual kits will be in the same colours as in here.
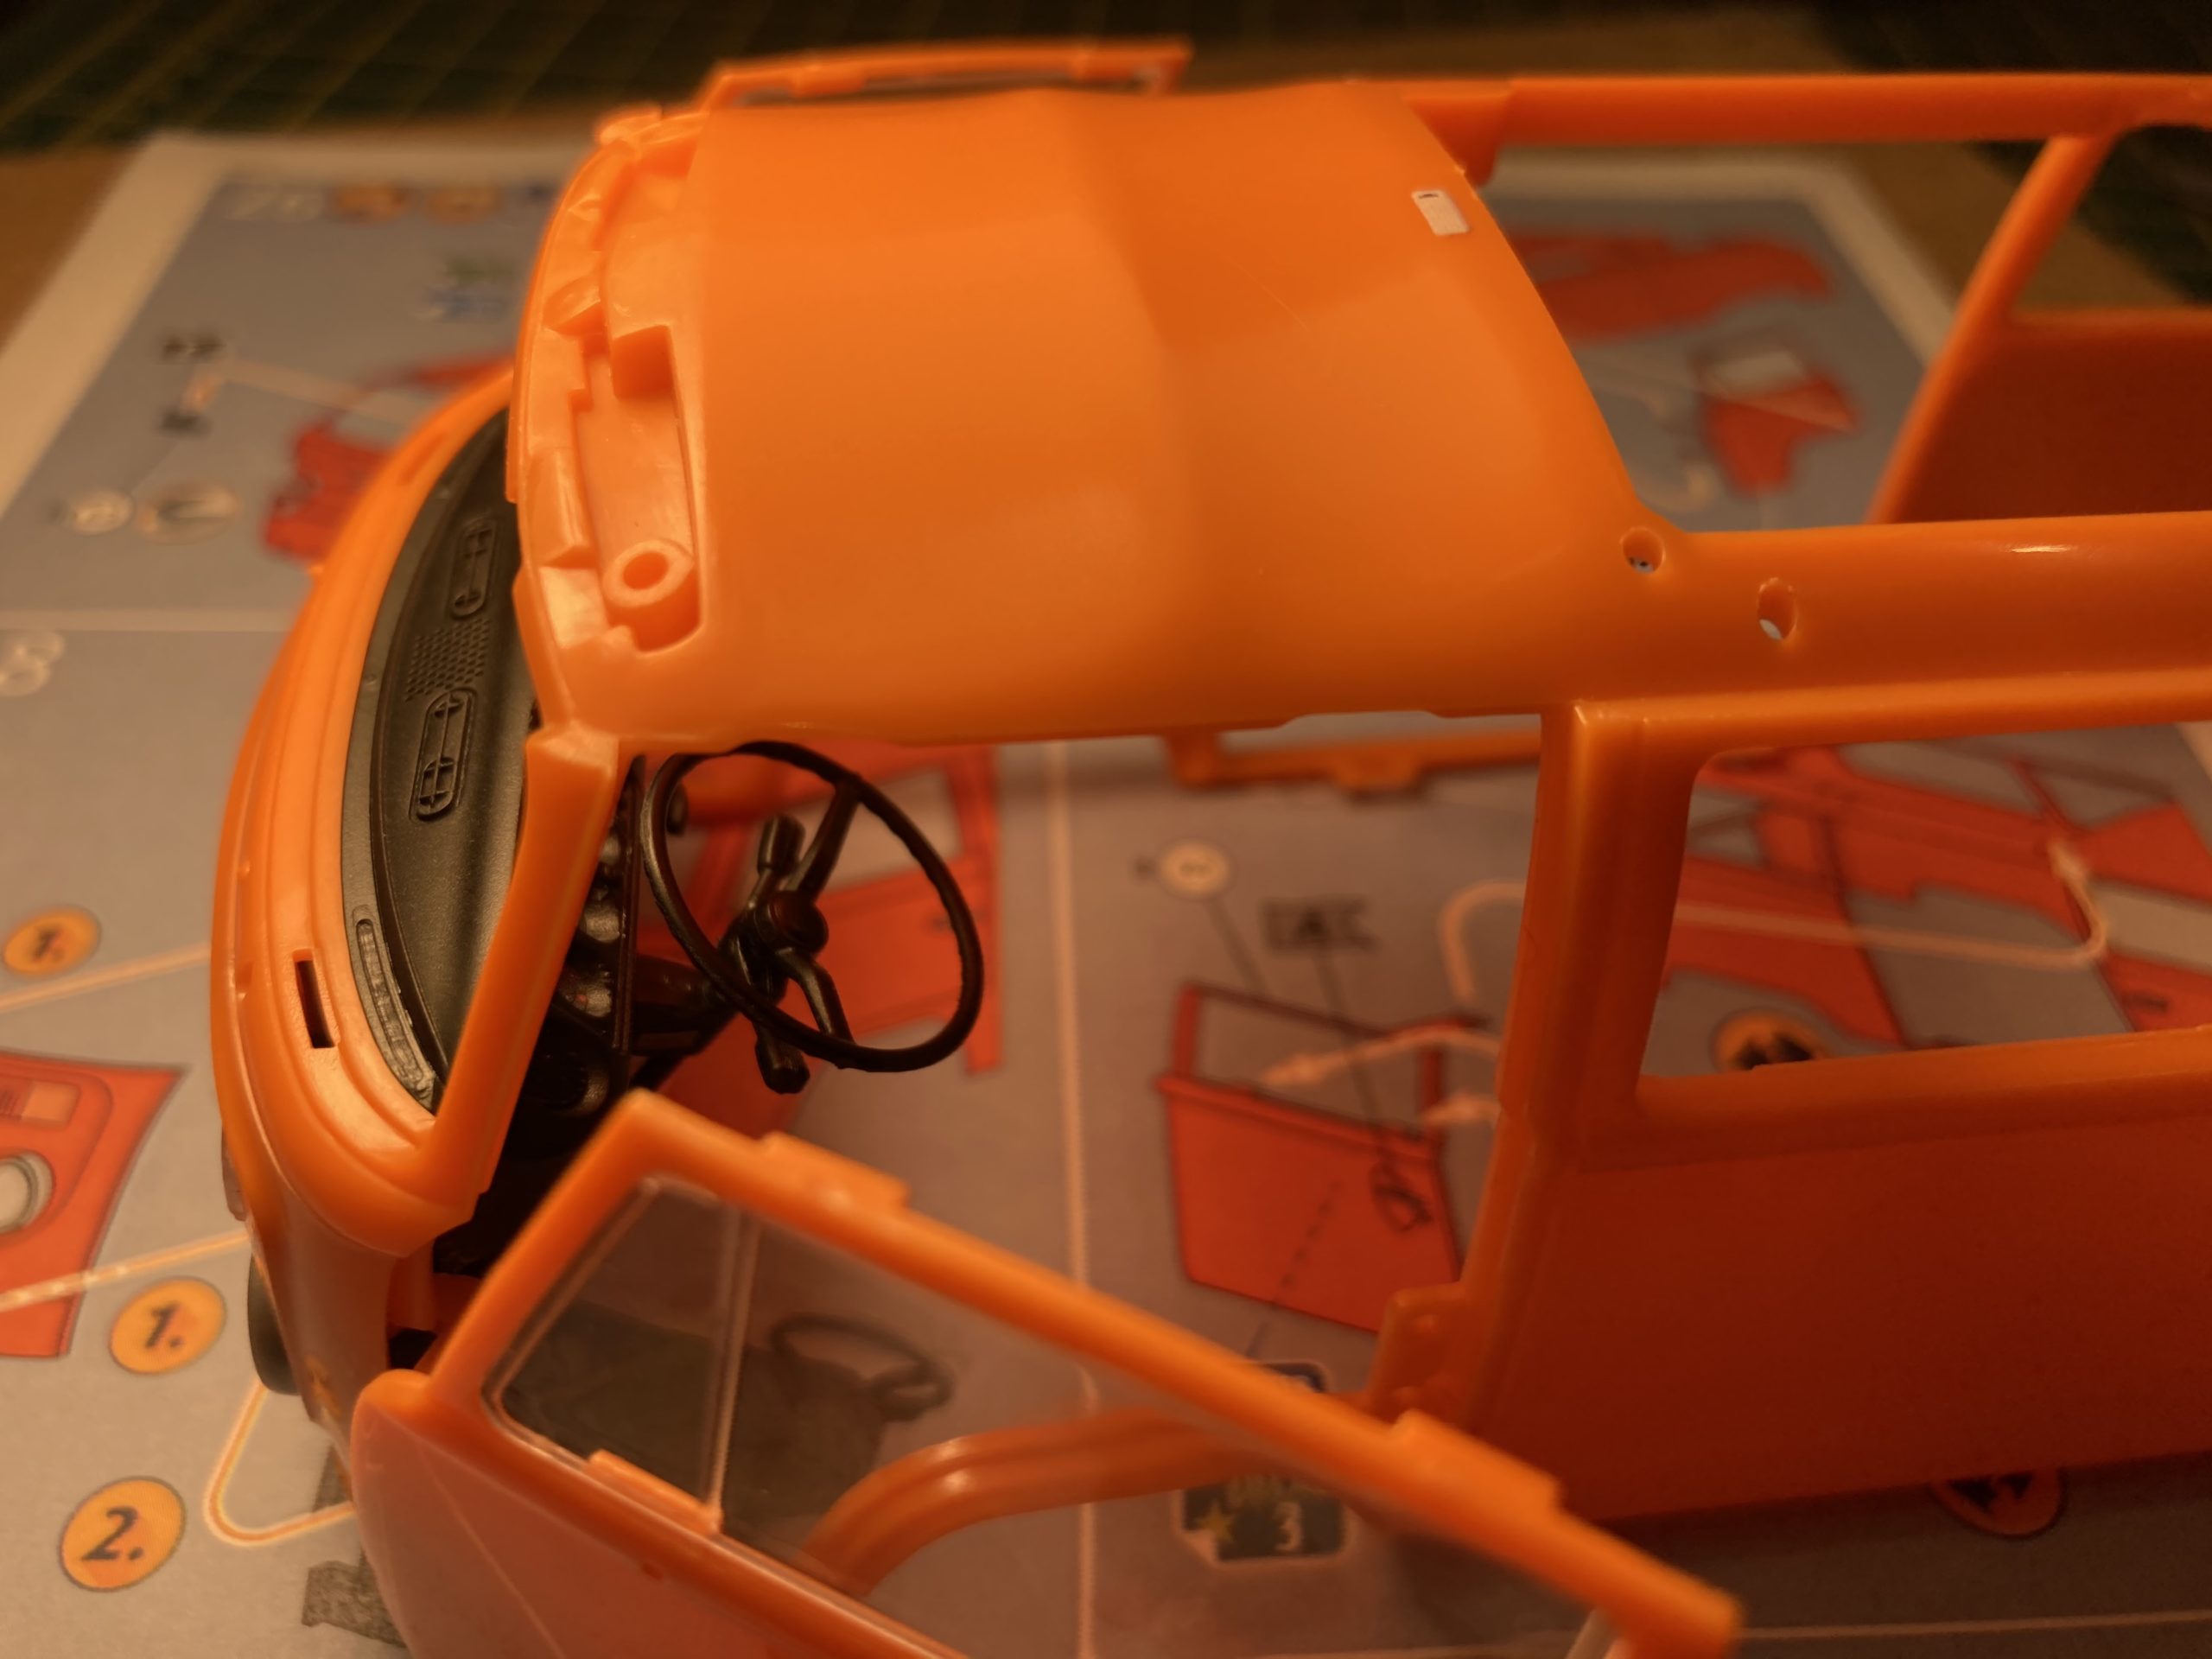
So, these are the stages…


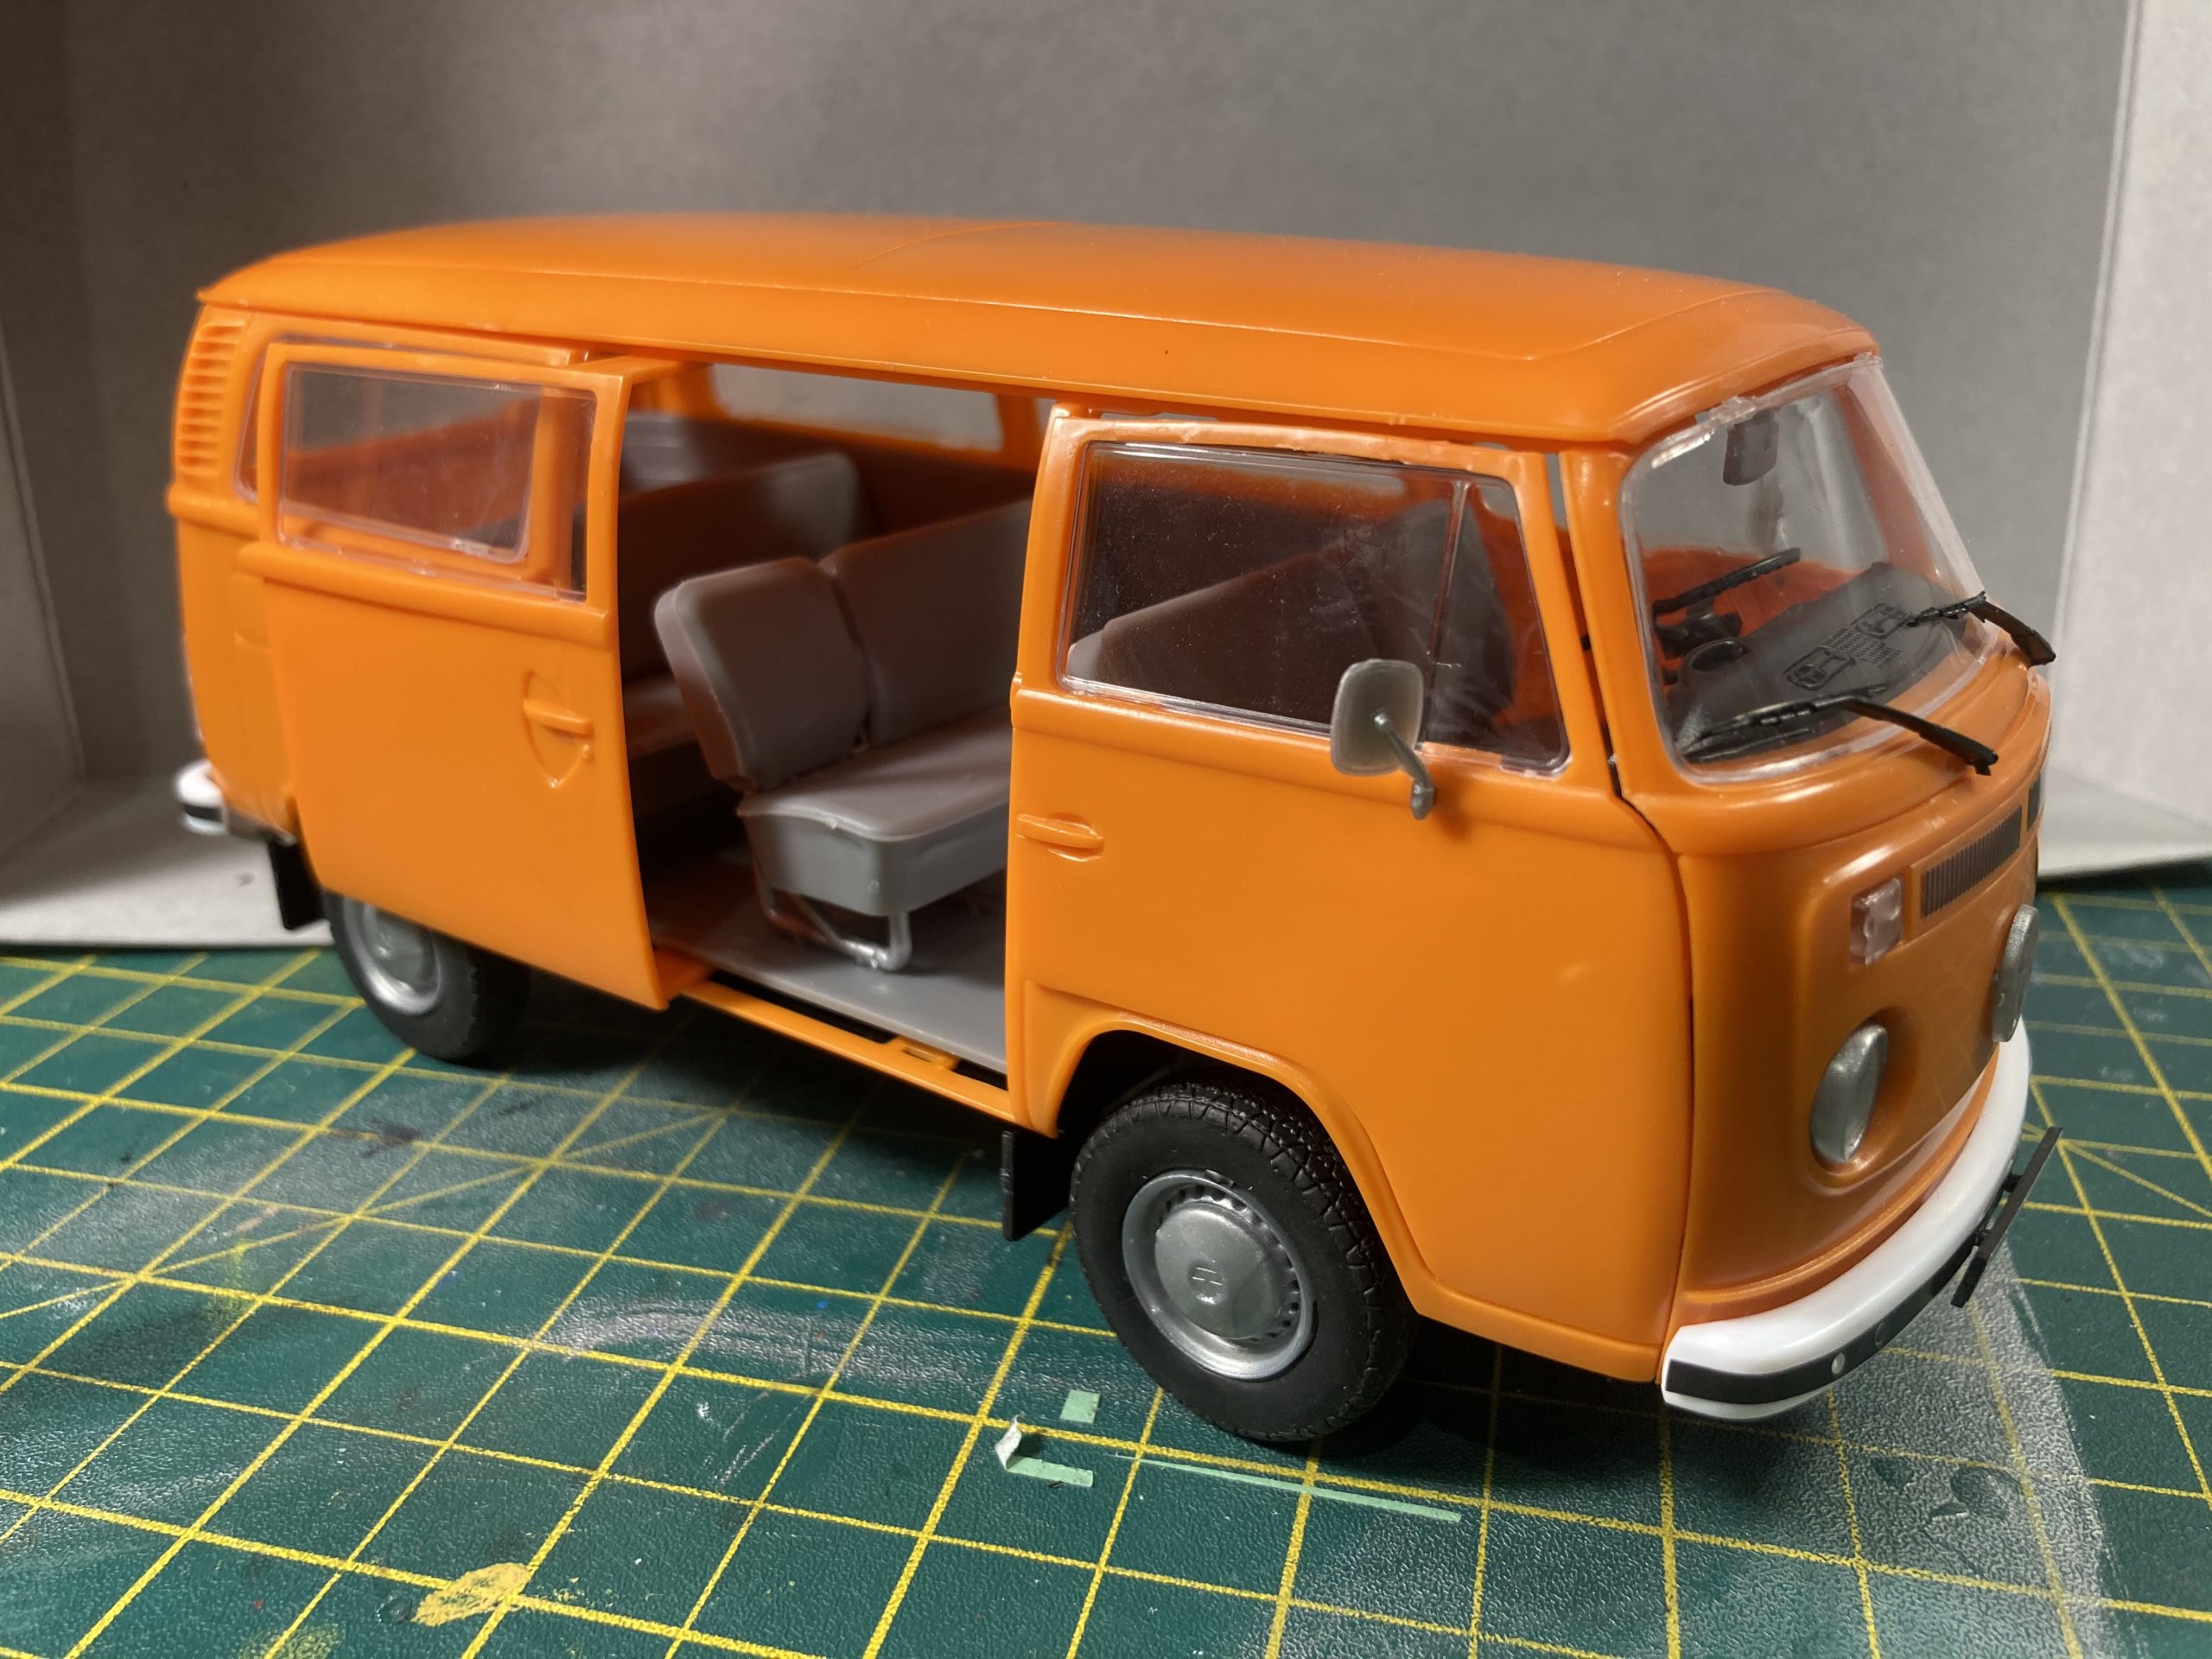


Thoughts on build number 1
It was very straightforward with very clear, multi coloured, step by step instructions. The guidance included a suggested paint scheme with a list of Revell referenced paints. There is a sheet of self-adhesive stickers and a duplicate sheet in decal form. I used the stickers in this first build (the stickers are very good quality) – and, as previously mentioned, no paint. The parts were generally very cleanly moulded with no flash to remove. The plastic seems to be not at all brittle and very strong – it needs to be, as some of the push fit click parts need quite a bit of force to push them together. The ‘click’ system seems to work very well and parts were convincingly locked into place. Some of the smaller items – such as the floor pedals and seat frames were a little tricky to push with the fingers – but it all went together fine. Care was needed with the windows – it was essential to make sure the edges were clean of ‘sprue marks’ and that the orientation (top to bottom) was correct. But, the windows click in with no problem. All the doors hinged ok, as did the rear cover and the slide mechanism for the side door was fine. As expected there is inevitably a certain amount of slack in the hinges and the door fit wasn’t precise. But, as a no-glue, click together model it all worked very well. There were a few options in here, including a front mounted spare wheel.
Build number 2
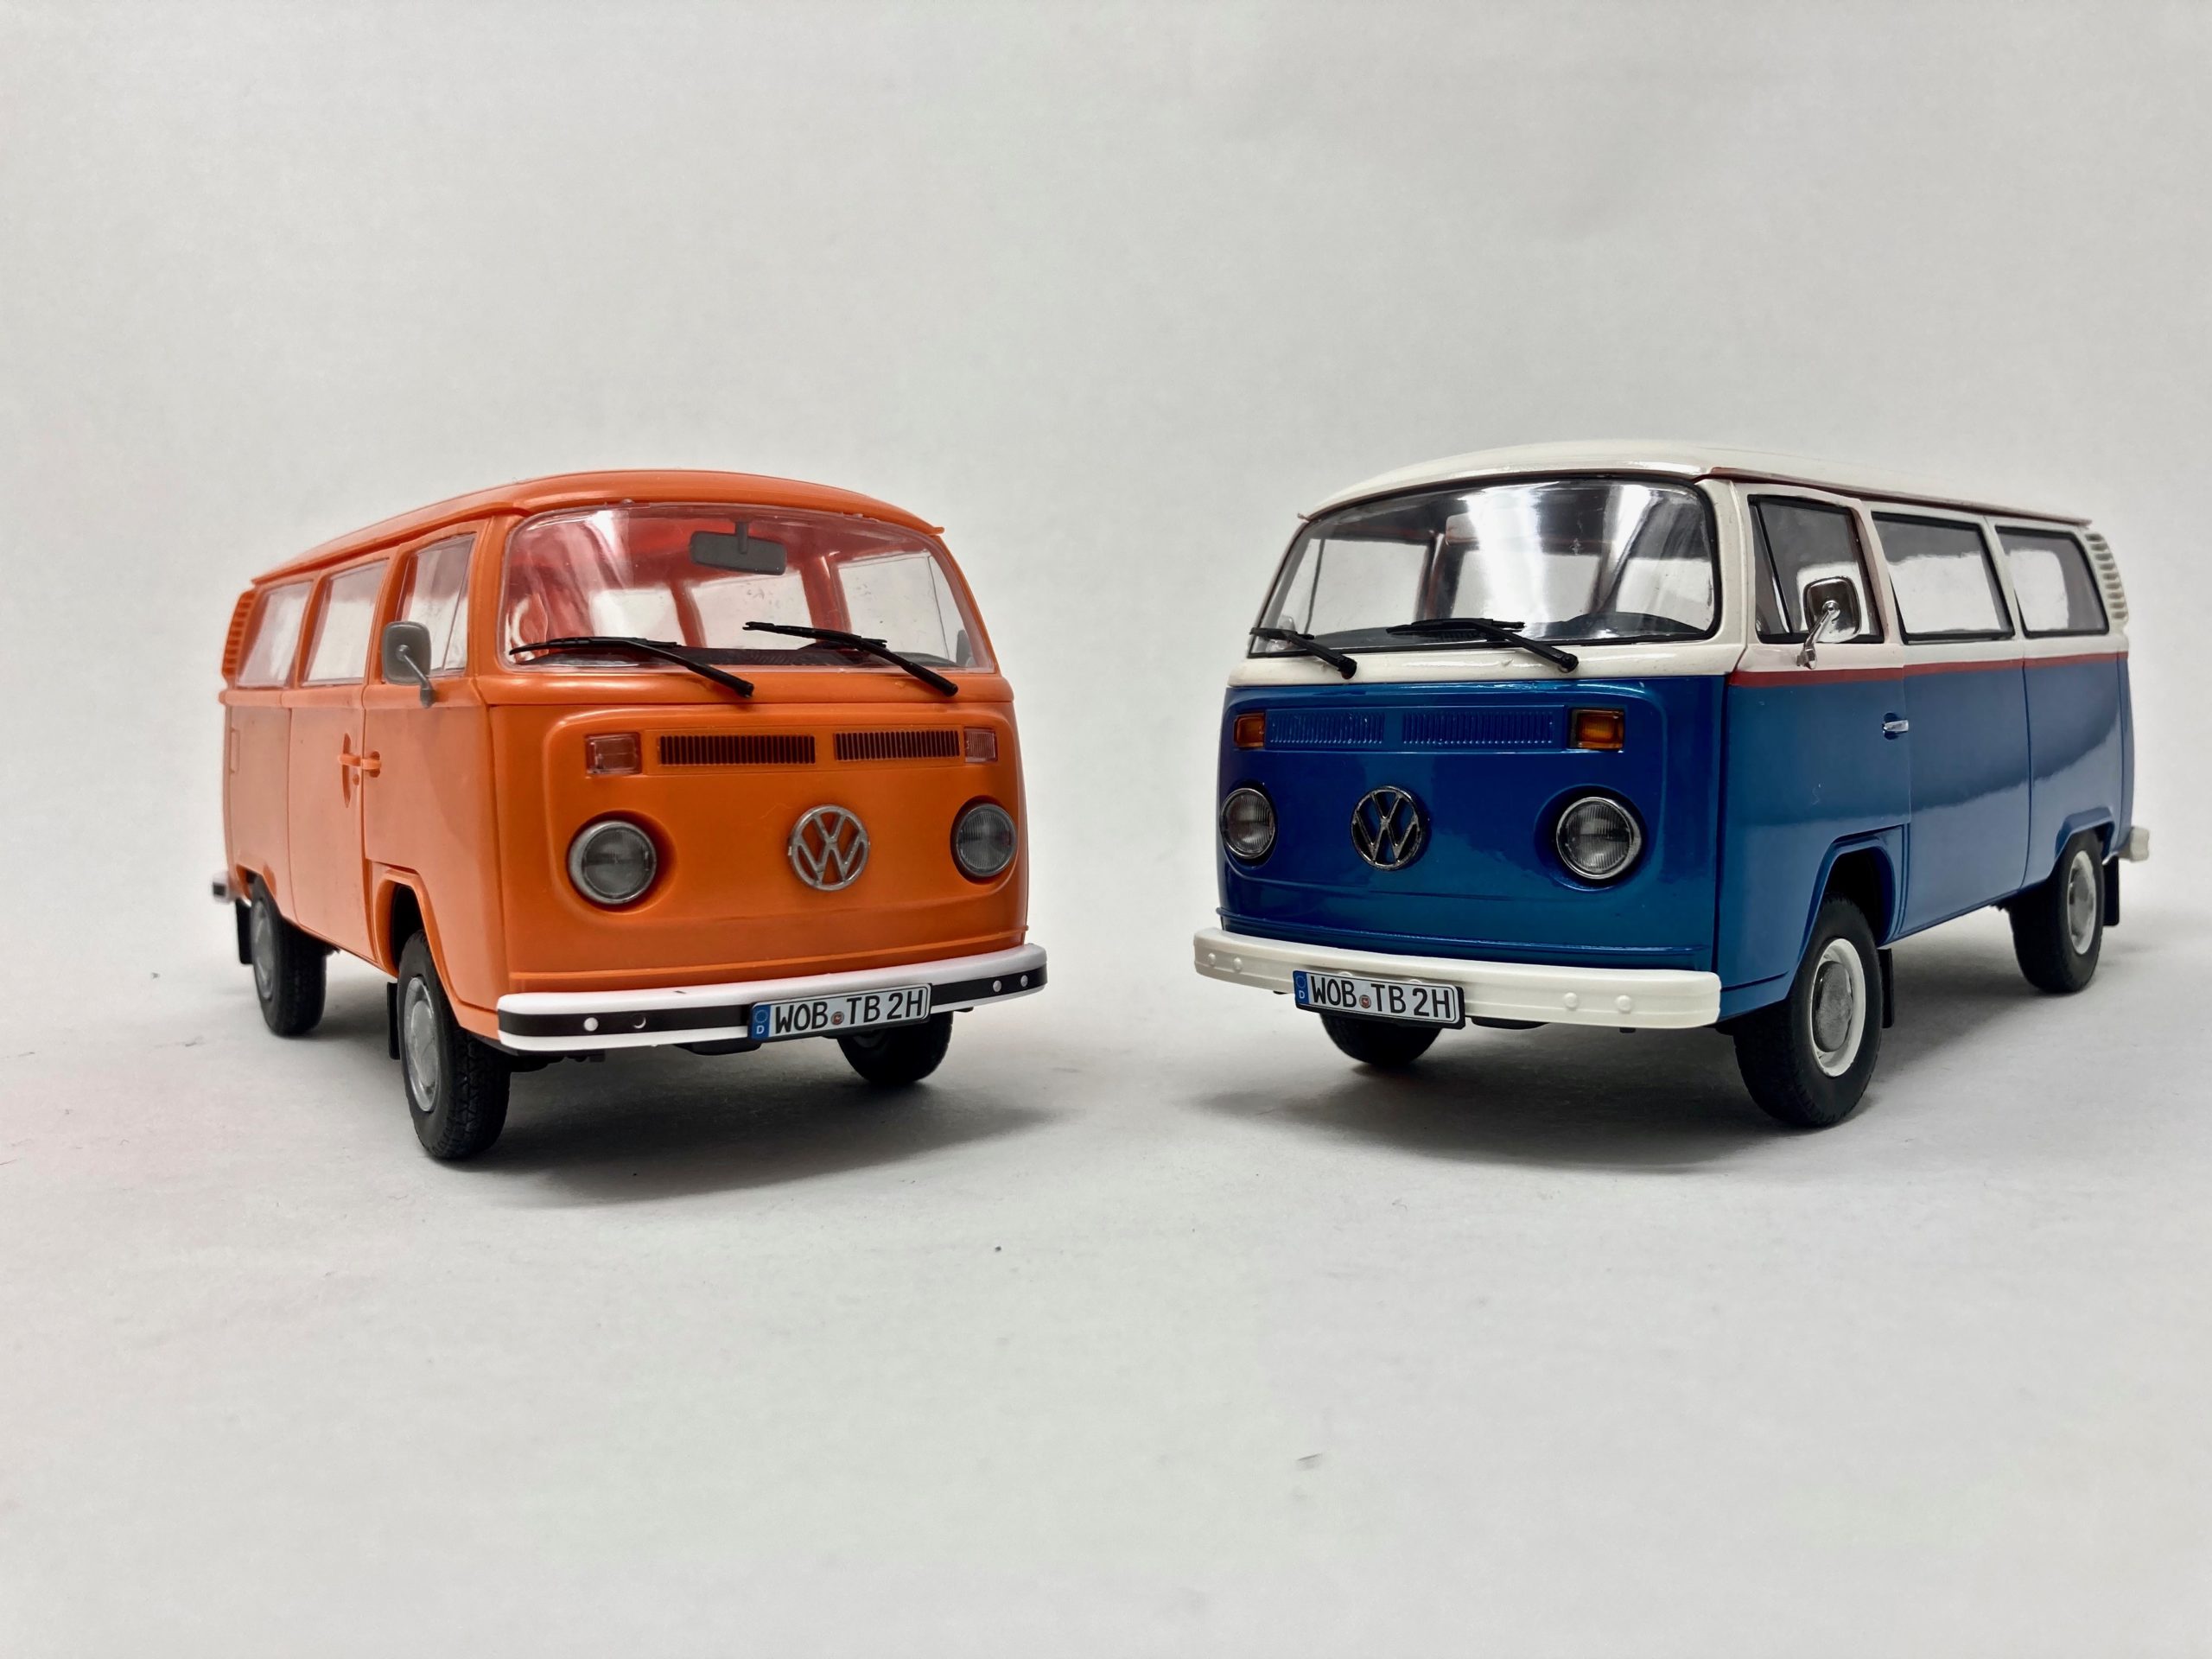
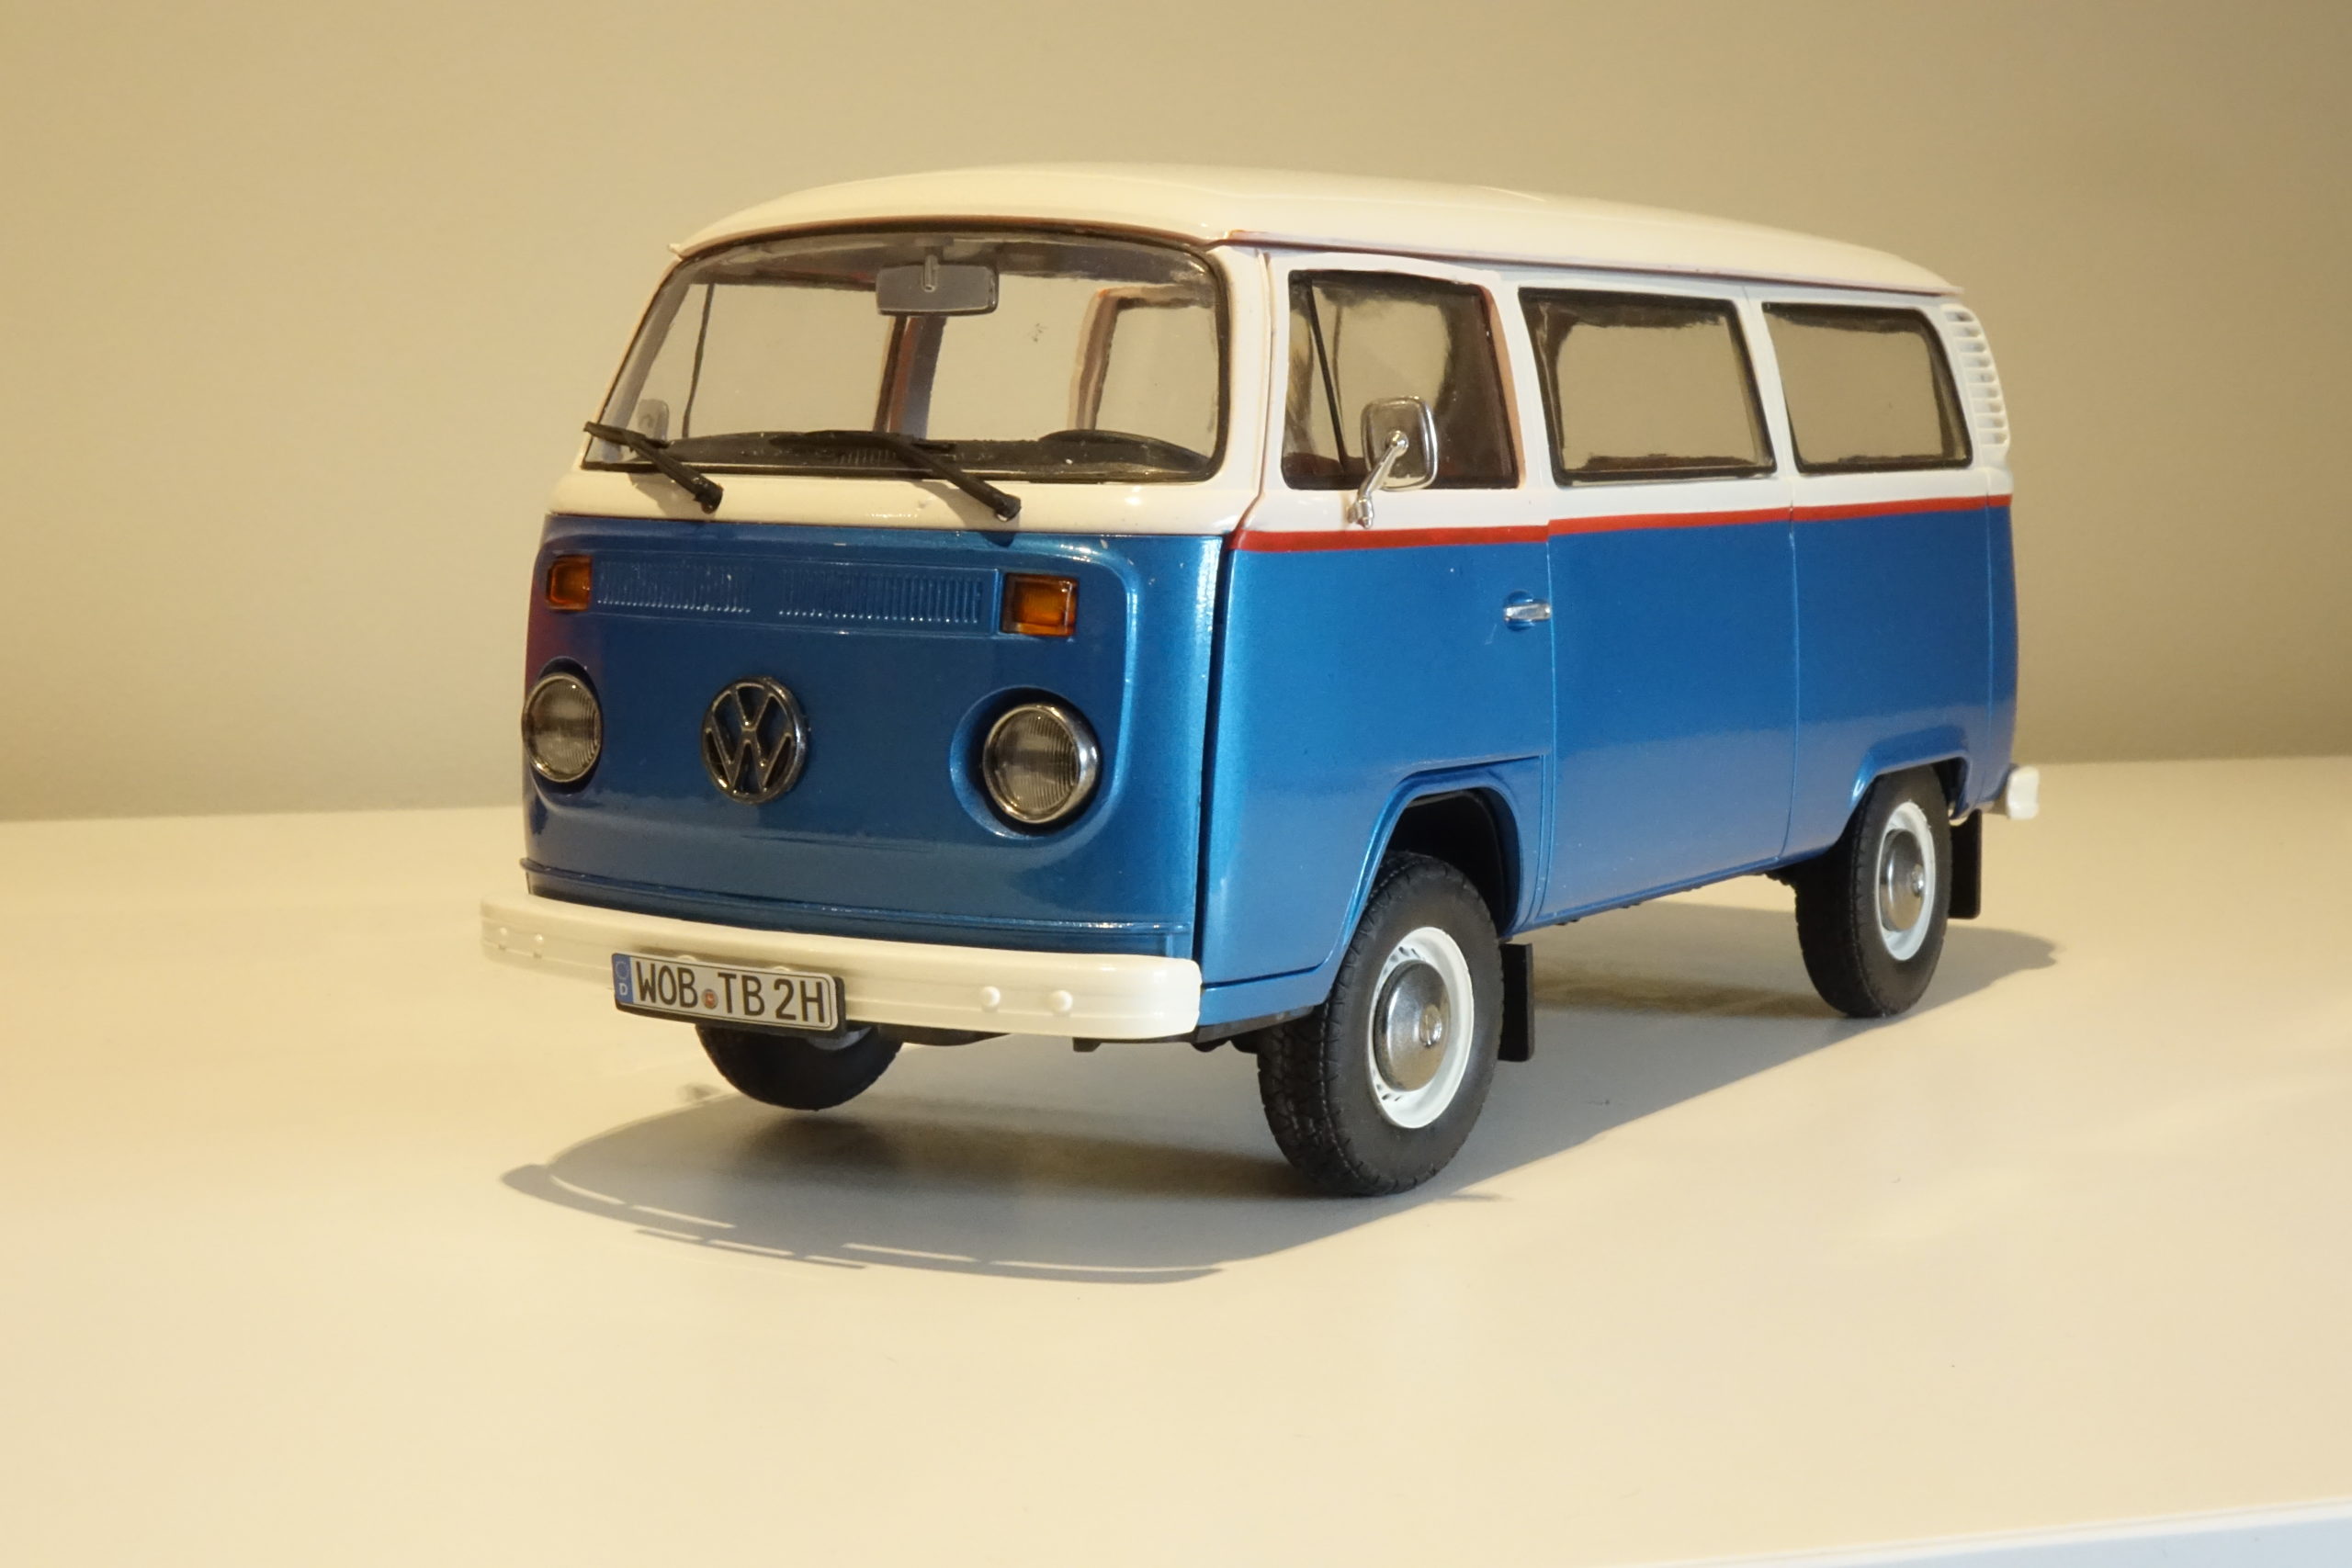
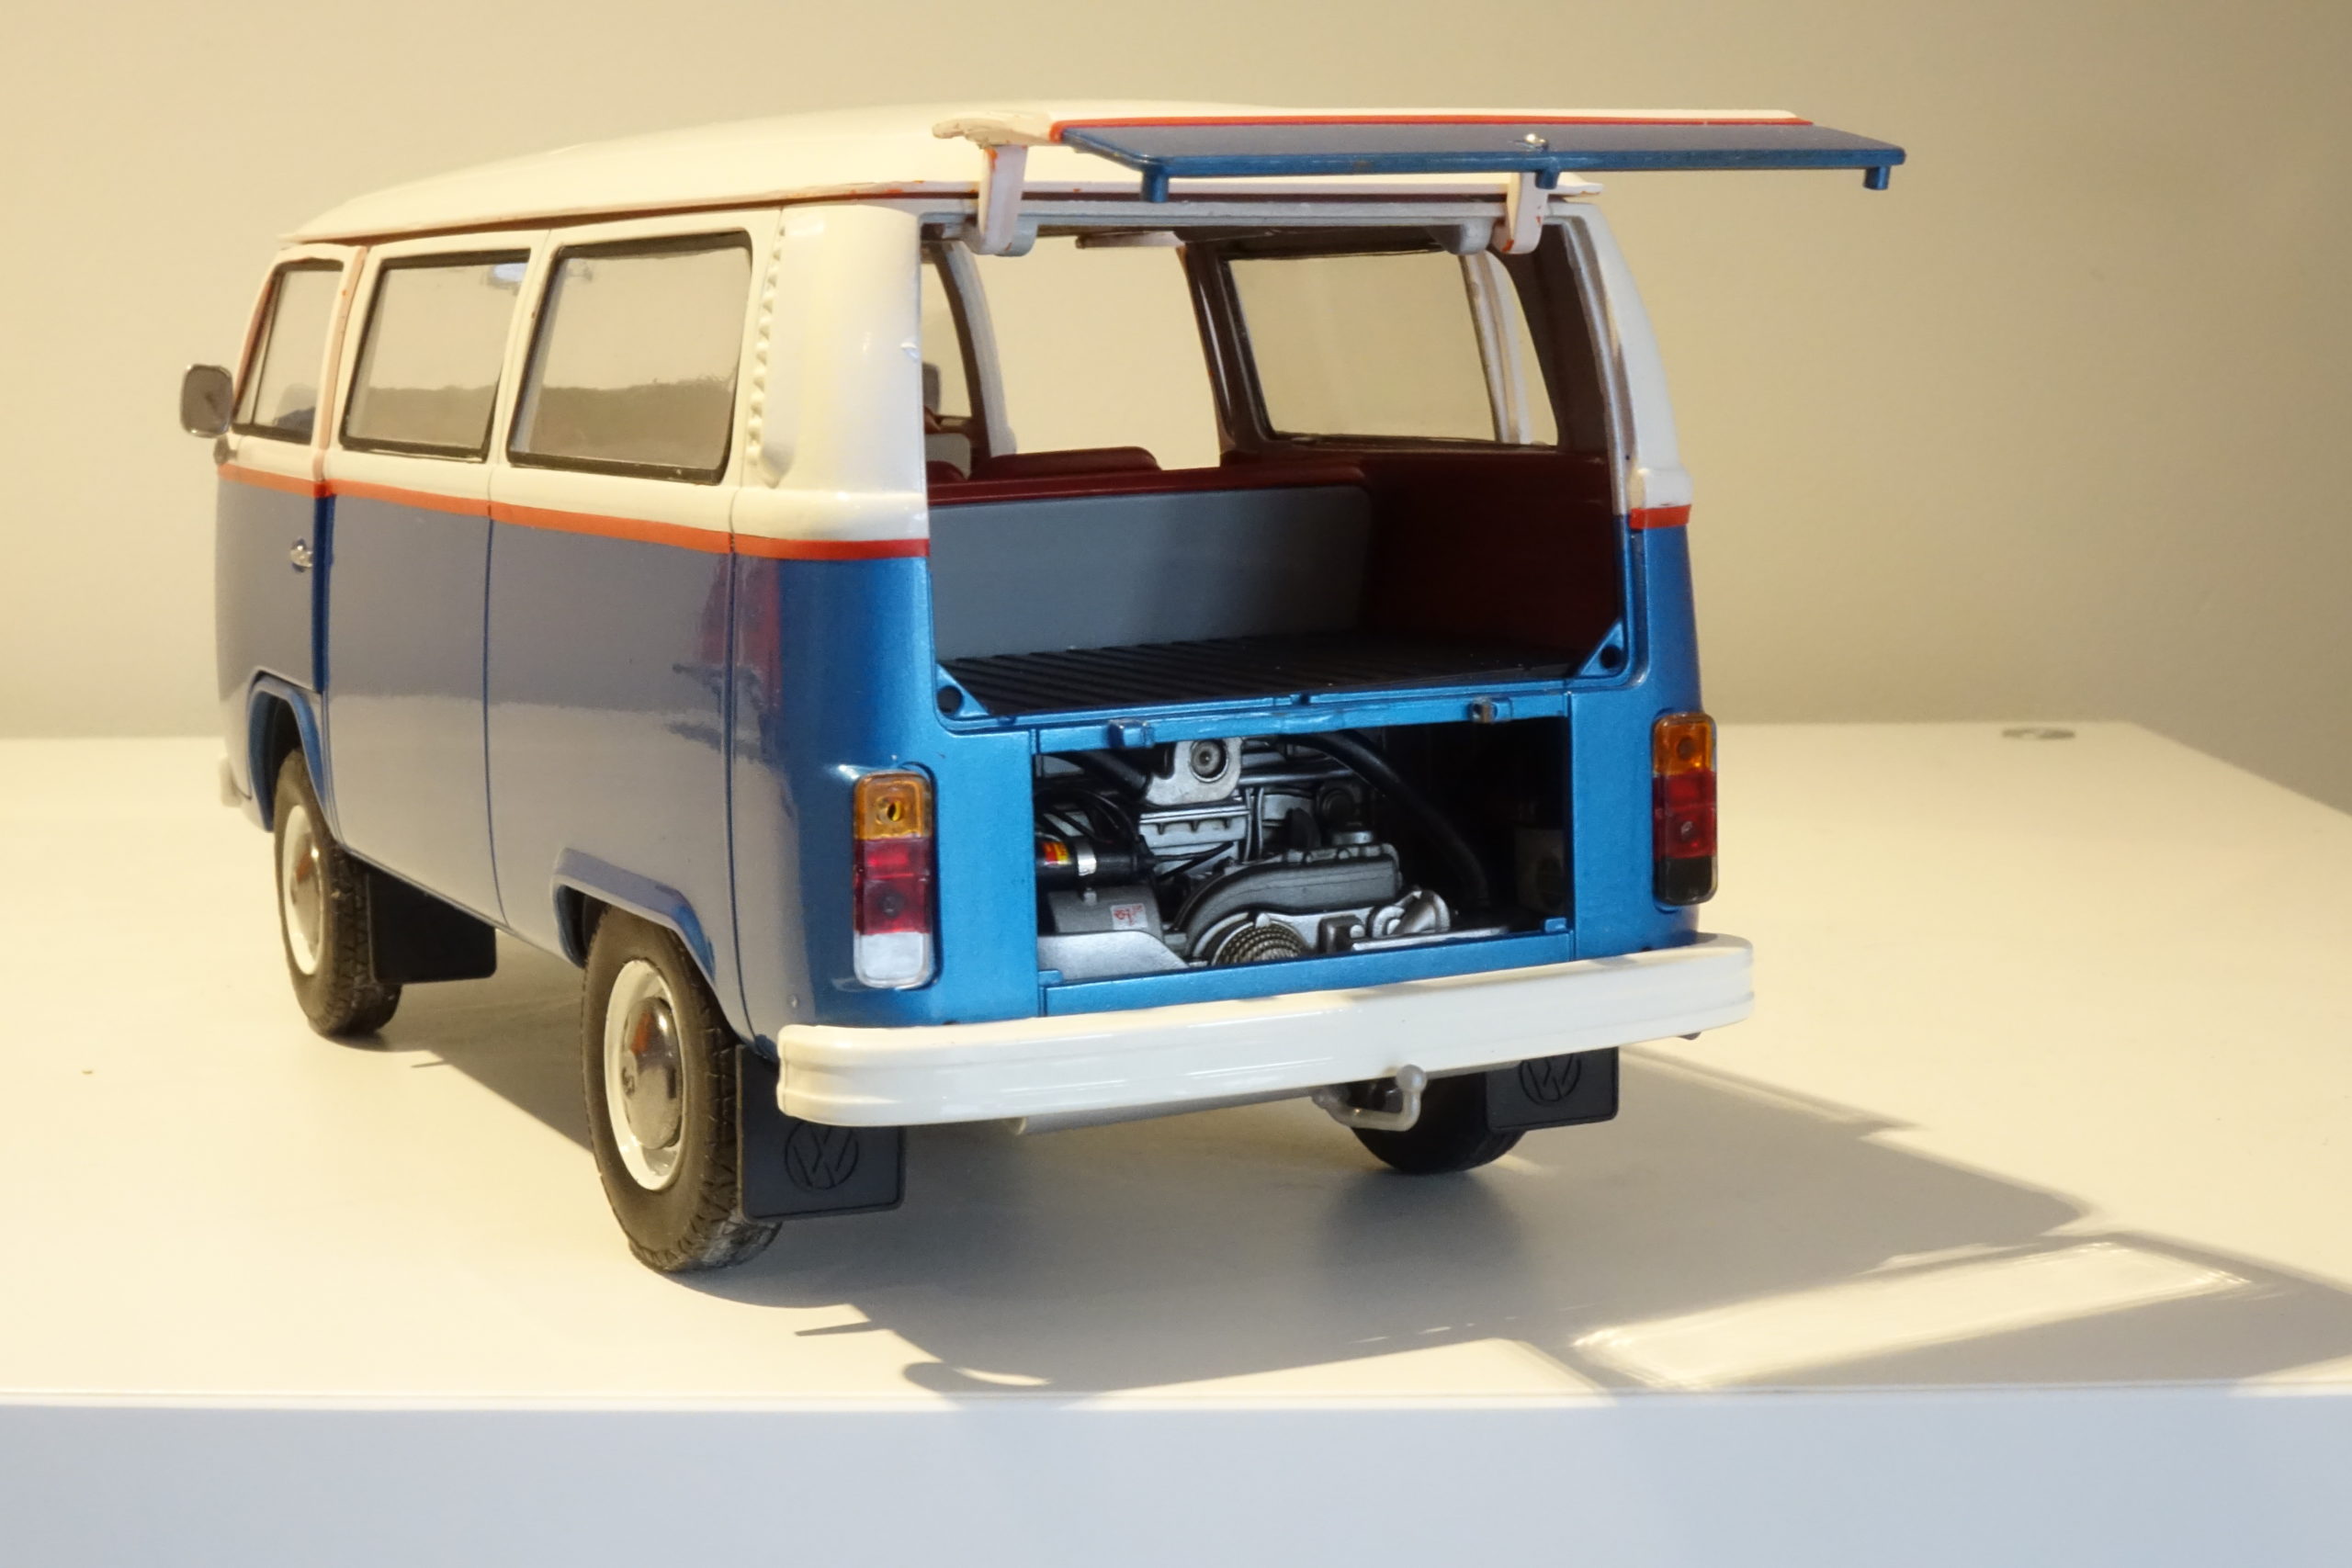
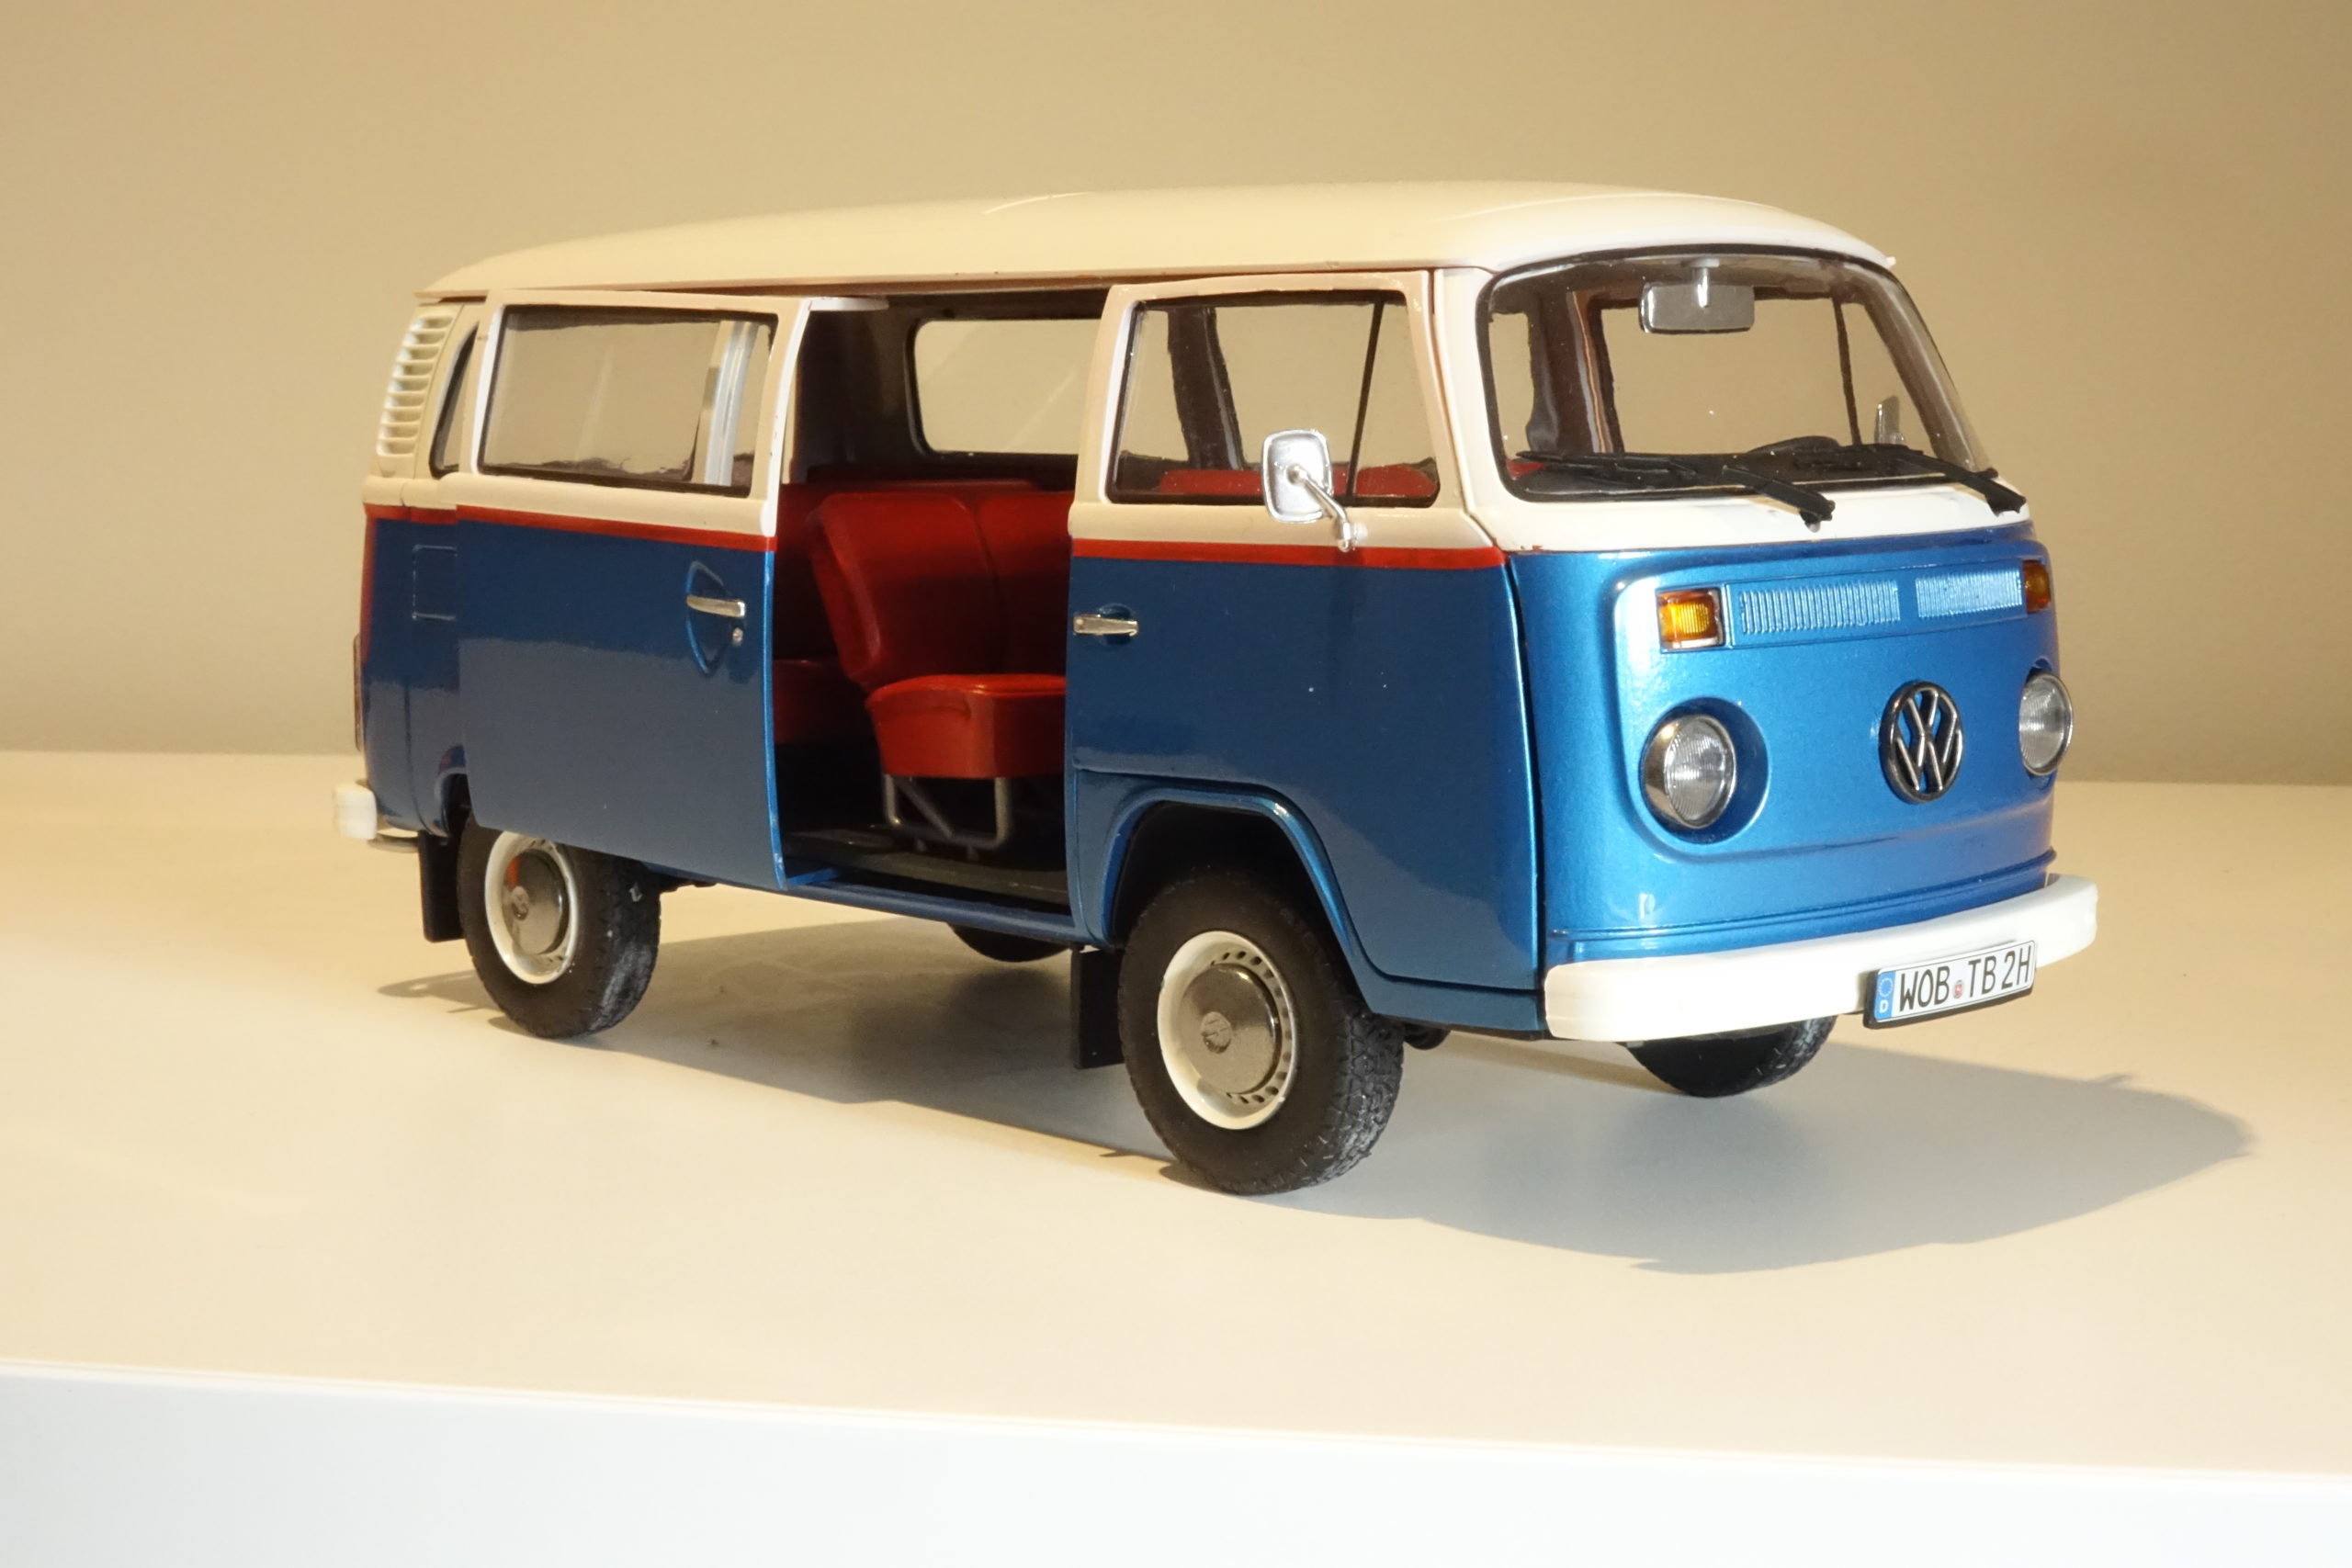
So, the idea here was to see if this “EasyClick” kit could form the basis of a more adventurous ‘modeller’s build”. Having said that, I don’t consider myself to be an adventurous modeller!– but, I gave it a go. I’m sure there are plenty of people out there who could really set to work on this and go far beyond what I have done. I decided after a fair bit of deliberation to go down a fairly ‘safe’ route of a slightly customised paint job and generally making it look like an ‘enthusiast’s, well looked after, nicely polished up street van’. I did consider the ‘worn out, rusty, neglected’ version that I have seen many a build of these old VW’s, but in the time frame I had to work in I opted for this less complicated take.
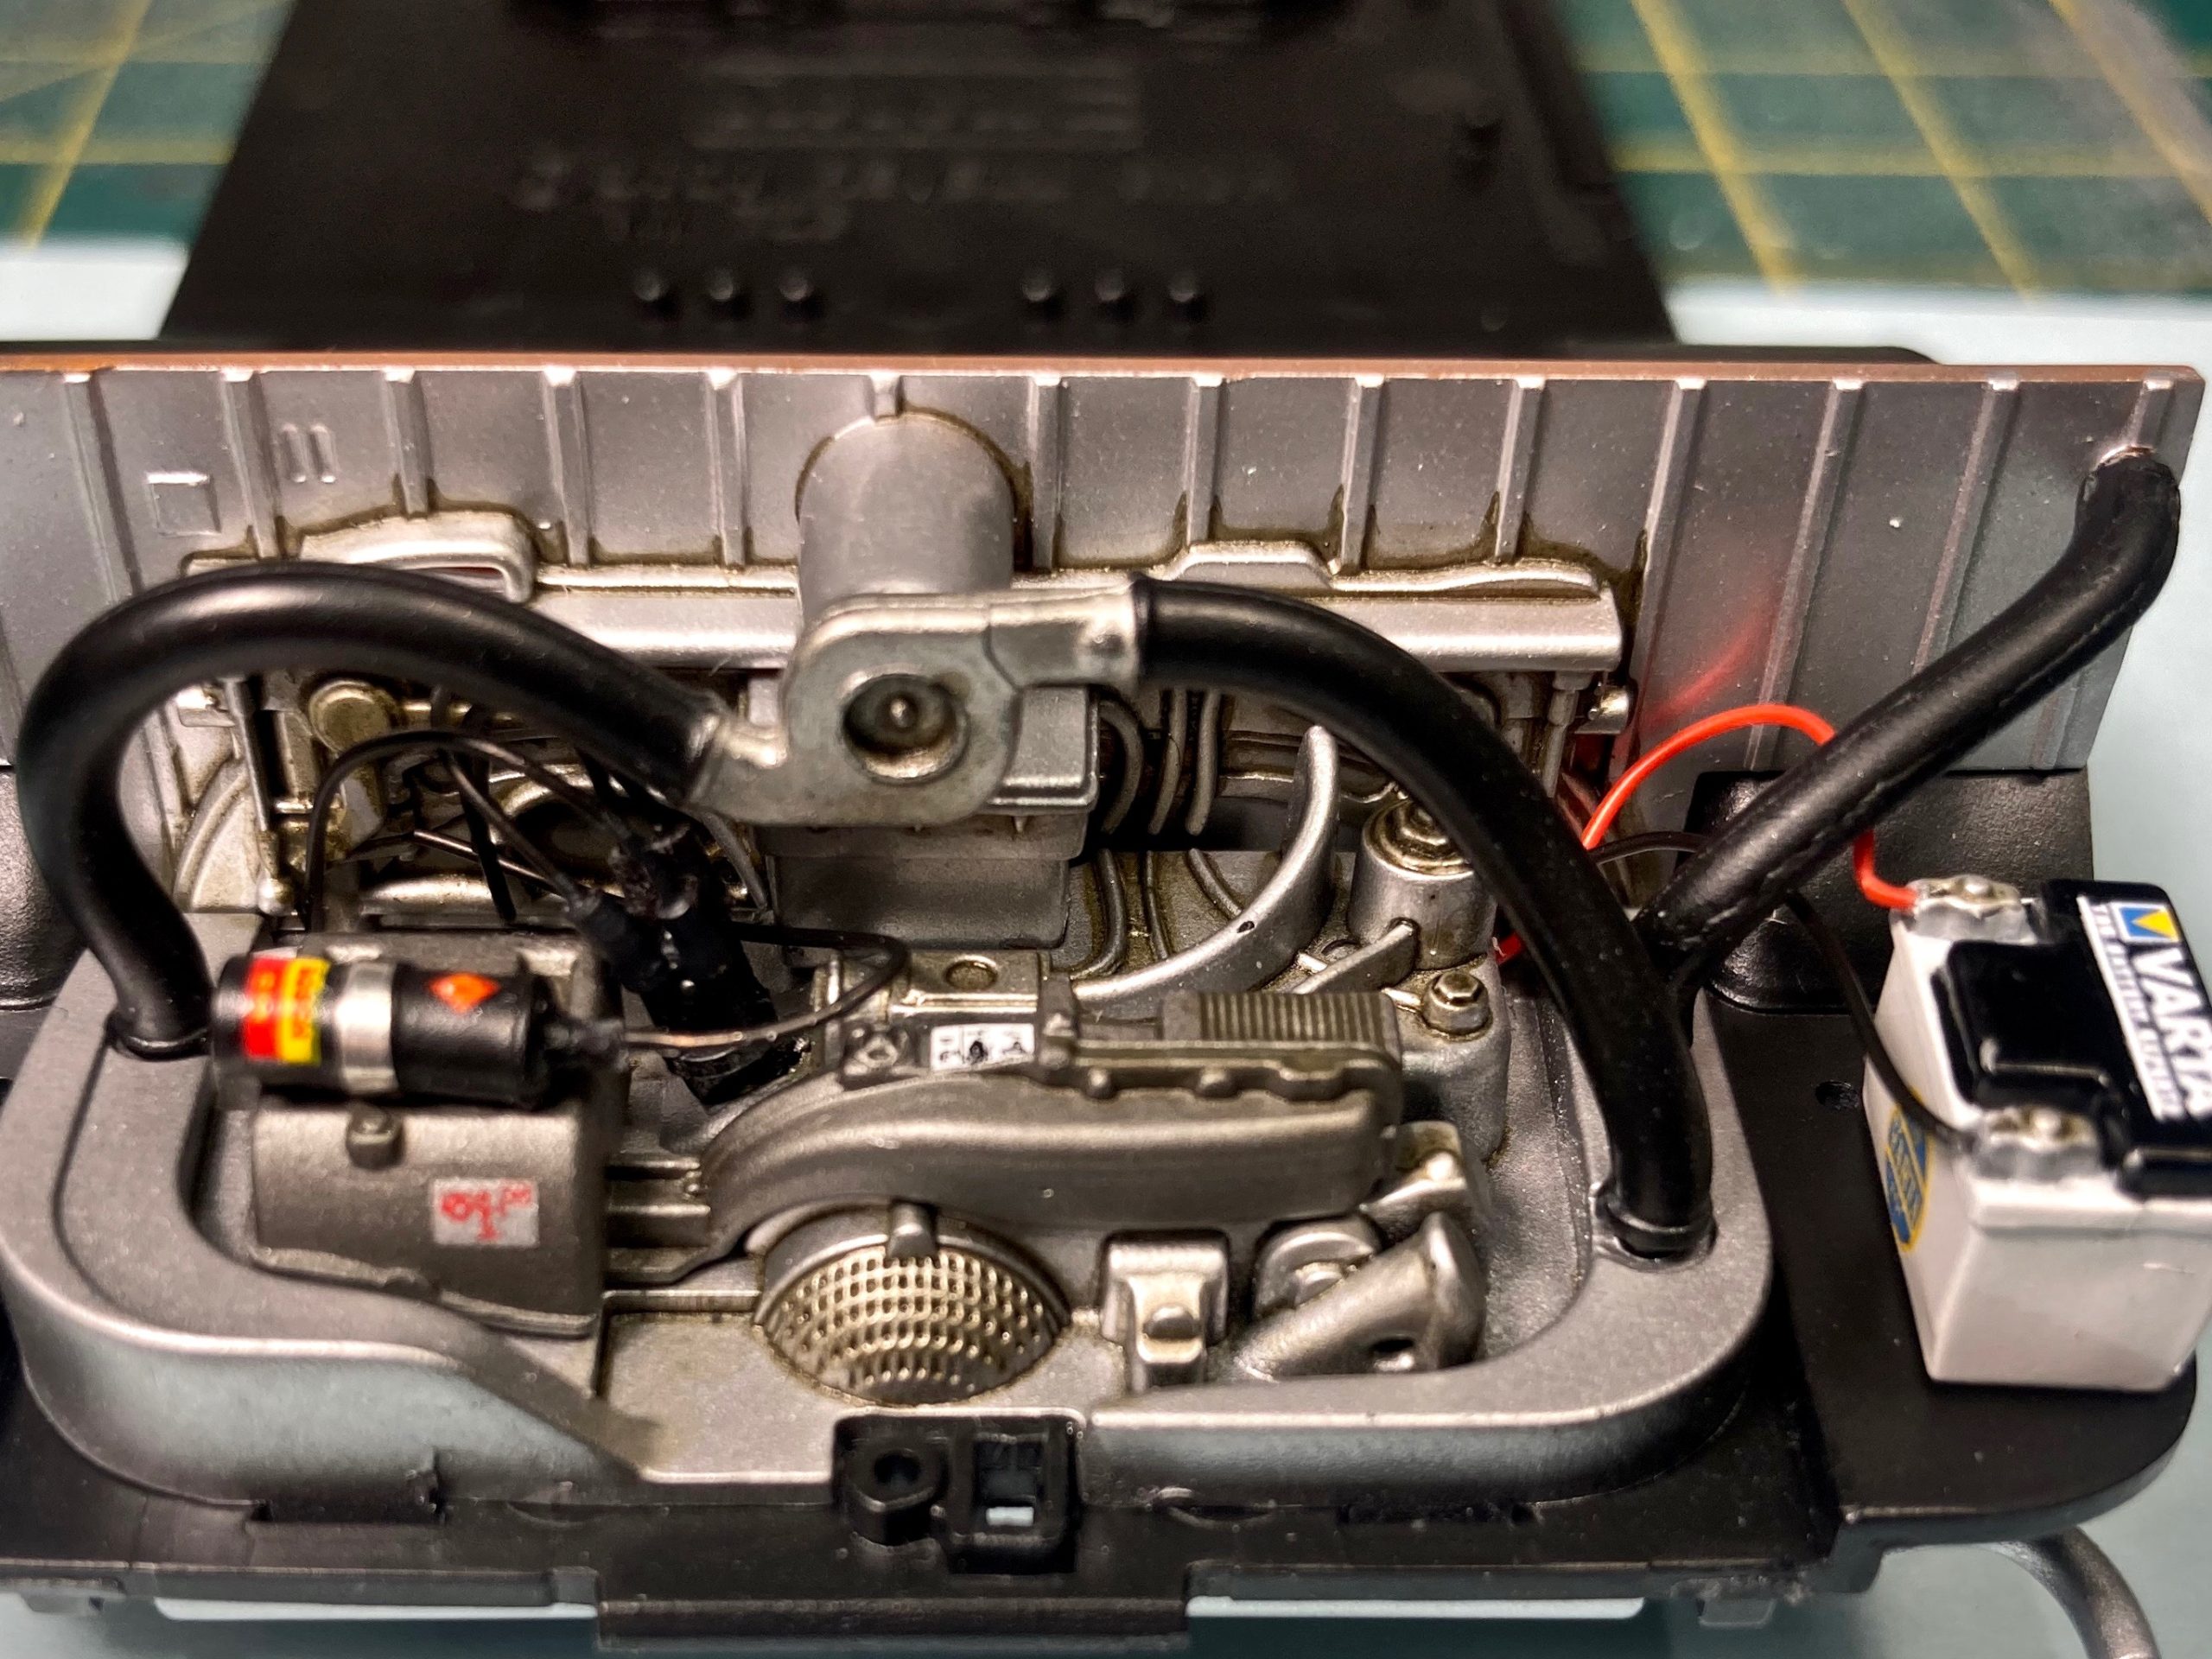
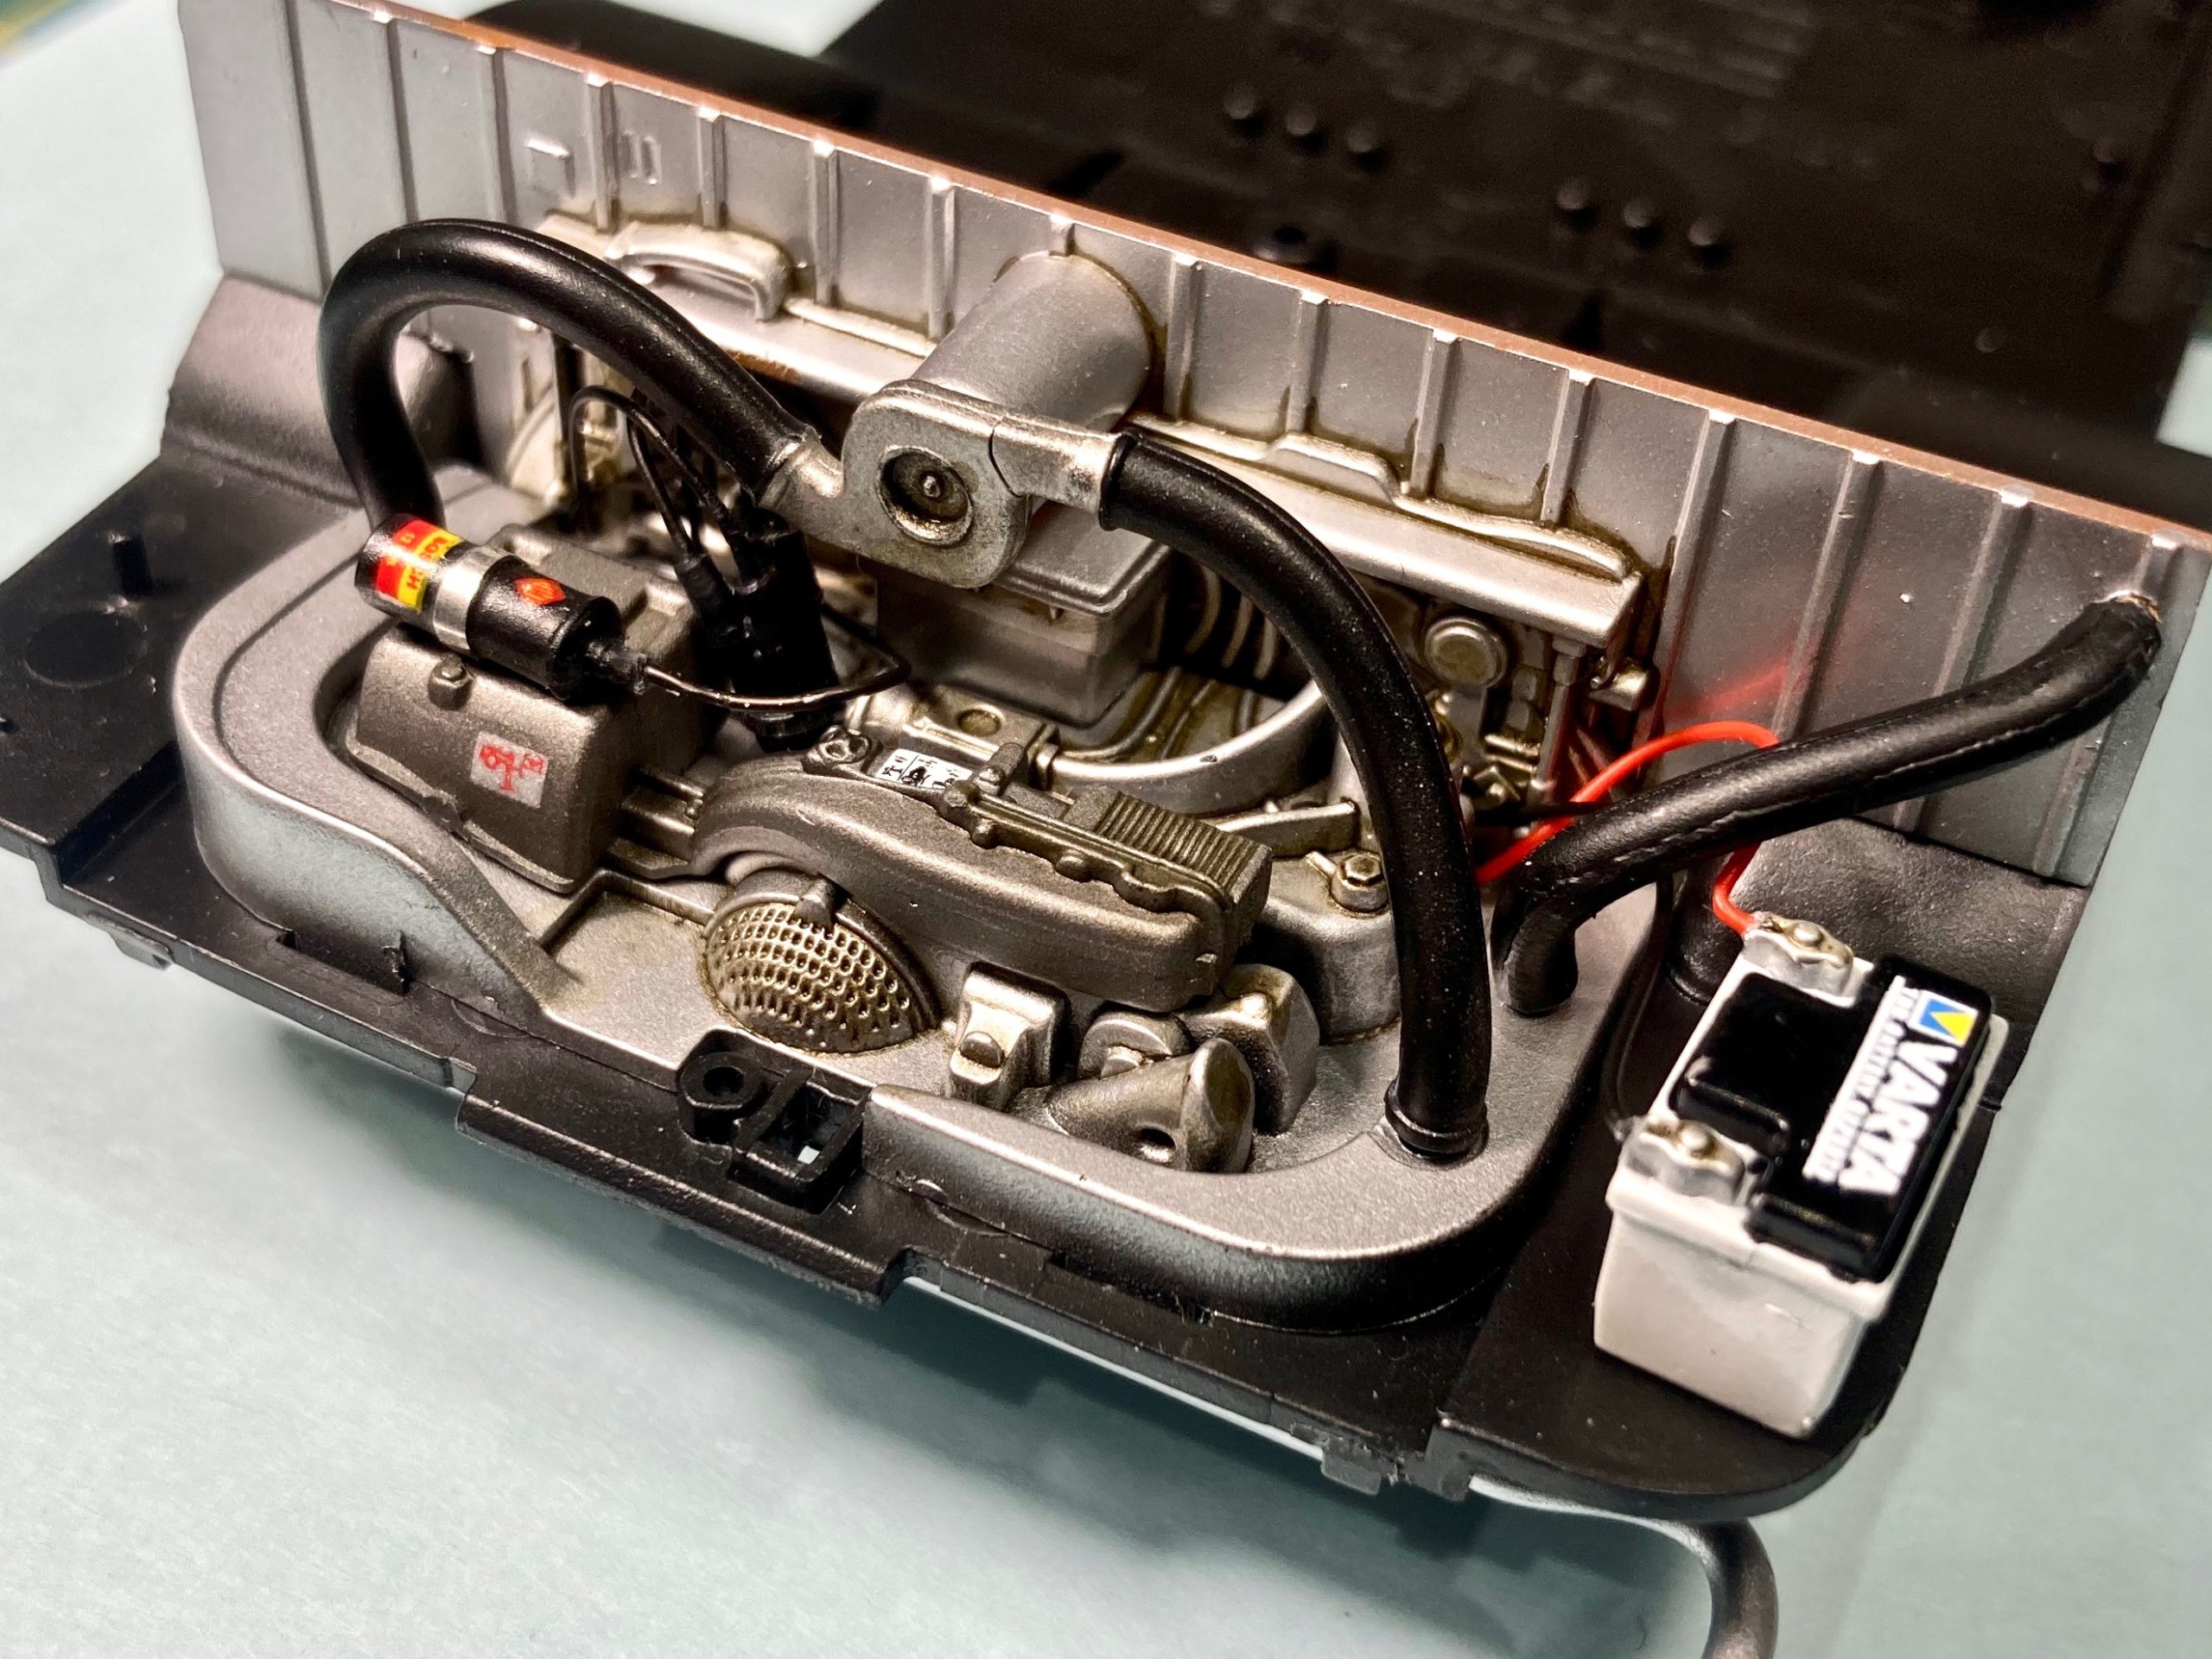
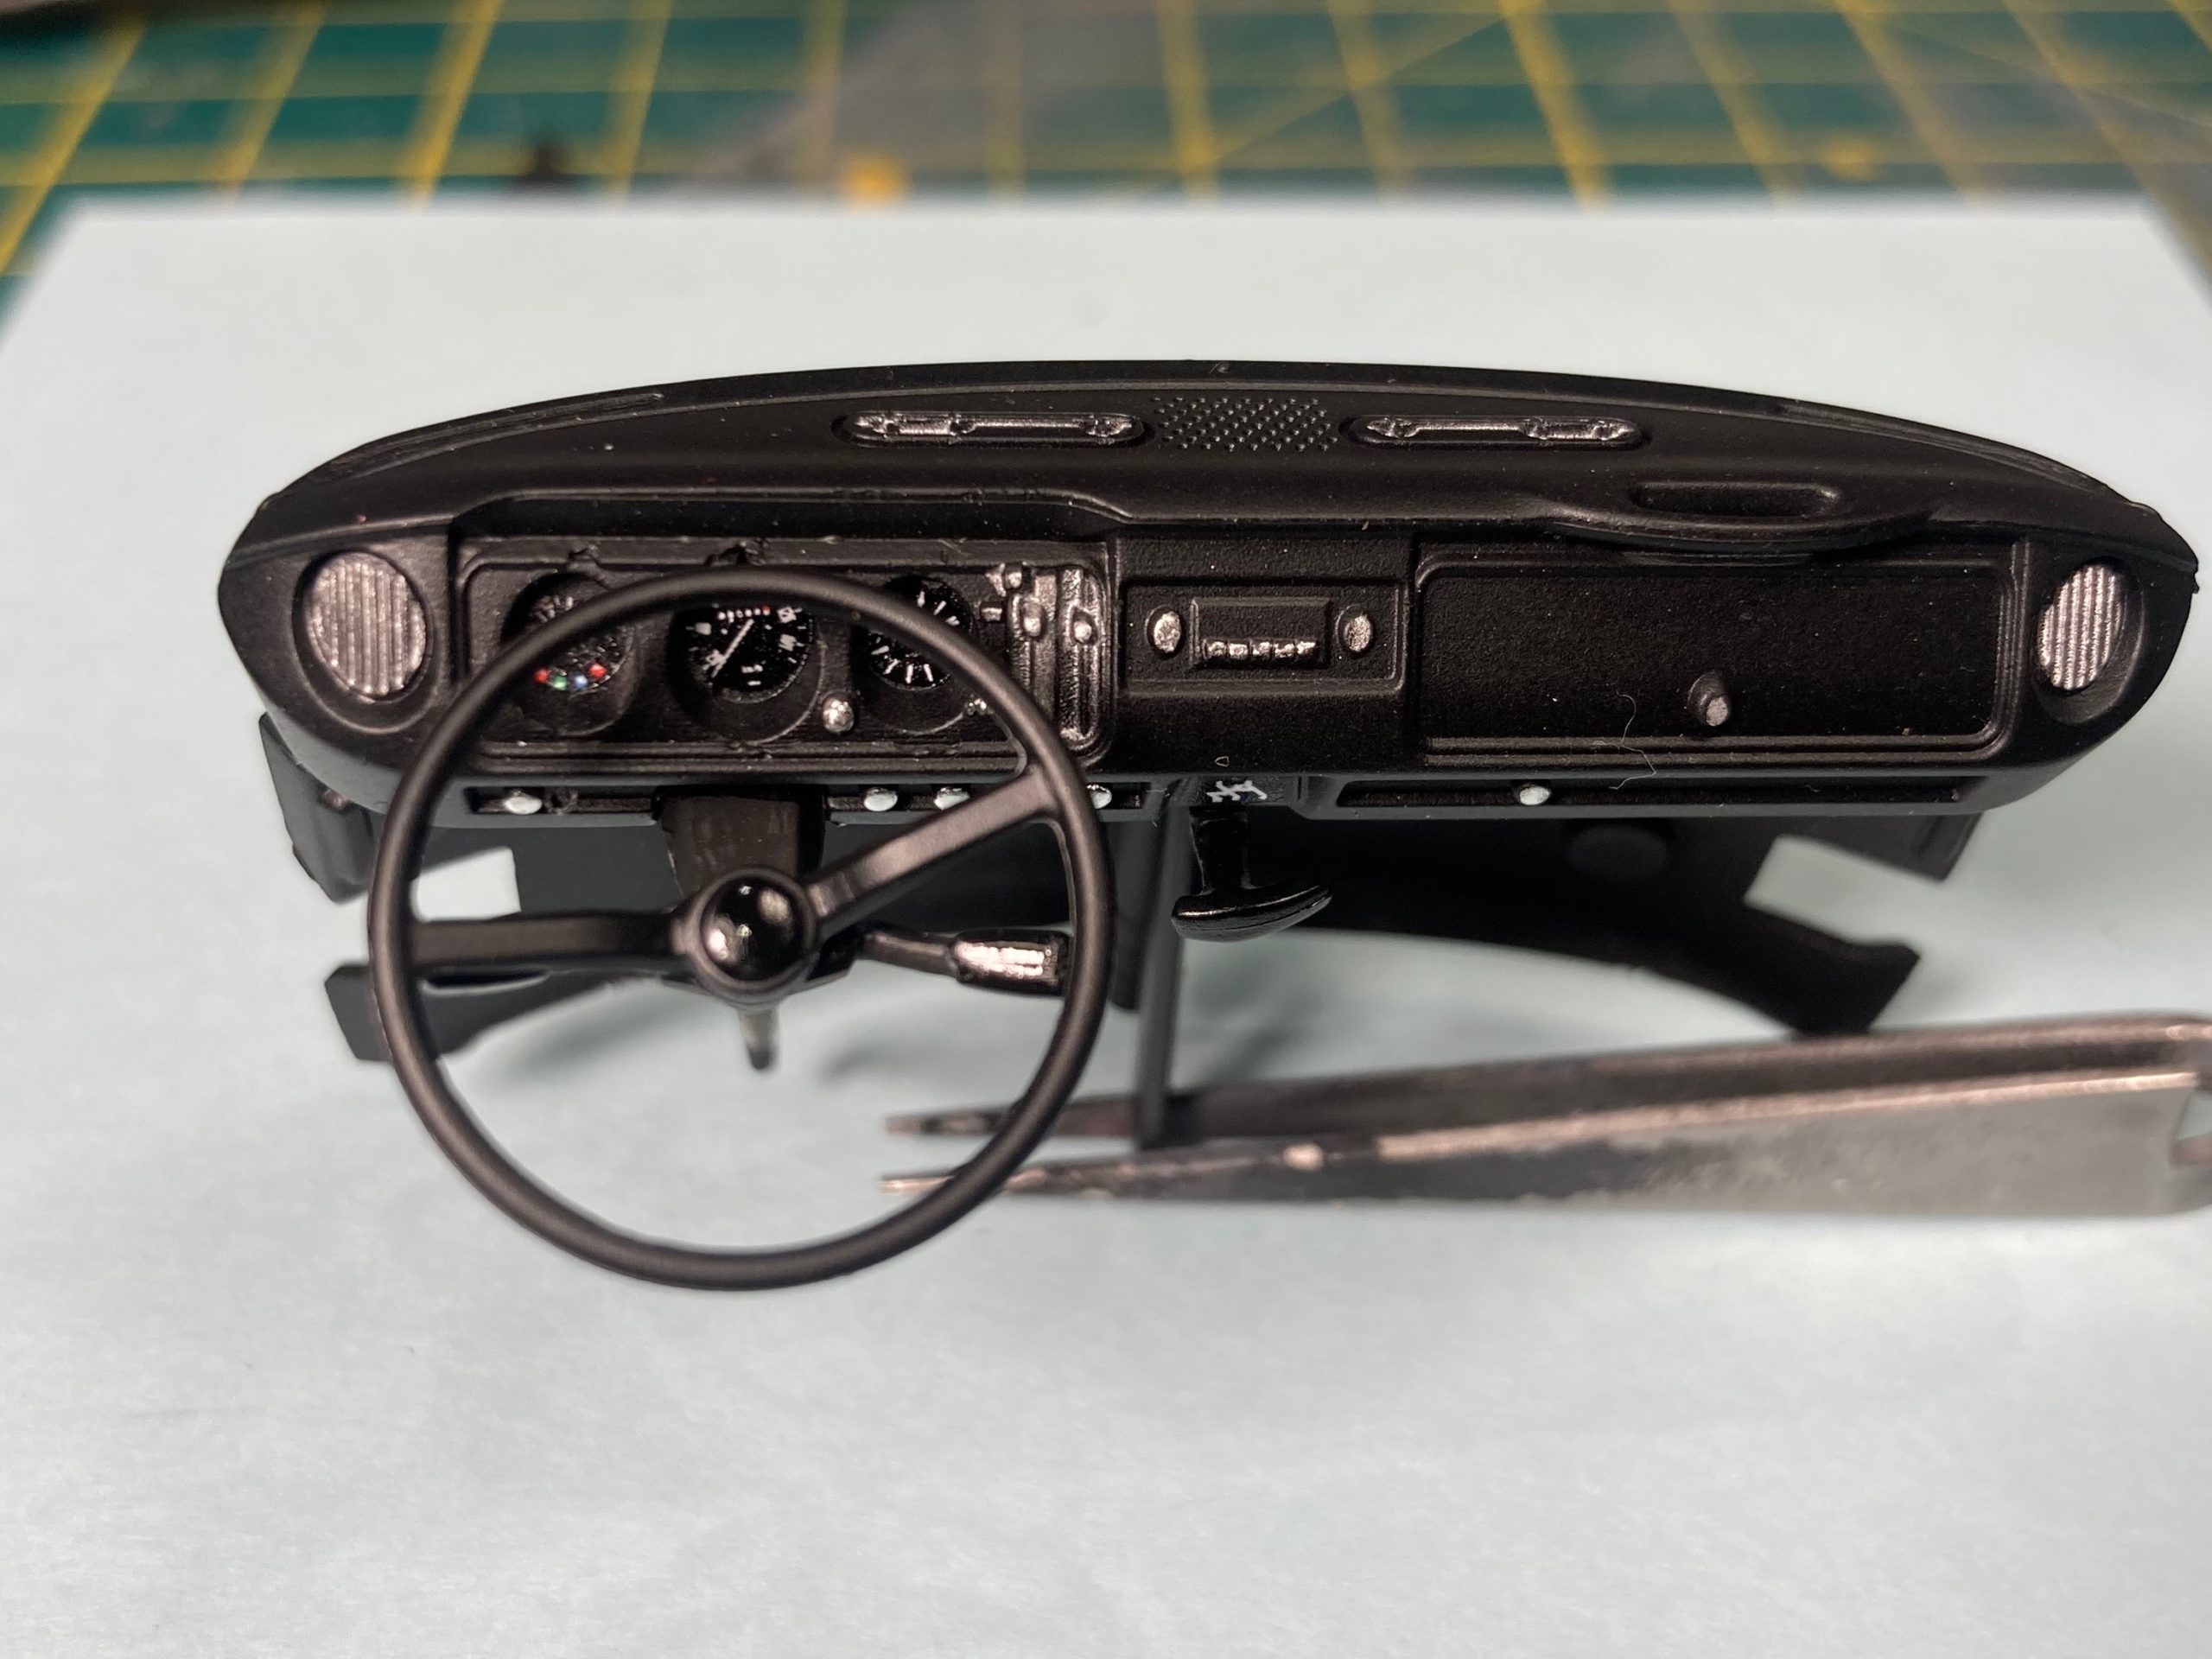
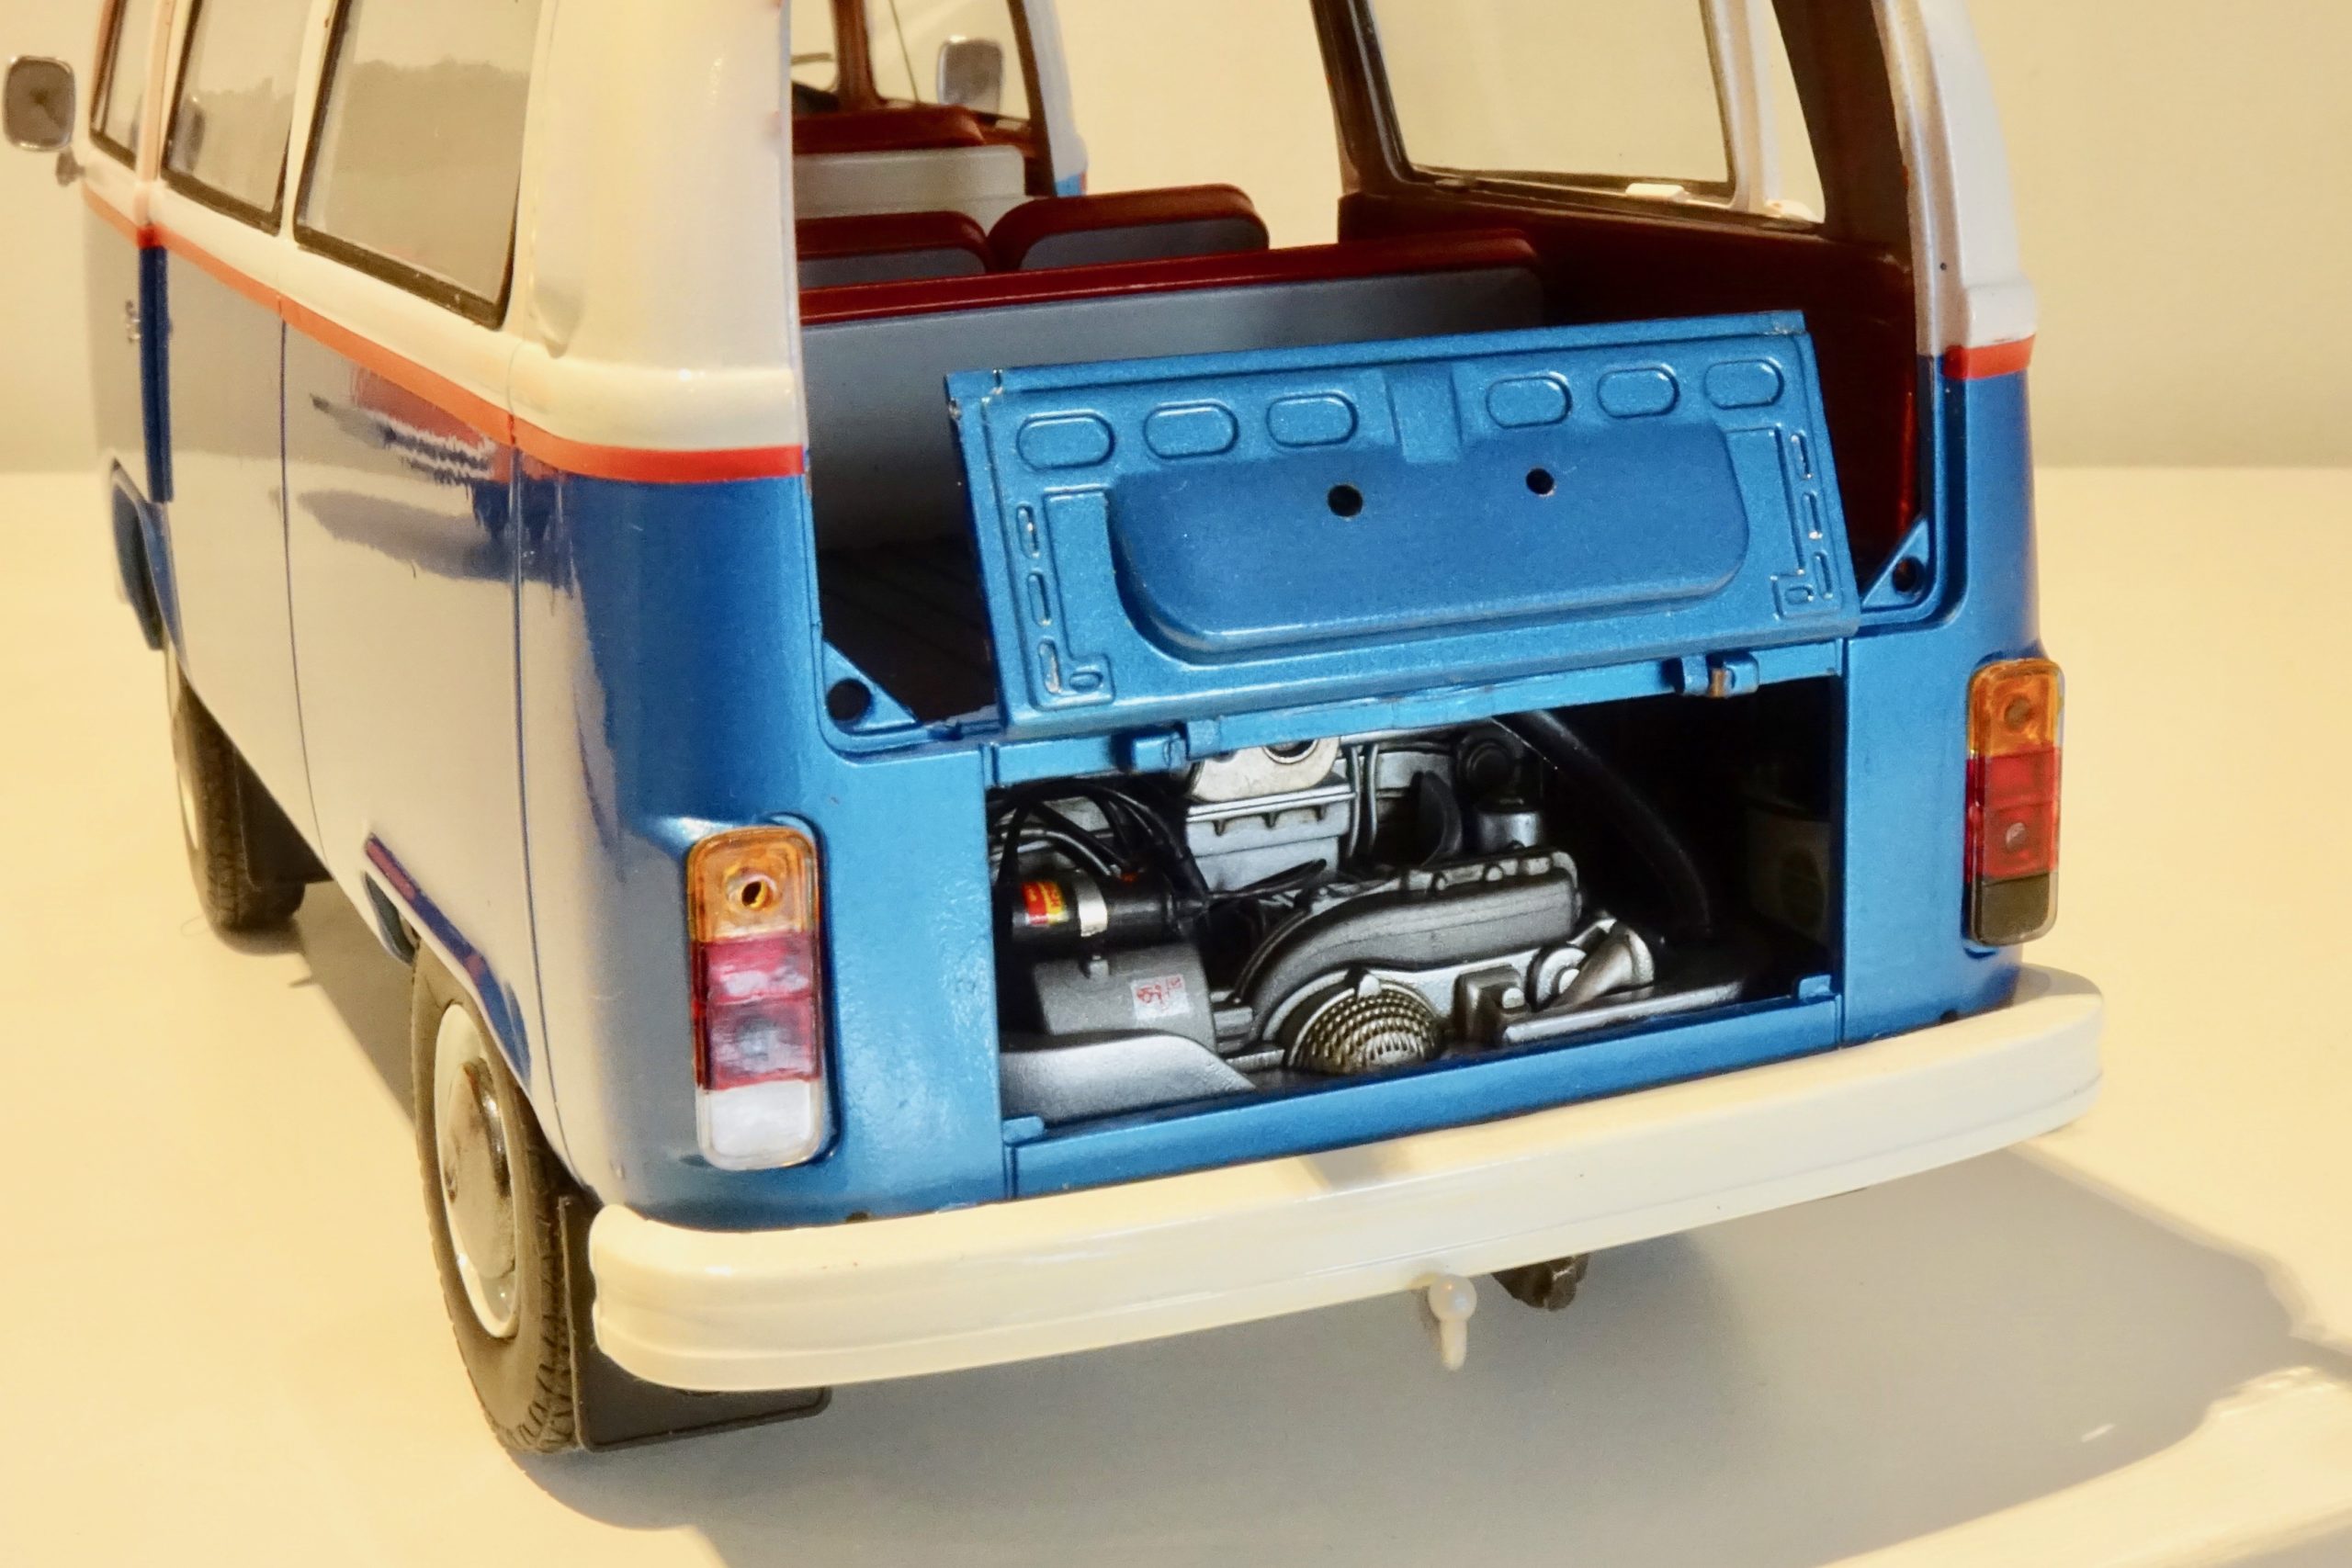
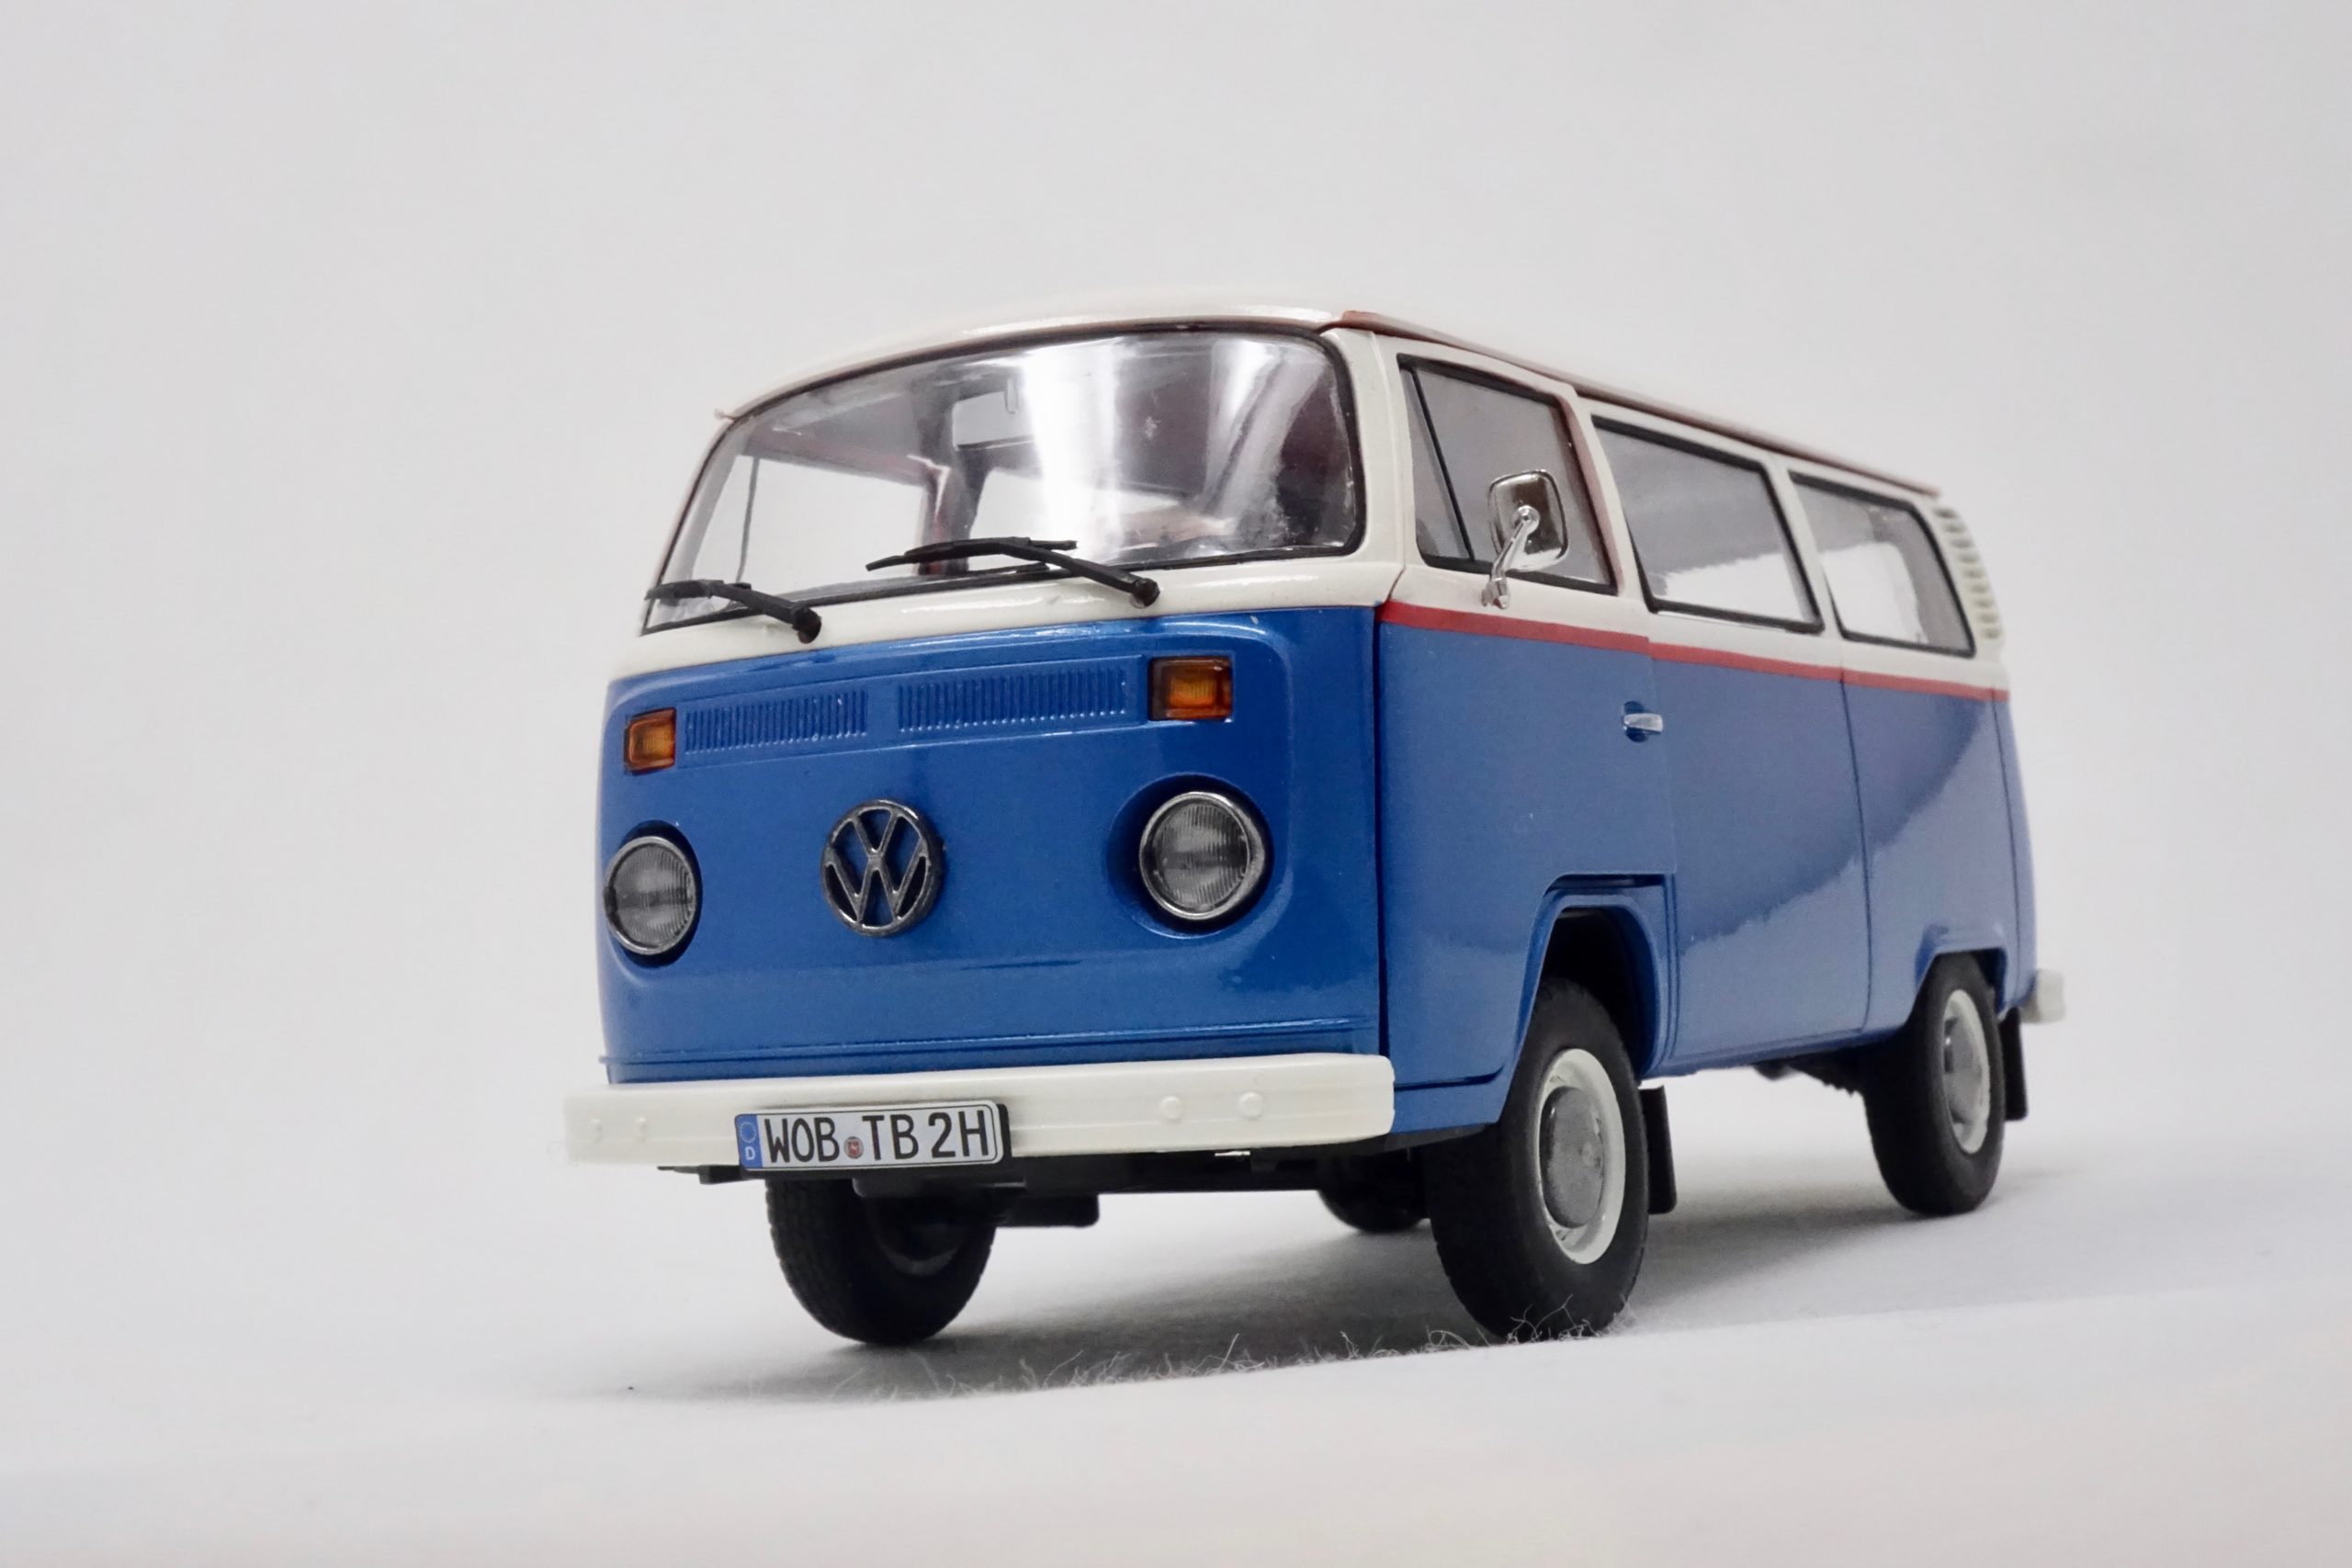
I used Tamiya Lacquer paints throughout – mixing the blue from some spare colours I had, to give rich, slightly metallic finish. The interior was painted in a suitably contrasting subdued red with two-tone grey trim etc. I did some detailing work on the dashboard, inner door panels and on the engine, adding battery cables, ignition leads and oil wash. The chrome work I did in Alclad Chrome paint.
Here’s the outcome


Thoughts on build number 2
First thing to say is that, overall, I was happy with the outcome. Having said that, this wasn’t quite as straightforward as I had hoped! Firstly, the paintwork: because the body is moulded in a fairly strong orange colour, it took several coats for the areas of white, both inside and out, to block the orange tint. No problem with the blue at all. I added the broad, red coach line to give a clean separation between white and blue because the body moulding did not have a sharp edge to follow. I tried without the coach line first and it just looked raggy.
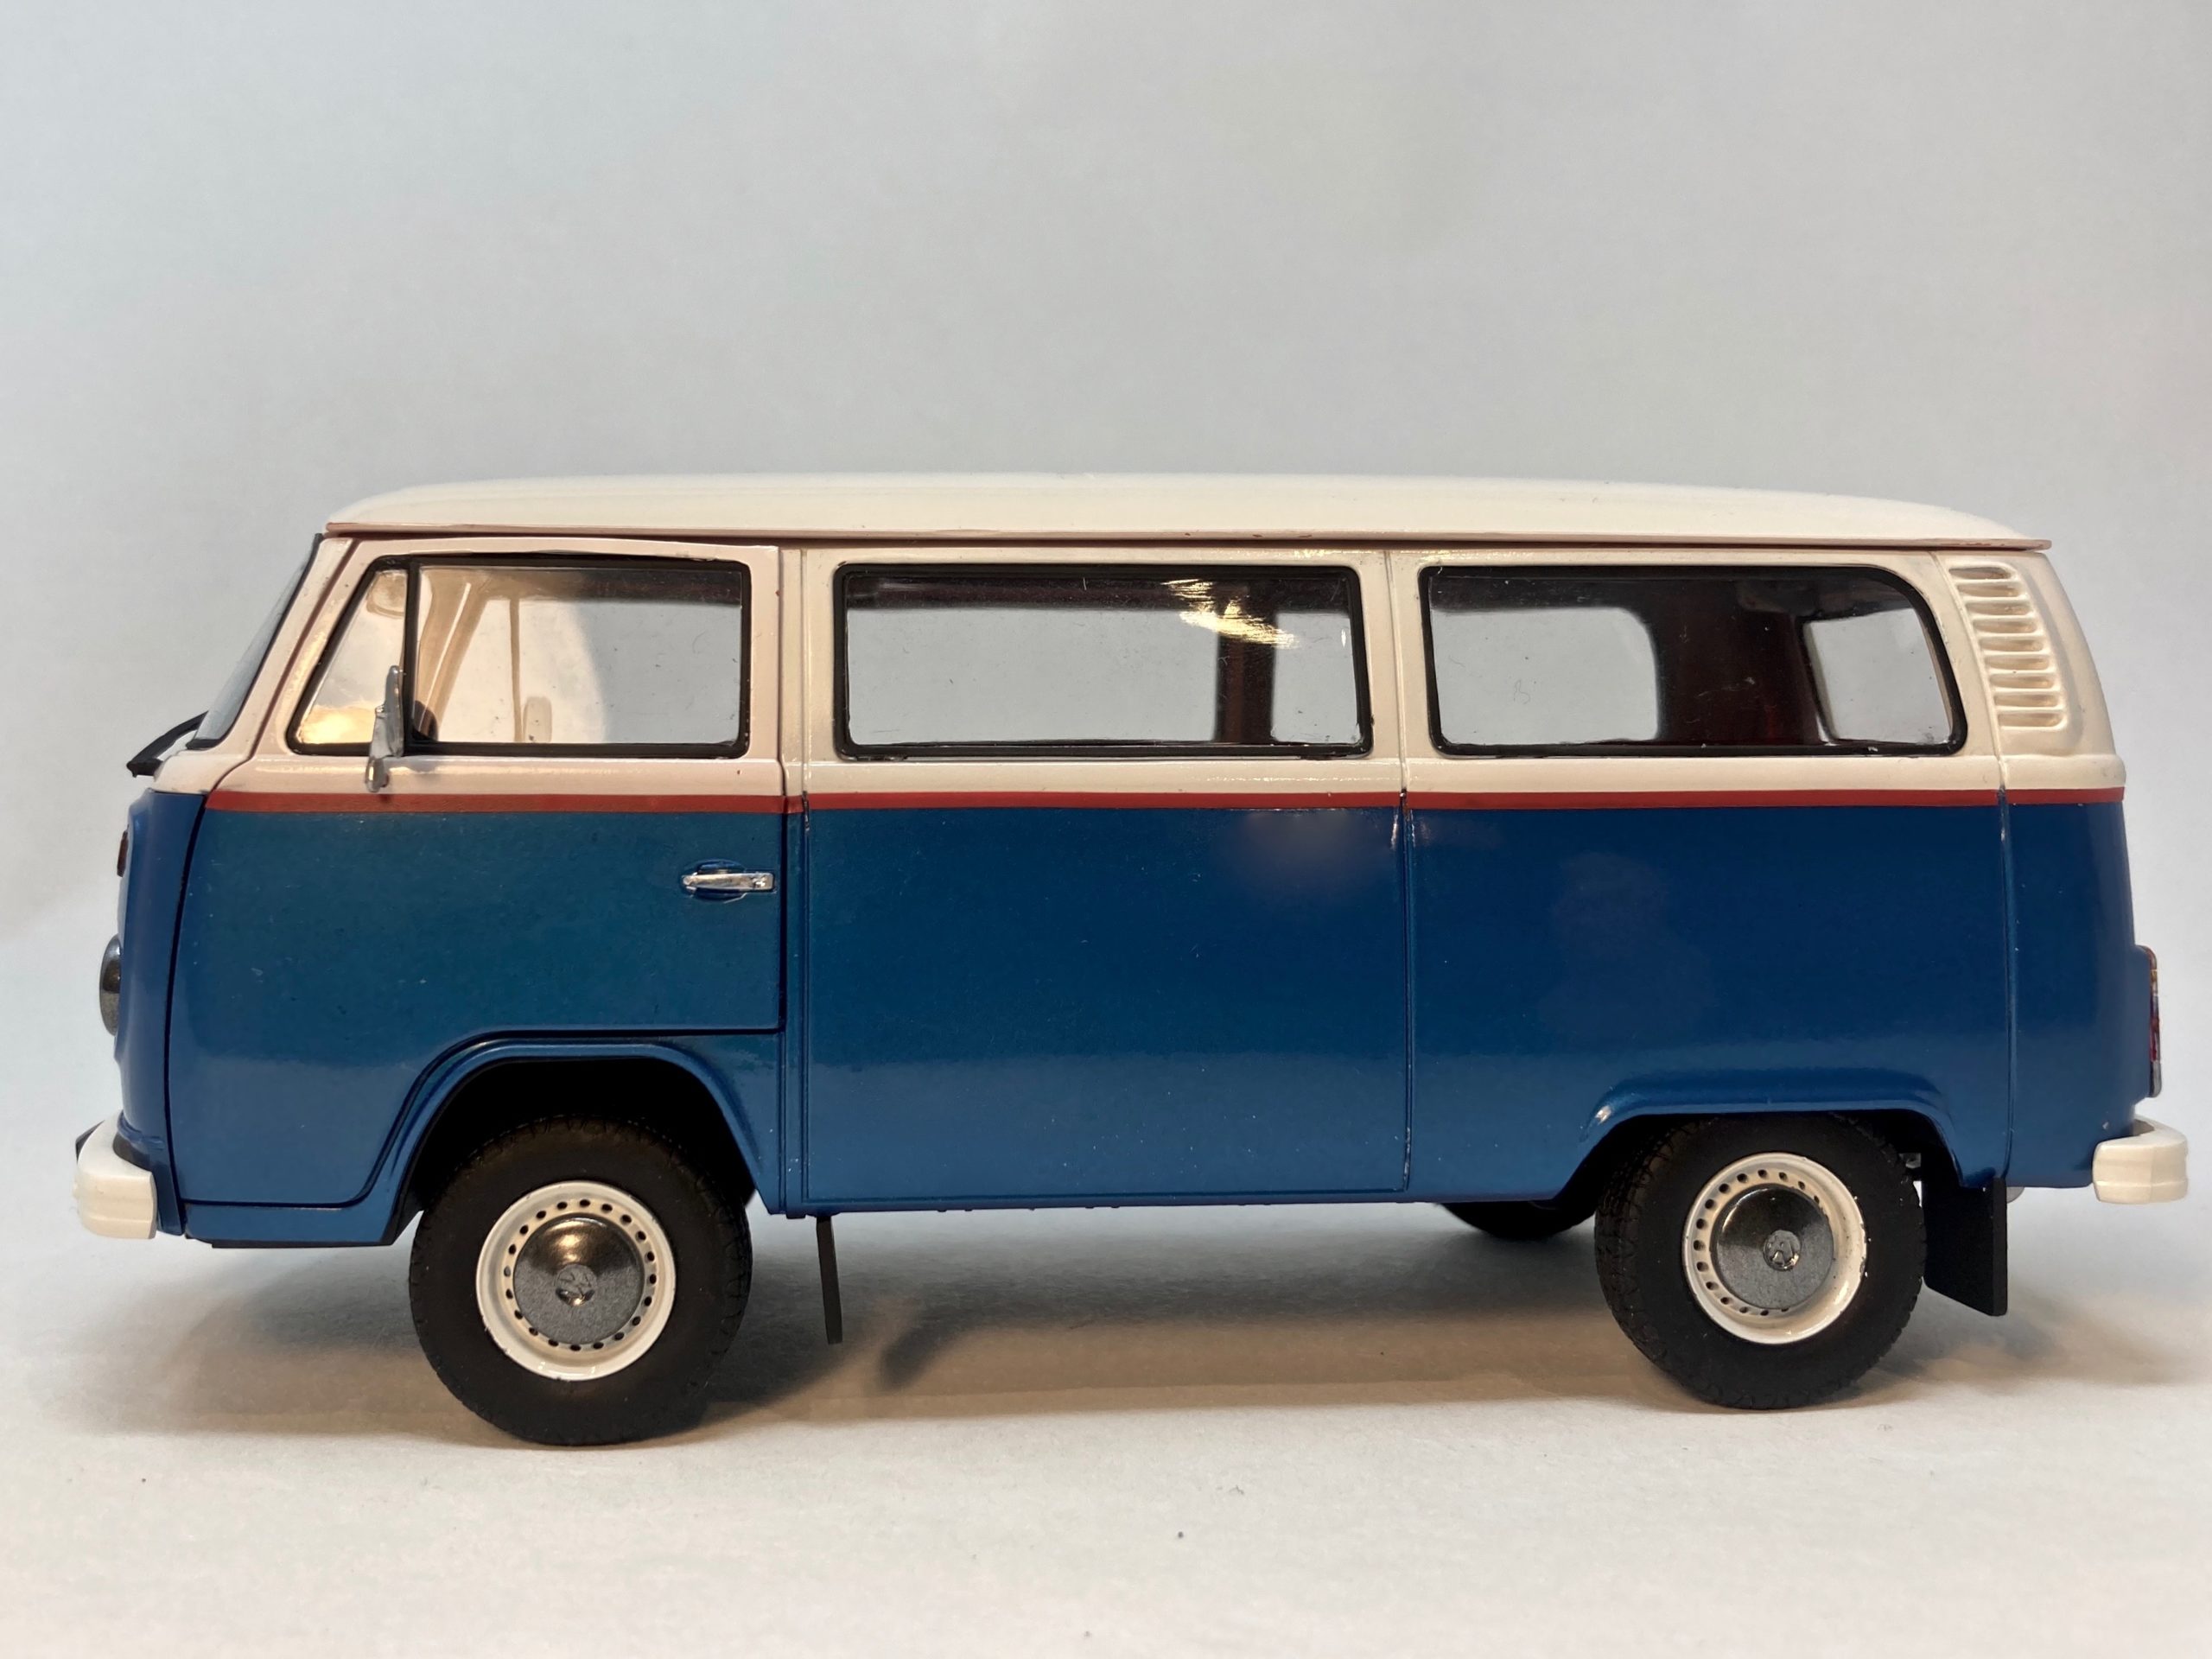
Adding the black seals/edges to the windows was a real challenge – because, again, the contours/mouldings were not clearly defined and masking up to produce neat, sharp lines was tricky. The windows of course are designed to ‘click fit’ into place – which they do, no problem. However this means that the click tabs are visible and the apertures in the doors and body are not clean and straight. So, even though I did get the windows masked up and painted very cleanly indeed, the seals just don’t sit right. The uneven top edge of the front door windows is actually because the aperture is not straight and the easy click window pushes the door out of shape. Again, it’s an inevitable consequence of the ‘easy click’ mouldings. This is not a criticism of the kit but it does mean, to me, that it doesn’t lend itself to creating a sharp, neat build of body/windows/doors etc.
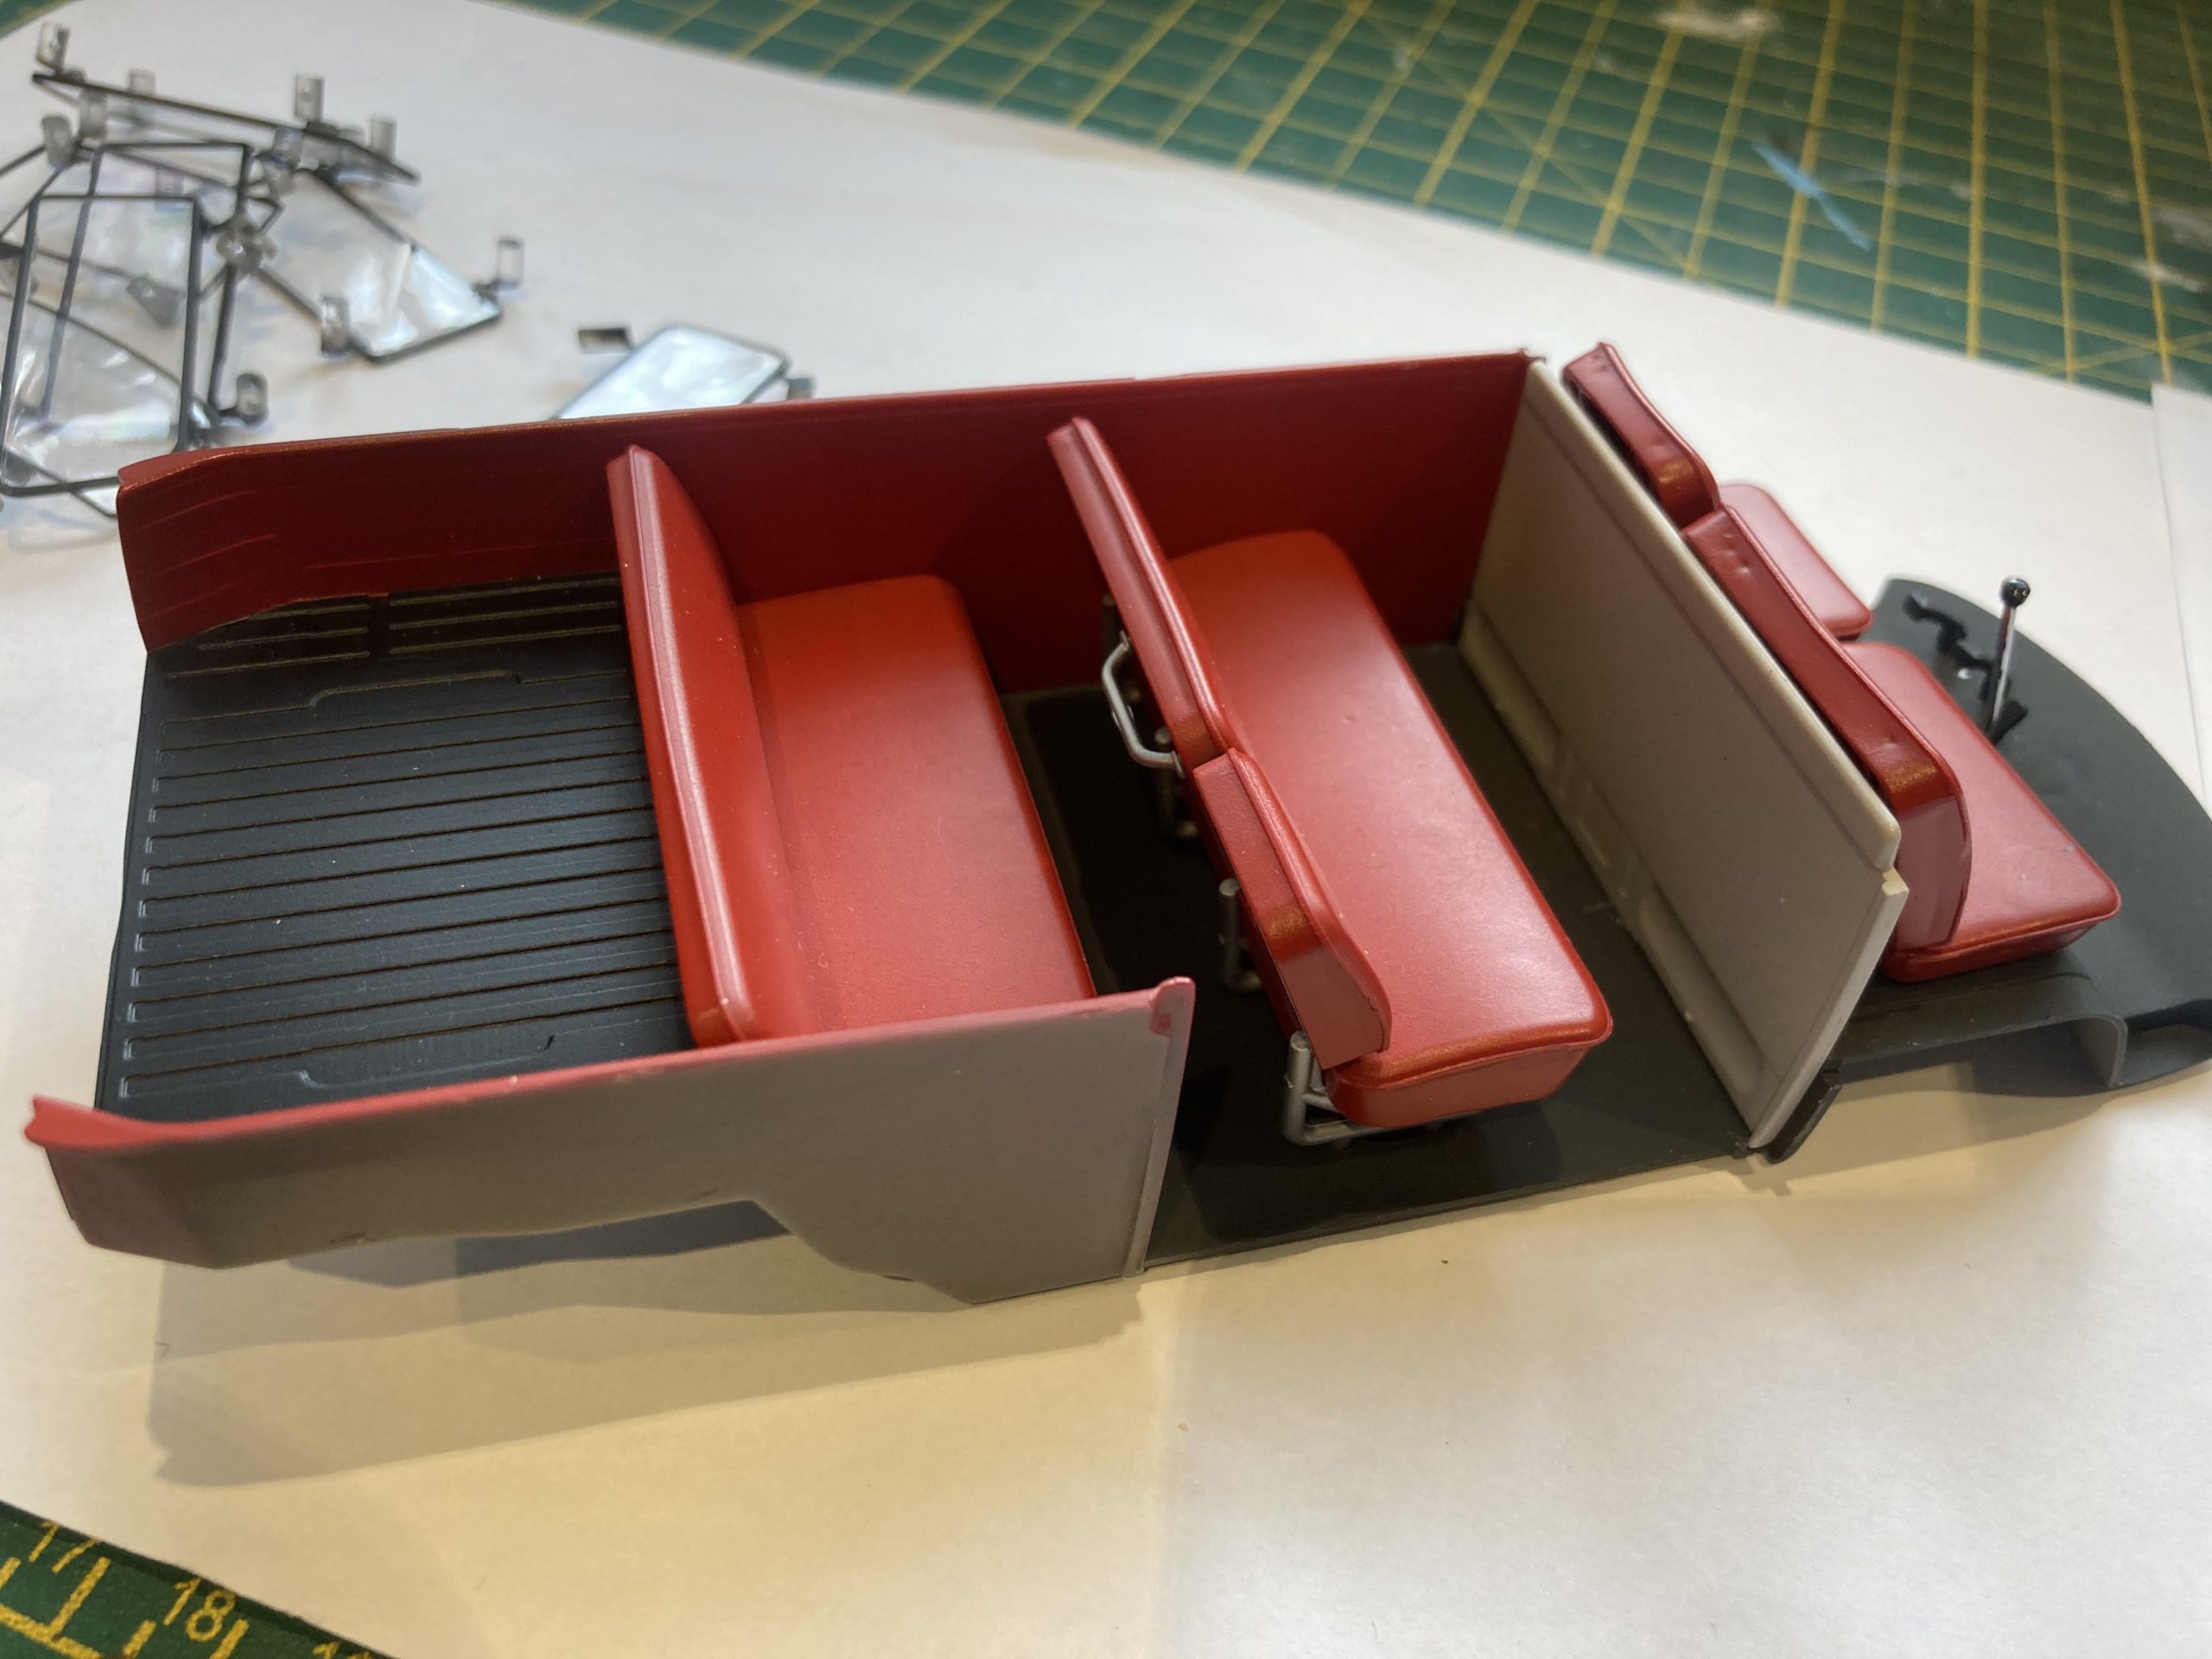
The interior (seating) is fairly plain but quite realistic. The door panels had a fair amount of detail on them, which I picked out with the duo-tone interior trim colours and with rivets, handles etc picked out in chrome silver.
The dashboard was (surprisingly) well detailed, with good quality, clear decals. This, together with some extra detailing for switches, etc gave a convincing result. Additionally, the engine, with the extra bit of detailing and oil wash, which brought it all to life, looked really good indeed. There were nice decals for the engine components, which gave extra realism.
Wheels and tyres also looked good, with chromed hub caps and painted to match the bumpers.
So – there it is – an ‘Easy Click’ VW T2 given a bit of a make over!
What have we taken from this build?
Build time
For version 1 – about 1.5 hours.
For version 2 – I spent about 20 hours
Tools, materials
For version 1 – very basic modelling tools – snips, a file or sanding stick.
For version 2 – I still used fairly basic tools – but an airbrush set up, masking tapes, buffing compound, a suitable pre-paint cleaning agent for the body parts, selection of Lacquer paints, Alclad Chrome. But no glue!!!
Kit specific advice
For version 1 – it’s very straightforward indeed. But, just be aware that for some of the click together parts a really good push is need to seat them properly. And, either small fingers or a pair of forceps or similar would be very useful to push the very small parts together.
Version 2 – as above plus whatever you decide to do!!
Overall thoughts…
I still haven’t quite got my head a round this. For an easy build, novice, beginner’s kit, I can’t really fault it. The instructions are extremely well set out and clear, the kit materials are excellent and there are literally ‘no extras’ to buy if the basic instructions are followed. And the product is quite convincing. Clearly, an unpainted model – especially in ‘all-over orange’ is not going to look too realistic – but you do get a fairly accurate model of this VW T2, with opening doors, tailgate, engine cover etc. And for the absolute beginner it’s a hit!
It could be taken to the next level with a simple paint job and the use of the decals. There’s a good amount of detail with the interior and the engine to add many hours of involvement. I think it would look good, especially for a relatively inexperienced model maker, to do this.
To take it to a ‘modeller’s’ level, I’m not sure. Ok, if you particularly want to build a VW T2 bus and make it into a rusty wreck, a barn find or some other incarnation it could well fit the bill. But, as mentioned before, the ‘EasyClick’ construction does mean that parts that are on a traditional scale model, with clean edges, neatly fitting windows and doors, etc are not found here – so this probably won’t fit the bill. Wobbly doors that don’t fit neatly into their apertures are very difficult to disguise.
These comments aren’t a criticism of the kit – because it’s not designed for what I did in stage 2. But it’s been enjoyable and interesting to have a go.
Happy modelling!